TEC620 - Smartwatch LIVOO - Free user manual and instructions
Find the device manual for free TEC620 LIVOO in PDF.
| Product type | Connected watch |
| Brand | Livoo |
| Model | TEC620 |
| Dimensions | Approximately 45 x 38 x 10 mm |
| Weight | Approximately 50 g |
| Screen | 1.3 inch TFT |
| Battery life | 15 days standby, up to 7 days normal use |
| Power supply | Integrated battery, charging via magnetic USB cable (5V) |
| Compatibility | Android and iOS |
| Water resistance | IP67 |
| Sensors | Heart rate, accelerometer |
| Health functions | Heart rate, sleep analysis, breathing exercise, pedometer, distance, calories, activity duration |
| Notifications | Calls, messages, apps |
| Calls | Answer calls via speaker and microphone |
| Music | Music player control |
| Sport | Modes: walking, indoor/outdoor running, cycling, hiking |
| Other functions | Stopwatch, find phone, remote photo control, weather, calculator, alarm, 20 contacts, business cards, wallet |
| Cleaning | With a dry cloth |
| Safety | Do not use with a pacemaker; do not expose to >50°C while charging |
| Box contents | Watch, magnetic charging cable, user manual |
Frequently Asked Questions - TEC620 LIVOO
User questions about TEC620 LIVOO
0 question about this device. Answer the ones you know or ask your own.
Ask a new question about this device
Download the instructions for your Smartwatch in PDF format for free! Find your manual TEC620 - LIVOO and take your electronic device back in hand. On this page are published all the documents necessary for the use of your device. TEC620 by LIVOO.
USER MANUAL TEC620 LIVOO
natural_image
Technical line drawing of a mechanical component with no visible text or symbolsfigure 1

text_image
QR code image containing encoded data, no visible human-readable textfigure 2
flowchart
graph TD
    A["Smart Home Control System"] -->|Data Transfer| B["Central Display"]
    B -->|Data Transfer| C["Smart Home Control System"]
    C -->|Data Transfer| D["Smart Home Control System"]
    D -->|Data Transfer| E["Smart Home Control System"]
    E -->|Data Transfer| F["Smart Home Control System"]
    F -->|Data Transfer| G["Smart Home Control System"]
    G -->|Data Transfer| H["Smart Home Control System"]
    H -->|Data Transfer| I["Smart Home Control System"]
    I -->|Data Transfer| J["Smart Home Control System"]
    J -->|Data Transfer| K["Smart Home Control System"]
    K -->|Data Transfer| L["Smart Home Control System"]
    L -->|Data Transfer| M["Smart Home Control System"]
    M -->|Data Transfer| N["Smart Home Control System"]
    N -->|Data Transfer| O["Smart Home Control System"]
    O -->|Data Transfer| P["Smart Home Control System"]
    P -->|Data Transfer| Q["Smart Home Control System"]
    Q -->|Data Transfer| R["Smart Home Control System"]
    R -->|Data Transfer| S["Smart Home Control System"]
    S -->|Data Transfer| T["Smart Home Control System"]
    T -->|Data Transfer| U["Smart Home Control System"]
    U -->|Data Transfer| V["Smart Home Control System"]
    V -->|Data Transfer| W["Smart Home Control System"]
    W -->|Data Transfer| X["Smart Home Control System"]
    X -->|Data Transfer| Y["Smart Home Control System"]
    Y -->|Data Transfer| Z["Smart Home Control System"]
    Z -->|Data Transfer| AA["Smart Home Control System"]
    AA -->|Data Transfer| AB["Smart Home Control System"]
    AB -->|Data Transfer| AC["Smart Home Control System"]
    AC -->|Data Transfer| AD["Smart Home Control System"]
    AD -->|Data Transfer| AE["Smart Home Control System"]
    AE -->|Data Transfer| AF["Smart Home Control System"]
    AF -->|Data Transfer| AG["Smart Home Control System"]
    AG -->|Data Transfer| AH["Smart Home Control System"]
    AH -->|Data Transfer| AI["Smart Home Control System"]
    AI -->|Data Transfer| AJ["Smart Home Control System"]
    AJ -->|Data Transfer| AK["Smart Home Control System"]
    AK -->|Data Transfer| AL["Smart Home Control System"]
    AL -->|Data Transfer| AM["Smart Home Control System"]
    AM -->|Data Transfer| AN["Smart Home Control System"]
    AN -->|Data Transfer| AO["Smart Home Control System"]
    AO -->|Data Transfer| AP["Smart Home Control System"]
    AP -->|Data Transfer| AQ["Smart Home Control System"]
    AQ -->|Data Transfer| AR["Smart Home Control System"]
    AR -->|Data Transfer| AS["Smart Home Control System"]
    AS -->|Data Transfer| AT["Smart Home Control System"]
    AT -->|Data Transfer| AU["Smart Home Control System"]
    AU -->|Data Transfer| AV["Smart Home Control System"]
    AV -->|Data Transfer| AW["Smart Home Control System"]
    AW -->|Data Transfer| AX["Smart Home Control System"]
    AX -->|Data Transfer| AY["Smart Home Control System"]
    AY -->|Data Transfer| AZ["Smart Home Control System"]
    AZ -->|Data Transfer| BA["Smart Home Control System"]
    BA -->|Data Transfer| BB["Smart Home Control System"]
    BB -->|Data Transfer| BC["Smart Home Control System"]
    BC -->|Data Transfer| BD["Smart Home Control System"]
    BD -->|Data Transfer| BE["Smart Home Control System"]
    BE -->|Data Transfer| BF["Smart Home Control System"]
    BF -->|Data Transfer| BG["Smart Home Control System"]
    BG -->|Data Transfer| BH["Smart Home Control System"]
    BH -->|Data Transfer| BI["Smart Home Control System"]
    BI -->|Data Transfer| BJ["Smart Home Control System"]
    BJ -->|Data Transfer| BK["Smart Home Control System"]
    BK -->|Data Transfer| BL["Smart Home Control System"]
    BL -->|Data Transfer| BM["Smart Home Control System"]
    BM -->|Data Transfer| BN["Smart Home Control System"]
    BN -->|Data Transfer| BO["Smart Home Control System"]
    BO -->|Data Transfer| BP["Smart Home Control System"]
    BP -->|Data Transfer| BQ["Smart Home Control System"]
    BQ -->|Data Transfer| BR["Smart Home Control System"]
    BR -->|Data Transfer| BS["Smart Home Control System"]
    BS -->|Data Transfer| BT["Smart Home Control System"]
    BT -->|Data Transfer| BU["Smart Home Control System"]
    BU -->|Data Transfer| BV["Smart Home Control System"]
    BV -->|Data Transfer| BW["Smart Home Control System"]
    BW -->|Data Transfer| BX["Smart Home Control System"]
    BX -->|Data Transfer| BY["Smart Home Control System"]
    BY -->|Data Transfer| BZ["Smart Home Control System"]
    BZ -->|Data Transfer|
    BZ -->|Data Transfer|
    BZ -->|Data Transfer|
    BZ -->|Data Transfer|
    BZ -->|Data Transfer|
    BZ -->|Data Transfer|
figure 3
A
A
A
text_image
AA 098 1 OCT 20 MON 08:30 AM 23°C 2 Bluetooth phone A Figure 6 Figure è A A A
text_image
00000 00.00 km 000 kcal awan won off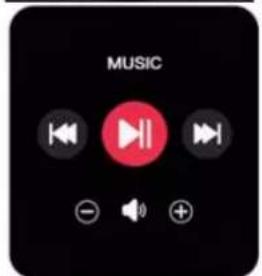
text_image
MUSIC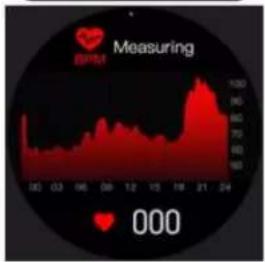
text_image
EPM Measuring 000figure 4
text_image
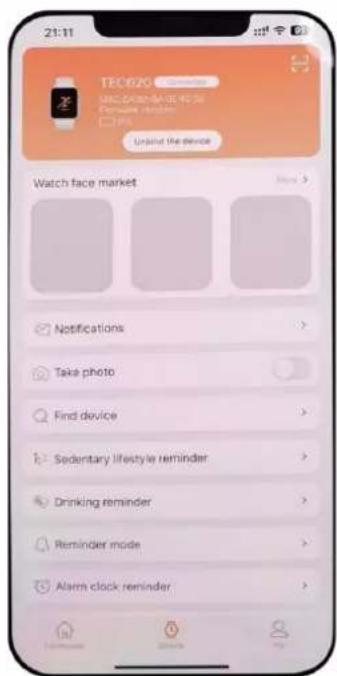
21:11 TEC020 UNIC DATA GUIDE TO Formative reminder UP Unlock the device Watch face market Notifications Take photo Find device Sedentary lifestyle reminder Drinking reminder Reminder mode Alarm clock reminderfigure 8
text_image
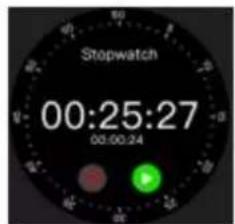
Stopwatch 00:25:27 00:00:24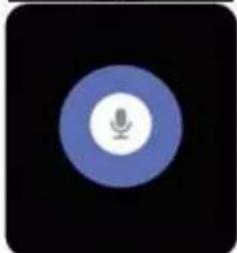
natural_image
Blue circular icon with a white microphone symbol on black background (no text or numbers)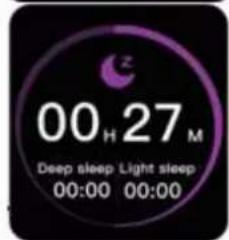
text_image
00 H 27 M Deep sleep Light sleep 00:00 00:00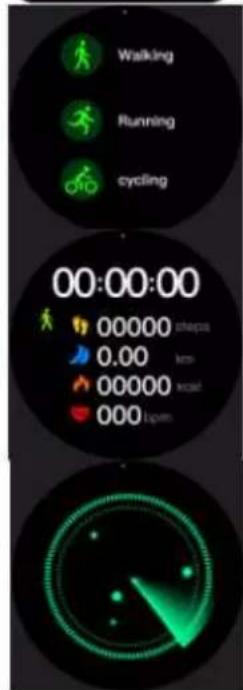
text_image
Walking Running cycling 00:00:00 00000 steps 0.00 km 00000 km/h 000 L/minfigure 5
Batterie :3.7 --- 220 mAh, 0.814 wh
Please, take time to read well the instruction sheet before the first use and keep them for a future use. A misuse of the appliance can dama,,e it or hurt the user. Assure that you use the appliance for the use for which it is desi,,ned. We refuse any responsibilities as for the dama,,es by an incorrect use or a bad manipulation.
- Do not char„e after the device was water dama„ed.
- This product is an electronic monitor, product. Data received from it cannot be used as medical basis.
- This device is not compatible with a pacemaker. Do not use this device if you have a pacemaker.
- Blood pressure testin, tip :
- Keep your body relaxed and still while testin,.
- Keep device at the same hei„ht as your heart, and don't talk while you are testin„.
-
A char„in„ environment of more than 50 de„rees may cause overheatin„ and deformation of the equipment.
-
This device uses built-in battery. It is forbidden to disassemble it. Please do not drop, collide, squeeze, puncture or cut.
- When the battery is broken or leakin, avoid contact with eyes and skin. When the situation occurs, do not touch the contact area and rinse immediately with water.
- Always disconnect the USB cable from the device immediately after use unless it is char„in„.
- Use the provided USB cable only.
- Do not disassemble or reassemble the product.
- Keep this product out of the reach of childrens.
- Keep the device dry.
ñechnicêl ípecificêtions
Input: 5V --- 0.5 A
Battery: 3.7 V —— 220 mAh, 0.814 Wh
Battery life: 15 days in standby, up to 7 days in use
Compatible with Android and iOS.
IP67 waterproofin,,
7 health functions: heart rate, sleep quality analysis, breathin,, exercise, pedometer, distance travelled, calories burned, activity time.
Warning:--
ñhis product is not ê medicël device ênd is not compêtiÃle with ê pêcemêker. Watches and their applications should not be used for dia„nosis, treatment, or prevention of diseases or illnesses. To chan„e your habits such as exercise and sleep, be sure to consult a qualified medical professional to avoid serious injury. We reserve the ri„ht to modify and improve any of the functions described in this manual without prior notice and continuously update the contents of the product. All contents are subject to the actual product.
Please stop wearin,, the smart bracelet in case of skin aller,,y or any discomfort.
Adjust the smart bracelet ti„htness to ensure air circulation.
áse of the device
Chérging Opérationx fully char„e the device before the first use. Take the included cable. Connect the ma„netic side on the back of the device. Plu„ the USB side of the cable in an USB port capable of char„in„ your device. When successfully connected, the screen will show that char„in„ is in pro„ress.
You cannot use your device durin,, char,,in,, process. Carefully observe the maximum char,,in,, volta,,e of the device (5V) to avoid any dama,,e.
úemoving the wêtch strêp: Push the metal switch on the back of the strap to remove the strap.
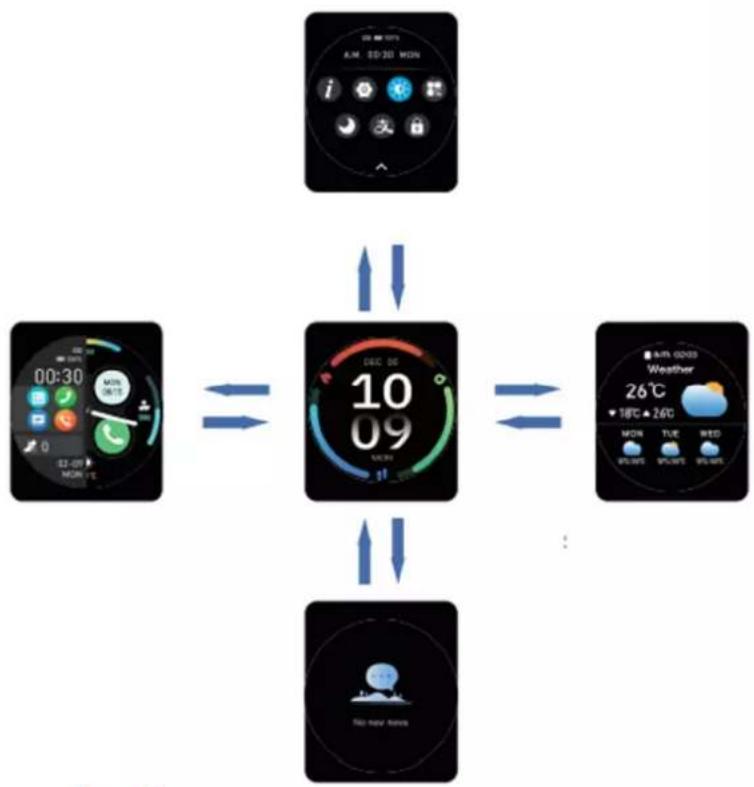
Button function
Power button (fi,,ure 6, button 1): lon,, press = switch on/off. Short press = Start the screen/return/stand by. In the main menu, double press to chan,,e the interface. Double press in home screen to initiate the voice assistant.
Sport button (fi,,ure 6, button 2): short press in home screen to enter sports mode.
Downloêding & pêring (Figure 2)
Start your Smartwatch with a lon,, press on the on/off side button (fi,,ure 6, button 1).
Download and install the application "RDFit" on your mobile by usin,, QR code in this instruction manual, in the watch (parameters, QR Code) or by searchin,, the application directly in AppStore or Goo„le Play.
Óêring
ÜAú¡I¡G: üOá HAëE ñO MA–E ñÜO OÓEúAñIO¡í ñO Fáóóü CO¡;ECñ üOáú DEäICE A¡D üOáú MOBIÓE !
OPERATION 1
Once you've download and install the application on your mobile device, please follow the instruction of the application to setup it as you prefer and accordin,, to your personal information. Activate the Bluetooth on your mobile device.
Launch the app and select "Connect the device" in "Device interface" (fi,,ure 8). The device should appear on the screen of your mobile. Select the device in the list and follow the instruction of your mobile.
OPERATION 2
Go to the setup menu in your device. Select "Bluetooth for callin," and validate it (Fi,ure 7).
In your mobile, check the list of the Bluetooth devices you can select. A second device has appeared in the list named 'TEC620-Call'. Connect your mobile with this device too to activate all the functions of your device.
„ote: Bluetooth devices can only be paired individually, so be sure to disconnect the previous Bluetooth device when connecting a new device. If the bluetooth icon 3.0 or 5.0 is colored, connection is successful.
„ote 2 : if you choose to disconnect the device and your mobile, do not forget to also “forget” the device in the Bluetooth parameter setup of your mobile.
How to set up the incoming notificêtion messêge?
- On your mobile, open RDFit. In the "Device" interface, select "push of the messa,,es". In this menu, you can enable your mobile to send selected notification on your device. Do not for,,et to save your settin,, before quittin,, the menu.
„ote 1: If the WeChat WEB is online at the same time, the Smartphone will not receive Incoming message notification. For some Smart- phones, you need to whitelist "RDFit" in the power saving mode, to avoid being turned off by the phone when the battery is low.
„ote 2: To receive all notification on your smartphone be sure that the notifications are enabled for the APPs in smartphone settings (steps mentioned above).
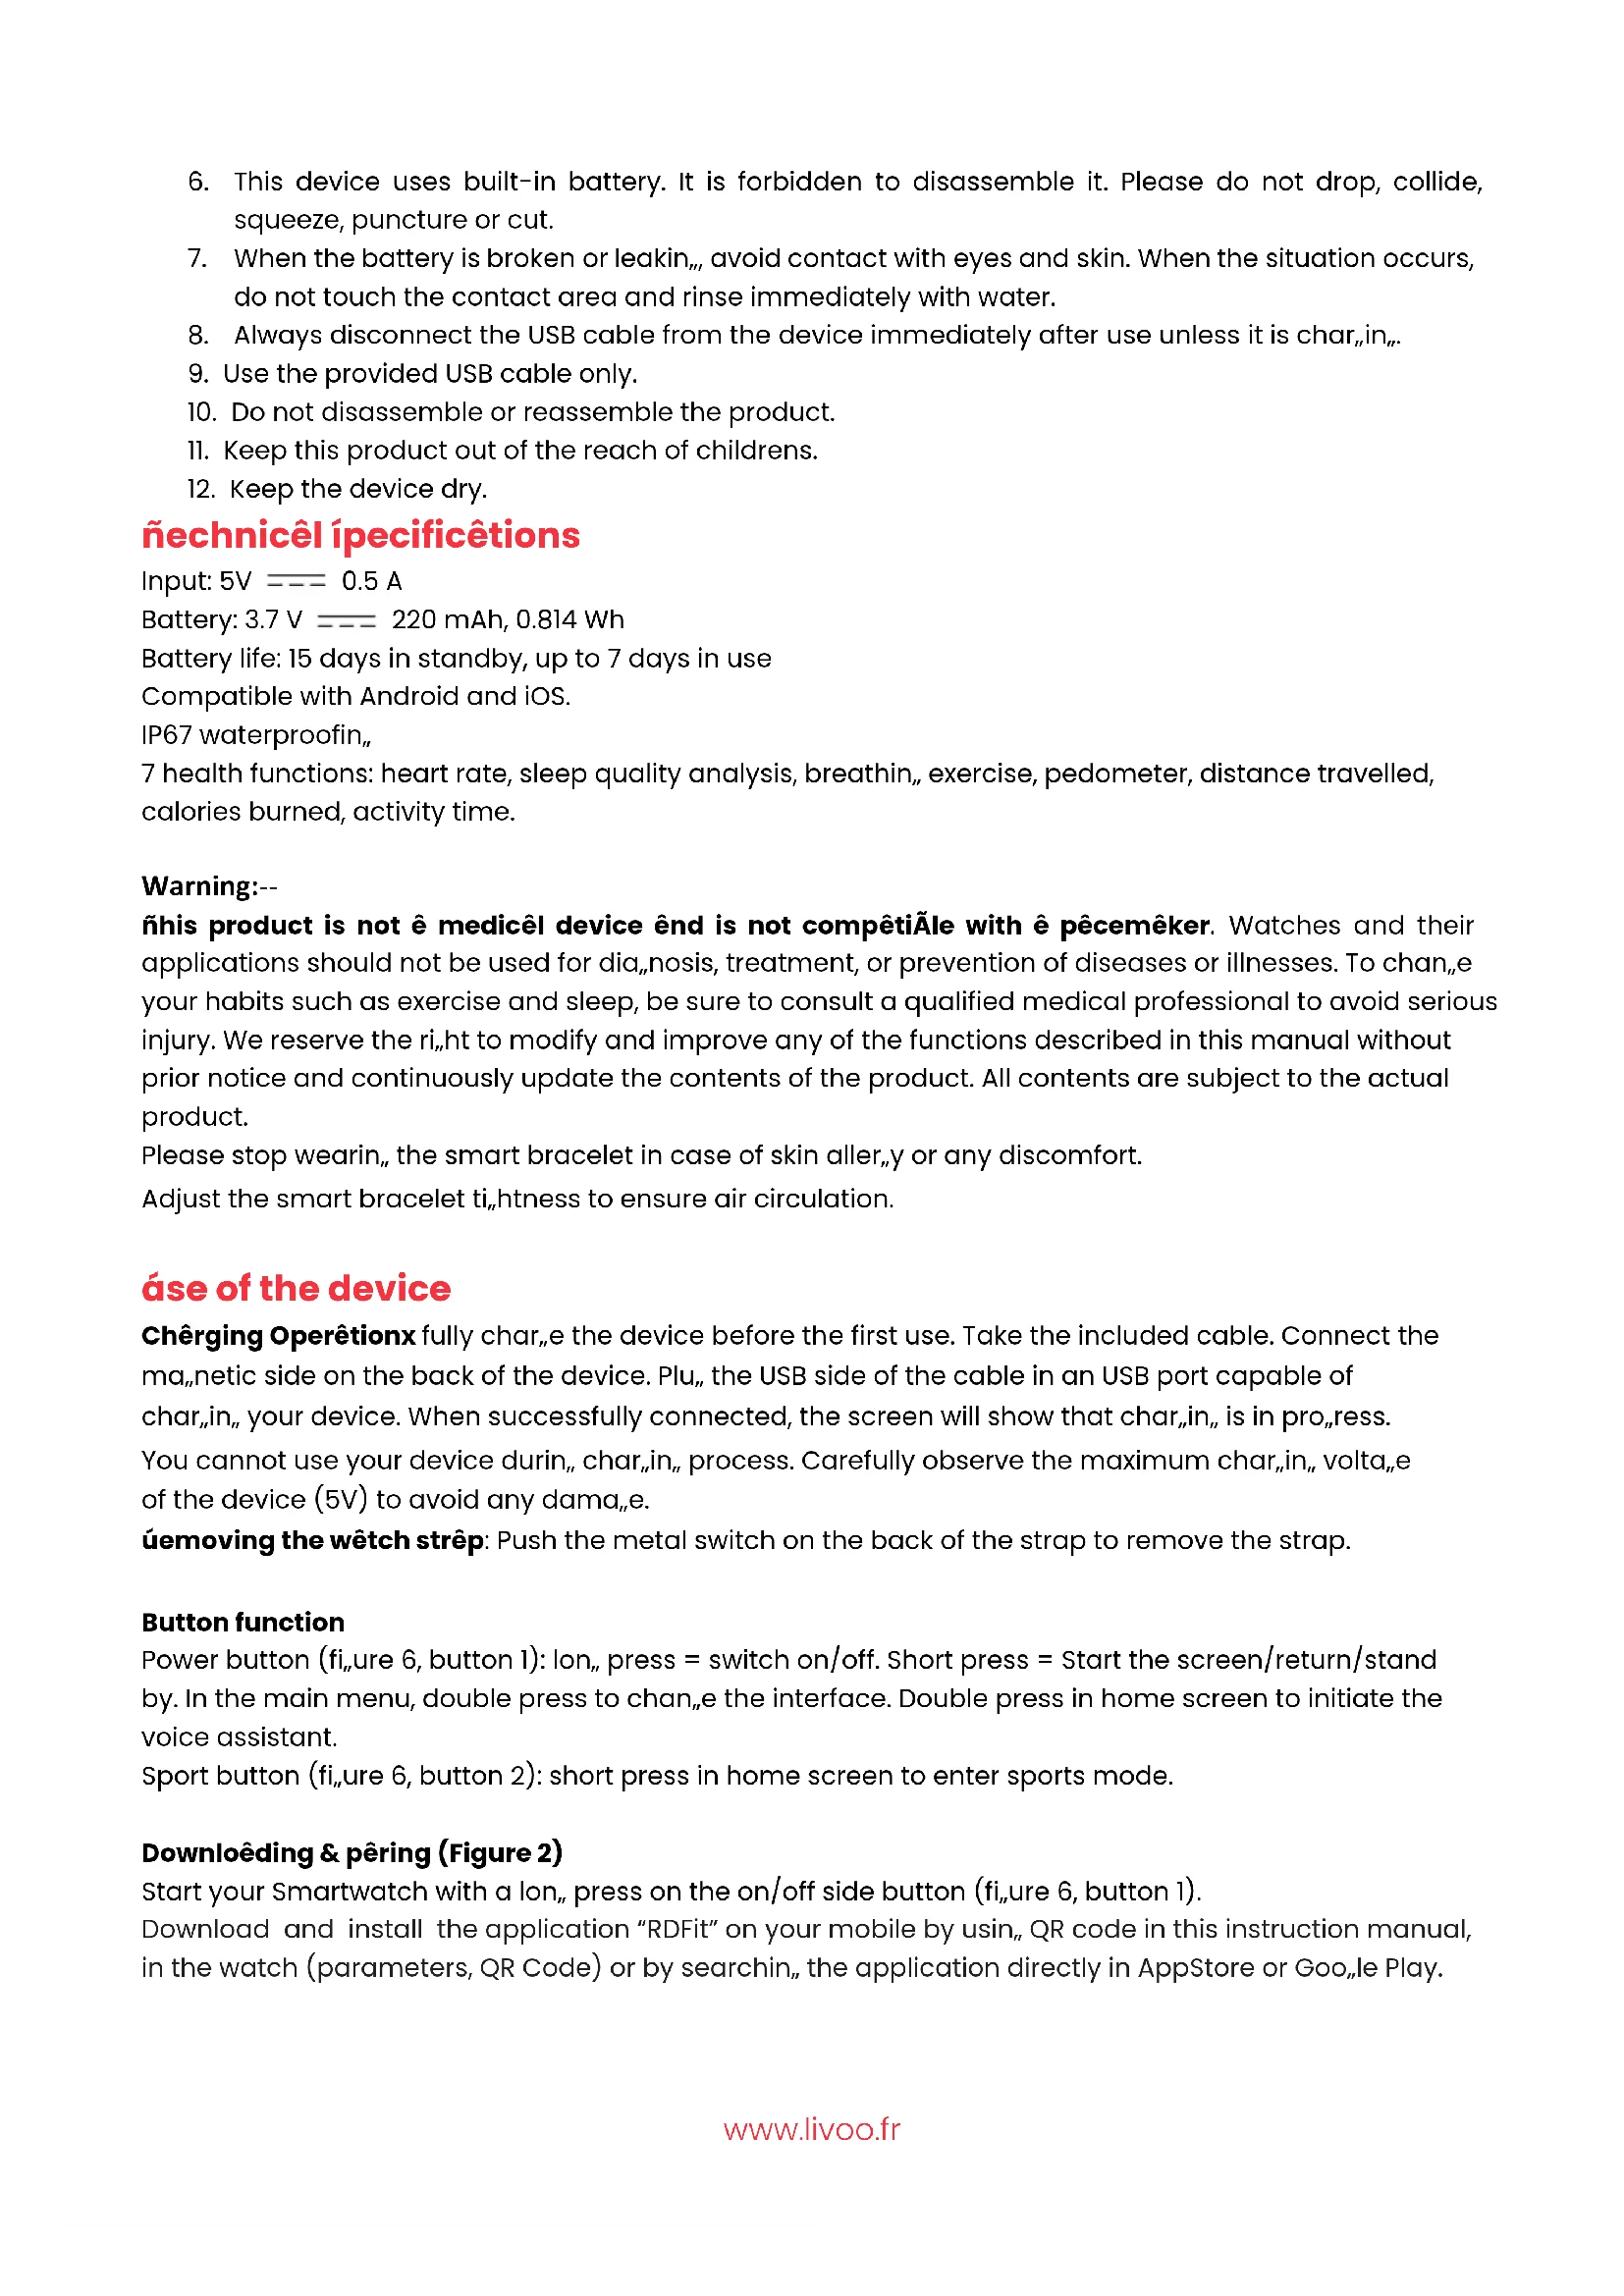
¡êvigête in the menu with your wêtch: (Figure z)
When your device is of, push the on/off button to activate it and let it show the standby screen. Click on the screen to enter the main menu, and swipe to the ri„ht to return to the standby screen.
Click to enter the correspondin,, function interface and swipe ri,ht to return to the main menu.
Swipe down to the screen control and swipe up to return.
Swipe up to enter the messa„e interface and swipe ri„ht to return.
Swipe ri„ht to enter the split screen interface and swipe left to return.
Slide left to enter the "addin," function" interface. In this interface, you can freely add and delete short access to some app. Swipe ri,ht to return.
Device épplicêtons
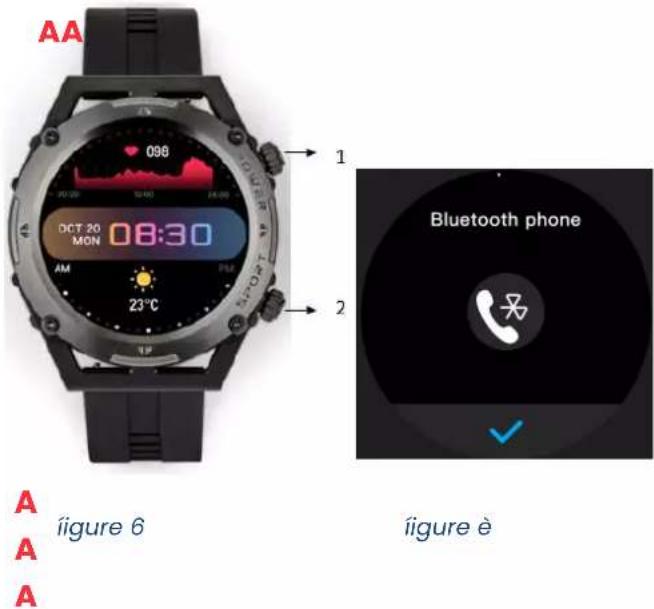
ítep-counting: the step-countin,, interface shows steps. Wear the smart bracelet on wrist, and the smart bracelet can automatically count steps, distance and calories.
Messêge: seven messa, es can be saved and seen directly on the device. The new messa, es will replace the oldest one by one. You can delete a messa, e or a call notification touchin, it for several seconds.
Cêlls: once your device is fully connected, you can take calls directly on your watch, talk thanks to the microphone in it and hear the discuss thanks to the speaker in it.
Music: the watch can control the music player of the mobile phone. When the mobile phone plays music, use the music application on your device to control the application on your mobile.
Heart rate measurement: the heart rate measurement application supports real-time dynamic heart rate. Be sure that there is no dirt at the bottom of the heart rate sensor when you run a measurement. Skin colour, hair density, tattoos and scars may affect the accuracy of the measurin, results, in which cases please re-measure the heart rate.
„ote: âhe heart rate sensor shall be closely attached to skin and well contacted with skin in measurement of heart rate.
Stop watch: Open this application to perform sin,le or multiple timin,.
Sleep: from 9 o'clock every ni„ht to 9 o'clock the next mornin„, wearin„ the smart bracelet at ni„ht will allow the watch to detect if you are asleep, to record deep sleep and li„ht sleep respectively and to summarize the total sleep time to help you monitor your sleep quality.
The sensor will measure your sleep quality accordin,, to the ran,,e and frequency of wrist movements when you sleep.
Motion: The watch can select multiple sports modes for sports: walkin, indoor runnin, outdoor runnin, cyclin, mountaineerin. After the sports are completed, the data can be displayed on the app.
Find a phone: when your mobile and the watch are connected, launch the application on the watch to let the mobile rin,.
Split screen: Swipe toward the ri„ht on the dial screen to access the split screen function to quickly access an application.
Dial push: push dials, di,,ital dials and customised dials from the app.
Dial: Connects to your phone with Bluetooth and dials out a call to make a call on the watch.
Call history: can synchronise the call history on the mobile phone.
Contacts: 20 contacts can be synchronised on the mobile phone.
Alarm clock: Up to five alarms can be added via the app.
Remote photo taking : on your mobile, launch the menu "Photo" in RDFIT application. The screen on your watch will show a white button. By clickin,, on the button, you take a picture with your phone.
Find the device: In RDFit App on your mobile, launch "Find the device" to make the watch rin,, and vibrate.
Weather: After connectin, to Bluetooth, the watch can display the weather condition of the day.
Breathing: You can set the length of time of the exercise and the breathin, speed.
Calculator: You can enter the calculator to do simple calculations.
Menu style : From the list provided, you can select the style of menu presentation you want to use.
Business card: The watch connects to the App and can push business cards from the App: WeChat, QQ, Alipay, Weibo, WhatsApp, Twitter, LinkedIn, Insta,,ram, Facebook, Line, Tim, Snapchat, Viber and other third party apps to the watch, so you can add new friends anytime, anywhere.
Wallet: The watch is connected to the app and you can send WeChat, Alipay, PayPal and other third-party app codes to your watch, so you can send money anytime, anywhere.
More settings. Click Settin„s to enter the Settin„s pa„e which displays functions such as lan„ua„e, APP download, product information, factory settin„s restoration, dials, screen off time and vibration intensity.
Cleaning and maintenance
Wipe your cable with a dry cloth. If not use, store in a dry place away from dust and humidity.
We, DELTA, BP61071, 67452 Mundolsheim – France
Declare under our own responsibility that the article :
- Description: Smartwatch ; - Reference: TEC620
to which this declaration applies, is in conformity with the applicable EU harmonization le, isolation
| DIÚECÑIÄEÍ | ¡OÚMEÍ or ÍÓECIFICAÑIOjí |
| RED 2014/53/EU | EN 50663:201œ EN 62368-1 2014+A11 201œET-I EN 300 328 V2.2.2 (2019-0œ)ET-I EN 301 489-1 V2.2.3 (2019-11)ET-I EN 301 489-1œ V3.2.4 (2020-09)EN 55032 2015+AC 2016+A1 2020+A11 2020EN 55035 201œ+A11 202 |
| ROH- 2011/65/EU The oúject | of the declaration descriúed aüove is in conformity with Directive 2011/65/EU of the European Parliament and of the Council of 8 June 2011 on the restriction of the use of certain hazardous sußstances in electrical and electronic equipment.EU 2011/65/EU et EU 2015/863 |
Mundolsheim le 25/01/2023
David Bousquet, CEO
text_image
DELTA SAS 1 Rue FOCH BP 61071 67452 MUNDOLSHEM CEDEX France SHEET: 324 32 106 00 99 APE: 516 J TEL: 132 100-22 61 32 FAX: 33 3 90 20 39 29 e-mail: delta@sellaart.com
Correct disposèl of the unit (Electricël énd Electronic Equipment)È(Applicaüle in the European Union and the rest of Europe that have adopted separate collection systems countries). The European Directive 2012/19/EU on Waste Electrical and Electronic Equipment (WEEE), requires that old household electrical appliances must not üe disposed of in the normal household waste stream. Old appliances must üe collected separately in order to optimize the recovery and recyclin, of the materials they contain and reduce the impact on human health and the environment. The symüol of the crossed out dustüin is marked on all products to remind the oüli,,ations of separate collection. Consumers should contact their local authority or retailer for information concernin,, the
correct disposal of their product.