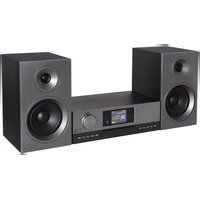
Elite Line PL910 - Hi-fi system Soundmaster - Free user manual and instructions
Find the device manual for free Elite Line PL910 Soundmaster in PDF.
| Product Type | Compact Hi-Fi system with DAB+/FM radio, CD player, USB, Bluetooth and auxiliary input |
| Brand | Soundmaster |
| Model | Elite Line PL910 |
| Dimensions (approx.) | 300 x 150 x 200 mm (W x H x D) |
| Weight (approx.) | 3 kg |
| Power supply | 12 V DC power adapter (included) |
| Power consumption | 25 W (max.) |
| Compatible disc types | CD, CD-R, CD-RW (audio, MP3, WMA) |
| Radio | DAB+ and FM RDS with 40 presets each |
| Bluetooth | Version 4.2, range 10 m, profiles A2DP and AVRCP |
| Auxiliary input | 3.5 mm jack socket |
| USB port | Play MP3/WMA files from USB flash drive (charging possible) |
| Headphone output | 3.5 mm jack socket |
| Equalizer | Presets: Normal, Classic, Jazz, Pop, Rock, My EQ (bass/treble adjustable) |
| Sleep timer | Off delay: 15, 30, 45, 60, 90 minutes |
| Alarm | Dual alarm adjustable to radio, CD, USB, buzzer |
| Display | Backlit LCD screen with multiple color themes |
| Remote control | Yes, with AAA batteries (supplied) |
| Care and cleaning | Wipe with a soft, dry cloth. Do not use abrasive products or solvents. |
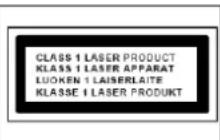
| Safety | Class 1 laser, protection against electric shock, automatic shut-off after 20 minutes in standby without signal |
| Spare parts / Repairability | Repair reserved for an authorized center. No user-serviceable parts. |
| General information | Manual available in multiple languages. Manufactured by Wörlein GmbH, Germany. |
Frequently Asked Questions - Elite Line PL910 Soundmaster
User questions about Elite Line PL910 Soundmaster
0 question about this device. Answer the ones you know or ask your own.
Ask a new question about this device
Download the instructions for your Hi-fi system in PDF format for free! Find your manual Elite Line PL910 - Soundmaster and take your electronic device back in hand. On this page are published all the documents necessary for the use of your device. Elite Line PL910 by Soundmaster.
USER MANUAL Elite Line PL910 Soundmaster
natural_image
Black digital audio recorder with external control panel and remote (no visible text or symbols)DEUTSCH
ENGLISH
FRANÇAIS
NEDERLANDS
ITALIANO
ESPANOL
DANSK
NORSK
SVENSKA
SUOMI
Hersteller
Dynamic Range Compression (DRC) 8
FM....9
Software Update....15
Software Version 15
BEDIENELEMENTE
FRONTANSICHT
text_image
1 2 3 4 5 6 7 8 9 10 11 12text_image
CLASS 1 LASES PRODUCT 13 15 14 16 DC IN 17text_image
Diagram showing a remote control with a screen and a remote device, illustrating the concept of viewing or monitoring.INSTALLATION
Lieferumfang
text_image
Diagram of a device rear panel with labeled ports and connections, showing a cable or cable to a wall-mounted device.Dynamic Range Compression (DRC)
text_image
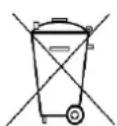
Diagram of a device rear panel with labeled ports and connectors, showing a cable inserted into the front panel.Do not dispose of this product with the normal household waste at the end of its life cycle. Return it to a collection point for the recycling of electrical and electronic devices. This is indicated by the symbol on the product, user manual or packaging
The materials are recyclable according to their labeling. By reusing materials or other forms of recycling old devices and packaging, you are making an important contribution to protecting our environment. If necessary, remove batteries and personal data before disposal free of charge and ask your local authority about the responsible disposal point.
| WARNING Risk of electric shock Do not open! | ! |
Caution: To reduce the risk of electric shock, do not remove the cover (or back). There are no user serviceable parts inside. Refer servicing to qualified service personnel.
This symbol indicates the presence of dangerous voltage inside the enclosure, sufficient enough to cause electric shock.
This symbol indicates the presence of important operating and maintenance instructions for the device
Used batteries are hazardous waste and NOT to be disposed of with the household waste! As a consumer you are legally obligated to return all batteries for environmentally responsible recycling – no matter whether or not the batteries contain harmful substances*)
Return batteries free of charge to public collection points in your community or shops selling batteries of the respective kind. Only return fully discharged batteries ^* marked Cd = cadmium, Hg = mercury, Pb = lead
- Only use mercury and cadmium-free batteries.
- Used batteries are hazardous waste and NOT to be disposed of with the household waste!!!
- Keep batteries away from children. Children might swallow batteries.
- Contact a physician immediately if a battery was swallowed.
- Check your batteries regularly to avoid battery leakage.
- Batteries shall not be exposed to excessive heat such as sunshine, fire or the like.
- CAUTION: Danger of explosion if battery is incorrectly replaced
- Replace only with the same or equivalent type
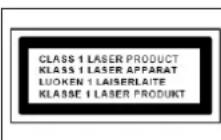
CAUTION - INVISIBLE LASER RADIATION WHEN OPENING THE COVER OR PRESSING THE SAFETY INTERLOCK. AVOID EXPOSURE TO THE LASER BEAM.

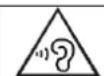
To prevent possible hearing damage, do not listen at high volume levels for long periods
- Use the device in dry indoor environments only.
- Protect the device from humidity.
- This apparatus is for moderate climates areas use, not suitable for use in tropical climates countries.
Safety, Environmental and Setup Instructions
- No objects filled with liquids, such as vases, shall be placed on the apparatus.
- The mains plug or an appliance coupler is used as the disconnect device, the disconnect devices shall remain readily operable.
- Connect this device to a properly installed and earthed wall outlet only. Make sure the mains voltage corresponds with the specifications on the rating plate.
- Make sure the mains cable stays dry during operation. Do not pinch or damage the mains cable in any way.
- A damaged mains cable or plug must immediately be replaced by an authorized service center.
- In case of lightning, immediately disconnect the device from the mains supply.
- Children should be supervised by parents when using the device.
- Clean the device with a dry cloth only.
- Do NOT use CLEANING AGENTS or ABRASIVE CLOTHS!
- Do not expose the device to direct sunlight or other heat sources.
- Install the device at a location with sufficient ventilation in order to prevent heat accumulation.
- Do not cover the ventilation openings!
- Install the device at a safe and vibration-free location.
- Install the device as far away as possible from computers and microwave units; otherwise radio reception may be disturbed.
- Do not open or repair the enclosure. It is not safe to do so and will void your warranty. Repairs only by authorized service/ customer center.
- No naked flame sources, such as lighted candles, should be placed on the unit.
- When you are necessary to ship the unit store it in its original package. Save the package for this purpose.
- In case of malfunction due to electrostatic discharge or fast transient (burst), remove and reconnect the power supply.
- If the unit is not using for a long period of time, disconnect it from the power supply by unplugging the power plug. This is to avoid the risk of fire.
TABLE OF CONTENTS
LOCATION OF CONTROLS 3
REMOTE CONTROL....4
Operating your Remote Control....4
Remote Control operation range 5
INSTALLATION....5
Content of delivery....5
AC power connection 5
BASIC OPERATIONS....6
Power ON/OFF....6
Selecting modes....6
Adjusting the volume 6
Mute 6
DAB 6
Full Scan 6
Selecting stations 6
Manual tune....7
Presets 7
DAB Information 8
Prune (remove stations that are listed but not available)....8
Dynamic range compression (DRC) 8
FM....8
Scan for a station in FM mode....8
Presets 8
FM Information 9
Scan settings....9
Audio settings....9
CD....9
CD playing....9
Resume function....10
Skip search and search....10
Repeat mode....10
Random mode....10
Intro function....10
Program mode....10
USB 10
USB playing....11
Resume function....11
Skip search and search....11
Repeat mode....11
Random mode....11
Intro function....11
Program mode....11
BLUETOOTH ^® 12
Pair Bluetooth devices....12
AUX-IN....13
SOUND QUALITY 13
Adjust Bass or Treble (My EQ)....13
Preset Equalizer 13
SLEEP TIMER....13
Activate the Sleep timer....13
Show the remaining sleep time 13
Cancel the sleep timer....13
ALARM....13
HEADPHONE....13
SYSTEM SETTINGS 14
Theme 14
Night Mode 14
Equaliser 14
Time/Date....14
Backlight....14
Language 14
Factory Reset 14
Software Update....14
Software Version 14
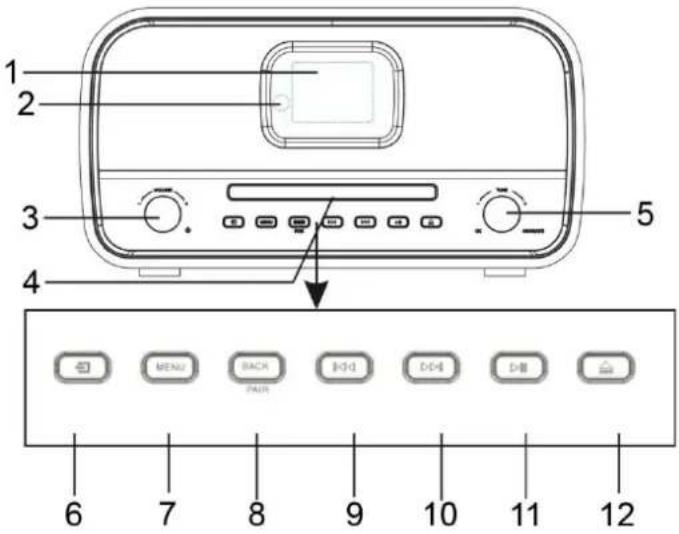
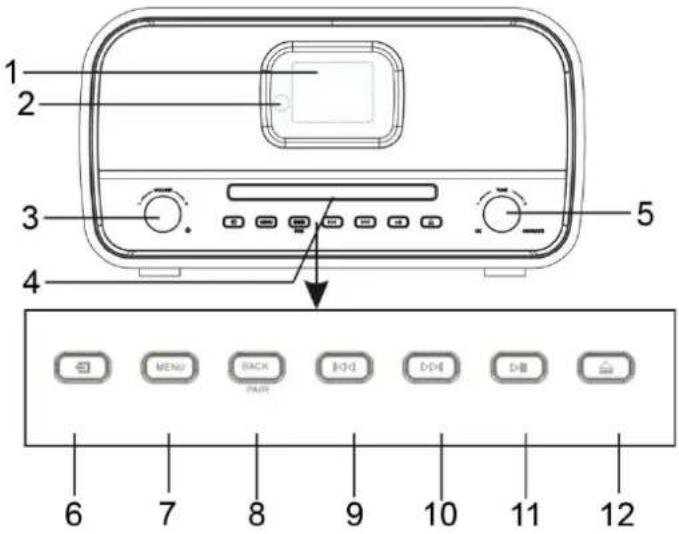
LOCATION OF CONTROLS
FRONT VIEW
text_image
1 2 3 4 5 6 7 8 9 10 11 121 Display
2 Remote Sensor
3 ⏻, VOL+ / VOL- knob
4 Disc tray
5 Navigate / OK knob
6 Source button
7 MENU button
8 BACK / PAIR button
9 button
10 button
11 PLAY / PAUSE button
12 ▲ Eject button
BACK VIEW
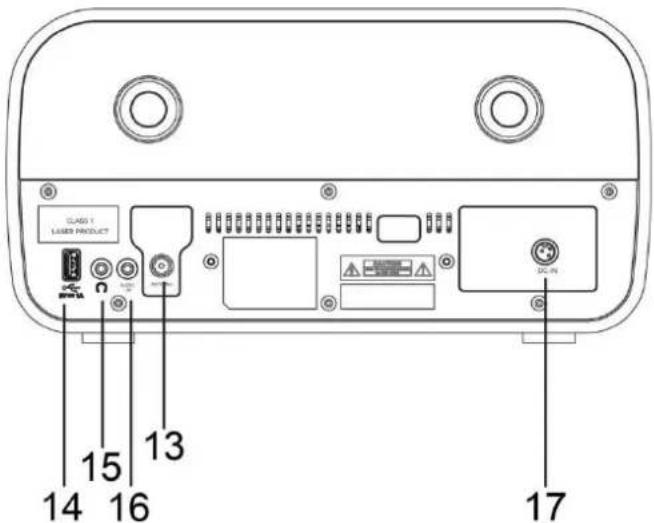
text_image
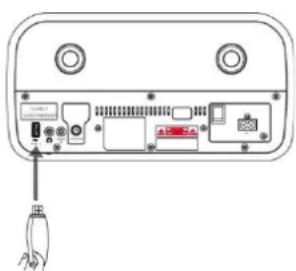
CLASS 1 LASES PRODUCT 13 15 14 16 DC IN 1713 Antenna socket
14 USB socket
15 Headphone jack
16 AUX IN jack
17 DC input
REMOTE CONTROL
1 ⏻ Standby / ON button
2 INTRO / AMS button
3 REPEAT button
4 EQ button
5 BASS +/- button
6 USER button
7 MENU button
8 ▲ button
9 button
10 ■ button
11 P +/- button
12 0-9 Numbers
13 INFO button
14 ▲ button
15 SLEEP button
16 Function buttons (CD/USB/DAB/FM/BT/AUDIO)
17 RANDOM button
18 TREBLE +/- button
19 PROGRAM button
20 ↻/PAIR button
21 ▶/ OK button
22 button
23 ▼ button
24 ✕ button
25 SET / CLOCK button
26 V +/- button
27 TIMER button
28 DIM button
text_image
1 FM CD USB DAB BT AMS INTRO REPEAT SLEEP AUDIO EQ + + + RANDOM BASS TREBLE USER - PROGRAM 7 MENU PAIR 20 8 21 9 II OK 22 23 10 SET CLOCK + 24 25 11 - TIMER - 26 27 1 2 3 12 4 5 6 7 8 9 13 INFO 0 DIM 28Operating your Remote Control
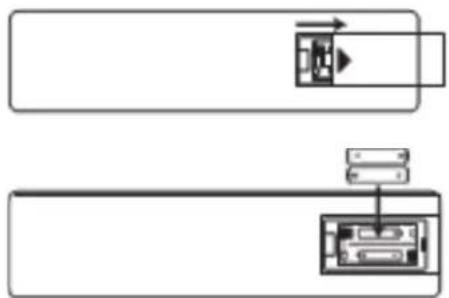
- Press and slide the back cover to open the battery compartment of the remote control.
- Insert two AAA size batteries. Make sure that the (+) and (-) ends of the batteries match the (+) and (-) ends indicated in the battery compartment.
- Close the battery compartment.
flowchart
graph TD
    A["Block 1"] --> B["Component 1"]
    B --> C["Component 2"]
    C --> D["Component 3"]
    D --> E["Component 4"]
    style A fill:#f9f,stroke:#333
    style E fill:#bbf,stroke:#333
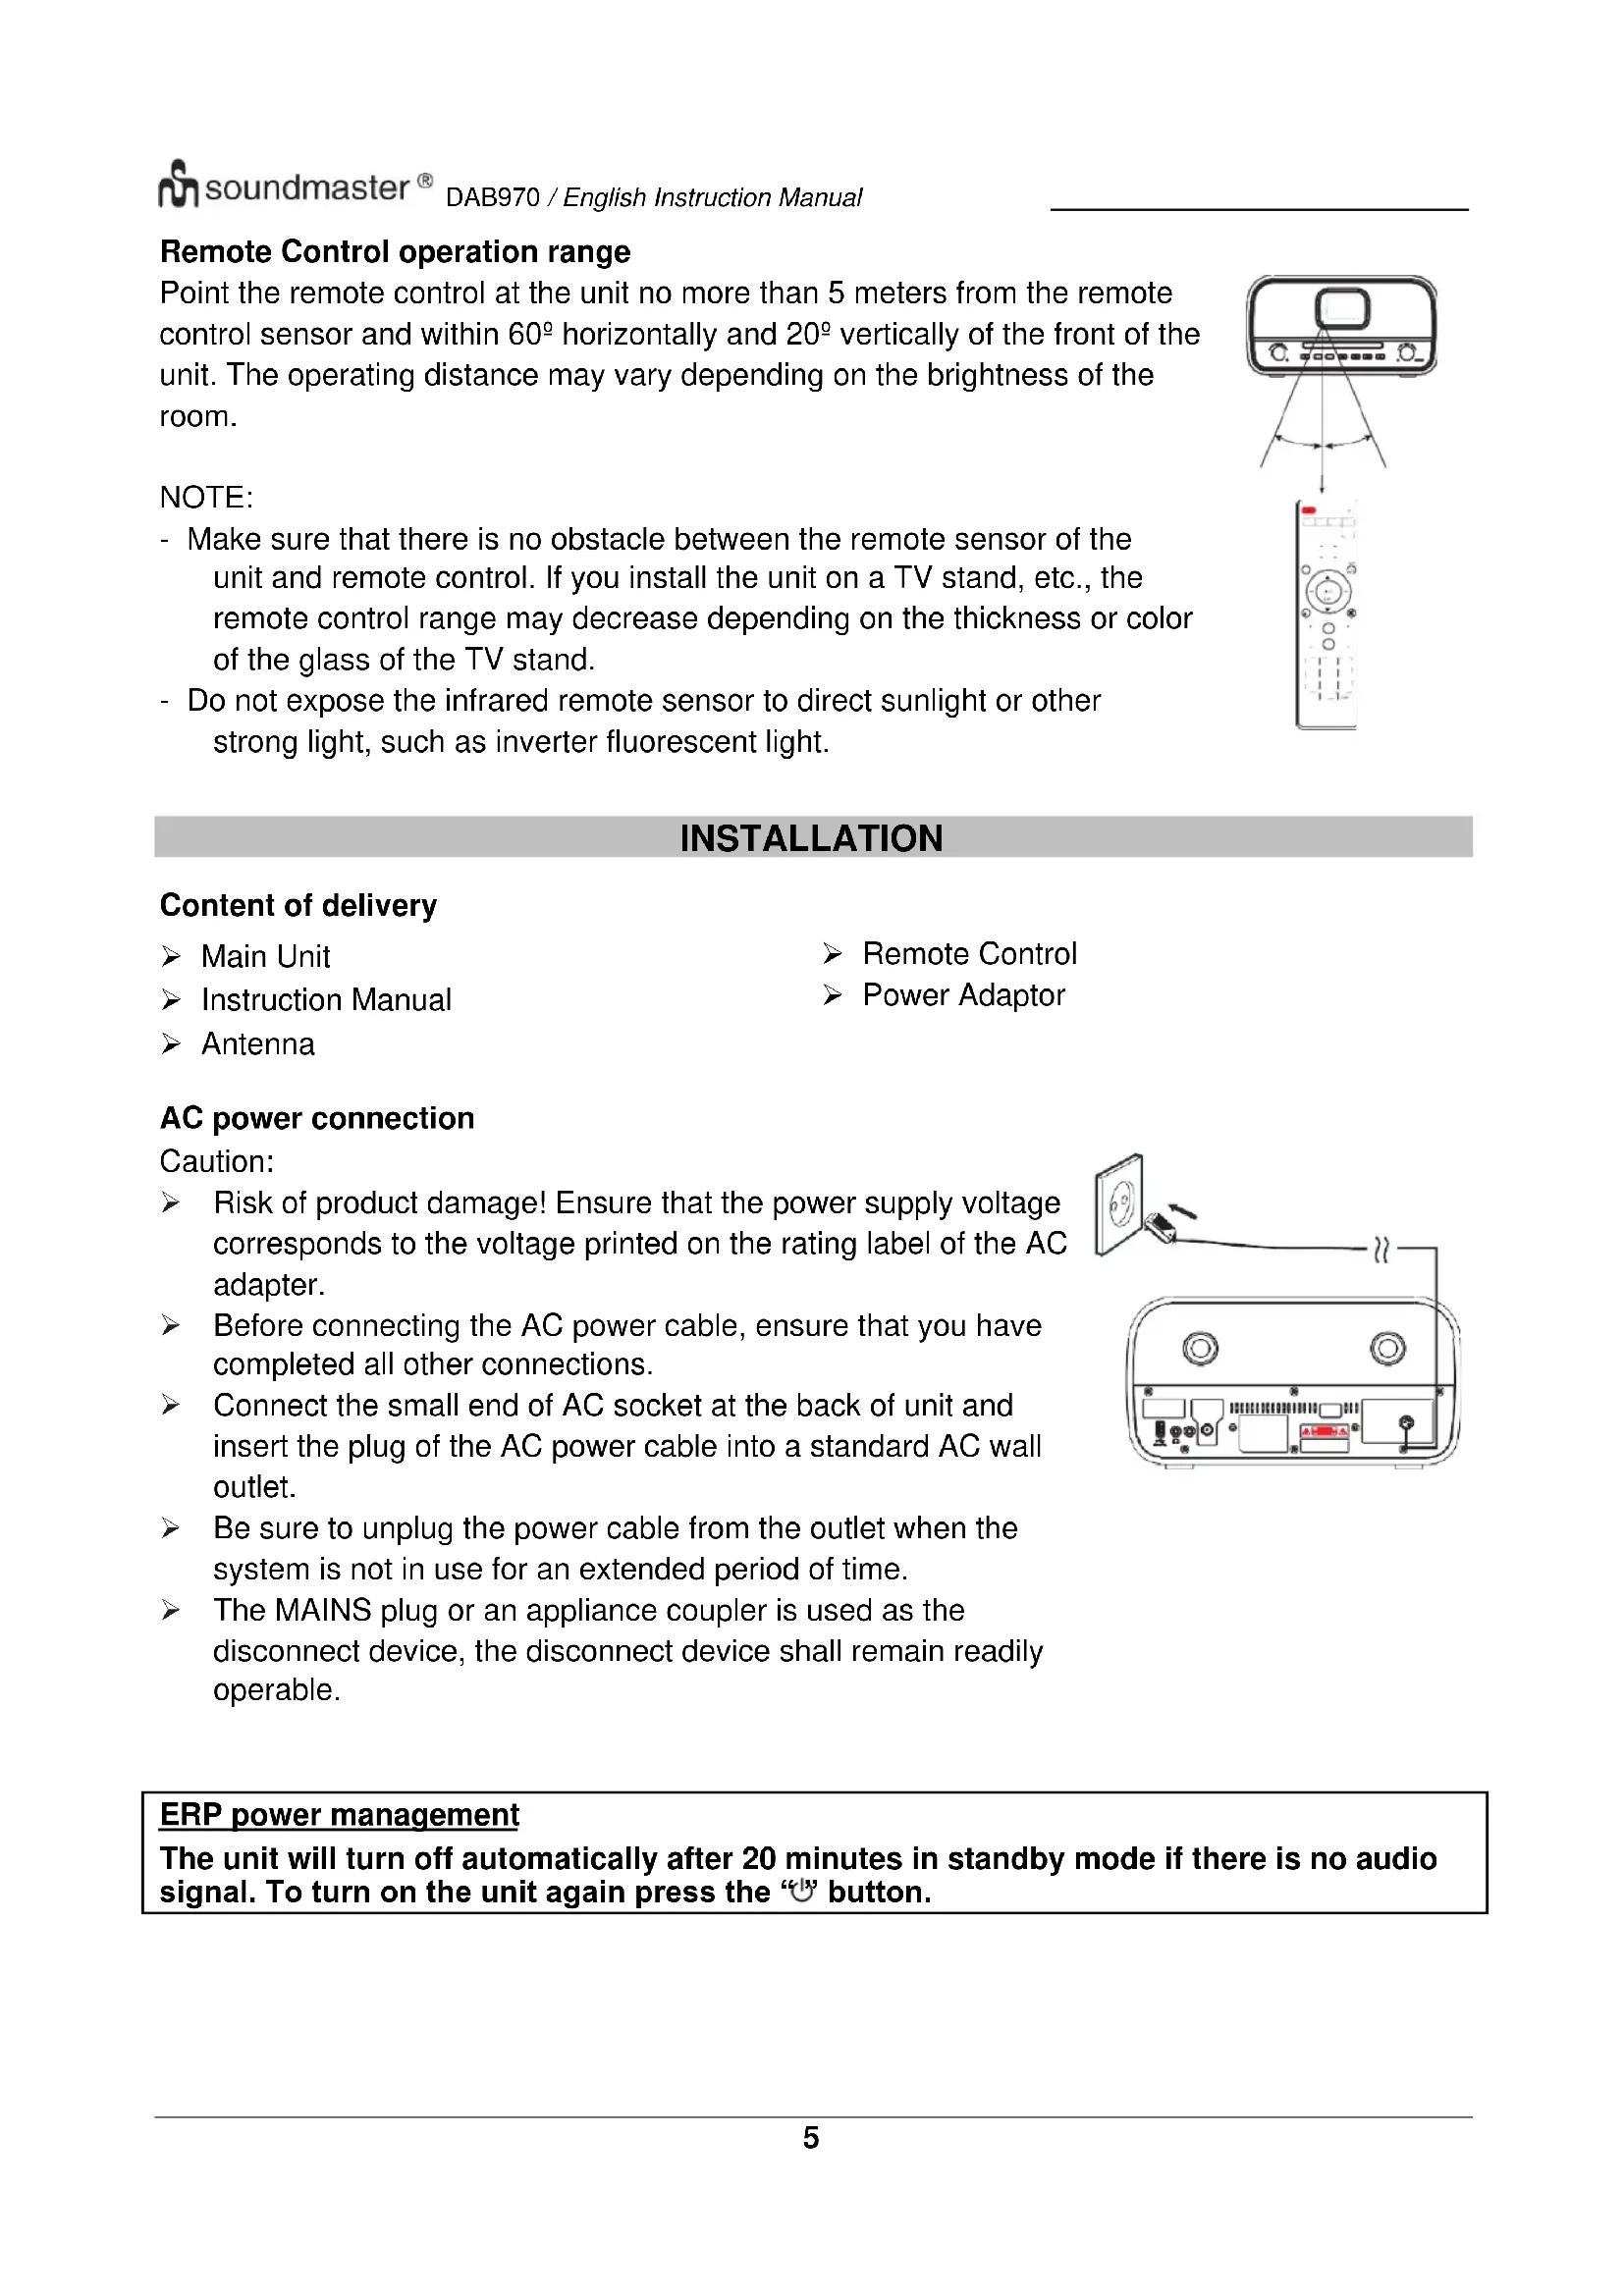
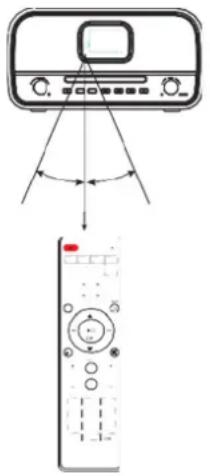
Remote Control operation range
Point the remote control at the unit no more than 5 meters from the remote control sensor and within 60^ horizontally and 20^ vertically of the front of the unit. The operating distance may vary depending on the brightness of the room.
NOTE:
- Make sure that there is no obstacle between the remote sensor of the unit and remote control. If you install the unit on a TV stand, etc., the remote control range may decrease depending on the thickness or color of the glass of the TV stand.
- Do not expose the infrared remote sensor to direct sunlight or other strong light, such as inverter fluorescent light.
text_image
Diagram showing a remote control with a display and a separate remote device, illustrating the concept of viewing or monitoring.INSTALLATION
Content of delivery
▶ Main Unit
Remote Control
Instruction Manual
Power Adaptor
Antenna
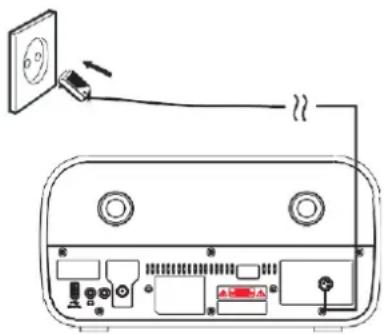
AC power connection
Caution:
Risk of product damage! Ensure that the power supply voltage corresponds to the voltage printed on the rating label of the AC adapter.
Before connecting the AC power cable, ensure that you have completed all other connections.
Connect the small end of AC socket at the back of unit and insert the plug of the AC power cable into a standard AC wall outlet.
Be sure to unplug the power cable from the outlet when the system is not in use for an extended period of time.
The MAINS plug or an appliance coupler is used as the disconnect device, the disconnect device shall remain readily operable.
text_image
Diagram showing a device rear panel connected to a power outlet via cable, with labeled ports and connectors.ERP power management
The unit will turn off automatically after 20 minutes in standby mode if there is no audio signal. To turn on the unit again press the “√” button.
BASIC OPERATIONS
Power ON/OFF
Press the “💡” knob on the unit or the “💡” button on the remote control to turn the unit on.
Press again the “💡” knob or the “💡” button on the remote control to turn the unit off.
Selecting modes
During on mode, press the “→” button on the unit repeatedly to switch between the modes or press the desired function on the remote control.
Adjusting the volume
Rotate the "VOLUME" knob on the unit or press the "V +/-" button on the remote control to decrease or increase the volume.
NOTE:
If you adjust the volume above 26, then power off and power on again, the volume will restore to the factory setting automatically.
Mute
During playing mode, press the “ ✉” button on the remote control, the sound will not be heard from the speaker.
Press the “×” button again, the “V +/-” button on the remote control or rotate the “VOLUME” knob to cancel the mute function. The sound can be heard from the speakers again.
DAB
The first time you use the unit, or if the station list is empty, the radio automatically performs a full scan to see what stations are available. You may also need to start a scan manually to update the list of stations for one of the following reasons:
New stations may become available from time to time.
➢ Stations close or can no longer be received (In the station list, invalid stations are indicated with a question mark in front of their name).
If reception was not good after the original scan (for example the antenna was not up), this may result in an empty or incomplete list of available stations.
If you have poor reception of some stations causing the audio to break up, you may wish to list only stations with good signal strength.
Press the “→” button repeatedly on the unit or press the “DAB” button on the remote control until “DAB” is displayed to select the DAB function.
Full Scan
Press the "MENU" button, select with the "▼ / ▲" buttons the function "Full scan" and press the "OK" button to confirm. The unit starts a complete scan. Once a scan is complete, the radio returns to playing the previously selected station or first station on the station list.
Selecting stations
- Use the “▼ / ▲” button on the remote control or rotate the “NAVIGATE” button on the unit to scroll through the list of station.
- Press "OK" on the remote control or on the unit to change station.
Some stations are secondary services associated with a Primary channel and only available at certain times. Any station that has associated secondary services is indicated with a double chevron pointing to the right. The Secondary radio station stations are always listed next to their primary station rather than the normal is indicated with a double chevron pointing left.
Manual tune
As well as the normal method of scanning, you can also manually tune to a particular channel /frequency. This can be useful for adjusting your antenna to achieve the best possible reception and scanning a particular channel to update the station list.
- Press "MENU" button on the unit or remote control.
- Select "Manual tune" and press "OK" to confirm.
- Use the “▼ / ▲” button on the remote control or rotate the “NAVIGATE” knob on the unit to display a particular channel/frequency and press the “OK” button on the remote control or on the unit to tune the selected channel/frequency.
- The display shows a live indication of the received signal strength on the selected frequency.
- Adjustments to your antenna will be manifested in the received signal strength displayed.
Note:
The slightly larger rectangle indicates the audio quality threshold - if the signal strength, as indicated by the solid rectangles, falls below this threshold the audio quality will deteriorate. At the same time the unit scans for any DAB stations on the selected frequency and updates the station list with any new stations found. To listen to any stations found, return to the “Now playing” screen and select the required station from the station list as normal.
Presets
The unit has 40 preset memories for DAB.
Store a station in a preset memory
- Select the desired station.
- Press and hold the "PROGRAM" button on the remote control about 3\~5 seconds until the display shows "Preset Store". Presets (1-40) are displayed as either "Empty" or with the currently stored station name.
- Use the “▼” ▲ button on the remote control or rotate the “NAVIGATE” knob on the unit to choose a preset memory, then press the “OK” on the remote control or on unit to store the currently playing station. After confirming the preset station is stored, the display reverts to the “Now playing” screen.
Note:
If a preset memory is already occupied, you can simply replace the old one with the new one. It is not necessary to delete the old preset station.
Recall a preset station
Press the "PROGRAM" button briefly, the display will show "Preset Recall". Select one of the listed preset stations by using the "▼ / ▲" buttons on the remote control or rotate the "NAVIGATE" button on unit. Then press the "OK" button on the remote control or on the unit to choose the selected preset station.
DAB Information
While a station is playing, the screen shows the station name and DLS (Dynamic Label Segment) information broadcast by the station such as program name, track title and contact details. Long DLS info, over 16 characters scrolls a cross.
Each time you press the "INFO" button, the next set of information is displayed, cycling through: DLS text, DL Plus information (this is only displayed if broadcast by the station), signal strength, program type, ensemble name, channel number/frequency, signal error rate, bit rate, DAB variant, time and date.
Note: DL Plus presents additional information that can be broadcast by stations and stored temporarily on your radio. To return to the default “Now playing” screen at any time, press and hold the “INFO” button.
Prune (remove stations that are listed but not available)
Press the "MENU" button, select the function "Prune Invalid" and press the "OK" button to confirm.
This removes all invalid stations, indicated in the station list with a “?” in front of the station name.
Dynamic range compression (DRC)
This function reduces the difference between the loudest and quietest audio being broadcast. Effectively, this makes quiet sounds comparatively louder, and loud sounds comparatively quieter.
Note: DRC only works if it is enabled by the broadcaster for a specific station
Change the DRC setting
- Press the "MENU" button on the remote control or on the unit
- Select "DRC" and press "OK" to confirm.
- Select one of the available options: DRC off | low | high.
FM
FM radio mode receives analogue radio from the FM band and displays RDS (Radio Data System) information about the station and show (where broadcast).
Press repeatedly the “→” button on the unit or the “DAB” button on the remote control until “FM” is displayed to select the FM function.
Scan for a station in FM mode
Automatic scan
Press the "INTRO/AMS" button on the remote control. The unit scans up through the FM band frequencies, showing the current frequency on the screen display. The found radio stations will be stored in the station list.
Manual scan
Press the “◀/▶” buttons on the remote control or unit to tune manually in 50 kHz steps.
Presets
The unit has 40 preset memories for FM, which works in the same way as DAB mode presets.
FM Information
While FM radio is playing, the screen shows the frequency of the radio station or if RDS information is available, the station name and any further “Radio Text” information.
If no information is available just the frequency, a "NO Radio Text" message is shown.
Each time you press the "INFO" button, the next set of information is displayed, cycling through: RDS Radio Text, program type, frequency, mono/stereo, time and date. To return to the default "Now playing" screen, press and hold the "INFO" button.
Scan settings
By default, FM scans stop at any available station (ALL Stations). This may result in poor quality audio from weak stations. The options are: All stations | Strong stations only.
To change the scan settings, to stop only at stations with good signal strength:
- Press the "MENU" button on the remote control or unit.
- Select "Scan setting", press "OK" to confirm and then select "Strong stations only". Press the "OK" button again to confirm.
Audio settings
By default, all stereo stations are reproduced in stereo. For weak stations, this may result in poor quality audio. The audio quality can be improved using mono. In the “Audio Setting” menu, the options are: Stereo allowed | Forced mono
Play weak stations in mono:
- Press the "MENU" button on the remote control or unit.
- Select "Audio setting", press "OK" to confirm and then select "Forced mono". Press the "OK" button again to confirm.
CD
Compatible Disc Types
| Disc Types | Disc Logo | Recorded Content |
| CD-R (CD Recordable - Audio/MP3/WMA) |  | AUDIO / MP3 / WMA |
| CD-RW (CD-Rewritable - Audio/MP3/WMA) |  | AUDIO / MP3 / WMA |
| AUDIO-CD (Compact Disc Digital Audio) |  | AUDIO |
Note: Some recorded files may not be able to be played due to the type and format of disc or condition of the recording.
CD playing
- Press the “→” button repeatedly on the unit or press the “CD” button on the remote control until “CD” is displayed to select the CD function.
- Press the “▲” button to open the disc tray and put the disc on the disc tray (with the printed side faced up).
- Press the “▲” again to close the disc tray. The unit will start the playback of the disc automatically.
- Press the "▶" button to pause the playback.
- To resume playback, press the "▶" button again.
- Press the "■" button on the remote control to stop the disc playing.
Note: While the CD is playing, the current track number and elapsed time will be displayed.
Resume function
You can pause and resume playback from the point where playback stopped (RESUME) by pressing the “■” button and turning off the power or switching functions. If you press the “■” button and then the “▶” button again, playback starts again from the beginning (track 1).
Skip search and search
- Press the “◀◀” button once or more to skip backward one or more tracks on the disc.
- Press the “▶” button once or more to skip forward one or more tracks on the disc.
- Press and hold the “◀◀” button on the remote control to search backward for the track position that you want to start playing from.
- Press and hold the “▶” button on the remote control to search forward for the track position that you want to start playing from.
Repeat mode
Press the "REPEAT" button repeatedly on the remote control to set the following repeat modes:
① = Repeat the current played track
F = Repeat folder
Q = Repeat all
No icon = Normal play mode
Random mode
Press the "RANDOM" button the remote control to activate the random mode. The random icon will show in the display. To de-activate the random mode, press the "RANDOM" button again.
Intro function
Press the "INTRO" button on the remote control to start play the beginning of each track consecutively from first song. The playing time of each track is 10 seconds. When you hear the desired track, press the "▶II" button twice.
Program mode
- When playing music, press the "button on the remote control."
- Then press the "PROGRAM" button, then the information "P01 T01" will be displayed on the screen.
- Choose the desired track with the buttons "◀◀" or "▶◀" to store as P01, P02 etc.
- Press the "PROGRAM" button to confirm the selected track and go to the next program setting.
- After finished setting, press the "▶" button to finalize and start the programmed playback.
- In program playback, the numbers on the remote control are invalid. You can only press the "◀◀" buttons to change the tracks.
- Change the source or press the "■" button twice to clear the program setting.
Note: You can store up to 20 tracks!
USB
Connect a USB mass storage device (including USB flash memory, USB flash players or memory cards) to this unit to enjoy the device's stored music through the powerful speakers of this unit.
USB playing
- Insert the USB device into the USB port at the rear side of the unit.
- Press the “→” button repeatedly on the unit or press the “USB” button on the remote control until “USB” is displayed to select the USB function.
- The playback will start automatically.
Resume function
This function works in the same way as in CD mode.
Skip search and search
This function works in the same way as in CD mode.
Repeat mode
This function works in the same way as in CD mode.
Random mode
This function works in the same way as in CD mode.
Intro function
This function works in the same way as in CD mode.
Program mode
This function works in the same way as in CD mode.
For devices with a USB cable
- Insert the plug of the USB cable (not supplied) into the USB socket at the rear side of the unit.
- Insert the other plug of the USB cable into the output terminal of the USB device.
text_image
Diagram of a device rear panel with labeled ports and connectors, showing internal components like USB drive and audio jack.USB charging (5V A socket only)
You can plug an USB cable in the USB socket to charge the mobile device.
Note:
If the USB device is corrupted, this unit will not be able to detect and play the music stored. Format the USB mass storage device and restore the music on the device with a computer.
BLUETOOTH®
You can listen to tracks from a media device if it is connected to the unit via Bluetooth. You need to pair your Bluetooth device with this unit before you connect them for the first time.
Pair Bluetooth devices
Note:
The operational range between this unit and a Bluetooth device is approximately 10 meters (without any object between the Bluetooth device and the unit).
Before you connect a Bluetooth device to this unit, ensure that you know the device's capabilities.
Any obstacle between this unit and the Bluetooth device can reduce the operational range.
If the signal strength is weak, your Bluetooth device may disconnect, but it will re-enter automatically into pairing mode.
- Press the “→” button repeatedly on the unit or press the “BT” button on the remote control until “Bluetooth” is displayed to select the Bluetooth function. If the unit is not paired to any Bluetooth device, the system enters automatically into pairing mode; or you need to press and hold the “PAIR” button to start pairing.
- Activate the Bluetooth function on your device and select the search mode. "DAB970" will appear on your Bluetooth device.
- To disconnect the Bluetooth function, switch to another function on the unit or disable the function from your Bluetooth device.
Tips:
If there is already an existing connection, press the "PAIR" button to re-activate the pairing mode. The existing connection will be interrupted.
The unit will also be disconnected when your device is moved beyond the operational range.
If you want to reconnect your device to this unit, place it within the operational range.
If the device is moved beyond the operational range, when it is brought back, check if the device is still connected to the unit.
If the connection is lost, follow the above instructions to pair your device again to the unit.
Listen Music from your Bluetooth device
If the connected Bluetooth device supports Advanced Audio Distribution Profile (A2DP), you can listen to music stored on the device through this unit.
If the device also supports Audio Video Remote Control Profile (AVRCP), you can use this unit's remote control to play music stored on the device.
-
Pair your device with this unit.
-
Play music via your device (if it supports A2DP).
-
Use supplied remote control to control play (if it supports AVRCP).
To pause/resume play, press the "▶" button.
To skip to a track, press the "◀◀" or "▶◀" buttons.
AUX-IN
- Plug the 3.5mm AUX cable (not included) into the "AUDIO IN" jack at the back side of the unit.
- Press the “→” button repeatedly on the unit or press the “AUDIO” button on the remote control until “AUX IN” is displayed to select the AUX IN function.
- Start the playback of your external device.
- Press the "V +/-" button on the remote control or rotate the "VOLUME" knob on the unit to adjust the desired volume.
SOUND QUALITY
Adjust Bass or Treble (My EQ)
- Press the "USER" button on the remote control.
- Then press the "Treble +/-" or "Bass +/-" buttons on the remote control to increase/decrease the function.
Preset Equalizer
Press the "EQ" button on the remote control. Select the desired sound characteristics such as Normal / Classic / Jazz / Pop / Rock / MY EQ with the "▼ / ▲" buttons on the remote control and press the "EQ" button to confirm.
SLEEP TIMER
Activate the Sleep timer
To set the sleep timer press the "SLEEP" button on the remote control repeatedly, it changes the number of minutes shown on the display in this sequence:
OFF 15 30 45 60 90 → →
Show the remaining sleep time
When the "SLEEP" button on the remote control is pressed once, the remaining sleep time is displayed. Wait for a second until the display returns to the original display.
Cancel the sleep timer
Press the "SLEEP" button repeatedly on the remote control until "off" is displayed.
ALARM
The clock must be correctly set for the alarm to operate correctly.
- Press the "TIMER" button to enter the timer function.
- Select "Alarm 1" or "Alarm 2" with the "▼ / ▲" buttons and press "OK".
- Select and adjust the following points: Alarm On/Off, Frequency, Date/Time, Source, Duration, Volume. Enter each point by pressing the "OK" button.
Note: If Digital Radio or FM is selected as the alarm source, the next menu item is the selection of the desired station.
HEADPHONE
Connect the headphone to the headphone jack on the back side of the unit. The sound through the speakers is no longer audible.
SYSTEM SETTINGS
Press the "MENU" button, select "System Settings" and press "OK" to confirm.
You find the following settings there:
Theme
Adjust the background color.
Night Mode
Activate or de-activate the night mode, adjust the time when the night mode should works.
Equaliser
Adjust 5 preinstalled sound settings or MyEQ.
Time/Date
➢ Set Time/Date: Adjust manual the time and date.
➢ Auto Update: Adjust the source for time and date update, de-active the update function.
➢ Set 12/24 Hour: Set the time format.
➢ Set Date Format: Set the date format.
➢ Clock Style: Adjust 4 different clock styles in standby mode.
Backlight
Adjust the timeout level and the display backlight in standby and on mode.
Language
Adjust the menu language.
Factory Reset
Reset the unit and delete all settings.
Software Update
Install a new software on the unit. A software update is only possible via USB.
NOTE: Before starting a software upgrade, ensure that DAB970BR is plugged into a stable main power connection. Disconnecting power during an upgrade may permanently damage the unit.
Software Version
Display the current installed software version.
Technical changes and misprints reserved.
Copyright by Woerlein GmbH, 90556 Cadolzburg, www.soundmaster.de
Duplication only with the permission of Woerlein GmbH
CE

PROTECTION DE L'ENVIRONNEMENT

text_image
Diagram showing a remote control with a screen and a remote device, illustrating the concept of viewing or monitoring.REMARQUE :
text_image
Diagram of a device rear panel with labeled ports and cable, showing connections to a wall-mounted device.text_image
Diagram of a device rear panel with labeled ports and connectors, showing internal components and a cable insertion point.Charge USB (prise 5 V A uniquement)
Stations selecteren....7
Handmatig afstemmen 7
Voorinstellingen....7
DAB-informatie 8
text_image
Diagram showing a remote control with a pointer and directional arrows, likely illustrating navigation or signal processing.OPMERKING:
text_image
Diagram of a device rear panel with labeled ports and connections, showing a cable or cable to a wall-mounted device.ERP-voedingsbeheer
natural_image
Diagram of a device rear panel showing internal components and a cable inserted into the socket (no text or labels visible)Software version (Versione software)....15
text_image
Diagram showing a remote control with a pointer and directional arrows, including a red button labeled 'Red' and a black square on the screen.NOTA:
text_image
Diagram of a device rear panel with labeled ports and cable, showing connections to a wall-mounted device.text_image
Diagram of a device rear panel with labeled ports and connectors, showing a cable inserted into the front panel.text_image
Diagram showing a remote control with a screen and a remote device, illustrating the concept of viewing or monitoring.INSTALACIÓN
text_image
Diagram of a device rear panel with labeled ports and an attached cable, showing electrical connections and a 60° symbol.text_image
Diagram of a device rear panel with labeled ports and connectors, showing a cable inserted into the front panel.Carga a través de USB (solo toma de 5V 1A)
text_image
Diagram showing a remote control with a screen and a remote device, illustrating the concept of viewing or monitoring.OPSÆTNING
Pakkens indhold
text_image
Diagram of a device rear panel with labeled ports and cable connections, showing a power outlet and indicator lights.Energibesparende strømstyring
text_image
Diagram of a device rear panel with labeled ports and connectors, showing internal components and a cable insertion point.Dynamic range compression (DRC) 8
FM....8
SYSTEMINNSTILLINGER....13
Tema 13
Nattmodus 13
Equaliser 13
Klokkeslett/Dato 13
Bakgrunnsbelysning 14
Språk....14
Tilbake til fabrikkinnstilling....14
text_image
Diagram showing a remote control with labeled buttons and a separate remote device with a red button.INSTALLASJON
Pakken inneholder
Hovedenhet
Bruksanvisning
Antenne
Fjernkontroll
Strømadapter
Strømtilførsel
Advarsel:
Fare for skade på produktet! Forsikre deg om at strømforsyningsspenningen tilsvarer spenningen som er trykt på AC-adapterens merketikett.
text_image
Diagram of a device rear panel with labeled ports and cable connections, showing internal components like buttons, switches, and a power outlet.ERP-strømstyring
Dynamic range compression (DRC)
text_image
Diagram of a device rear panel with labeled ports and connectors, showing a cable inserted into the front panel.USB-lading (kun 5 V A)
Du kan koble til en USB-kabel i USB-porten for å lade mobile enheter.
Merk:
*) markerade Cd = kadmium, Hg = kvicksilver, Pb = bly
VARNING - OSYNLIG LASERSTRÅLNING NÄR DU ÖPPNAR LOCKET ELLER TRYCKER PÅ SÄKERHETSSPÄRREN. UNDVIK EXPONERING FÖR LASERSTRÅLEN.
INNEHÅLLSFÖRTECKNING
PLACERING AV KNAPPAR .... 3
FJÄRRKONTROLL 4
text_image
Diagram showing a remote control with a pointer and a separate remote device, illustrating the concept of viewing or monitoring.INSTALLATION
text_image
Diagram of a device rear panel with labeled ports and cable connections, showing internal components like buttons, switches, and a power outlet.text_image
Diagram of a device rear panel with labeled ports and connectors, showing a cable inserted into the front panel.Copyright by Woerlein GmbH, 90556 Cadolzburg, www.soundmaster.de
7 MENU-painike
8 BACK/PAIR-painike
9 -painike
10 -painike
11 ▶ PLAY/PAUSE-painike
12 ▲ Eject-painike
NÄKYMÄ ALHAALTA

text_image
CLASS 1 LUSER PRODUCT 13 15 14 16 171 Standby/ON-painike
2 INTRO/AMS-painike
3 REPEAT-painike
4 EQ-painike
5 BASS +/- -painike
6 USER-painike
7 MENU-painike
8 ▲-painike
9 -painike
10 ■-painike
11 P +/- -painike
12 Numero 0–9
13 INFO-painike
14 ▲-painike
15 SLEEP-painike
16 Toimintopainikkeet (CD/USB/DAB/FM/BT/AUDIO)
17 RANDOM-painike
18 TREBLE +/- painike
19 PROGRAM-painike
20 ↻/PAIR-painike
21 ▶/OK-painike
22 ▶▶▶-painike
23 ▼-painike
24 -painike
25 SET/CLOCK-painike
26 V +/- -painike
27 TIMER-painike
28 DIM-painike

text_image
1 FM CD USB DAB BT AMS INTRO REPEAT SLEEP AUDIO 2 3 4 EQ + + + RANDOM 5 BASS TREBLE USER - - - PROGRAM 6 7 MENU PAIR 20 8 9 II OK 21 22 23 10 SET CLOCK + 24 25 11 - TIMER - 26 27 1 2 3 12 4 5 6 7 8 9 13 INFO 0 DIM 28text_image
Diagram showing a remote control with a screen and pointer, and a remote device with a red indicator light.ASENNUS
Pakkauksen sisältö
Pääyksikkö
Käyttöohje
Antenni
Kaukosäädin
Verkkovirtasovitin
AC-virtakytkentä
Huomio:
text_image
Diagram of a device rear panel with labeled ports and cable connections, showing internal components like buttons, switches, and a power outlet.ERP-virranhallinta
text_image
Diagram of a device rear panel with labeled ports and connectors, showing internal components and a cable insertion point.D 90556 Cadolzburg, Germany
Tel: +49 9103 71 67 0
Fax: +49 9103 71 67 12
E-Mail: info@soundmaster.de
Internet: www.soundmaster.de
Hereby, Wörlein GmbH declares that this device is in compliance with the essential requirements and other relevant provisions of Directive 2014/53/EU.
A copy of the declaration of conformity can be obtained from the above address.