
BPE556360M - Electric oven ELECTROLUX - Free user manual and instructions
Find the device manual for free BPE556360M ELECTROLUX in PDF.
| Brand | Electrolux |
| Model | BPE556360M |
| Product type | Built-in electric oven |
| Dimensions (H x W x D) | 594 x 595 x 567 mm |
| Built-in depth | 546 mm |
| Weight | 35.0 kg |
| Capacity | 71 L |
| Energy class | A+ |
| Conventional consumption | 1.09 kWh/cycle |
| Fan-assisted consumption | 0.69 kWh/cycle |
| Power supply | 230 V / 50 Hz |
| Cooking modes | Fan-assisted, Top/Bottom heat, Grill, Turbo grill, Pizza function, Moist fan heat, Frozen dishes, Low humidity, Assisted cooking |
| Included accessories | Wire shelf, baking tray, roasting pan, food probe, telescopic rails |
| Cleaning | Pyrolysis (3 programs: C1 1h, C2 1h30, C3 3h) |
| Lighting | Halogen bulb, energy class G, resistance 300 °C |
| Safety | Automatic shut-off, key lock, child safety |
| Clock functions | Timer, cooking time, delayed start, counter |
| Repairability index | Spare parts available: bulb, probe, door, glass panels |
| Warranty | 2 years (parts and labor) |
Frequently Asked Questions - BPE556360M ELECTROLUX
User questions about BPE556360M ELECTROLUX
0 question about this device. Answer the ones you know or ask your own.
Ask a new question about this device
Download the instructions for your Electric oven in PDF format for free! Find your manual BPE556360M - ELECTROLUX and take your electronic device back in hand. On this page are published all the documents necessary for the use of your device. BPE556360M by ELECTROLUX.
USER MANUAL BPE556360M ELECTROLUX
natural_image
Simple line drawing of a kitchen oven (no text or symbols)ЗА ОТЛИЧНИ РЕЗУЛТАТИ
natural_image
Line drawing of a rectangular plate with grid lines, no text or symbols presentТава за печене
natural_image
Simple line drawing of a square tray with internal grid lines (no text or symbols)
natural_image
Simple line drawing of a rectangular tray with internal lines and triangular segments (no text or symbols)
natural_image
Pure electrical circuit lines without any symbols
natural_image
Technical line drawing of two mechanical components with grooves and mounting brackets (no text or symbols)4. КОМАНДНО ТАБЛО
natural_image
Technical line drawing of a wooden ladder with two circular insets showing detailed details (no text or symbols)- SIGURNOSNE UPUTE.... 43
2.1 Instalacija....43
2.2 Električni priključak.... 44
2.3 Primjena....45
2.4 Održavanje i čišćenje....45
2.5 Pirolitičko čišćenje.... 46
natural_image
Line drawing of a rectangular plate with horizontal grooves and circular indentations (no text or symbols)Pekač za pecivo
Za torte i biskvite.
natural_image
Simple line drawing of a square tray with internal diagonal lines (no text or symbols)
natural_image
Simple line drawing of a rectangular tray with internal lines and triangular segments (no text or symbols)
natural_image
Pure electrical circuit lines without any symbols
natural_image
Two technical line drawings of mechanical components or brackets, no text or symbols present4. UPRAVLJAČKA PLOČA
4.1 Uvlačive tipke
Za početak korištenja uređaja pritisnite tipku. Tipka se izvlači.
4.2 Pregled upravljačke ploče
 |  |  |  |  |  |  |
| Tajmer | Brzo za-grijavanje | Osvijetljenje unutraš-njosti | Senzor zahranu | Potvrdite postavku | Pritisnite | Okrenite regulator |
| Odaberite funkciju pećnice za uključivanje uređaja. | ||||||
| Okrenite regulator funkcija pećnice u isključeni položaj kako biste isključili uređaj. | ||||||
4.3 Zaslon

Zaslon s ključnim funkcijama.
Indikatori zaslona
| Osnovni pokazatelji | ||||
 Blokiranje Blokiranje | [XX6W]Pomoć pri kuhanju | [14W0]Čišćenje |  Postavke Postavke |  Brzo zagrijavanje Brzo zagrijavanje |
| Indikatori tajmera | ||||
| [YY0]Zvučni alarm | [6Z0K]Vrijeme završetka |  Vrijeme odgode Vrijeme odgode | [TX2H]Tajmer prema go-re | |
| Traka napretka - za temperaturu ili vrije-me. Crtica je potpuno crvena kada uređajdosegne postavljenu temperaturu. | ||||
| Pokazatelj kuhanja na pari |  |
| Senzor za hranu indikator |  |
5. PRIJE PRVE UPORABE

UPOZORENJE!
6. SVAKODNEVNA UPORABA

UPOZORENJE!
natural_image
Line drawing of a rectangular metal tray with grid pattern (no text or symbols)Plech na pečení
natural_image
Simple line drawing of a square tray with internal grid lines (no text or symbols)
natural_image
Simple line drawing of a rectangular tray with internal lines and triangular segments (no text or symbols)
natural_image
Pure electrical circuit lines without any symbols
natural_image
Technical line drawing of two mechanical components with grooves and mounting brackets (no text or symbols)4. OVLÁDACÍ PANEL
4.1 Zasunovací ovladače
natural_image
Technical line drawing of a wooden ladder with two circular insets showing internal structural details (no text or symbols)natural_image
Line drawing of a kitchen appliance with a tray and outlet, showing a cable inserted into the rack (no text or symbols)
natural_image
Two laboratory setups: a cylindrical container with a probe and wire, and a beaker with a probe inserted into liquid (no text or symbols)3. BESCHRIJVING VAN HET PRODUCT...120
12. PROBLEEMOPLOSSING.....143
natural_image
Line drawing of a rectangular tray with grid pattern and side notches (no text or symbols)
natural_image
Simple line drawing of a square tray with internal diagonal lines (no text or symbols)
natural_image
Simple line drawing of a rectangular tray with internal lines and shading (no text or symbols)Voedselsensor
natural_image
Pure electrical circuit lines without any symbols
natural_image
Two mechanical components with grooves and mounting holes, shown in 3D rendering (no text or symbols)4. BEDIENINGSPANEEEL
12. PROBLEEMOPLOSSING

WAARSCHUWING!
Thank you for choosing this AEG product. We have created it to give you impeccable performance for many years, with innovative technologies that help make life simpler – features you might not find on ordinary appliances. Please spend a few minutes reading to get the very best from it.
Visit our website to:

Get usage advice, brochures, trouble shooter, service and repair information: www.aeg.com/support

Register your product for better service: www.registeraeg.com

Buy Accessories, Consumables and Original spare parts for your appliance: www.aeg.com/shop

For more recipes, hints, troubleshooting download My AEG Kitchen app.

Available on the App Store

GETTON Google Play
CUSTOMER CARE AND SERVICE
Always use original spare parts.
When contacting our Authorised Service Centre, ensure that you have the following data available: Model, PNC, Serial Number.
The information can be found on the rating plate.

Warning / Caution-Safety information

General information and tips

Environmental information
Subject to change without notice.
CONTENTS
- SAFETY INFORMATION......150
1.1 Children and vulnerable people safety.... 150
1.2 General Safety....151
- SAFETY INSTRUCTIONS.... 152
2.1 Installation....152
2.2 Electrical connection....153
2.3 Use.... 154
2.4 Care and cleaning....154
2.5 Pyrolytic cleaning....155
2.6 Internal lighting.... 155
2.7 Service....155
2.8 Disposal....156
- PRODUCT DESCRIPTION...... 156
3.1 General overview......156
3.2 Accessories.... 156
- CONTROL PANEL....157
4.1 Retractable knobs....157
4.2 Control panel overview.... 157
4.3 Display....158
- BEFORE FIRST USE....158
5.1 Initial cleaning.....158
5.2 Initial preheating.... 159
- DAILY USE...... 159
6.1 How to set: Heating functions.....159
6.2 Heating functions....160
6.3 Notes on: Moist Fan Baking.....161
6.4 How to set: Assisted Cooking.....161
6.5 Assisted Cooking......162
7. CLOCK FUNCTIONS......166
7.1 Clock functions.... 166
7.2 How to set: Clock functions...... 166
8. USING THE ACCESSORIES......168
8.1 Inserting accessories......168
8.2 Food Sensor.... 168
9. ADDITIONAL FUNCTIONS...... 170
9.1 Lock.... 170
9.2 Automatic switch-off.....170
9.3 Cooling fan....170
10. HINTS AND TIPS....171
10.1 Cooking recommendations.....171
10.2 Moist Fan Baking....171
10.3 Moist Fan Baking - recommended accessories....171
10.4 Cooking tables for test institutes172
11. CARE AND CLEANING....173
11.1 Notes on cleaning....174
11.2 How to clean: Cavity embossment.... 174
11.3 How to remove: Shelf supports .174
11.4 How to use: Pyrolytic Cleaning..175
11.5 Cleaning Reminder....176
11.6 How to remove and install: Door176
11.7 How to replace: Lamp....177
12. TROUBLESHOOTING.....178
12.1 What to do if....178
12.2 Service data....180
13. ENERGY EFFICIENCY......180
13.1 Product Information and Product Information Sheet.... 180
13.2 Energy saving....181
14. MENU STRUCTURE....181
14.1 Menu....181
15. ENVIRONMENTAL CONCERNS......182
1. ⚠ SAFETY INFORMATION
Before the installation and use of the appliance, carefully read the supplied instructions. The manufacturer is not responsible for any injuries or damage that are the result of incorrect installation or usage. Always keep the instructions in a safe and accessible location for future reference.
1.1 Children and vulnerable people safety
- This appliance can be used by children aged from 8 years and above and persons with reduced physical, sensory or mental capabilities or lack of experience and knowledge if they have been given supervision or instruction concerning the use of the appliance in a safe way and understand the hazards involved. Children of less than 8 years of age and persons with very extensive and complex disabilities shall be kept away from the appliance unless continuously supervised.
- Children should be supervised to ensure that they do not play with the appliance.
- Keep all packaging away from children and dispose of it appropriately.
- WARNING: The appliance and its accessible parts become hot during use. Keep children and pets away from the appliance when in use and when cooling down.
- If the appliance has a child safety device, it should be activated.
- Children shall not carry out cleaning and user maintenance of the appliance without supervision.
1.2 General Safety
- This appliance is for cooking purposes only.
- This appliance is designed for single household domestic use in an indoor environment.
- This appliance may be used in, offices, hotel guest rooms, bed & breakfast guest rooms, farm guest houses and other similar accommodation where such use does not exceed (average) domestic usage levels.
- Only a qualified person must install this appliance and replace the cable.
- Do not use the appliance before installing it in the built-in structure.
- Disconnect the appliance from the power supply before carrying out any maintenance.
- If the mains power supply cable is damaged, it must be replaced by the manufacturer, its Authorised Service Centre or similarly qualified persons to avoid an electrical hazard.
- WARNING: Ensure that the appliance is switched off before replacing the lamp to avoid the possibility of electric shock.
- WARNING: The appliance and its accessible parts become hot during use. Care should be taken to avoid touching heating elements or the surface of the appliance cavity.
- Always use oven gloves to remove or insert accessories or ovenware.
- Use only the food sensor (core temperature sensor) recommended for this appliance.
- To remove the shelf supports first pull the front of the shelf support and then the rear end away from the side walls. Install the shelf supports in the opposite sequence.
- Do not use a steam cleaner to clean the appliance.
- Do not use harsh abrasive cleaners or sharp metal scrapers to clean the glass door since they can scratch the surface, which may result in shattering of the glass.
- Before pyrolytic cleaning, remove all accessories and excessive deposits/spills from the appliance cavity.
2. SAFETY INSTRUCTIONS
2.1 Installation

WARNING!
Only a qualified person must install this appliance.
- Remove all the packaging.
- Do not install or use a damaged appliance.
- Follow the installation instructions supplied with the appliance.
- Always take care when moving the appliance as it is heavy. Always use safety gloves and enclosed footwear.
- Do not pull the appliance by the handle.
• Install the appliance in a safe and suitable place that meets installation requirements. - Keep the minimum distance from other appliances and units.
- Before mounting the appliance, check if the appliance door opens without restraint.
- The appliance is equipped with an electric cooling system. It must be operated with the electric power supply.
- The built-in unit must meet the stability requirements of DIN 68930.
| Cabinet minimum height (Cabinet under the work-top minimum height) | 578 (600) mm |
| Cabinet width 560 mm | |
| Cabinet depth 550 (550) mm | |
| Height of the front of the appliance 594 mm | |
| Height of the back of the appliance 576 mm | |
| Width of the front of the appliance 595 mm | |
| Width of the back of the appliance 559 mm | |
| Depth of the appliance 567 mm | |
| Built in depth of the appliance 546 mm | |
| Depth with open door 1027 mm | |
| Ventilation opening minimum size. Opening placed on the bottom rear side | 560x20 mm |
| Mains supply cable length. Cable is placed in the right corner of the back side | 1500 mm |
| Mounting screws 4x25 mm |
2.2 Electrical connection

WARNING!
Risk of fire and electric shock.
- All electrical connections should be made by a qualified electrician.
• The appliance must be earthed. - Make sure that the parameters on the rating plate are compatible with the electrical ratings of the mains power supply.
- Always use a correctly installed shockproof socket.
- Do not use multi-plug adapters and extension cables.
- Make sure not to cause damage to the mains plug and to the mains cable. Should the mains cable need to be replaced, this must be carried out by our Authorised Service Centre.
- Do not let mains cables touch or come near the appliance door or the niche below the appliance, especially when it operates or the door is hot.
- The shock protection of live and insulated parts must be fastened in such a way that it cannot be removed without tools.
- Connect the mains plug to the mains socket only at the end of the installation. Make sure that there is access to the mains plug after the installation.
- If the mains socket is loose, do not connect the mains plug.
- Do not pull the mains cable to disconnect the appliance. Always pull the mains plug.
- Use only correct isolation devices: line protecting cut-outs, fuses (screw type fuses removed from the holder), earth leakage trips and contactors.
- The electrical installation must have an isolation device which lets you disconnect the appliance from the mains at all poles. The isolation device must have a contact opening width of minimum 3 mm.
- Fully close the appliance door before you connect the mains plug to the mains socket.
- This appliance is supplied with a main plug and a main cable.
2.3 Use

WARNING!
Risk of injury, burns and electric shock or explosion.
- Do not change the specification of this appliance.
- Make sure that the ventilation openings are not blocked.
- Do not let the appliance stay unattended during operation.
- Deactivate the appliance after each use.
- Be careful when you open the appliance door while the appliance is in operation. Hot air can release.
- Do not operate the appliance with wet hands or when it has contact with water.
- Do not apply pressure on the open door.
- Do not use the appliance as a work surface or as a storage surface.
- Open the appliance door carefully. The use of ingredients with alcohol can cause a mixture of alcohol and air.
- Do not let sparks or open flames to come in contact with the appliance when you open the door.
- Do not put flammable products or items that are wet with flammable products in, near or on the appliance.

WARNING!
Risk of damage to the appliance.
- To prevent damage or discoloration to the enamel:
– do not put ovenware or other objects in the appliance directly on the bottom.
– do not put aluminium foil directly on the bottom of cavity of the appliance.
– do not put water directly into the hot appliance.
– do not keep moist dishes and food in the appliance after you finish the cooking. - be careful when you remove or install the accessories.
- Discoloration of the enamel or stainless steel has no effect on the performance of the appliance.
- Use a deep pan for moist cakes. Fruit juices cause stains that can be permanent.
• Always cook with the appliance door closed. - If the appliance is installed behind a furniture panel (e.g. a door) make sure the door is never closed when the appliance operates. Heat and moisture can build up behind a closed furniture panel and cause subsequent damage to the appliance, the housing unit or the floor. Do not close the furniture panel until the appliance has cooled down completely after use.
2.4 Care and cleaning

WARNING!
Risk of injury, fire, or damage to the appliance.
- Before maintenance, deactivate the appliance and disconnect the mains plug from the mains socket.
- Make sure the appliance is cold. There is the risk that the glass panels can break.
-
Replace immediately the door glass panels when they are damaged. Contact the Authorised Service Centre.
-
Be careful when you remove the door from the appliance. The door is heavy!
- Clean regularly the appliance to prevent the deterioration of the surface material.
- Clean the appliance with a moist soft cloth. Use only neutral detergents. Do not use abrasive products, abrasive cleaning pads, solvents or metal objects.
- If you use an oven spray, follow the safety instructions on its packaging.
2.5 Pyrolytic cleaning

WARNING!
Risk of Injury / Fires / Chemical Emissions (Fumes) in Pyrolytic Mode.
- Before carrying out the pyrolytic cleaning and initial preheating remove from the oven cavity: – any excess food residues, oil or grease spills / deposits.
- any removable objects (including shelves, side rails, etc., provided with the appliance) especially any non-stick pots, pans, trays, utensils, etc.
- Read carefully all the instructions for pyrolytic cleaning.
- Keep children away from the appliance while the pyrolytic cleaning operates. The appliance becomes very hot and hot air is released from the front cooling vents.
- Pyrolytic cleaning is a high temperature operation that can release fumes from cooking residues and construction materials, as such consumers are advised to:
– provide good ventilation during and after the pyrolytic cleaning.
– provide good ventilation during and after the initial preheating.
- Do not spill or apply water on the oven door during and after the pyrolytic cleaning to avoid damaging the glass panels.
- Fumes released from all pyrolytic ovens / cooking residues as described are not harmful to humans, including children, or persons with medical conditions.
- Keep pets away from the appliance during and after the pyrolytic cleaning and initial preheating. Small pets (especially birds and reptiles) can be highly sensitive to temperature changes and emitted fumes.
- Non-stick surfaces on pots, pans, trays, utensils etc., can be damaged by the high temperature pyrolytic cleaning operation of all pyrolytic ovens and can be also a source for low level harmful fumes.
2.6 Internal lighting

WARNING!
Risk of electric shock.
- Concerning the lamp(s) inside this product and spare part lamps sold separately: These lamps are intended to withstand extreme physical conditions in household appliances, such as temperature, vibration, humidity, or are intended to signal information about the operational status of the appliance. They are not intended to be used in other applications and are not suitable for household room illumination.
- This product contains a light source of energy efficiency class G.
- Use only lamps with the same specifications.
2.7 Service
• To repair the appliance contact the Authorised Service Centre.
- Use original spare parts only.
2.8 Disposal

WARNING!
Risk of injury or suffocation.
- Contact your municipal authority for information on how to dispose of the appliance.
- Disconnect the appliance from the mains supply.
- Cut off the mains electrical cable close to the appliance and dispose of it.
- Remove the door catch to prevent children or pets from becoming trapped in the appliance.
3. PRODUCT DESCRIPTION
3.1 General overview

Control panel
Knob for the heating functions
Display
Control knob
Socket for the food sensor
Heating element
Lamp
Fan
Shelf support, removable
Cavity embossment
Shelf positions
3.2 Accessories
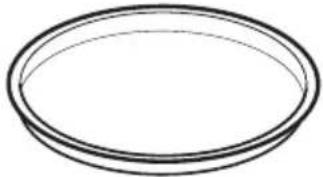
Wire shelf
For cookware, cake tins, roasts.
Baking tray
For cakes and biscuits.

natural_image
Line drawing of a rectangular tray with horizontal grooves and a side tab (no text or symbols)
natural_image
Simple line drawing of a square tray with internal diagonal lines (no text or symbols)Grill- / Roasting pan
To bake and roast or as a pan to collect fat.
Food sensor
To measure the temperature inside food.
Telescopic runners
For inserting and removing trays and wireshelf more easily.

natural_image
Simple line drawing of a rectangular tray with internal lines and shading (no text or symbols)
natural_image
Pure electrical circuit lines without any symbols
natural_image
Two identical mechanical components with grooves and mounting brackets, shown in isometric view (no text or symbols)4. CONTROL PANEL
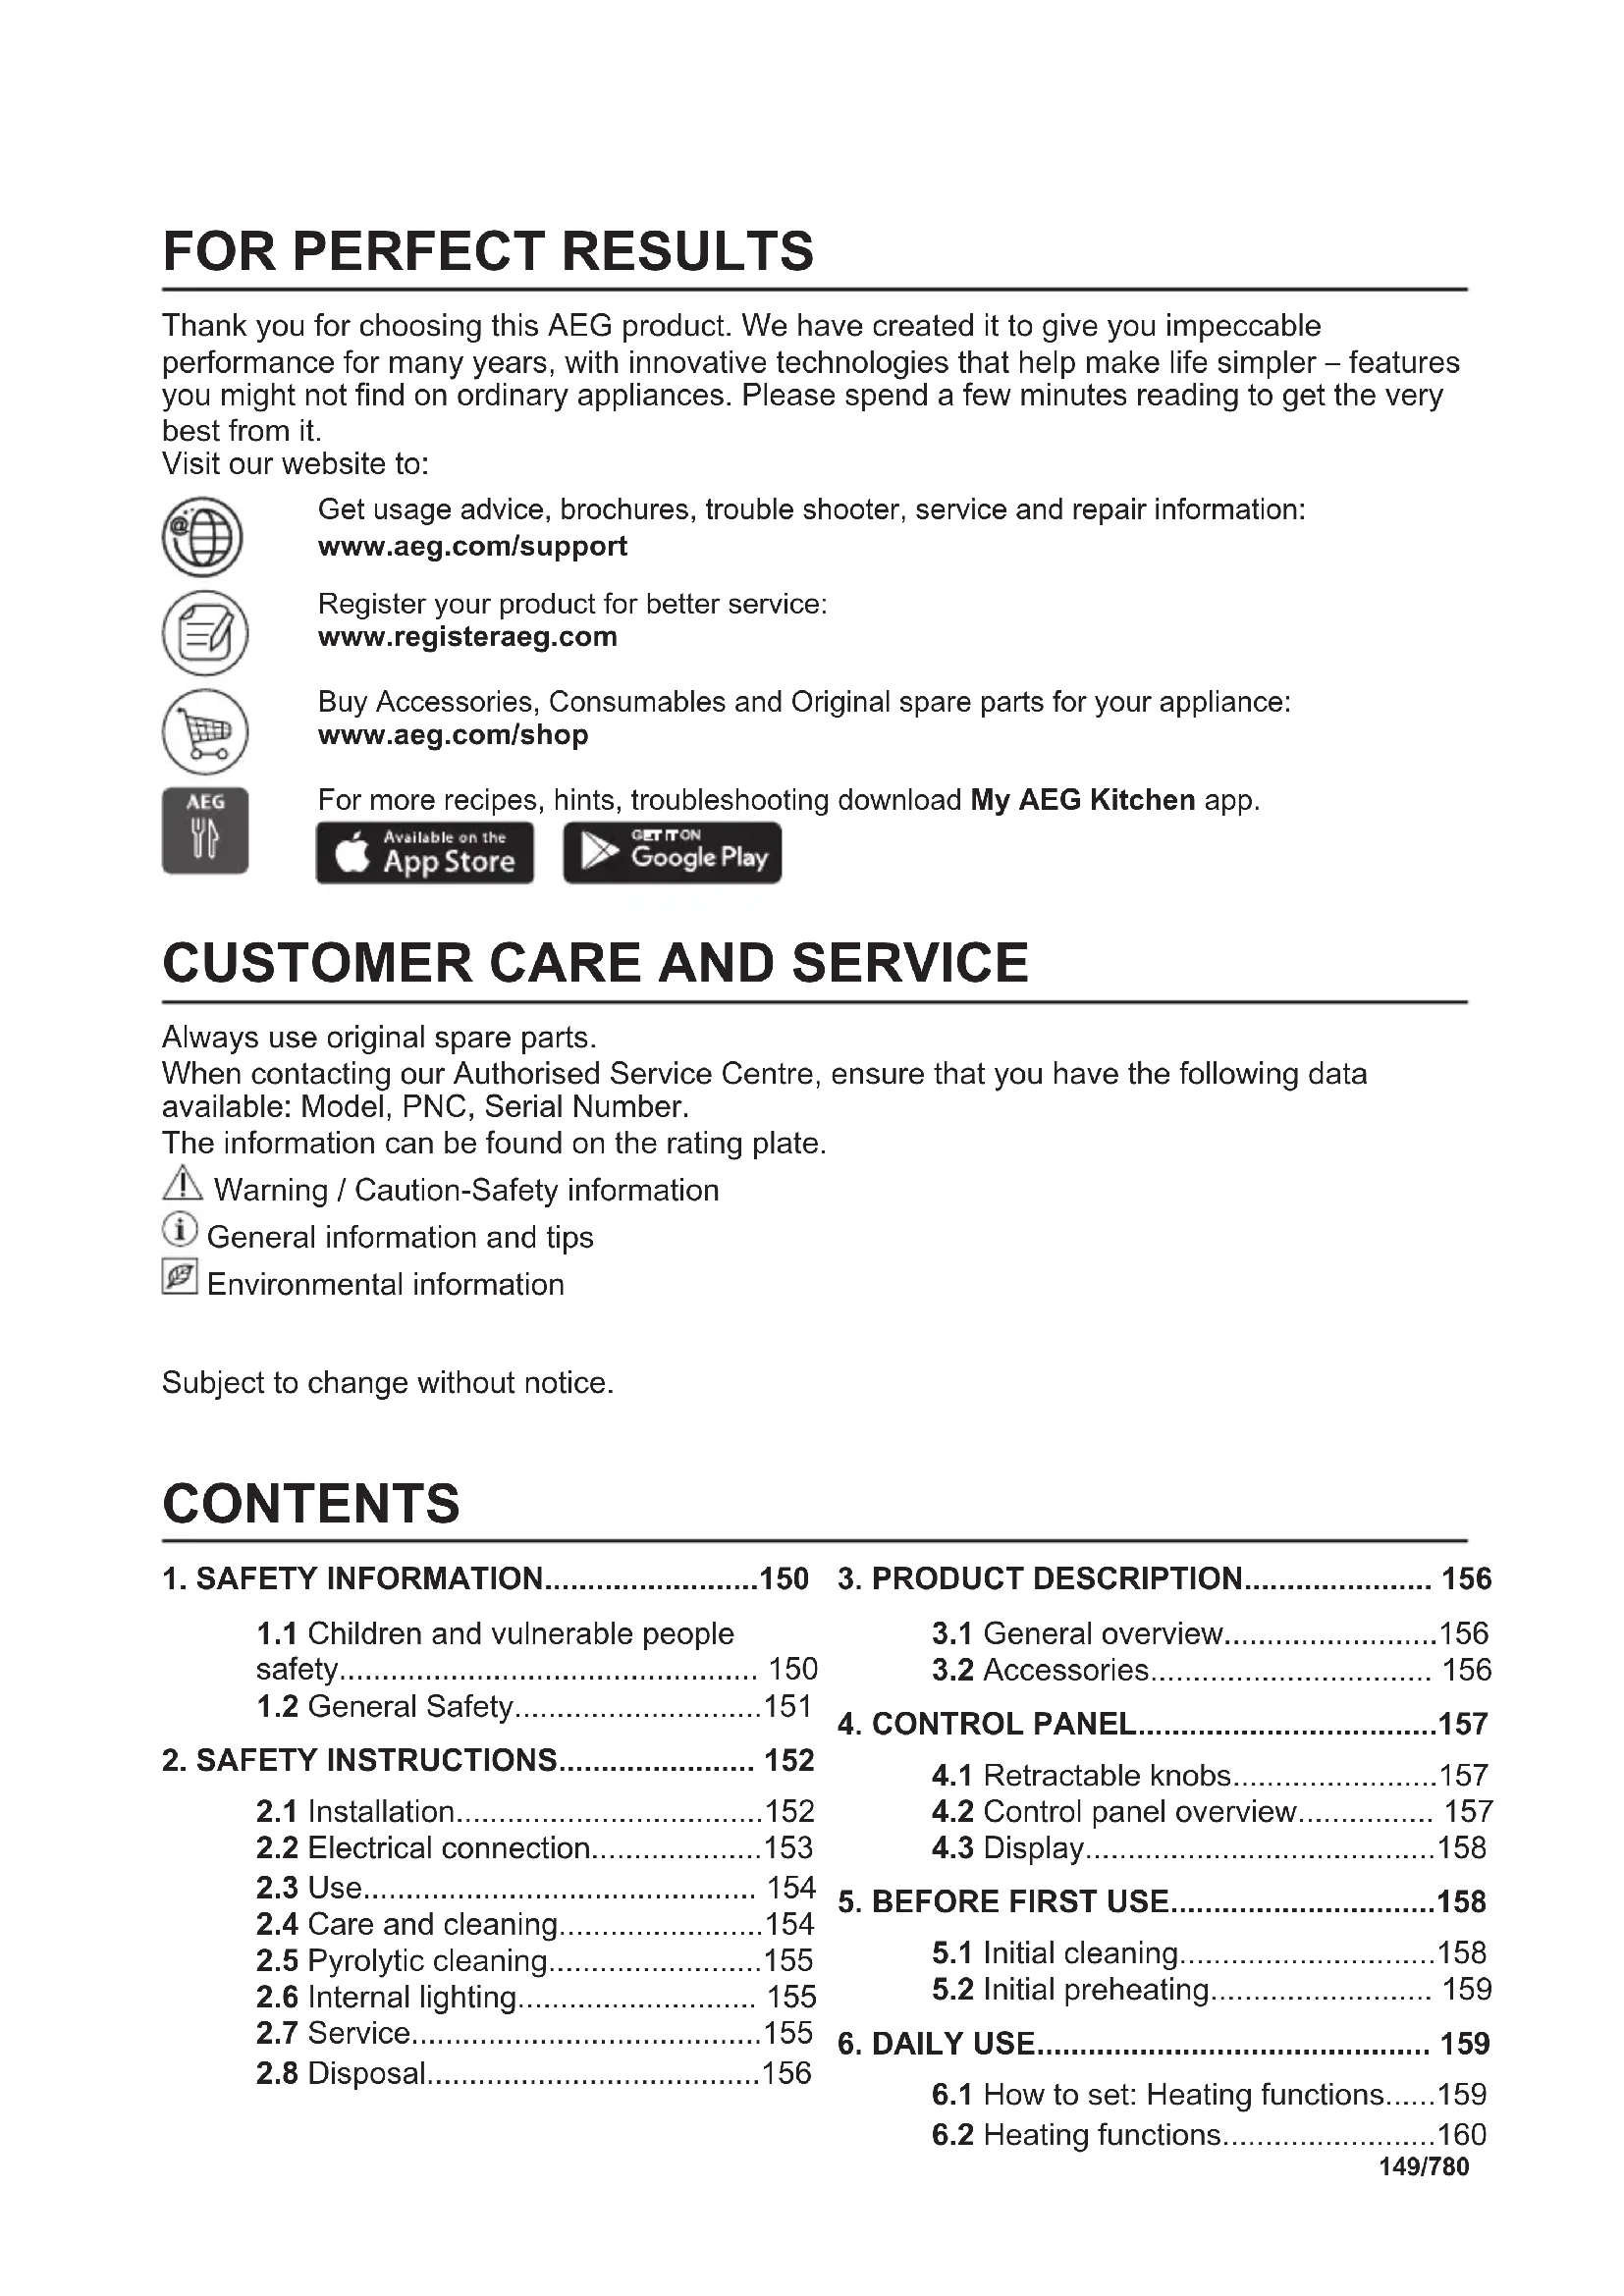
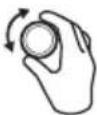
4.1 Retractable knobs
To use the appliance press the knob. The knob comes out.
4.2 Control panel overview
 |  |  |  | OK |  | 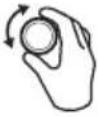 |
| Timer | Fast Heat Up | Light | Food Sensor | Confirm setting | Press Turn | the knob |
| Select a heating function to turn on the appliance. | ||||||
| Turn the knob for the heating functions to the off position to turn the appliance off. | ||||||
4.3 Display

Display with key functions.
Display indicators
| Basic indicators | ||||
| [SKDH]Lock | [TYGR]Assisted Cooking | [SCS2]Cleaning |  Settings Settings | [TTBT]Fast Heat Up |
| Timer indicators | ||||
| [DX3T]Minute minder | [HCR]STOPEnd time | [HCCI]Time Delay | [HHKE]Uptimer | |
| Progress bar - for temperature or time.The bar is fully red when the appliance reaches the set temperature. | ||||
| Steam cooking indicator | |
| Food sensor indicator |
5. BEFORE FIRST USE

WARNING!
Refer to Safety chapters.
5.1 Initial cleaning
| Before the first use, clean the empty appliance and set the time: | |||
 |  |  |  00:00Set the time. Press 00:00Set the time. Press  |
5.2 Initial preheating
 Preheat the empty oven before the first use. Preheat the empty oven before the first use. | |
| Step 1 Remove all accessories and removable shelf supports from the oven. | |
| Step 2 | Set the maximum temperature for the function:☐Let the oven operate for 1 h. |
| Step 3 | Set the maximum temperature for the function:☐Let the oven operate for 15 min. |
| i The oven can emit an odour and smoke during preheating. Make sure that the room is ventilated. | |
6. DAILY USE

WARNING!
Refer to Safety chapters.
6.1 How to set: Heating functions
| Step 1 Turn | the knob for the heating functions and select a heating function. |
| Step 2 Turn | the control knob to set the temperature. |
| Steam cooking | |||
| Make sure that the oven is cold. | |||
| Step 1 Step 2 Step 3 Step 4 | |||
 |  |  | Preheat the empty oven for 10 min to create humidity. Put food in the oven. |
| Fill the cavity embossment with tap water. | Select the steam heating function. | Set the temperature. | |
| Steam cooking |
| i The maximum capacity of the cavity embossment is 250 ml. Do not refill the cavity emboss-ment during cooking or when the oven is hot. |
| When the steam cooking ends: | ||
| Step 1 Step 2 Step | 3 | |
| Turn the knob for the heating functions to the off position to turn off the oven. | Carefully open the door. Re- leased humidity can cause burns. | Make sure that the oven is cold. Remove the remaining water from the cavity em- bossment. |
6.2 Heating functions
| Heating function Application | |
 True Fan Cooking True Fan Cooking | To bake on up to three shelf positions at the same time and to dry food. Set the temperature 20 - 40 °C lower than for Conventional Cooking. |
 Conventional Cooking Conventional Cooking | To bake and roast food on one shelf position. |
 Humidity Low Humidity Low | To add humidity during the cooking. To get the right colour and crispy crust during baking. To give more juiciness during reheating. To preserve fruit or vegetables. |
 Pizza Function Pizza Function | To bake pizza. To make intensive browning and a crispy bottom. |
 Bottom Heat Bottom Heat | To bake cakes with crispy bottom and to preserve food. |
 Frozen Foods Frozen Foods | To make convenience food (e.g., french fries, potato wedges or spring rolls) crispy. |
| Heating function Application | |
 Moist Fan Baking Moist Fan Baking | This function is designed to save energy during cooking. When you use this function, the temperature in the cavity may differ from the set temperature. The residual heat is used. The heating power may be reduced. For more information refer to "Daily Use" chapter, Notes on: Moist Fan Baking. |
 Grill Grill | To grill thin pieces of food and to toast bread. |
 Turbo Grilling Turbo Grilling | To roast large meat joints or poultry with bones on one shelf position. To make gratins and to brown. |
 Menu Menu | To enter the Menu: Assisted Cooking, Cleaning, Settings. |
6.3 Notes on: Moist Fan Baking
This function was used to comply with the energy efficiency class and ecodesign requirements (according to EU 65/2014 and EU 66/2014). Tests according to:
IEC/EN 60350-1
The oven door should be closed during cooking so that the function is not interrupted and the oven operates with the highest energy efficiency possible.
When you use this function the lamp automatically turns off after 30 sec.
For the cooking instructions refer to "Hints and tips" chapter, Moist Fan Baking. For general energy saving recommendations refer to "Energy Efficiency" chapter, Energy Saving.
6.4 How to set: Assisted Cooking
Every dish in this submenu has a recommended heating function and temperature. Use the function to prepare a dish quickly with default settings. You can also adjust the time and the temperature during cooking.
| For some of the dishes you can also cook with: | The degree to which a dish is cooked: |
| • Food Sensor • Rare | • Medium• Well done |
| Step 1 Step 2 Step 3 Step 4 |
 |  |  5 5 |  |
| Enter the menu. Select Assisted Cooking. Press OK | Select the dish. Press OK. | Insert the dish to the oven. Confirm setting. | |
6.5 Assisted Cooking
| Legend | |
 | Food sensor available. Place the Food sensor in the thickest part of the dish. The appliance turns off when the set Food sensor temperature is reached. |
 | The amount of water for the steam function. |
 | Preheat the appliance before you start cooking. |
 | Shelf level. |
The display shows P and a number of the dish that you can check in the table.
| Dish Weight | Shelf level / Accessory | ||
 | Roast Beef, rare | 1 - 1.5 kg; 4 - 5 cm thick pieces | baking trayFry the meat for a few minutes on a hot pan. Insert to the appliance. |
 | Roast Beef, medium | ||
 | Roast Beef, well done | ||
 | Steak, medium 180 | - 220 g per piece; 3 cm thick slices | roasting dish on wire shelfFry the meat for a few minutes on a hot pan. Insert to the appliance. |
 | Beef roast / braised (prime rib, top round, thick flank) | 1.5 - 2 kg | roasting dish on wire shelfFry the meat for a few minutes on a hot pan. Add liquid. Insert to the appliance. |
| 6 | Roast Beef, rare (slow cooking) | 1 - 1.5 kg; 4 - 5 cm thick pieces | baking trayUse your favourite spices or simply salt and fresh grounded pepper. Fry the meat for a few minutes on a hot pan. Insert to the appliance. |
| 7 | Roast Beef, medium (slow cooking) | ||
| 8 | Roast Beef, well done (slow cooking) | ||
| 9 | Fillet, rare (slow cooking) | 0,5 - 1.5 kg; 5 - 6 cm thick pieces | baking trayUse your favourite spices or simply salt and fresh grounded pepper. Fry the meat for a few minutes on a hot pan. Insert to the appliance. |
| 10 | Fillet, medium (slow cooking) | ||
| 11 | Fillet, done (slow cooking) | ||
| 12 | Veal roast (e.g. shoulder) | 0.8 - 1.5 kg; 4 cm thick pieces | roasting dish on wire shelfUse your favourite spices. Add liquid. Roast covered. |
| 13 | Pork roast neck or shoulder | 1.5 - 2 kg | roasting dish on wire shelfTurn the meat after half of the cooking time. |
| 14 | Pulled pork (slow cooking) | 1.5 - 2 kg | baking trayUse your favourite spices. Turn the meat after half of the cooking time to get an even browning. |
| 15 | Loin, fresh 1 - 1.5 kg; 5 - 6 cm thick pieces | roasting dish on wire shelfUse your favourite spices. | |
| 16 | Spare Ribs 2 - 3 kg; use raw, 2 - 3 cm thin spare ribs | deep panAdd liquid to cover the bottom of a dish. Turn the meat after half of the cooking time. | |
| 17 | Lamb leg with bonesDish Weight | 1.5 - 2 kg; 7 - 9 cm thick piecesShelf level / Accessory | roasting dish on baking trayAdd liquid. Turn the meat after half of the cooking time. |
| [242A] | Whole chicken 1 - 1.5 kg;fresh | 2;200 ml; casserole dish on baking trayUse your favourite spices. Turn the chicken after half of the cooking time to get an even browning. | |
| [8XCW] | Half chicken 0.5 - 0.8 kg | 3; baking trayUse your favourite spices. | |
| [46W7] | Chicken breast 180 - 200 g per piece | 2; casserole dish on wire shelfUse your favourite spices. Fry the meat for a few minutes on a hot pan. | |
| [CTST] | Chicken legs, fresh | - | 3; baking trayIf you marinated chicken legs first, set lower temperature and cook them longer. |
| [2722] | Duck, whole 2 - 3 kg | 2; roasting dish on wire shelfUse your favourite spices. Put the meat on roasting dish. Turn the duck after half of the cooking time. | |
| [234C] | Goose, whole 4 - 5 kg | 2; deep panUse your favourite spices. Put the meat on deep baking tray. Turn the goose after half of the cooking time. | |
| [KTST] | Meat loaf 1 kg | 2; wire shelfUse your favourite spices. | |
| [847B] | Whole fish, gril-led | 0.5 - 1 kgper fish | 2; baking trayFill the fish with butter and use your favourite spices and herbs. |
| [35C4] | Fish fillet - | 3; casserole dish on wire shelfUse your favourite spices. | |
| 27 | Cheesecake - | 2; 28 cm springform tin on wire shelf | |
| [SWCW] | Apple cake - | 2; 100 ml; baking tray | |
| 29 | Apple tart - | 2; pie form on wire shelf | |

| Dish Weight | Shelf level / Accessory | |
| 30 | Apple pie - | |
| 31 | Brownies 2 kg of dough | |
| 32 | Chocolate muffins | - |
| 33 | Loaf cake - | |
| 34 | Baked potatoes 1 kg | |
| 35 | Wedges 1 kg | |
| 36 | Grilled mixed vegetables | 1 - 1.5 kg |
| 37 | Croquets, frozen 0.5 kg | |
| 38 | Pommes, frozen 0.75 kg | |
| 39 | Meat / vegetable lasagna with dry pasta sheets | 1 - 1.5 kg |
| 40 | Potato gratin (raw potatoes) | 1 - 1.5 kg |
| 41 | Pizza fresh, thin | - |
| 42 | Pizza fresh, thick | - |
| 43 | Quiche - |
| Dish Weight | Shelf level / Accessory | ||
| 44 | Baguette / Cia-batta / White bread | 0.8 kg | 2; 150 ml; baking tray lined with bak-ing paperMore time needed for white bread. |
| 45 | All grain / rye / dark bread all grain in loaf pan | 1 kg | 2; 150 ml; baking tray lined with baking paper / wire shelf |
7. CLOCK FUNCTIONS
7.1 Clock functions
| Clock Function Application | |
 Minute minder Minute minder | When the timer ends, the signal sounds. |
 Cooking time Cooking time | When the timer ends, the signal sounds and the heating function stops. |
| [4ZDO]Time Delay | To postpone the start and / or end of cooking. |
 Uptimer Uptimer | Maximum is 23 h 59 min. This function has no effect on the operation of the oven.To turn on and off the Uptimer select: Menu, Settings. |
7.2 How to set: Clock functions
| How to set: Time of day | ||
| Step 1 Step 2 Step 3 | ||
 |  |  |
| To change the time of day enter the menu and select Settings, Time of day. | Set the clock. | Press: OK |
| How to set: Minute minder | |||
| Step 1 | The display shows:0:00 | Step 2 Step 3 | |
 |  |  | |
| Press: | Set the Minute minder | Press: OK | |
| i Timer starts counting down immediately. | |||
| How to set: Cooking time | ||||
| Step 1 Step 2 | The display shows:0:00STOP | Step 3 Step 4 | ||
 |  |  |  | |
| Choose a heating function and set the temperature. | Press repeated-ly: 🌐 | Set the cooking time. | Press: OK | |
| i Timer starts counting down immediately. | ||||
| How to set: Time Delay | |||||||
| Step 1 Step 2 | The display shows: the time of day  START START | Step 3 Step 4 | The display shows: --:-- [3X44] STOP | Step 5 Step 6 | |||
 |  |  |  |  |  | ||
| Select the heating function. | Press repeatedly: ⏻. | Set the start time. | Press: OK. | Set the end time. | Press: OK. | ||
| i Timer starts counting down at a set start time. | |||||||
8. USING THE ACCESSORIES

WARNING!
Refer to Safety chapters.
8.1 Inserting accessories
A small indentation at the top increases safety. The indentations are also anti-tip devices. The high rim around the shelf prevents cookware from slipping of the shelf.
| Wire shelf:Push the shelf between the guide bars of the shelf support. |  |
| Baking tray / Deep pan:Push the tray between the guide bars of the shelf support. |  |
8.2 Food Sensor
Food Sensor - measures the temperature inside the food.
| There are two temperatures to be set: | |
 The oven temperature. The oven temperature. | [T408]The core temperature. |
| For the best cooking results: | ||
| Ingredients should be at room temperature. | Do not use it for liquid dishes. | During cooking it must remain in the dish. |
How to use: Food Sensor
| Step 1 Turn on the oven. | ||
| Step 2 Set a heating function and, if necessary, the oven temperature. | ||
| Step 3 Insert: Food Sensor. | ||
| Meat, poultry and fish Casserole | ||
| Insert the tip of Food Sensor into the centre of meat, fish, in the thickest part if possible. Make sure that at least 3/4 of Food Sensor is inside of the dish. | Insert the tip of Food Sensor exactly in the centre of the casserole. Food Sensor should be stabilized in one place during baking. Use a solid ingredient to achieve that. Use the rim of the baking dish to support the silicone handle of Food Sensor. The tip of Food Sensor should not touch the bottom of a baking dish. | |
 |  | |
| Step 4 Plug Food Sensor into the socket at the front of the oven. The display shows the current temperature of: Food Sensor. | ||
| Step 5 | [TWTS] - press to set the core temperature of the sensor. | |
| Step 6 |  - press to confirm. When food reaches the set temperature, the signal sounds. You can choose to stop or to continue cooking to make sure the food is well done. - press to confirm. When food reaches the set temperature, the signal sounds. You can choose to stop or to continue cooking to make sure the food is well done. | |
| Step 7 Remove Food Sensor plug from the socket and remove the dish from the oven. | ||
9. ADDITIONAL FUNCTIONS
9.1 Lock
| This function prevents an accidental change of the appliance function. | ||
| Turn it on when the appliance works - the set cooking continues, the control panel is locked.Turn it on when the appliance is off - it cannot be turned on, the control panel is locked. | ||
 | OK- press and hold to turn on the function.A signal sounds. | OK- press and hold to turn it off. |
| i 3 x flashes when the lock is turned on. | ||
9.2 Automatic switch-off
For safety reasons the appliance turns off after some time, if a heating function works and you do not change any settings.
 (°C) (h) (°C) (h) |  |
| 30 - 115 12.5 | |
| 120 - 195 8.5 | |
| 200 - 245 5.5 | |
| 250 - maximum 3 |
The Automatic switch-off does not work with the functions: Light, Food sensor, Time Delay.
9.3 Cooling fan
When the appliance operates, the cooling fan turns on automatically to keep the surfaces of the appliance cool. If you turn off the appliance, the cooling fan can continue to operate until the appliance cools down.
10. HINTS AND TIPS
10.1 Cooking recommendations

The temperature and cooking times in the tables are guidelines only. They depend on the recipes and the quality and quantity of the ingredients used.
Your appliance may bake or roast differently to the appliance you had before. The hints below show recommended settings for temperature, cooking time and shelf position for specific types of the food.
If you cannot find the settings for a special recipe, look for the similar one.
10.2 Moist Fan Baking
For the best results follow suggestions listed in the table below. Use the third shelf position.
(°C) (min)
 |  (°C) (min) (°C) (min) |  |
| Pasta gratin 200 - 220 45 - 55 | ||
| Potato gratin 180 - 200 70 - 85 | ||
| Moussaka 170 - 190 70 - 95 | ||
| Lasagne 180 - 200 75 - 90 | ||
| Cannelloni 180 - 200 70 - 85 | ||
| Bread pudding 190 - 200 55 - 70 | ||
| Rice pudding 170 - 190 45 - 60 | ||
| Apple cake, made of sponge cake mixture(round cake tin) | 160 - 170 70 - 80 | |
| White bread 190 - 200 55 - 70 |
10.3 Moist Fan Baking - recommended accessories
Use the dark and non-reflective tins and containers. They have better heat absorption than the light colour and reflective dishes.
 Pizza pan Pizza pan | 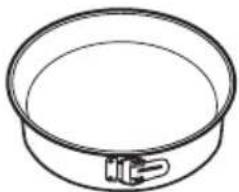 Baking dish Baking dish | 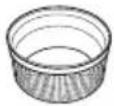 Ramekins Ramekins |  Flan base tin Flan base tin |
| Dark, non-reflective28 cm diameter | Dark, non-reflective26 cm diameter | Ceramic8 cm diameter,5 cm height | Dark, non-reflective28 cm diameter |
10.4 Cooking tables for test institutes
Information for test institutes
Tests according to: EN 60350, IEC 60350.
Baking on one level - baking in tins
 |  |  ^ min ^ min |  |  |
| Fatless sponge cake True | Fan Cooking 160 45 - 60 2 | |||
| Fatless sponge cake Conventional Cook-ing | 160 45 - 60 2 | |||
| Apple pie, 2 tins ∅20 cm True Fan Cooking 160 55 | - 65 2 | |||
| Apple pie, 2 tins ∅20 cm Conventional Cook-ing | 180 55 - 65 1 | |||
| Short bread True Fan Cooking 140 25 - 35 2 | ||||
| Short bread Conventional Cook-ing | 140 25 - 35 2 | |||
Baking on one level - biscuits
Use the third shelf position.
 |  |  ^ min ^ min |  |
| Small cakes, 20 per tray, preheat the empty oven | True Fan Cooking 150 20 - | 30 | |
| Small cakes, 20 per tray, preheat the empty oven | Conventional Cooking 170 | 20 - 30 |
Multilevel baking - biscuits
 |  |  °C min °C min |  |  |
| Short bread True Fan Cooking 140 25 - 45 2 / 4 | ||||
| Small cakes, 20 per tray, preheat the empty oven | True Fan Cooking 150 25 | -35 1 / 4 | ||
| Fatless sponge cake True Fan Cooking 160 45 - 55 2 / 4 | ||||
| Apple pie, 1 tin per grid (∅ 20 cm) | True Fan Cooking 160 55 | -65 2 / 4 | ||
Grill
Preheat the empty oven for 5 minutes.
Grill with the maximum temperature setting.
 |  |  min min |  |
| Toast Grill 1 - 2 5 | |||
| Beef steak, turn halfway through | Grill 24 - 30 4 |
11. CARE AND CLEANING

WARNING!
Refer to Safety chapters.
11.1 Notes on cleaning

Cleaning Agents
Clean the front of the appliance only with a microfibre cloth with warm water and a mild detergent.
Use a cleaning solution to clean metal surfaces.
Clean stains with a mild detergent.

Everyday Use
Clean the cavity after each use. Fat accumulation or other residue may cause fire.
Do not store the food in the appliance for longer than 20 minutes. Dry the cavity only with a microfibre cloth after each use.

Accessories
Clean all accessories after each use and let them dry. Use only a microfibre cloth with warm water and a mild detergent. Do not clean the accessories in a dishwasher.
Do not clean the non-stick accessories using abrasive cleaner or sharp-edged objects.
11.2 How to clean: Cavity embossment
Clean the cavity embossment to remove limestone residue after cooking with steam.
| Step 1 Step 2 Step 3 | ||
| Pour: 250 ml of white vinegar into the cavity embossment. Use maximum 6% vinegar without any additives. | Let the vinegar dissolve the limestone residue at the ambient temperature for 30 minutes. | Clean the cavity with warm water and a soft cloth. |
| For the function: Humidity Low clean the oven for every 5 - 10 cooking cycles. | ||
11.3 How to remove: Shelf supports
Remove the shelf supports to clean the oven.
| Step 1 Turn off the oven and wait until it is cold. | 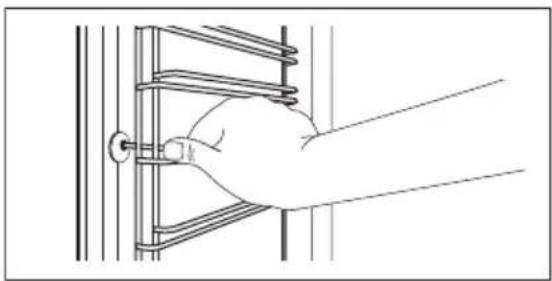 | |
| Step 2 Pull the front of the shelf support away from the side wall. | ||
| Step 3 Pull the rear end of the shelf support away from the side wall and remove it. | 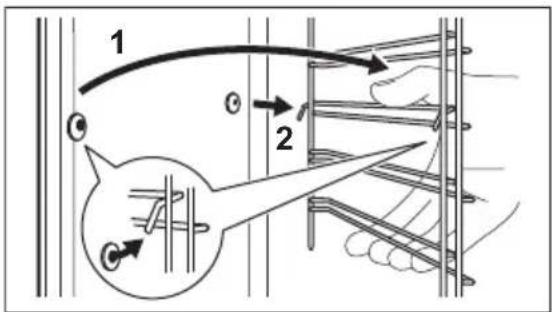 | |
| Step 4 Install the shelf supports in the opposite sequence.The retaining pins on the telescopic runners must point to the front. | ||
11.4 How to use: Pyrolytic Cleaning
Clean the oven with Pyrolytic Cleaning.

WARNING!
There is a risk of burns.

CAUTION!
If there are other appliances installed in the same cabinet, do not use them at the same time as this function. It can cause damage to the oven.
| Before the Pyrolytic Cleaning: | ||
| Turn off the oven and wait until it is cold. | Remove all accessories and removable shelf supports. | Clean the oven floor and the inner door glass with warm water, a soft cloth and a mild detergent. |
| Pyrolytic Cleaning | ||
| Step 1 | Enter menu: Cleaning √ | |
| Option Duration | ||
| C1 - Light cleaning 1 h | ||
| C2 - Normal cleaning 1 h 30 min | ||
| C3 - Thorough cleaning 3 h | ||
| Step 2 | OK- press to select the cleaning programme. | |
| Step 3 | OK- press to start the cleaning. | |
| Step 4 After cleaning, turn | the knob for the heating functions to the off position. | |
| When the cleaning starts, the oven door is locked and the lamp is off. Until the door unlocks the display shows: | ||
| When the cleaning ends: | ||
| Turn off the oven and wait until it is cold. | Clean the cavity with a soft cloth. | Remove the residue from the bottom of the cavity. |
11.5 Cleaning Reminder
| The oven reminds you when to clean it with pyrolytic cleaning. | |
| [4x3] flashes in the display for 5 sec after each cooking session. | To turn off the reminder enter the Menu and select Settings, Cleaning Reminder. |
11.6 How to remove and install: Door
You can remove the door and the internal glass panels to clean it. The number of glass panels is different for different models.

WARNING!
The door is heavy.

CAUTION!
Carefully handle the glass, especially around the edges of the front panel. The glass can break.
| Step 1 Fully open the door. |  | |
| Step 2 Lift and press the clamping levers (A) on the two door hinges. | ||
| Step 3 Close the oven door to the first opening position (approximately 70° angle). Hold the door at both sides and pull it away from the oven at an upwards angle. Put the door with the outer side down on a soft cloth on a stable surface. | ||
| Step 4 Hold the door trim (B) on the top edge of the door at the two sides and push inwards to release the clip seal. |  | |
| Step 5 Pull the door trim to the front to remove it. | ||
| Step 6 Hold the door glass panels on their top edge one by one and pull them up out of the guide. | ||
| Step 7 Clean the glass panel with water and soap. Dry the glass panel carefully. Do not clean the glass panels in the dish-washer. |  | |
| Step 8 After cleaning, do the above steps in the opposite sequence. | ||
| Step 9 Install the smaller panel first, then the larger and the door.Make sure that the glasses are inserted in the correct position otherwise the surface of the door may overheat. | ||
11.7 How to replace: Lamp

WARNING!
Risk of electric shock.
The lamp can be hot.
| Before you replace the lamp: | ||
| Step 1 Step 2 Step 3 | ||
| Turn off the oven. Wait until the oven is cold. | Disconnect the oven from the mains. | Put a cloth on the bottom of the cavity. |
Top lamp
| Step 1 Turn the glass cover to remove it. | 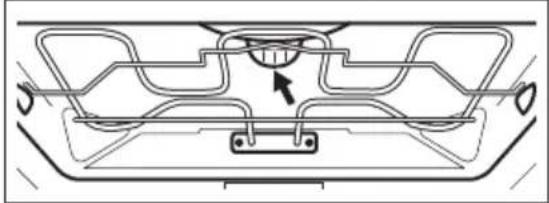 | |
| Step 2 Clean the glass cover. | ||
| Step 3 Replace the lamp with a suitable 300 °C heat-resistant lamp. | ||
| Step 4 Install the glass cover. | ||
12. TROUBLESHOOTING

WARNING!
Refer to Safety chapters.
12.1 What to do if...
In any cases not included in this table please contact with an Authorised Service Centre.
| [ywgk] The appliance does not turn on or does not heat up | |
| Problem Check if... | |
| You cannot activate or operate the appliance. The appliance is correctly connected to an electrical supply. | |
| The appliance does not heat up. The automatic switch-off is deactivated. | |
| The appliance does not heat up. The appliance door is closed. | |
| The appliance does not heat up. The fuse is not blown. | |

The appliance does not turn on or does not heat up
The appliance does not heat up. The Lock is off.

Components
Problem Check if...
The lamp is turned off. Moist Fan Baking - is turned on.
The lamp does not work. The lamp is burnt out.
The Food sensor does not operate. The plug of the Food sensor is fully inserted in-
to the socket.

Error codes
The display shows... Check if...
Err C2 You removed the Food sensor plug from the
socket.
Err C3 The appliance door is closed or the door lock is
not broken.
Err F102 The appliance door is closed.
Err F102 The door lock is not broken.
00:00 There was a power cut. Set the time of day.
If the display shows an error code that is not in this table turn the house fuse off and on to restart the appliance. If the error code recurs contact an Authorised Service Centre.

Cleaning
Problem Check if...

Cleaning
The water leaks out of the cavity embossment. There is too much water in the cavity embossment.
12.2 Service data
If you cannot find a solution to the problem yourself, contact your dealer or an Authorised Service Centre.
The necessary data for the service centre is on the rating plate. The rating plate is on the front frame of the appliance cavity. Do not remove the rating plate from the appliance cavity.
| We recommend that you write the data here: | |
| Model (MOD.) | |
| Product number (PNC) | |
| Serial number (S.N.) | |
13. ENERGY EFFICIENCY
13.1 Product Information and Product Information Sheet
| Supplier's name AEG | ||
| Model identification | BPE556360M 944188664BPK556360M 944188665 | |
| Energy Efficiency Index 81.2 | ||
| Energy efficiency class A+ | ||
| Energy consumption with a standard load, conventional mode | 1.09 kWh/cycle | |
| Energy consumption with a standard load, fan-forced mode | 0.69 kWh/cycle | |
| Number of cavities 1 | ||
| Heat source Electricity | ||
| Volume 71 l | ||
| Type of oven Built-In Oven | ||
| Mass | BPE556360M 35.0 | kg |
| BPK556360M 35.0 | kg | |
IEC/EN 60350-1 - Household electric cooking appliances - Part 1: Ranges, ovens, steam ovens and grills - Methods for measuring performance.
13.2 Energy saving

The appliance has features which help you save energy during everyday cooking.
Make sure that the appliance door is closed when the appliance operates. Do not open the appliance door too often during cooking. Keep the door gasket clean and make sure it is well fixed in its position.
Use metal cookware to improve energy saving.
When possible, do not preheat the appliance before cooking.
Keep breaks between baking as short as possible when you prepare a few dishes at one time.
Cooking with fan
When possible, use the cooking functions with fan to save energy.
Residual heat
The fan and lamp continue to operate. When you turn off the appliance, the display shows the residual heat. You can use that heat to keep the food warm.
When the cooking duration is longer than 30 min, reduce the appliance temperature to minimum 3 - 10 min before the end of cooking. The residual heat inside the appliance will continue to cook.
Use the residual heat to warm up other dishes.
Keep food warm
Choose the lowest possible temperature setting to use residual heat and keep a meal warm.
The residual heat indicator or temperature appears on the display.
Cooking with the lamp off
Turn off the lamp during cooking. Turn it on only when you need it.
Moist Fan Baking
Function designed to save energy during cooking.
When you use this function the lamp automatically turns off after 30 sec. You may turn on the lamp again but this action will reduce the expected energy savings.
14. MENU STRUCTURE
14.1 Menu
| Step 1 Step | 2 Step 3 Step 4 Step | 5 | ||
 |  |  |  |  |
| ≡ - select to enter the Menu. | Select the option from Menu struc-ture and press OK. | Select the set-ting. | OK - press to confirm setting. | Adjust the value and press OK |
| Turn the knob for the heating functions to the off position to exit the Menu. | ||||
| Menu structure | ||
 |  | Settings [5A0Z] |
| Settings | |||||
| 01 Time of day Change 02 Display brightness 1 - 5 | |||||
| 03 Key tones 1 - Beep | 2 - Click3 - Sound off | 04 Buzzer volume 1 - 4 | |||
| 05 Food Sensor Action 1 - Alarm and stop2 - Alarm | 06 Uptimer On / Off | ||||
| 07 Light On / Off 08 Fast Heat Up On / Off | |||||
| 09 Cleaning Reminder On / Off | 10 Demo mode Activation | code: 2468 | |||
| 11 Software version Check 12 R | Reset all settings | Yes / No | |||
15. ENVIRONMENTAL CONCERNS
Recycle materials with the symbol ⚙. Put the packaging in relevant containers to recycle it. Help protect the environment and human health by recycling waste of electrical and electronic appliances. Do not dispose of appliances marked with the symbol ⚗ with the household waste. Return the product to your local recycling facility or contact your municipal office.
PARIMATE TULEMUSTE SAAVUTAMISEKS
natural_image
Line drawing of a rectangular plate with grid pattern and side holes (no text or symbols)
natural_image
Simple line drawing of a square tray with internal grid lines (no text or symbols)
natural_image
Simple line drawing of a square tray with internal diagonal lines (no text or symbols)
natural_image
Pure electrical circuit lines without any symbols
natural_image
Technical line drawing of two mechanical components with grooves and mounting brackets (no text or symbols)4. JUHTPANEEL
2.1 Installation....221
natural_image
Line drawing of a rectangular plate with grid pattern (no text or symbols)
natural_image
Pure geometric diagram of a square frame with internal diagonal lines (no text or symbols)
natural_image
Simple line drawing of a square tray with internal diagonal lines (no text or symbols)Sonde de cuisson
natural_image
Pure electrical circuit lines without any symbols
natural_image
Technical line drawing of two mechanical components with grooves and mounting holes (no text or symbols)4. BANDEAU DE COMMANDE
natural_image
Technical line drawing of a wooden ladder with two circular insets showing internal details (no text or symbols)natural_image
Pure technical line drawing of a mechanical component or bracket (no text or symbols)natural_image
Line drawing of a kitchen appliance with a tray and attached electrical outlet (no text or symbols)
natural_image
Two laboratory setups: a cylindrical container with a probe and wire, and a beaker with a probe inserted into liquid (no text or symbols)modification in the case

zinogb3g06g b6n63s 0s dmdu5b7m0mds
2.7 Uzbek30u.....264
2.8 355356335....264
- 36600000000000000000000000000000000000000000000000000
3.1 6m3s00 264
3.2 265
- 3m686mmou 3s6gmo....265
2. ventralmenting of the quality of
2.1 მონტაეი

Assimabomgds! JU dmydommsd abmmco 33mnozogjdymds u3gbsmouOds y6cos ossy6m.
• მონსენით უკელა შეცუთვა.
• σή ροσδηβόγμον ρος σή ραδηγβόνων ρος θοσβόγμον δηθμόντησ.
- მიპუცვით დამონტაცების ინსტრუწვიებს, რომელიც მოწყობილობას მოპუკა.
• ΥΜΣΥΜΟΣΟΥ ηΥΣΟΟΣ ΑΣΗΜΟΒΟΥΣΟ ΑΔΗΥΜΟΝΟΥΜΟΥΣ ΖΑΡΟΣΦΙΒΩΝΥΣ, ΦΑΡΟΣΦΙΒ ΥΔΟΥΣ. ΥΜΣΥΜΟΣΟΥ ΖΑΡΟΥΣΟΥΣΟ ΒΑΡΟΣΦΙΒΟΥΣΟ ΒΑΡΟΣΦΙΒΟΥΣΟ ΘΑΡΟΣΦΙΒΟΥΣΟ ΘΑΡΟΣΦΙΒΟΥΣΟ.
• σή συσόντος όπημόντος υγριστος.
- སྲྱབ་པོད་པའིན་པརྒྱལ་པའིན་པརྒྱལ་པའིན་པརྒྱལ་པའིན་པརྒྱལ་པའིན་པརྒྱལ་པའིན་པརྒྱལ་པའིན་པརྒྱལ་པའན་པརྒྱལ་པའིན་པརྒྱལ་པའིན་པརྒྱལ་པའིན་པརྒྱལ་པའིན་པརྒྱལ་པའིན་པརྒྱལ་པའིན་པསྐད་པརྒྱལ་པའིན་པརྒྱལ་པའིན་པརྒྱལ་པའིན་པརྒྱལ་པའིན་པརྒྱལ་པའིན་པརྒྱལ་པའིན་པར།
• ἀγοδυμήνηξος άσόβαστημήκο ρολυξυξος υχες δημήμοπημηδόσος ρος χριμιψήμηδόσος.
- მოწყობილობის დამონტაფებამდე შეამოწმეთ, უპრომლემოდი იკეტება თუ არა მოწყობილობის კარი.
- მოწყობილობა აოწურვილია გაცრილების ელექტრული სისტებით. ის უნდა მუმაობდეს ლექტროკვების წყაროზე.
- ḥδαβδγδγμο δρμμο γδρος δγμυδσαγδαμρος DIN 68930-νι υξδαγμνηφόνού δασκαβδύ.
natural_image
Line drawing of a rectangular grid-patterned plate (no text or symbols)
natural_image
Simple line drawing of a square tray with internal grid lines (no text or symbols)
natural_image
Simple line drawing of a rectangular tray with internal lines and triangular segments (no text or symbols)
natural_image
Pure electrical circuit lines without any symbols
natural_image
Technical line drawing of two mechanical components with grooves and mounting holes (no text or symbols)4. 3m586mmou 3s5gmo
4.1 3500000000000000000000000000000000000000000
| dānānānānānānānānānānānānānānānānānānānānānānānānānānānānānānānānānānānānānānānānānānānānānānānānānānāmānānānānānānānānānānānānānānānānānānānānānānānānānānānānānānānānānānānānānānānānānānānānānānānānānāndānānānānānānānānānānānānānānānānānānānānānānānānānānānānānānānānānānānānānānānānānānānānānānānānānānmānānānānānānānānānānānānānānānānānānānānānānānānānānānānānānānānānānānānānānānānānānānānānānānānānānfānānānānānānānānānānānānānānānānānānānānānānānānānānānānānānānānānānānānānānānānānānānānānānānānānānlānānānānānānānānānānānānānānānānānānānānānānānānānānānānānānānānānānānānānānānānānānānānānānānānānālānānānānānānānānānānānānānānānānānānānānānānānānānānānānānānānānānānānānānānānānānānānānānānānānānāna nānānānānānānānānānānānānānānānānānānānānānānānānānānānānānānānānānānānānānānānānānānānānānānānānānāngānānānānānānānānānānānānānānānānānānānānānānānānānānānānānānānānānānānānānānānānānānānānānānānānānāni nānānānānānānānānānānānānānānānānānānānānānānānānānānānānānānānānānānānānānānānānānānānānānānānānānū nānānānānānānānānānānānānānānānānānānānānānānānānānānānānānānānānānānānānānānānānānānānānānānānānānō nānānānānānānānānānānānānānānānānānānānānānānānānānānānānānānānānānānānānānānānānānānānānānānānānānī nānānānānānānānānānānānānānānānānānānānānānānānānānānānānānānānānānānānānānānānānānānānānānānānānānabu nānānānānānānānānānānānānānānānānānānānānānānānānānānānānānānānānānānānānānānānānānānānānānānānānānah nānānānānānānānānānānānānānānānānānānānānānānānānānānānānānānānānānānānānānānānānānānānānānabu nānānānabu nānānabu nānānabu nānānabu nānānabu nānānabu nānānabu nānānabu nānānabu nānānabu nānānabu nānānabu nānānabu nānānabu nānānabu nāmshyshyshyshyshyshyshyshyshyshyshyshyshyshyshyshyshyshyshyshyshyshyshyshyshyshyshyshyshyshyshyshyshyshyshyshyshyshyshyshyshyshyshyshyshyshyshyshyshyshyshvshyshyshyshyshyshyshyshyshyshyshyshyshyshyshyshyshyshyshyshyshyshyshyshyshyshyshyshyshyshyshyshyshyshyshyshyshyshyshyshyshyshyshyshyshyshyshyshyshysh yshyshyshyshyshyshyshyshyshyshyshyshyshyshyshyshyshyshyshyshyshyshyshyshyshyshyshyshyshyshyshyshyshyshyshyshyshyshyshyshyshyshyshyshyshyshyshyshyshyshgshyshyshyshyshyshyshyshyshyshyshyshyshyshyshyshyshyshyshyshyshyshyshyshyshyshyshyshyshyshyshyshyshyshyshyshyshyshyshyshyshyshyshyshyshyshyshyshyshyshkshyshyshyshyshyshyshyshyshyshyshyshyshyshyshyshyshyshyshyshyshyshyshyshyshyshyshyshyshyshyshyshyshyshyshyshyshyshyshyshyshyshyshyshyshyshyshyshyshyshykshyshyshyshyshyshyshyshyshyshyshyshyshyshyshyshyshyshyshyshyshyshyshyshyshyshyshyshyshyshyshyshyshyshyshyshyshyshyshyshyshyshyshyshyshyshyshyshyshyshkyshyshyshyshyshyshyshyshyshyshyshyshyshyshyshyshyshyshyshyshyshyshyshyshyshyshyshyshyshyshyshyshyshyshyshyshyshyshyshyshyshyshyshyshyshyshyshyshyshyshgyshyshyshyshyshyshyshyshyshyshyshyshyshyshyshyshyshyshyshyshyshyshyshyshyshyshyshyshyshyshyshyshyshyshyshyshyshyshyshyshyshyshyshyshyshyshyshyshyshyshyyshyshyshyshyshyshyshyshyshyshyshyshyshyshyshyshyshyshyshyshyshyshyshyshyshyshyshyshyshyshyshyshyshyshyshyshyshyshyshyshyshyshyshyshyshyshyshyshyshyshygshyshyshyshyshyshyshyshyshyshyshyshyshyshyshyshyshyshyshyshyshyshyshyshyshyshyshyshyshyshyshyshyshyshyshyshyshyshyshyshyshyshyshyshyshyshyshyshyshyshya shyshyshyshyshyshyshyshyshyshyshyshyshyshyshyshyshyshyshyshyshyshyshyshyshyshyshyshyshyshyshyshyshyshyshyshyshyshyshyshyshyshyshyshyshyshyshyshyshyshyishyshyshyshyshyshyshyshyshyshyshyshyshyshyshyshyshyshyshyshyshyshyshyshyshyshyshyshyshyshyshyshyshyshyshyshyshyshyshyshyshyshyshyshyshyshyshyshyshyshythyshyshyshyshyshyshyshyshyshyshyshyshyshyshyshyshyshyshyshyshyshyshyshyshyshyshyshyshyshyshyshyshyshyshyshyshyshyshyshyshyshyshyshyshyshyshyshyshyshy | |||
| (224) | (224) | (224) | (224) |
| QD80000000000000000000000000000000000000000000000000000000000000000000000000000000000000000000000000000 | (224) | (224) | (224) |
| (224) | (224) | (224) | (224) |
| (224) | (224) | (224) | (224) |
| (224) | (224) | (224) | (224) |
| (224) | (224) | (224) | (224) |
| QD80000000000000000000000000000000000000000000000000000000000000000000 | (224) | (224) | (224) |
| (224) | (224) | ||
| 30600 31550 05650 09650 / 3455550 | ||
| 12 | 30650 30550 30550 (38.,30) | 0.8 - 1.5 38; 410 1000065550 |
| 13 | 30650 30550 30550 30550 30550 30550 30550 30550 30550 30550 30550 30550 30550 30550 30550 30550 30550 30550 15 - 2 38 | |
| 14 | 30650 30550 30550 30550 (38,30000000000000000000000000000000000000000000000000000000000000000000000000000000000000000000000000000 | 1.5 - 2 38 |
| 1.5 - 2 38 | ||
| 1 - 1.5 38; 5 - 610 1000065550 | ||
| 15 | 30650 30550 30550 30550 30550 30550 30550 30550 30550 30550 30550 30550 30550 30550 30550 30550 30 | |
| 16 | 30650 30550 30550 30550 30550 30550 30550 30550 30550 30550 30550 30550 30550 30550 30550 30550 30 | 1.5 - 2 38; 7 - 910 1000065550 |
| 17 | 30650 30550 30550 30550 30550 30550 30550 30550 30550 30550 30550 30550 30550 30550 30550 30550 30 | |
| 18 | 30650 30550 30550 30550 30550 30550 30550 30550 30550 30550 30550 30550 30550 30550 30550 30550 30 | |
| 19 | 30650 30550 30550 30550 30550 30550 30550 30550 30550 30550 30550 30550 30 | |
| JS6n0 JS6n1 JS6n2 JS6n3 JS6n4 JS6n5 JS6n6 JS6n7 JS6n8 JS6n9 JS6n10 JS6n11 JS6n12 JS6n13 JS6n14 JS6n15 JS6n16 JS6n17 JS6n18 JS6n19 JS6n20 JS6n21 JS6n22 JS6n23 JS6n24 JS6n25 JS6n26 JS6n27 JS6n28 JS6n29 JS6n30 JS6n31 JS6n32 JS6n33 JS6n34 JS6n35 JS6n36 JS6n37 JS6n38 JS6n39 JS6n40 JS6n41 JS6n42 JS6n43 JS6n44 JS6n45 JS6n46 JS6n47 JS6n48 JS6n49 JS6n50 JS6n51 JS6n52 JS6n53 JS6n54 JS6n55 JS6n56 JS6n57 JS6n58 JS6n59 JS6n60 JS6n61 JS6n62 JS6n63 JS6n64 JS6n65 JS6n66 JS6n67 JS6n68 JS6n69 JS6n70 JS6n71 JS6n72 JS6n73 JS6n74 JS6n75 JS6n76 JS6n77 JS6n78 JS6n79 JS6n80 JS6n81 JS6n82 JS6n83 JS6n84 JS6n85 JS6n86 JS6n87 JS6n88 JS6n89 JS6n90 JS6n91 JS6n92 JS6n93 JS6n94 JS6n95 JS6n96 JS6n97 JS6n98 JS6n99 JS6n100 JS6n101 JS6n102 JS6n103 JS6n104 JS6n105 JS6n106 JS6n107 JS6n108 JS6n109 JS6n110 JS6n111 JS6n112 JS6n113 JS6n114 JS6n115 JS6n116 JS6n117 JS6n118 JS6n119 JS6n120 JS6n121 JS6n122 JS6n123 JS6n124 JS6n125 JS6n126 JS6n127 JS6n128 JS6n129 JS6n130 JS6n131 JS6n132 JS6n133 JS6n134 JS6n135 JS6n136 JS6n137 JS6n138 JS6n139 JS6n140 JS6n141 JS6n142 JS6n143 JS6n144 JS6n145 JS6n146 JS6n147 JS6n148 JS6n149 JS6n150 JS6n151 JS6n152 JS6n153 JS6n154 JS6n155 JS6n156 JS6n157 JS6n158 JS6n159 JS6n160 JS6n161 JS6n162 JS6n163 JS6n164 JS6n165 JS6n166 JS6n167 JS6n168 JS6n169 JS6n170 JS6n171 JS6n172 JS6n173 JS6n174 JS6n175 JS6n176 JS6n177 JS6n178 JS6n179 JS6n180 JS6n181 JS6n182 JS6n183 JS6n184 JS6n185 JS6n186 JS6n187 JS6n188 JS6n189 JS6n190 JS6n191 JS6n192 JS6n193 JS6n194 JS6n195 JS6n196 JS6n197 JS6n198 JS6n199 JS6n200 JS6n201 JS6n202 JS6n203 JS6n204 JS6n205 JS6n206 JS6n207 JS6n208 JS6n209 JS6n210 JS6n211 JS6n212 JS6n213 JS6n214 JS6n215 JS6n216 JS6n217 JS6n218 JS6n219 JS6n220 JS6n221 JS6n222 JS6n223 JS6n224 JS6n225 JS6n226 JS6n227 JS6n228 JS6n229 JS6n230 JS6n231 JS6n232 JS6n233 JS6n234 JS6n235 JS6n236 JS6n237 JS6n238 JS6n239 JS6n240 JS6n241 JS6n242 JS6n243 JS6n244 JS6n245 JS6n246 JS6n247 JS6n248 JS6n249 JS6n250 JS6n251 JS6n252 JS6n253 JS6n254 JS6n255 JS6n256 JS6n257 JS6n258 JS6n259 JS6n260 JS6n261 JS6n262 JS6n263 JS6n264 JS6n265 JS6n266 JS6n267 JS6n268 JS6n269 JS6n270 JS6n271 JS6n272 JS6n273 JS6n274 JS6n275 JS6n276 JS6n277 JS6n278 JS6n279 JS6n280 JS6n281 JS6n282 JS6n283 JS6n284 JS6n285 JS6n286 JS6n287 JS6n288 JS6n289 JS6n290 JS6n291 JS6n292 JS6n293 JS6n294 JS6n295 JS6n296 JS6n297 JS6n298 JS6n299 JS6n300 JS6n301 JS6n302 JS6n303 JS6n304 JS6n305 JS6n306 JS6n307 JS6n308 JS6n309 JS6n310 JS6n311 JS6n312 JS6n313 JS6n314 JS6n315 JS6n316 JS6n317 JS6n318 JS6n319 JS6n320 JS6n321 JS6n322 JS6n323 JS6n324 JS6n325 JS6n326 JS6n327 JS6n328 JS6n329 JS6n330 JS6n331 JS6n332 JS6n333 JS6n334 JS6n335 JS6n336 JS6n337 JS6n338 JS6n339 JS6n340 JS6n341 JS6n342 JS6n343 JS6n344 JS6n345 JS6n346 JS6n347 JS6n348 JS6n349 JS6n350 JS6n351 JS6n352 JS6n353 JS6n354 JS6n355 JS6n356 JS6n357 JS6n358 JS6n359 JS6n360 JS6n361 JS6n362 JS6n363 JS6n364 JS6n365 JS6n366 JS6n367 JS6n368 JS6n369 JS6n370 JS6n371 JS6n372 JS6n373 JS6n374 JS6n375 JS6n376 JS6n377 JS6n378 JS6n379 JS6n380 JS6n381 JS6n382 JS6n383 JS6n384 JS6n385 JS6n386 JS6n387 JS6n388 JS6n389 JS6n390 JS6n391 JS6n392 JS6n393 JS6n394 JS6n395 JS6n396 JS6n397 JS6n398 JS6n399 JS6n400 JS6n501 JS6n502 JS6n503 JS6n504 JS6n505 JS6n506 JS6n507 JS6n508 JS6n509 JS6n510 JS6n511 JS6n512 JS6n513 JS6n514 JS6n515 JS6n516 JS6n517 JS6n518 JS6n519 JS6n520 JS6n521 JS6n522 JS6n523 JS6n524 JS6n525 JS6n526 JS6n527 JS6n528 JS6n529 JS6n530 JS6n531 JS6n532 JS6n533 JS6n534 JS6n535 JS6n536 JS6n537 JS6n538 JS6n539 JS6n540 JS6n541 JS6n542 JS6n543 JS6n544 JS6n545 JS6n546 JS6n547 JS6n548 JS6n549 JS6n550 JS6n551 JS6n552 JS6n553 JS6n554 JS6n555 JS6n556 JS6n557 JS6n558 JS6n559 JS6n560 JS6n561 JS6n562 JS6n563 JS6n564 JS6n565 JS6n566 JS6n567 JS6n568 JS6n569 JS6n570 JS6n571 JS6n572 JS6n573 JS6n574 JS6n575 JS6n576 JS6n577 JS6n578 JS6n579 JS6n580 JS6n581 JS6n582 JS6n583 JS6n584 JS6n585 JS6n586 JS6n587 JS6n588 JS6n589 JS6n590 JS6n591 JS6n592 JS6n593 JS6n594 JS6n595 JS6n596 JS6n597 JS6n598 JS6n599 JS6n600 JS6n601 JS6n602 JS6n603 JS6n604 JS6n605 JS6n606 JS6n607 JS6n608 JS6n609 JS6n610 JS6n611 JS6n612 JS6n613 JS6n614 JS6n615 JS6n616 JS6n617 JS6n618 JS6n619 JS6n620 JS6n621 JS6n622 JS6n623 JS6n624 JS6n625 JS6n626 JS6n627 JS6n628 JS6n629 JS6n630 JS6n631 JS6n632 JS6n633 JS6n634 JS6n635 JS6n636 JS6n637 JS6n638 JS6n639 JS6n640 JS6n641 JS6n642 JS6n643 JS6n644 JS6n645 JS6n646 JS6n647 JS6n648 JS6n649 JS6n650 JS6n651 JS6n652 JS6n653 JS6n654 JS6n655 JS6n656 JS6n657 JS6n658 JS6n659 JS6n660 JS6n661 JS6n662 JS6n663 JS6n664 JS6n665 JS6n666 JS6n667 JS6n668 JS6n669 JS6n670 JS6n671 JS6n672 JS6n673 JS6n674 JS6n675 JS6n676 JS6n677 JS6n678 JS6n679 JS6n680 JS6n681 JS6n682 JS6n683 JS6n684 JS6n685 JS6n686 JS6n687 JS6n688 JS6n689 JS6n690 JS6n700 JS6n701 JS6n702 JS6n703 JS6n704 JS6n705 JS6n706 JS6n707 JS6n708 JS6n709 JS6n710 JS6n711 JS6n712 JS6n713 JS6n714 JS6n715 JS6n716 JS6n717 JS6n718 JS6n719 JS6n720 JS6n721 JS6n722 JS6n723 JS6n724 JS6n725 JS6n726 JS6n727 JS6n728 JS6n729 JS6n730 JS6n731 JS6n732 JS6n733 JS6n734 JS6n735 JS6n736 JS6n737 JS6n738 JS6n739 JS6n740 JS6n741 JS6n742 JS6n743 JS6n744 JS6n745 JS6n746 JS6n747 JS6n748 JS6n749 JS6n750 JS6n751 JS6n752 JS6n753 JS6n754 JS6n755 JS6n756 JS6n757 JS6n758 JS6n759 JS6n760 JS6n761 JS6n762 JS6n763 JS6n764 JS6n765 JS6n766 JS6n767 JS6n768 JS6n769 JS6n770 JS6n771 JS6n772 JS6n773 JS6n774 JS6n775 JS6n776 JS6n777 JS6n778 JS6n779 JS6n780 JS6n781 JS6n782 JS6n783 JS6n784 JS6n785 JS6n786 JS6n787 JS6n788 JS6n789 JS6n790 JS6n791 JS6n792 JS6n793 JS6n794 JS6n795 JS6n796 JS6n797 JS6n798 JS6n799 JS6n800 JS6n801 JS6n802 JS6n803 JS6n804 JS6n805 JS6n806 JS6n807 JS6n808 JS6n809 JS6n810 JS6n811 JS6n812 JS6n813 JS6n814 JS6n815 JS6n816 JS6n817 JS6n818 JS6n819 JS6n820 JS6n821 JS6n822 JS6n823 JS6n824 JS6n825 JS6n826 JS6n827 JS6n828 JS6n829 JS6n830 JS6n831 JS6n832 JS6n833 JS6n834 JS6n835 JS6n836 JS6n837 JS6n838 JS6n839 JS6n840 JS6n841 JS6n842 JS6n843 JS6n844 JS6n845 JS6n846 JS6n847 JS6n848 JS6n849 JS6n850 JS6n851 JS6n852 JS6n853 JS6n854 JS6n855 JS6n856 JS6n857 JS6n858 JS6n859 JS6n860 JS6n861 JS6n862 JS6n863 JS6n864 JS6n865 JS6n866 JS6n867 JS6n868 JS6n869 JS6n870 JS6n871 JS6n872 JS6n873 JS6n874 JS6n875 JS6n876 JS6n877 JS6n878 JS6n879 JS6n880 JS6n881 JS6n882 JS6n883 JS6n884 JS6n885 JS6n886 JS6n887 JS6n888 JS6n889 JS6n890 JS6n891 JS6n892 JS6n893 JS6n894 JS6n895 JS6n896 JS6n897 JS6n898 JS6n899 JS6n900 JS701 JS702 JS703 JS704 JS705 JS706 JS707 JS708 JS709 JS710 JS711 JS712 JS713 JS714 JS715 JS716 JS717 JS718 JS719 JS720 JS721 JS722 JS723 JS724 JS725 JS726 JS727 JS728 JS729 JS730 JS731 JS732 JS733 JS734 JS735 JS736 JS737 JS738 JS739 JS740 JS741 JS742 JS743 JS744 JS745 JS746 JS747 JS748 JS749 JS750 JS751 JS752 JS753 JS754 JS755 JS756 JS757 JS758 JS759 JS760 JS761 JS762 JS763 JS764 JS765 JS766 JS767 JS768 JS769 JS770 JS771 JS772 JS773 JS774 JS775 JS776 JS777 JS778 JS779 JS780 JS781 JS782 JS783 JS784 JS785 JS786 JS787 JS788 JS789 JS790 JS791 JS792 JS793 JS794 JS795 JS796 JS797 JS798 JS799 JS800 JS801 JS802 JS803 JS804 JS805 JS806 JS807 JS808 JS809 JS810 JS811 JS812 JS813 JS814 JS815 JS816 JS817 JS818 JS819 JS820 JS821 JS822 JS823 JS824 JS825 JS826 JS827 JS828 JS829 JS830 JS831 JS832 JS833 JS834 JS835 JS836 JS837 JS838 JS839 JS840 JS841 JS842 JS843 JS844 JS845 JS846 JS847 JS848 JS849 JS850 JS851 JS852 JS853 JS854 JS855 JS856 JS857 JS858 JS859 JS860 JS861 JS862 JS863 JS864 JS865 JS866 JS867 JS868 JS869 JS870 JS871 JS872 JS873 JS874 JS875 JS876 JS877 JS878 JS879 JS880 JS881 JS882 JS883 JS884 JS885 JS886 JS887 JS888 JS889 JS890 JS891 JS892 JS893 JS894 JS895 JS896 JS897 JS898 JS899 JS900 JS901 JS902 JS903 JS904 JS905 JS906 JS907 JS908 JS909 JS910 JS911 JS912 JS913 JS914 JS915 JS916 JS917 JS918 JS919 JS920 JS921 JS922 JS923 JS924 JS925 JS926 JS927 JS928 JS929 JS930 JS931 JS932 JS933 JS934 JS935 JS936 JS937 JS938 JS939 JS940 JS941 JS942 JS943 JS944 JS945 JS946 JS947 JS948 JS949 JS950 JS951 JS952 JS953 JS954 JS955 JS956 JS957 JS958 JS959 JS960 JS961 JS962 JS963 JS964 JS965 JS966 JS967 JS968 JS969 JS970 JS971 JS972 JS973 JS974 JS975 JS976 JS977 JS978 JS979 JS980 JS981 JS982 JS983 JS984 JS985 JS986 JS987 JS988 JS989 JS990 JS991 JS992 JS993 JS994 JS995 JS996 JS997 JS998 JS999 JS1000 | ||
| JSH00 JSH00 JSH00 JSH00 JSH00 JSH00 JSH00 JSH00 JSH00 JSH00 JSH00 JSH00 JSH00 JSH00 JSH00 JSH00 JSH00 JSH00 JSH00 JSH00 JSH00 JSH00 JSH00 JSH00 JSH00 JSH00 | JSH00 JSH00 JSH00 JSH00 JSH00 JSH00 JSH00 JSH00 JSH00 JSH00 JSH00 JSH00 JSH00 JSH00 JSH00 JSH00 JSH00 JSH00 JSH00 JSH00 JSH00 JSH00 JSH00 JSH00 JSH | ||
| 29 | JSH00 JSH00 JSH00 JSH00 JSH00 JSH00 JSH00 JSH00 JSH00 JSH00 JSH00 JSH00 JSH00 JSH00 JSH00 JSH00 JSH00 JSH00 JSH00 JSH00 JSH00 JSH00 JSH00 JSH00 JSH | JSH00 JSH00 JSH00 JSH00 JSH00 JSH00 JSH00 JSH00 JSH00 JSH00 JSH00 JSH00 JSH00 JSH00 JSH00 JSH00 JSH00 JSH00 JSH00 JSH00 JSH00 JSH00 JSH00 JSH00 JSH150 JSH; 22 JSHJSH00 JSH00 JSH00 JSH00 JSH00 JSH00 JSH00 JSH00 JSH00 JSH00 JSH00 JSH00 JSH00 JSH00 JSH00 JSH00 JSH00 JSH00 JSH00 JSH00 JSH00 JSH00 JSH00 JSH00 JSH03 JSH00 JSH00 JSH00 JSH00 JSH00 JSH00 JSH00 JSH00 JSH00 JSH00 JSH00 JSH00 JSH00 JSH00 JSH00 JSH00 JSH00 JSH00 JSH00 JSH00 JSH00 JSH00 JSH00 JSH00 JSH03 JHSH00 JSH00 JSH00 JSH00 JSH00 JSH00 JSH00 JSH00 JSH00 JSH00 JSH00 JSH00 JSH00 JSH00 JSH00 JSH00 JSH00 JSH00 JSH00 JSH00 JSH00 JSH00 JSH00 JSH00 JSH00 JHSH00 JSH00 JSH00 JSH00 JSH00 JSH00 JSH00 JSH00 JSH00 JSH00 JSH00 JSH00 JSH00 JSH00 JSH00 JSH00 JSH00 JSH00 JSH00 JSH00 JSH00 JSH00 JSH00 JSH00 JSH3 JSH00 JSH00 JSH00 JSH00 JSH00 JSH00 JSH00 JSH00 JSH00 JSH00 JSH00 JSH00 JSH00 JSH00 JSH00 JSH00 JSH00 JSH00 JSH00 JSH00 JSH00 JSH00 JSH00 JSH00 JSH3 JSIHSH00 JSH00 JSH00 JSH00 JSH00 JSH00 JSH00 JSH00 JSH00 JSH00 JSH00 JSH00 JSH00 JSH00 JSH00 JSH00 JSH00 JSH00 JSH00 JSH00 JSH00 JSH00 JSH00 JSH00 JSH03 SSH00 JSH00 JSH00 JSH00 JSH00 JSH00 JSH00 JSH00 JSH00 JSH00 JSH00 JSH00 JSH00 JSH00 JSH00 JSH00 JSH00 JSH00 JSH00 JSH00 JSH00 JSH00 JSH00 JSH03 SSH00 SSH00 JSH00 JSH00 JSH00 JSH00 JSH00 JSH00 JSH00 JSH00 JSH00 JSH00 JSH00 JSH00 JSH00 JSH00 JSH03 SSH00 SSH00 JSH00 JSH00 JSH00 JSH00 JSH00 JSH00 JSH00 JHSH00 JSH00 JSH00 JSH00 JSH00 JSH00 JSH00 JSH00 JSH00 JSH00 JSH00 JSH00 JSH00 JSH00 JSH03 SSH00 SSH00 JSH00 JSH00 JSH00 JSH00 JSH00 JSH00 JSH00 JSH00 JHSH00 JSH00 JSH00 JSH00 JSH00 JSH00 JSH00 JSH00 JSH00 JSH00 JSH00 JSH03 SSH00 SSH00 JSH00 JSH00 JSH00 JSH00 JSH00 JSH00 JSH00 JSH03 SSH00 SSH00 JSH00 JSH00 JSH00 JSH00 JSH00 JSH03 SSH00 SSH00 JSH00 JSH00 JSH00 JSH00 JSH03 SSH00 SSH00 JSH00 JSH00 JSH00 JSH03 SSH00 SSH00 JSH00 JSH00 JSH00 JSH03 SSH00 SSH00 JSH00 JSH00 JSH00 JSH03 SSH00 SSH00 JSH00 JSH00 JSH03 SSH00 SSH00 JSH00 JSH00 JSH03 SSH00 SSH00 JSH00 JSH00 JSH03 SSH00 SSH00 JSH00 JSH00 JSH03 SSH00 SSH00 JSH00 JSH00 JSH03 SSH00 SISH00 SISH00 SISH00 SISH00 SISH00 SISH00 SISH03 SSH00 SISH00 SISH00 SISH00 SISH03 SSH00 SISH00 SISH00 SISH03 SSH00 SISH00 SISH00 SISH03 SSH00 SISH00 SISH00 SISH03 SSH00 SISH00 SISH03 SSH00 SISH00 SISH04 SSH00 SISH00 SISH04 SSH00 SISH04 SSH04 SSH04 SSH04 SSH04 SSH04 SSH04 SSH04 SSH04 SSH04 SSH04 SSH04 SSH04 SSH04 SSH04 SSH15 SSH15 SSH15 SSH15 SSH15 SSH15 SSH15 SSH15 SSH15 SSH15 SSH15 SSH15 SSH15 SSH15 SSH15 SSH15 SSH15 SSH15 SSH15 SSH15 SSH15 SSH15 SSH15 SSH15 SSH15 SSH16 SSH16 SSH16 SSH16 SSH16 SSH16 SSH16 SSH16 SSH16 SSH16 SSH16 SSH16 SSH16 SSH16 SSH16 SSH16 SSH16 SSH16 SSH16 SSH16 SSH16 SSH16 SSH16 SSH16 SSH16 SSH17 SSH17 SSH17 SSH17 SSH17 SSH17 SSH17 SSH17 SSH17 SSH17 SSH17 SSH17 SSH17 SSH17 SSH17 SSH17 SSH17 SSH17 SSH17 SSH17 SSH17 SSH17 SSH17 SSH17 SSH17 SSH18 SSH18 SSH18 SSH18 SSH18 SSH18 SSH18 SSH18 SSH18 SSH18 SSH18 SSH18 SSH18 SSH18 SSH18 SSH18 SSH18 SSH18 SSH18 SSH18 SSH18 SSH18 SSH18 SSH18 SSH18 SSH19 SSH19 SSH19 SSH19 SSH19 SSH19 SSH19 SSH19 SSH19 SSH19 SSH19 SSH19 SSH19 SSH19 SSH19 SSH19 SSH19 SSH19 SSH19 SSH19 SSH19 SSH19 SSH19 SSH19 SSH19 SSH18 SSH18 SSH18 SSH18 SSH18 SSH18 SSH18 SSH18 SSH18 SSH18 SSH18 SSH18 SSH18 SSH18 SSH18 SSH18 SSH18 SSH18 SSH18 SSH18 SSH18 SSH18 SSH18 SSH18 SSH17 SSH17 SSH17 SSH17 SSH17 SSH17 SSH17 SSH17 SSH17 SSH17 SSH17 SSH17 SSH17 SSH17 SSH17 SSH17 SSH17 SSH17 SSH17 SSH17 SSH17 SSH17 SSH17 SSH17 SSH16 SSH16 SSH16 SSH16 SSH16 SSH16 SSH16 SSH16 SSH16 SSH16 SSH16 SSH16 SSH16 SSH16 SSH16 SSH16 SSH16 SSH16 SSH16 SSH16 SSH16 SSH16 SSH16 SSH16 SSH15 SSH15 SSH15 SSH15 SSH15 SSH15 SSH15 SSH15 SSH15 SSH15 SSH15 SSH15 SSH15 SSH15 SSH15 SSH15 SSH15 SSH15 SSH15 SSH15 SSH15 SSH15 SSH15 SSH15 SSH14 SSH14 SSH14 SSH14 SSH14 SSH14 SSH14 SSH14 SSH14 SSH14 SSH14 SSH14 SSH14 SSH14 SSH14 SSH14 SSH14 SSH14 SSH14 SSH14 SSH14 SSH14 SSH14 SSH14 SSH14 SSH13 SSH13 SSH13 SSH13 SSH13 SSH13 SSH13 SSH13 SSH13 SSH13 SSH13 SSH13 SSH13 SSH13 SSH13 SSH13 SSH13 SSH13 SSH13 SSH13 SSH13 SSH13 SSH13 SSH13 SSH13 SSH12 SSH12 SSH12 SSH12 SSH12 SSH12 SSH12 SSH12 SSH12 SSH12 SSH12 SSH12 SSH12 SSH12 SSH12 SSH12 SSH12 SSH12 SSH12 SSH12 SSH12 SSH12 SSH12 SSH12 SSH12 SSH11 SSH11 SSH11 SSH11 SSH11 SSH11 SSH11 SSH11 SSH11 SSH11 SSH11 SSH11 SSH11 SSH11 SSH11 SSH11 SSH11 SSH11 SSH11 SSH11 SSH11 SSH11 SSH11 SSH11 SSH11 SSH12 SSH12 SSH12 SSH12 SSH12 SSH12 SSH12 SSH12 SSH12 SSH12 SSH12 SSH12 SSH12 SSH12 SSH12 SSH12 SSH12 SSH12 SSH12 SSH12 SSH12 SSH12 SSH12 SSH12 SSH13 SSH13 SSH13 SSH13 SSH13 SSH13 SSH13 SSH13 SSH13 SSH13 SSH13 SSH13 SSH13 SSH13 SSH13 SSH13 SSH13 SSH13 SSH13 SSH13 SSH13 SSH13 SSH13 SSH13 SSH14 SSH14 SSH14 SSH14 SSH14 SSH14 SSH14 SSH14 SSH14 SSH14 SSH14 SSH14 SSH14 SSH14 SSH14 SSH14 SSH14 SSH14 SSH14 SSH14 SSH14 SSH14 SSH14 SSH14 SSH15 SSH15 SSH15 SSH15 SSH15 SSH15 SSH15 SSH15 SSH15 SSH15 SSH15 SSH15 SSH15 SSH15 SSH15 SSH15 SSH15 SSH15 SSH15 SSH15 SSH15 SSH15 SSH15 SSH15 SSH2 | JSH00 JSH00 JSH00 JSH00 JSH00 JSH00 JSH00 JSH00 JSH00 JSH00 JSH00 JSH00 JSH00 JSH00 JSH00 JSH00 JSH00 JSH00 JSH00 JSH00 JSH00 JSH00 JSH00 JSH00 JSH25 SSH25 SSH25 SSH25 SSH25 SSH25 SSH25 SSH25 SSH25 SSH25 SSH25 SSH25 SSH25 SSH25 SSH25 SSH25 SSH25 SSH25 SSH25 SSH25 SSH25 SSH25 SSH25 SSH25 SSH25 SSH25 SISHTSISHTSISHTSISHTSISHTSISHTSISHTSISHTSISHTSISHTSISHTSISHTSISHTSISHTSISHTSISHTSISHTSISHTSISHTSISHTSISHTSISHTSISHTSISHTSISHTSISHTSISHTSISHTSISHTSISHTSISHTSISHTSISHTSISHTSIRSSISHTSISHTSISHTSISHTSISHTSISHTSISHTSISHTSISHTSISHTSISHTSISHTSISHTSISHTSISHTSISHTSISHTSISHTSISHTSISHTSISHTSISHTSISHTSISHTSISHTSISHTSISHTSISHTSISHTSISHTSISHTSISHTSISHTSIISSISHTSISHTSISHTSISHTSISHTSISHTSISHTSISHTSISHTSISHTSISHTSISHTSISHTSISHTSISHTSISHTSISHTSISHTSISHTSISHTSISHTSISHTSISHTSISHTSISHTSISHTSISHTSISHTSISHTSISHTSISHTSISHTSISHTTSSISHTSISHTSISHTSISHTSISHTSISHTSISHTSISHTSISHTSISHTSISHTSISHTSISHTSISHTSISHTSISHTSISHTSISHTSISHTSISHTSISHTSISHTSISHTSISHTSISHTSISHTSISHTSISHTSISHTSISHTSISHTSISHTSISHTsISHTSISHTSISHTSISHTSISHTSISHTSISHTSISHTSISHTSISHTSISHTSISHTSISHTSISHTSISHTSISHTSISHTSISHTSISHTSISHTSISHTSISHTSISHTSISHTSISHTSISHTSISHTSISHTSISHTSISHTSISHTSISHTSISHTSisISHTSISHTSISHTSISHTSISHTSISHTSISHTSISHTSISHTSISHTSISHTSISHTSISHTSISHTSISHTSISHTSISHTSISHTSISHTSISHTSISHTSISHTSISHTSISHTSISHTSISHTSISHTSISHTSISHTSISHTSISHTSISHTSISHTSIsISHTSISHTSISHTSISHTSISHTSISHTSISHTSISHTSISHTSISHTSISHTSISHTSISHTSISHTSISHTSISHTSISHTSISHTSISHTSISHTSISHTSISHTSISHTSISHTSISHTSISHTSISHTSISHTSISHTSISHTSISHTSISHTSISHTS is IS IS IS IS IS IS IS IS IS IS IS IS IS IS IS IS IS IS IS IS IS IS IS IS IS IS IS IS IS IS IS IS IS IS IS IS IS IS IS IS IS IS IS IS IS IS IS IS IS IS IS IS IS IS IS IS IS IS IS IS IS IS IS IS IS IS IS IS IS IS IS IS IS IS IS IS IS IS IS IS IS IS IS IS IS IS IS IS IS IS IS IS IS IS IS IS IS IS IS IS ISSHTSISHTSISHTSISHTSISHTSISHTSISHTSISHTSISHTSISHTSISHTSISHTSISHTSISHTSISHTSISHTSISHTSISHTSISHTSISHTSISHTSISHTSISHTSISHTSISHTSISHTSISHTSISHTSISHTSISHTSISHTSISHTSISHTSISITSSISHTSISHTSISHTSISHTSISHTSISHTSISHTSISHTSISHTSISHTSISHTSISHTSISHTSISHTSISHTSISHTSISHTSISHTSISHTSISHTSISHTSISHTSISHTSISHTSISHTSISHTSISHTSISHTSISHTSISHTSISHTSISHTSISHT SISHTSISHTSISHTSISHTSISHTSISHTSISHTSISHTSISHTSISHTSISHTSISHTSISHTSISHTSISHTSISHTSISHTSISHTSISHTSISHTSISHTSISHTSISHTSISHTSISHTSISHTSISHTSISHTSISHTSISHTSISHTSISHTSISHT S is IS IS IS IS IS IS IS IS IS IS IS IS IS IS IS IS IS IS IS IS IS IS IS IS IS IS IS IS IS IS IS IS IS IS IS IS IS IS IS IS IS IS IS IS IS IS IS IS IS IS IS IS IS IS IS IS IS IS IS IS IS IS IS IS IS IS IS IS IS IS IS IS IS IS IS IS IS IS IS IS IS IS IS IS IS IS IS IS IS IS IS IS IS IS IS IS IS IS IssHTSISHTSISHTSISHTSISHTSISHTSISHTSISHTSISHTSISHTSISHTSISHTSISHTSISHTSISHTSISHTSISHTSISHTSISHTSISHTSISHTSISHTSISHTSISHTSISHTSISHTSISHTSISHTSISHTSISHTSISHTSISHTSISHTSIS HT S is IS IS IS IS IS IS IS IS IS IS IS IS IS IS IS IS IS IS IS IS IS IS IS IS IS IS IS IS IS IS IS IS IS IS IS IS IS IS IS IS IS IS IS IS IS IS IS IS IS IS IS IS IS IS IS IS IS IS IS IS IS IS IS IS IS IS IS IS IS IS IS IS IS IS IS IS IS IS IS IS IS IS IS IS IS IS IS IS IS IS IS IS IS IS IS IS IS Iss HT S is IS IS IS IS IS IS IS IS IS IS IS IS IS IS IS IS IS IS IS IS IS IS IS IS IS IS IS IS IS IS IS IS IS IS IS IS IS IS IS IS IS IS IS IS IS IS IS IS IS IS IS IS IS IS IS IS IS IS IS IS IS IS IS IS IS IS IS IS IS IS IS IS IS IS IS IS IS IS IS IS IS IS IS IS IS IS IS IS IS IS IS IS IS IS IS IS Iss HT s is is is is is is is is is is is is is is is is is is is is is is is is is is is is is is is is is is is is is is is is is is is is is is is is is is is is is is is is is is is is is is is is is is is is is is is is is is is is is is is is is is is is is is is is is is is is is is is is is is is isis is is is is is is is is is is is is is is is is is is is is is is is is is is is is is is is is is is is is is is is is is is is is is is is is is is is is is is is is is is is is is is is is is is is is is is is is is is is is is is is is is is is is is is is is is is is is is is is is is is is its is its is its is its is its is its is its is its is its is its is its is its is its is its is its is its is its is its is its is its is its is its is its is its is its is its is its is its is its is its is its is its is its is its is its is its is its is its is its is its is its is its is its is its is its is its is its is its is its is its is his is his is his is his is his is his is his is his is his is his is his is his is his is his is his is his is his is his is his is his is his is his is his is his is his is his is his is his is his is his is his is his is his is his is his is his is his is his is his is his is his is his is his is his is his is his is his is his is his is his is its is his is his is his is his is his is his is his is his is his is his is his is his is his is his is his is his is his is his is his is his is his is his is his is his is his is his is his is his is his is his is his is his is his is his is his is his is his is his is his is his is his is his is his is his is his is his is his is his is its is its is its is its is its is its is its is its is its is its is its is its is its is its is its is its is its is its is its is its is its is its is its is its is its is its is its is its is its is its is its is its is its is its is its is its is its is its is its is its is its is its is its is its is its is its is its is its is its is this is its is its is its is its is its is its is its is its is its is its is its is its is its is its is its is its is its is its is its is its is its is its is its is its is its is its is its is its is its is its is its is its is its is its is its is its is its is its is its is its is its is its is its is its is its is its is its is its is its is it's its its its its its its its its its its its its its its its its its its its its its its its its its its its its its its its its its its its its its its its its its its its its its its its its its its its its its its its its its its its its its its its its its its its its its its its its its its its its its its its its its its its its its its its its its its its its its its its its its its its itsits its its its its its its its its its its its its its its its its its its its its its its its its its its its its its its its its its its its its its its its its its its its its its its its its its its its its its its its its its its its its its its its its its its its its its its its its its its its its its its its its its its its its its its its |
| 30600 5165006666666666666666666666666666666666666666666666666666666666666666666666666666666666666666666666666666 | 1 - 1.5 38 | 1; 35666666666666666666666666666666666666666666666666666666666666666666666666666666666666666666666666666 | |
| 40 | 356666666666666666666666666666666666666666666666666666666666666666666666666666666666666666666666666 | 1.5 38 | 1; 35666666666666666666666666666666666666666666666666666666666666666666666666666666666666666 |
| 41 | 3035 35500, 35500 | - | 112; 10000000000000000000000000000000000000000000000000000000000000000000000000000000000000000000000000000 |
| 42 | 3035 35500, 35500 | - | 112; 15566666666666666666666666666666666666666666666666666666666666666666666666666666666666666666666666666 |
Uzbekistan, Uzbekistan, Uzbekistan, Uzbekistan, Uzbekistan, Uzbekistan, Uzbekistan, Uzbekistan, Uzbekistan, Uzbekistan, Uzbekistan, Uzbekistan, Uzbekistan, Uzbekistan, Uzbekistan, Uzbekistan, Uzbekistan, Uzbekistan, Uzbekistan, Uzbekistan, Uzbekistan, Uzbekistan, Uzbekistan, Uzbekistan, Uzbekistan, Uzbekistan, Uzbekistan, Uzbekistan, Uzbekistan, Uzbekistan, Uzbekistan, Uzbekistan, Uzbekistan, Uzbekistan,
( g_{1}g_{2}g_{3}g_{4}g_{5}g_{6}g_{7}g_{8}g_{9}g_{10}g_{11}g_{12}g_{13}g_{14}g_{15}g_{16}g_{17}g_{18}g_{19}g_{20}g_{21}g_{22}g_{23}g_{24}g_{25}g_{26}g_{27}g_{28}g_{29}g_{30}g_{31}g_{32}g_{33}g_{34}g_{35}g_{36}g_{37}g_{38}g_{39}g_{40}g_{41}g_{42}g_{43}g_{44}g_{45}g_{46}g_{47}g_{48}g_{49}g_{50}g_{51}g_{52}g_{53}g_{54}g_{55}g_{56}g_{57}g_{58}g_{59}g_{60}g_{61}g_{62}g_{63}g_{64}g_{65}g_{66}g_{67}g_{68}g_{69}g_{70}g_{71}g_{72}g_{73}g_{74}g_{75}g_{76}g_{77}g_{78}g_{79}g_{80}g_{81}g_{82}g_{83}g_{84}g_{85}g_{86}g_{87}g_{88}g_{89}g_{90}g_{91}g_{92}g_{93}g_{94}g_{95}g_{96}g_{97}g_{98}g_{99}h_1h_2h_3h_4h_5h_6h_7h_8h_9h_10h_11h_12h_13h_14h_15h_16h_17h_18h_19h_20h_21h_22h_23h_24h_25h_26h_27h_28h_29h_30h_31h_32h_33h_34h_35h_36h_37h_38h_39h_40h_41h_42h_43h_44h_45h_46h_47h_48h_49h_50h_51h_52h_53h_54h_55h_56h_57h_58h_59h_60h_61h_62h_63h_64h_65h_66h_67h_68h_69h_70h_71h_72h_73h_74h_75h_76h_77h_78h_79h_80h_81h_82h_83h_84h_85h_86h_87h_88h_89h_90h_91h_92h_93h_94h_95h_96h_97h 98h 99
13.2 borough borough boroughs

30600000000000000000000000000000000000000000000000000000000000
g 6m0n 30 g'ymo b'g o bsbgmdmo3m0n 3g0m63j3s0n, g6m0n 10s1m7yrmjds4p g 0n60ndy3-10 g'ymonos sog g 3g0sd3o6gm 3m7ymdommm0n 3g0d3gns7gms. d6s0g0n 3mmbjun gsgndgrmwqds 3m7ymdommm0s0n 5mugdymn 6s6h6b n0nm0n 2sdmyc6j0nn.
4. BEDIENFELD....305
4.1 Versenkbare Knöpfe......305
4.2 Überblick – Bedienfeld......305
4.3 Display....306
natural_image
Line drawing of a rectangular tray with grid pattern and side notches (no text or symbols)
natural_image
Simple line drawing of a square tray with internal diagonal lines (no text or symbols)
natural_image
Simple line drawing of a rectangular tray with internal lines and shading (no text or symbols)Temperatursensor
natural_image
Pure electrical circuit lines without any symbols
natural_image
Two mechanical components with grooves and mounting holes, shown in 3D rendering (no text or symbols)4. BEDIENFELD
natural_image
Technical line drawing of a wooden ladder with two magnified views showing internal structure details (no text or symbols)natural_image
Technical line drawing of a mechanical component or bracket assembly (no text or symbols)8.2 Temperatursensor
natural_image
Symbol of a trash bin crossed with a diagonal line, representing no waste or elimination (no text or labels)natural_image
Recycling symbol with three arrows forming a triangle (no text or labels)natural_image
Line drawing of a rectangular grid-patterned plate (no text or symbols)Ταψί ψησίματος
natural_image
Simple line drawing of a square tray with internal diagonal lines (no text or symbols)
natural_image
Simple line drawing of a rectangular tray with internal lines and triangular segments (no text or symbols)
natural_image
Pure electrical circuit lines without any symbols
natural_image
Technical line drawing of two mechanical components with grooves and mounting brackets (no text or symbols)8. XP'HΣH TΩN EΞAPTHMATΩN

ΠΡΟΕΙΔΟΠΟΙΗΣΗ!
natural_image
Line drawing of a rectangular tray with grid pattern and side notches (no text or symbols)
natural_image
Simple line drawing of a square tray with internal diagonal lines (no text or symbols)
natural_image
Simple line drawing of a rectangular tray with internal lines and shading (no text or symbols)Húshömérő szenzor
natural_image
Pure electrical circuit lines without any symbols
natural_image
Technical line drawing of two mechanical components with grooves and mounting holes (no text or symbols)4. KEZELÓPANEL
natural_image
Line drawing of a rectangular plate with grid pattern (no text or symbols)
natural_image
Simple line drawing of a square tray with internal diagonal lines (no text or symbols)Grila/cepamā panna
natural_image
Simple line drawing of a rectangular tray with internal lines and shading (no text or symbols)
natural_image
Pure electrical circuit lines without any symbols
natural_image
Two identical mechanical components with grooves and mounting holes, shown in isometric view (no text or symbols)4. VADĪBAS PANELIS
4.1 legremdējamie regulatori
natural_image
Technical line drawing of a metal frame structure with two magnified views showing internal details (no text or symbols)natural_image
Pure technical line drawing of a rectangular frame with curved edges and railings, no text or symbols present8.2 Termozonde
natural_image
Line drawing of a rectangular grating or tray with grid lines, no text or symbols presentKepimo padėklas
Pyragams ir sausainiams kepti.
Grilio / kepinimo prikaistuvis
Kepti ir skrudinti arba riebalams surinkti.
Maisto termometras
natural_image
Simple line drawing of a square tray with internal diagonal lines (no text or symbols)
natural_image
Simple line drawing of a rectangular tray with internal lines and triangular segments (no text or symbols)
natural_image
Pure electrical circuit lines without any symbols
natural_image
Technical line drawing of two mechanical components with grooves and mounting brackets (no text or symbols)4. VALDYMO SKYDELIS
natural_image
Technical line drawing of a ladder with two circular insets showing internal structural details (no text or symbols)natural_image
Line drawing of a rectangular plate with grid pattern and side holes (no text or symbols)
natural_image
Simple line drawing of a square tray with internal grid lines (no text or symbols)
natural_image
Simple line drawing of a rectangular tray with internal lines and triangular segments (no text or symbols)
natural_image
Pure electrical circuit lines without any symbols
natural_image
Technical line drawing of two mechanical components with grooves and mounting brackets (no text or symbols)4. PAINEL DE COMANDOS
4.1 Botões retráteis
natural_image
Technical line drawing of a wooden ladder with two magnified views showing internal structure details (no text or symbols)natural_image
Technical line drawing of a mechanical component or bracket assembly (no text or symbols)8.2 Sonda térmica
Available on the App Store

GETTON Google Play
ASISTENȚĂ PENTRU CLIENTI ȘI SERVICE
natural_image
Line drawing of a rectangular tray with grid pattern and side notches (no text or symbols)
natural_image
Simple line drawing of a square tray with internal diagonal lines (no text or symbols)
natural_image
Simple line drawing of a rectangular tray with internal lines and shading (no text or symbols)Senzor de gătire
natural_image
Pure electrical circuit lines without any symbols
natural_image
Technical line drawing of two mechanical components with grooves and mounting holes (no text or symbols)4. PANOUL DE COMANDĂ
4.1 Butoane de selectare retractabile
natural_image
Line drawing of a rectangular plate with horizontal grooves and grid lines (no text or symbols)
natural_image
Simple line drawing of a square tray with internal diagonal lines (no text or symbols)
natural_image
Simple line drawing of a rectangular tray with internal lines and triangular segments (no text or symbols)
natural_image
Pure electrical circuit lines without any symbols
natural_image
Technical line drawing of two mechanical components with grooves and mounting holes (no text or symbols)natural_image
Line drawing of a rectangular grid-patterned tray or rack (no text or symbols)
natural_image
Simple line drawing of a square tray with internal diagonal lines (no text or symbols)
natural_image
Simple line drawing of a rectangular tray with internal lines and shading (no text or symbols)Температурни сензор
natural_image
Pure electrical circuit lines without any symbols
natural_image
Two technical line drawings of mechanical components with no visible text or symbols4. КОМАНДНА ТАБЛА
natural_image
Technical line drawing of a wooden ladder with two magnified views showing internal structure details (no text or symbols)natural_image
Pure technical line drawing of a mechanical component or bracket (no text or symbols)8.2 Температурни сензор
Температурни сензор – мери температуру унутар хране.
natural_image
Line drawing of a kitchen appliance with a tray and attached electrical outlet (no text or symbols)
natural_image
Two laboratory setups: a cylindrical container with a probe and wire, and a beaker with a probe inserted into liquid (no text or symbols)natural_image
Line drawing of a rectangular plate with radial grooves and a central slot (no text or symbols)
natural_image
Simple line drawing of a square tray with internal grid lines (no text or symbols)
natural_image
Simple line drawing of a square tray with internal diagonal lines (no text or symbols)
natural_image
Pure electrical circuit lines without any symbols
natural_image
Technical line drawing of two mechanical components with grooves and mounting brackets (no text or symbols)4. OVLÁDACÍ PANEL
4.1 Zasúvacie ovládače
natural_image
Technical line drawing of a wooden pallet with two circular insets showing internal structure details (no text or symbols)natural_image
Line drawing of a kitchen appliance with a tray and outlet, showing a cable being inserted into the interior (no text or symbols)
natural_image
Illustration of a cylindrical device connected to a wire with a probe, and a beaker with a probe inserted into liquid (no text or symbols)8. UPORABA DODATNE OPREME......689
8.1 Vstavljanje opreme.... 689
8.2 Sonda za hrano.... 690
9. DODATNE FUNKCIJE....691
9.1 Ključavnica....691
9.2 Samodejni izklop....692
9.3 Ventilator za hlajenje.... 692
10. NAMIGI IN NASVETI.... 692
natural_image
Line drawing of a rectangular plate with grid pattern (no text or symbols)
natural_image
Simple line drawing of a square tray with internal diagonal lines (no text or symbols)Posoda za žar/pekač
natural_image
Line drawing of a square tray with internal diagonal lines (no text or symbols)
natural_image
Pure electrical circuit lines without any symbols
natural_image
Technical line drawing of two mechanical components with grooves and mounting holes (no text or symbols)4. UPRAVLJALNA PLOŠČA
natural_image
Line drawing of a rectangular tray with grid pattern and side notches (no text or symbols)
natural_image
Simple line drawing of a square tray with internal diagonal lines (no text or symbols)
natural_image
Simple line drawing of a rectangular tray with internal lines and shading (no text or symbols)Sonda térmica
natural_image
Pure electrical circuit lines without any symbols
natural_image
Two technical line drawings of mechanical components with no visible text or symbols4. PANEL DE MANDOS
4.1 Mandos escamoteables
Available on the App Store

GETTON Google Play
natural_image
Line drawing of a rectangular plate with grid pattern (no text or symbols)
natural_image
Simple line drawing of a square tray with internal diagonal lines (no text or symbols)natural_image
Simple line drawing of a rectangular tray with internal lines and shading (no text or symbols)
natural_image
Pure electrical circuit lines without any symbols
natural_image
Two identical mechanical components with grooves and mounting holes, shown in isometric view (no text or symbols)4. ПАНЕЛЬ КЕРУВАННЯ
natural_image
Technical line drawing of a metal frame structure with two magnified views showing internal details (no text or symbols)natural_image
Pure technical line drawing of a mechanical component or bracket (no text or symbols)8.2 Термощуп
natural_image
Line drawing of a kitchen appliance with a tray and attached electrical outlet (no text or symbols)
natural_image
Two laboratory setups: a cylindrical container with a probe and wire, and a beaker with a probe inserted into liquid (no text or symbols)natural_image
Five circular icons representing shopping and e-commerce activities: cart, printer, gear, and shopping cart (no text or symbols)
CE
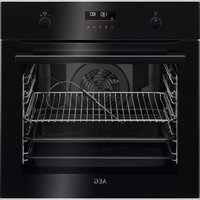
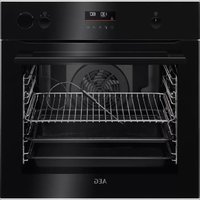
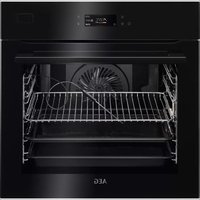
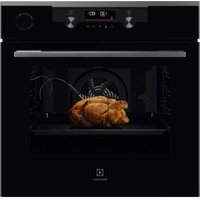
- ЗА ОТЛИЧНИ РЕЗУЛТАТИ
- Тава за печене
- КОМАНДНО ТАБЛО
- Pekač za pecivo
- UPRAVLJAČKA PLOČA
- Uvlačive tipke
- Pregled upravljačke ploče
- Zaslon
- PRIJE PRVE UPORABE
- SVAKODNEVNA UPORABA
- Plech na pečení
- OVLÁDACÍ PANEL
- Zasunovací ovladače
- BESCHRIJVING VAN HET PRODUCT...120
- PROBLEEMOPLOSSING.....143
- Voedselsensor
- BEDIENINGSPANEEEL
- PROBLEEMOPLOSSING
- WAARSCHUWING!
- CUSTOMER CARE AND SERVICE
- CONTENTS
- CLOCK FUNCTIONS......166
- USING THE ACCESSORIES......168
- ADDITIONAL FUNCTIONS...... 170
- HINTS AND TIPS....171
- CARE AND CLEANING....173
- TROUBLESHOOTING.....178
- ENERGY EFFICIENCY......180
- MENU STRUCTURE....181
- ENVIRONMENTAL CONCERNS......182
- ⚠ SAFETY INFORMATION
- Children and vulnerable people safety
- General Safety
- SAFETY INSTRUCTIONS
- Installation
- WARNING!
- Electrical connection
- Use
- Care and cleaning
- Pyrolytic cleaning
- Internal lighting
- Service
- Disposal
- PRODUCT DESCRIPTION
- General overview
- Accessories
- Wire shelf
- Baking tray
- Grill- / Roasting pan
- Food sensor
- Telescopic runners
- CONTROL PANEL
- Retractable knobs
- Control panel overview
- Display
- BEFORE FIRST USE
- Initial cleaning
- Initial preheating
- DAILY USE
- How to set: Heating functions
- Heating functions
- Notes on: Moist Fan Baking
- How to set: Assisted Cooking
- Assisted Cooking
- CLOCK FUNCTIONS
- Clock functions
- How to set: Clock functions
- USING THE ACCESSORIES
- Inserting accessories
- Food Sensor
- ADDITIONAL FUNCTIONS
- Lock
- Automatic switch-off
- Cooling fan
- HINTS AND TIPS
- Cooking recommendations
- Moist Fan Baking
- Moist Fan Baking - recommended accessories
- Cooking tables for test institutes
- Information for test institutes
- Grill
- CARE AND CLEANING
- Notes on cleaning
- How to clean: Cavity embossment
- How to remove: Shelf supports
- How to use: Pyrolytic Cleaning
- CAUTION!
- Cleaning Reminder
- How to remove and install: Door
- How to replace: Lamp
- TROUBLESHOOTING
- What to do if...
- The appliance does not turn on or does not heat up
- Components
- Error codes
- Cleaning
- Service data
- ENERGY EFFICIENCY
- Product Information and Product Information Sheet
- Energy saving
- Cooking with fan
- Residual heat
- Keep food warm
- Cooking with the lamp off
- Moist Fan Baking
- MENU STRUCTURE
- Menu
- ENVIRONMENTAL CONCERNS
- PARIMATE TULEMUSTE SAAVUTAMISEKS
- JUHTPANEEL
- Sonde de cuisson
- BANDEAU DE COMMANDE
- zinogb3g06g b6n63s 0s dmdu5b7m0mds
- ventralmenting of the quality of
- მონტაეი
- 3m586mmou 3s5gmo
- 3500000000000000000000000000000000000000000
- borough borough boroughs
- BEDIENFELD....305
- Temperatursensor
- BEDIENFELD
- Temperatursensor
- Ταψί ψησίματος
- XP'HΣH TΩN EΞAPTHMATΩN
- ΠΡΟΕΙΔΟΠΟΙΗΣΗ!
- Húshömérő szenzor
- KEZELÓPANEL
- Grila/cepamā panna
- VADĪBAS PANELIS
- legremdējamie regulatori
- Termozonde
- Kepimo padėklas
- Grilio / kepinimo prikaistuvis
- Maisto termometras
- VALDYMO SKYDELIS
- PAINEL DE COMANDOS
- Botões retráteis
- Sonda térmica
- ASISTENȚĂ PENTRU CLIENTI ȘI SERVICE
- Senzor de gătire
- PANOUL DE COMANDĂ
- Butoane de selectare retractabile
- Температурни сензор
- КОМАНДНА ТАБЛА
- Температурни сензор
- Zasúvacie ovládače
- UPORABA DODATNE OPREME......689
- DODATNE FUNKCIJE....691
- NAMIGI IN NASVETI.... 692
- Posoda za žar/pekač
- UPRAVLJALNA PLOŠČA
- Sonda térmica
- PANEL DE MANDOS
- Mandos escamoteables
- ПАНЕЛЬ КЕРУВАННЯ
- Термощуп
Brand : ELECTROLUX
Model : BPE556360M
Category : Electric oven