
BEPW2000 - Pressure washer BLACK & DECKER - Free user manual and instructions
Find the device manual for free BEPW2000 BLACK & DECKER in PDF.

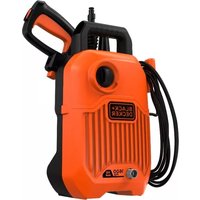
| Product type | High pressure cleaner |
| Brand | Black & Decker |
| Model | BEPW2000 |
| Rated power | 2000 W |
| Maximum pressure | 150 bar (2100 PSI) |
| Nominal pressure | 105 bar (1523 PSI) |
| Nominal flow rate | 5.8 L/min |
| Maximum flow rate | 7.5 L/min |
| Maximum water temperature | 50 °C |
| High pressure hose length | 6 m |
| Weight | 3.2 kg |
| Power supply | Mains (230 V ~ 50 Hz) |
| Motor type | Brushed |
| Motor protection | IPX5 |
| Self-priming | Yes |
| Guaranteed sound power level | 93 dB(A) |
| Main functions | Adjustable high pressure cleaning, detergent application, rinsing |
| Included accessories | Turbo nozzle, adjustable nozzle, detergent bottle, nozzle cleaning tool |
| Maintenance and cleaning | Clean the water inlet filter and nozzles regularly |
| Safety | Double insulation, trigger lock, automatic shut-off |
| Spare parts and repairability | Original parts available; contact an authorized center |
| General information | Domestic use only; do not use on drinking water network without separator |
Frequently Asked Questions - BEPW2000 BLACK & DECKER
The nozzles can be stored on the lance, and the spray handle attaches to the back of the appliance.
User questions about BEPW2000 BLACK & DECKER
0 question about this device. Answer the ones you know or ask your own.
Ask a new question about this device
Download the instructions for your Pressure washer in PDF format for free! Find your manual BEPW2000 - BLACK & DECKER and take your electronic device back in hand. On this page are published all the documents necessary for the use of your device. BEPW2000 by BLACK & DECKER.
USER MANUAL BEPW2000 BLACK & DECKER
This pressure washer is intended for household use for cleaning boats, cars, decks, driveways, grills, house siding, motorcycles, patios, and outdoor furniture.
Do not let children come into contact with the tool. Supervision is required when inexperienced operators use this tool.
This tool is intended for consumer use only.
Safety instructions
IMPORTANT SAFETY INSTRUCTIONS

WARNING: When using this pressure washer, basic safety precautions should always be followed including the following:
- If the supply cord is damaged, it must be replaced by the manufacturer or an authorised BLACK+DECKER Service Centre in order to avoid a hazard.
- This machine is not intended for use by persons (including children) with reduced physical, sensory or mental capabilities, or lack of experience and knowledge.
Children should be supervised to ensure that they do not play with the appliance.
Read all the instructions before using the product.
To reduce the risk of injury, close supervision is necessary when a product is used near children. - Know how to stop the product and bleed pressures quickly. Be thoroughly familiar with the controls.
Stay alert - watch what you are doing.
Do not operate the product when fatigued or under the influence of alcohol or drugs. - Keep operating area clear of all persons and animals.
Do not overreach or stand on unstable support. Keep good footing and balance at all times.
Follow the maintenance instructions specified in the manual. - The electric supply connection shall be made by a qualified electrician and comply with IEC 60364-1. It is recommended that the electric supply to this machine should include either a residual current device that will interrupt the supply if the leakage current to earth exceeds 30mA for 30ms or a device that will prove the earth circuit.

WARNING: Risk of injection or injury - do not direct discharge stream at persons or animals.

WARNING: Read this entire manual before attempting to assemble, operate or install the product.

WARNING: This unit was designed for specific applications. It should not be modified and/or used for any application other than that which it was designed.
NOTICE: Always store your pressure washer in a location where the temperature will not fall below 40^ (4^) . Freeze damage is not covered by the warranty.
- Do not touch plug or outlet with wet hands.
- Avoid accidental starts. Move switch on unit to OFF position before connecting or disconnecting cord to electrical outlets.
- Water spray must never be directed towards any electric wiring or directly towards the pressure washer machine itself or fatal electric shock may occur.
- Never carry your pressure washer by the cord. Do not pull on the cord to disconnect from the outlet.
- To prevent damage, the cord should not be crushed, placed next to sharp objects or near a heat source.
- Check power cords before using. Damaged cords can reduce performance of pressure washer or cause a fatal electrical shock
- The narrow pin point stream is very powerful. It is not recommended for use on painted surfaces, wood surfaces or items attached with an adhesive backing.
- Keep operating area clear of all persons and animals.
- Always use both hands when operating pressure washer to maintain complete control of the wand.
- Do not touch nozzle or water spray while operating. Never place hands in front of nozzle.
- Wear safety goggles while operating. Wear protective clothing and footwear to protect against accidental spraying.
- Disconnect power plug from the outlet when not in use and prior to the detaching of the high pressure hose.
- Never tie knots or kink the high pressure hose as damage could result. Inspect the high pressure hose regularly. Replace the hose immediately if it is damaged, worn or shows any signs of cracks, bubbles, pinholes, or other leakage. Never grasp a high-pressure hose that is leaking or damaged.
- Do not operate or store this product in temperatures below 40^ (4^) . Freeze damage is not covered by the warranty.
- Carefully observe all chemical instructions and warnings before using. Use only approved pressure washer cleaners. Do not use bleach, chlorine, or any cleaners containing acids. Always follow manufacturer's label recommendations for proper use of cleaners. Always protect eyes, skin and respiratory system from cleaners.
-
The pressure washer should not be used in areas where gas vapors may be present. An electric spark could cause an explosion or fire.
-
To minimize the amount of water getting into the pressure washer, the unit should be placed as far as possible from the cleaning site during operation.
- To prevent accidental discharge, the spray gun should be secured by locking the trigger when not in use.
- To allow free air circulation, the pressure washer should NOT be covered during operation.
- Never touch, grasp or attempt to cover a pinhole or similar water leak on the high-pressure hose. The stream of water IS under high pressure and WILL penetrate skin.
- Use only hoses and accessories rated for pressure higher than your pressure washer's PSI / Bar. Never use with any other manufacturer's accessories or components.
- Never defeat the safety features of this product.
- Do not operate machine with missing, broken or unauthorised parts.
- Never spray flammable liquids or use pressure washer in areas containing combustible dust, liquid, or vapors.

WARNING : This machine has been designed for use with the cleaning agent supplied or recommended by the manufacturer. The use of other cleaning agents or chemicals may adversely affect the safety of the machine.

WARNING: During use of high pressure cleaners, aerosols may be formed. Inhalation of aerosols can be hazardous to health.

WARNING: High pressure jets can be dangerous if subject to misuse. The jet must not be directed at persons, live electrical equipment or the machine itself.

WARNING: Do not use the machine within range of persons unless they wear protective clothing.

WARNING: Do not direct the jet against yourself or others in order to clean clothes or foot-wear.

WARNING: Risk of explosion - Do not spray flammable liquids.

WARNING: High pressure cleaners shall not be used by children or untrained personnel.

WARNING: High pressure hoses, fittings and couplings are important for the safety of the machine. Use only hoses, fittings and couplings recommended by the manufacturer.

WARNING: To ensure machine safety, use only original spare parts from the manufacturer or approved by the manufacturer.

WARNING: Water that has flowed through backflow preventers is considered to be nonpotable.

WARNING: the machine shall be disconnected from its power source during cleaning or maintenance and when replacing parts.

WARNING: Do not use the machine if a supply cord or important parts of the machine are damaged, e.g. safety devices, high pressure hoses, trigger gun.

WARNING: Inadequate extension cords can be dangerous. If an extension cord is used, it shall be suitable for outdoor use, and the connection has to be kept dry and off the ground. It is recommended that this is accomplished by means of a cord reel which keeps the socket at least 60~mm above the ground.

WARNING: Always switch off the mains disconnecting switch when leaving the machine unattended.

WARNING: Depending on the application, shielded nozzles can be used for high pressure cleaning, which will reduce the emission of hydrous aerosols dramatically. However, not all applications allow the use of such a device. If shielded nozzles are not applicable for the protection against aerosols, a respiratory mask of class FFP 2 or equivalent may be needed, depending on the cleaning environment.
Safety of others
This tool is not intended for use by persons (including children) with reduced physical, sensory or mental capabilities, or lack of experience and knowledge, unless they have been given supervision or instruction concerning use of the tool by a person responsible for their safety.
Children should be supervised to ensure that they do not play with the appliance.
Vibration
The declared vibration emission values stated in the technical data and the declaration of conformity have been measured in accordance with a standard test method provided by EN60335-2-79 and may be used for comparing one tool with another. The declared vibration emission value may also be used in a preliminary assessment of exposure.

WARNING: The vibration emission value during actual use of the Pressure Washer can differ from the declared value depending on the ways in which the tool is used. The vibration level may increase above the level stated.
When assessing vibration exposure to determine safety measures required by 2002/44/EC to protect persons regularly using power tools in employment, an estimation of vibration exposure should consider, the actual conditions of use and the way the tool is used, including taking account of all parts of the operating cycle such as the times when the tool is switched off and when it is running idle in addition to the trigger time.
Labels on tool
The following symbols are shown on the tool along with the date code:


Warning! To reduce the risk of injury, the user must read the instruction manual.

Wear eye protection.

Wear ear protection.

Machine not suitable for connection to the potable water mains.
Directive 2000/14/EC guaranteed sound power. BEPW1300
Directive 2000/14/EC guaranteed sound power. BEPW1700
Directive 2000/14/EC guaranteed sound power. BEPW2000
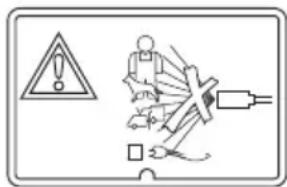
Never direct the water jet at people, animals, the machine or electric components
Electrical safety

This tool is double insulated; therefore no earth wire is required. Always check that the power supply corresponds to the voltage on the rating plate.
Features (Fig. A)
- High pressure hose
- Spray wand
- Nozzle button
- Spray handle
- Spray handle grip
- Trigger lock-off
-
Trigger
-
Spray fan to pencil jet nozzle
- Hose connector
10.Filter - Soap bottle
- Soap bottle applicator
- Hose connect button
- Nozzle cleaning tool
- Turbo nozzle (BEPW2000)
- Pressure washer unit
- ON/OFF dial
- Handle
- Retractable handle (BEPW1700, BEPW2000)
- High pressure water outlet
- Cord retaining hook
- Power cord
Assembly and Adjustments

WARNING: Before attempting any of the following operations, make sure that the tool is switched off and unplugged.
Attaching Spray Handle (Fig. B)
- To connect the spray handle (4) to the spray wand (2), insert the end of the spray handle onto the end of the spray wand.
- Press in and turn the spray handle counterclockwise to lock it into position.
Attaching High Pressure Hose (Fig. C)
NOTICE: Never pull high pressure hose or water supply hose to move pressure washer. This could damage hose and/or pump inlet and/or pump outlet.
- To connect the high pressure hose ( 1 ) to the spray handle ( 4 ) , depress the hose connect button ( 13 ) while clicking the hose end ( 23 ) into the spray handle. Release the hose connect button when the hose end has clicked into position.
- To connect the high pressure hose to the pressure washer unit (16), screw the hose collar (24) onto the high pressure water outlet (20).
NOTE: Uncoil the high pressure hose before installation to prevent kinks.
NOTE: Avoid cross threading when installing the hose.
Cross threading will cause leaks.
Attaching Garden Hose (Fig. D, K2)
NOTE: Before connecting the garden hose to the pressure washer unit, run water through the garden hose for thirty seconds to clear any debris from inside the garden hose.
-
To connect the garden hose to the pressure washer unit (16), screw the filter (10) to the water intake (25).
-
Connect the garden hose to the hose connector ( 9 ) by loosening the screw of the garden connector and attaching the hose onto the connector. Connect the garden hose to the hose connector ( 9 ) by screwing the garden hose to the garden connector.
- Attach the garden hose (28) mounted onto the garden connector to the filter (10) until it "clicks".
NOTE: Always disconnect the garden hose after usage.
Attaching Nozzles (Fig. A, E)

DANGER: Risk of fluid injection. Do not direct discharge stream toward persons, unprotected skin, eyes or any pets or animals. Serious injury will occur.

WARNING: Flying objects could cause risk of serious injury. DO NOT attempt to change nozzles while pressure washer is running. Turn pressure washer unit OFF before changing nozzles.
- To connect a nozzle to the spray wand (2), depress the nozzle button (3) on the spray wand and insert the appropriate nozzle.
- Release the button to lock the nozzle in place.
- Give the nozzle a firm tug to ensure the nozzle is locked into place.
Spray Fan to Pencil Jet Nozzle
Adjusting Fan Pattern (Fig. E1, E2)
The angle of spray coming out of the spray wand may be adjusted by rotating the nozzle. This will vary the spray pattern from approximately a 0^ narrow high impact stream to a 60^ wide fan spray.
A wide fan pattern distributes the impact of the water over a larger area, resulting in excellent cleaning action with a reduced risk of surface damage. Large surface areas can be cleaned more quickly using a wide fan pattern.
A narrow pencil jet stream distributes the impact of the water in a concentrated area, resulting in a high impact force on the cleaning surface. Use a narrow pencil jet stream for deep cleaning in a concentrated area. However, use it cautiously, as it may damage some surfaces.
Attaching Soap Bottle (Fig. J4)
To connect the soap bottle (11) to the spray handle (4), insert the end of the soap bottle inside the spray handle and turn the soap bottle counterclockwise to lock it into position.
NOTE: The wand and soap bottle cannot be installed at the same time.
NOTE: The soap bottle should be positioned underneath the barrel of the spray handle. Do not position the soap bottle above the barrel of the plastic gun as this will lead to soap dripping on the barrel.
Spray fan to pencil jet nozzle
For gentle wide area cleaning.
Turbo Nozzle For abrasive cleaning.
(Included with BEPW2000 model only)
Operation

WARNING: To reduce the risk of serious personal injury, turn unit off and disconnect it from power source before making any adjustments or removing/installing attachments or accessories. An accidental start-up can cause injury.
Proper Hand Position (Fig. F)

WARNING: To reduce the risk of serious personal injury, ALWAYS use proper hand position as shown.

WARNING: To reduce the risk of serious personal injury, ALWAYS hold securely in anticipation of a sudden reaction.
Proper hand position requires one hand on the spray handle grip (5) and the other hand on the spray handle (4).
Pressure Washing
Preparing Surface for Cleaning
- Remove objects from the area which could create a hazard such as children's toys or outdoor furniture.
- Insure that all doors and windows are closed tight.
- Protect all plants and trees in the adjacent area with a drop cloth ensuring that they will not be harmed by any overspray.
- Pre-rinse cleaning area with fresh water.
- Use only detergents formulated for pressure washers.
- Always test detergent in an inconspicuous area before use.
Preparing Pressure Washer Unit for Use (Fig. K1, K2, K3, K4)

DANGER: Risk of fluid injection and laceration. When using the high-pressure setting, DO NOT allow the high-pressure spray to come in contact with unprotected skin, eyes, or with any pets or animals. Serious injury will occur.

CAUTION: Before operation:
- Connect the garden hose to a water supply. Water can be drawn from a faucet or another water supply. Refer to Self Priming under Preparing Pressure Washer Unit for Use.
ENGLISH
(Original instructions)
- Connect the high pressure hose to the pressure washer and the spray handle. For instructions on connecting the high pressure hose to the pressure washer and spray handle, please refer to Attaching High Pressure Hose under Assembly and Adjustments.
- Connect the garden hose to the pressure washer. For instructions on connecting the water supply to the pressure washer, please refer to Attaching Garden Hose under Assembly and Adjustments.
- Plug the power cord into an appropriate power source.
Preparing Spray Handle (Fig. A)
IMPORTANT: Before turning on the pressure washer unit, disengage the trigger lock-off (6) and squeeze the trigger (7).
- Disengage the trigger lock-off (6).
- Squeeze the trigger (7). Hold the trigger for 30 seconds to purge the system of air.
- If air is still found in the water stream, continue to run water through the spray handle.
Water Connection

WARNING: According to the applicable regulations, the appliance must never be used on the drinking water network without a system seperator. Use a system seperator as per IEC 61770 Type BA.
Water flowing through a system seporter is not considered drinkable.

- Comply with the regulations of your water supply company.
- All connecting hoses must have properly sealed joints.
- Make sure the supply hose is at least 12.7mm in diameter and is reinforced.
- The appliance should never be used on the drinking water supply without a backflow valve. Water that has passed the backflow valve is considered undrinkable.
Cleaning a Surface (Fig. A)
- To start the pressure washer, rotate the ON/OFF dial (17) to the ON position.
- Confirm that the water faucet is open or use any other water source so that water will be supplied to the pressure washer unit.
- The best angle for spraying water against a cleaning surface is 45^ .
-Spraying head on tends to cause dirt particles to imbed in the surface.
-
When working on vertical surfaces, it is best to apply detergent starting at the bottom and working upwards which will prevent the detergent from sliding down and causing streaks.
-
To disengage the spray handle, release the trigger. NOTE: Excessive pump pressure may be the result of a clogged nozzle. Always turn OFF the pressure washer unit and unplug the unit before attempting to unclog a nozzle.
Detergents (Fig. J1, J2, J3, J4)
For steps on attaching the detergent/soap bottle, please refer to Attaching Soap Bottle under Assembly and Adjustments.
The use of detergents can dramatically reduce cleaning time and assist in the removal of difficult stains. Some detergents have been customized for pressure washer use on specific cleaning tasks.
The cleaning power of detergents comes from applying them to a surface and giving the chemicals time to break down the dirt and grime. Detergents work best when applied at low pressure.
The combination of chemical action and high pressure rinsing is very effective.
On vertical surfaces, apply the detergent starting at the bottom and work your way upward. This will prevent the detergent from sliding down and causing streaks. High pressure rinsing should also progress from the bottom to top. On particularly tough stains, it may be necessary to use a brush in combination with detergents and high pressure rinsing.
Moving the Pressure Washer (Fig. A)
- Turn OFF the pressure washer unit (16) by rotating the ON/OFF dial (17) to the OFF position and then turn OFF the water supply.
- Point the spray wand ( 2 ) in a safe direction and pull the trigger ( 7 ) to release remaining water pressure.
- When the spray wand is completely empty, lift the pressure washer by the handle (18).
Shutdown (Fig. A, D)
- Turn OFF the pressure washer unit (16) by rotating the ON/OFF dial (17) to the OFF position and unplug the cord from the outlet.
- Turn OFF water at the faucet or disconnect from any other water source.
- Discharge residual pressure by squeezing the trigger (7) until no more water comes out of the spray wand (2).
-
Engage the spray trigger lock-off ( 6 ).
-
Disconnect the garden hose (28) from the water intake (25).
- Disconnect the high pressure hose (1) from the high pressure water outlet (20) and drain hose.
Self Priming (Fig. A, C, D, K1, K2, K3, K4)
- Connect the inlet hose to the pressure washer. Refer to Attaching Garden Hose under Assembly and Adjustments.
- Place the free end of the hose with filter attached into the alternative water source (e.g. bucket, etc.)
- Connect the high pressure hose to the spray handle. Please refer to Attaching High Pressure Hose under Assembly and Adjustments.
- Plug the pressure washer unit into a power source.
- Actuate the pressure washer by rotating the ON/OFF dial to the ON position.
- Turn OFF the pressure washer as soon as water is spraying out of the outlet tube of the unit.
- Unplug the pressure washer unit from the power source.
- Assemble the high pressure hose to the outlet tube of the pump.
- Plug the pressure washer unit into a power source.
- Actuate the pressure washer by rotating the ON/OFF dial to the ON position.
- Actuate the trigger of the spray handle to start cleaning work.
Maintenance
Your BLACK+DECKER tool has been designed to operate over a long period of time with a minimum of maintenance. Continuous satisfactory operation depends upon proper tool care and regular cleaning.

Warning! Before performing any maintenance on the tool.
- Regularly clean the ventilation slots in your tool using a soft brush or dry cloth.
Regularly clean the motor housing using a damp cloth. Do not use any abrasive or solvent-based cleaner.
Cleaning
Nozzle Cleaning (Fig. A, G)
If the nozzle becomes clogged with foreign materials, such as dirt, excessive pressure may develop. If the nozzle becomes partially clogged or restricted, the pump pressure will pulsate. Clean the nozzle immediately using the nozzle cleaner.
- Turn OFF and unplug the pressure washer unit ( 16 ).
- Turn OFF the water supply.
- Pull trigger (7) on spray handle (4) to relieve any water pressure.
-
Remove the nozzle from the spray wand (2) by depressing the button (3).
-
Using the nozzle cleaning tool (14), unclog any debris from the nozzle.
- Run water from a faucet or garden hose through the nozzle.
Filter Cleaning (Fig. A, L)
Inspect the filter ( 10 ) before each use and clean if necessary. Remove the filter element and run under clear water to remove any debris.
Storage (Fig. H, I)
- Store in a dry, covered location above freezing temperature. STORE INDOORS.
- Always completely empty water from high pressure hose, pressure washer unit, nozzles, and spray wand.
- Nozzles can be stored in the unit as shown in Fig. H. NOTE: The turbo (BEPW2000) or pen to fan nozzles can be stored on the wand.
- Power cord can be stored coiled up and secured with the cord retaining hook (21) as shown in Fig. I.
- High pressure hose (1) can be stored coiled up and secured on the handle (18) with the help of the hook and latch strap (27) as shown in Fig. 1.
- The spray handle (4) can be stored onto the rear of the unit using the bracket (26) as shown in Fig. 1.
- The spray wand (2) can be stored onto the rear of the unit using the bracket (26) as shown in Fig. 1.
Mains plug replacement (U.K. & Ireland only)
If a new mains plug needs to be fitted:
Safely dispose of the old plug.
- Connect the brown lead to the live terminal in the new plug.
Connect the blue lead to the neutral terminal.

Warning! No connection is to be made to the earth terminal. Follow the fitting instructions supplied with good quality plugs.
Recommended fuse: 13 A.
Protecting the environment

Separate collection. Products and batteries marked with this symbol must not be disposed of with normal household waste.
Products and batteries contain materials that can be recovered or recycled, reducing demand for raw materials. Please recycle electrical products and batteries according to local provisions. Further information is available at www.2helpU.com
Technical data
| BEPW1300 BEPW1700 BEPW2000 | |||
| Type 1 1 1 | |||
| Power | 1300W 1700W 200W | ||
| Rated Flow Rate | 5.2 L/min 5.5 L/min 5.8 L/min | ||
| Max Flow Rate | 6.6 L/min 6.8 L/min 7.5 L/min | ||
| Rated Pressure (Bar/PSI/MPa) | 74 / 1073 / 7.4 83.5 / 1211 / 8.35 | 105 / 1523 / 10.5 | |
| Max Pressure (Bar/PSI/MPa) | 110 / 1600 / 11 125 / 1800 / 12.5 | 150 / 2100 / 15 | |
| Water Temp 50 °C 50 | °C 50 °C | ||
| Inlet Water | Cold Clean water | Cold Clean water | Cold Clean water |
| Guaranteed sound power level LWA dB(A) | 92 91 | 93 | |
| Maximum Input Pressure MPa | 1.0 | 1.0 | 1.0 |
| Motor Protection | IPX5 | IPX5 | IPX5 |
| Motor Type | Brushed | Brushed | Brushed |
| Pump | Aluminum | Aluminum | Aluminum |
| Self Priming | Yes | Yes | Yes |
| Hose Length | 3M 6M | 6M | |
| Integrated Filter | Yes | Yes | Yes |
| Weight | 4.9 KG 6.3 KG 8 KG | ||
| Repulsive Force of the Gun to the Maximum Pressure | 21N | 21N | 21N |
N&V test data:
BEPW1300:
Emission sound pressure level L_PA : 77.0 dB(A); K=3.0 dB(A)
Measured sound power level: L_WA : 89.0 dB(A); K = 2.8 dB(A)
Vibration emission value ah: less than 2.5m / s^2 . K = 0.6m / s^2
BEPW1700:
Emission sound pressure level L_PA : 75 dB(A); K = 3 dB(A)
Measured sound power level: L_WA : 88 dB(A); K = 2.2 dB(A)
Vibration emission value ah: less than 2.5m / s^2 ; K = 0.5m/s²
BEPW2000:
Emission sound pressure level L_PA : 78 dB(A); K=3.0 dB(A)
Measured sound power level: L_WA:91.0dB(A) . K = 1.4dB(A)
Vibration emission value ah: less than 2.5m / s^2 . K = 0.6m / s^2
EC declaration of conformity
MACHINERY DIRECTIVE OUTDOOR NOISE DIRECTIVE

BEPW1300, BEPW1700, BEPW2000 Pressure Cleaner
Black & Decker declares that these products described under "technical data" are in compliance with:
2006/42/EC, EN60335-1:2012+A11:2014+A13:2017+A1:2019 +A14:2019+A2:2019, EN60335-2-79:2012.
2000/14/EC, Annex V
BEPW1300:
Measured sound power level: L_WA : 89.0 dB(A); K = 2.8 dB(A)
The guaranteed sound power level L_WA : 92 dB(A)
BEPW1700:
Measured sound power level: L_WA : 88 dB(A); K = 2.2 dB(A)
The guaranteed sound power level L_WA 91 dB(A)
BEPW2000:
Measured sound power level: L_WA:91.0dB(A) . K = 1.4 dB(A) The guaranteed sound power level L_WA:93dB(A)
These products also comply with Directive 2014/30/EU and 2011/65/EU. For more information, please contact Black & Decker at the following address or refer to the back of the manual. The undersigned is responsible for compilation of the technical file and makes this declaration on behalf of Black & Decker.
Paeck Dcpuech
Patrick Diepenbach
General Manager, Benelux
Black and Decker,
Declaration of conformity The Supply of Machinery (Safety) Regulations 2008

BEPW1300, BEPW1700, BEPW2000 Pressure Cleaner
Black & Decker declares that these products described under "technical data" are in compliance with:
The Supply of Machinery (Safety) Regulations, 2008, S.I. 2008/1597 (as amended):
EN60335-1:2012+A11:2014+A13:2017+A1:2019+A14:2019
The Noise Emission in the Environment by Equipment for use
Outdoors Regulations 2001, S.I. 2001/1701 (as amended). Schedule 8.
BEPW1300:
Measured sound power level: L_WA : 89.0 dB(A); K = 2.8 dB(A)
The guaranteed sound power level L_WA : 92 dB(A)
BEPW1700:
Measured sound power level: L_WA : 88 dB(A); K = 2.2 dB(A)
The guaranteed sound power level L_WA 91 dB(A)
BEPW2000:
Measured sound power level: L_WA : 91.0 dB(A); K=1.4 dB(A)
The guaranteed sound power level L_WA : 93 dB(A)
These products conform to the following UK Regulations:
Electromagnetic Compatibility Regulations, 2016,
S.I.2016/1091 (as amended).
The Restriction of the Use of Certain Hazardous Substances
in Electrical and Electronic Equipment Regulations 2012, S.I.
2012/3032 (as amended).
For more information, please contact Black & Decker at the following address or refer to the back of the manual.
The undersigned is responsible for compilation of the technical file and makes this declaration on behalf of Black & Decker.

Paul Featherstone
Product Director - Outdoor Products Group
Black and Decker UK,
270 Bath Road, Slough
Berkshire, SL1 4DX
England
30.12.2021
Guarantee
Black & Decker is confident of the quality of its products and offers consumers a 24 month guarantee from the date of purchase. This guarantee is in addition to and in no way prejudices your statutory rights. The guarantee is valid within the territories of the Member States of the European Union, European Free Trade Area and the United Kingdom.
To claim on the guarantee, the claim must be in accordance with Black & Decker Terms and Conditions and you will need to submit proof of purchase to the seller or an authorised repair agent. Terms and conditions of the Black & Decker 2 year guarantee and the location of your nearest authorised repair agent can be obtained on the Internet at www.2helpU.com, or by contacting your local Black & Decker office at the address indicated in this manual.
Please visit our website www.blackanddecker.co.uk to register your new Black & Decker product and receive updates on new products and special offers.
TROUBLESHOOTING

WARNING: Risk of Unsafe Operation. Before servicing unit unplug or disconnect electrical supply, turn water supply off, discharge residual pressure, and engage spray handle lock-off.
PROBLEM CAUSE CORRECTION
| Motor does not start. Unit not plugged in. Plug in power cord. | ||
| ON/OFF switch is in the OFF position. Turn switch to the "ON" position. | ||
| Wand trigger not being squeezed. Squeeze trigger with switch in "ON" position. | ||
| Unit does not reach high pressure. Water faucet not fully turned on. Open water valve fully. | ||
| Water inlet filter clogged. Remove filter and rinse to clean. | ||
| Nozzle worn. Replace with new nozzle. | ||
| Pump is sucking air. Check that hoses and fittings are air tight. Turn OFF machine and purge pump by squeezing trigger gun until a steady flow of water emerges from the nozzle. | ||
| Water supply restricted. Check water hose for kinks, leaks and blockage. | ||
| Unit is not properly self primed. | Refer to Self Priming under Assembly and Adjustments. | |
| Output pressure varies high/low. | Not enough inlet water supply. | Turn water on full force - check hose for leaks and kinks. |
| Pump is sucking air. Check that hoses and fittings are air tight. Turn OFF machine and purge pump by squeezing trigger gun until a steady flow of water emerges from the nozzle. | ||
| Water inlet screen clogged. | To unclog, rinse OFF with water. | |
| Discharge nozzle is obstructed. | Blow out or remove debris. | |
| Garden hose connection leaks. | Loose fittings. | Tighten fittings. |
| Missing/worn rubber washer. | Replace washer in hose adapter. | |
| Spray wand leaks. | Spray wand not properly attached. | Insert the spray wand into the spray handle. Push in and turn to lock spray wand into place. |
| Broken O-ring. | Contact your local dealer. | |
| Pump is excessively noisy. | Pump is sucking air. | Check that hoses and fittings are air tight. Turn OFF machine and purge pump by squeezing trigger gun until a steady flow of water emerges from the nozzle. |
| Water leaks from pump. | Loose fittings. | Check that all fittings are tight. |
| Water seals are damaged or worn. | Contact your local dealer. | |
| Oil leaks. | Oil seals are damaged or worn. | Contact your local dealer. |
| Motor buzzes but fails to run. | Supply voltage below minimum. | Verify that only the pressure washer is running on this circuit. |
| System has residual pressure. | Turn unit off, squeeze trigger on spray wand to release pressure, then turn unit on. | |
| Voltage loss due to extension cord. | Plug directly into outlet. | |
| Cleaner not used for long periods. | Contact your local dealer. | |
| No detergent. | Detergent container is empty. | Add more detergent. |
| Detergent bottle or suction tube not properly connected. | Check connections. | |
| Detergent is too thick. | Use detergent recommended for use in pressure washers only. | |
| Filter on detergent suction tube is clogged. | Run warm water through filter to remove debris. | |
| Damaged or clogged detergent suction tube. | Remove obstruction or replace detergent suction tube. | |
| Discharge nozzle is obstructed. | Blow out or remove debris. | |
Verwendungszweck
General Manager, Benelux
Black and Decker,
General Manager, Benelux
Black and Decker,
(Fig. K1, K2, K3, K4)

Autoadescamento (Fig. A, C, D, K1, K2, K3, K4)
Idropulitrice BEPW1300, BEPW1700, BEPW2000
WAARSCHUWING: Risico van inpuiting of letsel -
General Manager, Benelux
Black and Decker,
PROBLEEM OORZAAK OPLOSSING
Director General, Benelux
Black and Decker,
(Fig. A, C, D, K1, K2, K3, K4)
Director-Geral, Benelux
Black and Decker,
General Manager, Benelux
Black and Decker,
Selvfyllende (Fig. A, C, D, K1, K2, K3, K4)
General Manager, Benelux
Black and Decker,
General Manager, Benelux
Black and Decker,
Ta TPOIOVTA KAI OI MTATAPIECS TEPIEXOUV UIAKAIIOU MTOPOUV VA AVAKTNBOUV N VA AVAKUKWBOUV, WOTVA MEIWBOUV OI AVAYKECS YIA TPOTECS UAE.
Napakaoue va avakukwete Ta nektpiKa Tpoovta KAI TIC mTatapiec ouwva te Touc totikoC kavoviouC.
Nepiootepcnnpopoeic diathevtai oTOV IOTOTTO
www.2helpU.com
TexviKa xaapaktnpitiká


- Safety instructions
- IMPORTANT SAFETY INSTRUCTIONS
- Safety of others
- Vibration
- Labels on tool
- Electrical safety
- Features (Fig. A)
- Assembly and Adjustments
- Attaching Spray Handle (Fig. B)
- Attaching High Pressure Hose (Fig. C)
- Attaching Garden Hose (Fig. D, K2)
- Attaching Nozzles (Fig. A, E)
- Spray Fan to Pencil Jet Nozzle
- Adjusting Fan Pattern (Fig. E1, E2)
- Attaching Soap Bottle (Fig. J4)
- Operation
- Proper Hand Position (Fig. F)
- Pressure Washing
- Preparing Surface for Cleaning
- Preparing Pressure Washer Unit for Use (Fig. K1, K2, K3, K4)
- ENGLISH
- (Original instructions)
- Preparing Spray Handle (Fig. A)
- Water Connection
- Cleaning a Surface (Fig. A)
- Detergents (Fig. J1, J2, J3, J4)
- Moving the Pressure Washer (Fig. A)
- Shutdown (Fig. A, D)
- Self Priming (Fig. A, C, D, K1, K2, K3, K4)
- Maintenance
- Cleaning
- Nozzle Cleaning (Fig. A, G)
- Filter Cleaning (Fig. A, L)
- Storage (Fig. H, I)
- Mains plug replacement (U.K. & Ireland only)
- Protecting the environment
- N&V test data:
- EC declaration of conformity
- MACHINERY DIRECTIVE OUTDOOR NOISE DIRECTIVE
- Declaration of conformity The Supply of Machinery (Safety) Regulations 2008
- Guarantee
- TROUBLESHOOTING
- Verwendungszweck
- (Fig. K1, K2, K3, K4)
- Autoadescamento (Fig. A, C, D, K1, K2, K3, K4)
- WAARSCHUWING: Risico van inpuiting of letsel -
- (Fig. A, C, D, K1, K2, K3, K4)
- Selvfyllende (Fig. A, C, D, K1, K2, K3, K4)
Brand : BLACK & DECKER
Model : BEPW2000
Category : Pressure washer