Neal - Car seat Lionelo - Free user manual and instructions
Find the device manual for free Neal Lionelo in PDF.
User questions about Neal Lionelo
0 question about this device. Answer the ones you know or ask your own.
Ask a new question about this device
Download the instructions for your Car seat in PDF format for free! Find your manual Neal - Lionelo and take your electronic device back in hand. On this page are published all the documents necessary for the use of your device. Neal by Lionelo.
USER MANUAL Neal Lionelo
text_image
Diagram of a car with multiple warning icons and checkmarks, labeled with red X and green checkmarks and red exclamation marks.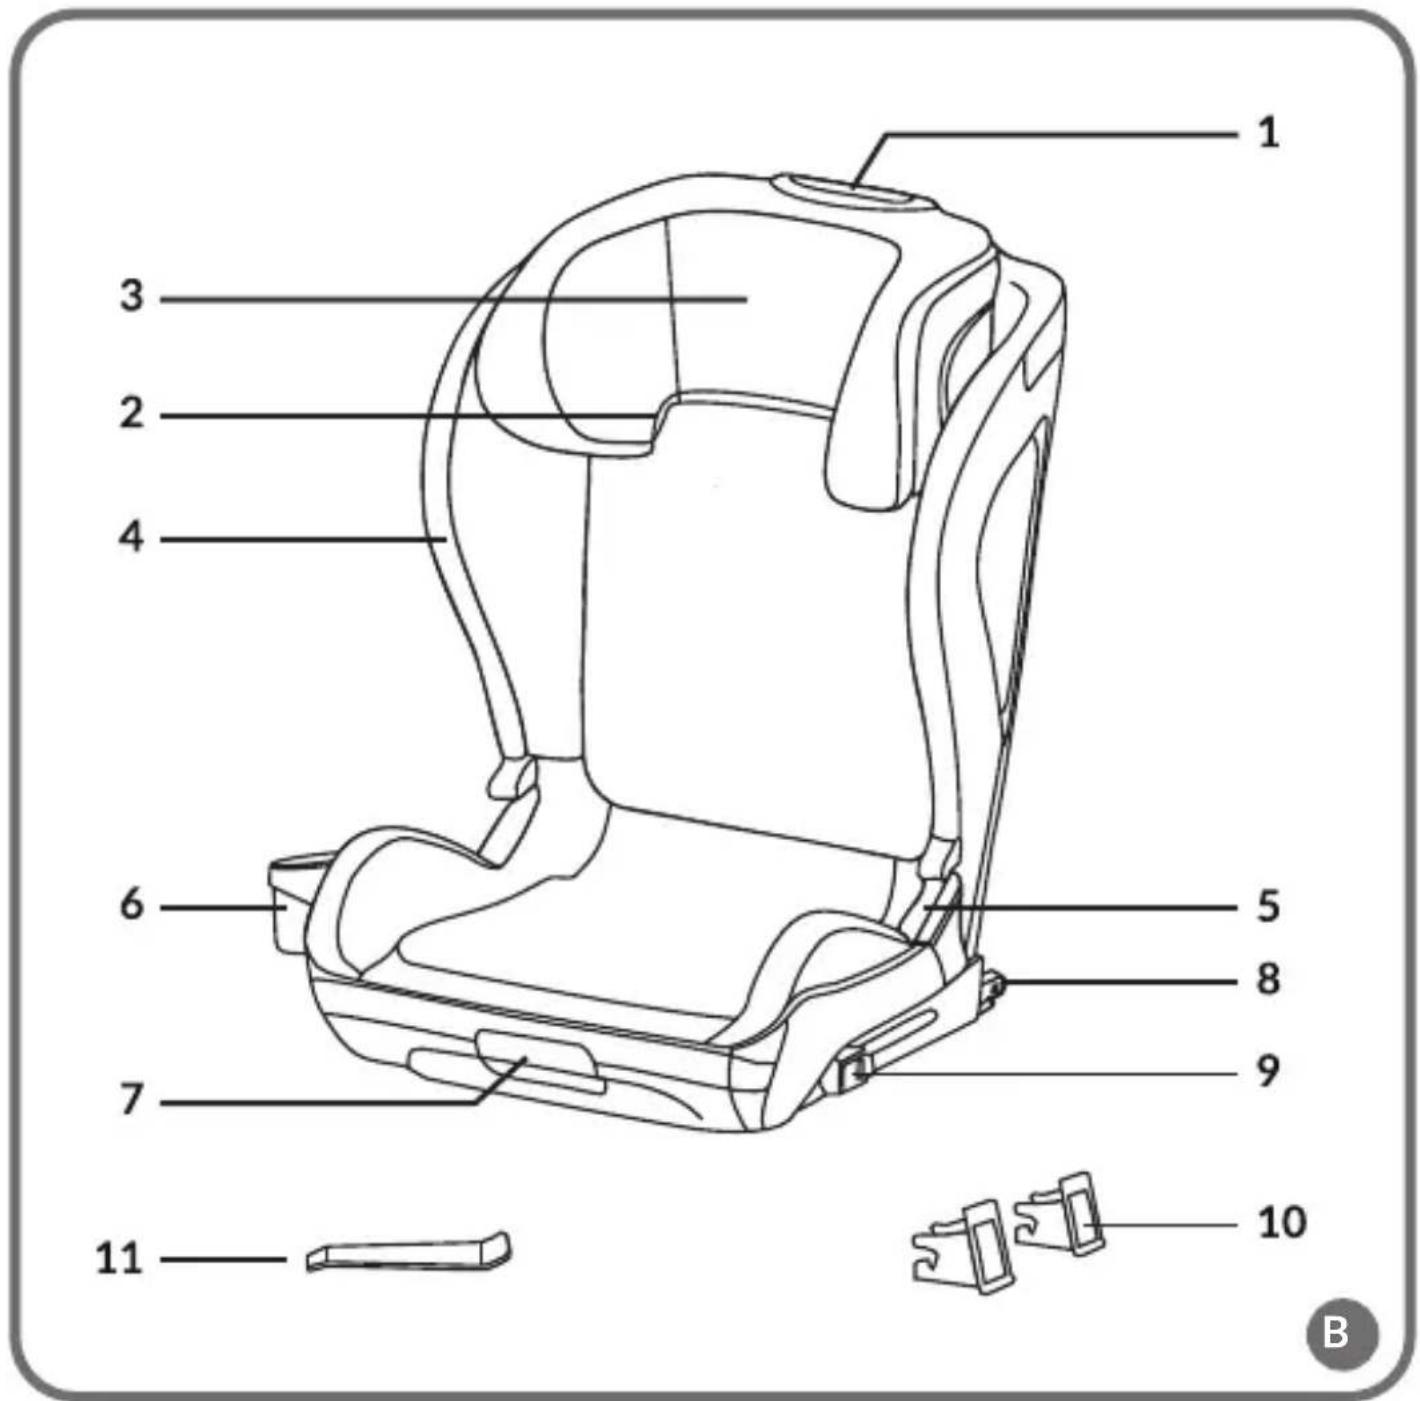
text_image
1 2 3 4 5 6 7 8 9 10 11 B
natural_image
Illustration of a hand holding a tool interacting with a car component, showing blue and green directional arrows (no text or symbols)1
text_image
click2
text_image
Diagram illustrating a mechanical assembly process with blue arrows indicating direction and a magnified view showing two components.3

text_image
Diagram showing car seatbelt buckle assembly with labeled buttons and warning symbols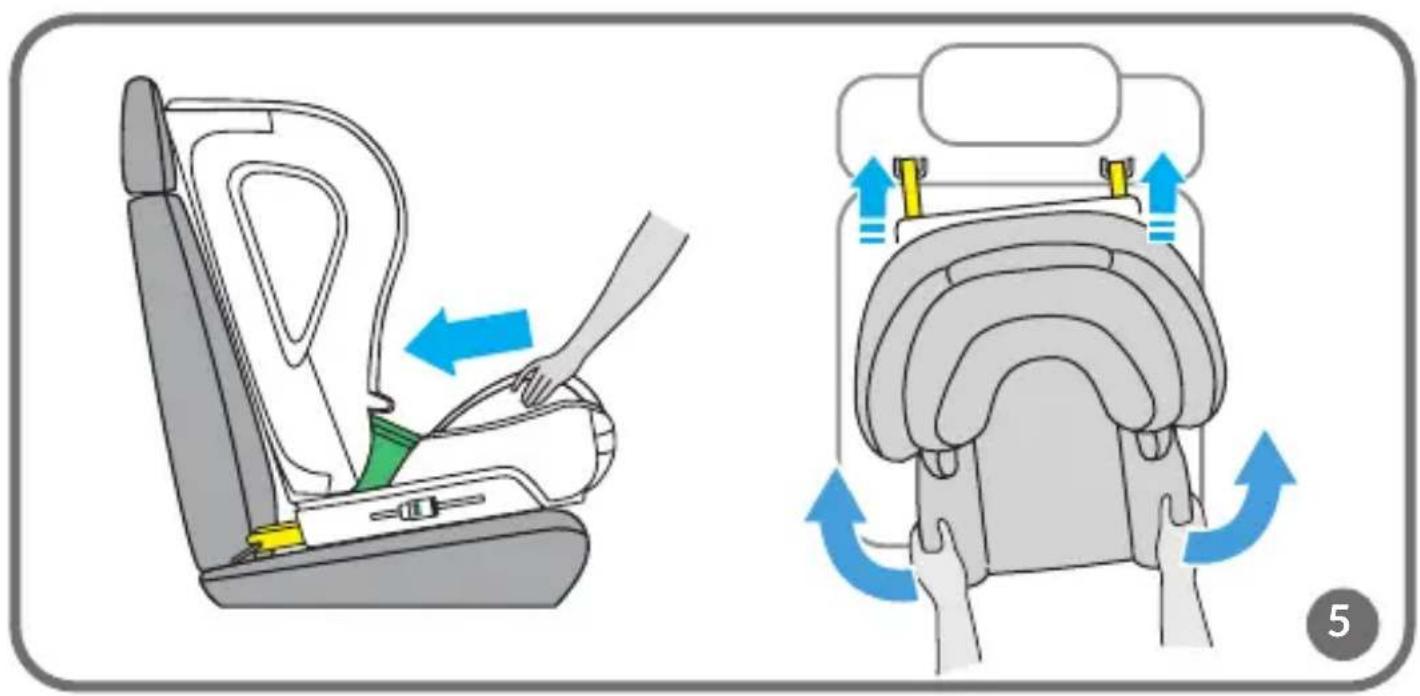
text_image
Diagram illustrating car seatbelt usage, showing left-side and right-side instructions with blue arrows indicating changes.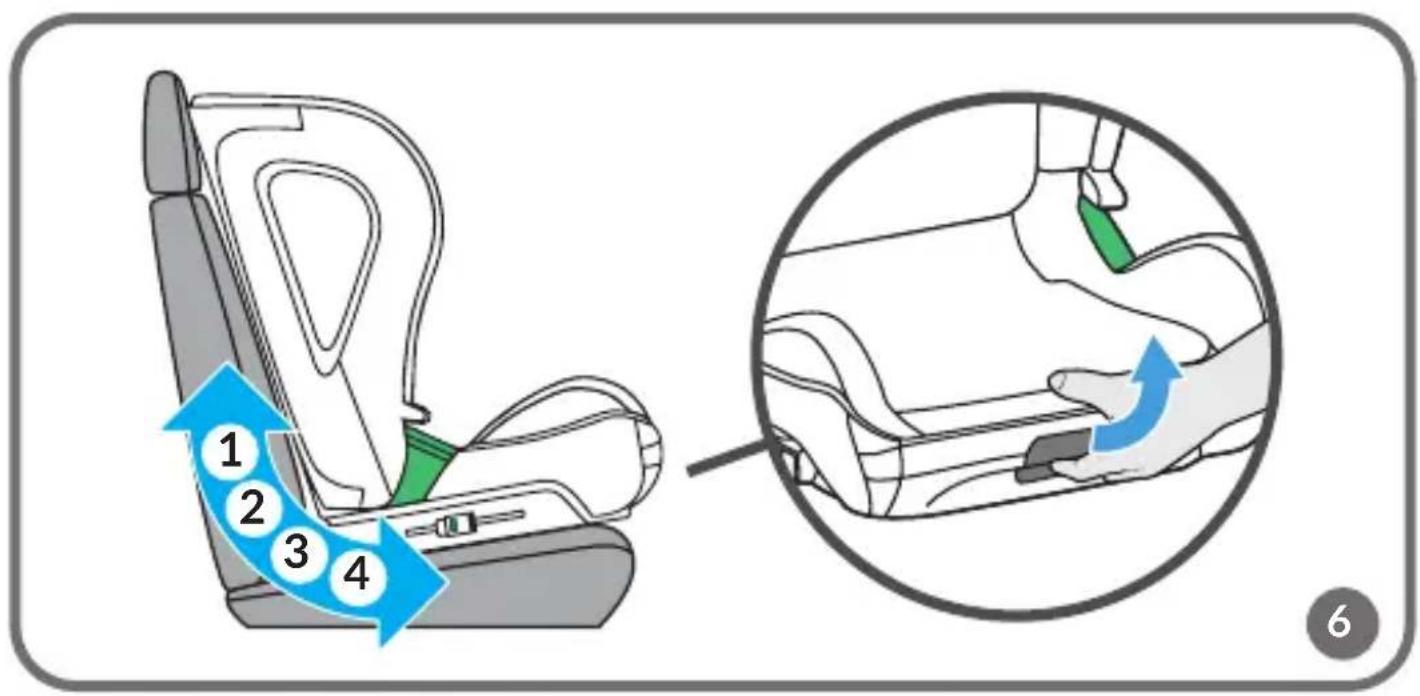
text_image
1 2 3 4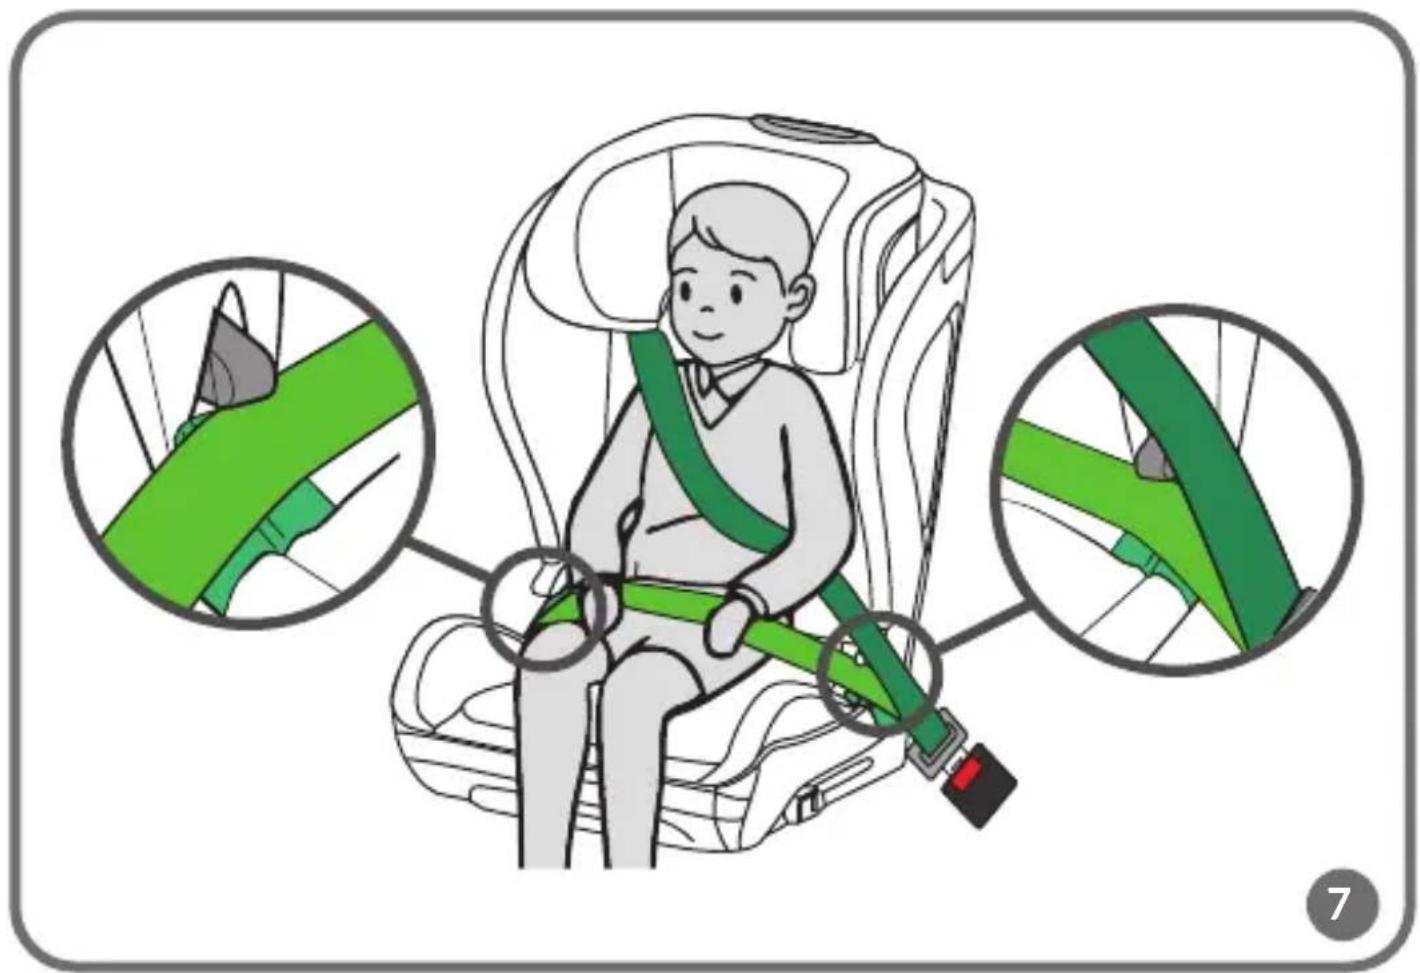
text_image
Illustration of a child wearing a car seatbelt with green straps, showing three close-ups of the seatbelt.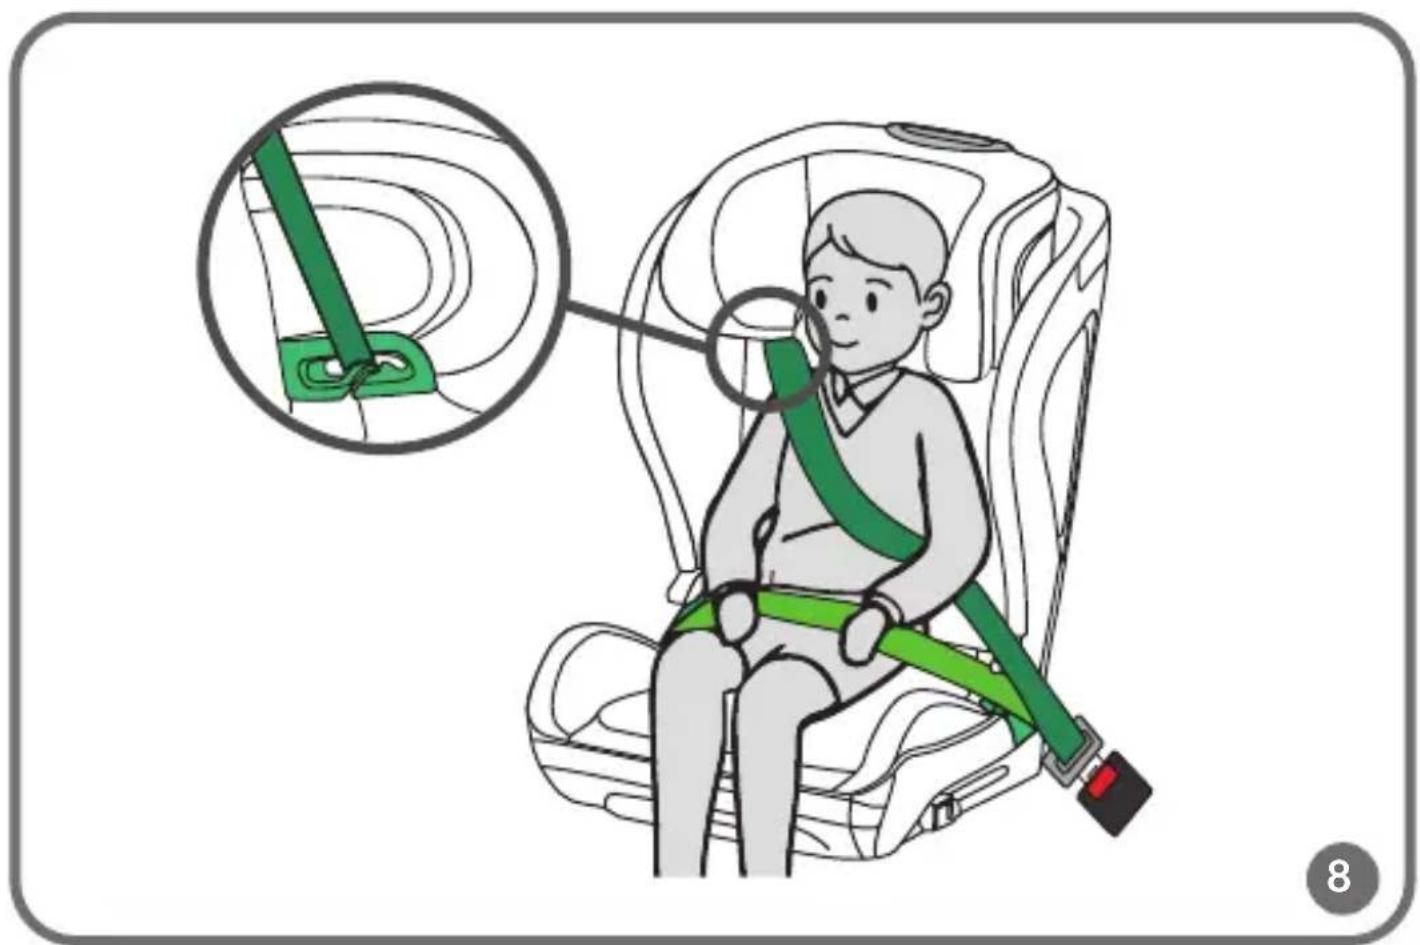
text_image
Illustration of a child wearing a car seatbelt with a magnified inset showing the seatbelt being lifted.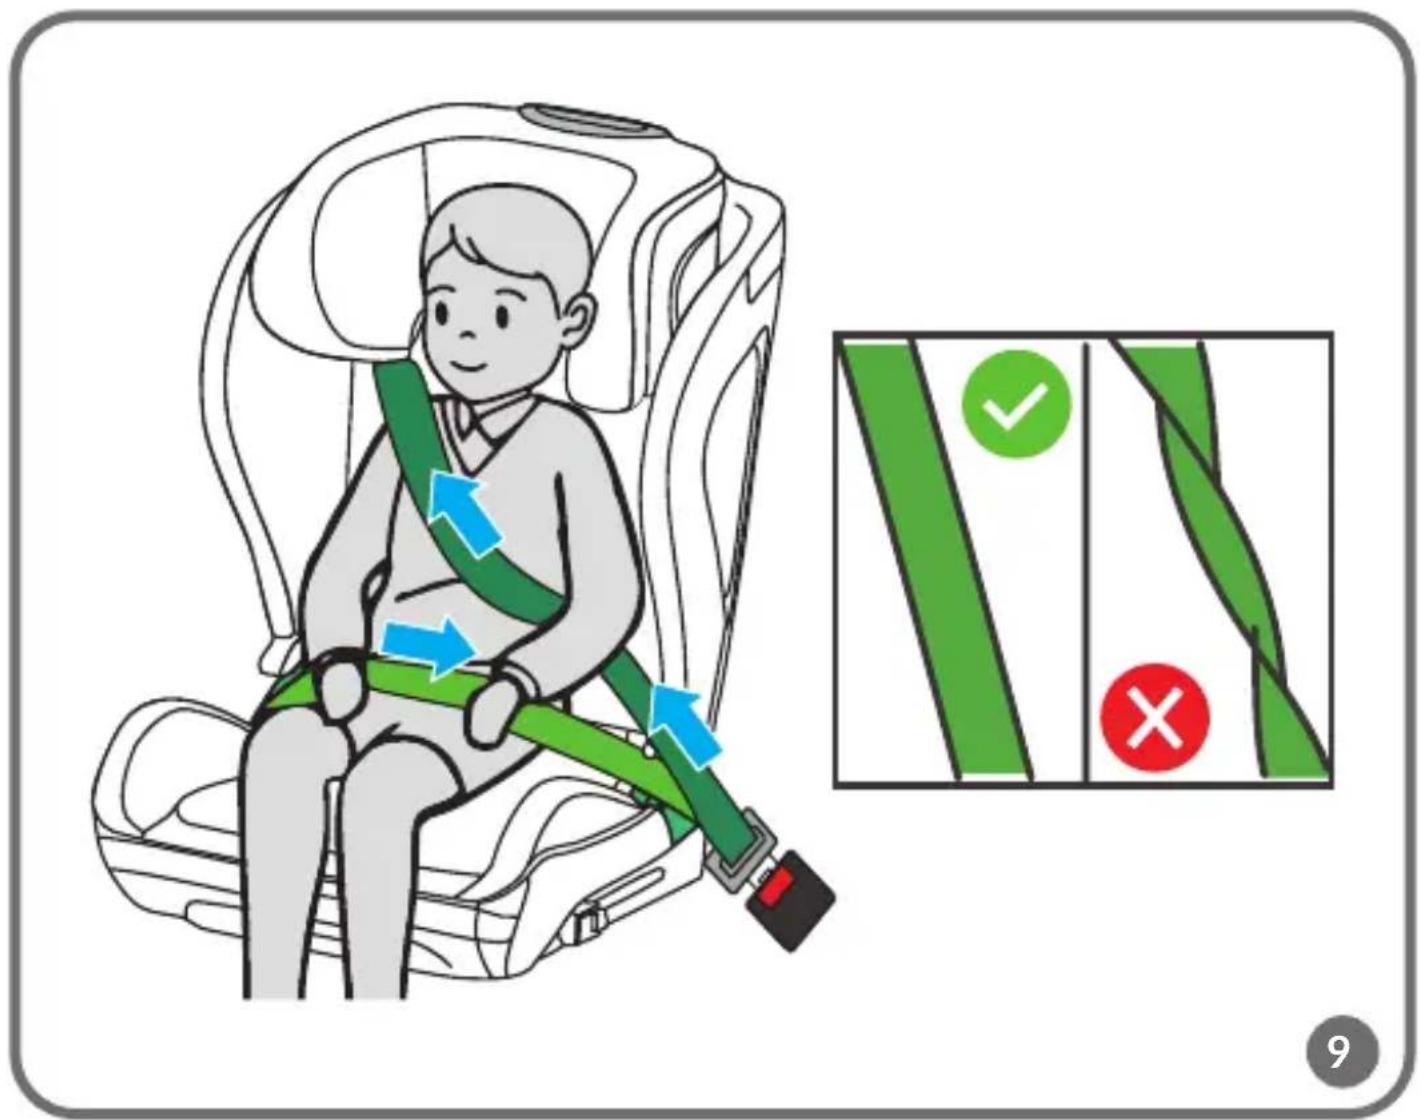
text_image
Illustration of a child in a car seatbelt with directional arrows and a safety check panel showing green checkmark and red cross.
text_image
Medical illustration showing hand placement on car seat and child positioning with checkmarks indicating correct and incorrect actions.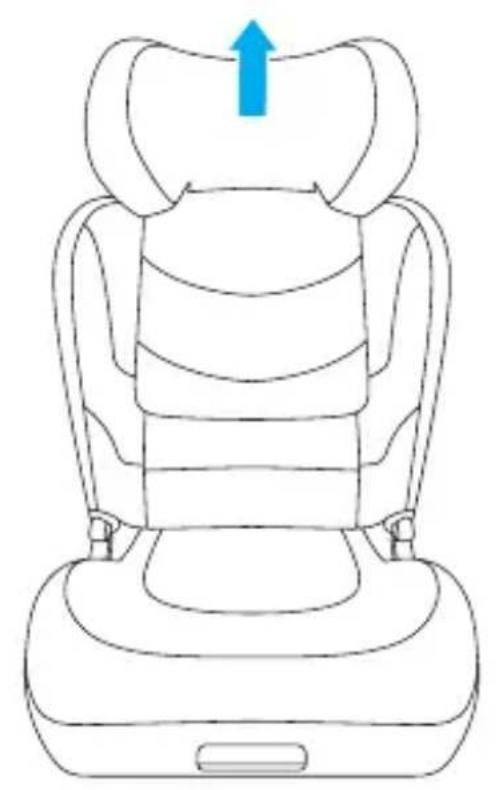
natural_image
Line drawing of a car comfort seat with a blue upward arrow indicating upward motion (no text or symbols)
natural_image
Line drawing of a car comfort seat with a blue arrow indicating the seat area (no text or symbols)11
natural_image
Line drawing of a person seated in a car seatbelt, holding a small object (no text or symbols)12
Dear Customer!
If you have any comments or questions about the product you have purchased, please contact us: help@lionelo.com
Manufacturer:
BrandLine Group Sp. z o.o.
This is a i-Size booster seat Enhanced Child Restraint System. It is approved according to UN Regulation No. 129, for use primarily in "i-Size seating positions" as indicated by vehicle manufacturers in the vehicle user's manual. If in doubt, consult either the Enhanced Child Restraint System manufacturer or the retailer.
Information for the 135–150 cm height range NOTE
This is an enhanced child restraint system (a vehicle-specific booster seat). Details on compatible vehicles are available at the end of the user manual.
The product is suitable for installation in the seating position marked with the symbolin Fig. A only if this seating position is equipped with 3-point seat belts.
The product is not suitable for installation in the seating position marked with the symbol in Fig. A.
The product is suitable for installation in the seating position marked with the symbolin. Fig. A only in a forward-facing position, with the airbag turned off, and in a seating position equipped with 3-point seat belts.
WARNINGS
- The hard and plastic components of the child restraint system must be positioned and installed in a manner that prevents them from being caught by a sliding seat or vehicle door during normal vehicle operation.
- The product is designed for children in the height range from 100 to 150 cm.
- Child restraint systems must be appropriately sized for the child. The straps must not be twisted.
- The belts securing the child restraint system to the vehicle must be tight.
- Make sure that the lap straps are positioned low to properly protect the child's pelvis.
- If the product has been subjected to significant forces, such as impact, it should be replaced.
- Do not modify the seat or add any new components without authorisation of the relevant approval authority. For maximum safety of your child, make sure to attach and use the system in accordance with the instructions in the manual.
- The plastic components of the seat may heat up in the sun and cause burns on the child's skin.
- Never leave a child unattended in the seat inside a vehicle.
- Luggage and similar items must be properly secured to prevent injuries in case of a collision.
- Do not use the seat without the fabric cover.
- Do not substitute the cover with an item from another set. It is an integral component of the set and affects the operation of the restraint system.
- Consult the user manual provided by the vehicle manufacturer.
- The device may not fit all approved vehicles if adjusted for the height range above 135 cm.
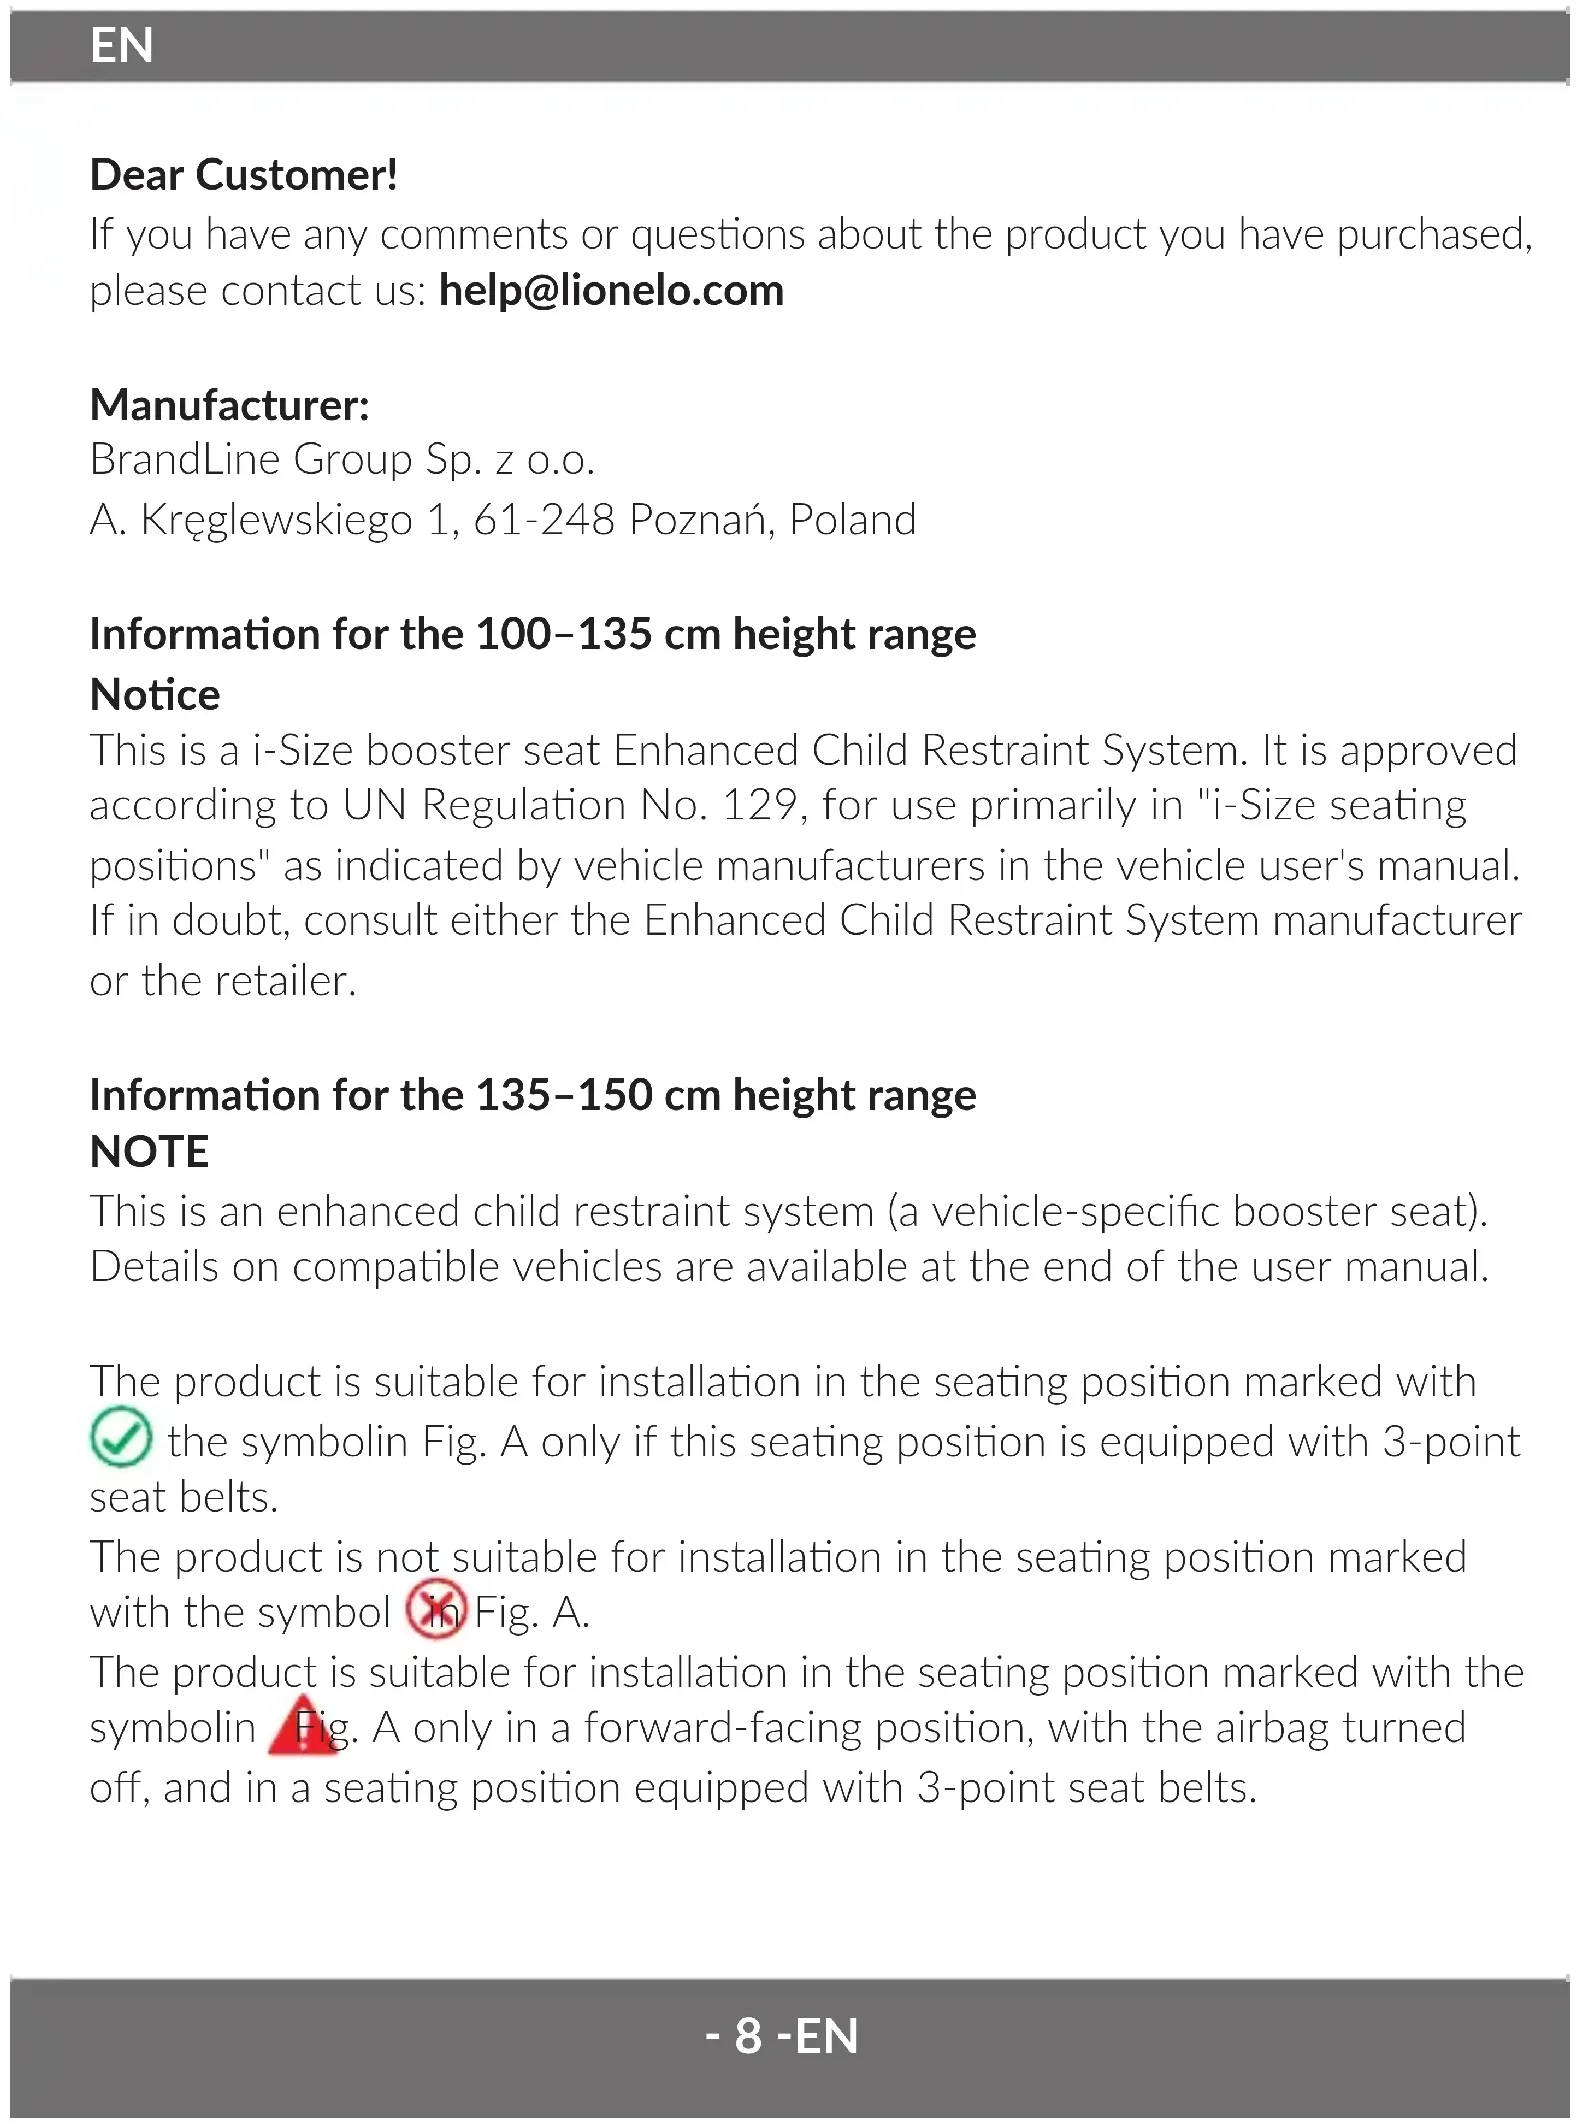
DESCRIPTION OF PARTS (FIG. B)
- Headrest adjustment lever
- Shoulder strap guides
-
Headrest
-
Backrest cover
- Lap strap guide
- Cup holder
- Tilt adjustment lever
- ISOFIX connectors
- ISOFIX lever
-
ISOFIX adapters
-
Tuck tool for cover installation
SEAT INSTALLATION
| Seat installation Seat | orientation | Seat position Child size | |
| - Installation by means of ISOFIX and car safety belt- Installation by means of the car's safety belt alonePosition the seat in one of the 4 available recline positions. | Forward-facing | 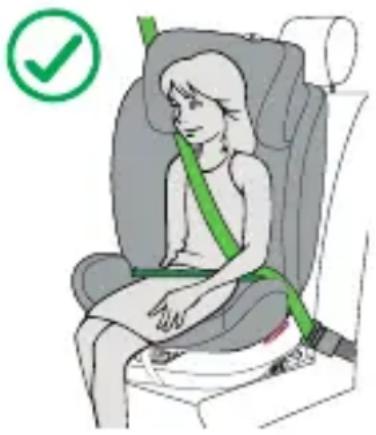 | Between 100 and 150 cm |
FORWARD-FACING INSTALLATION (100–150 cm)
- Place the child seat on the car seat in the designated installation area.
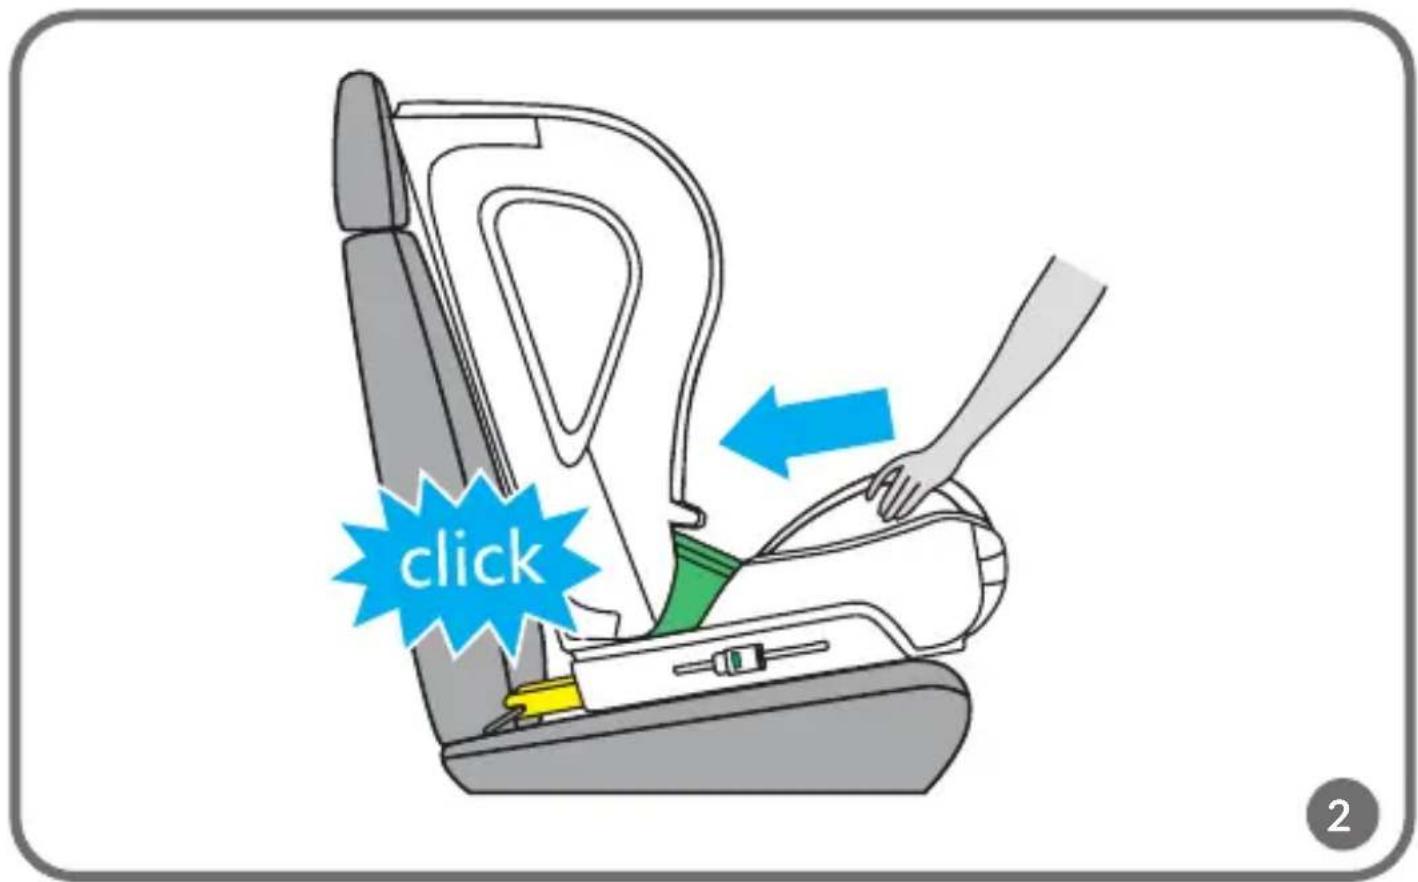
Important! For installation without ISOFIX, skip steps 2 to 4. - Push in the ISOFIX lever (9, Fig. A), and extend the ISOFIX arms as far as possible (Fig. 1). Anchor the ISOFIX arms into the attachments located in the car seat. The arms will interlock and you will hear a characteristic click (Fig. 2).
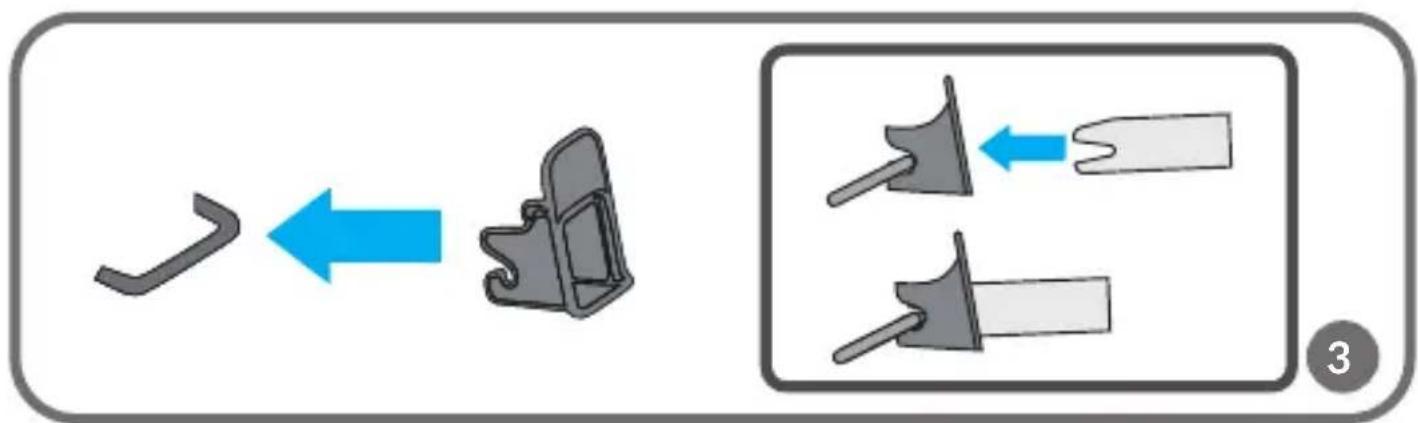
Important! If your car is not equipped with suitable ISOFIX guides, use the adapters (Fig. 3). -
The green indicator on the ISOFIX button must be visible on both sides (Fig. 4).
-
Push the seat against the backrest of the car's seat (Fig. 5). Apply a left-right movement to push the seat base towards the backrest to ensure it is tightly secured against the car seat.
- Adjust the seat tilt to one of the 4 available positions using the tilt adjustment lever (Fig. 6).
- Place the child in the seat and adjust the headrest (see: Headrest adjustment).
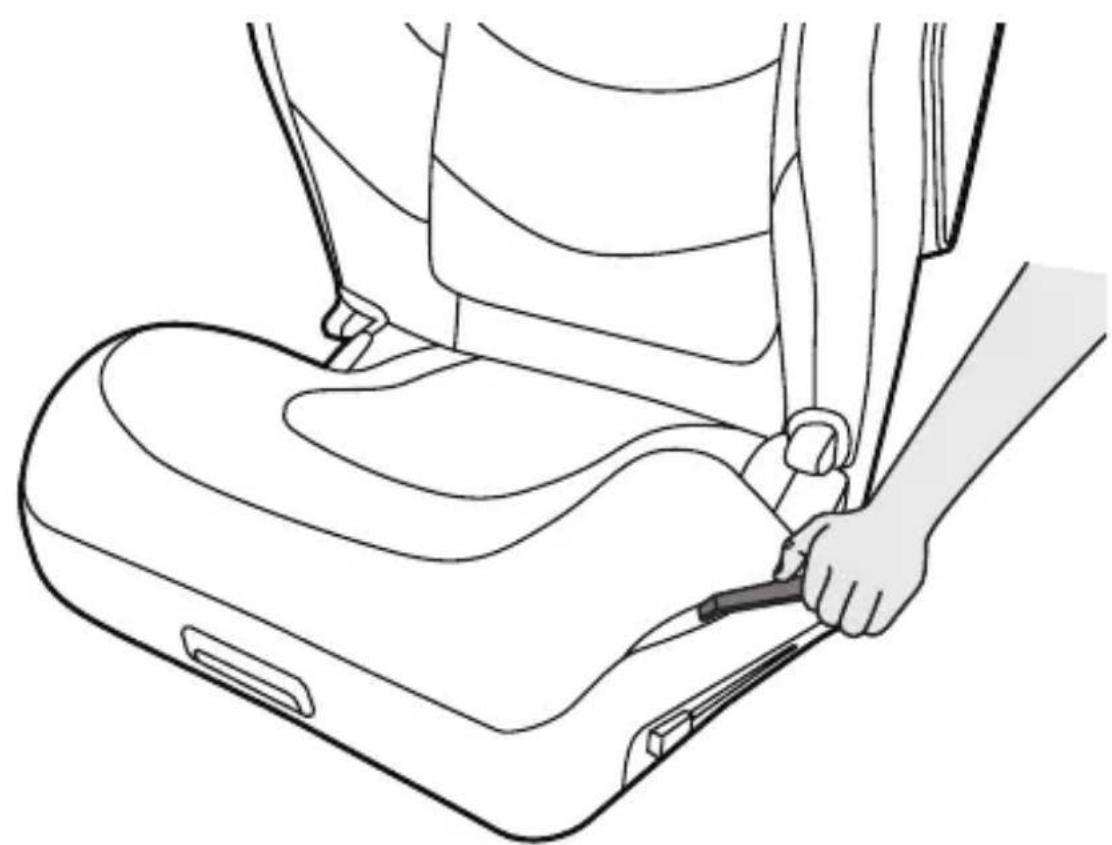
- Pull out the car safety belt as far as possible and fasten it; you will hear a clicking sound.
- Thread the lap section of the belt through the green lap belt guide (Fig. 7).
- Thread the shoulder section of the belt through the green shoulder belt guide located under the headrest (Fig. 8).
- Tension the car safety belt by pulling it towards the retractor. The car safety belt should fit tightly around the child's body. Make sure the straps are not twisted (Fig. 9).
HEADREST ADJUSTMENT
To adjust the headrest to the child's height, pull the headrest adjustment lever (Fig. 10).
SEAT TILT ADJUSTMENT
To adjust the recline of the seat, pull the tilt adjustment lever (7, Fig. B) and slide the seat to the desired position. The seat has 4 levels of backrest tilt adjustment.
SEAT REMOVAL - ISOFIX
To detach the ISOFIX arms, push in the ISOFIX lever (9, Fig. B). The arms can be extended from the base (the indicator on the ISOFIX button turns red). Pull the ISOFIX retractor lever to slide the arms into the seat base on both sides.
REMOVING AND INSTALLING CAR SEAT COVER
-
Raise the headrest to the highest setting (see: Headrest adjustment) and remove the headrest cover.
-
Unfasten the metal clasps and remove the seat cover from the seat (Fig. 11).
- Place the cover on the seat using the supplied tuck tool. Fasten the metal clasps to secure the cover (Fig. 12).
CLEANING AND MAINTENANCE
The cover can be hand-washed at temperatures up to 30^ C. Do not tumble dry. Do not expose the cover to sunlight for drying. To clean the plastic parts, use a damp cloth and a mild detergent. Avoid using harsh detergents or bleaching agents.
The photos are for reference only; the actual appearance of products may differ from the photos.
Drogi Kliencie!
BrandLine Group Sp. z o.o.
BrandLine Group Sp. z o.o.
BrandLine Group Sp. z o.o.
BrandLine Group Sp. z o.o.
BrandLine Group Sp. z o.o.
BrandLine Group Sp. z o.o.
BrandLine Group Sp. z o.o.
A. Kręglewskiego 1, 61-248 Poznań (Poznanė), Lenkija
Informacija ūgio grupei nuo 100 iki 135 cm DĖMESIO
BrandLine Group Sp. z o.o.
BrandLine Group Sp. z o.o.
JUSTERING AV NACKSTÖDET
BrandLine Group Sp. z o.o.
BrandLine Group Sp. z o.o.
BrandLine Group Sp. z o.o.
A. Kręglewskiego 1, 61-248 Poznań, Puola
BrandLine Group Sp. z o.o.
BrandLine Group Sp. z o.o.
BrandLine Group Sp. z o.o.
BrandLine Group Sp. z o.o.
Detailed warranty conditions are available on the website: