Izzy - Car seat Lionelo - Free user manual and instructions
Find the device manual for free Izzy Lionelo in PDF.

User questions about Izzy Lionelo
0 question about this device. Answer the ones you know or ask your own.
Ask a new question about this device
Download the instructions for your Car seat in PDF format for free! Find your manual Izzy - Lionelo and take your electronic device back in hand. On this page are published all the documents necessary for the use of your device. Izzy by Lionelo.
USER MANUAL Izzy Lionelo
natural_image
Line drawing of a car comfort seat with 'Ilovi' branding on the backrest (no text or symbols beyond label)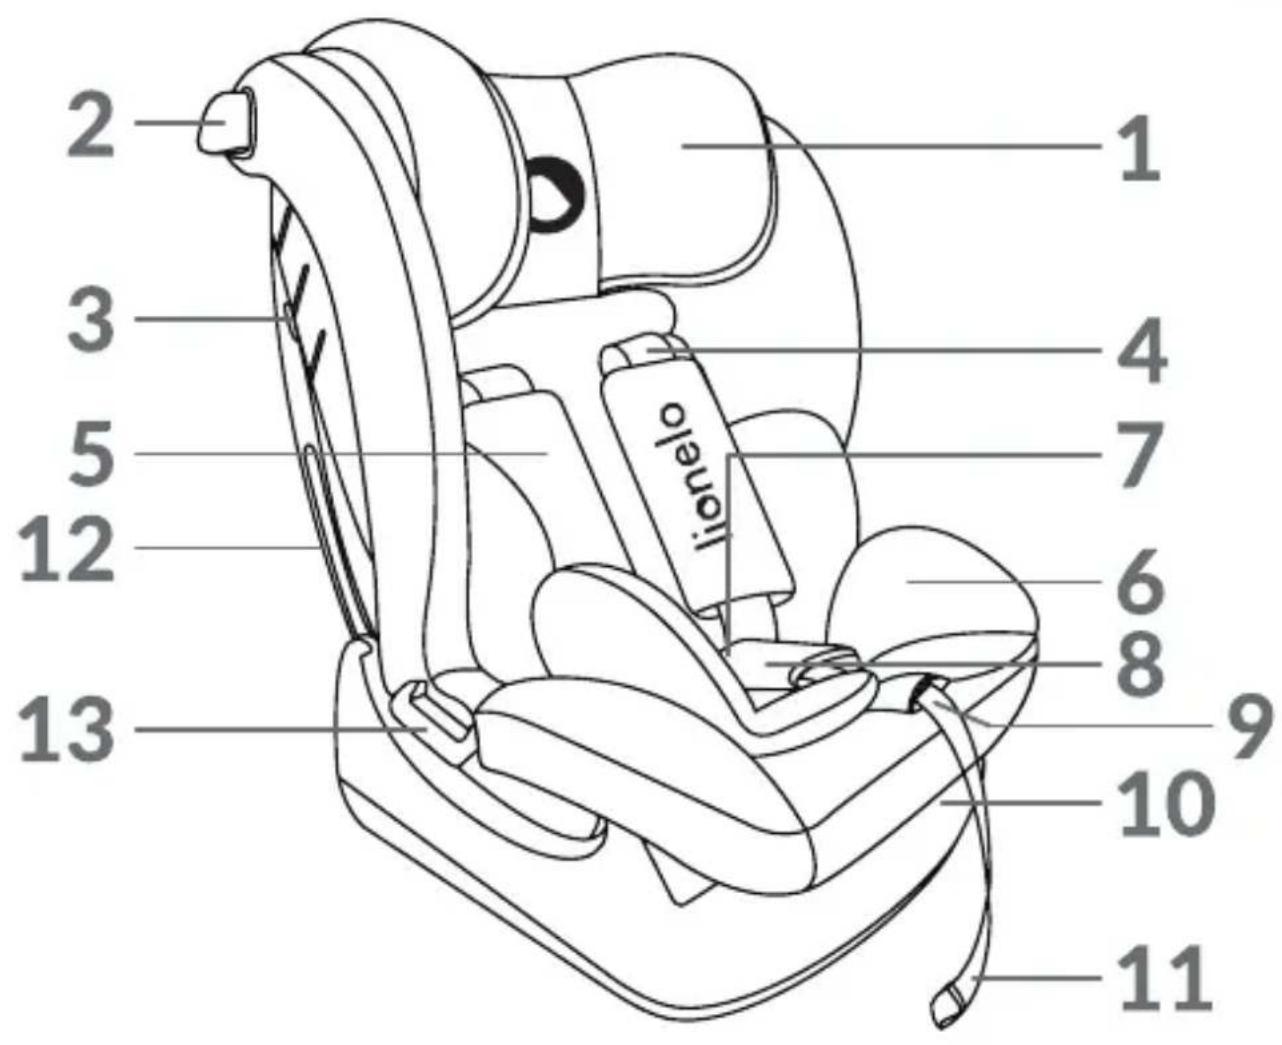
B

natural_image
Simple line drawing of a person in a seat with a green circular background (no text or symbols)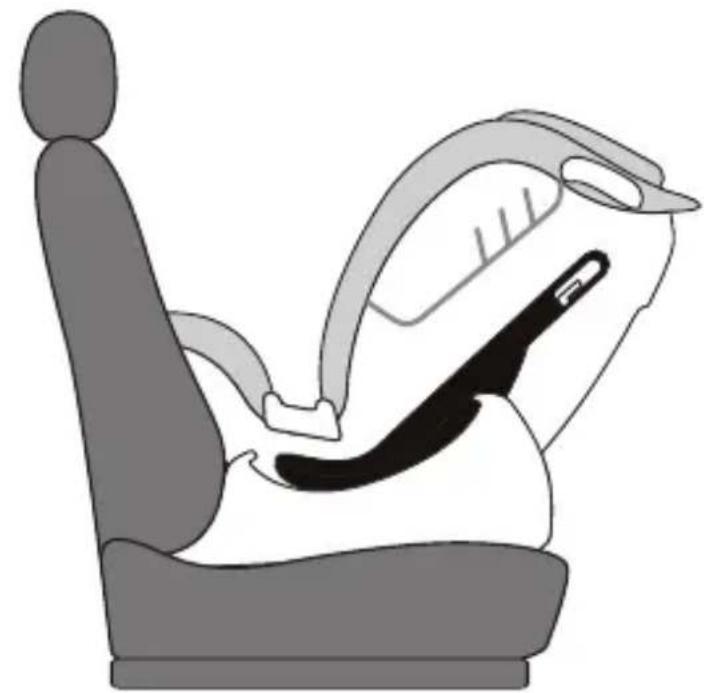
natural_image
Illustration of a car seatbelt with seatbelt and seatbelt (no text or symbols)1
natural_image
Line drawing of a car seatbelt device with green belt and handle (no text or symbols)2

3
9

flowchart
graph TD
    A["Start: Surgical Placement"] --> B["Step 1: Positioning"]
    B --> C["Step 2: Positioning"]
    C --> D["Step 3: Positioning"]
    D --> E["End: Positioning"]
natural_image
Illustration of a hand holding a medical device with a tool, no text or symbols present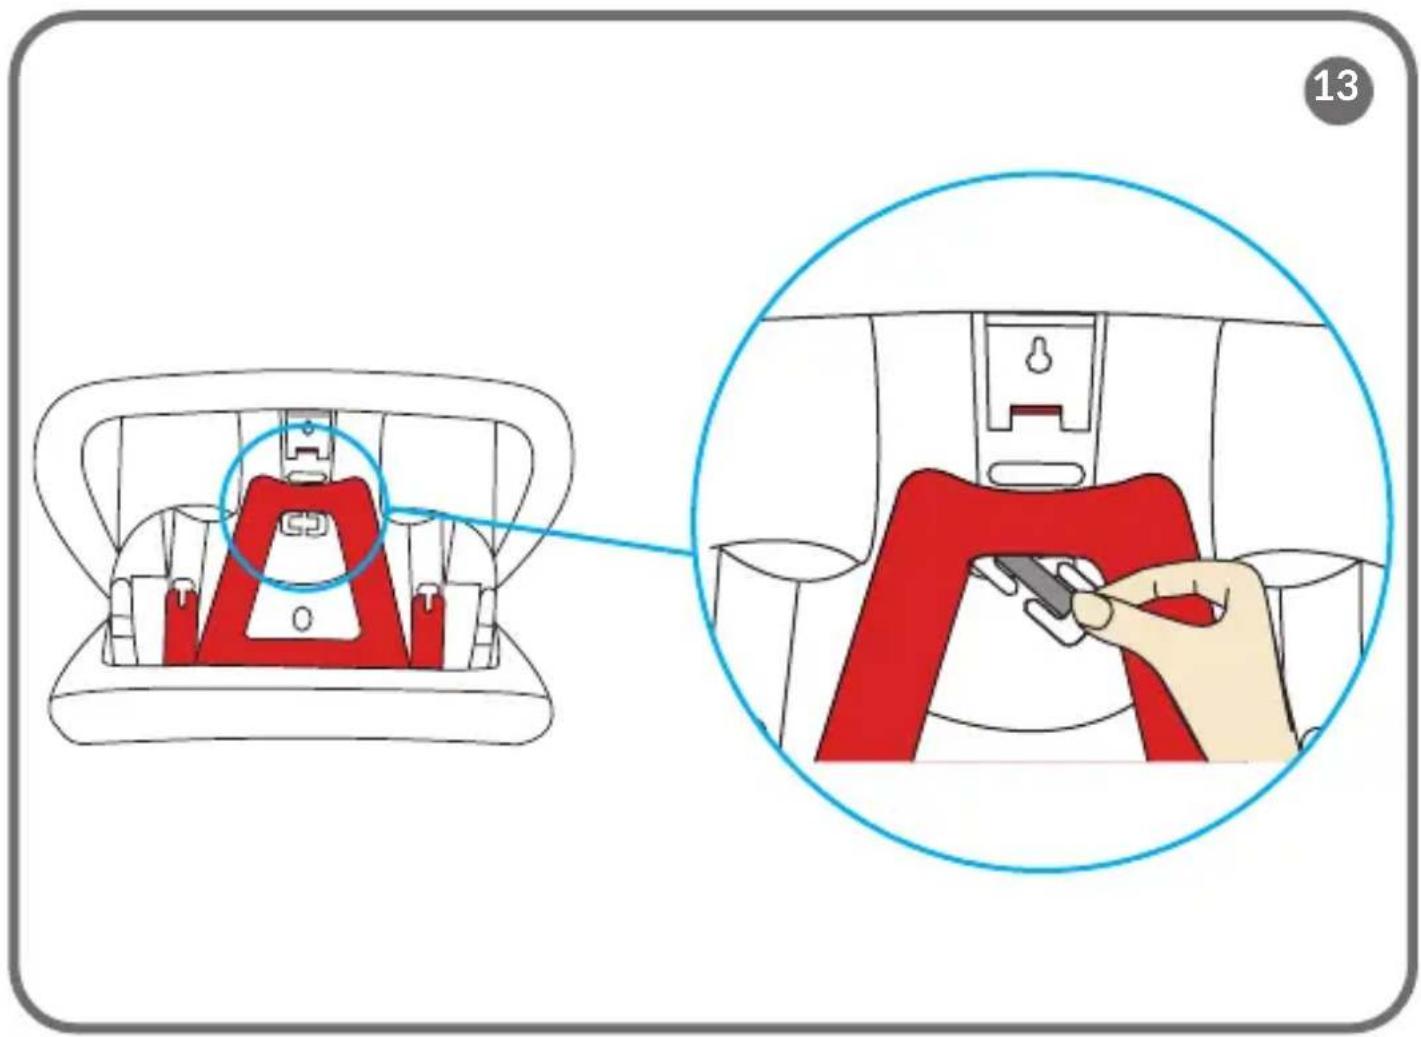
14
natural_image
Illustration of a hand pressing down on a car seat, showing blue arrows indicating direction (no text or symbols)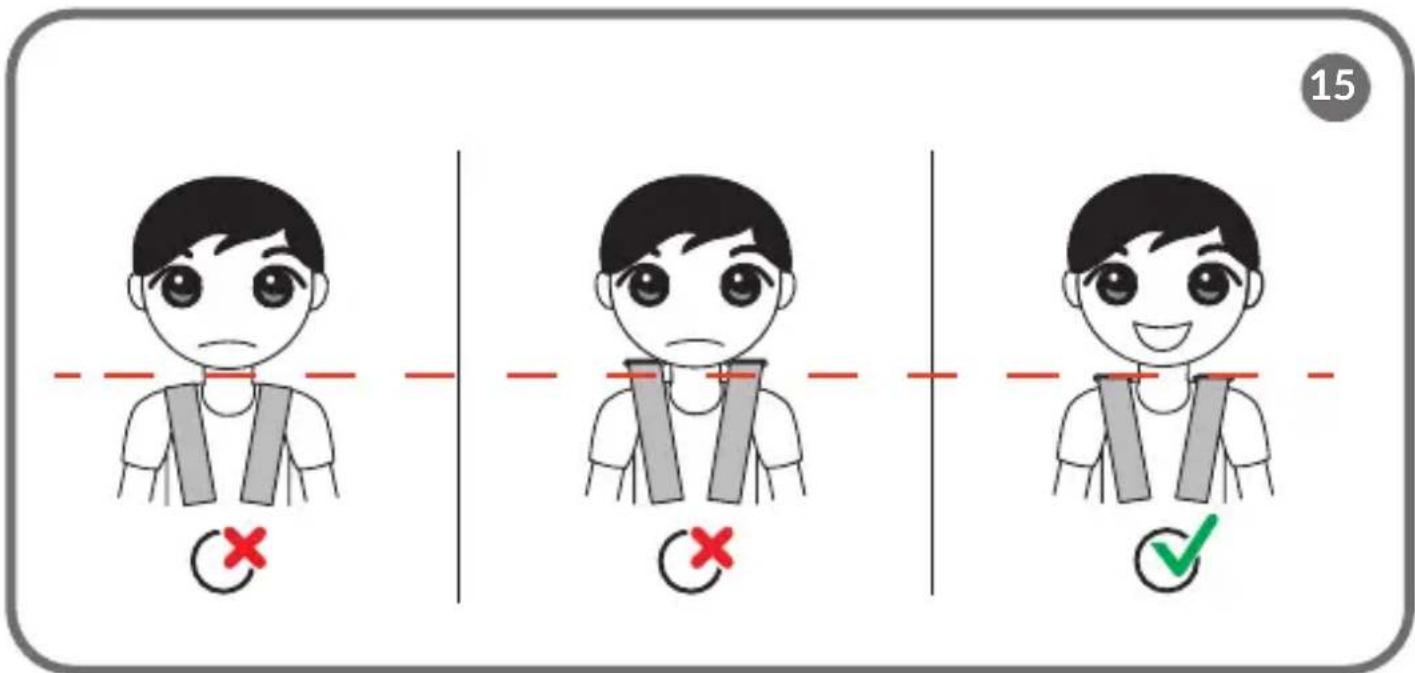
Dear customer!
Should you have any remarks or questions concerning the product, please do not hesitate to contact us: help@lionelo.com
Producer:
BrandLine Group Sp. z o. o.
Applies to rearward-facing installation (40 - 105 cm).
NOTICE
This is a Universal Belted Enhanced Child Restraint System. It is approved according to UN Regulation No. 129, for use primarily in "Universal seating positions" as indicated by vehicle manufacturers in the vehicle user's manual.
If in doubt, consult either the Enhanced Child Restraint System manufacturer or the retailer.
Applies to forward-facing installation (100 - 150 cm).
NOTICE
This is a i-Size booster seat Enhanced Child Restraint System. It is approved according to UN Regulation No. 129, for use primarily in "i-Size seating positions" as indicated by vehicle manufacturers in the vehicle user's manual.
If in doubt, consult either the Enhanced Child Restraint System manufacturer or the retailer.
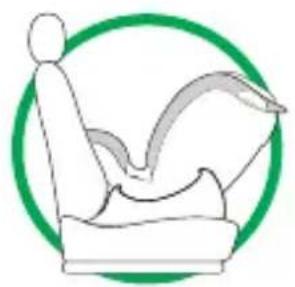
The product is suitable for installation only on the locations marked with the symbol in Fig. B.
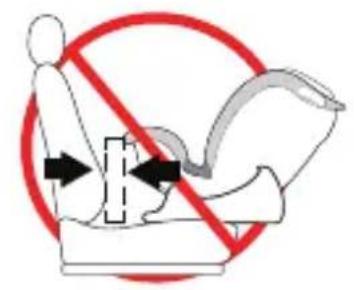
The product is suitable for installation on the seat marked with the symbol in fig. B only forward-facing and with the airbag deactivated. It is recommended that the seat should only be installed in the rear seats of the car.
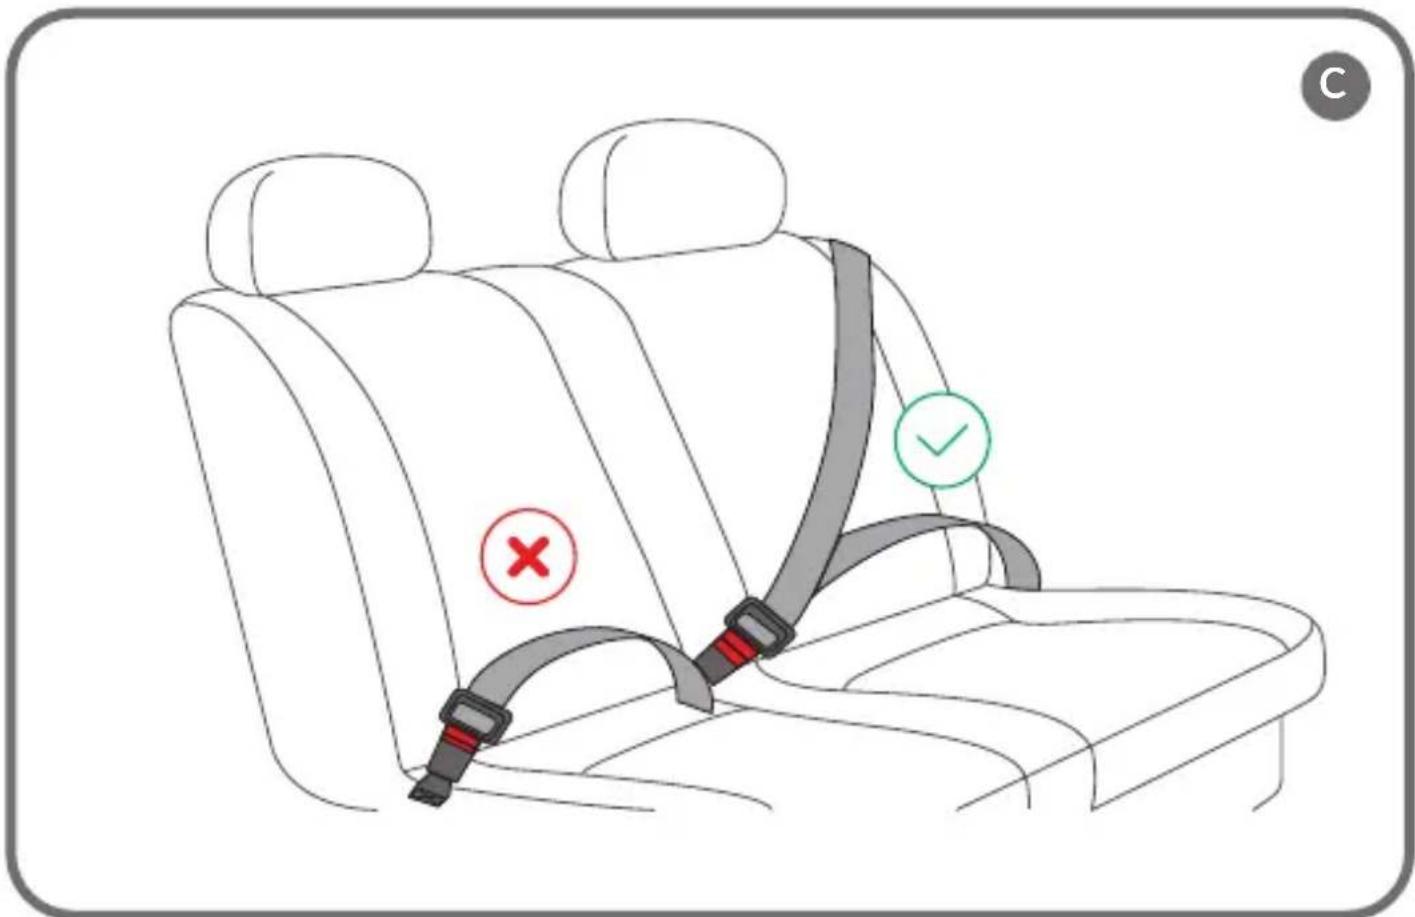
The seat is suitable for installation on the seat marked with the symbol ?_2 in fig. B only if the seat is equipped with 3-point seat belts (fig. C).
WARNINGS:
- The product is designed for children between 40 and 150 cm tall.
- If your child is less than 15 months old or less than 76 cm tall, do not use a forward-facing seat.
- Hard parts and plastic parts of the child restraint system should be placed and installed in such a way that they cannot be trapped by a sliding seat or vehicle door under normal vehicle operating conditions.
- For rear-facing installation, do not use the seat where the front airbag is active.
- Any seatbelt that restrains the child must be well-fitted to the child's sizes. The belts must not be twisted.
- The straps securing the restraint to the vehicle must be tight.
- Make sure the lap belts run low to adequately secure the pelvis.
- If the product has been exposed to strong elements (such as impact), it should be replaced.
- Do not make any changes to the seat or add new components without approval from the approval authority. To ensure maximum safety for your child, the equipment should be attached and used as recommended in the instructions.
- The plastic parts of this seat can heat up in the sun and cause burns on the child's skin.
- Never leave a child alone in a car seat in a vehicle.
- Luggage and other similar items should be secured so that they will not cause any injury in a collision situation.
- Do not use the seat without its fabric cover.
- The cover cannot be replaced with an item from another set. It is an integral part of the set and affects the operation of the restraint.
- Always carry this instruction manual with you.
- Refer to the vehicle manufacturer's owner's instruction manual.
- The device may not fit all approved vehicles when adjusted
for a range above 135 cm.
LIST OF PARTS (FIG. A)
- Headrest
- Shoulder belt guide (rearward-facing installation)
- Belt holder (rearward-facing installation)
- Seat belts
- Seat belt cover
- Reduction insert
-
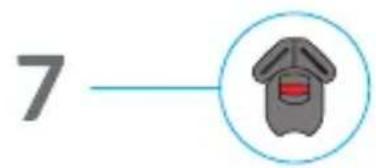
Seat belt buckle
-
Buckle cover
- Belt tension adjustment button
- Backrest tilt adjustment lever
- Belt tension adjustment strap
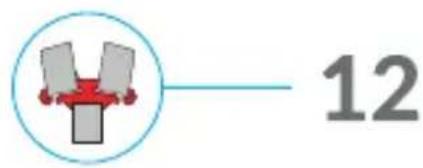
- Belt connector
- Lap belt guide (forward-facing installation)
- Lumbar pad
INSTALLATION IN THE CAR
| Seat installation Seat | orientation | Seat position Child's measurement |
| - Installation with car belts- Child fastened with seat beltPut the seat in the semi-reclining position (see: Seat tilt adjustment). | Rearward-facing From | 105 cmChild's weight: maximum 18 kg |
| - Installation with car belts- Child fastened with car seat beltAdjust the seat to one of the available positions 1-2-3 (see: Seat tilt adjustment). | Forward-facing | From 100 to 150 cm |
 |
REARWARD-FACING (40 - 105 CM)
- Adjust the seat to the semi-reclining position (see: Seat tilt adjustment).
- Place the car seat on the couch of the car. Make sure the seat fits firmly against the back of the car seat (fig. 1).
- Pull out the car belt.
- Pass the lap part of the car belt through the rear lower part of the seat so that it passes under the guide in the base on both sides of the seat (fig. 2). Fasten the belt.
- Pass the shoulder part of the belt through the guide in the seat back (A, fig. 3). Then pass the shoulder belt through the belt hook by pushing it back with your
finger (B, fig. 3).
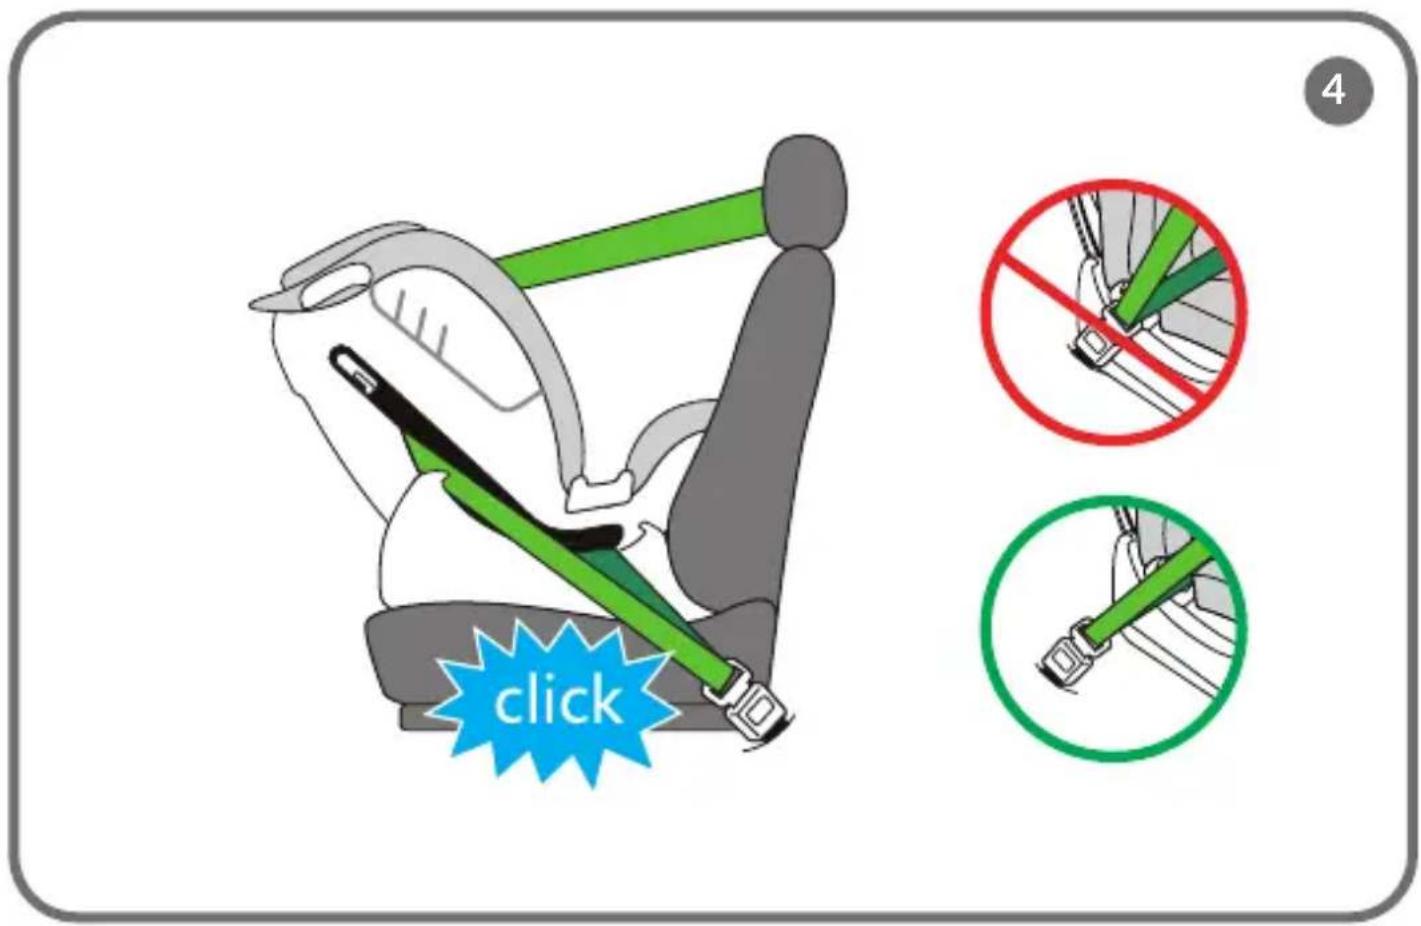
- Make sure that the belt is as tight as possible and that it is not twisted. Make sure the car belt buckle is not too close to the lap belt guide (fig. 4).
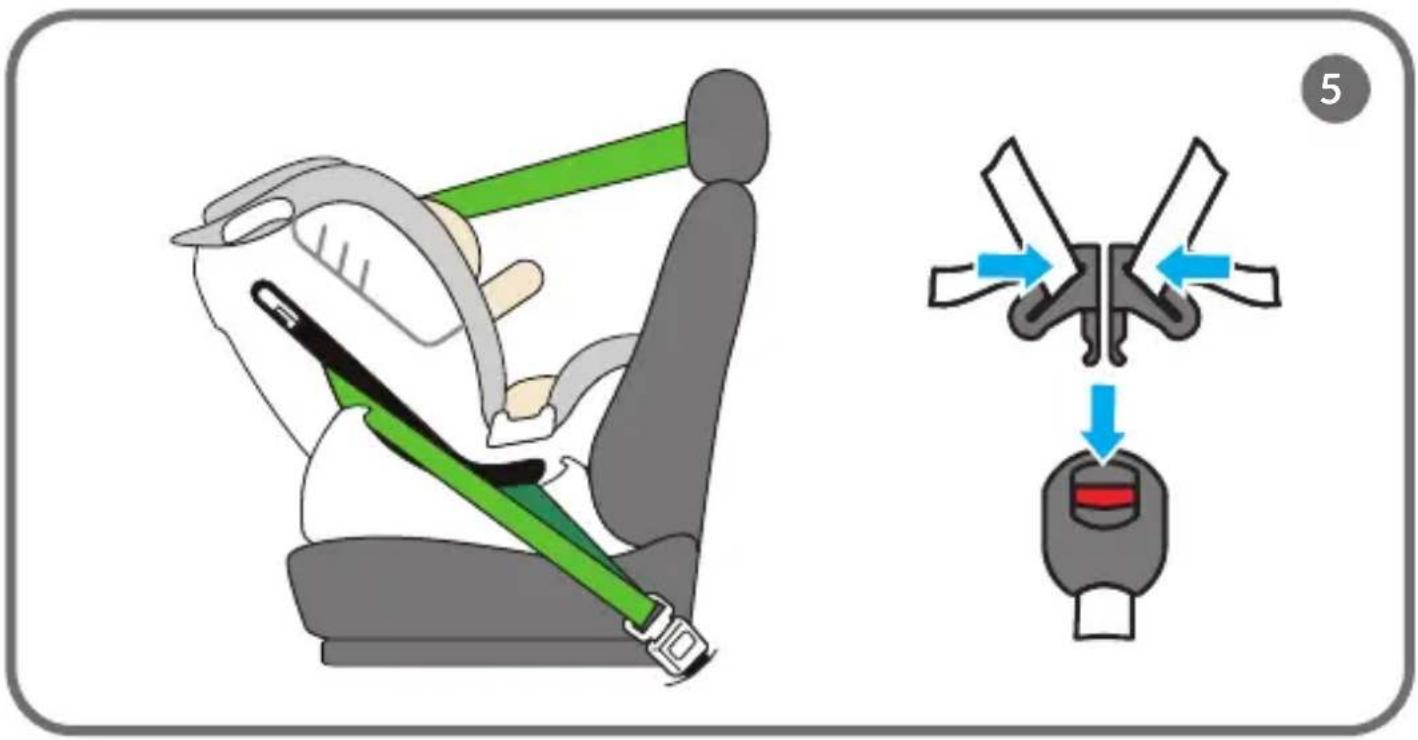
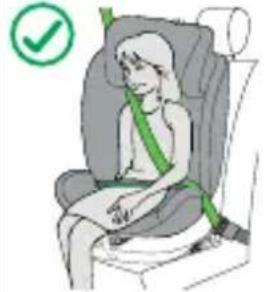
- Place the child in the seat (fig. 5) and fasten it with the seat belts (see: Seat belts).
- Adjust the headrest (see: Headrest adjustment).
Note! Make sure that the seat belts fit tightly on the child's body and that they are not twisted. Make sure the lap belts run low and protect the child's pelvis. The belts should be tight against the child's body, but should not be too tight and cause discomfort.
REARWARD-FACING (100 - 150 CM)
- Remove the seat belts (see: Removal of the seat belts) and remove the reduction pad.
- Adjust the seat to one of the available positions 1-2-3 (see: Seat tilt adjustment).
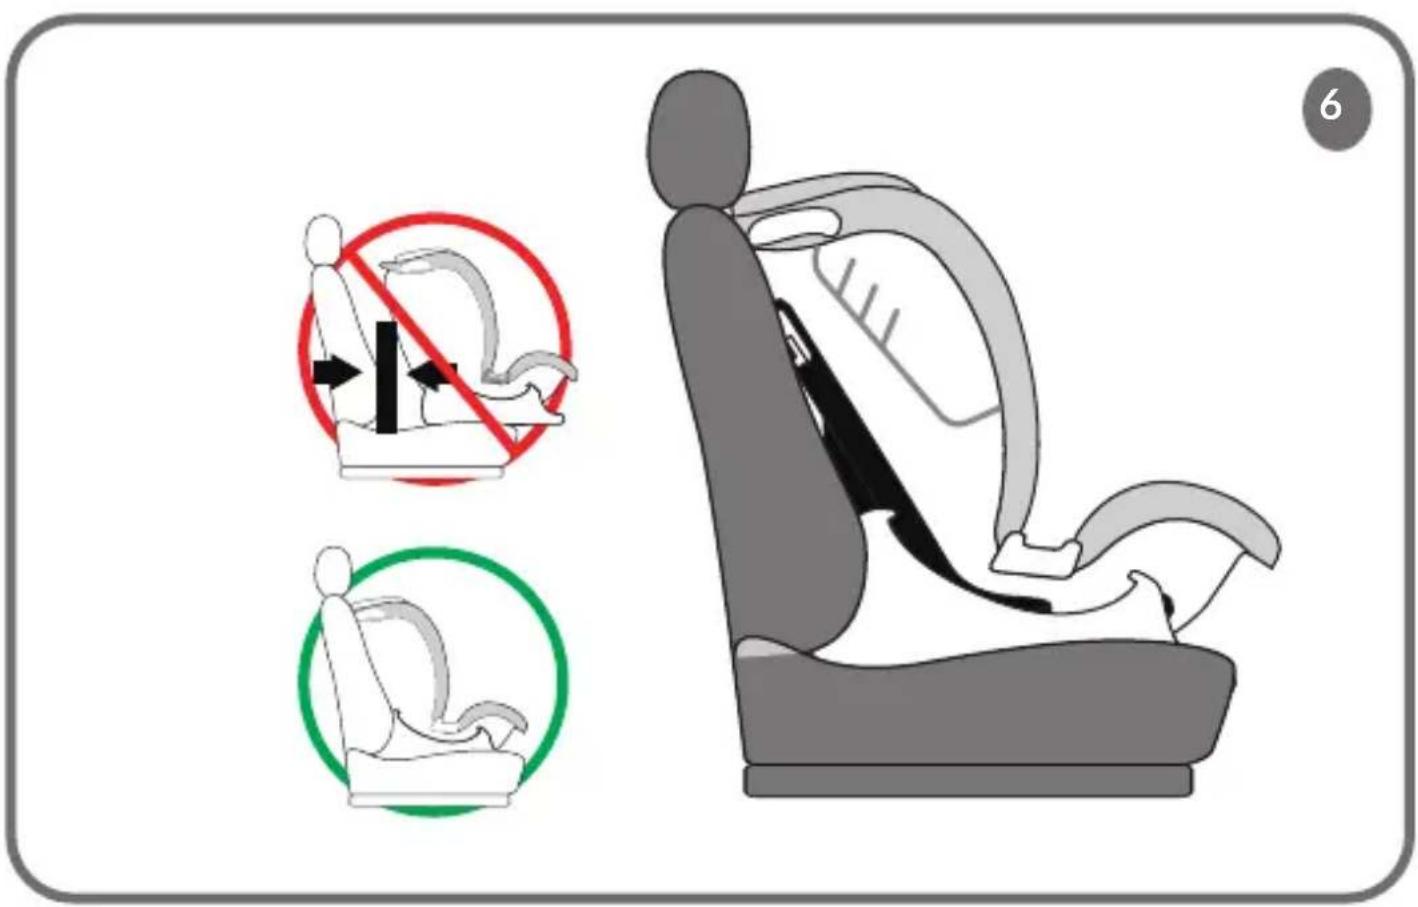
- Place the car seat on the couch of the car. Make sure the seat fits firmly against the car seat (fig. 6).
- Place the child in the seat and adjust the headrest (see: Headrest adjustment).
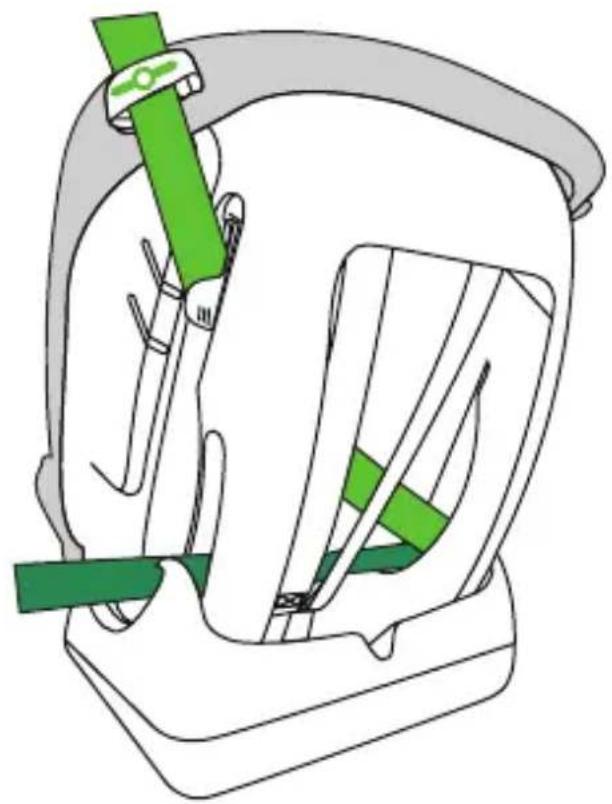
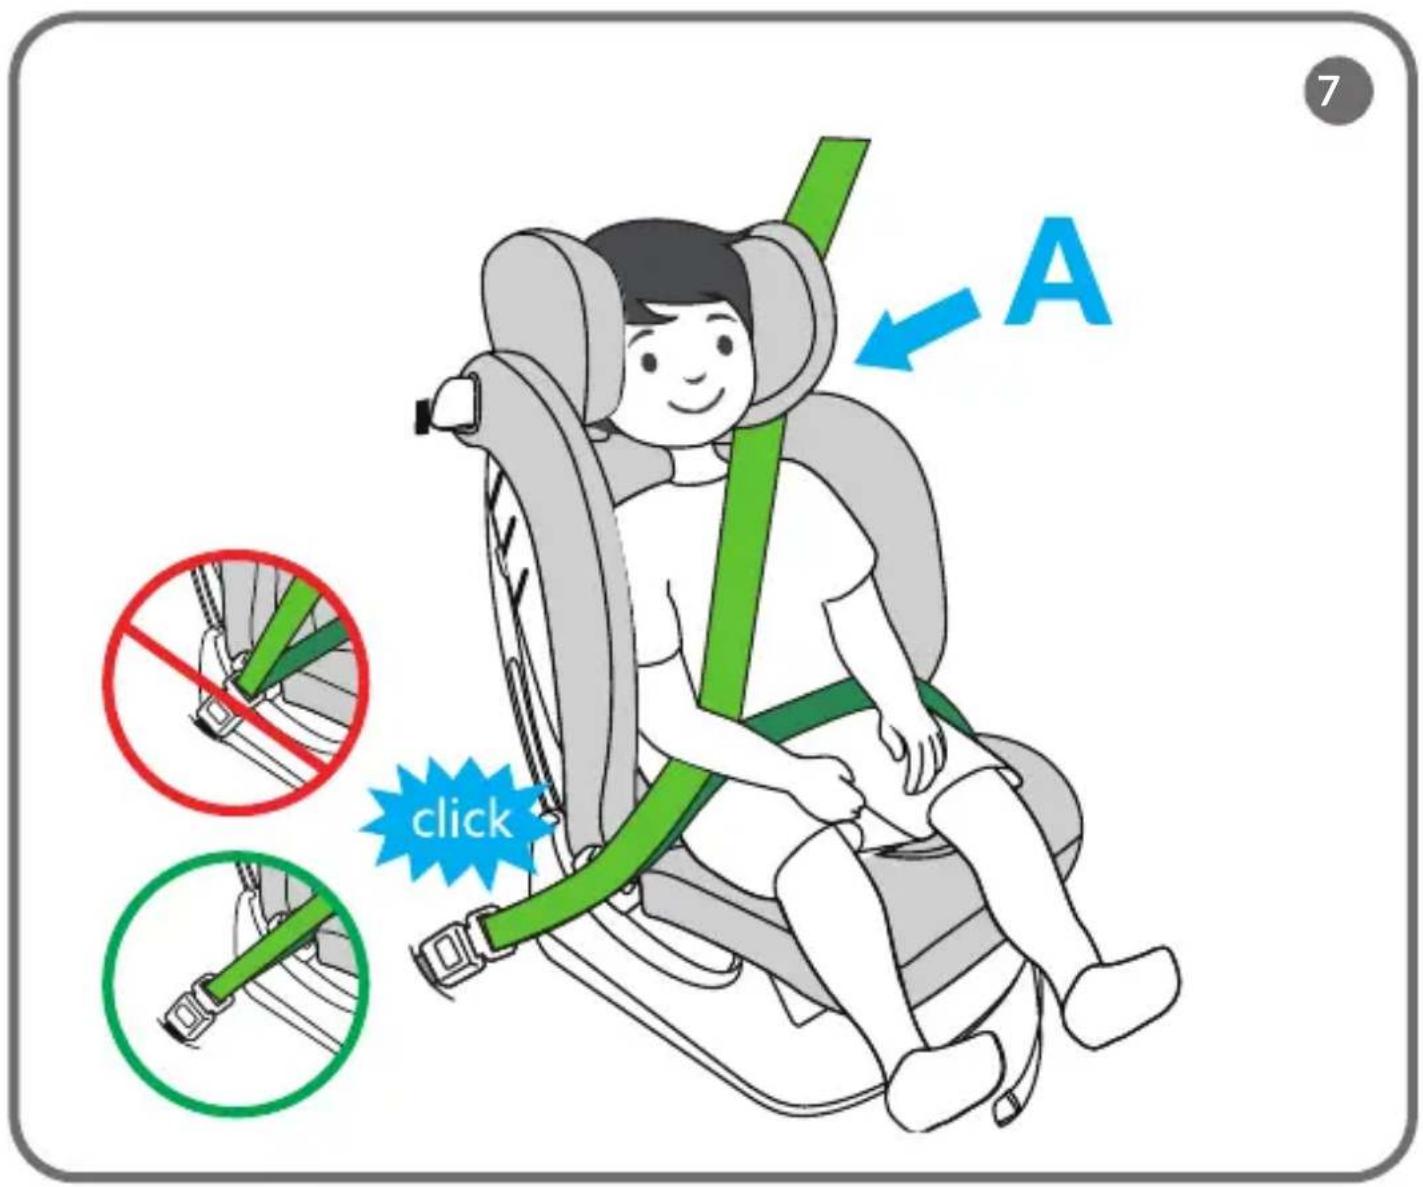
- Feed the shoulder belt through the green colored space between the headrest and the seat (A, fig. 7). Pass the lap belt through the lap belt guide (13, fig. A).
- Fasten the belt and make sure it is as tight as possible and not twisted. Make sure the car belt buckle is not too close to the lap belt guide (fig. 7).
REDUCTION PAD AND LUMBAR PAD
The pads are designed for the smallest children, improving their comfort and providing additional support. The lumbar pad is designed for infants – pull it out when the child needs more space in the seat. The reduction pad can be used until the child exceeds a height of 60 cm.
SEAT BELTS
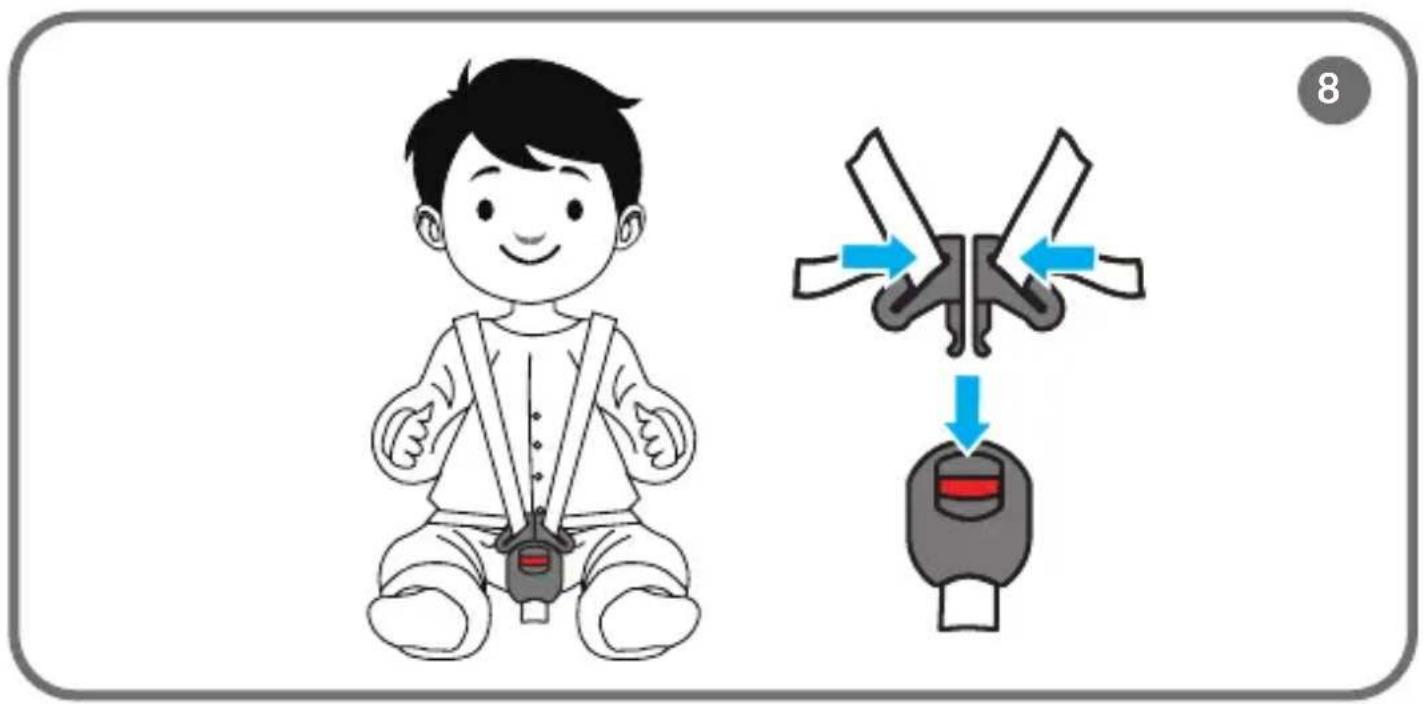
BELT FASTENING
- Connect the belt connectors, and then insert them into the buckle (fig. 8). You will hear a characteristic click. Make sure the belts are properly tensioned and not twisted.
- To unfasten the belts, press the red button on the buckle.
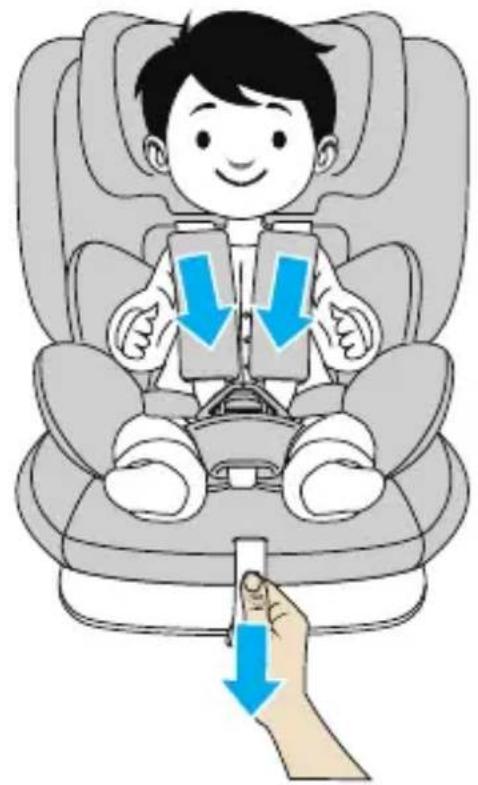
BELT TENSION ADJUSTMENT
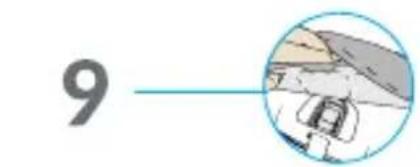
- To tighten the belts, pull the belt tension adjustment strap (fig. 9).
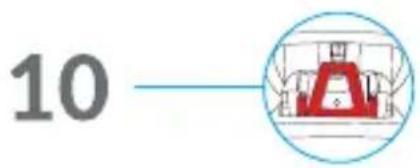
- To loosen the belts, press the belt tension adjustment button (fig. 10) and pull on
the shoulder belts.
REMOVAL OF THE SEAT BELTS
- Loosen the belts (see: Belt tension adjustment).
- Adjust the headrest to the highest available position (see: Headrest adjustment).
- Press the button located on the buckle and unfasten the belts.
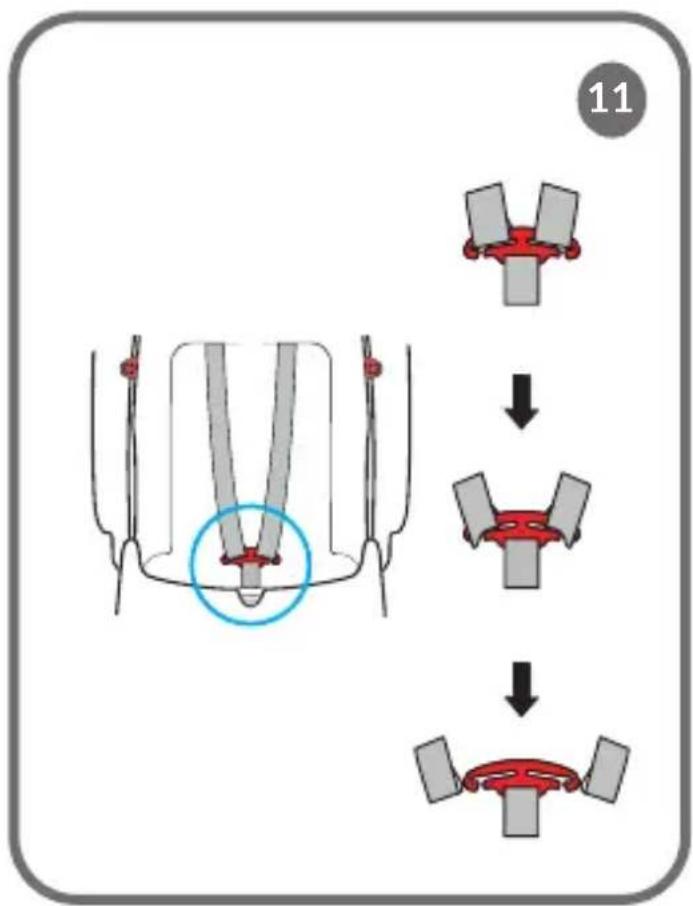
- Remove the belts from the buckle located at the rear of the backrest (fig. 11), then put the belts through the holes in the backrest.
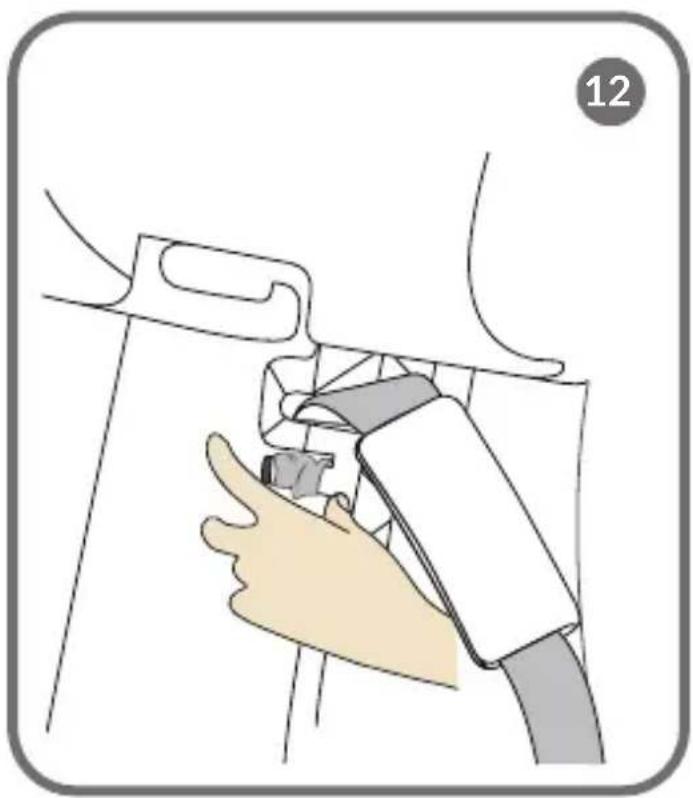
- Unfasten the upper part of the backrest cover, and pull out the shorter part of the seat belts with covers, removing them from the hooks located inside the backrest (fig. 12).
- Put the seat in the reclining position, then remove the belt from the buckle located in the base of the seat. Remove the belt along with the buckle and buckle cover (fig. 13).
To reinstall the belt, repeat the above steps in reverse order.
HEADREST ADJUSTMENT
To change the headrest height:
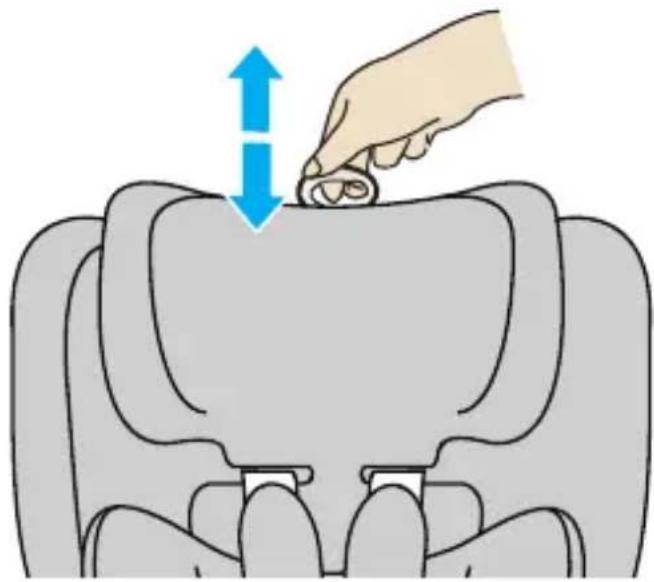
- While holding the seat belt tension adjustment button (9, fig. A), loosen the belts. This will allow you to adjust the height of the headrest more freely.
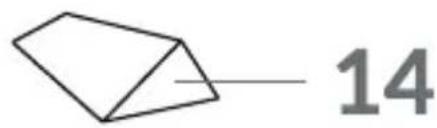
- Pull the headrest adjustment lever and adjust the height of the headrest to the child's shoulder level (fig. 14).
Note! Make sure the belts are not too high, such as at or above the ear line, or too low, such as behind the child's back (fig. 15).
SEAT TILT ADJUSTMENT
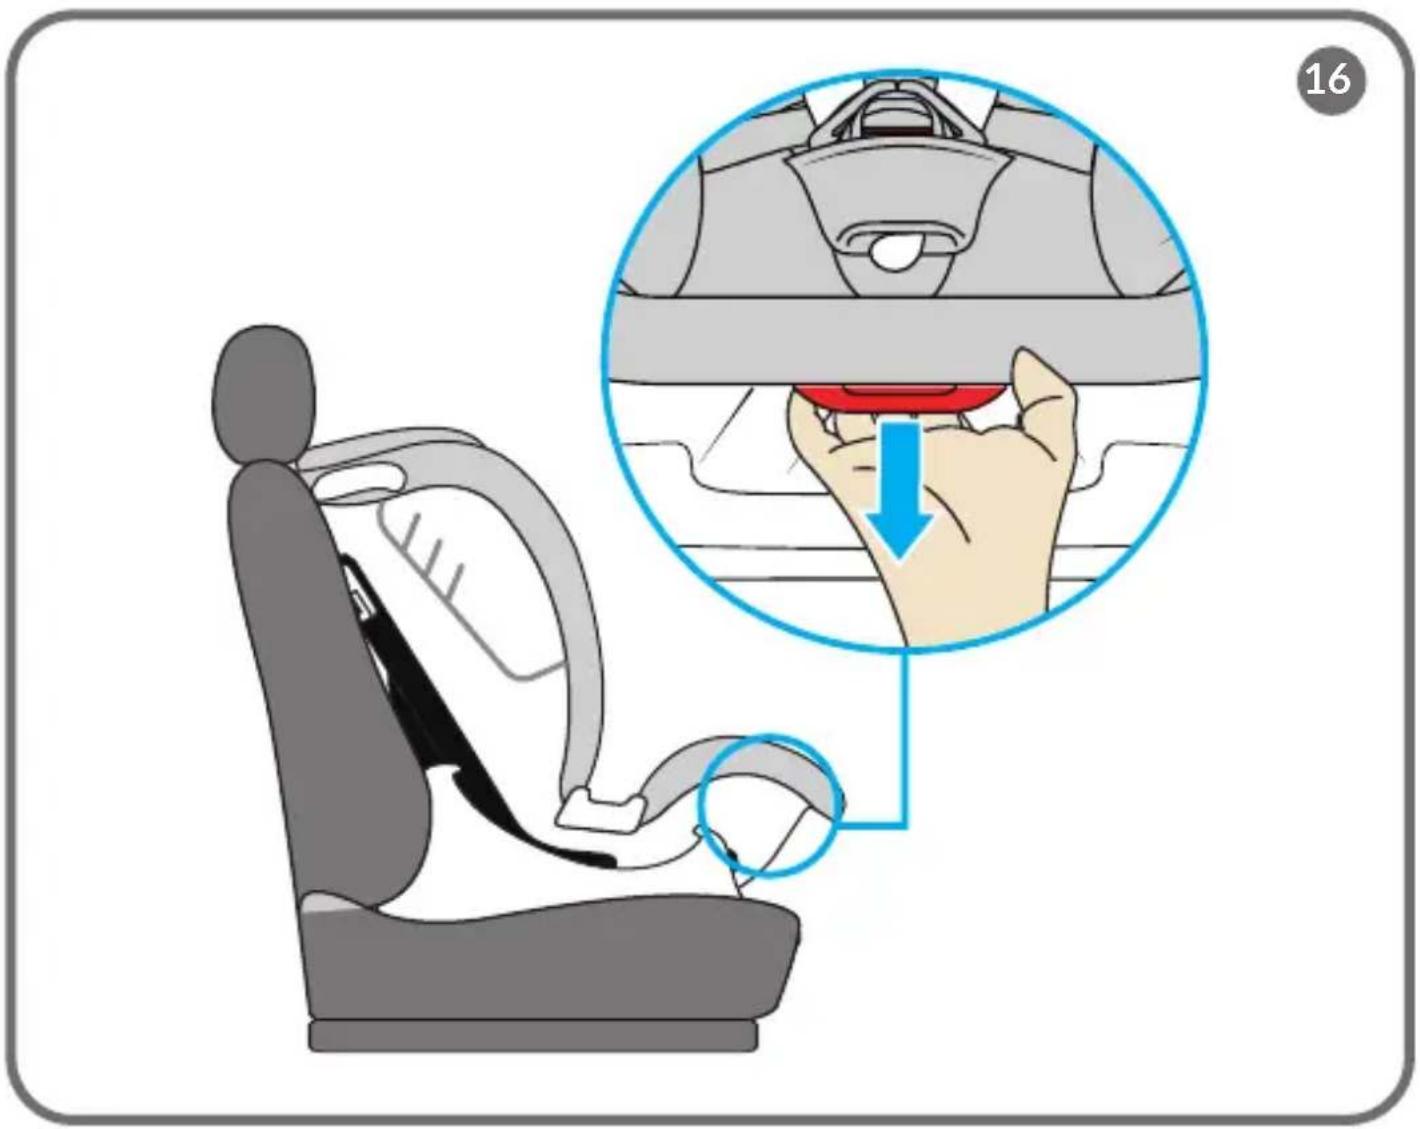
To adjust the seat tilt, press the seat tilt adjustment lever (10, fig. A) and move the seat to the desired position (fig. 16). Move the seat slightly until you hear a distinct click sound – the seat has been secured in the selected position.
Note! In the rearward-facing position, use the seat in the semi-reclining position. In the forward-facing position, use the seat in one of the available positions 1-2-3.
REMOVING AND ATTACHING THE COVER
Unzip the cover and slide it completely off the seat body. To do this:
- Adjust the headrest to the highest available position (see: Headrest adjustment).
- Unfasten the seat belts.
-
Start the removal from the cover located on the headrest.
-
Unfasten the hook-and-loop fasteners, then remove the remaining pieces of the cover. To reattach the cover to the seat, follow the above steps in reverse order.
MAINTENANCE AND CLEANING
Regularly check the seat for damage. If there are any abnormalities, contact the manufacturer's service department.
Avoid exposing the seat to direct sunlight. Covers can be washed in warm water (30°C) with soap or mild detergent. Do not dry the covers in the sun.
Clean the buckle, seat belts and plastic parts with warm water. Do not use any detergents.
The photos are for reference only, the actual look of the products may differ from the ones shown in the pictures.
PL
Drogi Kliencie!
BrandLine Group Sp. z o.o.