
HG08649 - Lighting CRIVIT - Free user manual and instructions
Find the device manual for free HG08649 CRIVIT in PDF.

| Product type | Wet room LED lighting |
| Brand | Crivit |
| Model | HG08649 |
| Operating voltage | 230 V ~ 50 Hz |
| Rated power | LED max. 18 W |
| Bulb | LED T8, G13, 0.13 A, 18 W (model HG08649A) |
| Protection rating | IP65 (dust-tight and protected against water jets) |
| Protection class | II (double insulation) |
| Use | Indoor only, dry or wet rooms, wall mounting |
| Energy efficiency class | F |
| Package contents | 1 luminaire, 1 LED bulb, 12 locking clips, 2 mounting clips, 4 wall plugs, 4 screws, 1 manual |
| Warranty | 3 years (from date of purchase) |
| IAN reference | 374063_2104 |
| Care and cleaning | Disconnect power before cleaning; use a dry, lint-free cloth; do not use water or solvents |
| Safety | Installation by a qualified electrician; do not use with a dimmer; do not immerse |
| Replacing the bulb | The LED T8 tube must only be replaced with a T8 tube of the same model (HG08649A) |
| Special features | Non-dimmable, not suitable for emergency lighting, use in explosive atmosphere prohibited |
Frequently Asked Questions - HG08649 CRIVIT
User questions about HG08649 CRIVIT
0 question about this device. Answer the ones you know or ask your own.
Ask a new question about this device
Download the instructions for your Lighting in PDF format for free! Find your manual HG08649 - CRIVIT and take your electronic device back in hand. On this page are published all the documents necessary for the use of your device. HG08649 by CRIVIT.
USER MANUAL HG08649 CRIVIT
LED MOISTURE-PROOF LIGHT
Operation and Safety Notes
FR BE
ÉCLAIRAGE À LED POUR PIECE HUMIDE
LED-VÄDRUMSBELYSNING
Operation and Safety Notes Page 32
FR/BE
Description of parts.. Page 35
Technical data.. Page 36
Scope of delivery Page 37
Safety instructions.. Page 38
Preparation Page 44
Required tools and material Page 44
Installation Page 45
Changing the light bulb Page 48
Maintenance and Cleaning Page 49
Disposal.. Page 50
Warranty and service . Page 51
Warranty . Page 51
Warranty claim procedure1 Page 53
Service.. Page 54
| List of pictograms used | |
| ~ | Alternating current / voltage |
| Protection class II | |
| For indoor use only. | |
| LED lifespan | |
| EELL | This light is not suitable for emergency operation. |
| Light bulb - only insert in a dry environment. | |
| Please note the product is not dimmable. | |
| IP65 | Dust-tight / water jet protected (IP65) |
C
CE mark indicates conformity with relevant EU directives applicable for this product.
LED MOISTURE-PROOF LIGHT
Introduction
We congratulate you on the purchase of your new product. You have chosen a high quality product. The instructions for use are part of the product. They contain important information concerning safety, use and disposal. Before using the product, please familiarise yourself with all of the safety information and instructions for use. Only use the product as described and for the specified applications. If you pass the product on to anyone else, please ensure that you also pass on all the documentation with it.
Properuse
The product is intended for providing illumination and for mounting on walls.

For indoor use only! This product is only suitable for private use in dry indoor rooms. The product is not
intended for commercial use or for use in other applications. The product can be mounted on all normally flammable surfaces. This product is intended for use only in a domestic, private household environment.
Description of parts
1 Light cover
2 Dowels
3 Screws
4 Locking clamp
5 Light base
6 Locking nut (cable outlet)
7 Mounting clamp
8 Mains connection cable (external)
9 Lustre terminal
10 Light bulb
- Technicaldata
LED Moisture-Proof Light Model Number: HG08649
Operating voltage :
230 ~V 50 ~Hz
Rated power:
LED max. 18 W
GS certified
Protection class :
//
IP rating :
IP65
Light bulbModel Number:
HG08649A
LED, T8, G13, 0.13A, 18 W (no starter
needed)
The LED T8 tube can only be replaced by
same model or same type of T8 tube.
This product contains a light source of
energy efficiency class "F".
Scope of delivery
1 LED Moisture-Proof Light
1 LED light bulb, LED, T8, G13, 0.13A 18 W
12 Locking clamps
2 Mounting clamps
4 Wall plugs
4 Screws
1 Set of assembly instructions and
instructions for use
- Safetyinstructions

GERWARNING! TO LIFE AND RISK OF ACCIDENTS FOR INFANTS
AND CHILDREN! Never leave children alone and unsupervised with the packaging material. There is always a risk of suffocation if children play with the packaging material. Children often underestimate risks. Always keep children away from the packaging material. This product is not a toy.
The right to claim under the guarantee shall be rendered invalid in respect of damage caused by the non-observation of these operating instructions! No liability is accepted for consequent damage! No liability is accepted for damage to property or persons caused by improper handling or non-observation of the safety advice!
This product can be used by children aged from 8 years and above and persons with reduced physical, sensory or mental capabilities or lack of experience and knowledge if they have been given supervision or instruction concerning use of the product in a safe way and understand the hazards involved. Children shall not play with the product. Cleaning and user maintenance shall not be made by children without supervision. This product is not a toy and should be kept out of the reach of children. Children are not aware of the dangers associated with handling electrical products.
- Do not allow the product or the packaging materials to lie around unattended. Plastic film or bags, Styrofoam etc. can turn into dangerous toys for children.
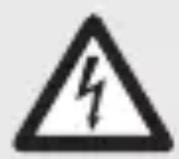
CAUTION! DANGER OF EXPLOSION!
Do not operate the product in potentially explosive environments in which there are inflammable vapours, gases or dusts.
- Do not expose the product to direct sunlight, rain, snow or ice. Failure to observe this advice may result in damage to the product.
- Do not attach the product to damp or conductive substrates.
The LED tube can NOT be used in other luminaires. It can only be used in the luminaire model no.: HG08649.
Install only the LED T8 tube model no.: HG08649A. It is not compatible with other types of LED tubes.
This lamp is designed for general lighting service (excluding for example explosive atmospheres).
To avoid danger to life from electric shock
Always check the product for damage before connecting it to the mains power supply. Never use the product if it shows any signs of damage.
In the event of damage, repairs or other problems with the product, please contact the Service Centre or an electrician.
Before installation, switch off the electrical circuit at the circuit breaker box or remove the fuse from the fuse box.
The basic insulated cables of the permanent wiring must be fitted with additional insulation.
- Use double insulated cables from the connection point to the light. The basic insulation must be sufficiently short so that the basic insulation does not come into contact with the mounting surface or any screws.
- Never open or insert anything into electrical fittings or equipment. Doing this sort of thing can lead to a serious danger to life from electric shock.
If the external flexible cable or cord of this luminary is damaged, it shall be replaced by a special cord or cord exclusively available from the manufacturer or his service agent.
Before assembly, ensure that the mains power voltage available corresponds to the operating voltage necessary of the light (see Technical data).

To avoid danger of fire and injury
■ RISK OF INJURY! Check every LED and lampshade for damage immediately upon unpacking. Do not fit the product if the LEDs and / or lampshades are faulty. If they are, contact the service point for a replacement.
OF ELECTRIC SHOCK! DANGER OF DAMAGE TO PROPERTY! DANGER OF INJURY! Importe
The electrical connection must be established by a qualified electrician or a person trained to perform electrical installations. This person must be familiar with the properties of the product and the connection regulations. Make sure you will not be drilling into electrical, gas or water lines inside the wall. Use a power drill to drill the holes into the brick wall. Always observe all safety instructions for the power drill in the manual for the power drill. Death or injury due to electric shock may otherwise result. If necessary, check the wall using a suitable detector before you drill.
- Do not use this product for dimmers or electronic switches.
This light is not suitable for emergency operation.
This light is not suitable for high frequency operation.
The LED T8 tube can only be replaced by same model or same type of T8 tube.
Preparation
- Required tools and material
The tools and materials specified are not included.
This information and these values are non-binding and are only provided as a reference. The nature of the material is determined by the individual local conditions.
- H05RN-F cable in required length with wire end
- ferrules (minimum cross-section 2 × 1.0 mm^2 )
- Pencil / marking tool
-
Voltage tester
-
Cross-tip screwdriver
- Electric drill
- Edge cutter
- Drill (Ø 6 mm)
- Slotted head screwdriver
Installation
NOTE: Remove all packaging materials from the product.
Before installing, you will need to remove the light bulb 10 from the lamp. Start by loosening the light cover 1 by opening the locking clamps 4 on the sides of the light base 5.
- Check carefully from which side the light cover 1 can be fully opened then remove the light bulb 10 by unscrewing it from the socket with a 1 turn (see Fig. I, J).
Mark the drill holes with approx. 10-15 mm distance between them.
Now drill the mounting holes ( approx. 6mm 40~mm deep). Be sure not to
damage the power cable.
- Insert the wall plugs 2 into the drilled holes. Secure the mounting clamps 7 using the screws 3 provided (see Fig. B).
- Push a locking clamp into every bracket on the side of the light base (see Fig. C).
- Loosen the locking nut ⑥ on the cable outlet.
- Push the light base 5 into the mounting clamps 7 (see Fig. E).
Check that it is positioned securely.
Guide the mains connection cable (external) 8 through the cable outlet in the light base 5 (see Fig. F). Make sure that the double isolation of the mains connection cable (external) 8 reaches fully into the light base 5. - Connect the mains connection cable (external) using the lustre terminal (see Fig. F). Be sure that the colours of the connected lines match (L or 2 = black or
brown, N or 1 = blue or white). Protection class 2: This light is specially insulated and must not be connected to a protective conductor.
- Screw the locking nut 6 on the cable outlet tight.
Make sure that the rubber seal tightly surrounds the mains connection cable (external) 8.
Make sure that the cable is positioned in the light base 5 in the brackets intended for this purpose. - When install the T8 tube to the luminaire, the polarity should be match according to Fig. F.
Now insert the light bulb 10 into the sockets and fix it in place by turning it a 1 rotation (see Fig. G). -
Place the light cover 1 on the light base 5.
Make sure that the rubber seal is attached correctly. -
Hook the locking clamps 4 onto the lightcover 1 and close these by exerting slight pressure (see Fig. H).
Check that they are positioned correctly. - Replace the fuse or switch on the circuit breaker (I setting) in the fuse box.
- Your light is now ready to use.
- Changing the light bulb
- Allow the light bulb 10 to cool down fully before replacing it.
- Remove the fuse or switch off the circuit breaker (O setting) in the fuse box.
To replace the light bulb, use a clean, lint-free and dry cloth. - Loosen the light cover 1 by opening the locking clamps 4 on the side.
- Check carefully from which side the light cover 1 can be fully opened.
Remove the faulty light bulb from the sockets by turning it a 1 rotation (see Fig. I, J).
Insert the new light bulb into the sockets and fix it in place by turning it a 1 rotation (see Fig. K, L).
- Place the light cover 1 on the light base 5 and close the locking clamps 4 (see Fig. H).
- Replace the fuse or switch on the circuit breaker (I setting) in the fuse box.
- Maintenance and Cleaning
Allow the product to cool down completely.

WARNING!
DANGER TO LIFE
FROM ELECTRIC SHOCK! Before
carrying out any tasks on the product, switch off the electrical circuit at the circuit breaker box or remove the fuse from the fuse box.
CAUTION! Do not use solvents, petrol etc.

WARNING!
DANGER TO LIFE
FROM ELECTRIC SHOCK! For reasons
of electrical safety, the product must never be cleaned with water or other fluids or be immersed in water. When cleaning, only use a dry, lint-free cloth.
Disposal
The packaging is made entirely of recyclable materials, which you may dispose of at local recycling facilities.

Observe the marking of the packaging materials for waste separation, which are marked with
abbreviations (a) and numbers (b) with following meaning: 1-7: plastics / 20-22: paper and fibreboard / 80-98: composite materials.

The product and packaging materials are recyclable, dispose of it separately for better waste
treatment. The Triman logo is valid in France only.
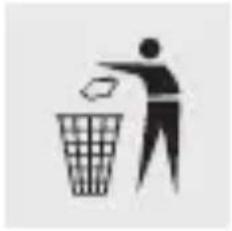
Contact your local refuse disposal authority for more details of how to dispose of your worn-out product.

To help protect the environment, please dispose of the product properly when it has reached the
end of its useful life and not in the household waste. Information on collection points and their opening hours can be obtained from your local authority.
Warranty and service
Warranty
The product has been manufactured to strict quality guidelines and meticulously examined before delivery. In the event of product defects you have legal rights against the retailer of this product. Your legal rights are not limited in any way by our warranty detailed below.
The warranty for this product is 3 years from the date of purchase. Should this product show any fault in materials or manufacture within 3 years from the date of purchase, we will repair or replace it - at our choice - free of charge to you.
The warranty period begins on the date of purchase. Please keep the original sales receipt in a safe location. This document is required as your proof of purchase. This warranty becomes void if the product has been damaged, or used or maintained improperly.
The warranty applies to defects in material or manufacture. This warranty does not cover product parts subject to normal wear, thus possibly considered consumables (e.g. batteries) or for damage to fragile parts, e.g. switches, rechargeable batteries or glass parts.
Warranty claim procedure
To ensure quick processing of your case, please observe the following instructions:
Please have the till receipt and the item number (IAN 374063_2104) available as proof of purchase.
You will find the item number on the rating plate, an engraving, on the front page of the instructions for use (bottom left), or as a sticker on the rear or bottom of the product.
If functional or other defects occur, please contact the service department listed either by telephone or by e-mail.
You can return a defective product to us free of charge to the service address that will be provided to you. Ensure that you enclose the proof of purchase (till receipt) and information about what the defect is and when it occurred.
Service
Service Great Britain
Tel.: 08000569216
E-Mail: owim@lidl.co.uk

Service Ireland
Tel.: 1800 200736
E-Mail: owim@lidl.ie

Installation Page 69
LED, T8, G13, 0,13A, 18 W (green starter)
vereist)

- LED MOISTURE-PROOF LIGHT
- ÉCLAIRAGE À LED POUR PIECE HUMIDE
- LED-VÄDRUMSBELYSNING
- Description of parts.. Page 35
- Technical data.. Page 36
- Scope of delivery Page 37
- Safety instructions.. Page 38
- Preparation Page 44
- Required tools and material Page 44
- Installation Page 45
- Changing the light bulb Page 48
- Maintenance and Cleaning Page 49
- Disposal.. Page 50
- Warranty and service . Page 51
- Warranty . Page 51
- Warranty claim procedure1 Page 53
- Service.. Page 54
- Introduction
- Properuse
- Description of parts
- - Technicaldata
- Scope of delivery
- - Safetyinstructions
- GERWARNING! TO LIFE AND RISK OF ACCIDENTS FOR INFANTS
- CAUTION! DANGER OF EXPLOSION!
- To avoid danger to life from electric shock
- To avoid danger of fire and injury
- OF ELECTRIC SHOCK! DANGER OF DAMAGE TO PROPERTY! DANGER OF INJURY! Importe
- Preparation
- - Required tools and material
- Installation
- NOTE: Remove all packaging materials from the product.
- - Changing the light bulb
- - Maintenance and Cleaning
- WARNING!
- DANGER TO LIFE
- FROM ELECTRIC SHOCK! Before
- FROM ELECTRIC SHOCK! For reasons
- Disposal
- Warranty and service
- Warranty
- Warranty claim procedure
- Service
- Service Great Britain
- Service Ireland
Brand : CRIVIT
Model : HG08649
Category : Lighting