Silent Base 601 - Desktop Computer Be Quiet! - Free user manual and instructions
Find the device manual for free Silent Base 601 Be Quiet! in PDF.
| Brand | Be Quiet! |
| Model | Silent Base 601 |
| Product Type | Desktop Case (Mid Tower) |
| Dimensions (W x H x D) | 532 x 240 x 514 mm |
| Net Weight (without window / with window) | 10.49 kg / 11.22 kg |
| Gross Weight (without window / with window) | 12.5 kg / 13.23 kg |
| Materials | SECC steel, ABS plastic, tempered glass (Window version) |
| Supported Power Supply | PS2 ATX (not included) |
| Supported Motherboard Formats | E-ATX (30.5 x 27.5 cm), ATX, M-ATX, Mini-ITX |
| Front I/O | 2x USB 3.0, 1x USB 2.0, HD Audio (mic + headphone), fan controller, HDD and power LED |
| PCI Slots | 7 + 2 (vertical GPU slots) |
| Storage Bays | Up to 7 x 3.5" (8 included) / up to 14 x 2.5" (6 included) |
| Pre-installed Fans | 1x Pure Wings 2 140 mm front (1000 RPM), 1x Pure Wings 2 140 mm rear (1000 RPM) |
| Additional Fan Mounts | Front: 2x 140/120 mm; Top: 3x 140/120 mm; PSU cover: 1x 140/120 mm |
| Radiator Mounts | Front: 120/140/240/280/360 mm; Top: 120/240/360 mm; Rear: 120/140 mm |
| Maximum CPU Cooler Height | Up to 185 mm |
| Maximum PSU Length | Up to 288 mm |
| Maximum GPU Length | 449 mm (without HDD cage) / 287 mm (with HDD cage) |
| Sound Dampening | Sound insulation panels on front, side and top |
| Dust Filters | Removable filters front and underside |
| Integrated Fan Controller | 3 levels (max 3 fans 3-pin) |
| Manufacturer Warranty | 3 years (upon presentation of invoice) |
| Included Accessories | HDD cage, rubber grommets, HDD screws, M3 screws, 6#32 screws, cable ties, E-ATX standoff |
| Maintenance and Cleaning | Clean dust filters regularly; use a soft, dry cloth for the case; avoid abrasive products |
| Safety | Disconnect the device before any intervention; follow assembly instructions; do not modify the chassis (voids warranty) |
| Spare Parts and Repairability | Fans, filters, cables and accessories available; contact customer service for specific parts |
| General Information | Designed for silent operation; water cooling compatible; optimized cable management |
Frequently Asked Questions - Silent Base 601 Be Quiet!
User questions about Silent Base 601 Be Quiet!
0 question about this device. Answer the ones you know or ask your own.
Ask a new question about this device
Download the instructions for your Desktop Computer in PDF format for free! Find your manual Silent Base 601 - Be Quiet! and take your electronic device back in hand. On this page are published all the documents necessary for the use of your device. Silent Base 601 by Be Quiet!.
USER MANUAL Silent Base 601 Be Quiet!
natural_image
Line drawing of a beige computer tower case with ventilation grilles and a label 'be quick!' (no other text or symbols)SILENT BASE 601
EXCELLENT SILENCE AND USABILITY
USER MANUAL
1. INTRODUCTION.... 4
- SPECIFICATIONS 5
- CONTENTS 6
- EXPLODED VIEW & PARTS 7
- FAN COMPATIBILITY.... 49
- RADIATOR SUPPORT 49
- REMOVING INDIVIDUAL COMPONENTS.... 50
- AFFIXING AND REMOVING DISK DRIVES 51
- INSTALLING THE COMPONENTS 55
LIMITED WARRANTY 59
We are delighted you have chosen to buy our Silent Base PC case. Please read the information here and carefully follow all the instructions prior to installation. Should you have further questions, please contact our customer service. See contact information in the manufacturer's details section.
Warranty
- 3-year manufacturer's warranty for the consumer (original purchase from authorized be quiet! dealers only)
- Your original receipt of purchase will be required before warranty services are rendered. Please store it carefully.
- Manipulations and/or technical modifications of any kind, or damage due to the application of mechanical force, will void your warranty.
- To read the warranty terms and conditions in full, see Service/Warranty Conditions on our website at bequiet.com.
Our General Terms and Conditions of Business also apply. For details please refer online under bequiet.com.
Manufacturer's details
Listan GmbH & Co. KG | Biedenkamp 3a | 21509 Glinde | Germany
Visit the contact section on bequiet.com for the right regional service information.
Monday through Friday 09:00 - 17:30 (UTC+1)
Tel. 0049 40 736 7686 - 44 Fax 0049 40-7367686-69
Email: service@bequiet.com
Website: www.bequiet.com
Copyright
- You are not allowed to reproduce, disclose, publish or store the contents of this documentation, or excerpts of it, without the prior written consent of Listan.
- be quiet! is a registered trademark of Listan GmbH & Co. KG. Other products and company names mentioned in this documentation may be the brands or trademarks of their respective owners.
- In accordance with company policy, all Listan products are subject to ongoing development. Listan reserves the right to make changes and improvements to any product described in this documentation without prior notice.
- Under no circumstances shall Listan be held liable for loss of data or income, or for any specific, incidental, direct, or indirect damage, however it arises.
- The content of this documentation represents the status at time of writing. Listan does not assume, whether expressed or implicit, any liability for the correctness or completeness of the content of this documentation, including, but not limited to the implicit guarantee of market suitability for a particular purpose, unless applicable laws or jurisdiction specifically stipulate such a liability.
Listan reserves the right to make changes to this documentation or to withdraw the documentation at any time without prior announcement.
2. SPeCIFICatlOnS
natural_image
Line drawing of a rectangular electronic device with ventilation grilles and a label on the front panel (no readable text or symbols)| Motherboard compatibility E-ATX (30.5 x 27.5cm), ATX, M-ATX, Mini-ITX | |
| Case type Midi-Tower | |
| PSU PS2 ATX (not included) | |
| Dimensions (L x W x H in mm) 532 x 240 x 514 | |
| Material Steel (SECC), ABS plastic, tempered glass* | |
| Weight (kg) 10.49 (net) / 12.5 (gross)11.22 (net) / 13.23 (gross)* | |
| I/O panel 2x USB 3.0, 1x USB 2.0, HD audio (microphone + audio), Fan controller,HDD status LED | |
| PCI slots 7 + 2 | |
| Drive bays up to 7x 3.5" (3 included)up to 14x 2.5" (6 included) | |
| Preinstalled fans (mm) / (rpm) Front: 1x Pure Wings 2 140 / 1,000Rear: 1x Pure Wings 2 140 / 1,000 | |
| Optional fans (mm) Front: 2x 140/120Top: 3x 140/120PSU shroud: 1x 140/120 | |
| Optional radiators (mm) | Front: 120, 140, 240, 280, 360Top: 120, 240, 360Rear: 120, 140 |
| Maximum dimensions (mm) | CPU cooler: up to 185PSU: 288GPU: 449/287 (without HDD cage) |
| Noise cancellation | Sound insulation mats (front / side / top) |
| Cooling solutions | Air channels (top and front)3-step fan controller (3x 3-pin) |
*Silent Base 601 Window
3. COnentS
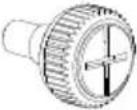
| Images Part Name | Amount Usage | ||
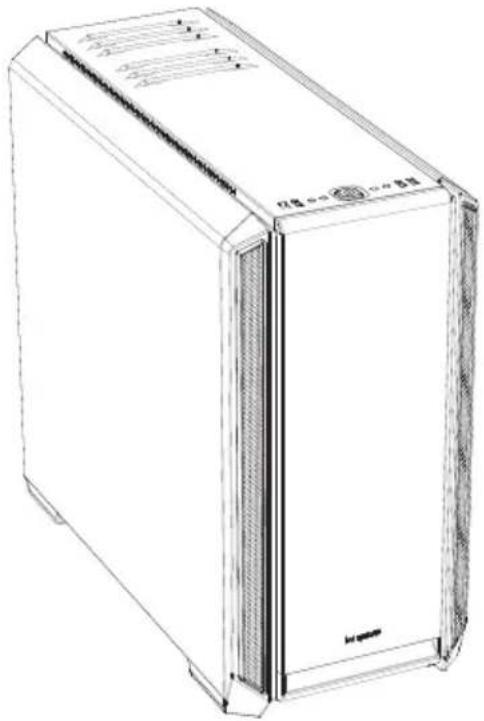
 | HDD cage 1 Installation of hard disk | ||
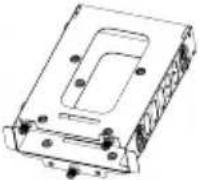
 | HDD rubber decoupling 4 Decoupled mounting of HDD | ||
 | HDD screw 12 Affixing the HDD | ||
 | M3 screw 12 Fastening the SSD | ||
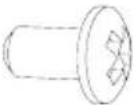 | 6#32 screw 12 Affixing the motherboard | ||
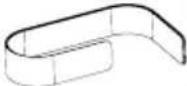 | Cable ties 6 Cable management | ||
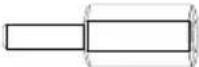 | Stand-off screw | 1 Securing an E-ATX motherboard | |
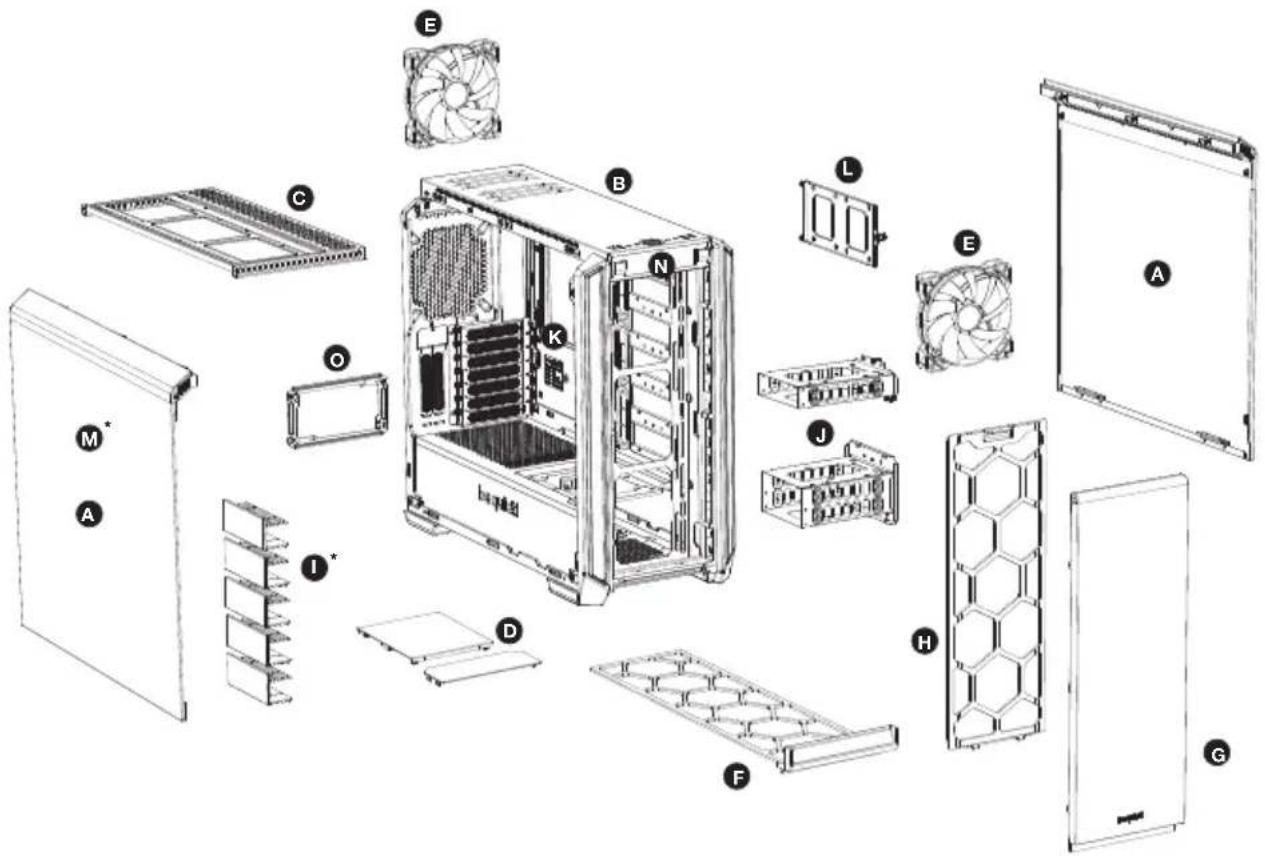
4. eXPLOded VleW and deSCrIPtION OF PartS
text_image
Exploded view diagram of a server rack system with labeled components from fan to door| A Side panel I HDD slot cover* | |||
| B Case body J HDD cage | |||
| C | Detachable top bracket for fans and radiators | K | Motherboard tray |
| D Top cover of PSU shroud L SSD bracket | |||
| E Pure Wings 2 fan M Side window of tempered glass* | |||
| F Floor air filter N Front I/O panel | |||
| G Case front O PSU bracket | |||
| H Front air filter | |||
*Silent Base 601 Window only
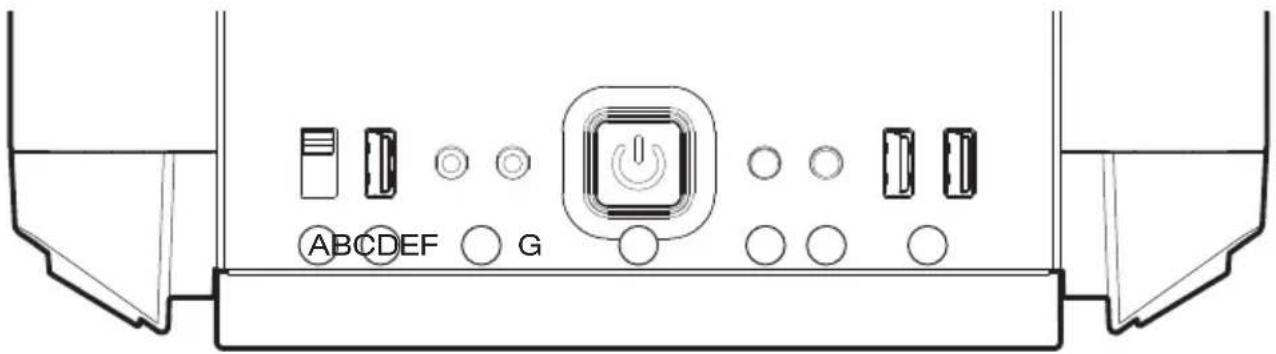
4.1 Front I/O and media ports
text_image
ABCDEF G| A 3 | step fan controller E Reset button | ||
| B U | SB 2.0 F HDD LED | ||
| C | HD Audio (microphone + audio) | G | USB 3.0 |
| D P | Power button |
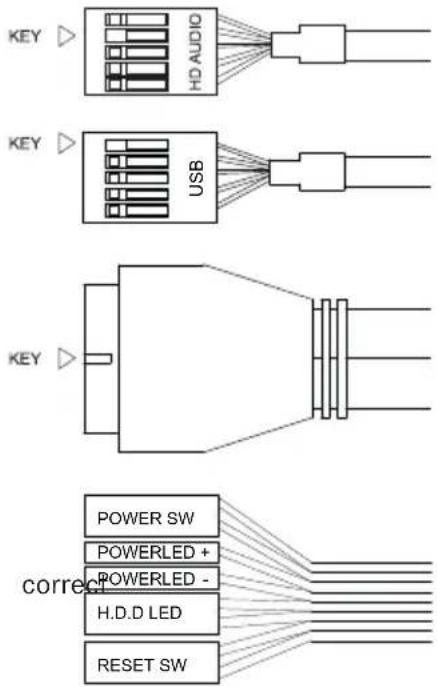
4.2 I/O ports
The front I/O ports that are provided require connections to your motherboard. Refer to your motherboard handbook for information on pin assignments and sockets.
HD audio (headphone and microphone sockets)
Determine the HD audio pin connectors on your motherboard and insert the HD audio cables into the sockets allocated there.
USB 2.0
Locate the USB 2.0 pin connector on your motherboard and attach the USB 2.0 cables using the designated sockets there.
USB 3.0
Locate the USB 3.0 pin connector on your motherboard and attach the USB 3.0 cables using the designated sockets there.
On/off switch, LED power indicator, HDD activity indicator, reset button
The illustrated plug connects the power switch and the case's LED indicators with your motherboard. Take care to use the polarity with the LEDs.
text_image
KEY HD AUDIO KEY USB KEY correct POWER SW POWERLED + POWERLED - H.D.D LED RESET SW4.3 Use of fan controller
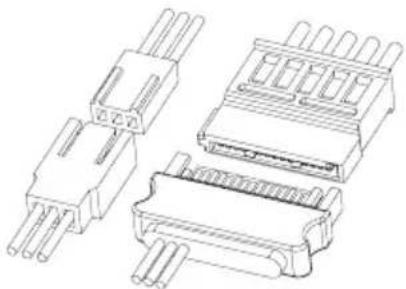
Please plug the S-ATA connector of the fan speed controller to your power supply to take control of up to three 3-pin fans.
natural_image
Technical line drawing of four different electronic component packages (no text or symbols)5. FAN COMPATIBILITY 49
1. EINLEITUNG
natural_image
Line drawing of a rectangular electronic device with ventilation grilles and a label on the front panel (no readable text or symbols)text_image
Exploded view diagram of a computer system with labeled components from fan to towernatural_image
Line drawing of a desktop computer case with ventilation slots and drive bays (no text or symbols)text_image
Exploded view diagram of a computer system with labeled components from fan to towernatural_image
Technical line drawing of four different electronic component packages (no text or symbols)5. COMPATIBILITÉ VENTILATEURS 49
1. WErOWadZenle
natural_image
Line drawing of a desktop computer case with ventilation slots and ventilation duct (no text or symbols)text_image
Exploded view diagram of a desktop computer showing internal components like CPU, fans, and storage compartments with labeled parts A through M.text_image
ABC D EF Gnatural_image
Pure electrical circuit lines without any symbolsnatural_image
Technical line drawing of four different electronic component packages (no text or symbols)5. KOMPATYBILNOŚĆ Z WENTYLATORAMI
1. INPRODUCCIÓN
natural_image
Line drawing of a rectangular electronic device with ventilation grilles and a label on the front panel (no readable text or symbols)text_image
Exploded view diagram of a computer system with labeled components from fan to towernatural_image
Technical line drawing of four different electronic component packages (no text or symbols)5. COMPATIBILIDAD CON VENTILADORES 49
1. ВВЕДЕНИЕ
natural_image
Line drawing of a white server unit with ventilation grilles and ventilation ducts (no text or symbols)text_image
Exploded view diagram of a computer system with labeled components from fan to towernatural_image
Technical line drawing of four different electronic component packages (no text or symbols)natural_image
Line drawing of a server unit with ventilation grilles and ventilation ducts (no text or symbols)text_image
Exploded view diagram of a desktop computer with labeled components from fan to towertext_image
A B C D E F Gnatural_image
Technical line drawing of four different electronic component packages (no text or symbols)5. 風扇相容性....49
1. 简
natural_image
Line drawing of a rectangular electronic device with front panel and side panels (no text or symbols)text_image
Exploded view diagram of a desktop computer with labeled components from fan to towertext_image
A B C D E F Gnatural_image
Technical line drawing of four different electronic component packages (no text or symbols)5. 风扇兼容性
1. はじめに
natural_image
Line drawing of a rectangular electronic device with ventilation grilles and a label on the front panel (no readable text or symbols)text_image
Exploded view diagram of a computer tower case with labeled components from fan to doortext_image
A B C D E F Gnatural_image
Technical line drawing of four different electronic component packages (no text or symbols)5. Ean COMPatIBILItY
DE LÜFterKOMPatIBILITÄt | CMPatIBILITÉ VentILateurS | KOMatYBILnOŚĆ WentY-
LatOrÓW | ES COMPatIBILIdad deL VentILadOr | ☑ВМЕСТИМЫЕ ВЕНТИЛЯТОРЫ |
natural_image
Technical line drawing of a server rack unit with multiple drive bays and internal compartments (no text or labels)| Position Size | (mm) |
| Top 3x 140, 3x | 120 |
| Front 3x 140, | 3x 120 |
| Rear 1x 140, | 1x 120 |
| PSU shroud | 1x 140, 1x 120 |
natural_image
Technical line drawing of a desktop computer case with internal components and external storage racks (no text or symbols)| Position Size | (mm) |
| Top | 120, 240, 360 |
| Front | 120, 140, 240, 280, 360 |
| Rear | 120, 140 |
7. EkeMOVIng IndIVIduaL COMPONENTS
natural_image
Technical line drawing of a server rack with internal components and a highlighted cable outlet (no text or symbols)EN: To remove the side panel, press the button on the back of the case. Then drag the side panel slightly towards yourself.
natural_image
Technical line drawing of a server rack with ventilation grilles and a single door (no text or symbols)EN: Pull the side panel upwards and out.
natural_image
Line drawing of a wall-mounted air conditioner unit with a door and vent, showing internal structure (no text or symbols)EN: To remove the front panel, pull it up from the bottom to and draw it out at the top.
natural_image
Line drawing of a door frame structure with internal compartments and a handle (no text or symbols)EN: To insert the front panel, slide it in at the top and down to the bottom.
natural_image
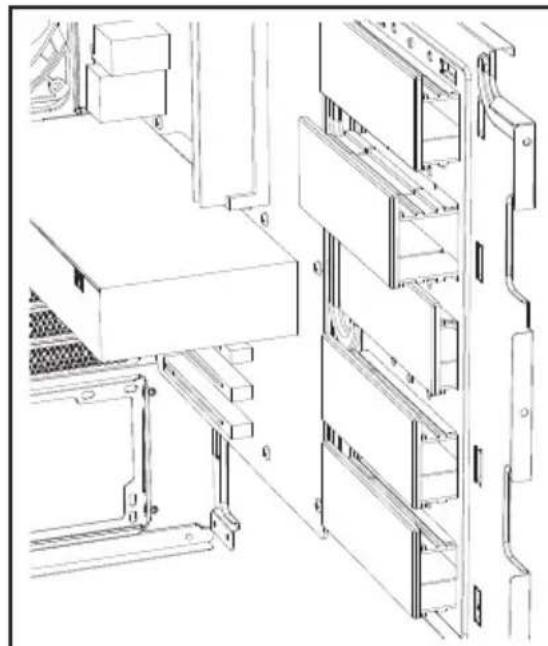
Technical line drawing of a multi-level industrial storage or rack system with no visible text or symbolsEN: The five HDD slot covers may each be positioned in three ways. They can either completely cover the openings at two offset distances to suit different cable widths. DE: Die fünf HDD-Slot-Cover können in drei Stufen ver- stellt werden. Sie verdecken die Öffnungen vollständi oder in zwei Höhen für unterschiedliche Kabeldicken. FR: Les cinq couvercles de fente pour disque dur peuvent être positionnés de trois manières. Ils peuvent recouvrir complètement l'ouverture ou à deux distances de décal-agepour s'adapter à différentes largeurs de câbles. PL: Można rozmieścić pięć zaślepek/osłon gniazd HDD na trzy sposoby. Mogą one całkowicie zakryć otwór lub być odsunięte w dwóch odległościach w celu dopasowania do różnych szerokości prowadzonych przewodów. ES: Cada una de las cinco cubiertas para ranura de disco duro puede colocarse de tres maneras. Pueden cubrir por completo la abertura o bien con dos distancias desplaza-daspara adaptarse a diferentes anchuras de cable. RU: Пять заглушек слотов HDD могут быть установлены в трех положениях: полностью закрывая отверстия или в двух положениях, в разной степени открывая их для монтажа кабелей различной толщины. TW: 五個 HDD 插槽蓋板可分別以三種方式放置。蓋板可完全覆蓋開口・或是採兩個偏移距離以適應不同的纜線宽度。 CN: 五个硬盘插槽蓋每个都能以三种方式放置。它们可以完全盖住开口处・或偏移两段距离以适合不同的线缆宽度。 JP: 5つの HDD スロットカバーは、それぞれ3つの方法で配置できます。開口部または2つのオフセット距離で完全に覆うことができるため、異なるケーブル幅に適合することができます。
natural_image
Technical line drawing of a server rack unit with mounting brackets and wiring (no text or symbols)EN: According to requirements, they can be removed or repositioned to install graphics cards or for cable management.
text_image
Technical line drawings of a mechanical assembly with labeled components and cross-sectional viewsEN: To optimize the cable routing up to two individual segments of the covers can be „punched out“ if necessary.
Warning: Any segments that are snapped off cannot be refitted.
natural_image
Technical line drawing of a server rack with multiple ports and ventilation ducts (no text or symbols)EN: Secure the motherboard with the 6#32 screws. Stand-offs for an ATX motherboard are preinstalled.
natural_image
Line drawing of a desktop computer tower with visible drive bays and fan array (no text or labels)EN: Unscrew and detach the respective PCI slot covers before attempting to insert PCI / PCIe add-on cards.
natural_image
Technical line drawing of a computer tower case with visible internal components and no readable text or symbolsEN: Graphics cards can also be installed vertically. The "Riser Card" that is needed to achieve this is not included in the scope of delivery.
natural_image
Technical line drawing of a server rack with internal components and two separate mounting brackets (no text or symbols)EN: Unscrew the knurled-head screws on the back of the case and then remove the power supply bracket.
As per the terms and conditions of this limited warranty as given below, be quiet! warrants its new products to be free of defects resulting from faulty materials and faulty manufacturing for the length of the warranty period.
I. APPLICABILITY
This non-transferable warranty is applicable to newly purchased, previously unopened be quiet! products and is enforceable by only the original consumer purchaser. Proof of purchase is required for warranty service, so should be retained. be quiet! does not provide warranty registration services.
II. WARRANTY PERIOD
For eligible products, parts and labor are warranted for the applicable warranty period from the date of purchase. The applicable warranty period varies by product model, and is identified in your user documentation, on the product package, or as listed below. Should any of these warranty periods differ, the longest specified warranty period will apply. Replaced products will be warranted for the remainder of the original warranty period or thirty days, whichever is longer.
III. EXCLUSIONS
The following are not covered by the warranty:
- Normal wear and tear.
- Any product which has been modified without permission from be quiet!, or on which the serial number or warranty sticker has been defaced, modified, or removed.
- Damage, deterioration or malfunction resulting from:
Accident, abuse, misuse or improper use, neglect, connection to an improper voltage source, unauthorized product modification, or failure to follow instructions included with the product.
Fire, water, lightning, or other acts of nature.
Repair or attempted repair by anyone not authorized by be quiet!.
Shipping or transport damage (claims must be made with the carrier).
Any other cause which does not relate to a defect in materials or manufacturing workmanship.
-
Cartons, cases, batteries, cabinets, tapes, accessories or other consumables used with this product.
-
be quiet!, Inc. does not warrant that this product will meet your requirements. It is your responsibility to determine the suitability of this product for your purpose.
-
Removal or installation charges.
-
Shipping charges.
-
Any incidental charges.
IV. EXCLUSION OF DAMAGES
be quiet!'s sole obligation and liability under this warranty is limited to the repair or replacement of a defective product at its option. be quiet! shall not, in any event, be liable for any special, incidental, indirect, or consequential damages whatsoever, including but not limited to loss of profits, revenue, or data (whether direct or indirect), damages resulting from interruption of service and loss of business, or for liability in tort relating to this product or resulting from its use or possession, even if be quiet! has been advised previously of the possibility of such damages.
V. LIMITATIONS OF IMPLIED WARRANTIES
There are no other warranties, expressed or implied, including but not limited to those of merchantability or fitness for a particular purpose. The duration of implied warranties is limited to the warranty length specified in Paragraph II.
VI. LOCAL LAW AND YOUR WARRANTY
This warranty gives you specific legal rights. You may also have other rights granted under local law. These rights may vary.
VII. NO OTHER WARRANTY
No be quiet! employee, dealer, or other agent is authorized to make any modification, extension, or addition to this warranty.
VIII. TO OBTAIN TECHNICAL SUPPORT OR WARRANTY SERVICE
Please see your product owner's manual or visit the service section at www.bequiet.com for details and contact information. You will need to provide proof of purchase for warranty service.