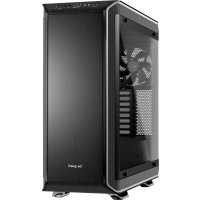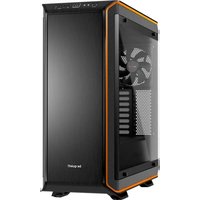
Dark Base Pro 900 rev. 2 - Desktop Computer Be Quiet! - Free user manual and instructions
Find the device manual for free Dark Base Pro 900 rev. 2 Be Quiet! in PDF.


User questions about Dark Base Pro 900 rev. 2 Be Quiet!
0 question about this device. Answer the ones you know or ask your own.
Ask a new question about this device
Download the instructions for your Desktop Computer in PDF format for free! Find your manual Dark Base Pro 900 rev. 2 - Be Quiet! and take your electronic device back in hand. On this page are published all the documents necessary for the use of your device. Dark Base Pro 900 rev. 2 by Be Quiet!.
USER MANUAL Dark Base Pro 900 rev. 2 Be Quiet!
We are delighted you have chosen to buy our Dark Base PC case. Please read the information here and carefully follow all the instructions prior to installation. Should you have further questions, please contact our customer service. See contact information in the manufacturer's details section.
Warranty
3-year manufacturer's warranty for the consumer (original purchase from authorized be quiet! dealers only)
- Your original receipt of purchase will be required before warranty services are rendered. Please store it carefully.
- Manipulations and/or technical modifications of any kind, or damage due to the application of mechanical force, will void your warranty.
To read the warranty terms and conditions in full, see Service/Warranty Conditions on our website at bequiet.com.
Our General Terms and Conditions of Business also apply. For details please refer online under bequiet.com.
Manufacturer's details
Listan GmbH & Co. KG | Biedenkamp 3a | 21509 Glinde | Germany
Visit the contact section on bequiet.com for the right regional service information.
Monday through Friday 09:00 - 17:30 (UTC+1)
Tel. 0049 40 736 7686 - 44 Fax 0049 40-7367686-69
Email: service@bequiet.com
Website: www.bequiet.com
Copyright
You are not allowed to reproduce, disclose, publish or store the contents of this documentation, or excerpts of it, without the prior written consent of Listan.
- be quiet! is a registered trademark of Listan GmbH & Co. KG. Other products and company names mentioned in this documentation may be the brands or trademarks of their respective owners.
In accordance with company policy, all Listan products are subject to ongoing development. Listan reserves the right to make changes and improvements to any product described in this documentation without prior notice.
Under no circumstances shall Listan be held liable for loss of data or income, or for any specific, incidental, direct, or indirect damage, however it arises.
- The content of this documentation represents the status at time of writing. Listen does not assume, whether expressed or implicit, any liability for the correctness or completeness of the content of this documentation, including, but not limited to the implicit guarantee of market suitability for a particular purpose, unless applicable laws or jurisdiction specifically stipulate such a liability.
Listan reserves the right to make changes to this documentation or to withdraw the documentation at any time without prior announcement.
2. SPECIFICATIONS
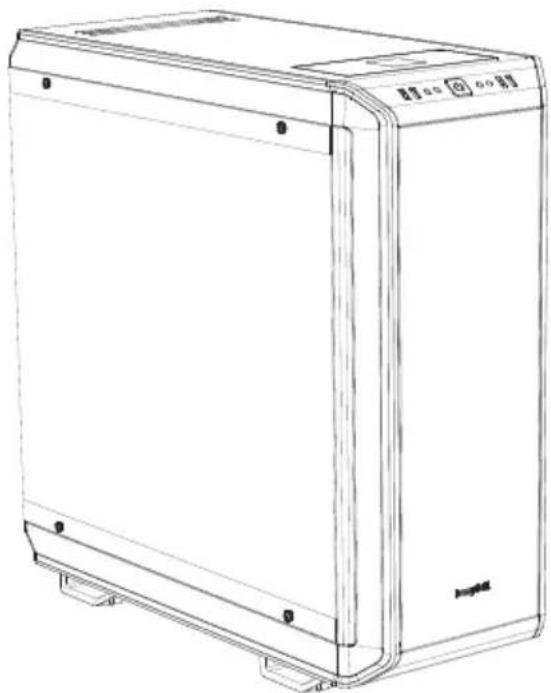
| Dimensions (W x H x D in mm) | 243 x 586 x 577 |
| Case type Full tower | |
| Material 0.8mm - 1mm SECC, | 0.8mm aluminum, ABS plastic, 4mm tinted and tempered glass |
| Motherboard compatibility E-ATX, XL-ATX, ATX, M-ATX, Mini-ITX | |
| Front I/O connectors 2x USB 3.0, 1x USB 3.1 Type C Gen. 2, 1x USB Quick Charging Option, HD audio (microphone + headphones), RGB control switch, HDD status display | |
| Fan controller 8x PWM stepples control / PWM hub | |
| Max. CPU cooler height (mm) 185 | |
| Max. graphics card lenght (mm) | 325 / 470 (without HDD bracket) |
| Max. PSU length (mm) 150 - 284 | |
| PCI slots 8 | |
| 5.25" bay 2 | |
| 3.5" bay 7 (5 ex works) | |
| 2.5" bay 14 (10 ex works) | |
| Case fans (mm) / (rpm) | Front: 2x Silent Wings 3 140 / 1,600 | Rear: 1x Silent Wings 3 140 / 1,600 |
| Optional case fans (mm) | Front: 1x 140 (without ODD cage, bracket included) Top: 3x 140 / 4x 120 / 1x 180 | Bottom: 2x 140/120 | PSU shroud: 1x 120 |
| Optional radiator installation (mm) | Front: 120, 140, 240, 280, 360, 420 Top: 120, 140, 180, 240, 280, 360, 420 Rear: 120, 140 |
| Additional features | Wireless charger for Qi enabled devices, switchable multi mode, multi color and expandable RGB LED lightning (white, red, green, blue, orange, purple), supports motherboard LED control |
3. CONTENTS
| Images Part Name | Amount Usage | ||
| LCS bracket 1 Attaching liquid cooling pumps, etc. | |||
| Fan bracket 1 Mounting a third fan on the front | |||
| HDD screw 20 Affixing the HDD | |||
| M3 screw 8 Fastening the SSD | |||
| 6#32 screw 14 | Affixing the motherboard and SSD bracket | ||
| Stand-off screw 3 Securing an E-ATX motherboard | |||
| Knurled-head M3 8 Affixing an ODD | |||
| Cable ties | 6 Cable management | ||
| HDD cage | 3 Installation of extra hard disks | ||
| LED strip | 2 Lighl ing | ||
| HDD rubber decoupling | 12 | Sound isolation of HDD cage | |
| Double HDD slot cover | 1 Covering the dual HDD slot | ||
| SSD bracket 1 Fixing an SSD on the PSU shroud |
4. EXPLODED VIEW AND DESCRIPTION OF PARTS
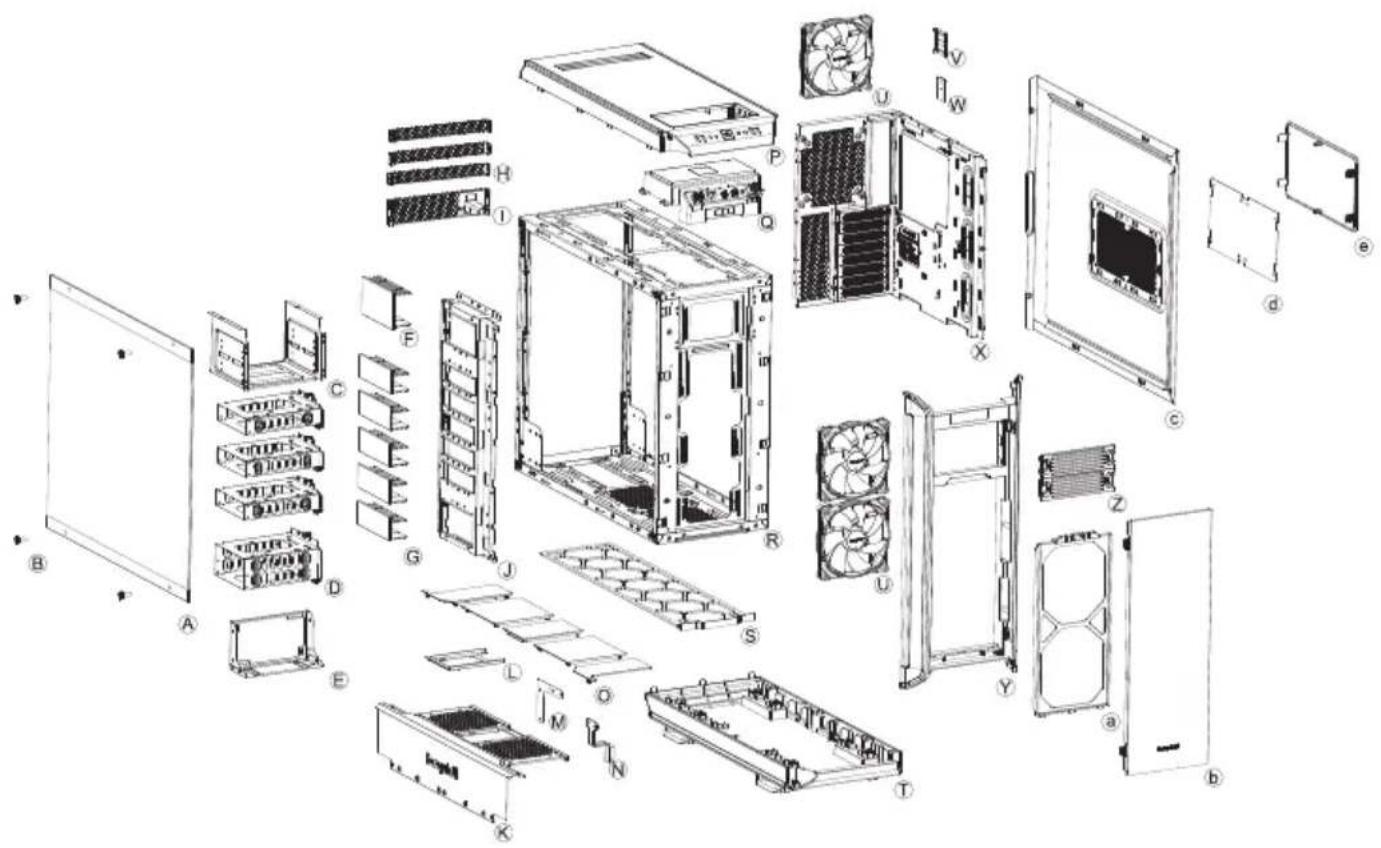
| A Side window of tempered glass Q Front I/O panel | ||
| B Fastening screws R Case body | ||
| C DD cage S Floor air filter | ||
| D HDD cage T Case floor | ||
| E PSU mounting U Silent Wings 3 fan | ||
| F Double HDD slot cover V SSD bracket | ||
| G HDD slot covers W PCB panel | ||
| H Rear slot covers X Motherboard tray | ||
| I Rear PSU shroud | Y Case front | |
| J HDD panel | Z ODD covers | |
| K Front of the PSU shroud | ||
| L SSD bracket | a | Front air filter |
| M Mounting for PSU shroud | b Door | |
| N Mounting for PSU shroud | c Side panel | |
| O Top cover of PSU shroud | d Filter in the side panel | |
| P Top cover of case | e 2-stepped opening in the side panel | |
4.1 Front I/O and media ports
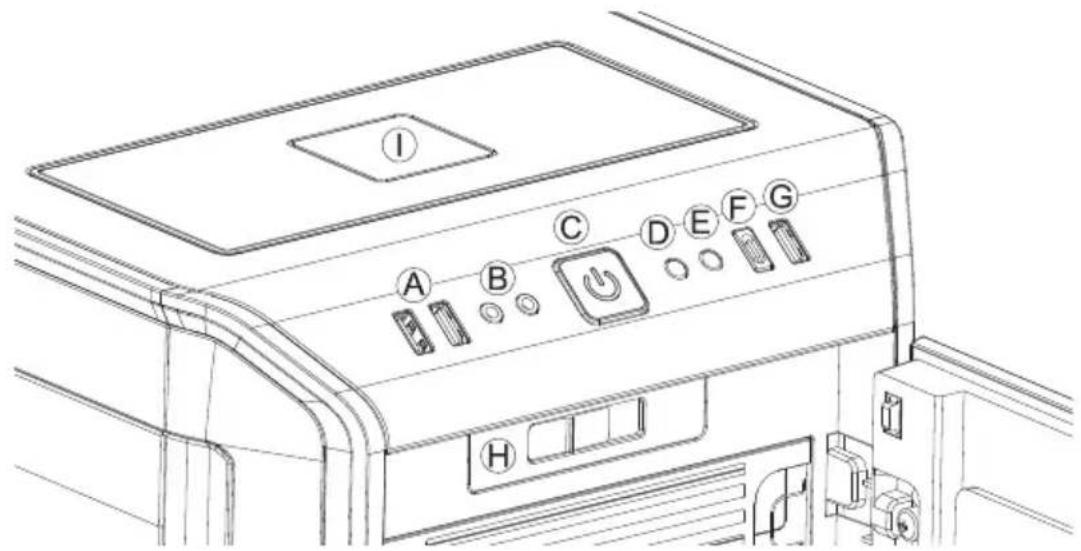
| A USB 3.0 F USB 3.1 Type C Gen. 2 | ||
| B HD audio (microphone and audio) G Quick charging option | ||
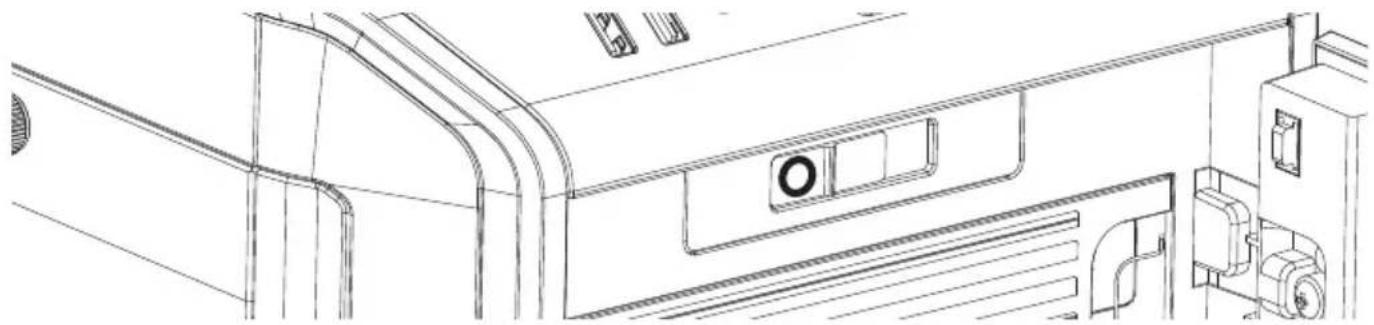
| C Power button H Steppless fan controller | ||
| D LED control switch I Qi charging station | ||
| E HDD LED |
4.2 I/O ports
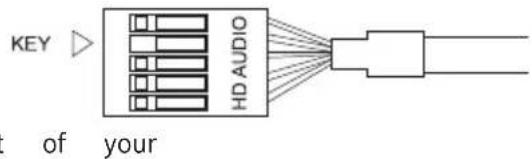
The front I/O ports that are provided require connections to your motherboard.
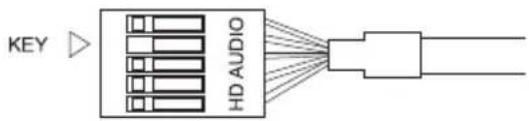
HD audio (headphone and microphone sockets)
Determine the HD audio pin connectors on your motherboard and insert the HD audio cables into the sockets allocated there. You will find information about the pin assignm motherboard in the motherboard handbook.
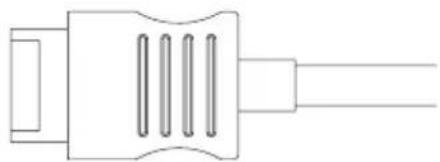
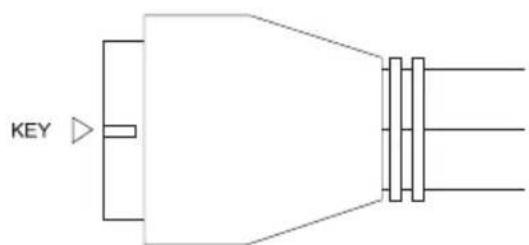
USB 3.1 Type C Gen. 2
Locate the USB 3.1 Type C pin connector on your motherboard and attach the USB 3.1 Type C cable using the designated sockets there.
USB 3.0
Find the USB 3.0 pin connectors on your motherboard and plug the USB 3.0 cable into the sockets allocated there. You will find information about the pin assignment of your motherboard in the motherboard handbook.
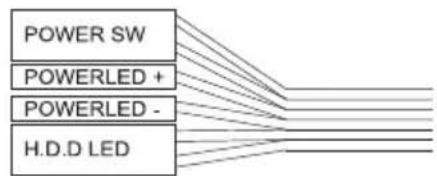
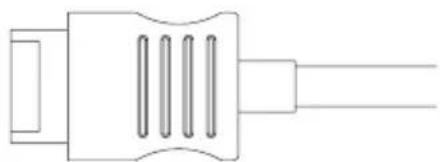
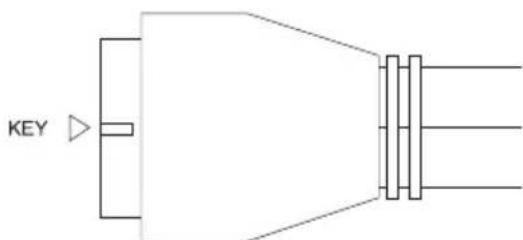
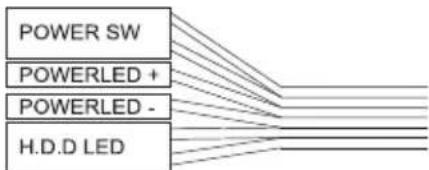
On/off switch, LED power indicator, HDD activity indicator
The illustrated plug connects the power switch and the case's LED indicators with your motherboard. Take care to use the correct polarity with the LEDs. Your motherboard handbook will provide information on the correct connections.
4.3 PCB panel ports
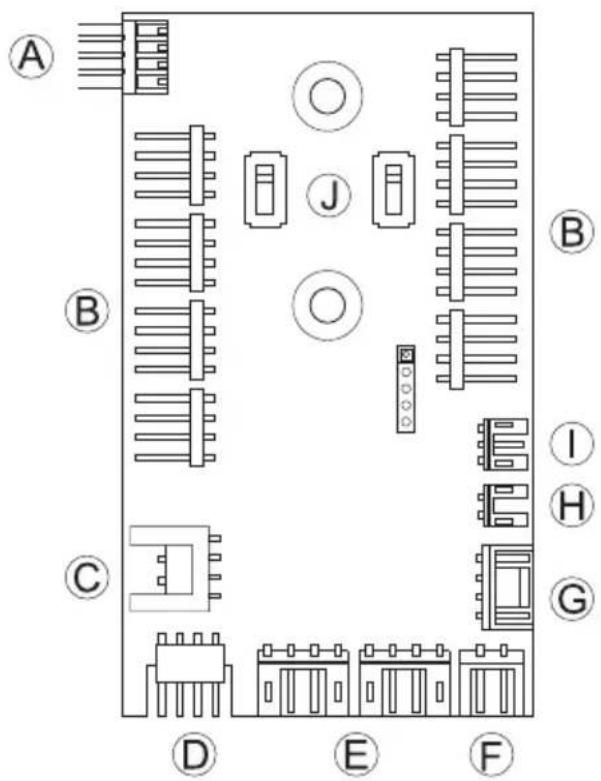
| A P | WM connector to the motherboard |
| B P | WM connector to the fans |
| C LED | connector to the motherboard |
| D LED | output for added external LEDs |
| E C | connector for the supplied LEDs |
| F C | connector for the Qi charger |
| G S | ATA power connector |
| H LED switch | connector |
| I C | connection cable for fan controller slider switch |
| J S | switches for choosing between Silence and Performance modes |
4.4 Use of fan controller
The fan controller has two modes of operation.
1. Automatic operation
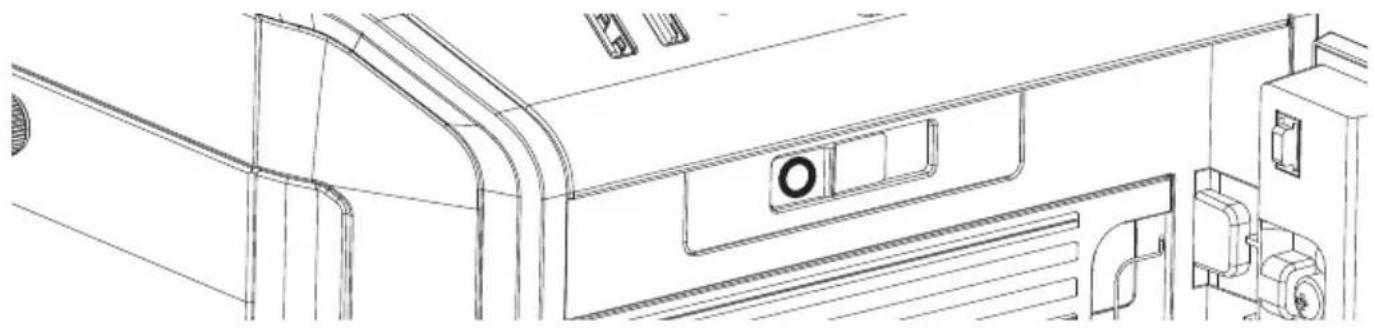
In this case the PWM signal of the motherboard is used and the speed of all PWM fans connected is automatically regulated by the motherboard. To enable this the slider switch must be positioned at position "0" completely to the left. For the automatic PWM fan controller to function, a cable must connect port "A" on the PCB panel to the PWM connector on your motherboard. Lacking this connection it is only possible to regulate the speed of the fans connected manually.
2. Manual control
Whenever the fan controller slider switch is moved rightwards away from its far left position, the PWM signal is ignored and the speed of the fans is manually controlled in a stepless range. In total eight PWM fans can be connected to the fan controller PCB. These eight sockets are divided into two channels (left and right) each with four connections. By setting the switches "J" on the PCB it is possible to choose between Silence and Performance modes independently for both of these channels. According to these switch positions the range of fan speeds possible are 400 - 1,040rpm in Silence mode and 800 - 1,600rpm in Performance mode.
If the slider switch is returned to its starting position "0" on the far left, the PWM signal regains control of fans.
4.5 Installation and handling of the LEDs
It is possible to freely position the LED lighting supplied in the case to suit your system setup by affixing and connecting the adhesive strips. The LED strips must be connected to connector "E" on the PCB panel.
Description of the LEDs
The LED lighting included in the scope of delivery is controllable in several modes of color and operation. Connector "D" on the PCB panel can be used to connect additional LED lighting strips up to a maximum of 24 watts for lighting the interior of the case. It is also possible to link the LED strips supplied directly together and in this way extend them.
WARNING! Only 12V LEDs may be connected.
In manual mode by briefly pressing switch "D" on the front panel it is possible to cycle through the colors. When "breath mode" is enabled there is an intermediate step between each color.
| 1 W | White 8 Blue breath | ||
| 2 W | White breath 9 Orange | ||
| 3 Red 10 Orange breath | |||
| 4 Red breath 11 Purple | |||
| 5 Green 12 Purple breath | |||
| 6 | Green breath | 13 | Breath mode alternately in all colors |
| 7 Blue 14 LEDs off |
Synchronized operation
To toggle between manual and synchronized operation hold down switch "D" on the front panel for about three seconds.
In synchronized operation, connector "C" on the LED controller PCB is connected to the socket designated for RGB LED on the motherboard. The integrated lighting is then controlled by the motherboard, with the same range of colors.
For information about operation of the LED controller of your motherboard please refer to the motherboard handbook.
4.6 Charging station for Qi enabled devices
The preinstalled charging station provides contactless charging of any device that conforms to the Qi standard. If your device (e.g. your smartphone) is so equipped you can charge your device by simply placing it on area "I" on the top of the case, without the need to plug it in.
In so doing, make sure you place the device so that its charge receptor is positioned centrally on charging surface "I".
1. EINLEITUNG
4.3 PCB Panel Anschlüsse
KlajBmwa BkIoueHn, LED nHdkaun nHTaHn, nHdkau nAKTNBHOCTn HDD
IopKlnOuHTe KlaBnUy BkLIOueHn y LED nHdnKauno nTahn y aKTNBHOCTn HDD K BaWe MATEPNHcKo nnate.Co6IouaIte noJrpHOCTb npn noKIOueHn LED. HOpMaun o Ha3NaueHnn pa3BeMOB CopeXITcB pyKOBOIDCTBe BaWe MATEPNHcKo nnAtbl.
4.3 Pa3beMbI nAaTbI ynpabBHeHnPCB

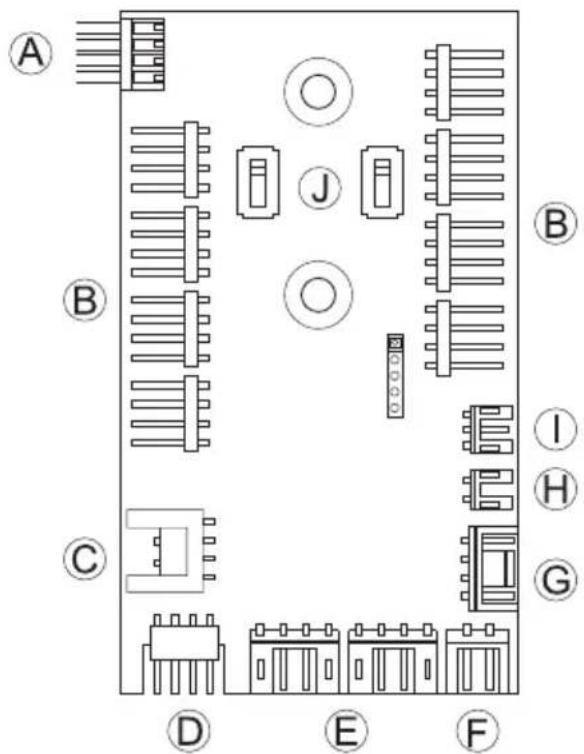
| A | PWM pa3bem K MaTePunHcKoI pIaTe |
| B | PWM pa3bem K BeHTnJIaTOpU |
| C | Pa3bem LED K MaTePunHcKoI pIaTe |
| D | Pa3bem ДЯ NOДКЛIOчЕпЯ ДОПОЛнITeЛьНоI LED NOДСВETКI |
| E | Pa3bem ДЯ NOДКЛIOчЕпЯ KOMПЛeKTHOJ LED NOДСВETКI |
| F | Pa3bem ДЯ QI 3apYdHOrO yCTpOiCTBa |
| G | Pa3bem ПИТаHЯ SATA |
| H | Pa3bem NepeKlIOuATEЯ LED NOДСВETКI |
| I | Pa3bem ФрОТальHOrO KOHTpOЛeРа ВЕТNЛЯTOPOВ |
| J | ПepeKlIOuATEЯ ржIMOB БecшUMHOrO ИЛ N I PONIЗВODIteЛьHOrO OXЛaЖДЕпЯ |
4.4 IcnoIb3ObaHne KOHTpOJIpeBaHTnJIaTOpOB
KoHTpOJIeP BeHTnJIaTOpOB ImeeT DaBa peXIma pa6Otbl.
1. ABOTOMATNUeCKN KOHTpOJIb
B 3TOM peKIme nCnONb3yeTcR PWM-CnHnIOT MaTePHNCKo NlaTbI uYnpaBHeHne BCEMn NOcOeINHeHHbIMK KOHTpOJIpepy PWM BeHTnJIaTOpaMn npOnCXODIT aBTOMaTHUeCKn.ДЯ 3TORO nepeKJIHOaTeJIb KOHTpOJIpepa DOnJKeH hXoDITbcR B KpaHem IeBOM nOLOXeHN B No3uIN "0".ДЯ aBTOMaTHUeCKo PWM-peryInpOBKn BeHTnJIaTOPOB HeO6xOdIMO npOBoDHO eNoDKJIIOueHne pa3bema "A"Ha Pnate ynpaBHeHna PCB K PWM pa3bemy BaWei MaTePHNCKo NlaTbI.ИнаYe BO3MOxHToJIbKO pyHoe ynpaBHeHne CKOpocTbIO nOdkNIOueHHbIX BeHTnJIaTOPOB.
2. Puyho KohtpoJb
Ecn npeeknluoateIb KOHTpOJIepe npemseH c KpaHero JEBORIO NOLOXeHna BnpaBO, PWM-CnHaC MaTeepINHcKo INaTbI INHOpNpyETcN CKOPoCTb BpaUeHNA BEHTNJrTOPOB MOKeT PnABHO perynpoBaTbcra BpyHyO. K nlaTe ynpabLeHnma OmyT 6bITb NODKIOUeHb DO BOCbMn PWM BeHTNJrTOPOB, no YtebPe Ha KaXdbI n3 DByx KaHAnOB (JebBi n npabBi). NepeKlIOuATEJI "J" N03BOJIAOT BbIbPaTb pexmbl beCswHMoro IIIN pON3BOIDNTelbHOrO OxJaXdEHnA dJI KaXdoRO KaHana He3aBNCIMo Dpyr OT dpyra. B 3aBncmoctn ot NOLOXeHnnepeKJIouaTeJeI dIaNa3OH CKOpOCTn BpaSeHnna BeHTNJrTOPOB coCTaBJIeT 400 - 1040 o6/MnH B peXmme Silence n 800 - 1600 o6/MnB peXmme Performance.
Pn noCneIyUoIeM nepeMeueHn nepeKIOuateJIa B n3HaayalbHOe noLoXeHne "0" 6yTeBocCTaHOBJIeHa aBTOMaTHueCKa peYJInpOBKa cKOpOCTn BeHTnJIrTOPOB no PWM-cnrHany C MaTePHNcKo nnTaBl.
4.5 MoNTaxи ИспоЛьзоване LED посБETКI
KOMNJIeKTHbIe NOLOCKn LED NOcBETKn MOryT 6bITb npOn3BOJbHO pa3MeUeHbI B KOpNyCe B COOTBeTCTBm C BaUNMn IpeINoYTeHnAaMn 6laOJaP KNeiKOMy OCHOBaHIO. CBeToNDnOHNbIE NOLOCbI Heo6xOdIMNo NODKlIoUHTb K pa3bemy «E» Ha naHeJIu PCB.
Onncahne LED noDCBETKn
KoPJIeKTHa CBeToIIOJHnA LED nOcBcTeKa nOdepXnBaET HeCKoJIbKO cBeTob CBeueHn apeKIMOB pa60tbl. Pa3bEm «D» Ha naHeN PCB nCnoJIb3yEtCra dJa nOdkIoUeHnna DONoJIHnTeJIbHOI NOcBcTKn cyMMapHOm MOuHocTBIO He 6oJIee 24BT. KOMJIeKTHbIe nOLOckn LED noDCBETKN TaKKe MOryT 6bITb HEnOCpeCTBeHNO CoeINHeHb Ipyr c Dpyrom.
BHUMAHNE! Donyckaetc nCnoJb3ObaHne TOnbko 12B MoDyJeN.
B pyuHOM pexKIme ynpaBHeHn IoDCBETKO Bbl MOKeTe BbIbupaTb CBeT CBeUHn KpaTKm HaxKaTneM Ha nepeKlIOuAteJIb “D”. IpnomExkyToUHbIM pexKUMom npi nepeKlIOUeHn MExdy CBETAMN IOcBETKN YBIAETCaHMeJHHa NylbCaun NOCDBETKn.
IopKluoyene npoB0a "C" nlaTbI ynpabJeHnPCB K COOTBeTCTByUOeMy pa3bemy RGB LED KOHTpOJIepa BaSeM MaTePHNcKo INaTbI N03BOJrE T npaBJIrTb IOdCBETKO CpeICTBaMIMaTePHNcKo INaTbI.
Инфорmaцио о paбote LED koHTpoJIpepa MaTePunHcKo IJIaTbI CMOTpnte B pyKOBoIDCTBe K BaSei MaTePunHcKo IJIaTe.
4.6 NcnoJb3OBAHHe Qi 3apJdHoro yctpoIcTba
YCTAHOBJIeHHoe B KOpnyce 3apJHoe yCTPOIcTBO N03BOLJeT 3apJXaTb Qi COBMeCTnMbIe YCTPOIcTBA 6e3 IcNoJIb3OBAHnI npoBOIOB. EcIy yCTPOIcTBO (HaIpIMep, CMapTfoH) OChaUeHO 3ToI ONuEi, erO MoXHo 3apJXaTb 6e3 IpOBoDHorO CoeINHeHnI, pa3MeCTnB erO Ha IJIaCTnHe «|» Ha BepxHne NaHEnI KOpnyca.
Y6eINTEcB npn 3TOM, yTO yCTpOInCTBO aKKypaTHo pa3MeUeHO nO ceHTpy 3aprHOn pIaCTnHbI "I".
1. 简要
8x PCIe slots available*/space above the motherboard*:40mm
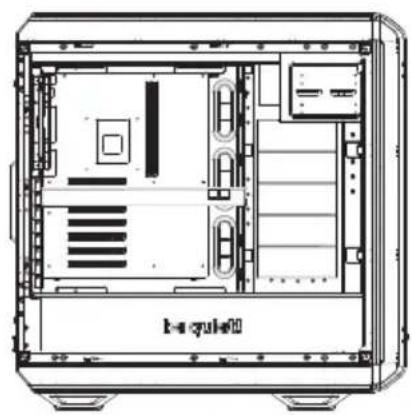
A3
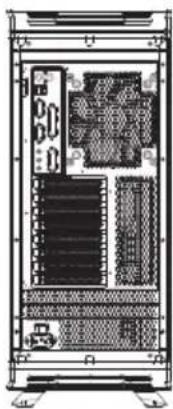
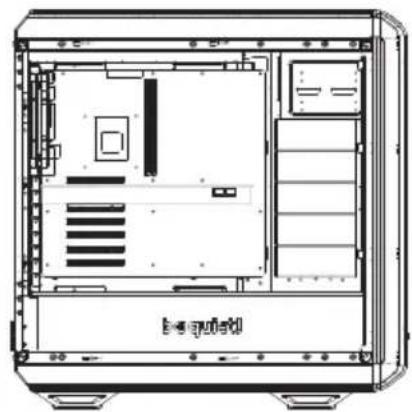
A4
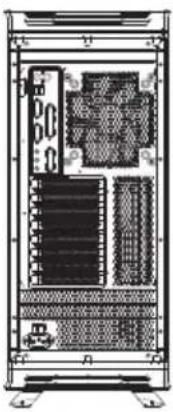
6x PCIe slots available / space above the motherboard: 62mm
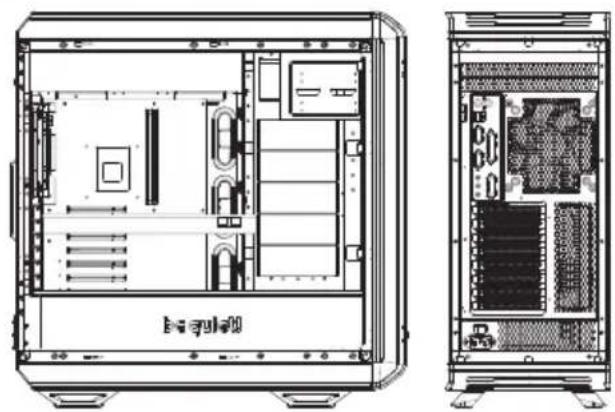
A5 A6
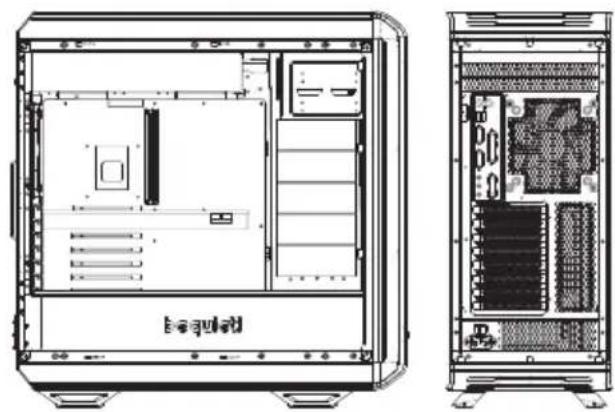
5x PCIe slots available / space above the motherboard: 84mm
Layout B Windowed side on the right | Seitenfenster
rechts | Panneau vitre sur la droite | Okno po prawej stronie | Lateral acristalado a la derecha | CTeKlnHnA 6okOBa nHeIb cnpaba | 右側開窗側 | 右边的窗口側 | 右のウINDU側
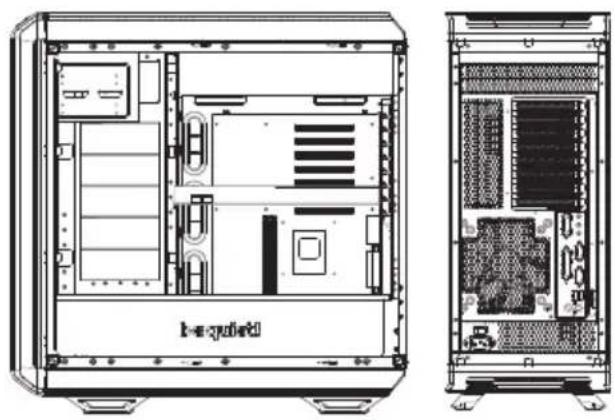
B1 B2
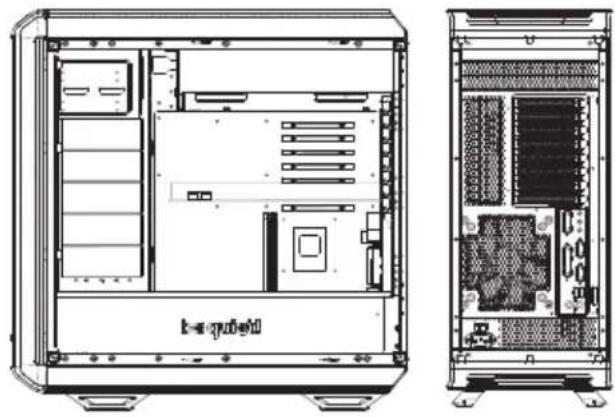
8x PCIe slots available / space above the motherboard: 55mm
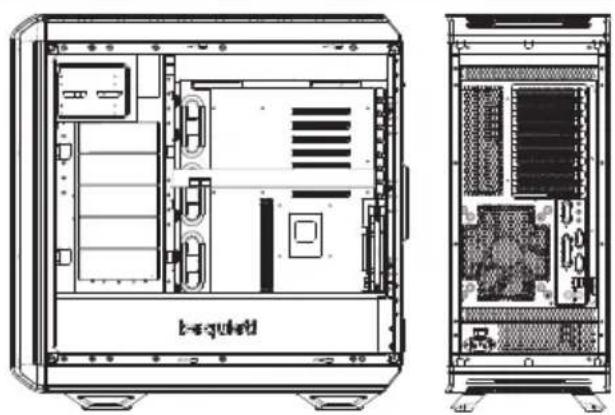
B3 B4
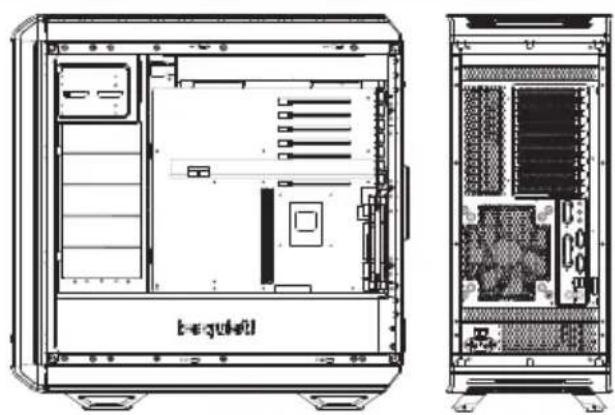
8x PCIe slots available*/space above the motherboard*:77mm
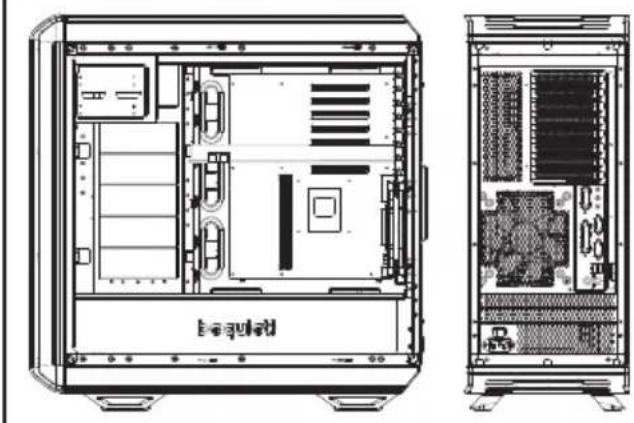
B5 B6
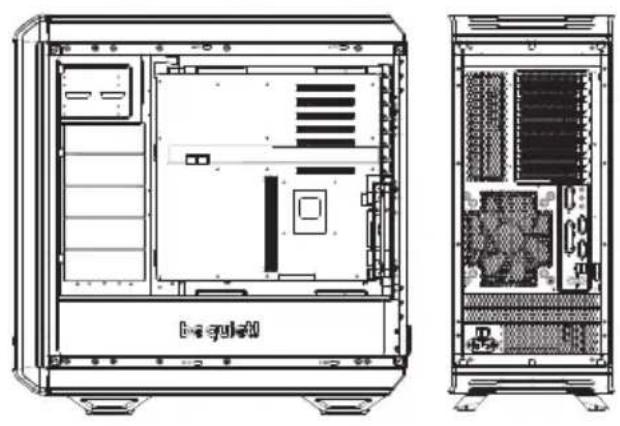
8x PCIe slots available / space above the motherboard: 99mm
PCIe slots available / space above the motherboard | Verfügbare PCIe Anschlüsse / Platz über Mainboard | Emplacements PCI / dessus de la carte mère | Dostepe gniazd PCIe /.),不错se nad plyta glowna | Ranuras para PCIe disponibles/espacio sobre la plac base | cnoTob doctynho / npoctpaHCTBO nad MaTePnHcKoI pIaToi | 個 PCIe 可用插槽/主機板上方空間 | PCIe 插槽可用/主板上方空间 | PCI-EStOトが使用可能/マサイーネローフ上のスを一ス
Note: These are just sample configurations. Many alternatives are also possible.
EN: Press all hooks on the inside of the case outwards, to release the front.
EN: Now detach the case front from the case body.
EN: First remove the case front. Locate the eight hooks under the top cover and press these to the outside, to release the cover.
Please note: To simplify installation or replacement it is recommended you remove the HDD cage.
EN: First remove the screws on the PSU shroud.
EN: First remove the case front and the top cover. Next remove the front I/O module, in order to unfasten the screws holding the ODD cage and remove this.
EN: Install the fan bracket to fit an additional fan on the front.
EN: It is possible to install two HDDs into the upper and lower parts of the double HDD cage. To secure these please use the screws supplied.
EN: Detach the SSD bracket on the rear side of the motherboard tray.
Warning: Any segments that are snapped off cannot be refitted.
BHHMaHHe: YdaJIeHHbIe CeMHe He MOrYt 6bITb BOCCTaHOBJHebl.
警告:任何折斷的部分無法重新裝回。
警告:片段去掉后无法再重新装回。
警告:折取のせダメトは再取り付けます。
10. MODIFYING THE CASE LAYOUT
DEGEHAAUSELAYOUT ANPASSEN | MODIFICATION DE LA CONFIGURATION | PL MODYFIKOWANIE UKLADU OBUDOWY | MODIFICACION DE LA CONFIGURACION DE LA CAJA | RU N3MEHEHNE CXEMBI KOPNYCA | TW 修改機殼配置 | CN 修改机箱布局 | JP キームイアウの変更
10.1 Changing the mounting height of the motherboard tray (layouts 3, 4, 5, 6) | Einbauhöhe des Mainboard-Traysändern (Layout 3, 4, 5, 6) | Modification de la hauteur du plateau de la carte mère (dispositions 3, 4, 5, 6) | Zmiana wysokosci montazu tacki plyt y glownej (uklady 3, 4, 5, 6) | Cambio de la alta de montaje de la bandeja de la plac base (configuraciones 3, 4, 5, 6) | Изменные положеня подоча MaTeРинской платы NO ВьICOTe (cXeMbI 3, 4, 5, 6) | 更改主機板托盤的安裝高度(配置3、4、5、6) | 更改主板托盘安装高度(布局3、4、5、6) | マサイーニボーブレイの取付け高さの変更(レイアウト3、4、5、6)
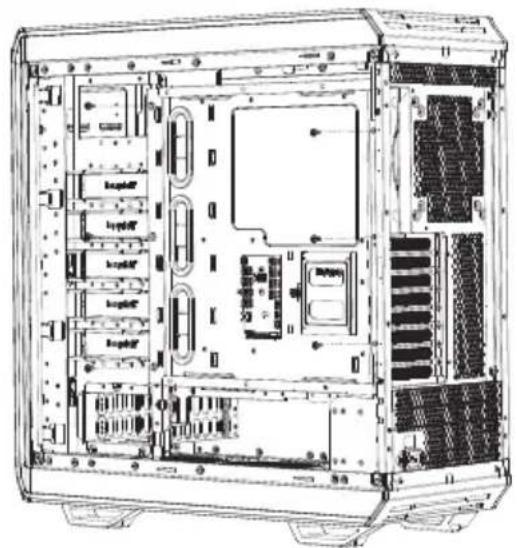
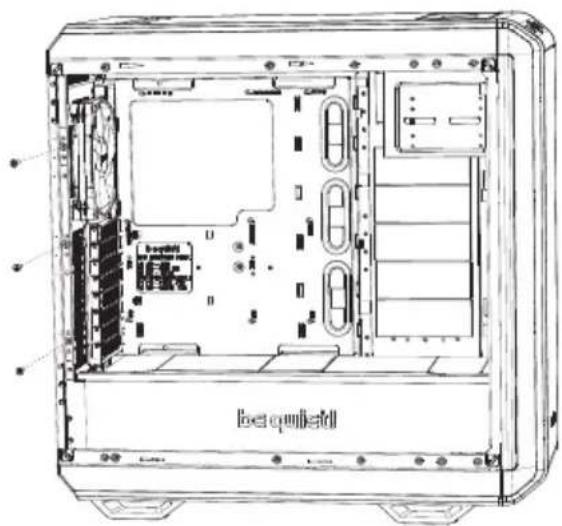
EN: Remove the side panel. Unscrew the six screws on the rear side of the motherboard tray (as shown).
EN: Unscrew the three screws on the front side of the motherboard tray (as shown) and detach the motherboard tray.
EN: As a first step, remove the PSU shroud. Next unscrew the screws holding the PSU mounting and detach this.
EN: Affix the mounting to the PSU with screws.
EN: Fit the power cable into the rear of the PSU before positioning the PSU and mounting in the case. Then secure the PSU mounting with its screws.
EN: Unscrew and detach the respective PCI slot covers before attempting to insert PCI / PCIe add-on cards.
EN: Install the supporting brackets onto the HDD panel.
As per the terms and conditions of this limited warranty as given below, be quiet! warrants its new products to be free of defects resulting from faulty materials and faulty manufacturing for the length of the warranty period.
I. APPLICABILITY
This non-transferrable warranty is applicable to newly purchased, previously unopened be quiet! products and is enforceable by only the original consumer purchaser. Proof of purchase is required for warranty service, so should be retained. be quiet! does not provide warranty registration services.
II. WARRANTY PERIOD
For eligible products, parts and labor are warranted for the applicable warranty period from the date of purchase. The applicable warranty period varies by product model, and is identified in your user documentation, on the product package, or as listed below. Should any of these warranty periods differ, the longest specified warranty period will apply. Replaced products will be warranted for the remainder of the original warranty period or thirty days, whichever is longer.
III. EXCLUSIONS
The following are not covered by the warranty:
- Normal wear and tear.
- Any product which has been modified without permission from be quiet!, or on which the serial number or warranty sticker has been defaced, modified, or removed.
- Damage, deterioration or malfunction resulting from:
Accident, abuse, misuse or improper use, neglect, connection to an improper voltage source, unauthorized product modification, or failure to follow instructions included with the product.
Fire, water, lightning, or other acts of nature.
Repair or attempted repair by anyone not authorized by be quiet!.
Shipping or transport damage (claims must be made with the carrier).
Any other cause which does not relate to a defect in materials or manufacturing workmanship.
- Cartons, cases, batteries, cabinets, tapes, accessories or other consumables used with this product.
- be quiet!, Inc. does not warrant that this product will meet your requirements. It is your responsibility to determine the suitability of this product for your purpose.
- Removal or installation charges.
- Shipping charges.
- Any incidental charges.
IV. EXCLUSION OF DAMAGES
be quiet! 's sole obligation and liability under this warranty is limited to the repair or replacement of a defective product at its option. be quiet! shall not, in any event, be liable for any special, incidental, indirect, or consequential damages whatsoever, including but not limited to loss of profits, revenue, or data (whether direct or indirect), damages resulting from interruption of service and loss of business, or for liability in tort relating to this product or resulting from its use or possession, even if be quiet! has been advised previously of the possibility of such damages.
V. LIMITATIONS OF IMPLIED WARRANTYES
There are no other warranties, expressed or implied, including but not limited to those of merchantability or fitness for a particular purpose. The duration of implied warranties is limited to the warranty length specified in Paragraph II.
VI. LOCAL LAW AND YOUR WARRANTY
This warranty gives you specific legal rights. You may also have other rights granted under local law. These rights may vary.
VII. NO OTHER WARRANTY
No be quiet! employee, dealer, or other agent is authorized to make any modification, extension, or addition to this warranty.
VIII. TO OBTAIN TECHNICAL SUPPORT OR WARRANTY SERVICE
Please see your product owner's manual or visit the service section at www.bequiet.com for details and contact information. You will need to provide proof of purchase for warranty service.