
PCEKM 1205 - Coffee grinder PROFICOOK - Free user manual and instructions
Find the device manual for free PCEKM 1205 PROFICOOK in PDF.

| Brand | ProfiCook |
| Model | PCEKM 1205 |
| Product type | Coffee grinder |
| Power supply | 220-240 V~, 50-60 Hz |
| Power | 200 W |
| Protection class | II |
| Net weight | Approx. 1.93 kg |
| Bean hopper capacity | Not specified (domestic use) |
| Ground coffee container capacity | Up to 12 cups |
| Grind fineness adjustment | From extra fine to coarse, sliding lever |
| Safety | Safety switch (requires bean hopper correctly installed) |
| Functions | Automatic grinding, automatic stop, cup number selection |
| Material | Plastic and stainless steel (burrs) |
| Maintenance | Regular cleaning with brush, hoppers washable in hot water |
| Included accessories | Measuring spoon with cleaning brush |
Frequently Asked Questions - PCEKM 1205 PROFICOOK
User questions about PCEKM 1205 PROFICOOK
0 question about this device. Answer the ones you know or ask your own.
Ask a new question about this device
Download the instructions for your Coffee grinder in PDF format for free! Find your manual PCEKM 1205 - PROFICOOK and take your electronic device back in hand. On this page are published all the documents necessary for the use of your device. PCEKM 1205 by PROFICOOK.
USER MANUAL PCEKM 1205 PROFICOOK
natural_image
Modern ProFi 100K digital coffee maker with glass lid and red powder, no visible text or symbols on the device itself.Bedienungsanleitung
Thank you for choosing our product. We hope you will enjoy using the appliance.
Symbols in this Instruction Manual
Important information for your safety is specially marked. It is essential to comply with these instructions in order to avoid accidents and prevent damage to the appliance:

WARNING:
This warns you of dangers to your health and indicates possible injury risks.

CAUTION:
This refers to possible hazards to the appliance or other objects.

NOTE:
This highlights tips and information.
Contents
Overview of the Components....3
General Notes......30
Special Safety Precautions for this Appliance....30
Designated Use....31
Unpacking the Appliance....31
Overview of the Components/Scope of Delivery......32
Notes for Use....32
Electrical Connection 32
Safety Switch 32
Switching the Appliance On/Off 32
Short-Term Operation 32
Setting the Degree of Grinding 32
Regulator for Setting the
Powder Quantity (Number of Cups) 32
Remaining Coffee Beans....32
Operation 33
Cleaning 33
Removable Accessories....33
Grinder 33
Motor Housing....33
Storage....33
Troubleshooting....34
Technical Data....34
Disposal 34
Meaning of the "Dustbin" Symbol 34
General Notes
Read the operating instructions carefully before putting the appliance into operation and keep the instructions including the warranty, the receipt and, if possible, the box with the internal packing. If you give this appliance to other people, please also pass on the operating instructions.
- The appliance is designed exclusively for private use and for the envisaged purpose. This appliance is not fit for commercial use.
- Do not use it outdoors. Keep it away from sources of heat, direct sunlight, humidity (never dip it into any liquid) and sharp edges. Do not use the appliance with wet hands. If the appliance is humid or wet, unplug it immediately.
- When cleaning or putting it away, switch off the appliance and always pull out the plug from the socket (pull the plug itself, not the lead) if the appliance is not being used and remove the attached accessories.
- The appliance and the mains lead have to be checked regularly for signs of damage. If damage is found the appliance must not be used.
- Use only original spare parts.
- In order to ensure your children's safety, please keep all packaging (plastic bags, boxes, polystyrene etc.) out of their reach.

WARNING:
Do not allow small children to play with the plastic foil.
There is a danger of suffocation!
Special Safety Precautions for this Appliance

WARNING:
- Always disconnect the appliance from the supply if it is left unattended and before assembling, disassembling or cleaning.
- Do not manipulate any safety switches! This misuse may result in injuries.

WARNING:
• This appliance shall not be used by children.
- Keep the appliance and its cord out of the reach of children.
• Children shall not play with the appliance.
- Appliances can be operated by persons with reduced physical, sensory, or mental capabilities or lack of experience and / or knowledge if they have been given supervision or instruction concerning the use of the appliance in a safe way and understood the hazards involved.
- Do not repair the appliance by yourself. Always contact an authorized technician. If the supply cord is damaged, it must be replaced by the manufacturer, its service agent or similarly qualified persons in order to avoid a hazard.

CAUTION:
Do not immerse the appliance into water for cleaning. Please follow the instructions as stipulated in the chapter "Cleaning".
Designated Use
This appliance is used for grinding roasted coffee beans. It is not suitable to grind nuts, spices or the like.
It is intended for domestic use and use of similar areas. It may only be used in the manner described in this instruction manual. The appliance may not be used for commercial purposes.
Any other use is considered as not intended and may lead to damage of property or even to personal injury.
The manufacturer assumes no liability for damage which may occur through incorrect use.
Unpacking the Appliance
- Remove the appliance from the package.
- Remove all packaging material such as films, filler, cable holders and cardboard.
- Check the delivery contents for completeness.
- Should the package contents be incomplete or damages be found, do not take the appliance into operation. Take it immediately back to the dealer.

NOTE:
Dust or production residues can be located on the appliance. We recommend to clean the appliance as described under "Cleaning".
Overview of the Components / Scope of Delivery
1 Lid for the coffee bean container
2 Container for the coffee beans (removable)
3 Cap of the grinder (upper grinding cone)
4 Grinder
5 Lever for adjusting the degree of grinding
6 Symbols for setting the grinding degree
7 Measuring spoon with cleaning brush
8 Motor housing
9 Collection tank for the coffee powder (can be pulled out)
10 Lid for the collection tank
11 Regulator for setting the powder quantity (number of cups)
12 Control lamp
13 On / off button
Notes for Use
Electrical Connection
- Check whether the mains voltage that you want to use, corresponds with that of the appliance. You will find the information about it on the rating plate.
- Only connect the appliance to a properly installed safety socket. The control lamp flashes 3 times.
Safety Switch
The appliance is equipped with a safety switch. It only works if the container for the coffee beans is mounted correctly.
Switching the Appliance On/Off

NOTE:
The appliance cannot be switched on until a powder volume setting has been selected.
- Press the ⏻ button. The control lamp lights up continuously. The grinding process begins.
- The grinding process finishes automatically.
- You can also finish the grinding process with the ⏻ button at any time.
Short-Term Operation
Only use the appliance in immediate succession for a maximum of 5 times. Allow the appliance to cool down for about 10 minutes before using it again.
Setting the Degree of Grinding
The grinder is gradually adjustable from extra fine to coarse. Observe the symbols for setting the grinding degree. The small dots mean a fine setting and the big dots a coarse setting.
How fine or coarse you grind your coffee depends on the further use of the coffee powder. The type of coffee beans and the roasting process have an additional impact on the taste. With a little practice you will find out which grind setting is right for you. We can give you the following indications:
| Grind adjustment Usage | |
| Extra fine Espresso machine | |
| Fine Coffee machine | |
| Medium Hand filter | |
| Coarse | French Press coffee |

IMPORTANT NOTE:
In rare cases once selected the finest grind setting maybe the coffee powder is clumping together or correct portion of coffee powder won't be dispensed. At worst, the grinder can be blocked.
This is not a fault of the device but depends on the quality of the coffee beans (fat content, moisture).
- Clean the appliance as described under "Cleaning Grinder".
- Set the grinding degree one or two points coarser for the next grinding process.

NOTE: Avoid blockages of the grinder
Set the grinding degree when the container for coffee beans is completely empty or only during the grinding process.
To change the grinding degree, slide the lever to the desired setting.
Regulator for Setting the Powder Quantity (Number of Cups)
Use the slider to set the amount of coffee that is to be ground. Make sure that there are always enough coffee beans in the container for coffee beans. Choose between 2 and 12 cups of coffee. The control lamp will flash.
The amount of coffee powder per cup depends on your personal taste, the type of coffee and the grinding grade setting.

NOTE: Tip for espresso
Only grind the amount of coffee you are going to use immediately.
Remaining Coffee Beans
Remove the coffee beans from the appliance if they are older than a week. They have lost their aroma and diminish the coffee taste.

TIP:
Store coffee beans in a sealed, air-tight container in the refrigerator. That way, the coffee stays aromatic for longer.
Operation

CAUTION:
Before using the appliance, inspect the coffee bean container for foreign matter and remove it.
- Place the container for the coffee beans on the grinder. Observe the symbols. Place the container with the symbol ▼ above the symbol ▲ on the appliance. Turn the container clockwise until it stops. It must audibly snap in.
- Place the coffee grounds container with the lid in the motor housing until it stops.
- Adjust the desired degree of grinding with the lever.
-
Fill the coffee beans into the container. Do not overfill the container.
-
Place the lid on the container for the coffee beans.
- Use the slider to select the number of cups for which you want to ground coffee powder.
- Switch on the appliance with the ⏻ button. The control lamp lights up continuously.

NOTE:
If you want to stop the grinding process prior to the set time, press the ⏻ button.
-
When the grinding process is completed, the control lamp flashes 3 times. Pull out the collecting container with the coffee powder. Empty it.
-
Disconnect the power supply from the socket when you are not using the appliance.
Cleaning

WARNING:
• Always disconnect the power plug before cleaning.
- Never immerse the appliance in water for cleaning. Do not pour water into the mounted container for coffee beans. It could cause an electric shock or fire.

CAUTION:
- Do not use wire brushes or other abrasive objects.
- Do not use any sharp or abrasive cleaning agents.
- Clean the appliance regularly. Coffee beans leave an oily residue. These deposited oils turn rancid. The rancid oils negatively influence the taste of your coffee.
- Espresso and other dark coffee roasts have a higher oil content, which requires more frequent cleaning.
Removable Accessories
- Turn the coffee beans container counterclockwise to remove it. Wipe it with a damp cloth.
- Clean the coffee grounds container and lids in a warm rinse bath.
- Allow the parts to dry completely before refitting them.
- Place the container for the coffee beans on the grinder. Observe the symbols. Place the container with the symbol ▼ above the symbol ▲ on the appliance. Turn the container clockwise until it stops. It must audibly snap in.
- Place the coffee grounds container with the lid in the motor housing until it stops.
Grinder
- Loosen the cap of the grinder counter-clockwise with a small turn. Remove it.

NOTE:
This process could be difficult due to jammed bean remains.
- Clean the upper grinding cone with the cleaning brush.
- Adherent powder in the grinder can also be removed with the cleaning brush. Use a vacuum cleaner to remove the coffee powder residues from inside the grinder.
- Replace the cap of the grinder. Turn it a little clockwise until it stops.
Motor Housing
For cleaning of the housing, only use a damp cloth and mild detergents.
Storage
- Clean the appliance as described. Let the accessories dry completely.
- We recommend that you keep the appliance in the original packaging, if you do not want to use it for a longer period.
• Always store the appliance out of reach of children in a well ventilated, dry place.
Troubleshooting
| Problem Possible Cause | Solution | |
| The appliance is not working. | The appliance has no power supply. | Check the outlet with a different appliance. |
| Your appliance is equipped with a safety switch. This prevents an accidental starting of the engine. | Make sure that the container for the coffee beans is mounted correctly. | |
| The overheating protection has been activated. The motor is too hot. | Let the appliance cool down for at least 30 minutes before switching it on again. | |
| The appliance is defect. Consult our service department or an expert. | ||
| • The appliance stops unexpectedly.• The degree of grinding cannot be adjusted. | A coffee bean has become stuck. | 1. Disconnect the mains plug from the wall socket!2. Pull out the collection tank.3. Remove the remaining coffee beans.4. Remove the container for the coffee beans and the locking for the grinder as described under “Cleaning”.5. Remove the jammed coffee bean or foreign body. |
| The grinder is blocked by a foreign body. | ||
Technical Data
Model: PC-EKM 1205 Power supply: 220 - 240 V\~, 50 - 60 Hz Power consumption: 200 W Protection class: II Net weight: approx. 1.93 kg
The right to make technical and design modifications in the course of continuous product development remains reserved.
This appliance has been tested according to all relevant current CE guidelines, such as electromagnetic compatibility and low voltage directives, and is manufactured according to the latest safety regulations.
Disposal
Meaning of the "Dustbin" Symbol
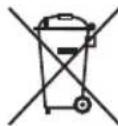
Protect our environment: do not dispose of electrical equipment in the domestic waste.
Please return any electrical equipment that you will no longer use to the collection points provided for their disposal.
This helps avoid the potential effects of incorrect disposal on the environment and human health.
This will contribute to the recycling and other forms of re-utilisation of electrical and electronic equipment.
Information concerning where the equipment can be disposed of can be obtained from your local authority.
Instrukcja obsługi
CTC Clatronic Sp. z o.o
Ul. Brzeska 1
45-960 Opole
Usuwanie


- Bedienungsanleitung
- Symbols in this Instruction Manual
- WARNING:
- CAUTION:
- NOTE:
- Contents
- General Notes
- Special Safety Precautions for this Appliance
- Designated Use
- Unpacking the Appliance
- Overview of the Components / Scope of Delivery
- Notes for Use
- Electrical Connection
- Safety Switch
- Switching the Appliance On/Off
- Short-Term Operation
- Setting the Degree of Grinding
- IMPORTANT NOTE:
- NOTE: Avoid blockages of the grinder
- Regulator for Setting the Powder Quantity (Number of Cups)
- NOTE: Tip for espresso
- Remaining Coffee Beans
- TIP:
- Operation
- Cleaning
- Removable Accessories
- Grinder
- Motor Housing
- Storage
- Troubleshooting
- Technical Data
- Disposal
- Meaning of the "Dustbin" Symbol
- Instrukcja obsługi
- Usuwanie
Brand : PROFICOOK
Model : PCEKM 1205
Category : Coffee grinder