
RH68B8840B1 - Freezer SAMSUNG - Free user manual and instructions
Find the device manual for free RH68B8840B1 SAMSUNG in PDF.
| Product type | Freezer |
| Brand | Samsung |
| Model | RH68B8840B1 |
| Energy class | A+ |
| Useful freezer capacity | 260 L |
| Dimensions (H × W × D) | 1780 × 700 × 700 mm |
| Net weight | 70 kg |
| Refrigerant | R600a |
| Noise level | 42 dB |
| Freezer temperature | -18 °C |
| Fast freeze function | Yes |
| Defrost | Automatic (No Frost) |
| Freezer compartment | 4 stars |
| Freezing capacity | 10 kg/24h |
| Autonomy in case of power failure | 12 h |
| Installation type | Free-standing |
| Controls | Electronic with digital display |
| Interior lighting | LED |
| Open door alarm | Yes |
| Spare parts available | Handles, gaskets, drawers, hinges (via Samsung support) |
| Maintenance and cleaning | Clean the gaskets and drawers regularly. Use a soft cloth and soapy water. Do not use abrasive products. |
| Warranty | Subject to Samsung's general terms and conditions |
Frequently Asked Questions - RH68B8840B1 SAMSUNG
User questions about RH68B8840B1 SAMSUNG
0 question about this device. Answer the ones you know or ask your own.
Ask a new question about this device
Download the instructions for your Freezer in PDF format for free! Find your manual RH68B8840B1 - SAMSUNG and take your electronic device back in hand. On this page are published all the documents necessary for the use of your device. RH68B8840B1 by SAMSUNG.
USER MANUAL RH68B8840B1 SAMSUNG
User servicing manual
MODEL CODE: RF6H, RS68A, RS6GA, RS67A, RS66A, RS68N, RS67M, RS66M, RS6GN, RS6JN, RS6KN*
- You can check where to buy replacement parts at http://samsung.com/support
-
Visit the part purchase site and enter the model code of your product to check the parts available for purchase. The model code is labelled on the outer side of your product.
-
You can check the model code and version on the barcode label at the bottom left of the product.
-
For replacement parts, make sure the part name matches that of the illustration in this manual.
- User-serviceable parts are limited to handles (some models only), gaskets, drawers, and hinges.
NOTE
Following the repair by a non-authorised service provider, self-repair or non-professional repair of the product, Samsung is not liable for any damage to the product, any injury or any other product safety issue caused by any attempt to repair the product which does not carefully follow these repair and maintenance instructions. Any damage to the product caused by an attempt to repair the product by any person other than a Samsung certified service provider will not be covered by the warranty.
CAUTION
- The part name listed on the site may differ from that in this manual. Please make sure you choose the right part name.
- Replacing hinges requires extreme caution because it involves detaching the door.
- Be sure to wear safety gloves while making repairs.
English
The actual image and provided parts of the refrigerator may differ, depending on the model and the country.
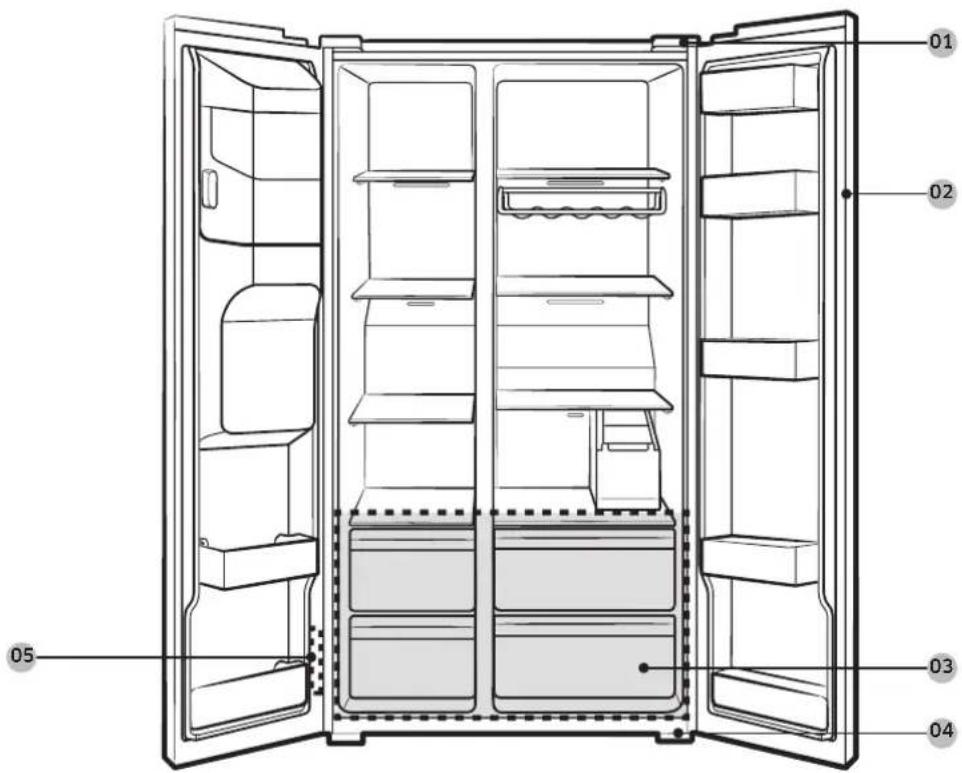
01 Top hinge 02 Gasket
03Drawer 04 Bottom hinge
05 Barcode label
English
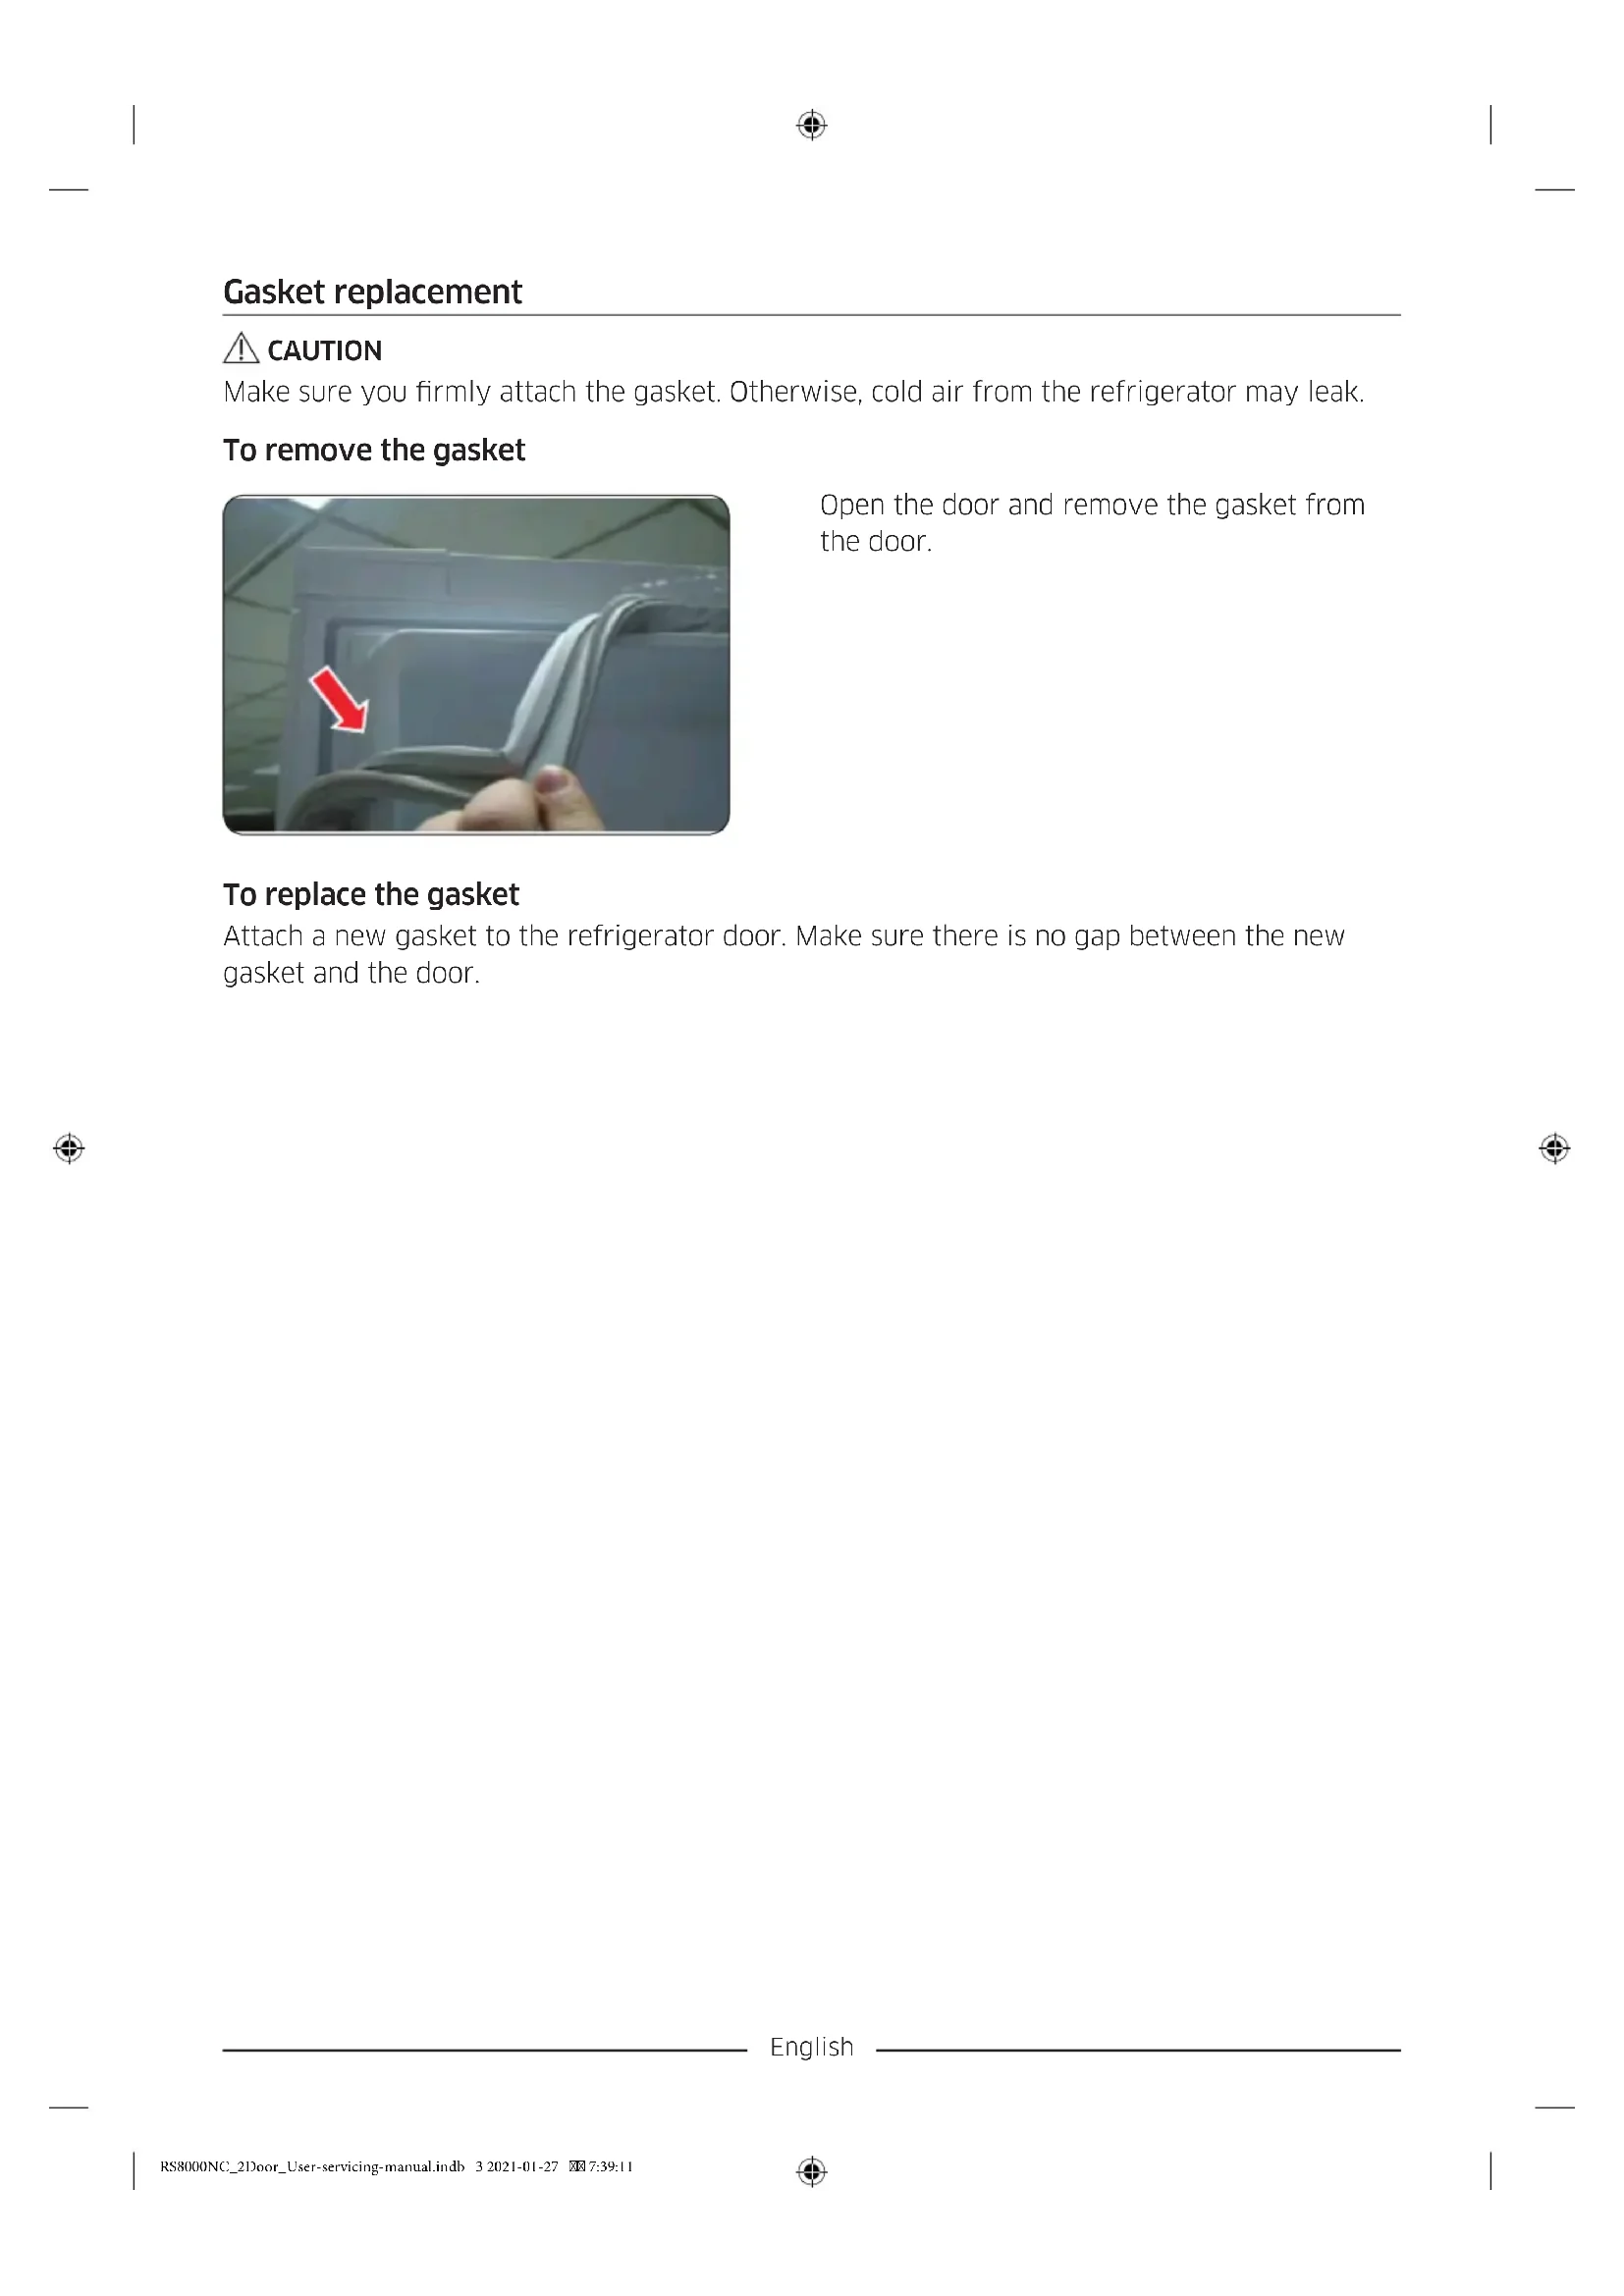
Gasket replacement
CAUTION
Make sure you firmly attach the gasket. Otherwise, cold air from the refrigerator may leak.
To remove the gasket
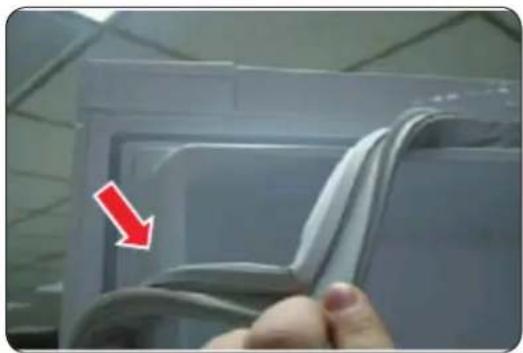
Open the door and remove the gasket from the door.
To replace the gasket
Attach a new gasket to the refrigerator door. Make sure there is no gap between the new gasket and the door.
English
Drawer replacement
CAUTION
Check that the drawer is inserted properly into the rail during assembly.
Drawers
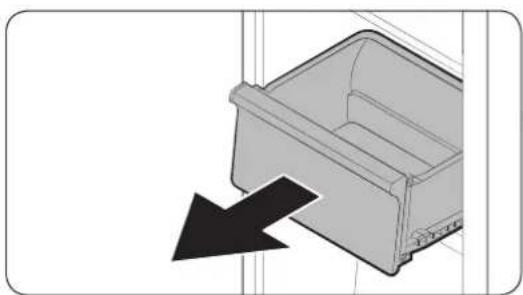
Gently lift up the front of the drawer and slide out.
Vegetable / Dried food and meat storage drawer
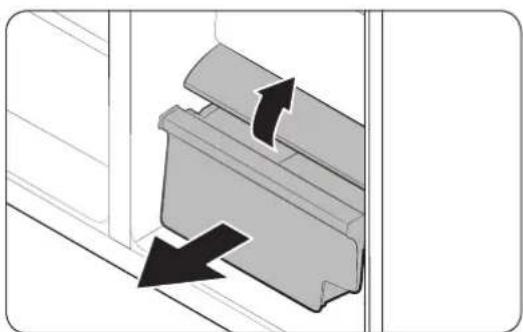
To remove the vegetable drawer from the fridge or the dry drawer from the freezer:
- First, remove surrounding multipurpose drawers if necessary.
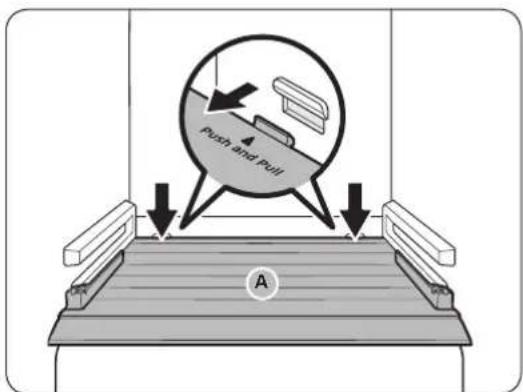
- If your refrigerator has a cover (A) for the vegetable/dry drawer, remove it in the following method.
a. Pull the drawer halfway out.
b. Pull the cover while pressing the rear sides (as marked in the figure).
- Gently pull out the vegetable/dry drawer.
To reattach the drawers
Reattaching the drawers follows the reverse order of their respective removal steps
English
Hinge replacement
To replace the hinges, you must remove the doors first.
CAUTION
- When removing the doors, take extreme caution because the doors are heavy.
- Before replacing the hinges, put a soft pad such as cardboard on the floor to prevent scratches on the door when you place the doors down.
- As the hinges must be handled carefully and replaced by two or more persons, we recommend you to call for professional technical service.
- If you remove the hinge without holding the door, the door may fall and cause injury.
- Ensure that the shaft is firmly tightened on the hinge.
- Check that the hinge is firmly attached to the cabinet.
- Make sure the wire connectors are connected properly.
- Be careful not to damage the wires when fastening the top cover.
WARNING
- Tilting/laying the refrigerator requires a minimum of 2 people.
- Disconnect the power cord before reversing the doors.
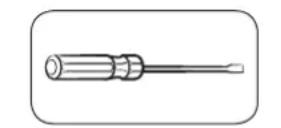
Tools required (not provided)
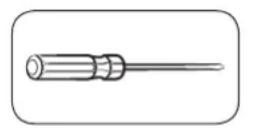
Phillips screwdriver Flat-head screwdriver
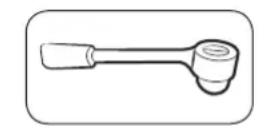
Socket spanner (10 mm)
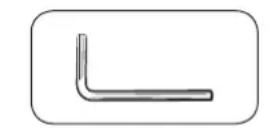
Allen spanner (5 mm)
English
To replace the hinges
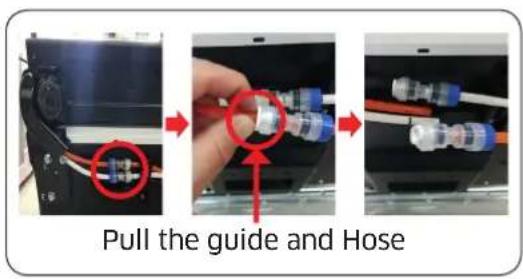
Disconnect the water line
CAUTION
- Make sure the water hoses are connected with matching colours. (only for Dispenser model)
- To prevent water leaks, each water hose must be inserted fully to the centre of the transparent coupler. (only for Dispenser model)
- Ensure that the water hose surface is not damaged. (only for Dispenser model)
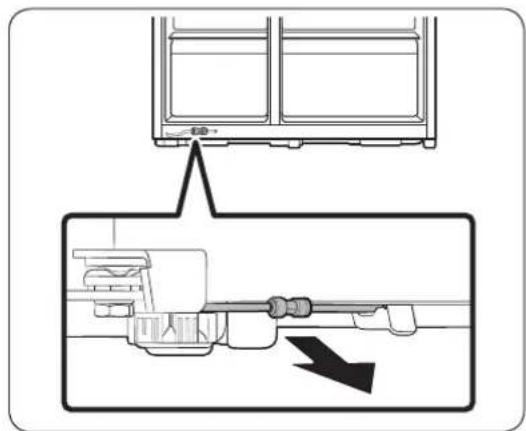
- From the bottom rear side of the refrigerator, pull out the water line to the front.
NOTE
The refrigerator's water line is a water circulation line that connects between the water pipe from the water source and the hoses from the water filtering system of the refrigerator.
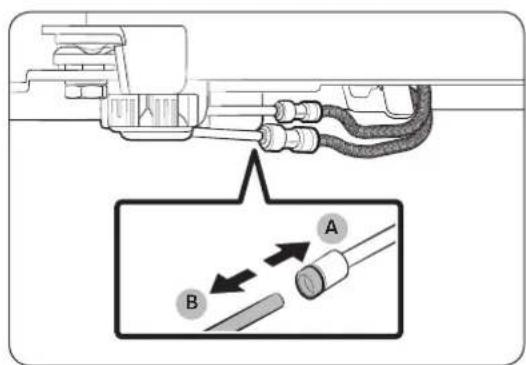
- To disconnect the hoses, press and hold the transparent coupler (A) and detach the water hose (B).
CAUTION
Do not apply excessive force to the coupler. It may break.
English
Detach the doors

CAUTION
The door may fall off or over and damage itself during any of these steps. To prevent an accident, use extreme caution when performing these steps.
-
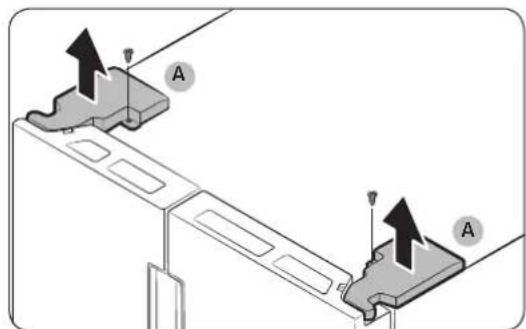
Use a Phillips screwdriver to unscrew the hinge covers (A) on the top of each door.
-
Open the doors to loosen the hinges and remove the hinge covers. Once the covers are removed, close the doors.
-
Disconnect the electrical harness.
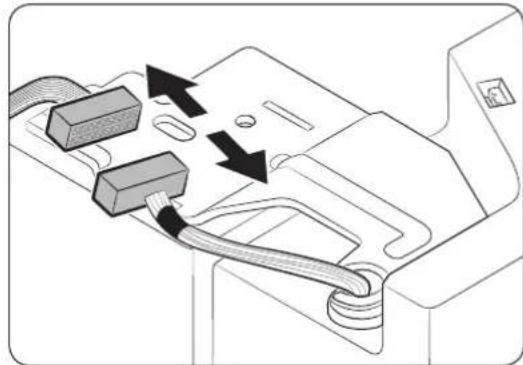
- Gently lift the clamp.

NOTE
To prevent damage to the clamp or injuries, do not lift the clamp forcefully.
- Pull the clamp to remove.
English

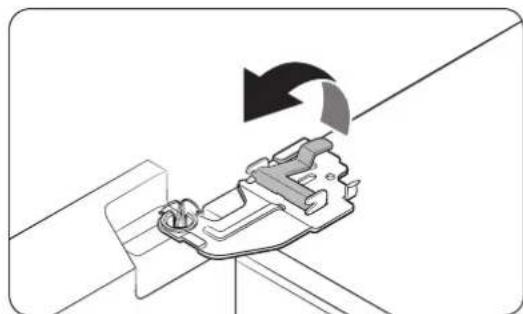
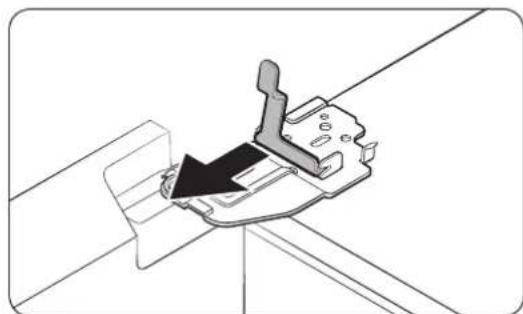
- Open the door by 90 degrees. While holding the door, remove the hinge.
CAUTION
If you remove the hinge without holding the door, the door may fall and cause injury.
English
Hinge Low
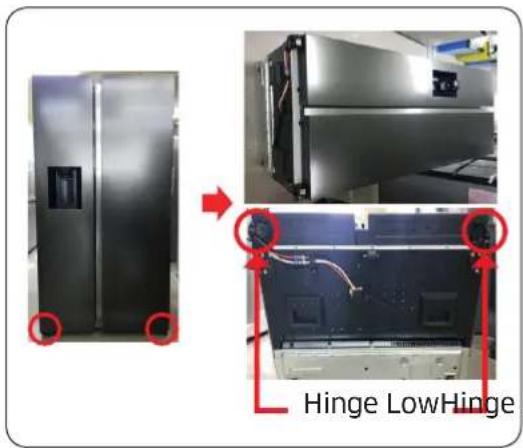
- Lay down the set.
CAUTION
- Must working more than 2 people.
-
Be sure to unplug the Power Cord before performing the operation above.
-
Disconnect Hose. (Only Hinge Low Left)
-
Exhaust Water in Hose. (Only Hinge Low Left)
-
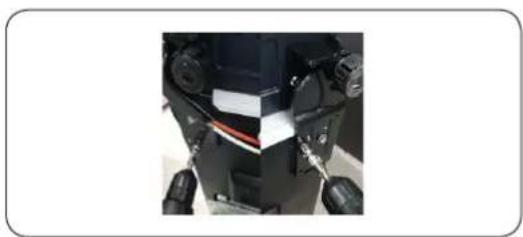
Remove Bolt(3ea). (Using spanner or 10mm Box wrench)
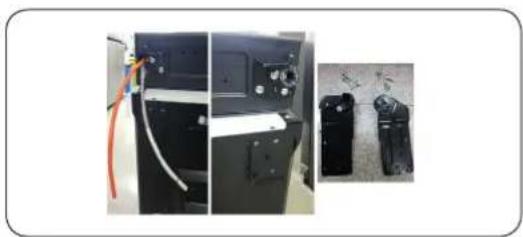
- Remove Hinge Low L/R.
- Reassemble in the opposite order of disassemble after replacing the top, middle, and/or bottom hinge.
CAUTION
- Make sure the wire connectors are connected properly.
- Be careful not to damage the wires when fastening the top cover.
English
Reconnect the water hoses
Once the refrigerator has passed through the entrance, reconnect the water hoses.
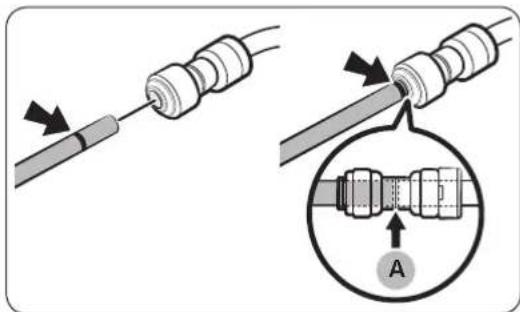
A. Centre of transparent coupler
CAUTION
- Make sure the water hoses are connected with matching colours.
- To prevent water leaks, each water hose must be inserted fully to the centre of the transparent coupler.
After reconnecting the water hoses, push them under the cabinet and arrange them on the hook.
CAUTION
- Make sure the wire connectors are connected properly.
- Be careful not to damage the wires when fastening the top cover.
English
Guide de réparation
CODE DU MODELE: RF6H*, RS68A*, RS6GA*, RS67A*, RS66A*, RS68N*, RS67M*, RS66M*, RS6GN*, RS6JN*, RS6KN*
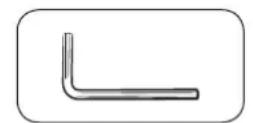
Inbusschlüssel (5 mm)
Deutsch