
Wine Bank 50 Serie 5 HWS49GA - Wine cellar HAIER - Free user manual and instructions
Find the device manual for free Wine Bank 50 Serie 5 HWS49GA HAIER in PDF.
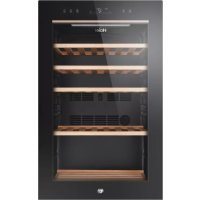



| Product type | Wine cellar |
| Brand | Haier |
| Model | Wine Bank 50 Series 5 HWS49GA |
| Storage capacity | 198 L (approx. 50 bottles depending on stacking) |
| Dimensions (D x W x H) | 585 x 497 x 820 mm |
| Power supply | 220-240 V ~ 50 Hz |
| Climate class | SN, N, ST, T (10°C to 38°C) |
| Energy efficiency class | F |
| Annual energy consumption | 104 kWh/year |
| Adjustable temperature range | 5°C to 20°C (41°F to 68°F) |
| Main functions | Touch screen, auto lock, open door alarm, standby mode, low temperature compensation, power-off memory |
| Defrost | Automatic |
| Lighting | Interior LED (12 V, 5 W max), switchable |
| Safety | Key lock, child safety (supervision required), flammable refrigerant R600a |
| Activated carbon filter | Yes, replacement recommended once a year |
| Number of shelves (racks) | 4 racks (including one lower for Magnum bottles) |
| Door reversibility | Yes (can be reversed from right to left) |
| Noise level | 37 dB(A) (class C) |
| Availability of spare parts | 7 years for electronic components; 10 years for door seals (from the last unit of the model) |
| Weight | Approx. 40 kg (estimate) |
Frequently Asked Questions - Wine Bank 50 Serie 5 HWS49GA HAIER
User questions about Wine Bank 50 Serie 5 HWS49GA HAIER
0 question about this device. Answer the ones you know or ask your own.
Ask a new question about this device
Download the instructions for your Wine cellar in PDF format for free! Find your manual Wine Bank 50 Serie 5 HWS49GA - HAIER and take your electronic device back in hand. On this page are published all the documents necessary for the use of your device. Wine Bank 50 Serie 5 HWS49GA by HAIER.
USER MANUAL Wine Bank 50 Serie 5 HWS49GA HAIER
Wine Cellar User Guide
Wine Cooler
Operating Instructions
Wine Cellar
EN WARNING: Risk of fire/flammable material.
The symbol indicates there is a risk of fire since flammable materials are used. Take care to avoid causing a fire by igniting flammable material.
Thank you for purchasing a Haier Product.
Please read these instructions carefully before using this appliance. The instructions contain important information which will help you get the best out of the appliance and ensure safe and proper installation, use and maintenance.
Keep this manual in a convenient place so you can always refer to it for the safe and proper use of the appliance.
If you sell the appliance, give it away, or leave it behind when you move house, make sure you also pass this manual so that the new owner can become familiar with the appliance and safety warnings.


Legend
Warning - Important Safety information
General information and tips
Environmental information
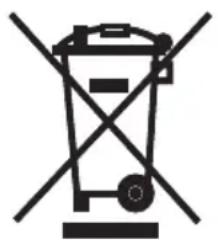
Disposal
Help protect the environment and human health. Put the packaging in applicable containers to recycle. Help recycle waste of electrical and electronic appliances. Do not dispose appliances marked with this symbol with the household waste. Return the product to your local recycling facility or contact your municipal office.
Risk of injury or suffocation!
Refrigerants and gases must be disposed of professionally. Ensure that the tubing of the refrigerant circuit is not damaged before being properly disposed of. Disconnect the appliance from the mains supply. Cut off the mains cable and dispose of it. Remove the trays and drawers as well as the door catch and seals, to prevent children and pets from getting closed in the appliance.
Old appliances still have some residual value. An environmentally friendly method of disposal will ensure that valuable raw materials can be recovered and used again.
Cyclopentane, a flammable substance not harmful to ozone, is used as an expander for the insulation foam.
By ensuring this product is disposed of correctly, you will help prevent potential negative consequences for the environment and human health, which could otherwise be caused.
For more detailed information about recycling of this product, please contact your council, your household waste disposal service, or the shop where you purchased the product, handled by the professionals.
EN
Content
1-Safety information. 4 2-Safety tips. 7 3-Maintenance 11 4-Accessories. 13 5- Product description 14 6- Installation 15 7-Use 18 8- Energy saving tips 21 9 - Equipment 22 10-Care and cleaning. 23 11- Troubleshooting 24 12-Technical data 27 13- Customer Service 28 14-Wine bottle stacking. 29
This appliance is intended to be used exclusively for the storage of wine. Before switching on the appliance for the first time, read the following safety hints:

WARNING!
Before first use
Make sure there is no transport damage. - Remove all packaging and keep out of children's reach and dispose of them in an environmentally friendly manner.
- Wait at least two hours before installing the appliance in order to ensure the refrigerant circuit is fully efficient.
- Handle the appliance always with at least two persons because it is heavy.
Installation
The appliance should be placed in a well-ventilated place. Ensure a space of at least 10 cm above and around the appliance. WARNING: Keep ventilation openings, in the appliance enclosure or in the built-in structure, clear of obstruction. Never place the appliance in a damp area or location where it might be splashed with water. Clean and dry water splashes and stains with a soft clean cloth. Do not install your wine cellar in any location not properly insulated or heated, e.g., garage, etc. Your wine cellar was not designed to operate in ambient temperature below 10°C. Do not install the appliance in direct sunlight or near heat sources (e.g., stoves, heaters). Install and level the appliance in an area suitable for its size and use. Make sure that the electrical information on the rating plate agrees with the power supply. If it does not, contact an electrician.
The appliance is operated by a 220-240 VAC/50 Hz power supply. Abnormal voltage fluctuation may cause the appliance to fail to start, or damage to the temperature control or compressor, or there may be an abnormal noise when operating. In such case, an automatic regulator shall be mounted. Do not use multi-plug adapters and extension cables.

WARNING!
WARNING: Do not locate multiple portable socket outlets or portable power supplies at the rear of the appliance. WARNING: When positioning the appliance, ensure the supply cord is not trapped or damaged. Do not step on the power cable. Use a separate earthed socket for the power supply which is easily accessible. The appliance must be earthed. Only for UK: The appliance's power cable is fitted with a 3-cord (grounding) plug that fits a standard 3-cord (grounded) socket. Never cut off or dismount the third pin (grounding). After the appliance is installed, the plug should be accessible. WARNING: Do not damage the refrigerant circuit.
Daily use
This appliance can be used by children aged 8 years and above and persons with reduced physical, sensory, or mental capabilities, or lack of experience and knowledge, if they have been given supervision or instruction concerning use of the appliance in a safe way and understand the hazards involved. Children shall not play with the appliance. Children aged 3 to 8 years are allowed to load and unload refrigerating appliances, but are not allowed to clean or install them. Keep children under 3 years of age away from the appliance unless they are constantly supervised. Cleaning and user maintenance shall not be made by children without supervision. The appliance must be positioned so that the plug is accessible. If coal gas or other inflammable gas is leaking in the vicinity of the appliance, turn off the valve of the leaking gas, open the doors and windows, and do not unplug the power cable of the appliance. Wait at least 7 minutes to reconnect the power after it has been disconnected. Do not lift the appliance by its door handles. The keys must be kept out of the reach of children and not in the vicinity of the appliance to prevent children from being locked inside.

WARNING!
- Note that the appliance is set for operation within the specific ambient temperature range between 10 and 38°C. The appliance may not work properly if it is left for a long period at a temperature above or below the indicated range.
- Do not place unstable articles (heavy objects, containers filled with water) on top of the appliance, to avoid personal injury caused by falling objects or electric shock caused by contact with water.
- Open and close the door only with the handles. The gap between the door and the cabinet is very narrow. Do not put your hands in these areas to avoid pinching your fingers. Open or close the appliance doors only when there are no children standing within the range of door movement.
- Do not store or use inflammable, explosive, or corrosive materials in the appliance or in its vicinity.
- Do not store explosive substances such as aerosol cans with a flammable propellant in this appliance.
- Do not store medicines, bacteria, or chemical agents in the appliance. This appliance is a household appliance. It is not recommended to store materials that require strict temperature control.
- Do not set unnecessarily low temperatures in the wine cabinet compartment. Minus temperatures may occur at high settings. Attention: Bottles can burst.
- Do not touch the inside surface of the appliance compartment when it is in operation, especially with wet hands, as your hands may freeze onto the surface. For proper wine cooling, do not overload the appliance.
- Unplug the appliance in the event of a power interruption or before cleaning. Allow at least 7 minutes before restarting the appliance, as frequent starting may damage the compressor. WARNING: Do not use electrical devices inside the appliance, unless they are of the type recommended by the manufacturer. To avoid risks, a damaged power cord must be replaced by the customer service (see warranty card). To prolong the service life of the appliance, avoid turning it off.
- Never place the appliance horizontally on the ground. After tilting the appliance more than 45 degrees, wait for 24 hours before plugging it in.

WARNING!
Maintenance / cleaning
Make sure children are supervised if they carry out cleaning and maintenance. Disconnect the appliance from the electrical supply before undertaking any routine maintenance. Allow at least 7 minutes before restarting the appliance, as frequent starting may damage the compressor. Hold the plug, not the cable, when unplugging the appliance.
- Do not clean the appliance with hard brushes, wire brushes, detergent powder, petrol, amyl acetate, acetone and similar organic solutions, acid or alkaline solutions. Please clean with special refrigerator/freezer detergent to avoid damage. Eventually warm water and baking soda solution - about a tablespoon of baking soda to a litre/quarter of water. Rinse thoroughly with water and wipe dry. Do not use cleaning powders or other abrasive cleaners. Do not wash removable parts in a dishwasher.
WARNING: Do not use mechanical devices or other means to accelerate the defrosting process, other than those recommended by the manufacturer.
- If the supply cord is damaged, it must be replaced by the manufacturer, its service agent or similarly qualified persons in order to avoid a hazard.
- Do not try to repair, disassemble or modify the appliance by yourself. In case of repair, please contact our customer service.
- If the illuminating lamps are damaged, they must be replaced by the manufacturer, its service agent or similarly qualified persons in order to avoid a hazard.
- Eliminate the dust on the back of the unit at least once a year to avoid hazard by fire, as well as increased energy consumption.
Do not spray or flush the appliance during cleaning. Do not use water spray or steam to clean the appliance.
- Do not clean the cold glass door with hot water. Sudden temperature change may cause the glass to break. If you leave your appliance out of use for an extended period, leave it open to prevent odour and unpleasant smells building up inside.
Refrigerant gas information

WARNING!
The appliance contains the flammable refrigerant ISOBUTAN (R600a). Make sure the refrigerant circuit is not damaged during transportation or installation. Leaking refrigerant may cause injuries or ignite. If damage has occurred, keep away from sources of ignition, thoroughly ventilate the room, do not plug or unplug the power cords of the appliance or any other appliance. Contact customer service.
In case of eye contact with the refrigerant, rinse immediately under running water and call an eye specialist immediately.
WARNING: The refrigeration system is under high pressure. Do not tamper with it. Since flammable refrigerants are used, please install, handle, and service the appliance strictly according to the instructions and contact the professional agent or our after-sales service to dispose of the appliance.
Intended use
This appliance is intended to be used in household and similar applications such as:
- staff kitchen areas in shops, offices, and other working environments;
- farm houses and by clients in hotels, motels, and other residential type environments;
- bed and breakfast type environments;
- catering and similar non-retail applications.
To ensure the safe preservation of wine, please comply with this instruction for use.
The details on the most appropriate part in the compartment of the appliance where specific types of food shall be stored, considering the distribution of temperature that can be present in the different compartments of the appliance, are in the other part of the manual.
Changes or modifications to the device are not allowed. Unintended use may cause hazards and loss of warranty claims.
Disposal
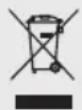
The symbol on the product or on its packaging indicates that this product may not be treated as household waste. Instead, it shall be handed over to the applicable collection point for the recycling of electrical and electronic equipment. By ensuring this product is disposed of correctly, you will help prevent potential negative consequences for the environment and human health, which otherwise could be caused by inappropriate waste handling of this product. For more detailed information about recycling of this product, please contact your local city office, your household waste disposal service, or the shop where you purchased the product.
Since flammable insulation blowing gases are used, please contact the professional agent or our after-sales service to dispose of the appliance.
WARNING!
Risk of injury or suffocation!
Refrigerants and gases must be disposed of professionally. Ensure that the tubing of the refrigerant circuit is not damaged before being properly disposed of. Disconnect the appliance from the mains supply. Cut off the mains cable and dispose of it. Remove the trays and drawers as well as the door catch and seals to prevent children and pets from getting closed in the appliance.
WARNING: Disconnect the appliance from the power supply before cleaning. - Do not clean the appliance with hard brushes, wire brushes, detergent powder, petrol, amyl acetate, acetone and similar organic solutions, acid or alkaline solutions. Please clean with special refrigerator detergent to avoid damage. - Clean the appliance when only little or no wine is stored. It is only necessary to clean it when it is dirty.
Clean the inside and housing of the appliance with a sponge dampened in warm water and neutral detergent. Rinse with clean warm water with a soft cloth. Do not clean any of the parts of the appliance in a dishwasher. - Allow at least 7 minutes before restarting the appliance as frequent starting may damage the compressor.
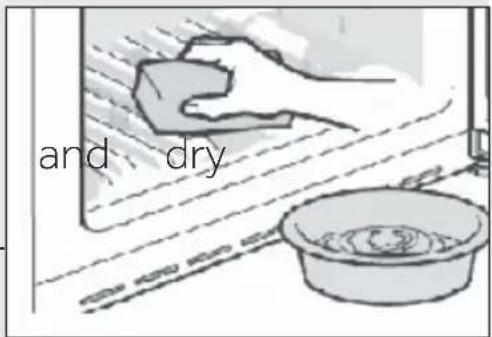
Clean the door gasket:
The door gaskets should be cleaned every 3 months to assure a proper seal. As below: Remove: Grasp the door gasket and pull
it out according to the direction of the arrow to remove the whole door gasket in order.
Dip the brush with water or food grade alcohol, clean up the door gasket groove firstly by pulling back and forth the brush. Then wipe the door gasket surface with a towel dipped with water or
food grade alcohol. Finally, wash the door gasket clean and wipe it dry with a clean towel.
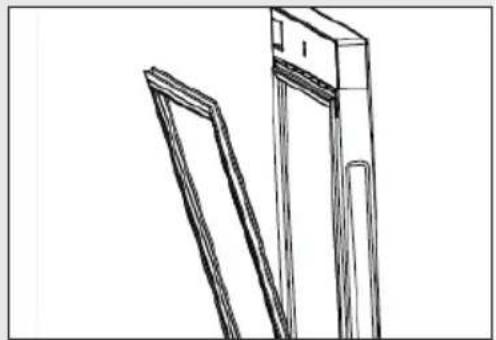
Installation of door gasket after cleaning:
Before installation, make sure that there is no water on the door gasket. Insert the door gasket into the groove, and press the door gasket tightly from the top to the bottom by hand until the whole door gasket is inserted into the groove.
Cleaning the shelves:
All shelves can be taken out for cleaning. Take out all bottles. Lift each shelf a little and take it out. Clean the shelf with a soft towel. Wait until the shelves are dry before putting them back in.
WARNING:
Wait at least 7 minutes to reconnect the power after the power has been disconnected.
Check the accessories and literature in accordance with this list: without isolation.
| Name User | Manual | Service Card | Shelf | Small shelf | Hinger-Cover | Energy Label | Key Left cam of door |
| HWS84GA | 1 1 6 1 1 1 2 2 | ||||||
| HWS84GNF | 1 1 6 1 1 1 2 2 | ||||||
| HWS49GA 1 | 1 4 1 1 1 2 2 | ||||||
| HWS49GAE | 1 1 4 // 1 // | ||||||
| HWS66GGE | 1 1 5 // 1 2 / |
Product description
EN

Notice
Due to technical changes and different models, some of the illustrations in this manual may differ from your model.
Picture of appliance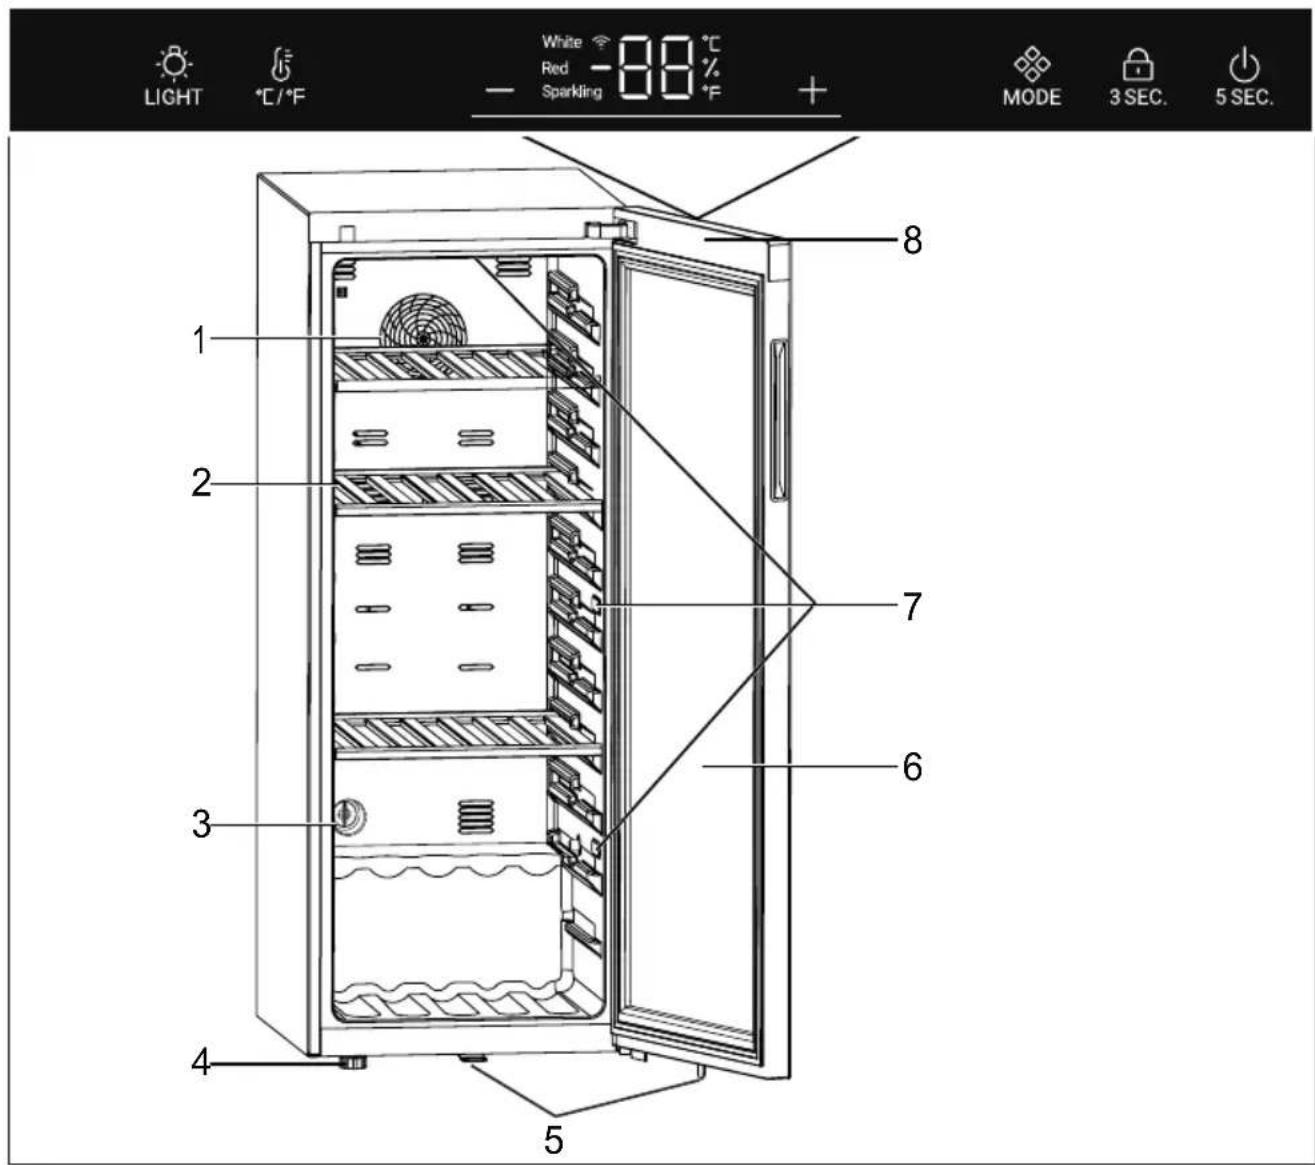
- Fan (except HWS49GAE, HWS66GGE)
- Shelf 3. Active charcoal filter
- Adjustable feet
- Lock (except HWS49GAE)
- Door
- LED lamp
- Display (on front of the door)
1. Unpacking
Take the appliance out of the packaging. Remove all packaging materials, including the foam base and all adhesive tape holding the accessories.
2. Environmental conditions
The room temperature should always be between 10°C and 38°C, since it can influence the temperature inside the appliance and its energy consumption. Do not install the appliance near other heat-emitting appliances (ovens, refrigerators) without isolation.
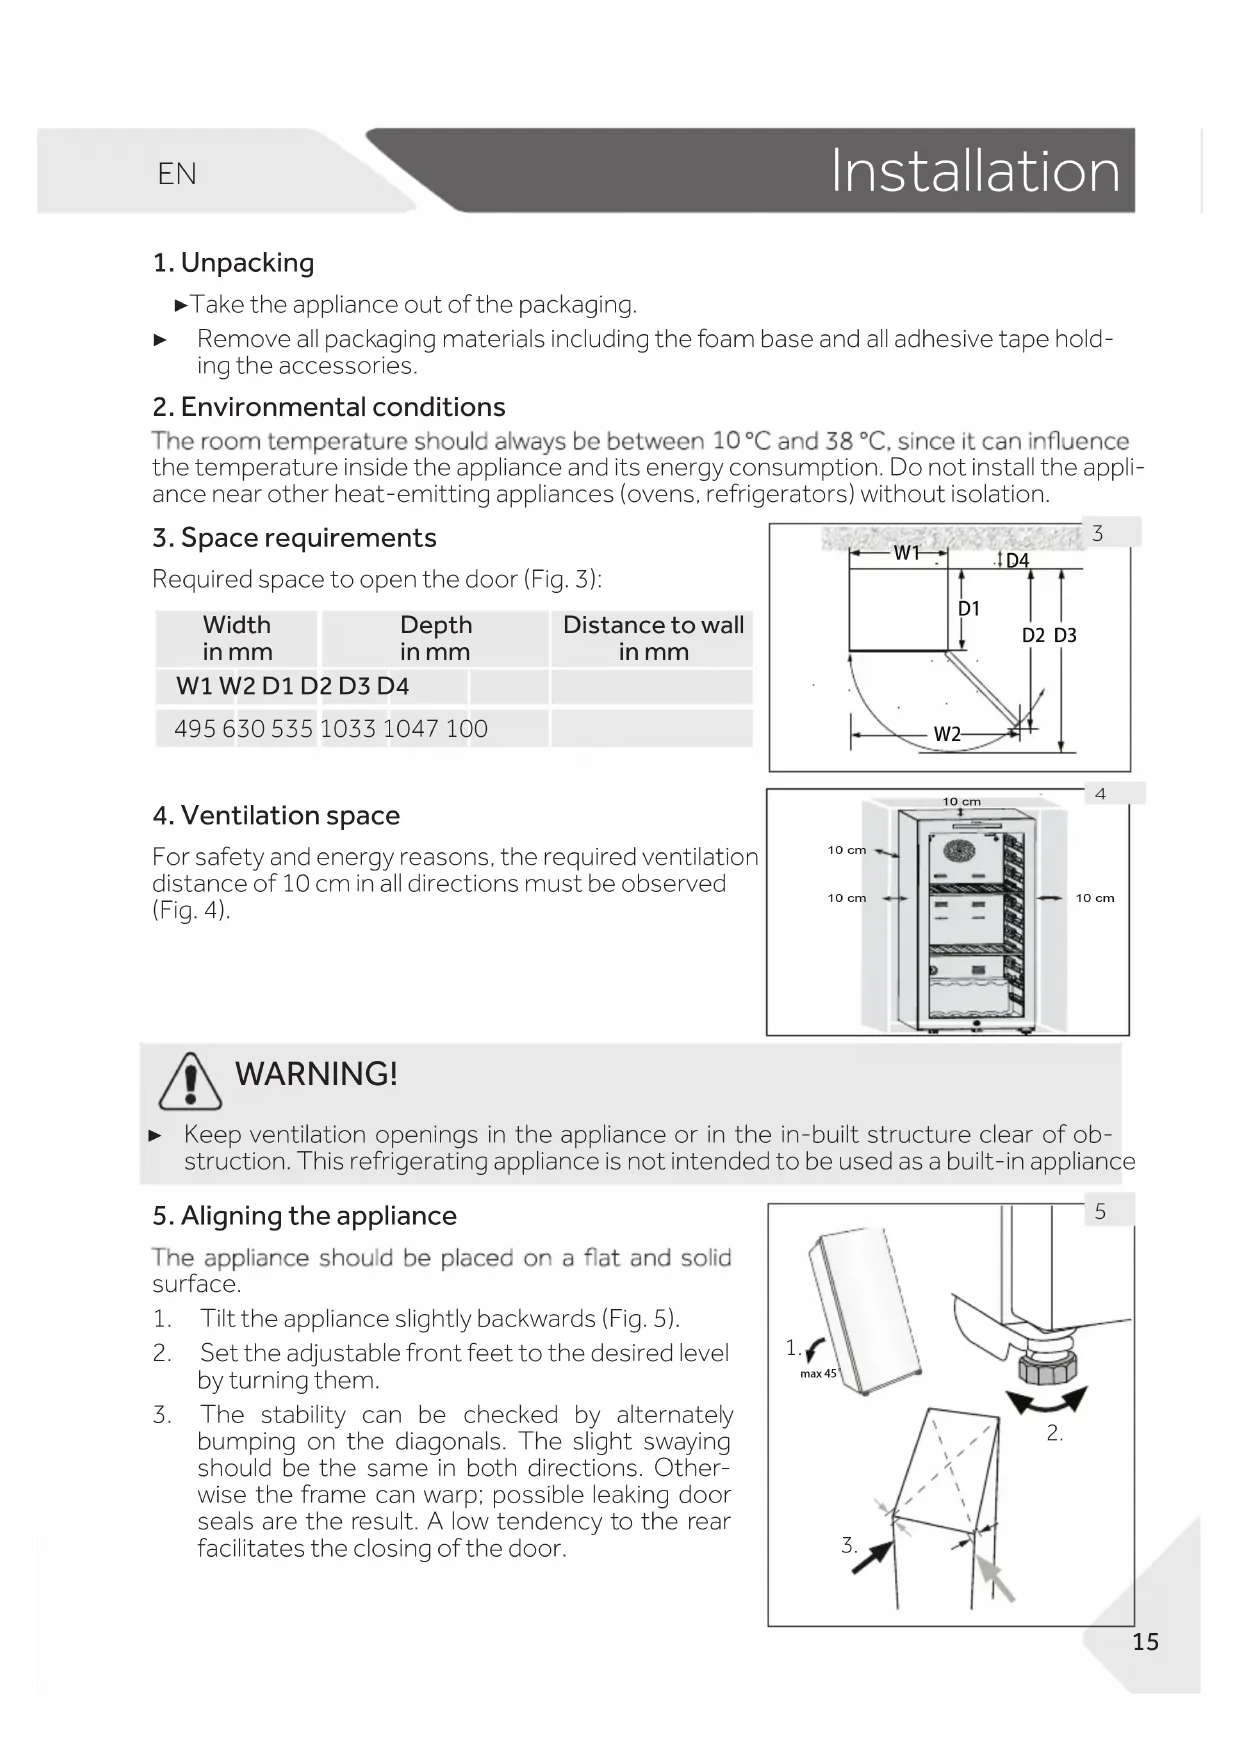
3. Space requirements
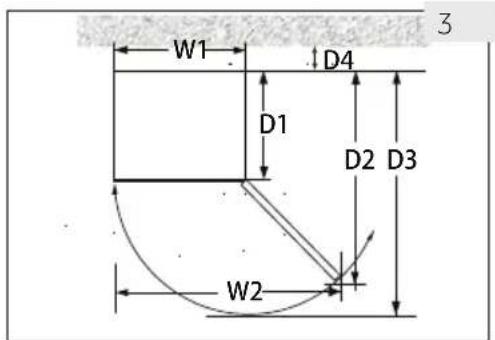
Required space to open the door (Fig. 3):
| Width in mm | Depth in mm | Distance to wall in mm |
| W1 W2 D1 D2 D3 D4 | ||
| 495 630 535 1033 1047 100 | ||
4. Ventilation space
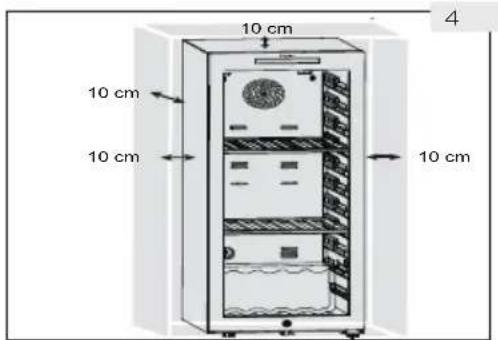
For safety and energy reasons, the required ventilation distance of 10 cm in all directions must be observed (Fig. 4).

WARNING!
- Keep ventilation openings in the appliance or in the in-built structure clear of obstruction. This refrigerating appliance is not intended to be used as a built-in appliance.
5. Aligning the appliance
The appliance should be placed on a flat and solid surface.
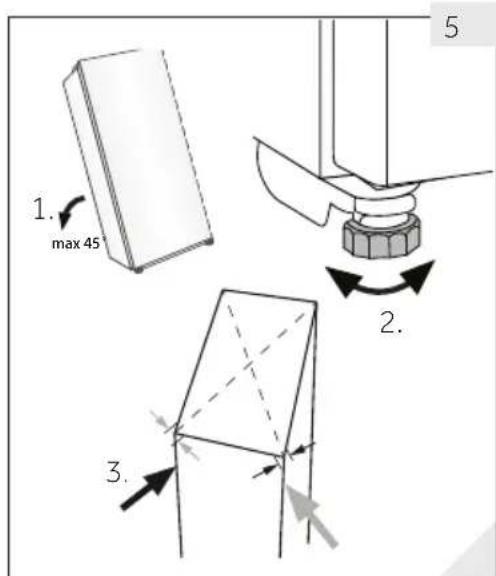
- Tilt the appliance slightly backwards (Fig. 5).
- Set the adjustable front feet to the desired level by turning them.
- The stability can be checked by alternately bumping on the diagonals. The slight swaying should be the same in both directions. Otherwise the frame can warp; possible leaking door seals are the result. A low tendency to the rear facilitates the closing of the door.
6
6. Fine tuning of the door
The appliance closes more easily if the levelling feet on the front are used:
Rotate the adjustable feet (Fig. 6) to turn them up or down:
Turning the feet clockwise raises the appliance. Turning the feet counterclockwise lowers the appliance.
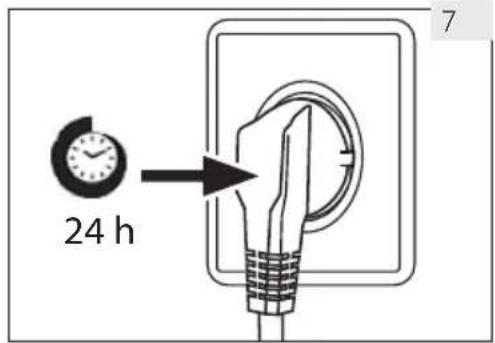
7 Waiting time
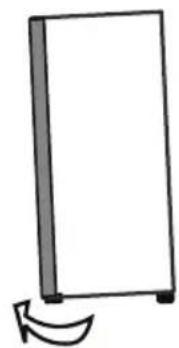
The maintenance-free lubrication oil is located in the capsule of the compressor. This oil can get through the closed pipe system during transport if the appliance is tilted. Before connecting the appliance to the power supply, wait 24 hours (Fig. 7) so that the oil runs back into the capsule.
8. Electrical connection
Before each connection check if:
power supply, socket and fusing are appropriate to the rating plate.
the power socket is earthed and no multi-plug or extension. the power plug and socket are fit properly.
Connect the plug to a properly installed household socket.

WARNING!
To avoid risks a damaged power cord must be replaced by the customer service (see warranty card).
9. Door Reversibility (except HWS49GAE, HWS66GGE)
Before connecting the appliance to the power supply, you should check whether the door swing must be changed from right (as delivered) to left, if this is required by the installation location and usability.

WARNING!
The appliance is heavy. You need two persons to carry out the door reversibility.
Before any operation, first unplug the appliance from the mains.
Do not tilt the appliance more than 45° to prevent damage to the cooling system.
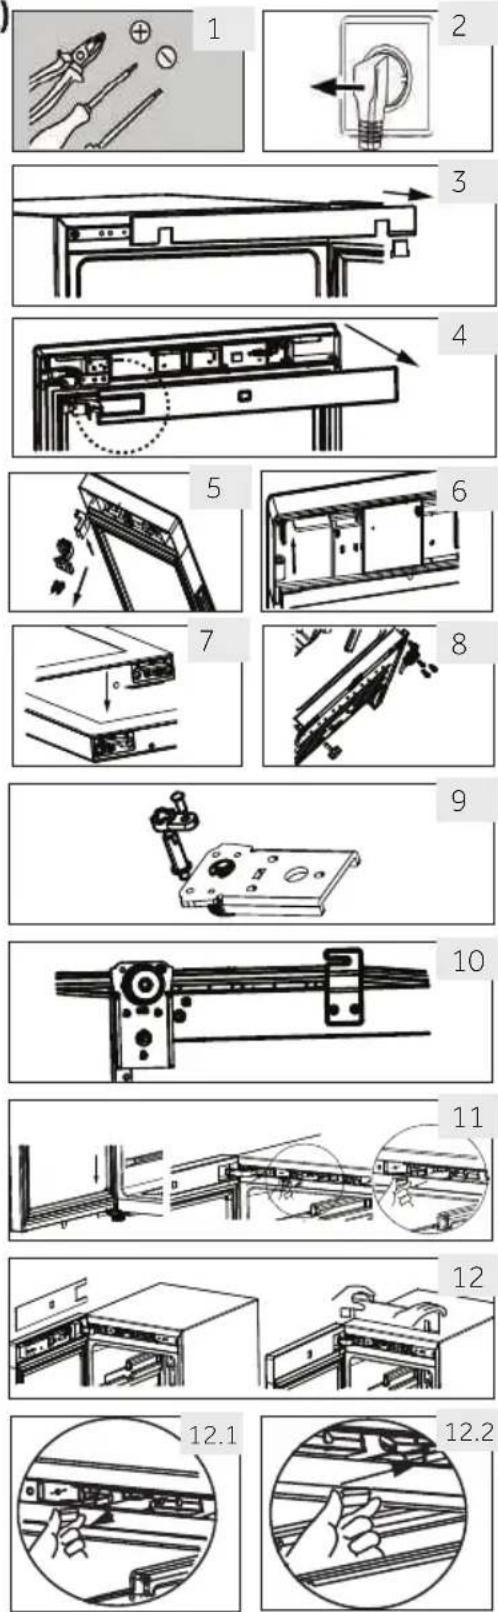
Assembly steps (except HWS49GAE, HWS66GGE)
- Provide necessary tools.
- Unplug the appliance.
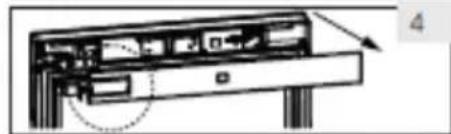
- Open the door, take down the front strip, and find the corresponding strip to remove the left side and place it on the right side of the gap.
- Unplug the connection cable. Pull out the upper part of the door seal, and take down the door back strip. (Remove from the left side opening)
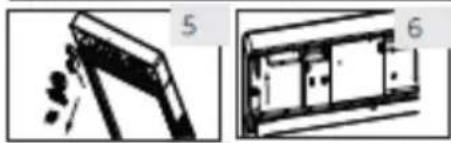
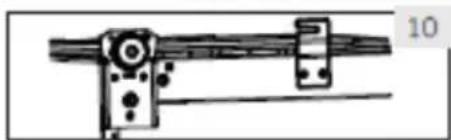
- Remove 2 screws on the upper hinge.
- Remove cover and hinge, remove axle cover, then assemble to the other side, then install the hinge in the axle.
- Remove the cam and door holder, move the door holder to the other side of the door. Install the new cam from the gift bag.
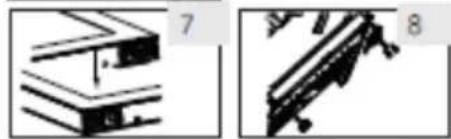
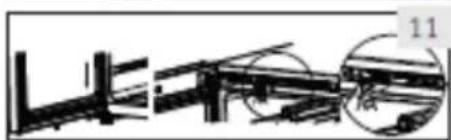
- Cabinet tilted (less than 45°), remove the bottom hinge (3 screws) for backup.
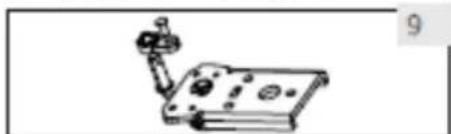
- Remove the lower hinge cam and hinge shaft. Install the shaft on the right side of the lower hinge. Take out the cam from the instruction bag and install it on the lower hinge shaft.
- Install the lower hinge and the bottom foot on the other side of the cabinet. Lubricate the cam.
- Install the door on the lower hinge shaft, and fix the upper hinge with two screws on the cabinet. Fix the signal wires in the middle of the upper hinge groove, and take the hinge cover in the instruction bag and fasten it on the upper hinge.
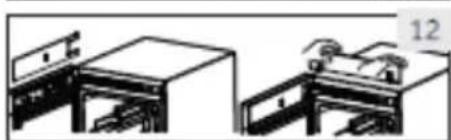
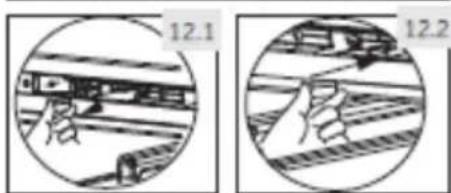
- Install the door seal and the door strip on the door. Insert the pair of door signal wires, move the magnetic switch (12.1) to the right mounting slot (12.2) of the upper beam box, and fasten the front trim of the cabinet.
- Make sure the door is able to open and close in a good condition.
1. Before first use
- Remove all packaging materials. This includes the foam base and all adhesive tape holding the wine cellar accessories inside and outside. Keep them out of children's reach and dispose them in an environmentally friendly manner. Clean the inside and outside of the appliance with water and a mild detergent before putting any wine in it. After the appliance has been levelled and cleaned, wait for at least 2 hours before connecting it to the power supply. If your wine cellar has been tilted for any reason, wait 24 hours before plugging it in. See section INSTALLATION.
- Once you have plugged the unit into an electrical outlet, let the unit run for at least 30 minutes to acclimatize itself before making any adjustments. The temperature is automatically set to 12°C. If desired, you can change the temperature manually. Please see TEMPERATURE.
2. Touch keys
The buttons on the control panel are touch keys, which respond when lightly touched with the finger.
3. Description for control panel
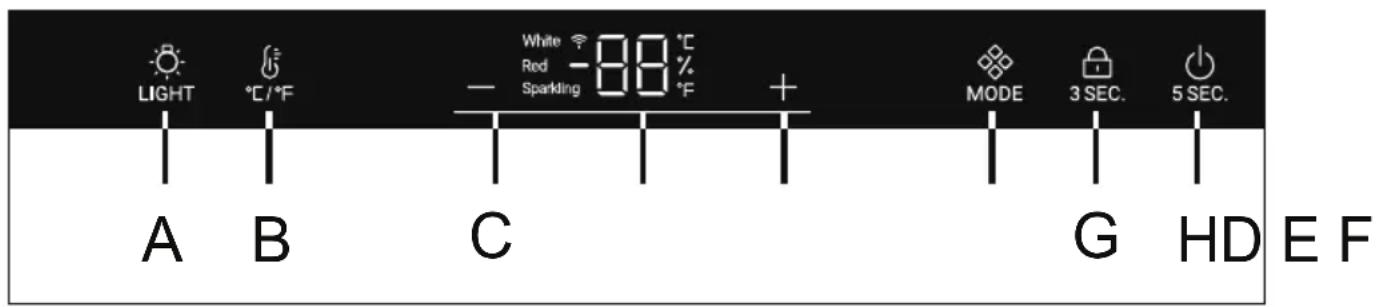
A Interior light button B °C/°F conversion button C Temperature adjust button: down D Display
E Temperature adjust button: up F Mode button G Lock button H Power button
4. Automatically locking function
The control panel automatically locks from any key presses after 30 seconds from being enabled, the light. To activate keylock press the button for 3 seconds, when locked the back lit LED lights will dim. Button A is not locked.
5. Power button function
Press the H button for 5 seconds to turn off the wine cellar. Then press the H button for 5 seconds to turn it on.
6. Temperature setting

Notice
Presettings
- Once you have plugged the unit into an electrical outlet, let the unit sit for at least 30 minutes to acclimatize itself before making any adjustments.
- When the appliance is switched on after disconnection from the main power supply, it may take several hours for the correct temperatures to be reached. The exact time varies depending on the environment and the temperature setting.
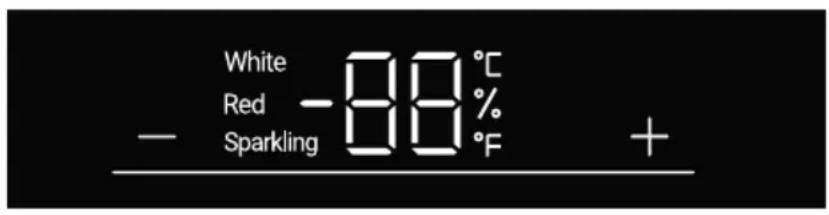
Press the + or - button, and the display will start to flash. Press the + or - button to set the desired temperature. The temperature setting range is 5-20°C (41-68°F). Stop pressing the key for 3 seconds, and the temperature is confirmed.
7. Mode function
Press the button, and the temperature switches from sparkling (8°C or 47°F) to white (12°C or 54°F) and red (16°C or 61°F).
1. Recommended temperature settings
The following drinking temperatures are recommended for the different types of wine.
| Red wine | +13°C to +20°C (+55°F to + 68°C) | Sparkling wine Prosecco | +5°C to +8°C (+41°F to 47°F) |
| White wine | +9°C to +12°C (+48°F to +54°F) |
If you store wine for long periods of time, it should be stored at a temperature between +10°C and +12°C (50°F and +54°F).
2. Standby mode
The display screen is dimmed automatically after 30 seconds.
It lights up automatically when any key is touched or the door is opened.

Notice
Influences on temperatures
The temperature inside the appliance is influenced by the following factors:
Ambient temperature
Frequency of door opening
Amount of stored bottles
The location of the appliance
The default setting is 12°C
When display stops flashing, it goes back to showing the current temperature inside the wine cellar. It will take some time to reach the set temperature.
9. Lighting mode setting
Press the button. When the lights in the cabinet are on, the lights will be lighted up gradually. When pressed the button once again the lights will be off gradually.
10. °C / °F function
Press the button, switch between Fahrenheit and Celsius.
11. Power-Off Memory function
If a power outage occurs, the wine cellar will automatically save the set temperature. After power is restored, it will run based on the temperature set before the outage.
12. Low temperature compensation function (except HWS49GAE, HWS66GGE)
The wine cellar has a low temperature compensation function to ensure temperature stability: When the ambient temperature is lower than the set temperature, the wine cellar automatically activates the low temperature compensation function, heating the interior. When the interior temperature reaches the set temperature, the low temperature compensation function automatically turns off.
13. Door opening alarm
If the door is left open for more than 1 minute, the buzzer will beep to give an alarm until the door is closed or any key on the display panel is operated, and then the buzzer will stop beeping.

Energy saving tips
Make sure the appliance is properly ventilated (see INSTALLATION). - Do not install the appliance in direct sunlight or near heat sources (e.g., stoves, heaters). - Avoid unnecessarily low temperatures in the appliance. Energy consumption increases the lower the temperature is set. - Open the appliance door as little and as briefly as possible. Do not exceed the designed number of bottles to avoid obstructing air flow. - Keep door seals clean so that the door always closes correctly. The most energy-saving configuration requires drawers, food boxes, and shelves to be positioned as in the factory-fresh condition, and food to be placed without blocking the air outlet of the duct.
Equipment
EN
1. Shelf
- The shelves are designed for easy storage and easy removal of wine. They can be cleaned with a soft towel.
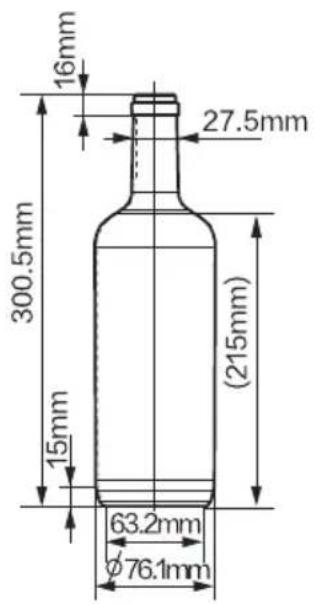
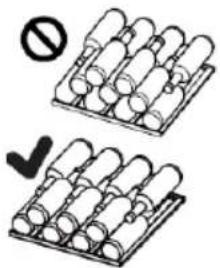
- Regular bottles with a diameter of 76mm can be stacked.
- Magnum bottles can be stacked on the bottom shelf.
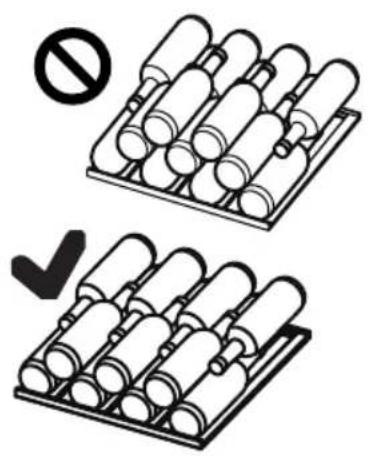
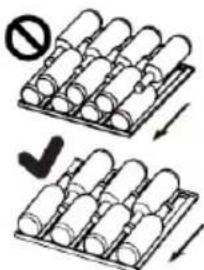
- The quantity can vary from the depicted number of bottles if they are stacked in a different way.
Advice for the layout of your wine cellar
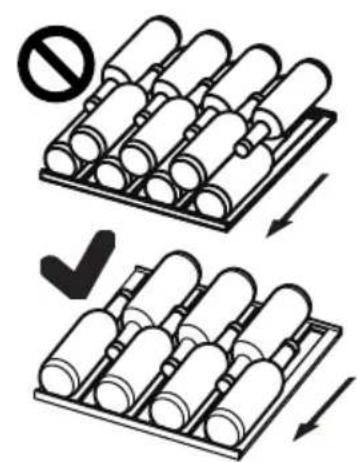
We recommend that the number of wine bottles should not exceed two layers on each shelf, and the bearing capacity of the wine shelves should not exceed 20 kg. Before placing the bottles inside the wine cellar, confirm whether or not the wine shelves are completely stable. In addition, confirm whether or not any bottle protrudes from the shelves in order to prevent bottles hitting the glass door upon closing.
2. The light
The LED interior light comes on when the door is opened. To turn on the light while the door is closed, touch the button. To turn the lights off, touch button again. To increase the energy efficiency, the lights should be turned off when the wine cellar is not being viewed.
3. The lock
To lock the wine cellar, close the door and put the key in the lock:
Lock the door by turning the key counterclockwise; Unlock the door by turning the key clockwise.
1. Defrosting
The defrosting of the wine cellar is done automatically; no manual operation is needed.
2. Replacing the LED lamp
The lamp uses LED as its light source, featuring low energy consumption and long service life. If there is any abnormality, please contact the customer service. See CUSTOMER SERVICE.

WARNING!
Do not replace the LED lamp yourself. It must only be replaced by either the manufacturer or the authorised service agent.
Parameters of LED lamp:
Voltage 12V; Max power: 8W (for HWS84GA, HWS84GNF) and HWS66GGE)
Voltage 12V; Max power: 5W (for HWS49GAE and HWS49GA)
3. Non-use for a longer period
Unplug the power cord.
Clean the appliance and door gaskets as described above.
Keep the door open to prevent the creation of bad odours inside.
4. Moving the appliance
- Remove all bottles and unplug the appliance.
- Secure shelves and other moveable parts in the wine cellar with adhesive tape.
- Do not tilt the wine cellar more than 45 degrees to avoid damaging the refrigerating system.
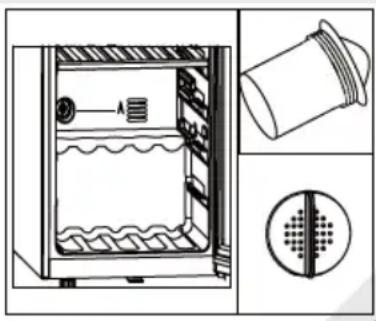
5. Air exchange with activated carbon filter
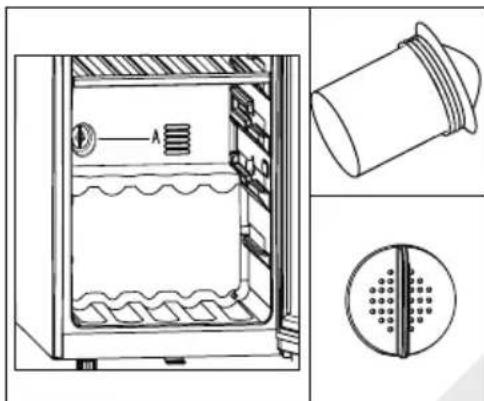
The way in which wines continue to mature depends on the ambient conditions. The quality of the air is therefore decisive for preserving the wine. An activated carbon filter has been fitted in the lower area of the rear wall of the appliance to ensure that the air throughput remains at an optimum quality.

Notice
We recommend that you replace the filter once a year. Filters can be obtained from your dealer.
Changing the filter:
Take the filter by the handle. Turn it to the left and remove.
Inserting the filter:
Insert with the handle in a vertical position. Turn it to the right and insert.
Troubleshooting
EN
Many occurring problems could be solved by yourself without specific expertise. In case of a problem, please check all shown possibilities and follow the instructions below before you contact an after-sales service. See CUSTOMER SERVICE.
WARNING!
Before maintenance, deactivate the appliance and disconnect the mains plug from the mains socket. Electrical equipment should be serviced only by qualified electrical experts, because improper repairs can cause considerable consequential damages. A damaged supply cord should only be replaced by the manufacturer, its service agent, or similarly qualified persons in order to avoid a hazard.
| Error Code | Cause Solution | |
| rH | The temperature is too high. | Please contact our after-sales service. |
| rL | The temperature is too low. | Please check ambient temperature should be between 10 °C and 38 °C. |
| Problem Possible Cause | Possible Solution | |
| The compressor does not work. | •Mains plug is not connected in the mains socket. | Connect the mains plug. |
| The appliance runs frequently or runs for a too long period of time. | The outdoor temperature is high. •The appliance has been off power for a period of time. •A door of the appliance is not tightly closed. •The door has been opened frequently or for too long. •The door gaskets are dirty, worn, cracked or mismatched. •The required air circulation guaranteed. •The temperature is set too low. | This case, it is normal for the appliance to run longer. Normally, it takes a while for the appliance to cool down completely. Close the door and ensure the appliance is located on a level ground and there is no food or container jarring the door. Do not open the door too frequently. Clean the door gasket or replace them by the customer service. Ensure adequate ventilation. The problem will resolved itself when the desired temperature has been reached. |
| The inside of the wine cellar is dirty and/or smells.. | •The inside of the wine cellar needs cleaning. | Clean the inside of the wine cellar. |
| It is not cold enough inside the appliance. | •The temperature is set too high. •Bottles have been added recently. •A door of the appliance is not tightly closed. •The door has been opened frequently or for too long. •The door gaskets are dirty, cracked or mismatched. | Reset the temperature. Allow time for recently added bottles to reach desired temperature. Close the door. Do not open the door too frequently. Clean the doorgasket or replace them by the customer service.. |
| It is too cold inside the appliance. | •The temperature is set too low. | Reset the temperature. |
| Moisture formation on the inside of the refrigerator compartment. | •The climate is too warm and too-damp. •A door of the appliance is not tightly closed. •The door has been opened frequently or for too long. | Increase the temperature. Close the door. Do not open the door/drawer too frequently. |
Troubleshooting
EN
| Problem Possible Cause Possible Solution | ||
| Moisture accumulates on the wine cellar;s outside surface. | ·The climate is too warm and too damp ·The door is not closed tightly.The cold air in the appliance and the warm air outside it condensates. | ·This is normal in damp climate and will change when the humidity decreases. ·Ensure that the door is shut tightly and that the gaskets seal properly. |
| The appliance makes abnormal sounds | ·The appliance is not located on level ground. ·The appliance touches some object around it. | ·Ajust the feet to level the appliance. ·Remove objects around the appliance. |
| A slight sound is to be heard similar to that of flowing water. | ·This is normal | - |
| The interior light- ing or cooling system does not work. | ·Mains plug is not connected to the mains socket. ·The power supply is not intact. ·The LED-lamp is out of order. | ·Connect the mains plug. ·Check the electrical supply to-the room.Call the local electricity company. ·Please call the service for changing |
| The sides of the cooler and door strip get warm | ·This is normal. | - |
| The door does not shut properly | ·The appliance is not level. ·The door is blocked. | ·Level the appliance with the leveling feet. ·Check for blockages like bottles or shelves. |
To contact the technical assistance, visit our website:
https://corporate.haier-europe.com/en/
Under the section "website", choose the brand of your product and your country. You will be redirected to the specific website where you can find the telephone number and form to contact the technical assistance.
Product fiche according to regulation EU No. 2019/2016
| Brand Haier Haier Haier | |||
| Model name / identifier | HWS49GA /HWS49GAE | HWS84GNF | HWS84GA /HWS66GGE |
| Category | Wine Cellar | Wine Cellar | Wine Cellar |
| Household refrigeration category III | |||
| Energy efficiency class | FFG | ||
| Annual energy consumption (kWh/year)1) | 104 110 | 149/153 | |
| Storage volume (L) 116/118 198 198 | |||
| Climate class: This appliance is intended to be used at an ambient temperature between 10 °C and 38 °C. | SN N ST | SN N ST | SN N ST |
| Airborne acoustical noise emissions (db(A) re 1pW) | C(37) | C(37) | C(37) |
| Type of appliance | Freestanding | Freestanding | Freestanding |
| This appliance is intended to be used exclusively for the storage of wine. | Yes | Yes | Yes |
| Dimensions (D/W/H in mm) 585/497/820 | 585/497/1270 | 585/497/1270 |
Explanations: 1) based on standard test results for 24 hours. The actual power consumption depends on the actual environment, the amount of bottling, the set temperature, the door opening and closing, etc. 2) The nominal power consumption is the value obtained according to the standard test when the wine cabinet does not turn on the internal light. - extended temperate: 'this refrigerating appliance is intended to be used at ambient temperatures ranging from 10°C to 32°C'; - temperate: 'this refrigerating appliance is intended to be used at ambient temperatures ranging from 16°C to 32°C'; - subtropical: 'this refrigerating appliance is intended to be used at ambient temperatures ranging from 16°C to 38°C'; - tropical: 'this refrigerating appliance is intended to be used at ambient temperatures ranging from 16°C to 43°C';
Standards and directives

This product meets the requirements of all applicable EC directives with the corresponding harmonised standards, which provide for CE marking.
Customer Service
EN
We recommend our Haier Customer Service and the use of original spare parts.
If you have a problem with your appliance, please first check section TROUBLESHOOTING.
If you cannot find a solution there, please contact
▶ your local dealer or - the Service & Support area at www.haier.com where you can find telephone numbers and FAQs and where you can activate the service claim.
To contact our Service, ensure that you have the following data available.
The information can be found on the rating plate.
Model Serial No.
Also check the Warranty Card supplied with the product in case of warranty.
For general business enquiries please find our addresses in Europe below:
| European Haier addresses | |||
| Country* Postal address Country Postal address | |||
| Italy | Haier Europe Trading SRL Via De Cristoforis, 12 21100 Verese ITALY | France | Haier Europe Trading SRL Via De Cristoforis, 12 21100 Verese ITALY |
| Spain Portugal | Haier Iberia SL Pg. Garcia Faria, 49-51 08019 Barcelona SPAIN | Belgium-FR Belgium-NL Netherlands Luxembourg | Haier Benelux SA Anderlecht Route de Lennik 451 BELGIUM |
| Germany Austria | Haier Deutschland GmbH Hewlett-Packard-Str. 4 D-61352 Bad Homburg GERMANY | Poland Czechia Hungary Greece Romania Russia | Haier Poland Sp. zo.o. Al. Jerozolimskie 181B 02-222 Warszawa POLAND |
| United Kingdom | Haier Appliances UK Co. Ltd. One Crown Square Church Street East Woking, Surrey, GU21 6HR UK | ||
AVAILABILITY OF SPARE PARTS: Thermostats, temperature sensors, printed circuit boards and light sources are available for a minimum period of seven years after placing the last unit of the model on the market. Door handles, door hinges, trays and baskets for a minimum period of seven years and door gaskets for a minimum period of 10 years, after placing the last unit of the model on the market.
Minimum guarantee is: 2 years for EU Countries, 3 years for Turkey, 1 year for UK, 1 year for Russia, 3 years for Sweden, 2 years for Serbia, 5 years for Norway, 1 year for
Morocco, 6 months for Algeria, Tunisia no legal warranty required.
For further information about the product, please consult https://eprel.ec.europa.eu/ or scan the QR on the energy label supplied with the appliance.
(66) HWS66GGE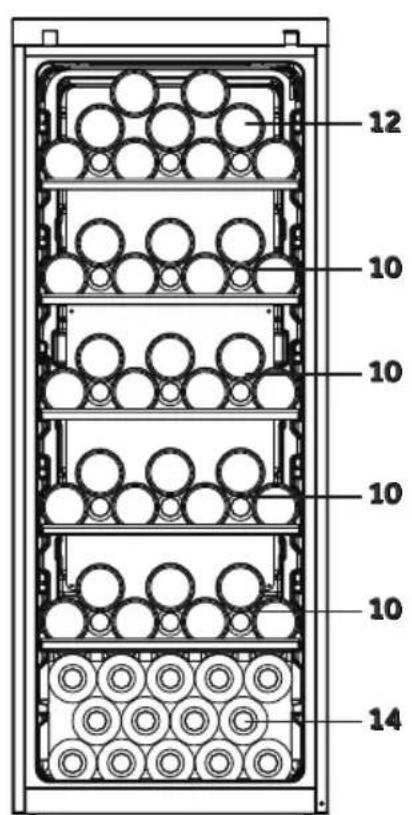
(49) HWS49GA HWS49GAE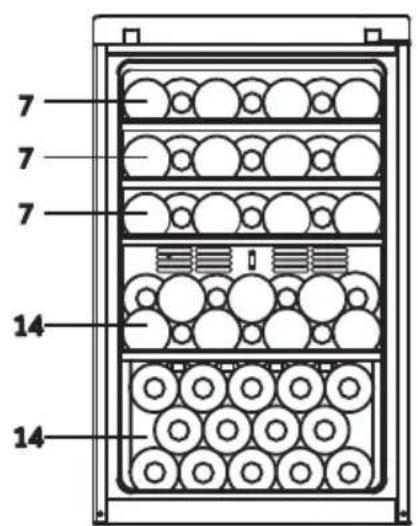
(84) HWS84GA HWS84GNF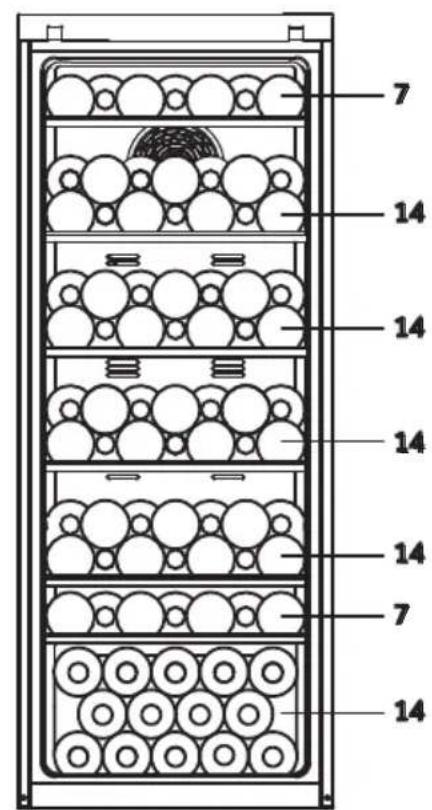
Haier
User Manual
Wine Cooler
HWS84GA
HWS84GNF
HWS49GA
HWS49GAE
HWS66GGE
Stand-by mode
Clean the shelves:
https://corporate.haier-europe.com/en/.
By properly disposing of this product, you will help prevent potential negative consequences for the environment and human health, which could otherwise arise from improper waste handling.
For more detailed information about recycling this product, please contact your local municipal waste disposal service or the shop where you purchased the product.
1-Safety information. 4 2-Safety instructions. 7 3-Operation. 8 4-Accessories. 9 5-Product description. 10 6-Installation. 11 7-Use. 16 8-Energy saving tips. 17 9-Cleaning. 18 10-Troubleshooting. 19 11-Search and repair of faults. 20 12-Technical data. 23 13-Customer service. 24 14-Warranty terms. 26
First read the instructions for use. Before using the device, read the following safety instructions.

WARNING!
Before first use
Check that the device has not been damaged during transport. Remove all packaging and keep it out of reach of children, and dispose of it in an environmentally friendly manner. Wait for the device to reach room temperature before installing it, to ensure that the cooling circuit operates correctly. When moving the device, be careful as it is heavy.
Installation
Place the device in a well-ventilated area. Leave at least 10 cm of free space above and around it. Warning: Do not cover the ventilation openings in the device or built-in structures. Never place the device in a damp place or where water splashes may fall on it. Wipe off water splashes and stains with a soft, clean cloth. Do not install the device in places that do not have proper insulation or heating, e.g., a garage. Your device is not intended for operation at ambient temperatures below 10°C. Do not install the device in direct sunlight or near heat sources (e.g., stove, heaters). Install and level the device in accordance with its size and intended use. Check that the electrical ratings on the nameplate match the power supply. Otherwise, contact an electrician. The device operates on 220-240V AC, 50 Hz. Voltage fluctuations may cause the device to fail to start, damage to the temperature regulator or compressor, or possible abnormal noise during operation. In this case, it is necessary to install an automatic voltage regulator. Do not use multi-outlet adapters or extension cords. Warning: Do not connect multiple portable sockets or portable power strips to the device. Warning: When positioning the device, ensure that the power cord is not pinched or damaged. Do not step on the power cord. Use a separate grounded outlet for the power supply, as it is essential. The device must be grounded. Warning: Do not damage the refrigerant circuit. This device can be used by children aged 8 and above and persons with reduced physical, sensory or mental capabilities or lack of experience and knowledge, provided they are supervised or instructed on the safe use of the device and understand the associated dangers.
They must not play with the device.
This appliance is designed for domestic use and similar applications such as staff kitchens in shops, offices, and other working environments; farmhouses; by clients in hotels, motels, and other residential type environments; bed and breakfast type environments; catering and similar non-retail applications. It is not intended for use by persons (including children) with reduced physical, sensory or mental capabilities, or lack of experience and knowledge, unless they have been given supervision or instruction concerning use of the appliance by a person responsible for their safety. Children should be supervised to ensure that they do not play with the appliance. Keep the appliance and its cord out of reach of children less than 8 years old. Cleaning and user maintenance shall not be made by children without supervision. The appliance must be positioned so that the plug is accessible. Do not place the appliance near a gas or electric cooker, or any other heat source. Do not operate the appliance with wet hands. Do not immerse the appliance, cord, or plug in water or any other liquid. Do not use the appliance if the cord or plug is damaged, or if the appliance has been dropped or damaged in any way. If the supply cord is damaged, it must be replaced by the manufacturer, its service agent, or similarly qualified persons in order to avoid a hazard. Do not use the appliance outdoors. Do not let the cord hang over the edge of a table or counter, or touch hot surfaces. Do not place the appliance on or near a hot gas or electric burner, or in a heated oven. Do not use the appliance for other than intended use. The appliance is intended for household use only. Do not store any explosive substances, such as aerosol cans with a flammable propellant, in this appliance. Do not store in this appliance any acids, bases, or chemical reagents. This appliance is not intended for storage of medical products. It is not recommended to store materials that require precise temperature control. Do not set an unnecessarily low temperature in the freezer compartment. At high ambient temperatures, minus temperatures may occur. Caution: Ice cubes may crack. Do not touch the inner surface of the freezer compartment with wet hands during operation, as hands may freeze to the surface. Proper cooling does not prevent the appliance from being used for other purposes. Disconnect the appliance from the power supply in case of malfunction or before cleaning. Wait at least 7 minutes before restarting the appliance, as frequent starts may damage the compressor. Caution: Do not use electrical appliances inside the appliance unless they are recommended by the manufacturer. To reduce the risk, the power cord must be replaced by a service agent (see warranty and notes).
To extend the service life of the appliance, do not switch it on and off frequently. Never place the appliance horizontally on the floor. After moving the appliance, leave it for 24 hours before plugging it into the socket.
Maintenance / Cleaning
Before cleaning or maintenance, unplug the appliance. Disconnect the appliance from the power supply before any servicing. Wait at least 7 minutes before restarting the appliance, as some start-ups may damage the compressor. If the appliance is damaged, do not use it; do not pull it by the cable. Do not clean the appliance with sharp objects, metal objects, abrasive powders, gasoline, ammonia, acetone, or similar organic solvents, acids, or alkalis. Please use a special cleaning agent for refrigerators/freezers to avoid damage. Rinse with clean water and a mild detergent solution - approximately one tablespoon of detergent per quart of water. Rinse thoroughly with water and dry. Do not use cleaning powders or other abrasive agents for cleaning. Do not wash any parts in the dishwasher. Caution. Do not use mechanical devices or other means to accelerate the defrosting process, except those recommended by the manufacturer. If the power cord is damaged, it must be replaced by the manufacturer, its service agent, or a similarly qualified person to avoid hazard. Do not attempt to repair, disassemble, or modify the appliance yourself. In case of repair, please contact our service center. If the light bulb is damaged, it must be replaced by the manufacturer, its service agent, or a similarly qualified person to avoid hazard. Replace the appliance door panel once a year to avoid hazards and increase energy efficiency. Do not spill or rinse the appliance with water or other liquids. Do not spill water or other liquids when cleaning the appliance. Do not wash cold parts with hot water. Sudden temperature changes may cause cracking. If you do not use the appliance for a long time, leave it open to prevent the formation of unpleasant odors inside.
Information about the refrigerant

WARNING!
The appliance contains the flammable refrigerant isobutane (R600a). Make sure the refrigerant circuit is not damaged during transport or installation. Refrigerant leakage can cause eye injury or fire. If leakage occurs, keep away from open flames, ventilate the room thoroughly, do not plug into an outlet and do not switch on any electrical devices or appliances. Contact the service center.
If the refrigerant leaks, rinse the affected area with plenty of water and contact a specialist.
Warning. The cooling system is under high pressure. Do not attempt to open it. Since flammable refrigerants are used, please install, service, and maintain the appliance strictly in accordance with the instructions and contact a professional agent or our service center for disposal.
Intended Use
This appliance is intended for use in households and similar applications, such as:
- Kxohhi 30HH JIJI IepcoHaJy B Mara3HHax, oicax Ta iHINx po6OHN cx cepeIOBuaX; -epmepcbki 6yHHKH, KJIiHCTaMH B ROTeJHX, MOTEJHX Ta iHHNX JKTJIOBHX IIpHMIIeHHX; -MiHi-roTeJI; -3aKJIaIINrpoMaIcBkoTOxapUyBaHHraTpa03Ipi6HoITopriBJIi.
Ⅲo6 3a6e3neHTn 6e3neue 36epiraHHBnHa, IOTpHMyItecra IIei iHcTpkykii 3 BHKOpHCTaHH. DeTaJII IIOIO HaIbIbII IIIXOJIaIOI YAcTHHH BiIJIeHH NpHJaIy,Je 6yIyTB 36epiratncn IEBHI BUNI IPOyKTIIB, BPaxOBYIOH pO3IOJI TEmIEpaTyPh, Jka MoKe 6yTH Bpi3HNX BiIJIeHHx INpHJAy, 3HaXoJITbcB IINII YAcTHHI Noci6HNka.
3a6opOHeHO BHOCTH 3miHn a6o MoHΦiKaii y IIpHJIaI. BHKOpHCTaHHI HIIHM YIHOM HIXIpeIb6aueHe 3acTOCyBaHHMoKe IIpH3BeCTH IO He6e3IeK Ta BtpaTH rapaHTiHHX BHMOr.
Ytniiaui
CnMBoJI Ha Bnpo6i a60 Ioro yIaKOBuBbKa3yec Ha Te, 1io IeN IIpoDyKT He MoJHa yTHJI3yBaTH JIK IO6yTOBI BIXOHN. HAtomictb Ioro cJIi IpeEaTH IIO BIINOBIDHO RYNKTY 36opy IJIIIEpepO6Kn eIeKtpnHOrO Ta eJIeKtpOnHOrO oJIaIHANHH. 3a6e3IIeHNBIM HAJIekHy yTHJI3aIIO IbTo Bnp6y, BN IOpOMoKeTe 3aIO6IRTH MOJIHBIM HeTaTHBHM HAcJIiKam IJI HABKOJINHbOTo CepeIOBnIa Ta 3IOPOB' JIOJe, kI MOJIIN 6 ByTN CInPnHHeHi HEIIpaBHbHOIO yTHJI3aIcIeIO IbTo Bnp6y. IIO6 OTPMaTH IetaJBHIy iHΦopMaIIIO Ipo IpepeO6Ky IbTo Bnp6y, 3BepHITbcrdo MlcueBOI MicbKOI BlaAIN, cIyKbON yTHJI3aII IIo6yTOBHX BiXoIB a60 MaRa3HH, Ye BN pNl6aIN Bnpi6.
OckijbKn BHKOPHCTOBYOTbcjIeKo3aMncti 130JIuHi ra3N,6yJb Jaacka,3BepHiTbcjdo npoceciiHoro areHa a6o Haooi nicJnnpoJaXhoi cJyK6n, uo6 yTuJI3yBaTH npHJA.
YBAΓA!
He6e3IeKa TpaBM a6o 3aIyXn!
XoJIOoareHTn Ta ra3n Heo6XiIHO yTHJI3yBaTH IpoΦeciHNo. IpeE HaJIeKHOU yTHJI3aIciHO IpekoHaITeC8, 10 Tpy6ka KOHTpy XoJIOoareHTy He NIOIIKOJKeHa. BiE'EnHaIte IprNlaI BId EJIeKTPomepeKi. BiipixTe Ka6JIb KHNBJeHHra Ta yTHJI3yIte Horo. 3HIMITb JOTKN Ta IIyXJIAH, a TaKOK DBePuaTa N yIiJIbHIOBaHi, 106 DiTH Ta DoMaIH Hi TBapHHn He 3aunHHIncB IprHJaI.
Ybara. Ipeepi qHHeHHM BiE'EnHaIe IIpHJaB BiD JKepeJia KHBJIeHHA. He ouHIIyIe Te npJIaI JopcTKHM IIITKAMN, IpOTAHM NITKAMN, MHOUHM IIOPOIIKOM, 6eH3HHOM, aMIJIaIeTaTOM, aIETOHOM Ta IIOJIbHMN opraIHJHMn PO3UHHAMN, KHCJIOTHHMn a6o IyJHKHMn PO3UHHAMN. OuHIyIe CIIeIIaJIbHM MHOUM 3aCO6OM IJIa XOJIIOHNJbHHKa, IIO6 yHHKNHT IOIIKOJKeHHJ. OuHyTe npHaJ, kIIO 36epiraTbca 3OBcIM He6aRaTO BnHa a6o 3OBcIM He 36epiraTbcra. HCTHTN IHO Heo6XiIDHO JINIE KOJIH BIn 6pydHNI. OuHcTiB BHyTpiiHHIO qactnHy ta KopIyC IprNJaIy r6KOIO, 3MOueHOIO B TeIIiB Boi 3 HeITpaJIbHM MHIQUHMaCO6OM ПомнITEЧИСТОЮ TEПЛIOЮ BOДIOIO I BHCYIITb M'ЯKOIO TKAHHIOIO. He MInIe KIOAnHy YacTHHy IprHJaY B NocyDoMHiHmMaHHi. 3auekaIte IprHnMHi 7 XBnIHn IIpeI Ipe3aIyckOM IIpHJaIy, ockJIbKn YacTn 3aIyck MoKe IIOIIKOJITN KOMIIpecop.
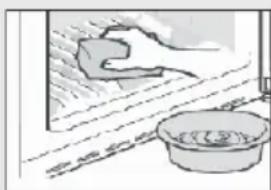
OuHCTITbIbepnHyiJIbHOBaU:
Remove the protective film from the door leaf. As shown in the figure: take the protective film by the corner and pull it off. Moisten the film with water or alcohol, then wipe the surface of the door leaf with a cloth moistened with water or alcohol.
Then wipe the door leaf dry with a clean cloth.
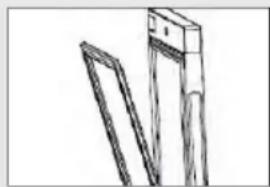
Installation of the door leaf after cleaning:
Before installation, make sure that the door leaf is
clean. Insert the door leaf into the groove and press it from top to bottom by hand until the entire door leaf is inserted into the groove.
Cleaning:
Use a mild detergent. Remove all stains. If the stain is slightly stubborn, wipe it off. Clean the stain with a soft cloth. Wait until the stain dries before reinstalling.
WARNING:
Wait at least 7 minutes to repeat the cleaning after the previous cleaning.
Accessories and documents are supplied according to this list: without fail.
Insert the plug into a properly installed socket.

WARNING!
To avoid risk, the damaged door leaf must be replaced by a service technician (see warranty terms).
9. Reversible door (except HWS49GAE, HWS66GGE)
Before connecting the device to the power supply, check if it is necessary to change the door from the right side (as supplied) to the left, if its installation location and ease of use require it.

WARNING! You may shiver or tremble to perform the adjustment. Before performing operations, disconnect the device from the network. Do not tilt the device more than 45° to avoid damaging the cooling system.
WARNING! You may shiver or tremble to perform the adjustment. Before performing operations, disconnect the device from the network. Do not tilt the device more than 45° to avoid damaging the cooling system.
EtainckJaadHn (okpim HWS49GAE, HWS66GGE)
- Take the necessary tool.
- Disconnect the device from the network.
- Open the doors, remove the front panel and take out the rear panel, so that it can be removed from both sides and placed on the right side of the rails.
- Disconnect the ground cable. Remove the upper part of the hinge and the shaft, then take out the hinge pin. (Remove from both sides of the opening)
- Unscrew 2 screws on the top plate.
- Remove the cover and the loop, remove the axle cover, then take it from the other side, and then install the loop on the axle. 7. Remove the handle and the door handle, move the door handle to the other side of the door. Install the new handle from the package.
- The hinge is tilted (less than 45°). Remove the lower loop (unscrew) for support.
- Remove the handle of the lower loop and the loop shaft. Install the shaft from the right side of the lower loop. Take the handle from the package with instructions and install it on the shaft of the lower loop.
- Install the lower loop and the lower shelf from the other side of the cabinet. Lubricate the handle.
- Install the door on the shaft of the lower loop and secure the upper loop with screws on the body. Secure the signal wires in the middle of the groove of the upper loop, and take the loop cover from the package with instructions and secure it on the upper loop.
- Install the door hinge and the door handle on the door. Insert the two signal wires of the door, move the magnetic switch (12.1) to the right mounting hole (12.2) of the upper beam box and secure the front part of the cabinet. 13. After adjustment, the doors should open and close properly.
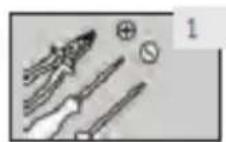
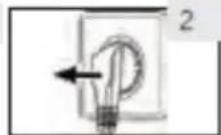
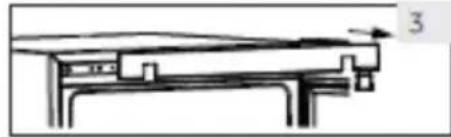
1. Check the usage
Clean the interior and exterior of the appliance with a soft cloth. Use a mild detergent to clean the interior and exterior. Keep them in an inaccessible place and dispose of them in an environmentally friendly manner. Clean the interior and exterior with a damp cloth before use.
After cleaning and drying the appliance, wait at least 2 hours before plugging it in. If the appliance has been tilted for any reason, wait 24 hours before plugging it in. Check the installation. After plugging the appliance into the electrical outlet, wait 30 minutes before starting the appliance to allow it to acclimatize. The temperature is automatically set to 12°C. If desired, you can change the temperature manually. Please check the temperature.
2. Touch controls
The buttons on the control panel are touch controls that respond even to a light touch of a finger.
3. Operation
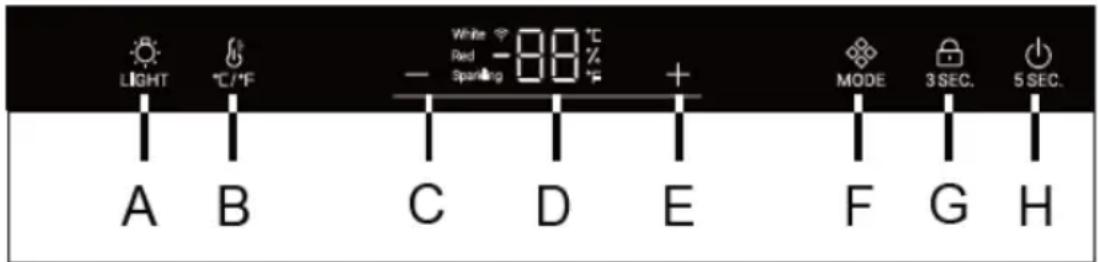
A Interior lighting in the button. B Temperature setting button: down. C Temperature setting button: up. D Button for selecting the mode. E Lock button. F Display button.
4. Automatic lock function
The controls are automatically locked after any button press within 30
seconds, and the display shows the lock symbol. To unlock the controls, press the
button for 3 seconds. After unlocking, the display shows the unlock symbol. Button A is not locked.
5. Display function
Press the button for 5 seconds, the display turns off. Then press the button for 5 seconds, the display turns on.
6. Temperature setting

Default
Temperature setting
After connecting the device to the electrical outlet, give it 30 minutes for acclimatization before first use. The plug must be connected to the main power supply. The temperature may be slightly higher than the ambient temperature.
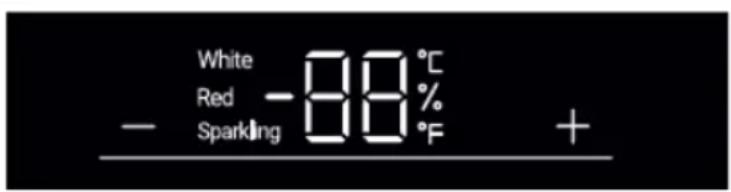
Press the "+" or "-" button to set the climate. Press the "+" or "-" button to set the desired temperature. The temperature range is from 5 to 20°C (41-68°F). Do not press the button for more than 3 seconds; the temperature is confirmed.
7. Function button
Press the MODE button. The temperature switches from "Cold Wine" (8°C or 47°F) to "Cool Wine" (12°C or 54°F) and "Cellar Wine" (16°C or 61°F).
Recommended temperature settings
For different types of wine, the following temperatures are recommended for storage.
| Червашие вино +13°C до +20°C (+55°F до +68°C) | Игнichte вино IIросекко | +5°C до +8°C (+41°F до +47°F) |
| Биile вино +9°C до +12°C (+48°F до +54°F) |
If you store wine for more than three hours, it should be stored at a temperature between +10°C and +12°C (50°F and 54°F).
Standby mode
The screen will automatically dim after 30 seconds.
It turns on automatically when you press any button or open the door.

Cleaning
Influence on temperature
The temperature inside the appliance is affected by the following factors:
The ambient temperature, the frequency of door opening, the quantity of food stored, and the placement of the appliance.
The default setting is 12°C.
When the door is opened, the interior light turns on. To check the set temperature, refer to the display.
9. Setting the lighting
Press the button. When the light in the cabinet is turned on, it will gradually dim.
With a repeated press of the button, the light will gradually turn off.
10. Function ℃/℉
Press the button to switch between Celsius and Fahrenheit.
11. Power-Off Memory function
In case of a power outage, the cabinet will automatically save the set temperature. After power is restored, it will operate based on the temperature set before the outage.
12. Low-temperature compensation function (except HWS49GAE, HWS66GGE)
This function compensates for low ambient temperatures to ensure temperature stability: when the ambient temperature is lower than the set temperature, the cabinet automatically starts the low-temperature compensation function, heating the interior. When the temperature inside reaches the set temperature, the low-temperature compensation function automatically turns off.
13. Door open alarm
If the doors are left open for more than 1 minute, an audible alarm will sound until the doors are closed or any key on the control panel is pressed. After that, the audible alarm stops.

Energy saving tips
Make sure the appliance is installed (see the "Installation" section) away from heat sources or direct sunlight. Avoid setting the temperature too low. Energy consumption increases when the temperature is set lower. Open the appliance door as little as possible and for a short time. Do not overload the appliance; do not block the air flow. Keep the condenser clean. Ensure the door seals are properly closed. The most energy-saving configuration is to keep the interior clean, store food items properly, and allow food to cool before placing it in the appliance without blocking the air vents.
1. Shelf
1. The shelves are designed for storing bottles and light items. They can be cleaned with a damp cloth. 2. The shelves can be assembled for bottles with a diameter of 76 mm. 3. The shelves can be placed on the lower shelf. 4. The quantity may differ from the shown quantity or the shelves, as they are packed in different ways.
Instructions for use: see below.
We recommend that the number of wine bottles does not exceed two pairs per shelf, and the maximum load of the wine shelves should not exceed 20 kg. Before placing the shelves in the wine cabinet, make sure that the shelves for wine are completely clean.
Also, check that no shelves protrude from the cabinet, to avoid impact of the shelves against the glass door when closing.
2. LIGHTING
The interior lighting turns on when the door is opened. To turn on
the light when the door is closed, press the button. To turn off the light, press the button again. To save energy, avoid turning on the light when the cabinet is not in use.
- LOCK
To lock the wine cabinet, close the door and insert the key into the lock:
Lock the door by turning the key counterclockwise;
Unlock the door by turning the key clockwise.
1. Defrosting
Defrosting of the wine cabinet is done automatically; no manual operation is needed.
2. Replacing the light bulbs
The light source is an LED that provides low energy consumption and long service life. If any malfunction occurs, contact the service center for customers. See "CUSTOMER SERVICE".

Do not replace the LED lamp yourself. It should only be replaced by the manufacturer or an authorized service agent.
LED lamp parameters:
Voltage 12 V: Maximum power: 8 W (for HWS84GA, HWS84GNF and HWS66GGE)
Voltage 12 V: Maximum power: 5 W (for HWS49GAE and HWS49GA)
3. If the device is not used for a long period
Turn off the device.
Clean the device and store it in a dry place, as described above.
Make sure that the formation of harmful deposits is prevented inside.
4. Moving the device
1. Remove all plugs and empty the device. 2. Close the lid and all moving parts with the arrow. 3. Do not tilt the device more than 45° to avoid damaging the cooling system.
5. Filter with activated carbon
The method of extending the service life of the device depends on the conditions of the environment. Therefore, the filter with activated carbon is installed in the lower part of the rear wall of the device to maintain optimal filtering capacity.

Filter
We recommend replacing the filter once a year. Filters can be obtained from your local dealer.
3MiHa φiJbTpɑ:
Bi3bmitb φ iJbTp 3a pyKy. IIOBepHITb Horo BJIbO i 3HIMtB.
BcTaHOBJIEHHaJIbTpA:
BcTaBTe pyuKy y BepTHKaJIbHOMy IOJIOKeHHI. IOBepHiTb Horo IIpaBopyu i BcTaBTe.
BaIaTO Ipo6JIeM, IIO BHNHKaOTb, MOxHa BnpiIHHTcAMoCTiHNO 6e3 cIeIIaJIbHHX 3HaHB. Y pa3i BHNHKHeHHa Ipo6JIeMH IIpeBipTe Bci 3a3HaueHi MoxJIHBOCTi Ta IOTpHMyIteCg HaBeJeHHX HIXKye IHcTpyKuII, IepHI HIX 3BepTaTHcA IO CJyK6N IicJIpaJHO O6CJIyTOByBaHHa. JNbIbCe po3iiI «OBCJYTOBYAHH KJIICHTIB>.

YBAGA!
IpeJIO6cJyROByBaHHaBMHKHITb npHJAi i BHIMtB BHJKy 3 po3eTKH. EJIeKtpo06JiaHahnHa Mae 06cIyTOByBaTHcra JINIIe KBAJIiΦIKOBaHHMn φaxIBaMMneJIeKtpHKaMH, TOMY IIO HeHaJIeXHH peMOHT MoKe IprH3BecTH Do 3HaUHHx HeIIpMaHX 3bNTkIB.
IIO6 yHnKHyTN He6e3IeKN, IIOIKoJKeHN 6JIOK JHBJIeHHaIOBHeH 3aMIHOBAHT JINIIe BHPo6HKn, Ioro cepBicHN aReHT aOo ocOba 3 aHaJIorIHNO KBaJIiΦikaIICIO.


- EN WARNING: RISK OF FIRE/FLAMMABLE MATERIAL
- THANK YOU FOR PURCHASING A HAIER PRODUCT
- LEGEND
- DISPOSAL
- RISK OF INJURY OR SUFFOCATION
- EN
- CONTENT
- WARNING
- BEFORE FIRST USE
- INSTALLATION
- DAILY USE
- MAINTENANCE / CLEANING
- REFRIGERANT GAS INFORMATION
- INTENDED USE
- CLEAN THE DOOR GASKET
- INSTALLATION OF DOOR GASKET AFTER CLEANING
- CLEANING THE SHELVES
- PRODUCT DESCRIPTION
- NOTICE
- UNPACKING
- ENVIRONMENTAL CONDITIONS
- SPACE REQUIREMENTS
- VENTILATION SPACE
- ALIGNING THE APPLIANCE
- FINE TUNING OF THE DOOR
- WAITING TIME
- ELECTRICAL CONNECTION
- DOOR REVERSIBILITY (EXCEPT HWS49GAE, HWS66GGE)
- ASSEMBLY STEPS (EXCEPT HWS49GAE, HWS66GGE)
- TOUCH KEYS
- DESCRIPTION FOR CONTROL PANEL
- AUTOMATICALLY LOCKING FUNCTION
- POWER BUTTON FUNCTION
- TEMPERATURE SETTING
- PRESETTINGS
- MODE FUNCTION
- RECOMMENDED TEMPERATURE SETTINGS
- STANDBY MODE
- INFLUENCES ON TEMPERATURES
- LIGHTING MODE SETTING
- °C / °F FUNCTION
- POWER-OFF MEMORY FUNCTION
- LOW TEMPERATURE COMPENSATION FUNCTION (EXCEPT HWS49GAE, HWS66GGE)
- DOOR OPENING ALARM
- ENERGY SAVING TIPS
- EQUIPMENT
- SHELF
- ADVICE FOR THE LAYOUT OF YOUR WINE CELLAR
- THE LIGHT
- THE LOCK
- DEFROSTING
- REPLACING THE LED LAMP
- PARAMETERS OF LED LAMP
- NON-USE FOR A LONGER PERIOD
- MOVING THE APPLIANCE
- AIR EXCHANGE WITH ACTIVATED CARBON FILTER
- CHANGING THE FILTER
- INSERTING THE FILTER
- TROUBLESHOOTING
- STANDARDS AND DIRECTIVES
- CUSTOMER SERVICE
- HAIER
- USER MANUAL
- STAND-BY MODE
- CLEAN THE SHELVES
- INFORMATION ABOUT THE REFRIGERANT
- YTNIIAUI
- YBAΓA
- OUHCTITBIBEPNHYIJIBHOBAU
- CLEANING
- REVERSIBLE DOOR (EXCEPT HWS49GAE, HWS66GGE)
- WARNING! YOU MAY SHIVER OR TREMBLE TO PERFORM THE ADJUSTMENT. BEFORE PERFORMING OPERATIONS, DISCONNECT THE DEVICE FROM THE NETWORK. DO NOT TILT THE DEVICE MORE THAN 45° TO AVOID DAMAGING THE COOLING SYSTEM
- ETAINCKJAADHN (OKPIM HWS49GAE, HWS66GGE)
- CHECK THE USAGE
- TOUCH CONTROLS
- OPERATION
- AUTOMATIC LOCK FUNCTION
- DISPLAY FUNCTION
- DEFAULT
- FUNCTION BUTTON
- SETTING THE LIGHTING
- FUNCTION ℃/℉
- LOW-TEMPERATURE COMPENSATION FUNCTION (EXCEPT HWS49GAE, HWS66GGE)
- DOOR OPEN ALARM
- REPLACING THE LIGHT BULBS
- IF THE DEVICE IS NOT USED FOR A LONG PERIOD
- MOVING THE DEVICE
- FILTER WITH ACTIVATED CARBON
- FILTER
- YBAGA
Brand : HAIER
Model : Wine Bank 50 Serie 5 HWS49GA
Category : Wine cellar