Music Amplifier - Audio Receiver BOSE - Free user manual and instructions
Find the device manual for free Music Amplifier BOSE in PDF.
| Product type | Audio receiver / stereo amplifier |
| Brand | Bose |
| Model | Music Amplifier |
| Dimensions (L x D x H) | 21 cm x 21 cm x 7,3 cm |
| Weight | 2 186 g |
| Power supply | 100-240 V~50/60 Hz, 240 W |
| Output power | 125 W per channel (8 ohms, 20 Hz-20 kHz, 0,1 % THD) |
| Signal-to-noise ratio | >100 dB |
| Input sensitivity (RCA) | 2 Vrms |
| Connectivity | Wi-Fi, Bluetooth, Ethernet, AirPlay 2, Built-in Chromecast |
| Audio inputs | 2 x RCA (analog), 1 x optical (digital) |
| Audio outputs | 2 pairs of speakers (binding post), 1 x LINE OUT (RCA), 1 x BASS (subwoofer 3,5 mm) |
| Number of supported speakers | Up to 4 (2 pairs, min. impedance 4 ohms per pair) |
| Main functions | Multiroom, voice assistants (Google Assistant, Amazon Alexa), SimpleSync, presets, Bluetooth streaming |
| Mounting | On shelf, in rack (bracket included), wall (bracket included) |
| Temperature range | 0 °C to 35 °C |
| Standby power consumption | <0,5 W |
| Network standby power consumption | <3 W (Wi-Fi and Ethernet enabled) |
| Maintenance and cleaning | Soft, dry cloth; vacuum with brush for hard-to-reach areas; unplug before cleaning |
| Safety | Overload protection, automatic shutdown in case of overheating |
| Spare parts and repairability | Replacement parts available via Bose customer service; limited warranty |
| General information | Model number: 437308; made in China; compatible with passive speakers |
Frequently Asked Questions - Music Amplifier BOSE
User questions about Music Amplifier BOSE
0 question about this device. Answer the ones you know or ask your own.
Ask a new question about this device
Download the instructions for your Audio Receiver in PDF format for free! Find your manual Music Amplifier - BOSE and take your electronic device back in hand. On this page are published all the documents necessary for the use of your device. Music Amplifier by BOSE.
USER MANUAL Music Amplifier BOSE
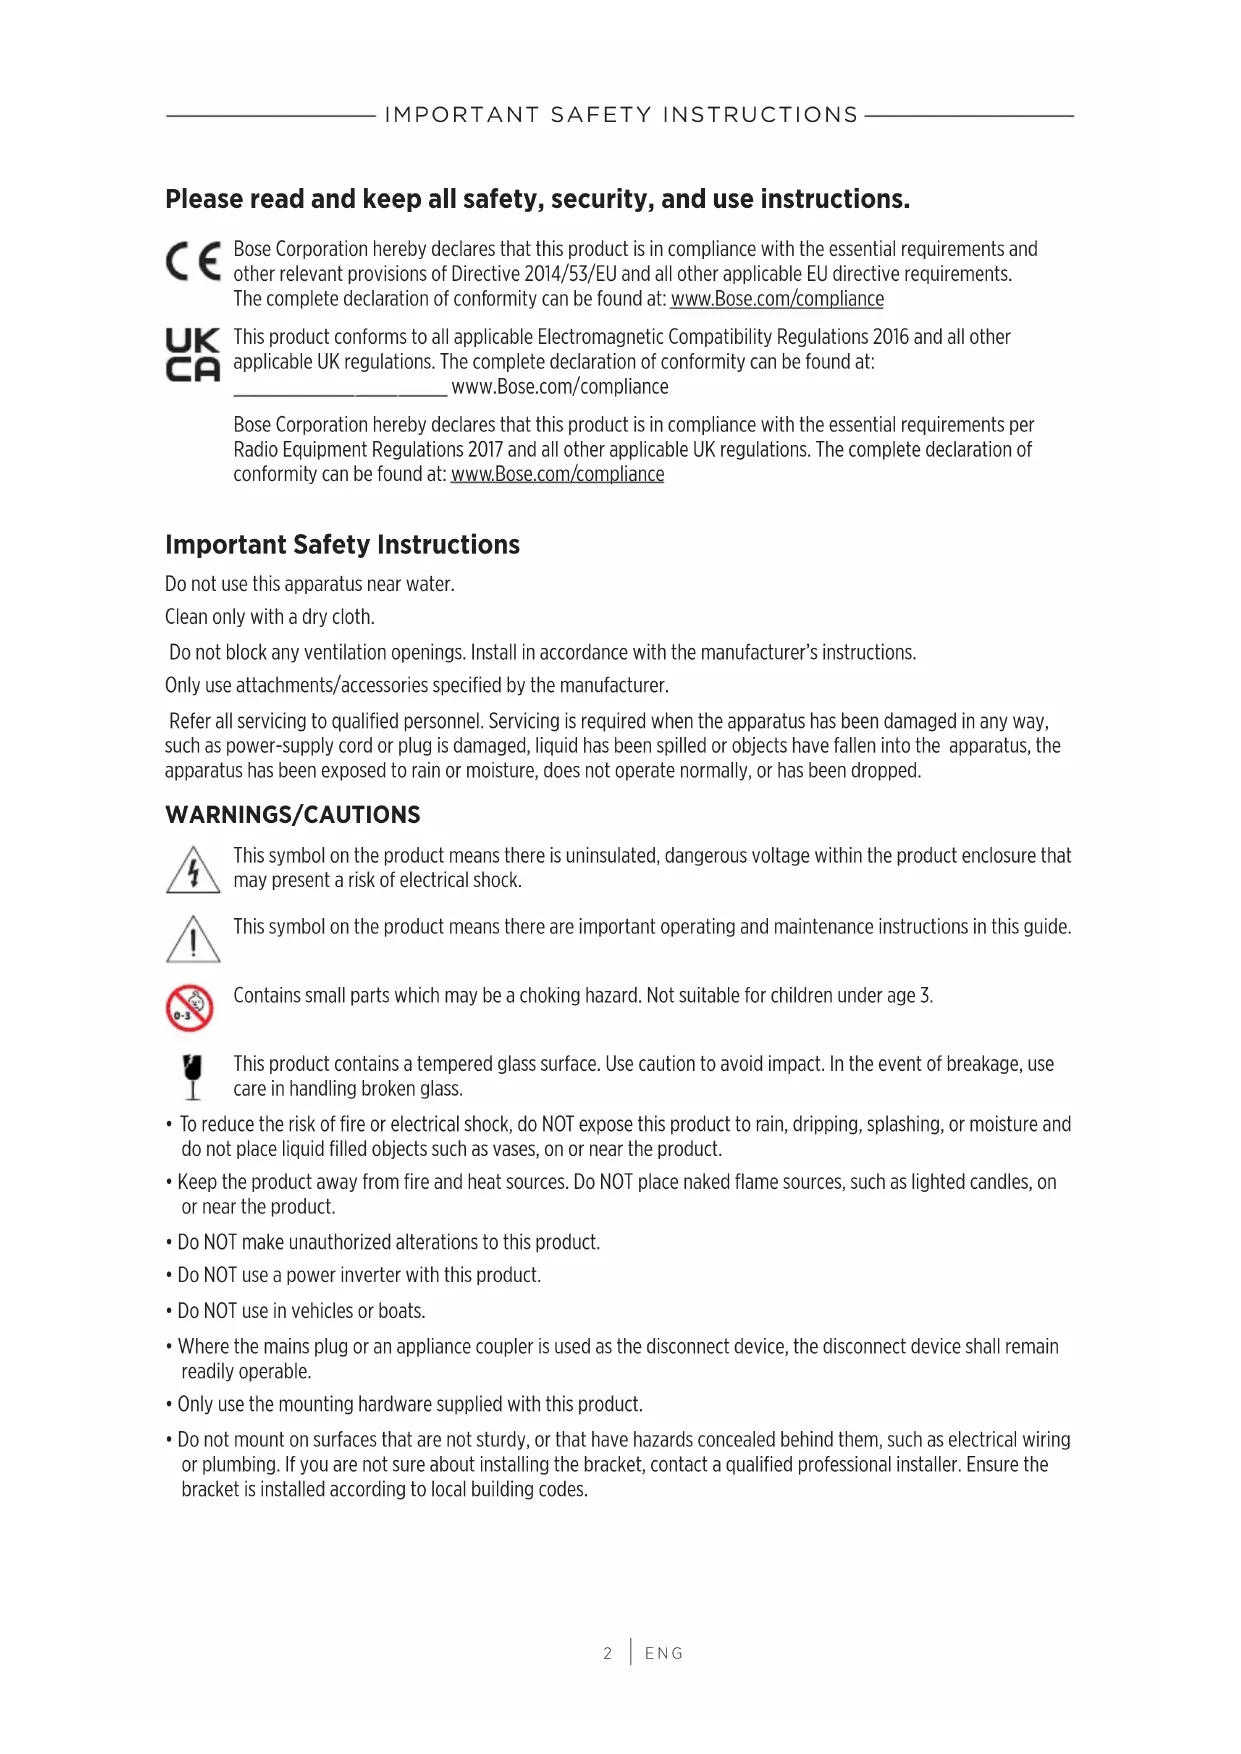
Please read and keep all safety, security, and use instructions.

Bose Corporation hereby declares that this product is in compliance with the essential requirements and other relevant provisions of Directive 2014/53/EU and all other applicable EU directive requirements. The complete declaration of conformity can be found at: www.Bose.com/compliance

This product conforms to all applicable Electromagnetic Compatibility Regulations 2016 and all other applicable UK regulations. The complete declaration of conformity can be found at: ____ www.Bose.com/compliance
Bose Corporation hereby declares that this product is in compliance with the essential requirements per Radio Equipment Regulations 2017 and all other applicable UK regulations. The complete declaration of conformity can be found at: www.Bose.com/compliance
Important Safety Instructions
Do not use this apparatus near water.
Clean only with a dry cloth.
Do not block any ventilation openings. Install in accordance with the manufacturer's instructions.
Only use attachments/accessories specified by the manufacturer.
Refer all servicing to qualified personnel. Servicing is required when the apparatus has been damaged in any way, such as power-supply cord or plug is damaged, liquid has been spilled or objects have fallen into the apparatus, the apparatus has been exposed to rain or moisture, does not operate normally, or has been dropped.
WARNINGS/CAUTIONS

This symbol on the product means there is uninsulated, dangerous voltage within the product enclosure that may present a risk of electrical shock.

This symbol on the product means there are important operating and maintenance instructions in this guide.

Contains small parts which may be a choking hazard. Not suitable for children under age 3.

This product contains a tempered glass surface. Use caution to avoid impact. In the event of breakage, use care in handling broken glass.
- To reduce the risk of fire or electrical shock, do NOT expose this product to rain, dripping, splashing, or moisture and do not place liquid filled objects such as vases, on or near the product.
- Keep the product away from fire and heat sources. Do NOT place naked flame sources, such as lighted candles, on or near the product.
- Do NOT make unauthorized alterations to this product.
- Do NOT use a power inverter with this product.
- Do NOT use in vehicles or boats.
- Where the mains plug or an appliance coupler is used as the disconnect device, the disconnect device shall remain readily operable.
- Only use the mounting hardware supplied with this product.
-
Do not mount on surfaces that are not sturdy, or that have hazards concealed behind them, such as electrical wiring or plumbing. If you are not sure about installing the bracket, contact a qualified professional installer. Ensure the bracket is installed according to local building codes.
-
Do not mount the product in locations where condensation may occur.
-
Only for mounting on the following surfaces:
-
Rack
- Wallboard ≥ 3/8" (10 mm)
- Masonry
- Wood
If mounted on surfaces other than stated above please contact a professional installer.
- Due to ventilation requirements, Bose does not recommend placing the product in a confined space such as in a wall cavity or in an enclosed cabinet.
- Do not place or install near any heat sources, such as fireplaces, radiators, heat registers, stoves or other apparatus (including amplifiers) that produce heat.
- To reduce the risk of fire, do not place any heating or cooking appliance beneath this product.
- The product label is located on the bottom of the product.
NOTE: This equipment has been tested and found to comply with the limits for a Class B digital device, pursuant to Part 15 of the FCC Rules. These limits are designed to provide reasonable protection against harmful interference in a residential installation. This equipment generates, uses, and can radiate radio frequency energy and, if not installed and used in accordance with the instructions, may cause harmful interference to radio communications. However, there is no guarantee that interference will not occur in a particular installation. If this equipment does cause harmful interference to radio or television reception, which can be determined by turning the equipment off and on, the user is encouraged to try to correct the interference by one or more of the following measures:
- Reorient or relocate the receiving product or antenna.
- Increase the separation between the equipment and receiver.
- Connect the equipment into an outlet on a circuit different from that to which the receiver is connected.
- Consult the dealer or an experienced radio/TV technician for help.
Changes or modifications not expressly approved by Bose Corporation could void the user's authority to operate this equipment.
This device complies with part 15 of the FCC Rules and with ISED Canada license-exempt RSS standard(s). Operation is subject to the following two conditions: (1) This device may not cause harmful interference, and (2) this device must accept any interference received, including interference that may cause undesired operation.
This device complies with FCC and ISED Canada radiation exposure limits set forth for general population. This equipment should be installed and operated with a minimum distance of 20 cm between radiator and your body. This transmitter must not be co-located or operating in conjunction with any other antenna or transmitter.
This device for operation in the 5150 - 5250 MHz is only for indoor use to reduce the potential for harmful interference to co-channel mobile satellite systems.
CAN ICES-3(B)/NMB-3(B)
For Europe:
Frequency bands of operation 2400 to 2483.5 MHz, 5150 to 5350 MHz, and 5470 to 5725 MHz.
Maximum transmit power less than 20 dBm EIRP.
Maximum transmit power is below regulatory limits such that SAR testing is not necessary and exempt per applicable regulations.
This device is restricted to indoor use when operating in the 5150 to 5350 MHz frequency range in all EU Member States listed in the table.
 | |||||||||
| BE DK IE UK(NI) FR CY SK HU AT SE | |||||||||
| BG DE PT EL HR LV LT MT PL | |||||||||
| CZ EE FI ES IT RO LU NL SI | |||||||||

This symbol means the product must not be discarded as household waste, and should be delivered to an appropriate collection facility for recycling. Proper disposal and recycling helps protect natural resources, human health and the environment. For more information on disposal and recycling of this product, contact your local municipality, disposal service, or the shop where you bought this product.
Low-power Radio-frequency Devices Technical Regulations
Without permission granted by the NCC, any company, enterprise, or user is not allowed to change frequency, enhance transmitting power or alter original characteristic as well as performance to an approved low power radio-frequency devices. The low power radio-frequency devices shall not influence aircraft security and interfere legal communications; If found, the user shall cease operating immediately until no interference is achieved. The said legal communications means radio communications is operated in compliance with the Telecommunications Management Act. The low power radio-frequency devices must be susceptible with the interference from legal communications or ISM radio wave radiated devices.
Product Power State Table
The product, in accordance with the Ecodesign Requirements for Energy Related Products Directive 2009/125/EC and the Ecodesign for Energy-Related Products and Energy Information (Amendment) (EU Exit) Regulations 2020, is in compliance with the following norm(s) or document(s): Regulation (EC) No. 1275/2008, as amended by Regulation (EU) No. 801/2013. The product is equipment with HiNA functionality.
| Required Power State Information | Power Modes | |
| Standby Networked Standby | ||
| Power consumption in specified power mode, at 230V/50Hz input | ≤ 0.5 W | Wi-Fi*, Ethernet, and Bluetooth* ≤ 3.0 W |
| Time after which equipment is automatically switched into mode | < 2.5 hours ≤ 20 minutes | |
| Power consumption in networked standby if all wired network ports are connected and all wireless network ports are activated, at 230V/50Hz input | N/A ≤ 3.0 W | |
| Wireless network port deactivation/activation procedures. Deactivating all networks will enable standby mode. | Wi-Fi: To deactivate, insert a thin paperclip into the hole in the back of the amplifier and press and hold for 2 seconds until the light on the back of the amplifier blinks white 3 times. Bluetooth: To deactivate, clear the Bluetooth pairing list. Press and hold the Bluetooth button ✝ on the amplifier for 10 seconds. To reactivate, connect a Bluetooth source. | |
China Restriction of Hazardous Substances Table
| Names and Contents of Toxic or Hazardous Substances or Elements | ||||||
| Toxic or Hazardous Substances and Elements | ||||||
| Part Name | Lead (Pb) | Mercury (Hg) | Cadmium (Cd) | Hexavalent (CR(VI)) | Polybrominated Biphenyl (PBB) | Polybrominated diphenylether (PBDE) |
| PCBs X 0 0 0 0 0 | ||||||
| Metal Parts X 0 0 0 0 0 | ||||||
| Plastic Parts 0 0 0 0 0 0 | ||||||
| Speakers X 0 0 0 0 0 0 | ||||||
| Cables X 0 0 0 0 0 0 | ||||||
| This table is prepared in accordance with the provisions of SJ/T 11364.O: Indicates that this toxic or hazardous substance contained in all of the homogeneous materials for this part is below the limit requirement of GB/T 26572. |  | |||||
| X: Indicates that this toxic or hazardous substance contained in at least one of the homogeneous materials used for this part is above the limit requirement of GB/T 26572. | ||||||
Taiwan Restriction of Hazardous Substances Table
| Equipment name: Amplifier, Type designation: 437308 | ||||||
| Restricted substances and its chemical symbols | ||||||
| Unit | Lead (Pb) | Mercury (Hg) | Cadmium (Cd) | Hexavalent chromium(Cr+6) | Polybrominated biphenyls (PBB) | Polybrominated diphenylethers (PBDE) |
| PCBs | -○ | ○ ○ | ○ ○ | |||
| Metal Parts | -○ | ○ ○ | ○ ○ | |||
| Plastic Parts | ○ | ○ ○ | ○ | ○ ○ | ||
| Speakers | -○ | ○ ○ | ○ ○ | |||
| Cables | -○ | ○ ○ | ○ ○ | |||
| Note 1: “○” indicates that the percentage content of the restricted substance does not exceed the percentage of reference value of presence. Note 2: The “-” indicates that the restricted substance corresponds to the exemption. | ||||||
Date of Manufacture: The eighth digit in the serial number indicates the year of manufacture; “2” is 2012 or 2022.
China Importer: Bose Electronics (Shanghai) Company Limited, Level 6, Tower D, No. 2337 Gudai Rd. Minhang District, Shanghai 201100
EU Importer: Bose Products B.V., Gorslaan 60, 1441 RG Purmerend, The Netherlands
Taiwan Importer: Bose Limited Taiwan Branch (H.K.), 9F., No.10, Sec. 3, Minsheng E. Road, Zhongshan Dist. Taipei City 10480, Taiwan Phone Number: +886-2-2514 7676
UK Importer: Bose Limited, Bose House, Quayside Chatham Maritime, Chatham, Kent, ME4 4QZ, United Kingdom
Input Rating: 100 - 240V \~ 50/60Hz, 240W
The CMIIT ID is located on the label on the bottom of the product.
Please complete and retain for your records
The serial and model numbers are located on the label on the bottom of the product.
Serial number:
Model number: 437308
Please keep your receipt with your owner's guide. Now is a good time to register your Bose product.
You can easily do this by going to worldwide.Bose.com/ProductRegistration
Security Information

This product is capable of receiving automatic security updates from Bose. To receive automatic security updates, you must complete the product setup process in the Bose Music app and connect the product to the Internet. If you do not complete the setup process, you will be responsible for installing security updates that Bose makes available.
Amazon, Alexa, Amazon Music, and all related logos are trademarks of Amazon.com, Inc. or its affiliates.
Apple, the Apple logo, Apple Music, and AirPlay are trademarks of Apple Inc., registered in the U.S. and other countries.
Use of the Works with Apple badge means that an accessory has been designed to work specifically with the technology identified in the badge and has been certified by the developer to meet Apple performance standards.
The Bluetooth ^® word mark and logos are registered trademarks owned by Bluetooth SIG, Inc. and any use of such marks by Bose Corporation is under license.
Google, Google Play, and Chromecast built-in are trademarks of Google LLC.
This product contains the iHeartRadio service. iHeartRadio is a registered trademark of iHeartMedia, Inc.
This product is protected by certain intellectual property rights of Microsoft. Use or distribution of such technology outside of this product is prohibited without a license from Microsoft.
Pandora is a trademark or registered trademark of Pandora Media, Inc. used with permission.
This product incorporates Spotify software which is subject to third-party licenses found here: ____ www.spotify.com/connect/third-party-licenses
Spotify is a registered trademark of Spotify AB.
USB Type-C ^® and USB-C ^® are registered trademarks of USB Implementers Forum.
Wi-Fi is a registered trademark of Wi-Fi Alliance ^® .
Bose, Bose Bass Module, Bose Music, Bose Music Amplifier, the Bose Music logo, Bose Noise Cancelling Headphones, QuietComfort, SimpleSync, SoundLink, SoundLink Revolve, and Virtually Invisible are trademarks of Bose Corporation.
Bose Corporation Headquarters: 1-877-230-5639
©2022 Bose Corporation. No part of this work may be reproduced, modified, distributed, or otherwise used without prior written permission.
To view the license disclosures that apply to the third-party software packages included as components of your Bose Music Amplifier product:
- On the amplifier, press and hold the Bluetooth button ✗ and Reset button for 15 seconds.
- Connect a USB cable to the SERVICE connector on the back of the amplifier.
- Connect the other end of the cable to a computer.
- On the computer, enter http://203.0.113.1/opensource in a browser window to display the EULA and license disclosure.
WHAT'S IN THE BOX
Contents 13
AMPLIFIER PLACEMENT
Recommendations.... 14
SPEAKER CONNECTION GUIDELINES
Speaker wire length recommendations.... 15
CONNECT SPEAKERS.... 16
POWER
Connect the amplifier to power 19
Network standby.... 19
BOSE MUSIC APP SETUP
Download the Bose Music app.... 20
EXISTING BOSE MUSIC APP USERS
Add the Main amplifier to an existing account 21
Connect to a different Wi-Fi ^® network.... 21
MAIN AND SUPPLEMENTAL AMPLIFIERS
Use case 1.... 22
Use case 2.... 23
Use case 3.... 23
CONNECT THE MAIN AMPLIFIER
Connect using the Bose Music app 24
Connect using an Ethernet cable 24
Connect an additional Main amplifier.... 24
CONNECT A SUPPLEMENTAL AMPLIFIER
Connect to the Main amplifier 25
Connect an additional Supplemental amplifier 25
AMPLIFIER PORTS......26
AMPLIFIER AND SPEAKER SETTINGS
Amplifier settings 27
Speaker settings.... 29
WORK WITH YOUR VOICE ASSISTANT
Google Assistant 30
Amazon Alexa 30
STREAM AUDIO WITH CHROMECAST 31
STREAM AUDIO WITH AIRPLAY
Stream audio from the Control Center.... 32
Stream audio from an app 32
PRESET PERSONALIZATION
Set a preset 33
Play a preset 33
BLUETOOTH® CONNECTIONS
Connect your mobile device.... 34
Disconnect a mobile device.... 35
Reconnect a mobile device.... 35
Connect an additional mobile device 35
Clear the amplifier device list.... 35
AMPLIFIER STATUS
Bluetooth and error status 36
Wi-Fi and power status 37
Main amplifier.... 37
Supplemental amplifier 37
Update, reset, and error status.... 38
ADVANCED FEATURES
Disable/Enable Wi-Fi capability 39
Overload protection 39
CONNECT BOSE PRODUCTS
Connect a Bose Bass Module.... 40
Connect a Bose SoundLink Bluetooth speaker or Bose headphones using SimpleSync™ technology.... 41
Benefits.... 41
Compatible products 41
Connect using the Bose Music app 42
Reconnect a Bose SoundLink Bluetooth speaker or Bose headphones... 42
CARE AND MAINTENANCE
Update the amplifier.... 43
Main amplifier.... 43
Supplemental amplifier 43
Clean the amplifier 43
Replacement parts and accessories.... 43
Limited warranty 43
TECHNICAL INFORMATION 44
TROUBLESHOOTING
Try these solutions first 45
Other solutions 45
Reset the amplifier 51
Restore the amplifier to factory default 51
APPENDIX A: RACK MOUNTING
Connect the brackets.... 52
Attach to the rack.... 53
Place the amplifier.... 55
APPENDIX B: WALL MOUNTING
Hardware specifications.... 56
Attach the mounting bracket.... 57
Attach the amplifier....60
APPENDIX C: CONNECT EXTERNAL SOURCE
Using an RCA audio cable.... 61
Using an optical cable.... 61
CONTENTS
Confirm that the following parts are included:

natural_image
Front view of a white electronic device labeled 'BOSE' with a small circular icon on the left (no additional text or symbols)Bose Music Amplifier Power cord*

natural_image
Simple line drawing of a U-shaped tube with two connectors (no text or symbols)
Rack screws for rack mounting (3) Connecting screws for rack mounting (3)


text_image
SACK MOUNT FRONT UP WALL MOUNTMounting bracket Rack bracket

natural_image
Simple line drawing of a rectangular panel with three circular holes, no text or symbols present.* May ship with multiple power cords. Use the power cord for your region.
NOTE: If part of the amplifier is damaged, don't use it. Contact your authorized Bose dealer or Bose customer service.
Visit: ____support.Bose.com/BMA
RECOMMENDATIONS
• Install the amplifier indoors.
• Make sure there is an AC (mains) outlet nearby.
- To avoid interference, keep other wireless equipment 1 – 3 ft (0.3 – 0.9 m) away from the amplifier.
- For optimum performance, place the amplifier in a well-ventilated area.
- Place the amplifier on a shelf, or mount it on a rack or wall.
- When mounting on a rack, make sure the rack mount arrow and four tabs are facing the front of the rack (see page 55).
- When mounting multiple amplifiers on a rack, use a separate rack mount for each amplifier.
- When mounting on a wall, make sure the wall mount arrow and four tabs are facing up (see page 57).
CAUTIONS:
- Place the amplifier in an area where the maximum ambient temperature is less than 104^ (40°C).
- Keep the back side of the amplifier at least 3 – 6 in (7.62 – 15.24 cm) away from any other surface. Do not block airflow from the back of the amplifier.
- Do NOT place the amplifier in a completely enclosed area. Doing so may result in poor performance.

text_image
3 - 6" 7.62 - 15.24 cm• One pair of speakers requires 4 ohm minimum each.
- Two pairs of speakers require 8 ohm minimum each.
CAUTION: Use only unpowered speakers. Do NOT connect any make or model of powered speakers. Doing so may cause damage to the equipment.
SPEAKER WIRE LENGTH RECOMMENDATIONS
MAXIMUM LENGTH GAUGE
| 30 ft (9 m) | 18 (0.82 mm ^2 ) |
| 45 ft (14 m) | 16 (1.3 mm ^2 ) |
| 70 ft (21 m) | 14 (2.0 mm ^2 ) |
Before connecting your speakers, place your speakers in their permanent location and make sure the amplifier is unplugged from an AC (mains) power outlet.
Speaker wires consist of two insulated wires:
- The marked wire (stripes, ribbing, or color) connects to the positive (+) terminal.
-
The plain wire connects to the negative (-) terminal.
-
Remove terminal block A from the SPEAKERS OUT port.

text_image
Diagram of a printer front panel with labeled ports and an icon, showing internal components and a zoomed-in view.- Connect the speaker wires to terminal block A.
a. Insert the left speaker's marked wire into the L+ positive terminal and the plain wire into the L- negative terminal.
b. Insert the right speaker's marked wire into the R+ positive terminal and the plain wire into the R- negative terminal.

text_image
LLRR + - + -- Using a small, flat-head screwdriver, tighten the screws on the terminals clockwise to secure the wires.

text_image
LLRR + - + -- Reinsert terminal block A into the SPEAKERS OUT port.

text_image
Diagram of an electronic device showing a power connector connected to a LIRR terminal, with labeled ports and a magnified view highlighting component A.- Connect the other end of the speaker wires to your speakers.
For instructions, refer to the online owner's guide for your speaker.
NOTE: Use a silicone caulking material such as RTV adhesive (available at your local hardware store) to protect the wiring at any outdoor speaker connections.
Connect additional speakers
You can connect up to two pairs of speakers to the amplifier for fuller sound.
To connect a second pair of speakers, repeat steps in “Connect Speakers” on page 16, using terminal block B.

NOTE: For best sound quality and balanced volume, when connecting two pairs of speakers, they should be the same speaker model since the same EQ setting will be applied to both pairs of speakers.
CONNECT THE AMPLIFIER TO POWER
-
Connect the power cord to the POWER port on the back of the amplifier.
-
Plug the other end of the power cord into an AC (mains) power outlet.

text_image
POWER (++) LINE OUT PASS RESET A B C D L H R OPTICAL IN SERVICE 1 2 3 SPEAKER SETTING L L H R L L B E L L B E L L B E L L B E L L B E L L B E L L B E L L B E L L B E L L B E L L B E L L B E L L B E L L B E L L B E L L B E L L B E L L B E L L B E L L B E L L B B L L B B L L B B L L B B L L B B L L B B L L B B L L B B L L B B L L B B L L B B L L B B L L B B L L B B L L B B L L B B L L B B L L B B L L B B L L B B L L B WBS L L B WBS L L B WBS L L B WBS L L B WBS L L B WBS L L B WBS L L B WBS L L B WBS L L B WBS L L B WBS L L B WBS L L B WBS L L B WBS L L B WBS L L B WBS L L B WBS L L KIRB SUSPBER + AD MTR IN TURR PLUG + PR PWR IN GALI (WBS) SUSPBER + AD MTR IN TURR PLUG + PR PWR INThe light on the back of the amplifier slowly blinks amber.
NOTES:
- If the amplifier has been set up and is set to Main (default), the light on the back of the amplifier glows solid white.
- If the amplifier has been set up and is set to Supplemental, the light on the back of the amplifier glows solid green.
NETWORK STANDBY
The amplifier transitions to network standby when audio has stopped and you have not pressed any buttons for 20 minutes. To wake the amplifier from network standby, play or resume audio using the Bose Music app on your mobile device or reconnect a Bluetooth source.
The Bose Music app lets you set up and control the Main amplifier (see page 22) from any mobile device, such as a smartphone or tablet.
Using the app, you can stream music, add music services, explore internet radio stations, set and change presets, work with your voice assistant, manage Main amplifier settings, and get updates and new features.
NOTE: If you have already created a Bose Music account for another Bose product, add the amplifier to your existing account (see page 21).
DOWNLOAD THE BOSE MUSIC APP
- On your mobile device, download the Bose Music app.

text_image
BOSE MUSIC

- Follow the app instructions to set up the amplifier.
ADD THE MAIN AMPLIFIER TO AN EXISTING ACCOUNT
To add your Bose Music Amplifier, open the Bose Music app and add your amplifier.
NOTES:
- You can only add a Main amplifier using the Bose Music app. Supplemental amplifiers don't display on your network or in the Bose Music app.
- To play the same audio on multiple speakers simultaneously, you can group Main amplifiers together using the Bose Music app. You can access this option from the main page. For more information, visit: support.Bose.com/BMAGrouping
CONNECT TO A DIFFERENT WI-FI NETWORK
Connect to a different network if your network name or password has changed, or if you want to change or add another network.
- Press and hold the Reset button for 5 seconds until the light on the back of the amplifier slowly blinks amber.

text_image
POWER <+••> LINE OUT BASS LINE IN R OPTICAL IN SERVICE A B C D ADVANCED SETTING 1 2 3 SPEAKER SETTING ONE PAIR - 40 MIN EA, TWO PAHS - 80 MIN EA, CLASS 2 WIRNG L L R R L L R R L L R R L L R R L L R R- On your mobile device, open your Wi-Fi settings.
- Select Bose Music Amplifier.
- Open the Bose Music app and follow the app instructions.
The amplifier can power up to two pairs of speakers. It can be set as the Main amplifier (default) or as a Supplemental amplifier (see page 27).
The Main amplifier connects to your network using a Wi-Fi connection or Ethernet cable (not provided). It can be controlled using the Bose Music app, your mobile device, or your voice assistant-enabled device connected to your network.
A Supplemental amplifier connects to the Main amplifier using an RCA audio cable and receives audio output from the Main amplifier. Supplemental amplifiers play the same audio as the Main amplifier, but don't display on your network, the Bose Music app, or your mobile device and can only play audio from the LINE IN port.
You can connect up to four Supplemental amplifiers to the Main amplifier for best sound quality. The amplifiers can be configured depending on the location or size of your environment, how many speakers you want to power, or where you want your audio to play.
NOTES:
- For best sound quality and balanced volume, when connecting a Supplemental amplifier to the Main amplifier, you should use the same speaker model and number of speakers per amplifier.
- Depending on your environment, it's possible to connect more than four Supplemental amplifiers to the Main amplifier without affecting performance.
USE CASE 1
Control up to two pairs of speakers in the same space, where the speakers play the same audio with little to no delay.

flowchart
graph TD
    A["Network"] -->|Wi-Fi or Ethernet| B["Main"]
    B -->|Speakers OUT| C["Speakers"]
    C --> D["Speakers (optional)"]
USE CASE 2
Control multiple pairs of speakers in a larger space, where all speakers power on and off simultaneously and play the same audio with little to no delay.

flowchart
graph TD
    A["Network"] -->|Wi-Fi or Ethernet| B["Main Supplemental"]
    B -->|LINE OUT| C["Speakers (optional)"]
    B -->|LINE IN| D["Speakers (optional)"]
    C -->|SPEAKERS OUT| E["Speakers"]
    D -->|SPEAKERS OUT| F["Speakers"]
USE CASE 3
Control multiple systems (amplifier and speakers) independently, where each system plays different audio.

flowchart
graph TD
    A["Network"] -->|Wi-Fi| B["Main"]
    B --> C["SPEAKERS OUT"]
    B --> D["SPEAKERS OUT"]
    C --> E["Speakers"]
    C --> F["Speakers (optional)"]
    D --> G["Speakers"]
    D --> H["Speakers (optional)"]
NOTES:
- Main amplifiers can also be connected to your network using an Ethernet cable (see page 24).
- For best sound quality and balanced volume, when connecting multiple pairs of speakers, they should be the same speaker model since the same EQ setting will be applied to the speakers.
- To play the same audio on all speakers simultaneously, for best sound quality group the Main amplifiers together using the Bose Music app. You can access this option from the main page. For more information, visit: support.Bose.com/BMAGrouping
You connect the Main amplifier to your network using the Bose Music app or an Ethernet cable (not provided).
CONNECT USING THE BOSE MUSIC APP
To connect the Main amplifier to your network using the Bose Music app, see page 20.
CONNECT USING AN ETHERNET CABLE
NOTE: If you connect to your network using an Ethernet cable without finishing setup using the Bose Music app, you will only be able to play audio from a Bluetooth source.
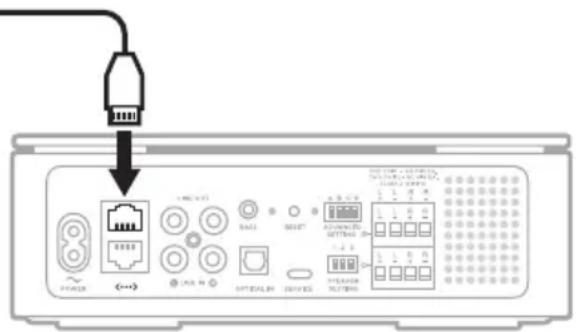
- On your router, connect one end of an Ethernet cable to an Ethernet port.
- On the Main amplifier, connect the other end of the cable to an Ethernet port.

text_image
Router Main amplifierConnect an additional Main amplifier
You can connect an additional Main amplifier directly to the router (see “Connect using an Ethernet cable”) or directly to the initial Main amplifier.
- On the Main amplifier, connect one end of an Ethernet cable to an Ethernet port.
- On the additional Main amplifier, connect the other end of the cable to an Ethernet port.

text_image
Main amplifier Additional Main amplifierYou connect a Supplemental amplifier to the Main amplifier or to another Supplemental amplifier using an RCA audio cable (not provided).
NOTE: You can connect up to four Supplemental amplifiers to the Main amplifier for best sound quality. Depending on your environment, it's possible to connect additional amplifiers without affecting performance.
CONNECT TO THE MAIN AMPLIFIER
- On the Main amplifier, connect the audio cable's white connector to the white LINE OUT port and the red connector to the red LINE OUT port.
- On the Supplemental amplifier, connect the other white connector to the white LINE IN port and the red connector to the LINE IN port.

text_image
Main amplifier Supplemental amplifierConnect an additional Supplemental amplifier
- On the Supplemental amplifier, connect the audio cable's white connector to the white LINE OUT port and the red connector to the red LINE OUT port.
- On the additional Supplemental amplifier, connect the other white connector to the white LINE IN port and the red connector to the LINE IN port.

text_image
Supplemental amplifier Additional Supplemental amplifier
text_image
POWER <...> LINE OUT BASS RESET OPTICAL IN SERVICE A B C D ADVANCED SETTING 1 2 X SPEAKER SETTING ONE PAIR - 40 MIN EA, TWO PAIRS - 90 MIN LA. CLASS 2 WIRENG L L R R + - + - L L R R + - + - L L R R + - + - L L R R + - + -PORT DESCRIPTION
| POWER | Applies power when the AC power cord is inserted into the port and then plugged into an AC (mains) outlet (see page 19). |
| <···> | Enables you to connect the Main amplifier to your network or to connect multiple Main amplifiers together using an Ethernet cable (not provided). See page 24. |
| LINE OUT LINE IN | Enables you to connect a Supplemental amplifier or an external source using a RCA audio cable (not provided). See page 61. |
| BASS | Enables you to connect a Bose Bass Module using a 3.5 mm stereo audio cable (not provided). See page 40. |
| OPTICAL IN | Enables you to play digital audio from an external source using an optical cable (not provided). See page 61. |
| SERVICE USB Type-C® port for service. | |
| SPEAKERS OUT Enables you to connect up to two pairs of speakers (see page 18). | |
AMPLIFIER SETTINGS
The ADVANCED SETTING switches are configured depending on how you want to hear your audio. To configure the amplifier, flip the appropriate ADVANCED SETTING switch(es) down.

text_image
LINE OUT BASS RESET A B C D ADVANCED SETTING 1 2 3 SPEAKER SETTING ONE PAR - 40 PN 24, TWO PAR + 80 MELA. CLASS 2 WITING L L R H L L R L L R L L R L L R L L R A B C D ADVANCED SETTINGMODE SWITCH POSITION DESCRIPTION
| Main | A - Up |  | Set the amplifier to Main. NOTE: Main amplifiers can be connected to your network using the Bose Music app or an Ethernet cable (not provided). See page 24. |
| Supplemental | A - Down |  | Set the amplifier to Supplemental. NOTES: • Supplemental amplifiers connect to the Main amplifier (or another Supplemental amplifier) using an RCA audio cable and play audio from the Main amplifier on the LINE IN port. • Supplemental amplifiers can't connect to your network and don't display in the Bose Music app. |
| N/A | B |  | Reserved for future use. |
| Stereo | C - Up Set th | [A B C D]  | out to Stereo. |
| Mono | C - Down |  | Set the audio output to Mono. NOTE: Mono is best when speakers are far apart. |
MODE SWITCH POSITION DESCRIPTION
| Line out:variable volume | D - Up |  | Control the volume using the Bose Music app.NOTE: This setting applies to the Main amplifierLINE OUTaudio and is heard through the Supplemental amplifier. |
| Line out:fixed volume | D - Down | Control the volume using the connected device with volume control.NOTES:When the volume is fixed, you can't control the volume using the Bose Music app.This setting applies to the Main amplifier. |
NOTES:
- The default position for all switches is up.
• Each switch can be configured independently. - If an ADVANCED SETTING switch is flipped while the amplifier is powered on, the amplifier will reset.
SPEAKER SETTINGS
You can apply a customized EQ setting to the Bose 251 Environmental Speakers or Bose Virtually Invisible 791 speakers. For all other speakers, the default EQ setting is used.

text_image
LINE OUT RASS RESET A B C D ADVANCED SETTING 1 2 3 SPEAKER SETTING PRETORT - TO SPEER, THY BEANS - ADVENTA, CLASS 2 WIND L L R R + - + - L L R R + - + - L L R R + - + - L L R R + - + - L L R R + - + - 0.0000-0.0000 1 2 3 SPEAKER SETTINGTo apply the customized EQ setting to your Bose 251 Environmental Speakers or Bose Virtually Invisible 791 speakers, flip the appropriate SPEAKER SETTING switch down. To apply the default EQ setting to all other speakers, leave all switches up.
PRODUCT SWITCH POSITION
| Bose 251 Environmental Speakers | 1 - Down 2 - Up 3 - Up |  |
| Bose Virtually Invisible 791 speakers | 1 - Up 2 - Down 3 - Up |  |
| All other speakers | 1 - Up 2 - Up 3 - Up |  |
NOTE:
- The default position for all switches is up.
- If any combination other than what is shown in the table above is used, the default EQ setting is used.
GOOGLE ASSISTANT
The amplifier is compatible with a Google Assistant-enabled device connected to your network. Control the amplifier using just your voice with Google.
Start with saying “Hey Google,” then say your request on
For example, try playing your favorite music. Just say “Hey Google, play My Workout playlist on Family Room.”
NOTES:
- Make sure you say the amplifier name you assigned in the Bose Music app. If multiple amplifiers have the same name, use the name assigned in the Google Assistant app or change the name in the Bose Music app.
- Google Assistant isn't available in all languages and countries.
- For more information on what Google Assistant can do, visit: ____ https://support.google.com/assistant
AMAZON ALEXA
If you have a separate device with Alexa Built-In connected to your network, you can control the amplifier from that device with voice commands. To set up voice control, enable the skill and link your Alexa account to your Bose account. Then just ask Alexa to play music.
Start with “Alexa,” then say your request on
NOTES:
- Make sure you say the amplifier name you assigned in the Bose Music app. If multiple amplifiers have the same name, use the name assigned in the Alexa app or change the name in the Bose Music app.
- Alexa isn't available in all languages and countries.
- For more information about what Alexa can do, visit: ____ https://www.amazon.com/usealexa
The amplifier comes with Chromecast built-in. With Chromecast built-in, you can stream audio from supported apps by simply tapping the Cast button.
NOTES:
- To use Chromecast built-in, you must have a Wi-Fi connection.
- Support for new apps is added periodically.
Your phone is your remote
- Simply tap the Cast button from apps you already know and love. No new logins or downloads required.
- Use your phone to search, play, pause, and turn up the volume from anywhere in the home.
- While you're streaming, you can keep using your phone for other things – scroll through social media, send a text, and even accept calls.
- Enjoy music throughout your house when you use multi-room casting with Chromecast-enabled amplifiers.
Unlimited entertainment, all on your schedule
Choose from millions of songs from popular music services like Pandora, Spotify, and TuneIn.
To enable Chromecast built-in, use the Bose Music app. You can access this option from the Settings menu.
The amplifier is capable of playing AirPlay 2 audio, which allows you to quickly stream audio from your Apple device to the amplifier.
NOTES:
- To use AirPlay 2, you need an Apple device running iOS 11.4 or later.
- Your Apple device and amplifier must be connected to the same Wi-Fi network.
- For more information about AirPlay, visit: https://www.apple.com/airplay
STREAM AUDIO FROM THE CONTROL CENTER
- On your Apple device, open the Control Center.
- Tap and hold the audio card in the top-right corner of the screen, then tap the AirPlay icon 🔒.
- Select your amplifier.
STREAM AUDIO FROM AN APP
- Open a music app (like Apple Music), and select a track to play.
- Tap 🔒.
- Select your amplifier.
You can personalize six presets to your favorite streaming music services, stations, playlists, artists, albums, or songs from your music library. You can access your music, at any time, with a simple touch of a button in the Bose Music app.
NOTE: You can't set presets when your source is a Bluetooth connection.
SET A PRESET
-
Stream music using the app.
-
While the music is playing, press and hold a preset in the app.
PLAY A PRESET
Once you personalize your presets, press a preset in the Bose Music app.
CONNECT YOUR MOBILE DEVICE
- Press the Bluetooth button ✝ on the front of the Main amplifier.

text_image
BOSEThe light on the front of the amplifier slowly blinks blue.
- On your mobile device, turn on the Bluetooth feature.
NOTE: The Bluetooth menu is usually found in the Settings menu.
- Select your amplifier from the device list.
NOTE: Look for the name you entered for your amplifier in the Bose Music app. If you didn't name your amplifier, the default name appears.

text_image
BLUETOOTH Bose Music AmplifierOnce connected, the light on the front of the amplifier glows solid blue then fades to black. The amplifier's name appears in the mobile device list.
DISCONNECT A MOBILE DEVICE
Use the Bose Music app to disconnect your mobile device.
TIP: You can also use Bluetooth settings on your mobile device. Disabling the Bluetooth feature disconnects all other devices.
RECONNECT A MOBILE DEVICE
Press the Bluetooth button ✝.
The amplifier tries to connect with the most recently-connected devices.
NOTES:
- Make sure the Bluetooth feature is enabled on your mobile device.
- The device must be within 30 ft (9 m) and powered on.
CONNECT AN ADDITIONAL MOBILE DEVICE
You can store up to eight devices in the amplifier device list.
NOTE: You can play audio from only one device at a time.
- Press and hold ✝ until the light on the front of the amplifier slowly blinks blue.
- On your mobile device, select your amplifier from the device list.
NOTE: Make sure the Bluetooth feature is enabled on your mobile device.
CLEAR THE AMPLIFIER DEVICE LIST
- Press and hold ✝ for 10 seconds until the light on the front of the amplifier blinks blue 3 times.
- Delete the amplifier from the Bluetooth list on your device.
All devices are cleared. The amplifier is ready to connect (see page 34).
BLUETOOTH AND ERROR STATUS
The light on the front of the amplifier shows the Bluetooth connection status of a mobile device and error alerts.

text_image
Bluetooth and error status BOSELIGHT ACTIVITY SYSTEM STATE
| Slowly blinking blue Ready to connect to mobile device | |
| Blinking blue Connecting to mobile device | |
| Solid blue then fades to black | Connected to mobile device |
| Blinks blue 3 times Cleared device list | |
| Blinks blue and red for 3 seconds | Bluetooth connection is disabled (Supplemental) |
| Solid red | Critical error (hardware) - contact Bose customer serviceNOTE: The lights on the front and the back of the amplifier glow solid red simultaneously. |
The light on the back of the amplifier shows Wi-Fi, power, and system status.
Wi-Fi, power, and system status

text_image
LINE OUT BASS RESET A B C D ADVANCED SETTING 1 2 3 SPEAKER SETTING ONE 7AIR - 40 MIN EA, TWO PAYS - 80 MIN EA, CLASS 2 WIRING L L R R + - + - L L R R + - + - L L R R + - + - L L R R + - + -WI-FI AND POWER STATUS
Main amplifier
Shows the Wi-Fi and power status of a Main amplifier.
LIGHT ACTIVITY SYSTEM STATE
| Slowly blinking white Powering on |
| Solid white Powered on |
| Slowly blinking amber Ready for Wi-Fi setup |
| Solid amber Wi-Fi setup in progress |
| Slowly blinking white Connecting to Wi-Fi |
| Solid white Connected to Wi-Fi |
Supplemental amplifier
Shows the power status of a Supplemental amplifier.
LIGHT ACTIVITY SYSTEM STATE
| Slowly blinking green Powering on |
| Solid green Powered on |
UPDATE, RESET, AND ERROR STATUS
Shows the status of software updates, resets, and error alerts.
LIGHT ACTIVITY SYSTEM STATE
| Blinking white Installing update | |
| Solid white Update complete | |
| Blinks red 3 times Reset complete | |
| Solid amber Wi-Fi error (Main) - contact Bose customer service | |
| Blinks amber 4 times Non-critical error (network connection error or source error) | |
| Solid red | Critical error (hardware) - contact Bose customer serviceNOTE: The lights on the front and the back of the amplifier glow solid red simultaneously. |
DISABLE/ENABLE WI-FI CAPABILITY
Insert a thin paperclip into the hole on the back of the amplifier and press and hold for 2 seconds until the light on the back of the amplifier blinks white 3 times.

text_image
LINE OUT BASS RESET A B C D L L R R L L R R L L R R 1 2 3 SPEAKER SETTING ONE PART - 40 MIN CA. TWO PANG - 60 MIN CA. CLASS 2 WIRING POWER <...> LINE IN R OPTICAL IN SERVICENOTE: Disabling/enabling Wi-Fi capability also disables/enables the Bluetooth feature.
OVERLOAD PROTECTION
The amplifier's overload protection feature automatically reduces maximum power output to prevent the amplifier from getting too hot. This may occur when the amplifier plays at high volume for a long duration or if it is installed in a location with limited ventilation. Full maximum output automatically returns as the amplifier cools down.
CONNECT A BOSE BASS MODULE
You can connect your Bose Bass Module to the amplifier using a 3.5 mm stereo audio cable (not provided).
NOTES:
• The 3.5 mm audio cable must be stereo and shielded.
- If you don't have a 3.5 mm audio cable, visit Bose.com/BM500 or Bose.com/BM700 to purchase a 15 ft (4.5 m) cable. You can also purchase this part at your local electronics store.
-
On the amplifier, connect one end of a 3.5 mm audio cable to the BASS port.
-
Connect the other end of the cable to the BASS IN port on the bass module.

text_image
Bose Bass Module 500 Bose Bass Module 700NOTE: For more information about your bass module, refer to your bass module owner's guide. Visit:
Bose Bass Module 700: Bose.com/BM700
Bose Bass Module 500: Bose.com/BM500
CONNECT A BOSE SOUNDLINK BLUETOOTH SPEAKER OR BOSE HEADPHONES USING SIMPLESYNC™ TECHNOLOGY
With Bose SimpleSync™ technology, you can connect certain Bose SoundLink Bluetooth speakers or Bose headphones to the amplifier for a new way to hear your music and movies.
Benefits
A personal listening experience: Listen to your TV or music without disturbing others by connecting your Bose headphones to the amplifier. Use independent volume controls on each product to lower or mute the amplifier while keeping your headphones as loud as you like.
Another room of audio: Listen to the same song in two different rooms at the same time by connecting your Bose SoundLink Bluetooth speaker to the amplifier.
NOTES:
- SimpleSync™ technology has a Bluetooth range of up to 30 ft (9 m). Walls and construction materials can affect reception. Depending on your environment, the range may be higher.
- You can't stream audio using a Bluetooth source when using SimpleSync™ technology.
Compatible products
You can connect most Bose SoundLink Bluetooth speakers to the amplifier, as well as Bose headphones.
Popular compatible products include:
- Bose SoundLink Revolve+ Bluetooth speaker
- Bose SoundLink Mini Bluetooth speaker
- Bose SoundLink Color Bluetooth speaker
- Bose Noise Cancelling Headphones 700
- Bose QuietComfort 35 wireless headphones
New products are added periodically. For a complete list and more information, visit:
worldwide.Bose.com/Support/Groups
Connect using the Bose Music app
To connect your Bose SoundLink Bluetooth speaker or Bose headphones to the amplifier, use the Bose Music app. For more information, visit:
_worldwide.Bose.com/Support/Groups
NOTES:
- Make sure that the product you're connecting is powered on, within 30 ft (9 m) of the amplifier, and ready to connect to another device. For more information, refer to your product owner's guide.
- You can connect only one product at a time to the amplifier.
RECONNECT A BOSE SOUNDLINK BLUETOOTH SPEAKER OR BOSE HEADPHONES
Power on your Bose SoundLink Bluetooth speaker or Bose headphones.
Your speaker or headphones try to connect to the most recently-connected Bluetooth device, including the amplifier.
NOTES:
- The amplifier must be within range (30 ft or 9 m) and powered on.
- If your speaker doesn't connect, see “Amplifier doesn't reconnect to a previously-connected Bose SoundLink Bluetooth speaker” on page 50.
- If your headphones don't connect, see “Amplifier doesn't reconnect to previously-connected Bose headphones” on page 50.
UPDATE THE AMPLIFIER
Main amplifier
The Main amplifier updates automatically when connected to the Bose Music app and your Wi-Fi network.
Supplemental amplifier
-
Flip switch A up to set it to a Main amplifier.
-
Add the amplifier to the Bose Music app (see page 24).
The amplifier updates automatically. When the update is complete, the light on the back of the amplifier glows solid white.
- Flip switch A down to revert it back to a Supplemental amplifier.
CLEAN THE AMPLIFIER
Clean the surface of the amplifier with a soft, dry cloth.
Use a brush attachment on a vacuum cleaner to clean the hard-to-reach areas.
CAUTIONS:
- Disconnect the power cord from the AC (mains) power outlet before cleaning.
- Do NOT use any sprays near the amplifier. Do not use any solvents, chemicals, or cleaning solutions containing alcohol, ammonia or abrasives.
- Do NOT allow liquids to spill into any openings.
REPLACEMENT PARTS AND ACCESSORIES
Replacement parts and accessories can be ordered through Bose customer service.
Visit: ____support.Bose.com/BMA
LIMITED WARRANTY
The amplifier is covered by a limited warranty. Visit our website at ____ worldwide.Bose.com/Warranty for details of the limited warrar
To register your product, visit worldwide.Bose.com/ProductRegistration for instructions. Failure to register will not affect your limited warranty rights.
SPECIFICATION VALUE
| Dimensions (approximate) | 8 1/4" wide x 8 1/4" deep x 2 1/10" high (21 cm x 21 cm x 7.3 cm) |
| Weight (amplifier only) | 4.8 lbs (2186g) |
| Power rating | 100-240V50/60 Hz, 240W |
| Input sensitivity RCA inputs: 2Vrms | |
| Signal to Noise ratio (S/N) | >100 dB |
| Output power (continuous average) | 125W / channel minimum into 8 ohms, from 20 Hz to 20 kHz, with no more than 0.1% THD |
| Temperature range | 32° F to 95° F (0°C to 35°C)NOTE: Depending on your environment, it's possible to operate outside of the recommended temperature range without affecting performance. |
TRY THESE SOLUTIONS FIRST
If you experience problems with the amplifier:
- Make sure the amplifier is connected to a live AC (mains) outlet.
- Secure all cables and speaker wires.
- Check the state of the amplifier (see page 36).
- Move the amplifier and mobile device away from possible interference (wireless routers, cordless phones, televisions, microwaves, etc.).
- Move the amplifier within the recommended range of your wireless router or mobile device for proper operation.
- Refer to your speaker owner's guide.
OTHER SOLUTIONS
If you could not resolve your issue, see the table below to identify symptoms and solutions to common problems. If you're unable to resolve your issue, contact Bose customer service.
Visit: ____ worldwide.Bose.com/contact
SYMPTOM SOLUTION
| Can’t complete network setup | Make sure the amplifier is set to Main (see page 27).Select correct network name and enter password.Connect your mobile device and amplifier to the same Wi-Fi network.Enable Wi-Fi on the mobile device you’re using for setup .Change the default browser on your mobile device.Close other open applications.Restart your mobile device and your router.Place the amplifier within range of the router.Reset the amplifier (see page 51).If your router supports both 2.4GHz and 5GHz bands, make sure both the mobile device and amplifier are connecting to the same band.Uninstall the Bose Music app, reset the amplifier (see page 51), and restart setup. |
SYMPTOM SOLUTION
| Can't connect to network | Make sure the amplifier is set to Main (see page 27).If the amplifier set to Main and a device is connected to an Ethernet port, make sure it's another Bose Music Amplifier.In the Bose Music app, select the correct network name, and enter the network password (case-sensitive).Make sure the amplifier and your mobile device are connected to the same Wi-Fi network.Enable Wi-Fi on the mobile device you're using for setup.Close other open applications on your mobile device.If multiple amplifiers are connected by cable, reduce the number connected.Connect the Main amplifier to the network using an Ethernet cable (see page 24).If connected to your network using an Ethernet cable:Check the cable (see page 24).Use a different Ethernet cable (see page 24).If your network information has changed, see page 21.Restart your mobile device and router.If your router supports both 2.4GHz and 5GHz bands, make sure both the device (mobile or computer) and amplifier are connecting to the same band.NOTE: Give each band a unique name to make sure you're connecting to the correct band.Reset the router.If connecting to a different network and the app doesn't prompt you for setup, go to the main screen and add the amplifier. |
| Bose Music app doesn't work on mobile device | Make sure your mobile device is compatible with the Bose Music app and meets minimum system requirements. For more information, refer to the app store on your mobile device.Uninstall the Bose Music app on your mobile device then reinstall the app (see page 20). |
SYMPTOM SOLUTION
| Poor or distorted audio | If two pairs of speakers are connected, use the same speaker model.Make sure the speakers are compatible: one pair of speakers requires 4 ohm minimum each, and two pairs of speakers require 8 ohm minimum each.Use the Bose Music app to group the Main amplifiers (see page 21).If the amplifier is connected to an external source using an RCA audio cable or optical cable, make sure it's set up using the Bose Music app (see page 20).If connected using an Ethernet cable or RCA audio cable:Reduce the number of amplifiers connected.Check the Ethernet cable (see page 24) or RCA audio cable (see page 25).Use a different Ethernet cable (see page 24) or RCA audio cable (see page 25). |
| Intermittent or no audio | If the amplifier is set to Main and a device is connected to the Ethernet port, make sure it's another Bose Music Amplifier.Firmly insert the speaker wires into the terminals on the back of the speakers and on the amplifier's connector panel. Confirm that no individual wires are touching across terminals (see page 16).Make sure the external music source is firmly connected to either the analog (red and white) or optical inputs.Stop other audio or video streaming applications.Unmute or increase the volume on the amplifier and mobile device.Unplug the power cord; reconnect after 1 minute.Restart your mobile device and router.Make sure volume isn't muted or too low. |
| Interference (corrupted audio) | Keep the amplifier away from metal objects, other audio/video components, and direct heat sources (see page 14).Change the router channel or band. Refer to your router owner's guide.Connect the Main amplifier using an Ethernet cable (see page 24). |
| Speakers don't play | Make sure the speaker wires are connected properly (see page 16).Disconnect AC power from the amplifier for 3 minutes. Reconnect power to the amplifier (see page 19).Play content using the Bose Music app. |
SYMPTOM SOLUTION
| One speaker doesn't play | Make sure the speaker wires are in good condition.Disconnect the wire from the working speaker and attach it to the non-working speaker. If the speaker doesn't play, the problem may be with the speaker and not the speaker wire.Disconnect the speaker wire from the terminal block connector. Connect it to the other terminal block connector. If the speaker plays, the problem may be the other speaker wire. Replace the speaker wire. If the speaker doesn't play, the problem may be in that channel of the amplifier. |
| Right and left stereo channels are heard on the wrong speakers | Make sure the speaker wires are connected properly (see page 16).Make sure that the red and white analog cables are properly connected, red to red and white to white on the amplifier and on the external music source. |
| Bass or treble is weak | Make sure the speaker wires are connected properly (see page 16).If they aren't, they could be playing out of phase.Make sure the speakers are compatible: one pair of speakers requires 4 ohm minimum each, and two pairs of speakers require 8 ohm minimum each.Make sure the amplifier software is up-to-date in the Bose Music app.Adjust the bass or treble level using the Bose Music app. |
| Can't connect with your mobile device using a Bluetooth connection | Make sure the amplifier is set to Main (see page 27). |
| Can't playBluetooth audio | On your mobile device, turn theBluetooth feature off and then on. Delete the amplifier from theBluetooth list. Connect again (see page 34).Make sure you're using a compatibleBluetooth mobile device.Make sure you're within 30 ft of the amplifier, and there are no large metal obstructions in the way.Delete the amplifier from your mobile deviceBluetooth list. Connect again (see page 34).Set up the Bose Music app first and perform all updates.Connect a different mobile device (see page 35).Clear the amplifier's device list (see page 35). Connect again (see page 34). |
SYMPTOM SOLUTION
| Can't stream audio using AirPlay | Make sure the amplifier is powered on and in range (see page 19).Make sure your Apple device and the amplifier are connected to the same Wi-Fi network.Update your Apple device.Make sure the amplifier is up-to-date (see page 43).If you can't find the AirPlay icon Ⓞ in the music app you're streaming from, stream audio from the Control Center.For additional support, visit:https://www.apple.com/airplay |
| Google Assistant doesn't respond | Make sure you have a Google Assistant-enabled device connected to your network.Make sure Google Assistant has been set up using the Bose Music app (see page 30).NOTE:The amplifier must be set up and connected to your Wi-Fi network using the Bose Music app.Connect your mobile device to Wi-Fi.Make sure you're in a country where Google Assistant is available.Make sure you're using the most up-to-date version of the Google Assistant app.Make sure your mobile device is compatible.Make sure you say the name you assigned in the Bose Music app.Make sure you use the same audio service account on the Bose Music app and Google Assistant app.For additional support, visit:https://support.google.com/assistant |
| Alexa doesn't respond | Make sure you're speaking to a separate device with Alexa Built-In connected to your network.Make sure Alexa has been set up using the Bose Music app (see page 30).NOTE:The amplifier must be set up and connected to your Wi-Fi network using the Bose Music app.Connect your mobile device to Wi-Fi.Make sure you're in a country where Amazon Alexa is available.Make sure you're using the most up-to-date version of the Alexa app.Make sure your mobile device is compatible.Make sure you say the name you assigned in the Bose Music app.For additional support, visit:https://www.amazon.com/usealexa |
SYMPTOM SOLUTION
| Amplifier doesn’t connect to a Bose SoundLink Bluetooth speaker or Bose headphones | Make sure that your speaker or headphones are powered on, within 30 ft (9 m) of the amplifier, and ready to connect to another device. For more information, refer to your product owner’s guide.Disconnect your speaker or headphones from other connected devices. |
| Amplifier doesn’t reconnect to a previously-connected Bose SoundLink Bluetooth speaker | On your speaker, use the product controls to cycle through the product device list until you hear the name for the amplifier. For product-specific instructions, refer to your speaker owner’s guide.Disconnect your speaker or headphones from other connected devices. |
| Amplifier doesn’t reconnect to previously-connected Bose headphones | Connect using the Bose Music app. You can access this option from the Settings menu.Disconnect your speaker or headphones from other connected devices. |
| Delayed audio from a connected Bose SoundLink Bluetooth speaker or Bose headphones | Not all Bose SoundLink Bluetooth speakers or headphones can play audio in perfect sync when connected to the amplifier. To check if your product is compatible, visit: worldwide.Bose.com/Support/GroupsInstall any available software updates for your speaker or headphones. To check for updates, open the appropriate Bose app for your product on your mobile device or visit btu.Bose.com on your computer. |
RESET THE AMPLIFIER
Press the RESET button to reset the amplifier.
NOTE: Resetting the amplifier doesn't affect ADVANCED SETTING configurations, SPEAKER SETTING configuration, or network settings.

text_image
POWER <...> LINE OUT BASS OCCOLATE OPTICAL IN SERVICE A B C D ADVANCED SETTING 1 2 3 SPEAKER SETTING ONE PART : ADAMINED, TWO PART : RD HIN EA, CLASS 2 WIRING L L R R + - + - L L R R + - + - L L R R + - + - L L R R + - + -RESTORE THE AMPLIFIER TO FACTORY DEFAULT
Restoring the amplifier clears all source, volume, and network settings from the amplifier and returns it to original factory settings.
Insert a thin paperclip into the hole in the back of the amplifier and press and hold for 10 seconds until the light on the back of the amplifier blinks red 3 times.

text_image
LINE OUT BASS RESET A B C D ADVANCED SETTING 1 2 3 SPEAKER SETTING ONE PARK - AD MINI EX, TWO PARKS - AD MINI EX, CLASS 2 WIRING. L L R R + - + - L L R R + - + - L L R R + - + - L L R R + - + -When the restore is complete, the light on the back of the amplifier slowly blinks amber.
NOTE: Restoring the amplifier doesn't affect ADVANCED SETTING configurations or SPEAKER SETTING configuration.
You can mount the amplifier on a rack (left or right side) using the mounting bracket, rack bracket, and hardware provided.
CAUTIONS:
- Only use mounting bracket, rack bracket, and hardware provided with the amplifier.
- When mounting multiple amplifiers on a rack, use a separate rack mount for each amplifier.
- Do NOT place or install the bracket or amplifier near any heat sources, such as fireplaces, radiators, heat registers, or other apparatus (including amplifiers) that produce heat.
CONNECT THE BRACKETS
- With the rack mount arrow visible and pointing to the front of the rack, align the holes on the mounting bracket with the holes on the rack bracket.

text_image
RACK MOUNT FRONT RACK MOUNT FRONT- Insert the connecting screws through the mounting bracket and rack bracket.

text_image
Technical diagram of a device rear panel with labeled ports and indicator lights- Using a small, Phillips-head screwdriver, turn the screws clockwise to secure the screws.

text_image
Technical diagram of a device rear panel with labeled components and a screwdriver indicating rotationATTACH TO THE RACK
- Align the holes on the rack bracket to the rack.
- Insert the rack screws through the rack bracket and rack.

natural_image
Technical line drawing of a mechanical assembly with mounting holes and a bracket (no text or symbols)-
Turn the screws clockwise to secure the screws.
-
Repeat steps 1-3 to attach the other side of the rack bracket of the rack.

natural_image
Technical line drawing of a mechanical assembly with mounting flanges and a central cylindrical component (no text or symbols)NOTE: You can also configure the assembly to attach the right side of the rack.

natural_image
Technical line drawing of a metal bracket assembly with mounting holes and internal compartments (no text or symbols)PLACE THE AMPLIFIER
- Align the four openings on the bottom of the amplifier with the four tabs on the mounting bracket.

text_image
Technical diagram showing the connection between a BOSE device and a battery pack, with labeled components and connection points.- Gently slide the amplifier back onto the tabs until the amplifier clicks into place.

natural_image
Technical line drawing of a Bose-branded electronic device with mounting brackets and mounting holes (no text or symbols)NOTE: To remove the amplifier from the mounting bracket, slide the amplifier forward to release from the tabs.
HARDWARE SPECIFICATIONS
You can mount the amplifier on a wall with the mounting bracket and hardware (not provided). When choosing the hardware, make sure you use hardware that is appropriate for the intended mounting surface.
ITEM WOOD WALLBOARD MASONRY
| Wall thickness | 12" (12.8 mm) or thicker | 18" (9.5 mm) or thicker | 4" (101.6 mm)or thicker |
| Drill bit | 12" (2.4 mm) | 14" (6.4 mm) | 14" (6.4 mm) |
| Phillips-headwood screws(4, not included) | #10 x 1 14 "(M5 x 32 mm) | Not used Not used | |
| Anchors(4, not included) | Not used | #10 (M5)wallboard anchorsNOTE: Requires a minimum of a 10 lb (4536g) rating. | #10 (M6)masonry anchorsNOTE: Requires a minimum of a 10 lb (4536g) rating. |
WARNING: Do NOT mount on surfaces that are not sturdy enough, or that have hazards concealed behind them, such as electrical wiring or plumbing. If you're not sure about installing the bracket, contact a qualified professional installer. Make sure the bracket is installed according to local building codes.
ATTACH THE MOUNTING BRACKET
CAUTIONS:
- Only use the mounting bracket provided with the amplifier.
- Do NOT mount the bracket on the ceiling.
- Do NOT place or install the bracket or amplifier near any heat sources, such as fireplaces, radiators, heat registers or other apparatus (including amplifiers) that produce heat.
- With wall mount arrow visible and pointing up, position the mounting bracket on the wall.

text_image
BACK MOUNT FRONT UP WALL MOUNT- Mark the four mounting hole locations on the wall through the mounting bracket holes.

text_image
BACK MOUNT UP WALL MOUNT-
Remove the mounting bracket.
-
Drill four holes in the wall.
- If mounting on wood, drill 332'' holes, then continue with step 5.
- If mounting on wallboard or masonry, refer to the instructions provided with the anchors for the proper hole size and instructions for mounting the bracket to the wall.
-
Align the mounting bracket to the drilled holes.
-
Insert four screws (not provided) through the mounting bracket.
- Using a screwdriver, tighten the screws clockwise to secure the screws.

text_image
BACK HOUNT FRONT UP WALL MOUNTATTACH THE AMPLIFIER
- Align the four openings on the back of the amplifier with the four tabs on the mounting bracket.

natural_image
Abstract diagram with four rounded rectangles and a central square, no text or symbols present
text_image
MAX POINT UP WALL HOUNT APPOINTBottom of amplifier Mounting bracket
- Gently slide the amplifier down onto the tabs until the amplifier clicks into place.

natural_image
Diagram showing two views of a device with internal components and light indicators, no text or symbols present.NOTE: To remove the amplifier from the mounting bracket, slide the amplifier up to release from the tabs.
You can connect the Main amplifier to your external analog or digital source using an RCA audio cable for an analog source or an optical cable for a digital source (both cables not provided).
NOTE: To play audio from an external source, the amplifier must be set up using the Bose Music app (see page 20).
USING AN RCA AUDIO CABLE
- On the external source, connect the RCA audio cable's white connector to the white LINE OUT port and the red connector to the red LINE OUT port.
- On the Main amplifier, connect the other white connector to the white LINE IN port and the red connector to the LINE IN port.
USING AN OPTICAL CABLE
- Remove the protective cap from both ends of the optical cable.

natural_image
Pure electrical circuit lines without any symbolsCAUTION: Inserting the plug with the cap attached can damage the plug and/or the port.
- Insert one end of the optical cable into your source's OPTICAL OUT port.
CAUTION: Inserting the plug with the wrong orientation can damage the plug and/or the port.
- On the Main amplifier, carefully insert the plug into the OPTICAL IN port.

text_image
LINE OUT BASS RESET A 3 C D L L R R + - + - L L R H + - + - 1 2 3 SPEAKER SETTING ONE PAIR - 40 MIN EA, TWO PAIRS - 40 MIN EA, CLASS 2 WIRING POWER <...> LINE IN R OPTICAL IN SERVICENOTE: The port has a hinged door that swings inward when inserting the plug.
- Firmly push the plug into the port until you hear or feel a click.

natural_image
Simple line drawing of a plug with radiating lines, enclosed in a circle (no text or symbols)Importør i Kina: Bose Electronics (Shanghai) Company Limited, Level 6, Tower D, No. 2337 Gudai Rd. Minhang District, Shanghai 201100
Importør i EU: Bose Products B.V., Gorslaan 60, 1441 RG Purmerend, Holland
Importør i Taiwan: Bose Limited Taiwan Branch (H.K.), 9F., No. 10, Sec. 3, Minsheng E. Road, Zhongshan Dist. Taipei City 10480, Taiwan Telefonnummer: +886-2-2514 7676
Importør i UK: Bose Limited, Bose House, Quayside Chatham Maritime, Chatham, Kent, ME4 4QZ, Storbritannien
Inputklassifikation: 100-240 V ∼ 50/60 Hz, 240W
HVAD ER DER I AESKEN?
Indhold 13
PLACERING AF FORSTÆRKEREN
Anbefalinger 14
RETNINGSLINJER FOR TILSLUTNING AF H∅JTTALER
STREAM LYD MED CHROMECAST 31
STREAM LYD MED AIRPLAY
TILSLUT PRODUKTER FRA BOSE
Tilslut et Bose Bass Module 40
natural_image
Front view of a white electronic device labeled 'BOSE' with a small circular icon on the left (no additional text or symbols)Bose Music Amplifier Netkabel*

natural_image
Simple line drawing of a U-shaped tube with two connectors (no text or symbols)

text_image
SACK MOUNT FRONT UP WALL MOUNTnatural_image
Simple line drawing of a rectangular panel with three circular holes, no text or symbols present.* Leveres muligvis med flere netledninger. Anvend netledningen til din region.
text_image
Diagram of an electronic device rear panel with labeled ports and a zoomed-in section view showing port labels like 'A' and 'LRR'.text_image
Diagram of an electronic device showing labeled ports and connections, including a zoomed-in section with a magnified view.text_image
B (+) - 1.2 2.3 3.4 4.5 5.6 6.7 7.8 8.9 9.0 10.1 11.2 12.3 13.4 14.5 15.6 16.7 17.8 18.9 19.0 20.1 21.2 22.3 23.4 24.5 25.6 26.7 27.8 28.9 29.0 30.1 31.2 32.3 33.4 34.5 35.6 36.7 37.8 38.9 39.0 40.1 41.2 42.3 43.4 44.5 45.6 46.7 47.8 48.9 49.0 50.1 51.2 52.3 53.4 54.5 55.6 56.7 57.8 58.9 59.0 60.1 61.2 62.3 63.4 64.5 65.6 66.7 67.8 68.9 69.0 70.1 71.2 72.3 73.4 74.5 75.6 76.7 77.8 78.9 79.0 80.1 81.2 82.3 83.4 84.5 85.6 86.7 87.8 88.9 89.0text_image
POWER (++)+ LINE OUT BAS1 RESET A B C D L L H P L L B R L L B R L L B R L L B R L L B R L L B R L L B R L L B R L L B R L L B R L L B R L L B R L L B R L L B R L L B R L L B R L L B R L L B R L L B R L L B R L L B S L L B S L L B S L L B S L L B S L L B S L L B S L L B S L L B S L L B S L L B S L L B S L L B S L L B S L L B S L L B S L L B S L L B S L L B S L L B S L L B M L L B M L L B M L L B M L L B M L L B M L L B M L L B M L L B M L L B M L L B M L L B M L L B M L L B M L L B M L L B M L L B M L L B M L L B M L L B M L L B N L L B N L L B N L L B N L L B N L L B N L L B N L L B N L L B N L L B N L L B N L L B N L L B N L L B N L L B N L L B N L L B N L L B N L L B N L L B N L L B M L L B M L L B M L L B M L L B M L L B M L L B M L L B M L L B M L L B M L L B M L L B M L L B M L L B M L L B M L L B M L L B M L L B M L L B M L L B S L L B S L L B S L L B S L L B S L L B S L L B S L L B S L L B S SPEAKER SETTINGtext_image
POWER <...> LINE OUT BASS OPTICAL IN SERVICE A B C D ADVANCED SETTING 1 2 3 SPEAKER SETTING ONE PAIR - 40 MIN EA, IWO PAIRS - 80 MIN EA. CLASS 2 WIRNG L L R R + - + - L L R R + - + - L L R R + - + - L L R R + - + -text_image
LINE OUT BASS RESET A B C D L L R R + - + - ADVANCED SETTING 1 2 X SPEAKER SETTING ONE PAIR - AD MIN EA, TWO PAIRS - 9D MIN LA. CLASS 2 WIRENG POWER <...> LINE IN R OPTICAL IN SERVICEPORT BESKRIVELSE
text_image
LINE OUT BASS RESET A B C D ADVANCED SETTING 1 2 3 SPEAKER SETTING ONE PAR - 40 PN 24, TWO PAR - 80 MIN EA. CLASS Z WITING L L H L R B L L R L L R L L R L L R A B C D ADVANCED SETTINGTILSTAND KONTAKT POSITION BESKRIVELSE
natural_image
Front view of a BOSE-branded electronic device casing with a circular button and 'BOSE' logo (no additional text or symbols)text_image
BLUETOOTH Bose Music Amplifiertext_image
POWER <...> LINE OUT BASS RESET LINE OUT B LINE IN R OPTICAL IN SERVICE A B C D L L R R + - + ADVANCED SETTING 1 2 3 SPEAKER SETTING ONE PAIR - 40 MIN EA, TWO PAIRS - 40 MIN EA. CLASS 2 WIRING L L R R + - + - L L R R + - + - L L R R + - + -WI-FI- OG STR∅MSTATUS
Primær forstærker
Bose Bass Module 500: Bose.com/BM500
TILSLUT EN BOSE SOUNDLINK BLUETOOTH-H∅JTTALER ELLER BOSE-HOVEDTELEFONER VED HJÆLP AF SIMPLESYNC™-TEKNOLOGI
worldwide.Bose.com/Support/Groups
text_image
LINE OUT BASS RESET A B C D L L R R L + - + - L + L + R + 1 2 3 SPEAKER SETTING ONE PART - 40 MIN EX, TWO PARTS - 80 MIN EX, CLASS 2 WIRING POWER <...> LINE IN R OPTICAL IN SERVICEtext_image
RACK MOUNT FRONT RACK MOUNT FRONTtext_image
Technical diagram of a device rear panel with labeled ports and indicator lightstext_image
Technical diagram of a device with labeled components and a screwdriver inserted into a componentFASTG∅R TIL RACKET
natural_image
Technical line drawing of a mechanical assembly with mounting holes and a vertical rod (no text or symbols)natural_image
Technical line drawing of a mechanical assembly with mounting flanges and a central cylindrical component (no text or symbols)natural_image
Technical line drawing of a metal bracket assembly with mounting holes and internal compartments (no text or symbols)PLACER FORSTÆRKEREN
text_image
Technical diagram showing the connection between a Bose device and its internal components, with labeled parts and annotations.natural_image
Technical line drawing of a Bose-branded electronic device with mounting brackets and mounting holes (no text or symbols)text_image
RACK MOUNT FROUNT UP WALL MOUNTtext_image
BOX MOUNT UP WALL MOUNTtext_image
BACK HOUNT UP WALL MOUNTFASTG∅R FORSTÆRKEREN
natural_image
Diagram of four square blocks arranged around a central square, surrounded by four rounded rectangles on a dotted grid background (no text or symbols)
text_image
MAX MOUNT FRONT UP WALL WALL UPnatural_image
Diagram showing two views of a device with internal components and light indicators, no text or symbols present.natural_image
Pure electrical circuit lines without any symbolstext_image
LINE OUT BASS RESET A 3 C D L L R R + - + - L L R H + - + - 1 2 3 SPEAKER SETTING ONE PAIR - 40 MIN EA, TWO PAIRS - 40 MIN EA, CLASS 2 WIRING + - + - L L R H + - + - L L R H + - + - L L R H + - + - OPTICAL IN SERVICEnatural_image
Simple line drawing of a plug with radiating lines, enclosed in a circle (no text or symbols)China-Import: Bose Electronics (Shanghai) Company Limited, Level 6, Tower D, No. 2337 Gudai Rd. Minhang District, Shanghai 201100
EU-Import: Bose Products B.V., Gorslaan 60, 1441 RG Purmerend, Niederlande
natural_image
Front view of a white electronic device labeled 'BOSE' with a small circular icon on the left (no additional text or symbols)Bose Music Amplifier Netzkabel*

natural_image
Simple line drawing of a U-shaped tube with two connectors (no text or symbols)
natural_image
Simple line drawing of a rectangular frame with three circular holes, no text or symbols present.text_image
Diagram of an electronic device rear panel with labeled ports and a magnified view showing port A, including a highlighted component.text_image
Diagram of an electronic device showing a power connector connected to a LIRR terminal, with labeled ports and a magnified view highlighting component A.text_image
Diagram of an electronic device rear panel with labeled ports and connectors, showing a zoomed-in view of the front panel.text_image
POWER <...> LINE OUT BASS LINE IN R OPTICAL IN SERVICE A B C D ADVANCED SETTING 1 2 3 SPEAKER SETTING ONE PAIR - 40 MIN EA. TWO PAIRS - 80 MIN EA. CLASS 2 WIRNG L L R R L L R R L L R R L L R R L L R Rnatural_image
Diagram showing a USB cable connected to four ports (no text or symbols present)Router
text_image
Diagram of a device rear panel with labeled ports and connectors, showing connections to a USB port and status LEDs.Hauptverstärker
text_image
POWER <...> LINE OUT BASS RESET A B C D ADVANCED SETTING 1 2 X SPEAKER SETTING ONE PAIR - 40 MIN EA, TWO PAIRS - 90 MIN LA. CLASS 2 WIRENG L L R R + - + - L L R R + - + - L L R R + - + - L L R R + - + -text_image
LINE OUT BASS RESET A B C D ADVANCED SETTING 1 2 3 SPEAKER SETTING ONE PAR - 40 PN 24, TWO PAR - 80 MIN EA. CLASS Z WITING L L H L R R L L R L L R L L R L L R A B C D ADVANCED SETTINGtext_image
BLUETOOTH Bose Music Amplifiertext_image
LINE OUT BASS RESET A B C D L L R R + - + - ADVANCED SETTING 1 2 3 SPEAKER SETTING ONE FAIR + 4D MIN EA. TWO PARTS + RS MIN EA. CLASS 2 WIRING L L R R + - + -WI-FI- UND BETRIEBSSTATUS
Hauptverstärker
text_image
POWER <...> LINE OUT LINE IN R OPTICAL IN SERVICE BASS RESET A B C D ADVANCED SETTING 1 2 3 SPEAKER SETTING ONE PART - 4G MIN EA, TWO PARTS - 80 MIN EA, CLASS 2 WIRING L L R R + - + - L L R R + - + - L L R R + - + - L L R R + - + -Bose Bass Module 500: Bose.com/BM500
BOSE SOUNDLINK BLUETOOTH-LAUTSPRECHER ODER BOSE-KOPFHÖRER MITHILFE VON SIMPLESYNC™- TECHNOLOGIE VERBINDEN
text_image
LINE OUT BASS RESET A B C D L L R R + - + - L L R R + - + - 1 2 3 L L R R + - + - SPEAKER SETTING ONE PART - 40 MINICAL, TWO PARTS - 80 MIN EX. CLASS 2 WIRINGtext_image
RACK MOUNT FRONT RACK MOUNT FRONTtext_image
Technical diagram of a device rear panel with labeled ports and indicator lightstext_image
Technical diagram of a device with labeled components and a screwdriver indicating rotation or adjustment.AM REGAL BEFESTIGEN
natural_image
Technical line drawing of a mechanical assembly with mounting flanges and a central component (no text or symbols)natural_image
Technical line drawing of a mechanical assembly with mounting flanges and internal components (no text or symbols)natural_image
Technical line drawing of a metal bracket assembly with mounting holes and internal compartments (no text or symbols)text_image
Technical diagram showing the connection between a Bose device and its internal components, with labeled parts and annotations.natural_image
Line drawing of a Bose-branded electronic device with mounting brackets and mounting holes (no text or symbols)text_image
BACK MOUNT FRONT UP WALL MOUNTtext_image
BACK MOUNT UP WALL MOUNTtext_image
BACK MOUNT FRONT UP WALL MOUNTnatural_image
Abstract diagram with four rounded rectangles and a central square, no text or symbols present
text_image
MAX. FORWARD UP WALL HOUNT DOWNnatural_image
Diagram showing two views of a device with internal components and light indicators, no text or symbols present.natural_image
Pure electrical circuit lines without any symbolstext_image
LINE OUT BASS RESET A 9 C D L L R R ADVANCED SETTING 1 2 3 SPEAKER SETTING ONE PART - 40 MIN EA, TWO PART - 80 MIN EA, CLASS 2 WIRING POWER <...> LINE IN R OPTICAL IN SERVICEnatural_image
Simple line drawing of a plug with radiating lines, enclosed in a circle (no text or symbols)Importeur in China: Bose Electronics (Shanghai) Company Limited, Level 6, Tower D, No. 2337 Gudai Rd. Minhang District, Shanghai 201100
Importeur in de EU: Bose Products B.V., Gorslaan 60, 1441 RG Purmerend, Nederland
AUDIO STREAMEN MET AIRPLAY
natural_image
Front view of a white electronic device labeled 'BOSE' with a small circular icon on the left (no additional text or symbols)Bose Music Amplifier Netsnoer*
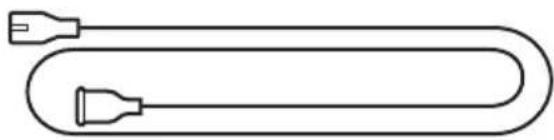
natural_image
Simple line drawing of a U-shaped tube with two connectors (no text or symbols)

text_image
SACK MOUNT FRONT UP WALL MOUNTMontagebeugel Rekbeugel
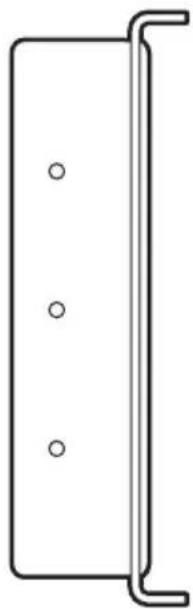
natural_image
Simple line drawing of a rectangular panel with three circular holes, no text or symbols present.text_image
Diagram of an electronic device rear panel with labeled ports and indicators, including a zoomed-in section view labeled 'A' pointing to port A.text_image
Diagram of an electronic device showing a power connector connected to a 1.2 microcontroller with LIRR indicator and labeled ports.text_image
POWER <...> LINE OUT BASS OPTICAL IN SERVICE A B C D ADVANCED SETTING 1 2 3 SPEAKER SETTING ONE PAIR - 40 MIN EA. IWO PAIRS - 80 MIN EA. CLASS 2 WIRING L L R R L L R R L L R R L L R R L L R R L L R Rnatural_image
Diagram showing a USB cable connecting to four ports (no text or symbols present)Router

text_image
Diagram of an electronic device rear panel with labeled ports and indicators, showing connections via a USB cable.Hoofdversterker
text_image
LINE OUT BASS RESET A B C D L L R R + - + - ADVANCED SETTING 1 2 X SPEAKER SETTING ONE PAIR - 40 MIN EA, TWO PAIRS - 90 MIN LA. CLASS 2 WIRENG POWER <...> LINE IN R OPTICAL IN SERVICEPOORT OMSCHRIJVING
text_image
LINE OUT BASS RESET A B C D ADVANCED SETTING 1 2 3 SPEAKER SETTING ONE PAR - 40 PN 24, TWO PAR + RG REE.A. CLASS 2 WITHG L L H H L L R L L N R L L N A L L N B A B C D ADVANCED SETTINGMODUS SCHAKELAAR STAND OMSCHRIJVING
text_image
POWER <...> LINE OUT RASS RESET A B C D ADVANCED SETTING 1 2 3 SPEAKER SETTING 245 PARE - 30 NFEV/UL, THO PARE - 60 NFEV/ CLASS 2 WIND L L R R + - + - L L R R + - + - L L R R + - + - L L R R + - + - L L R R + - + - L L R R + - + - L L R R + - + - L L R R + - + - L L R R + - + - L L R R + - + - L L R R + - + - L L R R + - + - SPEAKER SETTINGtext_image
BLUETOOTH Bose Music Amplifiertext_image
LINE OUT BASS RESET A B C D L L R R + - + - ADVANCED SETTING 1 2 3 SPEAKER SETTING ONE FAIR - 4D MIN EA, TWO PARTS - 4D MIN EA. CLASS 2 WIRENG L L R R + - + -WI-FI- EN STROOMSTATUS
Hoofdversterker
text_image
POWER <...> LINE OUT LINE IN R OPTICAL IN SERVICE BASS RESET A B C D ADVANCED SETTING 1 2 3 SPEAKER SETTING ONE PAR - 40 MIN EA, TWO PARTS - 80 MIN EA. CLASS 2 WIRING L L R R + - + - L L R R + - + - L L R R + - + -Bose Bass Module 500: Bose.com/BM500
EEN BOSE SOUNDLINK BLUETOOTH-LUIDSPREKER OF BOSE-HOOFDTELEFOON VERBINDEN MET SIMPLESYNC™-TECHNOLOGIE
- Bose SoundLink Revolve+ Bluetooth speaker
- Bose SoundLink Mini Bluetooth speaker
- Bose SoundLink Color Bluetooth speaker
- Bose noise cancelling headphones 700
- Bose QuietComfort 35 wireless headphones
text_image
POWER <+••> LINE OUT BASS OPTICAL IN SERVICE A B C D ADVANCED SETTING 1 2 3 SPEAKER SETTING ONE PART - AGNICAL, TWO PART - BD MIN EX, CLASS 2 WIRING L + L - R + - L + L - R + L + L - R + L + L - R + L + L - R + L + L - R + L + L - R + L + L - R + L + L - R + L + L - R + L + L - R + L + L - R + L + L - R + L + L - R + L + L - R + L + L - R + L + L - R + L + L - R + L + L- R + L + L- R + L + L- R + L + L- R + L + L- R + L + L- R + L + L- R + L + L- R + L + L- R + L + L- R + L + L- R + L + L- R + L + L- R + L + L- R + L + L- R + L + L- R + L + L- R + L+ L+R- L+ L+R- L+ L+R- L+ L+R- L+ L+R- L+ L+R- L+ L+R- L+ L+R- L+ L+R- L+ L+R- L+ L+R- L+ L+R- L+ L+R- L+ L+R- L+ L+R- L+ L+R- L+ L+R- L+ L- R+ L+ L- R+ L+ L- R+ L+ L- R+ L+ L- R+ L+ L- R+ L+ L- R+ L+ L- R+ L+ L- R+ L+ L- R+ L+ L- R+ L+ L- R+ L+ L- R+ L+ L- R+ L+ L- R+ L+ L- R+ L+ L- R+ L+ L 2 3 SPEAKER SETTINGDE VERSTERKER TERUGZETTEN OP DE FABRIEKSINSTELLINGEN
text_image
LINE OUT BASS RESET A B C D ADVANCED SETTING 1 2 3 SPEAKER SETTING ONE PART - ADMIN EA, TWO PARTS - ADMIN EA, CLASS 2 WIRING L L R R + - + - L L R R + - + - L L R R + - + - L L R R + - + -text_image
RACK MOUNT FRONT RACK MOUNT FRONTtext_image
Technical diagram of a device rear panel with labeled ports and indicator lightstext_image
Technical diagram of a device panel with screwdriver and labeled ports, showing assembly instructionsDE BEUGELS AAN HET REK BEVESTIGEN
natural_image
Technical line drawing of a mechanical assembly with mounting flanges and internal components (no text or symbols)natural_image
Technical line drawing of a mechanical assembly with mounting flanges and a central cylindrical component (no text or symbols)natural_image
Technical line drawing of a metal bracket assembly with mounting holes and internal compartments (no text or symbols)DE VERSTERKER PLAATSEN
text_image
Technical diagram showing connection between a BOSE device and a battery pack, with labeled components and connection points.natural_image
Technical line drawing of a Bose-branded electronic device with mounting brackets and mounting holes (no text or symbols)ITEM HOUT GIPSPLAAT METSELWERK
text_image
BACK MOUNT FRONT UP WALL MOUNTtext_image
Black Mount UP WALL MOUNTtext_image
BACK HOUNT UP WALL MOUNTDE VERSTERKER BEVESTIGEN
natural_image
Diagram of a square layout with four surrounding circles, no text or symbols present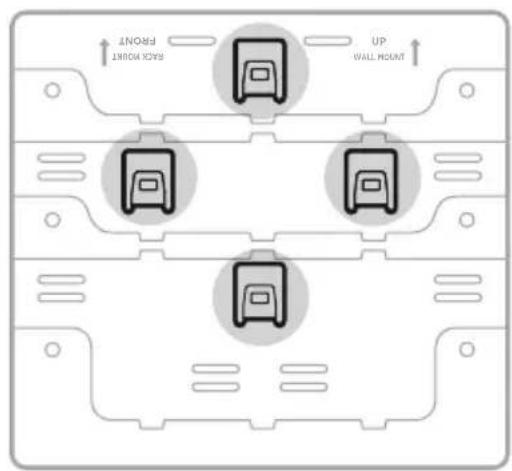
text_image
MAX MOUNT FOUNT UP WALL MOUNT UP MOUNTnatural_image
Diagram showing two views of a device with internal components and light indicators, no text or symbols present.natural_image
Pure electrical circuit lines without any symbolstext_image
LINE OUT BASS RESET A 3 C D L L R R + - + - L L R H + - + - 1 2 3 SPEAKER SETTING ONE YEAR - 40 MIN EA, TWO PARES - AG MIN EA, CLASS 2 WIRING POWER <...> LINE IN R OPTICAL IN SERVICEnatural_image
Simple line drawing of a flashlight with radiating lines, no text or symbols present.Importador en China: Bose Electronics (Shanghai) Company Limited, Level 6, Tower D, No. 2337 Gudai Rd. Minhang District, Shanghai 201100, China
natural_image
Front view of a white electronic device labeled 'BOSE' with a small circular icon on the left (no additional text or symbols)natural_image
Simple line drawing of a U-shaped tube with two connectors (no text or symbols)

text_image
BACK MOUNT FRONT UP WALL MOUNTVisite: ____ support.Bose.com/BMA
RECOMENDACIONES
text_image
Diagram of an electronic device rear panel with labeled ports and a magnified view showing port A, including a highlighted component and a connector pin LRR.text_image
Diagram showing two types of electrical connectors: a Y-shaped conductor with red leads and a LLRR (laser resistance) terminal block with four switches.text_image
Diagram of an electronic device showing power input, switch, and output with labeled ports and a magnified view highlighting component A.text_image
Diagram showing connection between a power adapter and an electronic device with labeled ports and connectorstext_image
POWER <...> LINE OUT BASS OPTICAL IN SERVICE A B C D ADVANCED SETTING 1 2 3 SPEAKER SETTING ONE PAIR - 40 MIN EA. IWO PAIRS - 80 MIN EA. CLASS 2 WIRNG L L R R + - + - L L R R + - + - L L R R + - + - L L R R + - + -text_image
LINE OUT BASS RESET A B C D L L R R + - + - ADVANCED SETTING 1 2 X SPEAKER SETTING ONE PAIR - AD MIN EA, TWO PAIRS - 9D MIN LA. CLASS 2 WIRENG POWER <...> LINE IN R OPTICAL IN SERVICEPUERTO DESCRIPCIÓN
text_image
LINE OUT BASS RESET A B C D ADVANCED SETTING 1 2 3 SPEAKER SETTING ONE PAR - 40 PN 24, TWO PAR - 80 M EEA, CLASS Z WTRING L L H H L L R L L N R L L R A B C D ADVANCED SETTINGtext_image
BLUETOOTH Bose Music Amplifiertext_image
LINE OUT BASS RESET A B C D ADVANCED SETTING 1 2 3 SPEER SETTING SHE 7 AIR + 4D MIN EA, TWO PARES + 80 MIN EA, CLASS 2 WIRING L L R R + - + - L L R R + - + - L L R R + - + - L L R R + - + - L L R R + - + -ESTADO DE LA WI-FI Y DE LA CORRIENTE
Amplificador principal
text_image
POWER <...> LINE OUT LINE IN R OPTICAL IN SERVICE BASS RESET A B C D ADVANCED SETTING 1 2 3 SPEAKER SETTING ONE PART - 40 MIN EA, TWO PARTS - 60 MIN EA, CLASS 2 WIRING L L R R + - + - L L R R + - + - L L R R + - + - L L R R + - + -Bose Bass Module 500: Bose.com/BM500
CONECTAR UN ALTAVOZ BOSE SOUNDLINK BLUETOOTH O AURICULARES BOSE USANDO LA TECNOLOGÍA SIMPLESYNC™
Visite: ____ support.Bose.com/BMA
GARANTÍA LIMITADA
Visite: ____ worldwide.Bose.com/contact
SÍNTOMA SOLUCIÓN
text_image
POWER <***> LINE OUT BASS LINE IN R OPTICAL IN SERVICE A B C D ADVANCED SETTING 1 2 3 SPEAKER SETTING ONE PART : 40 INK EA, TWO PART : 80 MIN EA, CLASS 2 WIRING L L R R + - + - L L R R + - + - L L R R + - + - L L R R + - + - L L R R + - + -text_image
LINE OUT BASS RESET A B C D L + - + - L + - + - ADVANCED SETTING 1 2 3 SPEAKER SETTING ONE PART - 40 MPEA, TWO PARTS - 80 MIN EX, CLASS 2 WIPINGtext_image
RACK MOUNT FRONT RACK MOUNT FRONTtext_image
Technical diagram of a device rear panel with labeled ports and indicator lightstext_image
Technical diagram of a device panel with screwdriver and labeled ports, showing a 321-327 connection point.FIJAR A LA ESTANTERÍA
natural_image
Technical line drawing of a mechanical assembly with mounting flanges and a central component (no text or symbols)natural_image
Technical line drawing of a mechanical assembly with mounting flanges and a central rod (no text or symbols)natural_image
Technical line drawing of a metal bracket assembly with mounting holes and internal compartments (no text or symbols)text_image
Technical diagram showing connection between a BOSE device and a rack-mounted device with labeled components and mounting points.natural_image
Line drawing of a Bose-branded electronic device with mounting brackets and mounting holes (no text or symbols)text_image
BACK HOUNT UP WALL MOUNTtext_image
MAX MOUNT UP WALL MOUNTtext_image
BACK MOUNT FRONT UP WALL MOUNTnatural_image
Abstract diagram with four rounded squares arranged around a central square, surrounded by dotted grid lines (no text or symbols)
text_image
MAX POINT UP WALL HOUNT APPOINTnatural_image
Technical line drawing of two rectangular electronic components with internal circuitry and light indicators (no text or symbols)natural_image
Pure electrical circuit lines without any symbolstext_image
LINE OUT BASS RESET A 3 C D L L R R + - + - L L R H + - + - 1 2 3 SPEAKER SETTING ONE YEAR - 40 MIN EA, TWO PARES - AG MIN EA, CLASS 2 WIRING POWER <...> LINE IN R OPTICAL IN SERVICEnatural_image
Simple line drawing of a flashlight with radiating lines, no text or symbols present.Maahantuoja Kiinassa: Bose Electronics (Shanghai) Company Limited, Level 6, Tower D, No. 2337 Gudai Rd. Minhang District, Shanghai 201100
Maahantuoja EU:ssa: Bose Products B.V., Gorslaan 60, 1441 RG Purmerend, The Netherlands
natural_image
Front view of a white electronic device labeled 'BOSE' with a small circular icon on the left (no additional text or symbols)natural_image
Simple line drawing of a U-shaped tube with two connectors (no text or symbols)

text_image
SACK MOUNT FRONT UP WALL MOUNTnatural_image
Simple line drawing of a rectangular panel with three circular holes, no text or symbols present.text_image
Diagram of an electronic device rear panel with labeled ports and a magnified view showing port A, including a highlighted connection point.text_image
Diagram of an electronic device showing power input, I/O ports, and LRR connector with labeled pins and connection points.text_image
POWER (++) LINE OUT PASS RESET A B C D L H E SPEED + ALMEN BY: TOMENT POWER CABBLE POWER OFFICE BY SERVICE SEAMER SETTING L L H E 1 2 3 L L H E L L H E L L H E L L H E L L H E L L H E L L H E L L H E L L H E L L H E L L H E L L H E L L H E L L H E L L H E L L H E L L H E L L H E L L H E L L H E L L H H L L H H L L H H L L H H L L H H L L H H L L H H L L H H L L H H L L H H L L H H L L H H L L H H L L H H L L H H L L H H L L H H L L H H L L H H L L H H L L H I L L H I L L H I L L H I L L H I L L H I L L H I L L H I L L H I L L H I L L H I L L H I L L H I L L H I L L H I L L H I L L H I L L H I L L H I L L H I L L H J L L H J L L H J L L H J L L H J L L H J L L H J L L H J L L H J L L H J L L H J L L H J L L H J L L H K L L H K L L H K L L H K L L H K L L H K L L H K L L H K L L H K L L H K L L H K L L H K L L H K L L H K L L H K L L H K L L H K L L H K L L H K L L H K L L H M L L H M L L H M L L H M L L H M L L H M L L H M L L H M L L H M L LH M L LH M LNH M LNH Mtext_image
LINE OUT BASS OPTICAL IN SERVICE A 9 C D ADVANCED SETTING 1 2 3 SPEAKER SETTING ONE PAIR - 40 MIN EA, TWO PAIR - 80 MIN EA, CLASS 2 WIRING L L R R L L R R L L R R L L R R L L R Rtext_image
LINE OUT BASS RESET A B C D L L R R + - + - ADVANCED SETTING 1 2 X SPEAKER SETTING ONE PAIR - AD MIN EA, TWO PAIRS - 9D MIN LA. CLASS 2 WIRENG POWER <...> LINE IN R OPTICAL IN SERVICELIITÄNTÄ KUVAUS
text_image
LINE OUT BASS RESET A B C D ADVANCED SETTING 1 2 A SPEAKER SETTING ONE (PAR - 40) MIN 24, TWO PARTS = TO MELLA. CLASS 2 WIRING L L R + - + - - L L R + - + - - L L R + - + - - L L R + - + - - L L R + - + - - L L R + - + - - L L R + - + - - L L R + - + - - L L R + - + - - L L R + - + - - L L R + - + - - L L R + - + - - A B C D ADVANCED SETTINGTILA KYTKIN ASENTO KUVAUS
text_image
LINE OUT RASS RESET A B C D ADVANCED SETTING 1 2 3 SPEAKER SETTING 20% PART - 50% PTA. TWO PARTS - 40% WEA. CLASS 2 WING L L R R L L R R L L R R L L R R L L R R 1 2 3 SPEAKER SETTINGtext_image
BLUETOOTH Bose Music Amplifiertext_image
POWER <...> LINE OUT BASS RESET LINE OUT + - LINE IN R OPTICAL IN SERVICE A B C D L L R R + - + ADVANCED SETTING 1 2 3 SPEAKER SETTING ONE PAIR - 40 MIN EA, TWO PAIRS - 40 MIN EA. CLASS 2 WIRING L L R R + - + L L R R + - + L L R R + - + - CLASS 2 WIRINGWI-FI- JA VIRTATILA
Päävahvistin
text_image
ONE PART - 40 MIN EA. TWO PARTS . 80 MIN EA. CLASS 2 WIRING A B C D L + L - R + - L + L - R + - L + L - R + - 1 2 3 L + L - R + - SPEAKER SETTING LINE OUT BASS RESET OPTICAL IN SERVICE POWER <...> +Bose Bass Module 500: Bose.com/BM500
BOSE SOUNDLINK BLUETOOTH -KAIUTTIMEN TAI BOSE-KUULOKKEIDEN YHDISTÄMINEN SIMPLESYNC™- TEKNOLOGIALLA
text_image
POWER <...> LINE OUT BASS OPTICAL IN SERVICE A B C D ADVANCED SETTING 1 2 3 SPEAKER SETTING ONE PART : ADJ MINEL, TWO PART : RD MINEL, CLASS 2 WIRING L L R R + - + - L L R R + - + - L L R R + - + - L L R R + - + -VAHVISTIMEN TEHDASASETUSTEN PALAUTTAMINEN
text_image
RACK MOUNT FRONT RACK MOUNT FRONTtext_image
Technical diagram of a device rear panel with labeled ports and indicator lightstext_image
Technical diagram of a device panel with screwdriver and labeled ports, showing mechanical assembly and mounting details.KIINNITTÄMINEN TELINEESEEN
natural_image
Technical line drawing of a mechanical assembly with mounting flanges and a central panel (no text or symbols)natural_image
Technical line drawing of a mechanical assembly with mounting flanges and a central rod (no text or symbols)natural_image
Technical line drawing of a metal bracket assembly with mounting holes and internal compartments (no text or symbols)KAIUTTIMEN ASETTAMINEN PAIKALLEEN
text_image
Technical diagram showing the connection between a BOSE device and a battery pack, with labeled components and connection points.natural_image
Technical line drawing of a Bose-branded electronic device with mounting brackets and mounting holes (no text or symbols)text_image
BACK MOUNT FRONT UP WALL MOUNTtext_image
Black Hole UP WALL MOUNTnatural_image
Diagram of a square layout with four surrounding circles, no text or symbols presenttext_image
MAX POINT UP WALL HOUNTnatural_image
Diagram showing two views of a device with internal components and light indicators, no text or symbols present.natural_image
Pure electrical circuit lines without any symbolstext_image
LINE OUT BASS RESET A 3 C D L L R R L L R H L L R H 1 2 3 SPEAKER SETTING ONE YEAR - 40 MIN EA, TWO Pairs - AG MIN EA, CLASS 2 WIRING POWER <...> LINE IN R OPTICAL IN SERVICEnatural_image
Simple line drawing of a flashlight with radiating lines, no text or symbols present.CONNEXION DES PRODUITS BOSE
natural_image
Front view of a white electronic device labeled 'BOSE' with a small circular icon on the left (no additional text or symbols)natural_image
Simple line drawing of a U-shaped tube with two connectors (no text or symbols)

text_image
BACK MOUNT FRONT UP WALL MOUNTnatural_image
Simple line drawing of a rectangular panel with three circular holes, no text or symbols present.text_image
Diagram of a device rear panel with labeled ports and indicators, including a magnified view of port A and a highlighted connection to LLRR.text_image
Diagram of an electronic device showing power input, port labels, and a connected I-LRR terminal block with cable connections.text_image
POWER <...> LINE OUT BASS INPUT A B C D ADVANCED SETTING 1 2 3 SPEAKER SETTING ONE PAIR - 40 MIN EA, IWO PAIRS - 80 MIN EA. CLASS 2 WIRNG L L R R L L R R L L R R L L R Rnatural_image
Diagram showing a USB cable connecting to four ports (no text or symbols present)Routeur
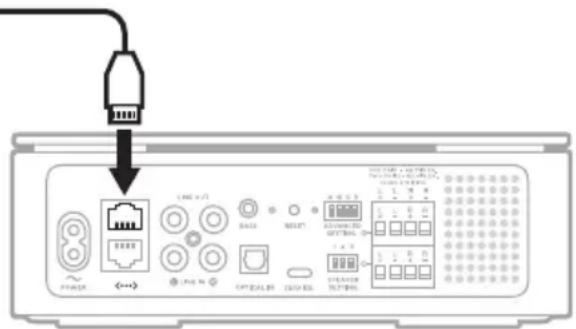
text_image
Diagram of an electronic device rear panel with labeled ports and indicators, showing connections to a USB port.Amplificateur principal
text_image
POWER <...> LINE OUT BASS RESET OPTICAL IN SERVICE A B C D ADVANCED SETTING 1 2 X SPEAKER SETTING ONE PAIR - 40 MIN EA, TWO PAIRS - 90 MIN LA. CLASS 2 WIRING L L R R + - + - L L R R + - + - L L R R + - + - L L R R + - + -PORT DESCRIPTION
text_image
LINE OUT BASS RESET A B C D ADVANCED SETTING 1 2 3 SPEAKER SETTING ONE PAR - 40 PN 24, TWO PAR - 80 MIN EA. CLASS Z WITING L L H L L R L L R L L R L L R A B C D ADVANCED SETTINGMODE COMMUTATEUR POSITION DESCRIPTION
text_image
LINE OUT RASS RESET A B C D ADVANCED SETTING 1 2 3 SPEAKER SETTING SUPPORT - 50 MHz, TWO PARE - 60 MHz, CLASS Z WING L L R R + - + - L L R R + - + - L L R R + - + - L L R R + - + - L L R R + - + - L L R R + - + - L L R R + - + - L L R R + - + - L L R R + - + - L L R R + - + - L L R R + - + - L L R R + - + - SPEAKER SETTINGtext_image
BLUETOOTH Bose Music Amplifiertext_image
LINE OUT BASS RESET A B C D L L R R + - + - ADVANCED SETTING 1 2 3 SPEAKER SETTING SINE PAIR + 4D MIN EA. TWO PARTS + 4D MIN EA. CLASS 2 WIRING L L R R + - + -ÉTAT DE LA CONNEXION WI-FI ET ÉTAT DE L'ALIMENTATION
Amplificateur principal
text_image
POWER <+••> LINE OUT BASS LINE IN OPTICAL IN SERVICE A B C D ADVANCED SETTING 1 2 3 SPEAKER SETTING ONE PART - ADMINICAL TWO PART - RD MIN EX, CLASS 2 WIRING L + L + R + L + L + R + L + L + R + L + L + R + L + L + R + L + L + R + L + L + R + L + L + R + L + L + R + L + L + R + L + L + R + L + L + R + L + L + R + L + L + R + L + L + R + L + L + R + L + L + R + L + L - R + L + L - R + L + L - R + L + L - R + L + L - R + L + L - R + L + L - R + L + L - R + L + L - R + L + L - R + L + L - R + L + L - R + L + L - R + L + L - R + L + L - R + L + L - R + L + L - R + L > L > L SPEAKER SETTINGRESTAURATION DES RÉGLAGES PAR DÉFAUT DE L'AMPLIFICATEUR
text_image
LINE OUT BASS RESET A B C D L L R R + - + - L L R R + - + - 1 2 3 SPEAKER SETTING ONE PARE - 40 MIN EA, TWO PARES - 80 MIN EX, CLASS 2 WIRING POWER <...> LINE IN R OPTICAL IN SERVICEtext_image
RACK MOUNT FRONT RACK MOUNT FRONTtext_image
Technical diagram of a device rear panel with labeled ports and indicator lightstext_image
Technical diagram of a device panel with labeled ports and a screwdriver, showing mechanical assembly and component layout.FIXATION AU RACK
natural_image
Technical line drawing of a mechanical assembly with mounting holes and a central connector (no text or symbols)natural_image
Technical line drawing of a mechanical assembly with mounting flanges and a central cylindrical component (no text or symbols)natural_image
Technical line drawing of a metal bracket assembly with mounting holes and internal compartments (no text or symbols)POSITIONNEMENT DE L'AMPLIFICATEUR
text_image
Technical diagram showing the connection between a device labeled 'BOSE' and its internal components, with annotations for mounting devices.natural_image
Technical line drawing of a Bose-branded electronic device with mounting brackets and mounting holes (no text or symbols)text_image
BACK MOUNT FRONT UP WALL MOUNTtext_image
MAX MOUNT UP WALL MOUNTtext_image
BACK MOUNT FRONT UP WALL MOUNTnatural_image
Abstract geometric diagram with four rounded rectangles and a central square, no text or symbols present
text_image
MAX. FLIGHT UP WALL HOUNT DOWNnatural_image
Diagram showing two views of a device with internal components and light indicators, no text or symbols present.natural_image
Pure electrical circuit lines without any symbolstext_image
LINE OUT BASS RESET A 9 C D L L R R L L R H L L R H 1 2 3 SPEAKER SETTING ONE PART - 40 MIN EA, TWO PART - 40 MIN EA, CLASS 2 WIRING POWER <...> LINE IN R OPTICAL IN SERVICEnatural_image
Simple line drawing of a plug with radiating lines, no text or symbols presentImportatore per la Cina: Bose Electronics (Shanghai) Company Limited, Level 6, Tower D, No. 2337 Gudai Rd. Minhang District, Shanghai 201100
Importatore per l'UE: Bose Products B.V., Gorslaan 60, 1441 RG Purmerend, Paesi Bassi
Importatore per il Messico: Bose de México S. de R.L. de C.V., Avenida Prado Sur #150, Piso 2, Interior 222 y 223, Colonia Lomas de Chapultepec V Sección, Miguel Hidalgo, Ciudad de México, C.P. 11000. Numero di telefono: +5255 (5202) 3545
Importatore per Taiwan: Bose Limited Taiwan Branch (H.K.), 9F., No. 10, Sec. 3, Minsheng E. Road, Zhongshan Dist. Taipei City 10480, Taiwan. Numero di telefono: +886-2-2514 7676
www.spotify.com/connect/third-party-licenses
STREAMING AUDIO CON CHROMECAST 31
STREAMING AUDIO CON AIRPLAY
natural_image
Front view of a white electronic device labeled 'BOSE' with a small circular icon on the left (no additional text or symbols)natural_image
Simple line drawing of a U-shaped tube with two connectors (no text or symbols)
natural_image
Simple line drawing of a rectangular panel with three circular holes, no text or symbols present.text_image
Diagram of an electronic device rear panel with labeled ports and a magnified view showing port A, including a highlighted component.text_image
Diagram of an electronic device showing a power connector connected to a LRR terminal with labeled ports and wiring.text_image
POWER LINE OUT BAS3 RSCT A B C D L L H B 2.2 T L L R D SPEAKER 1 2 T L L H B L L H B L L H B L L H B L L H B L L H B L L H B L L H B L L H B L L H B L L H B L L H B L L H B L L H B L L H B L L H B L L H B L L H B L L H B L L H B L L H A L L H A L L H A L L H A L L H A L L H A L L H A L L H A L L H A L L H A L L H A L L H A L L H A L L H A L L H A L L H A L L H A L L H A L L H A L L H A L L H B L L H B L L H B L L H B L L H B L L H B L L H B L L H B L L H B L L H B L L H B L L H B L L H B L L H B L L H B L L H B L L H B L L H B L L H B L L H C L L H C L L H C L L H C L L H C L L H C L L H C L L H C L L H C L L H C L L H C L L H C L L H C L L H C L L H C L L H C L L H C L L H C L L H C L L H C L L H D L L H D L L H D L L H D L L H D L L H D L L H D L L H D L L H D L L H D L L H D L L H D L L H D L L H D L L H D L L H D L L H D L L H D L L H D L L H D L L H E L L H E L L H E L L H E L L H E L L H E L L H E L L H E L L H E L L H E L L H Etext_image
POWER <...> LINE OUT BASS OPTICAL IN SERVICE A B C D ADVANCED SETTING 1 2 3 SPEAKER SETTING ONE PAIR - 40 MIN EA. TWO PAIRS - 80 MIN EA. CLASS 2 WIRNG L L R R L L R R L L R R L L R Rnatural_image
Diagram showing a USB cable connecting to four ports (no text or symbols present)Router

text_image
Diagram of an electronic device rear panel with labeled ports, connectors, and a USB cable connection indicator.text_image
LINE OUT BASS RESET A B C D L L R R + - + - ADVANCED SETTING 1 2 X SPEAKER SETTING ONE PAIR - 40 MIN EA, TWO PAIRS - 90 MIN LA. CLASS 2 WIRENG POWER <...> LINE IN R OPTICAL IN SERVICEPORTA DESCRIZIONE
text_image
LINE OUT BASS RESET A B C D ADVANCED SETTING 1 2 3 SPEAKER SETTING ONE PAIR - AD ON IN FOR PAIR + AS NEEA CLASS Z WITING L L R H L L R H L L R H L L R H L L R H A B C D ADVANCED SETTINGSTREAMING AUDIO DAL CENTRO DI CONTROLLO
STREAMING AUDIO DA UN'APP
text_image
BLUETOOTH Bose Music Amplifiertext_image
LINE OUT BASS RESET A B C D ADVANCED SETTING 1 2 3 SPEER SETTING SHE 7 AIR + 4D MIN EA, TWO PARES + 80 MIN EA, CLASS 2 WIRING L L R R + - + - L L R R + - + - L L R R + - + - L L R R + - + - L L R R + - + -text_image
ONE PAR - 40 MIN EA. TWO PARTS - 80 MIN EA. CLASS 2 WIRING A B C D L L R R + - + - L L R R + - + - L L R R + - + - 1 2 3 L L R R + - + - SPEAKER SETTING POWER <...> LINE OUT BASS RESET LINE IN R OPTICAL IN SERVICEBose Bass Module 500: Bose.com/BM500
CONNESSIONE DI UN DIFFUSORE BLUETOOTH SOUNDLINK BOSE O DI CUFFIE BOSE MEDIANTE LA TECNOLOGIA SIMPLESYNC™
Visitare: ____ worldwide.Bose.com/contact
SINTOMO SOLUZIONE
text_image
POWER <...> LINE OUT BASS OPTICAL IN SERVICE A B C D ADVANCED SETTING 1 2 3 SPEAKER SETTING ONE PART : 40 MIN EA, DWO PART : 80 MIN EA, CLASS 2 WIRING L L R R + - + - L L R R + - + - L L R R + - + - L L R R + - + -RIPRISTINO DELL'AMPLIFICATORE ALLE IMPOSTAZIONI DI PREDEFINITE
text_image
LINE OUT BASS RESET A B C D L L R R + - + - L L R R + - + - 1 2 3 SPEAKER SETTING ONE PARK - AD HINCEA, TWO PARKS - AD MINES, CLASS 2 WIRING. + - + - - L L R R + - + - - L L R R + - + - - L L R R + - + - -text_image
RACK MOUNT FRONT RACK MOUNT FRONTtext_image
Technical diagram of a device rear panel with labeled ports and indicator lightstext_image
Technical diagram of a device panel with screwdriver and labeled components, showing mounting points and assembly instructions.FISSAGGIO AL RACK
natural_image
Technical line drawing of a mechanical assembly with mounting holes and a bracket (no text or symbols)natural_image
Technical line drawing of a mechanical assembly with mounting flanges and a central cylindrical component (no text or symbols)natural_image
Technical line drawing of a metal bracket assembly with mounting holes and internal compartments (no text or symbols)text_image
Technical diagram showing the connection between a BOSE device and its internal components, with labeled parts and annotations.natural_image
Technical line drawing of a Bose-branded electronic device with mounting brackets and mounting holes (no text or symbols)text_image
BACK MOUNT FRONT UP WALL MOUNTtext_image
BACK MOUNT UP WALL MOUNTtext_image
BACK HOUNT UP WALL MOUNTFISSAGGIO DELL'AMPLIFICATORE
natural_image
Diagram of a four-positioned room layout with four square windows and a central square (no text or symbols)
text_image
FOUNT SAS-ROUND UP WALL HOUNTnatural_image
Technical line drawing of two rectangular electronic components with internal circuitry and light indicators (no text or symbols)natural_image
Pure electrical circuit lines without any symbolstext_image
LINE OUT BASS RESET A 9 C D L L R R ADVANCED SETTING 1 2 3 SPEAKER SETTING ONE PART - 40 MIN EA, TWO PART - 80 MIN EA, CLASS 2 WIRING POWER <...> LINE IN R OPTICAL IN SERVICEnatural_image
Simple line drawing of a plug with radiating lines, enclosed in a circle (no text or symbols)Kínai importör: Bose Electronics (Shanghai) Company Limited, Level 6, Tower D, No. 2337 Gudai Rd. Minhang District, Shanghai 201100
EU-importör: Bose Products B.V., Gorslaan 60, 1441 RG Purmerend, Hollandia
Tajvani importör: Bose Limited Taiwan Branch (H.K.), 9F., No. 10, Sec. 3, Minsheng E. Road, Zhongshan Dist. Taipei City 10480, Taiwan Phone Number: +886-2-2514 7676
natural_image
Front view of a white electronic device labeled 'BOSE' with a small circular icon on the left (no additional text or symbols)natural_image
Simple line drawing of a U-shaped tube with two connectors (no text or symbols)
natural_image
Simple line drawing of a rectangular panel with three circular holes, no text or symbols present.text_image
Diagram of an electronic device rear panel with labeled ports and a zoomed-in section view showing port labels like 'A' and 'LLRR'.text_image
Diagram of an electronic device showing power input, port labels, and a connected LHR component with cable connections.text_image
POWER <...> LINE OUT BASS MOUNT L LINE IN R OPTICAL IN SERVICE SPEAKER SETTING A B C D ADVANCED SETTING 1 2 3 ONE PAIR - 40 MIN EA, IWO PARTS - 80 MIN EA, CLASS 2 WIRING L L R R L L R R L L R R L L R R L L R Rtext_image
LINE OUT BASS RESET A B C D L L R R + - + - ADVANCED SETTING 1 2 X SPEAKER SETTING ONE PAIR - AD MIN EA, TWO PAIRS - 9D MIN LA. CLASS 2 WIRENG POWER <...>PORT LEÍRÁS
text_image
LINE OUT BASS RESET A B C D ADVANCED SETTING 1 2 3 SPEAKER SETTING ONE PAR - 40 PN 24, TWO PAR - 80 MIN EA. CLASS Z WITING L L H L L R L L R L L R L L R L L R A B C D ADVANCED SETTINGÜZEMMÓD KAPCSOLÓ POZÍCIÓ LEÍRÁS
text_image
BLUETOOTH Bose Music Amplifiertext_image
LINE OUT BASS RESET A B C D ADVANCED SETTING 1 2 3 SPEAKER SETTING ONE 7AIR - 40 MIN EA, TWO PAYS - 60 MIN EA, CLASS 2 WIRING L L R R + - + - L L R R + - + - L L R R + - + - L L R R + - + -text_image
LINE OUT BASS RESET A B C D L L R R L L R R L L R R 1 2 3 SPEAKER SETTING ONE PART - 40 MIN CA. TWO PANG - 60 MIN CA. CLASS 2 WIRING POWER <...> LINE IN R OPTICAL IN SERVICEBose Bass Module 500: Bose.com/BM500
A BOSE SOUNDLINK BLUETOOTH-HANGSZÓRÓ VAGY A BOSE FEJHALLGATÓ CSATLAKOZTATÁSA A SIMPLESYNC™ TECHNOLÓGIA HASZNÁLATÁVAL
text_image
POWER <+••> LINE OUT BASS LINE IN OPTICAL IN SERVICE A B C D ADVANCED SETTING 1 2 3 SPEAKER SETTING ONE PART - 40 MINEA, TWO PARTS - 60 MINEA, CLASS 2 WIRING L L R R + - + - L L R R + - + - L L R R + - + - L L R R + - + -text_image
POWER <...> LINE OUT LINE IN R OPTICAL IN SERVICE BASS RESET A B C D ADVANCED SETTING 1 2 3 SPEAKER SETTING ONE PART - 40 MIN EX, TWO PARTS - 80 MIN EX, CLASS 2 WIRING L L R R + - + - L L R R + - + - L L R R + - + - L L R R + - + -text_image
RACK MOUNT FRONT RACK MOUNT FRONTtext_image
Technical diagram of a computer monitor rear panel with labeled ports and indicatorstext_image
Technical diagram of a computer chassis with labeled components and a screwdriver indicating rotationCSATLAKOZTATÁS AZ ÁLLVÁNYHOZ
natural_image
Technical line drawing of a mechanical assembly with mounting flanges and a central component (no text or symbols)natural_image
Technical line drawing of a mechanical assembly with mounting flanges and internal components (no text or symbols)natural_image
Technical line drawing of a metal bracket assembly with mounting holes and internal compartments (no text or symbols)text_image
Technical diagram showing the connection between a BOSE device and its internal components, with labeled parts and annotations.natural_image
Technical line drawing of a Bose-branded electronic device with mounting brackets and mounting holes (no text or symbols)text_image
BACK MOUNT FRONT UP WALL MOUNTtext_image
BACK MOUNT UP WALL MOUNTtext_image
BACK MOUNT FRONT UP WALL MOUNTnatural_image
Diagram of a four-positioned device with four square buttons arranged around a central square (no text or symbols)text_image
SCKH HOLT UP WALL HOUNT FRONTnatural_image
Diagram showing two views of a device with internal components and light indicators, no text or symbols present.natural_image
Pure electrical circuit lines without any symbolstext_image
LINE OUT BASS RESET A 9 C D L L R R L L R H L L R H 1 2 3 SPEAKER SETTING ONE PART - 40 MIN EA, TWO PARTS - 80 MIN EA, CLASS 2 WIRING POWER <...> LINE IN R OPTICAL IN SERVICEnatural_image
Simple line drawing of a flashlight with radiating lines, no text or symbols present.Importør for Kina: Bose Electronics (Shanghai) Company Limited, Level 6, Tower D, No. 2337 Gudai Rd. Minhang District, Shanghai 201100
Importør for EU: Bose Products B.V., Gorslaan 60, NL-1441 RG Purmerend, Nederland
Importør for Taiwan: Bose Limited Taiwan Branch (H.K.), 9F., No. 10, Sec. 3, Minsheng E. Road, Zhongshan Dist. Taipei City 10480, Taiwan Telefonnummer: +886-2-2514 7676
Importør for Storbritannia: Bose Limited, Bose House, Quayside Chatham Maritime, Chatham, Kent, ME4 4QZ, Storbritannia
Strøminngang: 100–240 V ∼ 50/60 Hz, 240 W
STR∅MME LYD MED CHROMEKAST 31
STR∅MME LYD MED AIRPLAY
KOBLE TIL BOSE-PRODUKTER
Koble til en Bose Bass Module.... 40
Koble til Bose SoundLink Bluetooth speaker eller Bose-hodetelefoner med SimpleSync™-teknologi 41
Fordeler 41
Kompatible produkter.... 41
STELL OG VEDLIKEHOLD
natural_image
Front view of a white electronic device labeled 'BOSE' with a small circular icon on the left (no additional text or symbols)Bose Music Amplifier Strømledning*

natural_image
Simple line drawing of a U-shaped tube with two connectors (no text or symbols)

Rackskruer for rackmontering (3) Tilkoblingsskruer for rackmontering (3)
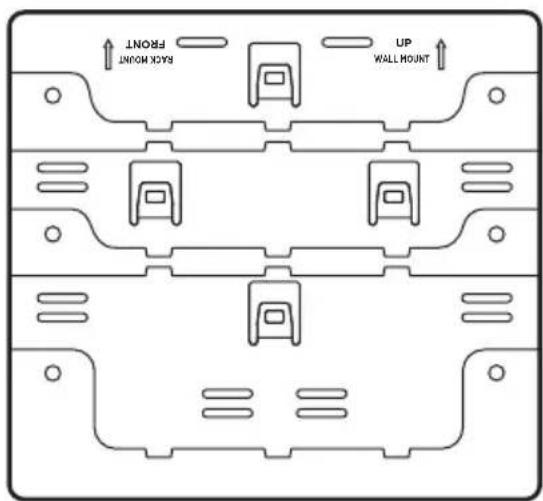
text_image
SACK MOUNT FRONT UP WALL MOUNTMonteringsbrakett Rackbrakett
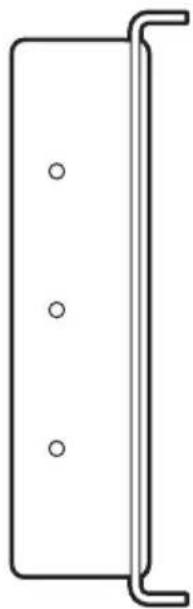
natural_image
Simple line drawing of a rectangular panel with three circular holes, no text or symbols present.*Kan leveres med flere strømledninger. Bruk strømledningen for ditt område.
text_image
Diagram of an electronic device rear panel with labeled ports and a magnified view showing port A, including a highlighted component.text_image
Diagram of an electronic device showing power input, switch, and output with labeled ports and a magnified view of component A.text_image
B (+) - 1.2 2.3 3.4 4.5 5.6 6.7 7.8 8.9 9.0 10.1 11.2 12.3 13.4 14.5 15.6 16.7 17.8 18.9 19.0 20.1 21.2 22.3 23.4 24.5 25.6 26.7 27.8 28.9 29.0 30.1 31.2 32.3 33.4 34.5 35.6 36.7 37.8 38.9 39.0 40.1 41.2 42.3 43.4 44.5 45.6 46.7 47.8 48.9 49.0 50.1 51.2 52.3 53.4 54.5 55.6 56.7 57.8 58.9 59.0 60.1 61.2 62.3 63.4 64.5 65.6 66.7 67.8 68.9 69.0 70.1 71.2 72.3 73.4 74.5 75.6 76.7 77.8 78.9 79.0 80.1 81.2 82.3 83.4 84.5 85.6 86.7 87.8 88.9 89.0text_image
POWER (++) LINE OUT PASS RESET A B C D L H E SINCE & SENSIC OFFICE IN SERVICE SEASER SETTING L L H E 1 2 3 L L H E L L H E L L H E L L H E L L H E L L H E L L H E L L H E L L H E L L H E L L H E L L H E L L H E L L H E L L H E L L H E L L H E L L H E L L H E L L H E L L H H L L H H L L H H L L H H L L H H L L H H L L H H L L H H L L H H L L H H L L H H L L H H L L H H L L H H L L H H L L H H L L H H L L H H L L H H L L H H L L HH L L HH L L HH L L HH L L HH L L HH L L HH L L HH L L HH L L HH L L HH L L HH L L HH L L HH L L HH L L HH L L HH L L HH L L HH L L HH L L HHH L L HHH L L HHH L L HHH L L HHH L L HHH L L HHH L L HHH L L HHH L L HHH L L HHH L L HHH L L HHH L L HHH L L HHH L L HHH L L HHH L L HHH L L HHH L L HHH L L H HH L L HH L L HH L L HH L L HH L L HH L L HH L L HH L L HH L L HH L L HH L L HH L L HH L L HH L L HH L L HH L L HH L L HH L L HH L L HH L L HH L L HH L L HH L L HH L L HH L L HH L I 2 3 4 5 6 7 8 9 10 11 12 13 14 15 16 17 18 19 20 21 22 23 24 25 26 27 28 29 30 31 32 33 34 35 36 37 38 39 40 41 42 43 44 45 46 47 48 49 50 51 52 53 54 55 56 57 58 59 60 61 62 63 64 65 66 67 68 69 70 71 72 73 74 75 76 77 78 79 80 81 82 83 84 85 86 87 88 89 90 91 92 93 94 95 96 97 98 99 100text_image
POWER <-->> LINE OUT BASS OPTICAL IN SERVICE A B C D ADVANCED SETTING 1 2 3 SPEAKER SETTING ONE PAIR - 40 MIN EA. TWO PAIRS - 80 MIN EA. CLASS 2 WIRNG L L R R L L R R L L R R L L R R L L R Rtext_image
LINE OUT BASS RESET A B C D L L R R + - + - ADVANCED SETTING 1 2 X SPEAKER SETTING ONE PAIR - AD MIN EA, TWO PAIRS - 9D MIN LA. CLASS 2 WIRENG POWER <...>PORT BESKRIVELSE
text_image
LINE OUT BASS RESET A B C D ADVANCED SETTING 1 2 3 SPEAKER SETTING ONE (PAR - 40) MIN.14, MIN.14 = 10 MIN.14, CLASS 2 WITING L L R R L L R L L R L L R L L R L L R L L R L L R L L R L L R L L R L L R L L R L L R L L R L L R L L R L L R L L R L L R L L R L L R L L R L L R L L R L L R L A B C D ADVANCED SETTINGMODUS BRYTER STILLING BESKRIVELSE
text_image
BLUETOOTH Bose Music AmplifierKOBLE TIL MOBILENHETER PÅ NYTT
text_image
POWER <...> LINE OUT BASS RESET LINE OUT B LINE IN R OPTICAL IN SERVICE A B C D L L R R + - + ADVANCED SETTING 1 2 3 SPEAKER SETTING ONE PAIR - 40 MIN EA, TWO PAIRS - 40 MIN EA. CLASS 2 WIRING L L R R + - + + - L L R R + - + + - L L R R + - + - + - + -WI-FI- OG STR∅MSTATUS
Hovedforsterker
KOBLE TIL EN BOSE BASS MODULE
Bose Bass Module 500: Bose.com/BM500
KOBLE TIL BOSE SOUNDLINK BLUETOOTH SPEAKER ELLER BOSE-HODETELEFONER MED SIMPLESYNC™-TEKNOLOGI
- Bose SoundLink Revolve+ Bluetooth speaker
- Bose SoundLink Mini Bluetooth speaker
- Bose SoundLink Color Bluetooth speaker
- Bose Noise Cancelling Headphones 700
- Bose QuietComfort 35 wireless headphones
text_image
POWER <...> LINE OUT BASS LINE IN OPTICAL IN SERVICE A B C D ADVANCED SETTING 1 2 3 SPEAKER SETTING ONE PART - AD MINICAL, TWO PARTS - RD MINICAL, CLASS 2 WIRING L + L + R + + - + - L + L + R + L + L + R + L + L + R + L + L + R + L + L + R + L + L + R + L + L + R + L + L + R + L + L + R + L + L + R + L + L + R + L + L + R + L + L + R + L + L + R + L + L + R + L + L + R + L + L + R + L + L - R + L + L - R + L + L - R + L + L - R + L + L - R + L + L - R + L + L - R + L + L - R + L + L - R + L + L - R + L + L - R + L + L - R + L + L - R + L + L - R + L + L - R + L + L - R + L + L - R + L / A / B / C / D / E / F / G / H / I / J / K / L / M / N / O / P / Q / R / S / T / U / V / W / X / Y / ZGJENOPPRETTE FABRIKKINNSTILLINGENE PÅ FORSTERKEREN
text_image
LINE OUT BASS RESET A B C D L L R R + - + - L + L + R + - + - 1 2 3 SPEAKER SETTING ONE PART - AD MIN EX, TWO PARTS - AD MIN EX, CLASS 2 WIRING POWER <...> LINE IN R OPTICAL IN SERVICEtext_image
RACK MOUNT FRONT RACK MOUNT FRONTtext_image
Technical diagram of a device rear panel with labeled ports and indicator lightstext_image
Technical diagram of a device panel with labeled components and a screwdriver indicating rotationFESTE TIL RACKET
natural_image
Technical line drawing of a mechanical assembly with mounting flanges and a connector housing (no text or symbols)natural_image
Technical line drawing of a mechanical assembly with mounting flanges and a central rod (no text or symbols)natural_image
Technical line drawing of a metal bracket assembly with mounting holes and internal compartments (no text or symbols)PLASSERE FORSTERKEREN
text_image
Technical diagram showing the connection between a BOSE device and a battery pack, with labeled components and connection points.natural_image
Technical line drawing of a Bose-branded electronic device with mounting brackets and mounting holes (no text or symbols)text_image
BACK MOUNT FRONT UP WALL MOUNTtext_image
BACK MOUNT UP WALL MOUNTtext_image
BACK HOUNT UP WALL MOUNTFESTE FORSTERKEREN
natural_image
Diagram of a square layout with four surrounding circles, no text or symbols present
text_image
MAX MOUNT FOUNT UP WALL MOUNT UPForsterkerens underside Monteringsbrakett
natural_image
Diagram showing two views of a device with internal components and light indicators, no text or symbols present.natural_image
Pure electrical circuit lines without any symbolsFORSIKTIG: Hvis du setter inn pluggen med hetten på, kan det føre til skade på pluggen og/eller porten.
text_image
LINE OUT BASS RESET A 3 C D L L R R L L R H L L R H 1 2 3 SPEAKER SETTING ONE PAIR - 40 MIN EA, TWO PAIRS - 40 MIN EA, CLASS 2 WIRING POWER <...> LINE IN R OPTICAL IN SERVICEnatural_image
Illustration of a plug with radiating lines indicating electrical connections (no text or symbols)Importer — Chiny: Bose Electronics (Shanghai) Company Limited, Level 6, Tower D, No. 2337 Gudai Rd. Minhang District, Shanghai 201100
Importer — UE: Bose Products B.V., Gorslaan 60, 1441 RG Purmerend, The Netherlands
Importer — Tajwan: Bose Limited Taiwan Branch (H.K.), 9F., No. 10, Sec. 3, Minsheng E. Road, Zhongshan Dist. Taipei City 10480, Taiwan Numer telefonu: +886-2-2514 7676
Importer — Wielka Brytania: Bose Limited, Bose House, Quayside Chatham Maritime, Chatham, Kent, ME4 4QZ, United Kingdom
Zasilanie: 100–240 V ∼ 50/60 Hz, 240 W
natural_image
Front view of a white electronic device labeled 'BOSE' with a small circular mark and a plus symbol on the front panel (no additional text or symbols)natural_image
Simple line drawing of a U-shaped tube with two connectors (no text or symbols)
natural_image
Simple line drawing of a rectangular panel with three circular holes, no text or symbols present.text_image
Diagram of an electronic device rear panel with labeled ports and a zoomed-in section view showing port labels like 'A' and 'LRR'.text_image
Diagram of an electronic device showing labeled ports and connectors, with a magnified view highlighting component A.text_image
Diagram of a computer monitor with labeled ports and connectors, showing a zoomed-in view of the front panel.text_image
POWER (++) + LINK OUT RASS RESET A B C D ADVANCED OPTIONS 1.2.3 SPEAKER SETTINGS L L N P L L R L L R L L R L L R L L R L L R L L R L L R L L R L L R L L R L L R L L R L L R L L R L L R L L R L L R L L R L L R L L R L L R L L R L L R L L R L L A 2 WIREI C-ALL 2 WIREItext_image
POWER <...> LINE OUT BASS LINE IN R OPTICAL IN SERVICE A S C D ADVANCED SETTING 1 2 3 SPEAKER SETTING ONE PAIR - 40 MHz EA, IWO PAIRS - 80 MHz EA, CLASS 2 WIRING L + L - R + - L + L - R + - L + L - R + - L + L - R + - L + L - R + - L + L - R + -natural_image
Diagram showing a USB cable connecting to four ports (no text or symbols present)Router

text_image
Diagram of an electronic device rear panel with labeled ports and indicators, showing connections to a USB port.Wzmacniacz główny
text_image
POWER <...> LINE OUT BASS RESET OPTICAL IN SERVICE A B C D ADVANCED SETTING 1 2 X SPEAKER SETTING ONE PAIR - AD MIN EA, TWO PAIRS - 9D MIN LA. CLASS 2 WIRENG L L R R + - + - L L R R + - + - L L R R + - + - L L R R + - + -ZŁĄCZE OPIS
text_image
LINE OUT BASS RESET A B C D ADVANCED SETTING 1 2 3 SPEAKER SETTING ONE PAR - 40 PN 24, TWO PAR - 80 MIN EA. CLASS Z WITING L L H L L R L L R L L R L L R L L R A B C D ADVANCED SETTINGtext_image
LINE OUT RASS RESET A B C D ADVANCED SETTING 1 2 3 SPEAKER SETTING 2017EAT - COINING, THO BARS - ADJUNED. CLASS 2 WINDING L L R R + - + - L L R R + - + - L L R R + - + - L L R R + - + - L L R R + - + - L L R R + - + - L L R R + - + - L L R R + - + - L L R R + - + - L L R R + - + - L L R R + - + - L L R R + - + - SPEAKER SETTINGtext_image
BLUETOOTH Bose Music AmplifierSTAN BLUETOOTH I BŁĘDY
Bose Bass Module 500: Bose.com/BM500
POŁĄCZENIE Z GŁOŚNIKIEM BOSE BLUETOOTH SOUNDLINK LUB SŁUCHAWKAMI BOSE PRZY UŻYCIU TECHNOLOGII SIMPLESYNC™
text_image
LINE OUT BASS OPTICAL IN SERVICE A B C D ADVANCED SETTING 1 2 3 SPEAKER SETTING ONE PART, 40 MIN EA, TWO PARTS - RD HIND EA, CLASS 2 WIRING L L R R + - + - L L R R + - + - L L R R + - + - L L R R + - + - L L R R + - + -PRZYWRÓCENIE DOMYŚLNYCH USTAWIEN FABRYCZNYCH WZMACNIACZA
text_image
LINE OUT BASS RESET A B C D L L R R + - + - L L R R + - + - 1 2 3 SPEAKER SETTING ONE PARK - 40 MVEEA, TWO PARS - 80 MIN EX, CLASS 3 WIRING POWER <...> LINE IN R OPTICAL IN SERVICEtext_image
RACK MOUNT FRONT RACK MOUNT FRONTtext_image
Technical diagram of a device rear panel with labeled ports and indicator lightstext_image
Technical diagram of a computer chassis with screwdriver and labeled components, showing a 324-bit drive mechanism.MOCOWANIE DO SZAFY NA WZMACNIACZ
natural_image
Technical line drawing of a mechanical assembly with mounting flanges and a bracket (no text or symbols)natural_image
Technical line drawing of a mechanical assembly with mounting flanges and internal components (no text or symbols)natural_image
Technical line drawing of a metal bracket assembly with mounting holes and internal compartments (no text or symbols)UMIESZCZANIE WZMACNIACZA
text_image
Technical diagram showing the connection between a BOSE device and a battery pack, with labeled components and connection points.natural_image
Line drawing of a Bose-branded electronic device with mounting brackets and mounting holes (no text or symbols)text_image
BACK MOUNT FROUNT UP WALL MOUNTtext_image
BACK MOUNT UP WALL MOUNTtext_image
BACK HOUNT UP WALL MOUNTMOCOWANIE WZMACNIACZA
natural_image
Diagram of a four-positioned room layout with four square windows and a central square (no text or symbols)
text_image
MAX MOUNT UP WALL MOUNT FRONTnatural_image
Technical line drawing of two rectangular electronic components with internal circuitry and light indicators (no text or symbols)natural_image
Pure electrical circuit lines without any symbolstext_image
LINE OUT BASS RESET A 3 C D L L R R L L R H 1 2 3 SPEAKER SETTING ONE YEAR - 40 MIN EA, TWO Pairs - 40 MIN EA, CLASS 2 WIRING POWER <...> LINE IN R OPTICAL IN SERVICEnatural_image
Simple line drawing of a flashlight with radiating lines, no text or symbols present.Importador na China: Bose Electronics (Shanghai) Company Limited, Level 6, Tower D, No. 2337 Gudai Rd. Minhang District, Shanghai 201100
Importador na CE: Bose Products B.V., Gorslaan 60, 1441 RG Purmerend, The Netherlands
Acoplar o rack.... 53
Posicionar o amplificador.... 55
APÊNDICE B: MONTAGEM NA PAREDE
natural_image
Front view of a white electronic device labeled 'BOSE' with a small circular mark and plus symbol on the front panel (no additional text or symbols)natural_image
Simple line drawing of a U-shaped tube with two connectors (no text or symbols)
text_image
BACK MOUNT FRONT UP WALL MOUNTnatural_image
Simple line drawing of a rectangular panel with three circular holes, no text or symbols present.Visite: ____support.Bose.com/BMA
RECOMENDAÇÕES
text_image
Diagram of a printer front panel with labeled ports and a magnified view showing port A, including a highlighted section and a close-up of the main component.text_image
Diagram of an electronic device showing power input, switch, and output with labeled ports and a magnified view highlighting component A.text_image
red Ethernet.Roteador

text_image
Diagram of an electronic device rear panel with labeled ports and indicators, showing connections via a cable outlet.Amplificador principal
text_image
POWER <...> LINE OUT BASS RESET A B C D ADVANCED SETTING 1 2 X SPEAKER SETTING ONE PAIR - 40 MIN EA, TWO PAIRS - 90 MIN LA. CLASS 2 WIRENG L L R R + - + - L L R R + - + - L L R R + - + - L L R R + - + -PORTA DESCRIÇÃO
text_image
LINE OUT BASS RESET A B C D ADVANCED SETTING 1 2 3 SPEAKER SETTING ONE PAR - 40 PN 24, TWO PAR - 30 MIN 24, CLASS Z WITING L L H - L L R - L L R - L L R - L L R - L L R - L L R - L L R - L L R - L L R - L L R - L L R - L L R - L L R - L L R - L L R - L L R - L L R - L L R - L L R - L L R - L L R - L L R - L L R - L L R - L L R - L L A B C D ADVANCED SETTINGtext_image
LINE OUT RASS RESET A B C D ADVANCED SETTING 1 2 3 SPEAKER SETTING OUT PART, CONTROLS, TWO PARTS, OR ITEMS, CLASS 2 ITEMS 1 2 3 SPEAKER SETTINGtext_image
BLUETOOTH Bose Music Amplifiertext_image
LINE OUT BASS RESET A B C D ADVANCED SETTING 1 2 3 SPEAKER SETTING ONE 7AIR - 40 MIN EA, TWO PAYS - 60 MIN TA. CLASS 2 WIRING L L R R + - + - L L R R + - + - L L R R + - + - L L R R + - + -STATUS DO WI-FI E DE ENERGIA
Amplificador principal
Bose Bass Module 500: Bose.com/BM500
CONECTAR UM ALTO-FALANTE BOSE SOUNDLINK BLUETOOTH OU FONES DE OUVIDO BOSE USANDO A TECNOLOGIA SIMPLESYNC™
Visite: ____ support.Bose.com/BMA
GARANTIA LIMITADA
Visite ____ worldwide.Bose.com/contact
SINTOMA SOLUÇÃO
text_image
POWER <...> LINE OUT BASS LINE IN OPTICAL IN SERVICE A B C D ADVANCED SETTING 1 2 3 SPEAKER SETTING ONE PART - AD MINICAL, TWO PARTS - RD MINICAL, CLASS 2 WIRING L + L + R + + - + - L + L + R + L + L + R + L + L + R + L + L + R + L + L + R + L + L + R + L + L + R + L + L + R + L + L + R + L + L + R + L + L + R + L + L + R + L + L + R + L + L + R + L + L + R + L + L + R + L + L + R + L + L - R + L + L - R + L + L - R + L + L - R + L + L - R + L + L - R + L + L - R + L + L - R + L + L - R + L + L - R + L + L - R + L + L - R + L + L - R + L + L - R + L + L - R + L + L - R + L + L - R + L / A / B / C / D / E / F / G / H / I / J / K / L / M / N / O / P / Q / R / S / T / U / V / W / X / Y / ZRESTAURAR AS CONFIGURAÇÕES PADRÃO DE FÁBRICA DO AMPLIFICADOR
text_image
RACK MOUNT FRONT RACK MOUNT FRONTtext_image
Technical diagram of a device rear panel with labeled components and mounting pointstext_image
Technical diagram of a device with labeled components and a screwdriver inserted into a componentACOPLAR O RACK
natural_image
Technical line drawing of a mechanical assembly with mounting holes and a vertical rod (no text or symbols)natural_image
Technical line drawing of a mechanical assembly with mounting flanges and a central cylindrical component (no text or symbols)natural_image
Technical line drawing of a metal bracket assembly with mounting holes and internal compartments (no text or symbols)text_image
Technical diagram showing connection between a BOSE device and a battery pack, with labeled components and connection points.natural_image
Line drawing of a Bose-branded electronic device with mounting brackets and mounting holes (no text or symbols)text_image
BACK MOUNT FRONT UP WALL MOUNTtext_image
BACK MOUNT UP WALL MOUNTtext_image
BACK MOUNT FRONT UP WALL MOUNTACOPLAR O AMPLIFICADOR
natural_image
Diagram of a four-positioned room layout with four square windows and a central square (no text or symbols)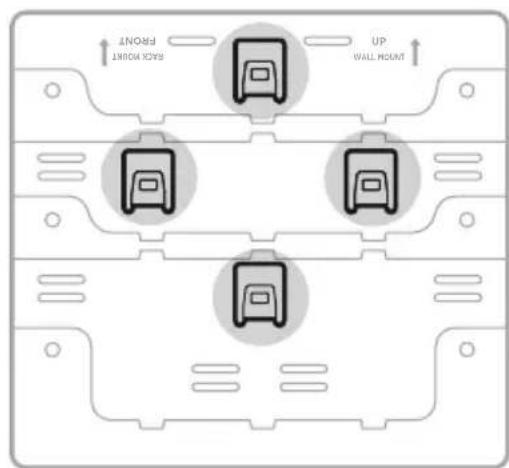
text_image
FOUNT BACK POINT UP WALL HOUNTnatural_image
Technical line drawing of two rectangular electronic components with internal circuitry and light indicators (no text or symbols)natural_image
Pure electrical circuit lines without any symbolstext_image
LINE OUT BASS RESET A 3 C D L L R R L L R H 1 2 3 SPEAKER SETTING ONE YEAR - 40 MIN EA, TWO Pairs - 40 MIN EA, CLASS 2 WIRING POWER <...> LINE IN R OPTICAL IN SERVICEnatural_image
Simple line drawing of a flashlight with radiating lines, no text or symbols presentKinaimportör: Bose Electronics (Shanghai) Company Limited, Level 6, Tower D, No. 2337 Gudai Rd. Minhang District, Shanghai 201100
EU-importör: Bose Products B.V., Gorslaan 60, 1441 RG Purmerend, Nederländerna
Taiwanimportör: Bose Limited Taiwan Branch (H.K.), 9F., No. 10, Sec. 3, Minsheng E. Road, Zhongshan Dist.
Taipei City 10480, Taiwan Telefonnummer: +886-2-2514 7676
UK-importör: Bose Limited, Bose House, Quayside Chatham Maritime, Chatham, Kent, ME4 4QZ, Storbritannien
Märkspänning: 100 – 240 V ∼ 50/60 Hz, 240 W
ANSLUT HÖGTALARNA 16
STRÖM
ANSLUTA BOSE-PRODUKTER
Ansluta en Bose Bass Module.... 40
natural_image
Front view of a white electronic device labeled 'BOSE' with a small circular icon on the left (no additional text or symbols)Bose Music Amplifier Elkabel*
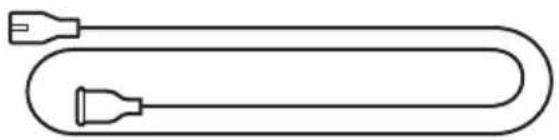
natural_image
Simple line drawing of a U-shaped tube with two connectors (no text or symbols)

natural_image
Simple line drawing of a rectangular frame with three circular holes, no text or symbols present.text_image
Diagram of a computer drive showing labeled ports and indicators, including a zoomed-in section with 'A' and 'LRR' labels.text_image
Diagram of an electronic device showing labeled ports and connections, including a zoomed-in section with a magnified view.text_image
POWER (++) LINE OUT PASS RESET A B C D L H E SINCE & SENSIC OFFICE IN SERVICE SEASER SETTING L L H E L L H E L L H E L L H E L L H E L L H E L L H E L L H E L L H E L L H E L L H E L L H E L L H E L L H E L L H E L L H E L L H E L L H E L L H E L L H E L L H H L L H H L L H H L L H H L L H H L L H H L L H H L L H H L L H H L L H H L L H H L L H H L L H H L L H H L L H H L L H H L L H H L L H H L L H H L L H H L L H I L L H I L L H I L L H I L L H I L L H I L L H I L L H I L L H I L L H I L L H I L L H I L L H I L L H I L L H I L L H I L L H I L L H I L L H I L L H I L L H J L L H J L L H J L L H J L L H J L L H J L L H J L L H J L L H J L L H J L L H J L L H J L L H J L L H J L L H J L L H J L L H J L L H K L L H K L L H K L L H K L L H K L L H K L L H K L L H K L L H K L L H K L L H K L L H K L L H K L L H K L L H K L L H K L L H K L L H K L L H K L L H K L L H M L L H M L L H M L L H M L L H M L L H M L L H M L L H M L L H M L L H M L LH M10000000000000000000000000000000000000000000000000000000000000000000000000000000000000000000000000000text_image
POWER <...> LINE OUT BASS OPTICAL IN SERVICE A B C D ADVANCED SETTING 1 2 3 SPEAKER SETTING ONE PAIR - 40 MIN EA. TWO PAIRS - 80 MIN EA. CLASS 2 WIRNG L L R R L L R R L L R R L L R R L L R Rtext_image
POWER <...> LINE OUT BASS RESET OPTICAL IN SERVICE A B C D ADVANCED SETTING 1 2 X SPEAKER SETTING ONE PAIR - 40 MIN EA, TWO PAIRS - 90 MIN LA. CLASS 2 WIRING L L R R + - + - L L R R + - + - L L R R + - + - L L R R + - + -PORT BESKRIVNING
text_image
LINE OUT BASS RESET A B C D ADVANCED SETTING 1 2 3 SPEAKER SETTING ONE (PAR - 40) MIN.14, MIN.14 = 10 MIN.14, CLASS 2 WITING L L R R L L R L L R L L R L L R L L R L L R L L R L L R L L R L L R L L R L L R L L R L L R L L R L L R L L R L L R L L R L L R L L R L L R L L R L L R L L R L A B C D ADVANCED SETTINGLÄGE BRYTARE POSITION BESKRIVNING
text_image
LINE OUT RASS RESET A B C D ADVANCED SETTING 1 2 3 SPEAKER SETTING 200 PARE - 50 MHz, TWO PARE - 80 MHz. CLASS Z WING L L R R + - + - L L R R + - + - L L R R + - + - L L R R + - + - L L R R + - + - L L R R + - + - L L R R + - + - L L R R + - + - L L R R + - + - L L R R + - + - L L R R + - + - L L R R + - + - SPEAKER SETTINGSPELA UPP ETT FÖRVAL
text_image
BLUETOOTH Bose Music AmplifierBLUETOOTH OCH FELSTATUS
text_image
POWER <...> LINE OUT BASS RESET LINE OUT + - LINE IN R OPTICAL IN SERVICE A B C D L L R R + - + ADVANCED SETTING 1 2 3 SPEAKER SETTING ONE PAIR - 40 MIN EA, TWO PAIRS - 40 MIN EA. CLASS 2 WIRING L L R R + - + L L R R + - + L L R R + - +WI-FI- OCH STRÖMSTATUS
Main-förstärkare
text_image
POWER <...> LINE OUT LINE IN R OPTICAL IN SERVICE BASS RESET A B C D ADVANCED SETTING 1 2 3 SPEAKER SETTING ONE PART - 40 MIN EA, TWO PARTS - 80 MIN EA, CLASS 2 WIRING L L R R + - + - L L R R + - + - L L R R + - + - L L R R + - + -Bose Bass Module 500: Bose.com/BM500
ANSLUTA EN BOSE SOUNDLINK BLUETOOTH-HÖGTALARE ELLER BOSE-HÖRLURAR MED SIMPLESYNC™-TEKNIK
text_image
POWER <...> LINE OUT BASS OCCOLATE OPTICAL IN SERVICE A B C D ADVANCED SETTING 1 2 3 SPEAKER SETTING ONE PART : ADJ NEEA, TWO PART : RG MINEA, CLASS 2 WIRING L L R R + - + - L L R R + - + - L L R R + - + - L L R R + - + -FABRIKSÅTERSTÄLL FÖRSTÄRKAREN
text_image
LINE OUT BASS RESET A B C D L L R R + - + - L L R R + - + - 1 2 3 SPEAKER SETTING ONE PART - AD MIN EX, TWO PARTS - AD MIN EX, CLASS 2 WIRING. + - + -text_image
RACK MOUNT FRONT RACK MOUNT FRONTtext_image
Technical diagram of a device rear panel with labeled components and directional arrows indicating movement or force.text_image
Technical diagram of a device with screwdriver inserted into a circuit board, showing labeled components and directional arrows.FÄST I RACKET
natural_image
Technical line drawing of a mechanical assembly with mounting holes and a bracket (no text or symbols)natural_image
Technical line drawing of a mechanical assembly with mounting flanges and a central cylindrical component (no text or symbols)natural_image
Technical line drawing of a metal bracket assembly with mounting holes and internal compartments (no text or symbols)text_image
Technical diagram showing the connection between a BOSE device and a battery pack, with labeled components and connection points.natural_image
Technical line drawing of a Bose-branded electronic device with mounting brackets and mounting holes (no text or symbols)text_image
BACK HOUNT UP WALL MOUNTtext_image
BACK MOUNT UP WALL MOUNTnatural_image
Diagram of a four-positioned room layout with four square windows and a central square (no text or symbols)
text_image
MAX MOUNT UP WALL MOUNT FRONTnatural_image
Technical line drawing of two rectangular electronic components with internal circuitry and light indicators (no text or symbols)natural_image
Pure electrical circuit lines without any symbolstext_image
LINE OUT BASS RESET A 3 C D L L R R + - + - L L R H + - + - 1 2 3 SPEAKER SETTING ONE PAIR - 40 MIN EA, TWO PAIRS - 40 MIN EA, CLASS 2 WIRING + - + - L L R H + - + - L L R H + - + - L L R H + - + - OPTICAL IN SERVICEnatural_image
Simple line drawing of a plug with radiating lines, enclosed in a circle (no text or symbols)natural_image
Front view of a BOSE-branded electronic device casing (no text or symbols visible)Bose Music Amplifier

natural_image
Simple line drawing of a U-shaped tube with two connectors (no text or symbols)สายไฟ*
text_image
RACK MOUNT FREQNT UP WALL MOUNTnatural_image
Simple line drawing of a rectangular object with three circular holes, no text or symbols present.text_image
Diagram of an electronic device rear panel with labeled ports and a zoomed-in section view showing port labels like 'A' and 'LLRR'.text_image
Diagram of an electronic device showing labeled ports and connections, including a zoomed-in section with a magnified view.text_image
Diagram showing connection between a power connector and an electronic device with labeled ports and indicatorstext_image
POWER <+><> LINE OUT BASS OPTICAL IN SERVICE A B C D ADVANCED SETTING 1 2 3 SPEAKER SETTING DINE PAIR - 40 MIN EA, TWO PAIR - 80 MIN EA. CLASS 2 WIRNG L L R R L L R R L L R R L L R R L L R Rtext_image
POWER <...> LINE OUT BASS RESET OPTICAL IN SERVICE A B C D ADVANCED SETTING 1 2 X SPEAKER SETTING ONE PAIR - 40 MIN EA, TWO PAIRS - 90 MIN LA. CLASS 2 WIRENG L L R R + - + - L L R R + - + - L L R R + - + - L L R R + - + -text_image
LINE OUT BASS RESET A B C D ADVANCED SETTING 1 2 3 SPEAKER SETTING SOP PARE - 40 HOURS, THIS PARTS = NO MIN EX. CLASS 2 WIRING L L R R L L R R L L R R L L R R L L R R L L R R A B C D ADVANCED SETTINGtext_image
LINE OUT RASS RESET A B C D L L R R L L H ADVANCED SETTING 1 2 3 SPEAKER SETTING 1 2 3 SPEAKER SETTINGtext_image
BLUETOOTH Bose Music Amplifiertext_image
LINE OUT BASS RESET A B C D L L H R + - + - ADVANCED SETTING 1 2 3 SPEAKER SETTING ONE PART: 40 MIN EA, TWO PART: 40 MIN EA, CLASS 2 WIRING + - + -text_image
LINE OUT BASS RESET A B C D L L R R + - + - L L R R + - + - 1 2 3 SPEAKER SETTING ONE PART - 40 MIN LA, TWO PARTS - 40 MIN EA, CLASS 2 WIRING POWER <...> LINE IN R OPTICAL IN SERVICEtext_image
Diagram showing connection between a device panel and its internal components, with labeled ports and connectors.Bose Bass Module 700
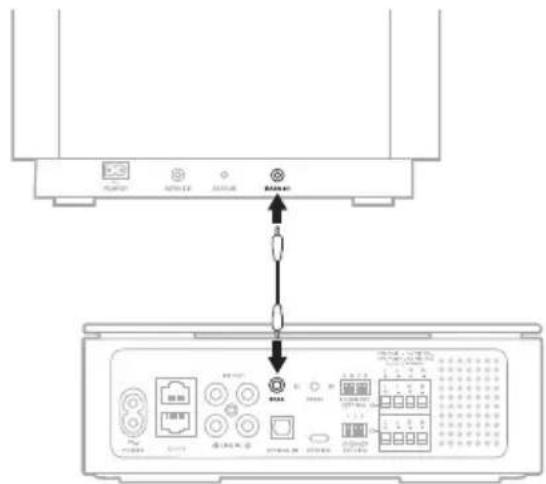
text_image
Diagram showing connection between a device panel and its internal components, with labeled ports and indicators.Bose Bass Module 500: Bose.com/BM500
_worldwide.Bose.com/Support/Groups
หมายเหตุ:
text_image
POWER <...> LINE OUT BASS O LINE IN R OPTICAL IN SERVICE A B C D ADVANCED SETTING 1 2 S SPEAKER SETTING ONE PAR - 40 MIN EA, TWO PAR - 80 MIN EA, CLASS 2 WIRING L L R R + - + - L L R R + - + - L L R R + - + - L L R R + - + -text_image
LINE OUT BASS RESET A B C D ADVANCED SETTING 1 2 3 SPEAKER SETTING ONE PARK - 40 MIN EA, TWO PARKS - 80 MIN EA, CLASS 2 WHERE L L R R + - + - L L R R + - + - L L R R + - + - L L R R + - + -text_image
RACK MOUNT FRONT RACK MOUNT FRONTtext_image
Technical diagram of a device rear panel with labeled components and directional arrows indicating movement or assembly.text_image
Technical diagram of a computer monitor with labeled ports and a screwdriver inserted, showing internal components and mounting points.ติดตั้งกับชั่นวาง
natural_image
Technical line drawing of a mechanical assembly with mounting holes and a vertical rod (no text or symbols)natural_image
Technical line drawing of a mechanical assembly with mounting flanges and a central rod (no text or symbols)natural_image
Technical line drawing of a metal bracket assembly with mounting holes and internal compartments (no text or symbols)text_image
Technical diagram showing the connection between a Bose device and its internal components, with labeled parts and connection points.natural_image
Technical line drawing of a Bose-branded electronic device with mounting brackets and mounting holes (no text or symbols)text_image
RACK MOUNT FROUNT UP WALL MOUNTtext_image
BREAK MOUNT FRONT UP WALL MOUNTnatural_image
Diagram showing four squares arranged around a central square, surrounded by four rounded rectangles (no text or symbols)
text_image
BACK POINT UP WIRE WALL UPnatural_image
Diagram showing two views of a device with circuitry and light indicators, no text or symbols presentnatural_image
Pure electrical circuit lines without any symbolstext_image
LINE OUT BASS RESET A B C D L L R R L L R R ADVANCED SETTING 1 2 3 SPEAKER SETTING ONE PART - 40 MIN EA, TWO PARTS - 90 MIN EA, CLASS 2 WIRING POWER <...> LINE IN R OPTICAL IN SERVICEnatural_image
Illustration of a plug with radiating lines, symbolizing electrical or electrical components (no text or symbols)중국 수입업체: Bose Electronics (Shanghai) Company Limited, Level 6, Tower D, No. 2337 Gudai Rd. Minhang District, Shanghai 201100
EU 수입업체: Bose Products B.V., Gorslaan 60, 1441 RG Purmerend, The Netherlands
멕시코 수입업체: Bose de México S. de R.L. de C.V., Avenida Prado Sur #150, Piso 2, Interior 222 y 223, Colonia Lomas de Chapultepec V Sección, Miguel Hidalgo, Ciudad de México, C.P. 11000 전화 번호: +5255 (5202) 3545
대만 수입업체: Bose Limited Taiwan Branch (H.K.), 9F., No. 10, Sec. 3, Minsheng E. Road, Zhongshan Dist. Taipei City 10480, Taiwan 전화 번호: +886-2-2514 7676
영국 수입업체: Bose Limited, Bose House, Quayside Chatham Maritime, Chatham, Kent, ME4 4QZ, United Kingdom
입력 정격: 100 - 240V \~ 50/60Hz, 240W
natural_image
Front view of a white electronic device labeled 'BOSE' with a small circular mark and number 4 on the front panel (no additional text or symbols)Bose Music Amplifier
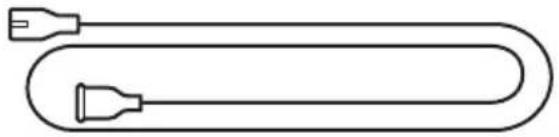
natural_image
Simple line drawing of a U-shaped tube with two connectors (no text or symbols)전원 코드*
랙 마운팅용 략 나사(3)

랙 마운팅용 연결 나사(3)
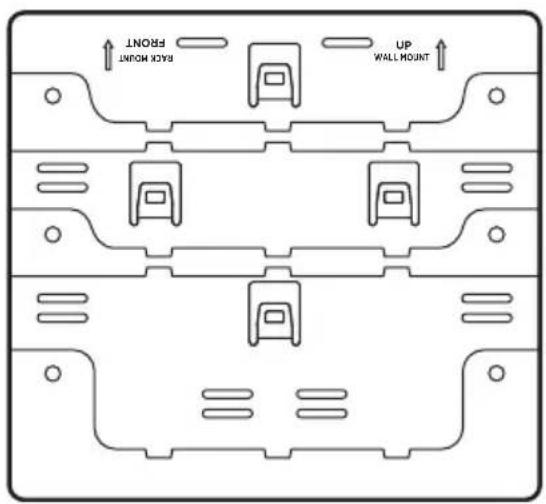
text_image
BACK MOUNT FRONT UP WALL MOUNT마운팅 브래킷 략 브래킷
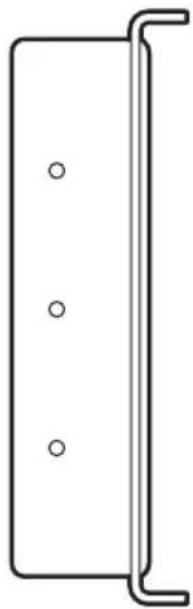
natural_image
Simple line drawing of a rectangular panel with three circular holes, no text or symbols presenttext_image
Diagram of an electronic device showing labeled ports and connectors, with a magnified view highlighting component A.text_image
Diagram of an electronic device showing labeled ports and connections, including a zoomed-in section with a magnified view.text_image
POWER (++) LINE OUT BASE RIGHT A B C D L L R P OPTICAL IN SERVICE SPEAKER SETTING 1 2 3 L L R P THE FLOW - ACCESS TO TAIN START, ALL PUBLIC CAULIF MARGINtext_image
POWER <...> LINE OUT BASS OPTICAL IN SERVICE A B C D ADVANCED SETTING 1 2 3 SPEAKER SETTING ONE PART - 4D MIN EA, TWO PARTS - 80 MIN EA, CLASS 2 WIRING L L R R + - + - L L R R + - + - L L R R + - + - L L R R + - + - L L R R + - + -text_image
POWER <...> LINE OUT BASS RESET OPTICAL IN SERVICE A 3 C D L L R R ADVANCED SETTING 1 2 3 SPEAKER SETTING ONE 7 AIR - AG MIN EA, TWO 7 PAIRS - AG MIN EA. CLASS 2 WIRING L L R R L L R R L L R R L L R R포트 설명
text_image
LINE OUT BASS RESET A B C D ADVANCED SETTING 1 2 3 SPEAKER SETTING ONE PAR - 40 PN 74, TWO PAGES +85 MHz EA, CLASS 2 VIERG L L R H L L R L L R L L R L L R A B C D ADVANCED SETTING모드 스위치 위치 설명
text_image
BLUETOOTH Bose Music Amplifiertext_image
LINE OUT BASS RESET A 0 C D L L R R + - + - ADVANCED SETTING 1 2 3 SPEAKER SETTING ONE PART - 40 MIN EA. TWO PARTS - 30 MIN EA. CLASS 2 WIRING L L R R + - + -WI-FI 및 전원 상태
주 앱프
Bose Bass Module 500: Bose.com/BM500
worldwide.Bose.com/Support/Groups
참고:
text_image
POWER <...> LINE OUT BASS OPTICAL IN SERVICE A B C D ADVANCED SETTING 1 2 3 SPEAKER SETTING ONE PART, AD MINERA, TWO PARTS - NO MINERA, CLASS 2 WIRING L L R R + - + - L L R R + - + - L L R R + - + - L L R R + - + -공장 기본값으로 앱프 복원
text_image
LINE OUT BASS RESET A B C D L + L - R + - L + L - R + - L + L - R + - 1 2 3 SPEAKER SETTING ONE PART: 40 MIN EA, TWO PARTS: 80 MIN EA, CLASS 2 WIRING POWER <...> LINE IN R OPTICAL IN SERVICEtext_image
Technical diagram of a device rear panel with labeled ports and indicator lightstext_image
Technical diagram of a device rear panel with screwdriver and labeled ports, showing mechanical assembly and mounting features.랙에 부착
natural_image
Technical line drawing of a mechanical assembly with mounting holes and a central connector (no text or symbols)natural_image
Technical line drawing of a mechanical assembly with mounting flanges and a central rod (no text or symbols)natural_image
Technical line drawing of a metal bracket assembly with mounting holes and internal compartments (no text or symbols)앱프 배치
text_image
Technical diagram showing the connection between a Bose device and its internal components, with labeled parts and connection points.natural_image
Technical line drawing of a Bose-branded electronic device with mounting brackets and mounting holes (no text or symbols)text_image
BACK MOUNT FRONT UP WALL MOUNTtext_image
MAX MOUNT UP WALL MOUNTtext_image
FRONT BACK MOUNT UP WALL MOUNT앱프 부착
natural_image
Diagram of a four-positioned device with four square buttons arranged around a central square (no text or symbols)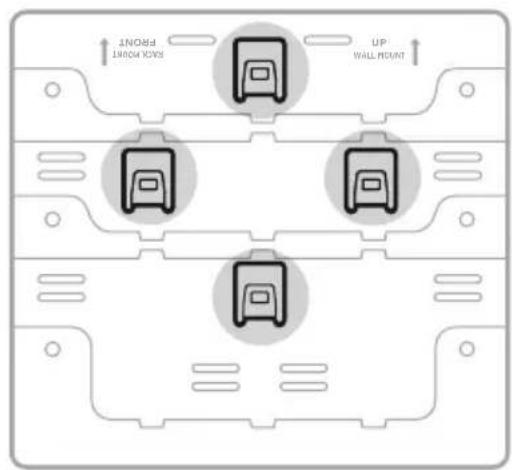
text_image
INOMD SHORT YOUN UP WALL POINT앱프 바닥 마운팅 브래킷
natural_image
Technical line drawing of two electronic components with circuitry and light indicators (no text or symbols)natural_image
Pure electrical circuit lines without any symbolstext_image
LINE OUT BASS RESET A B C D L L R R + - + - L L R R + - + - 1 2 3 SPEAKER SETTING ONE PAIR - 4D MIN EA, TWO PAIRS - 4D MIN TA, CLASS 2 WIRING POWER <...> LINE IN R OPTICAL IN SERVICEnatural_image
Simple line drawing of a plug with radiating lines, enclosed in a circle (no text or symbols)natural_image
Front view of a BOSE-branded electronic device casing (no text or symbols visible)Bose Music Amplifier

natural_image
Simple line drawing of a U-shaped tube with two connectors (no text or symbols)电源线 *

用于机架安装的机架螺钉(3个)

用于机架安装的连接螺钉(3个)

text_image
BACK MOUNT UP WALL MOUNT安装架 机架托架

natural_image
Simple line drawing of a rectangular panel with three circular holes, no text or symbols present.text_image
Diagram of an electronic device rear panel with labeled ports and a magnified view showing port A, including LRR component.- 将扬声器线连接到接线端子 A。
text_image
Diagram of an electronic device showing power input, switch, and LRR terminal with labeled ports and connection pointstext_image
POWER <...> LINE OUT BASS OPTICAL IN SERVICE A B C D ADVANCED SETTING 1 2 3 SPEAKER SETTING ONE PAIR - 40 MIN EA, TWO PAIRS - 80 MIN EA, CLASS 2 WIRING L L R R L L R R L L R R L L R R L L R Rtext_image
POWER <...> LINE OUT BASS RESET A 3 C D L L R R ADVANCED SETTING 1 2 3 SPEAKER SETTING ONE 7AIR - 4G MIN EA, TWO PAIRS - 6D MIN EA, CLASS 2 WIRING L L R R L L R R L L R R L L R R端口 说明
text_image
POWER <...> LINE OUT BAS3 RESET A B C D ADVANCED SETTING 1 2 SPEAKER SETTING ONE YEAR - 40 MHz (From Signal + 10 MHz)- CLASS SERVICE L L H H I L R S L L R S L L R S L L R S L L R S A B C D ADVANCED SETTING模式 开关 位置 说明
text_image
LINE OUT BASS RESET A B C D L L R R L L R R 1 2 3 SPEAKER SETTING ONE PART 1. 20 MIN/TA, TWO PARTS - ALL WINDLA. CLASS 2 WARNING 1 2 3 SPEAKER SETTINGtext_image
BLUETOOTH Bose Music Amplifiertext_image
POWER <...> LINE OUT BASS RESET L LINE IN R OPTICAL IN SERVICE A B C D ADVANCED SETTING 1 2 3 SPEAKER SETTING ONE PART - 40 MIN EA, TWO PARTS - 40 MIN EA, CLASS 2 WIRING L L R R + - + - L L R R + - + - L L R R + - + - L L R R + - + - L L R R + - + -WI-FI 和电源状态
主放大器
text_image
LINE OUT BASS RESET A B C D ADVANCED SETTING 1 2 3 SPEAKER SETTING ONE PARK - 40 MIN EX, TWO PARKS, 40 MIN EX, CLASS 2 WIRING. L + L - R + - L + L - R + - L + L - R + - L + L - R + - L + L - R + - L + L - R + - POWER <...> LINE IN R OPTICAL IN SERVICEBose Bass Module 500: Bose.com/BM500
_worldwide.Bose.com/Support/Groups
使用 Bose Music 应用连接
text_image
POWER <...> LINE OUT BASS LINE IN OPTICAL IN SERVICE A B C D ADVANCED SETTING 1 2 3 SPEAKER SETTING ONE PART - AG MIN EA, TWO PARTS - AG MIN EA, CLASS 2 WIRENG L L R R + - + - L L R R + - + - L L R R + - + - L L R R + - + -将放大器恢复到出厂默认状态
text_image
RACK MOUNT FRONT RACK MOUNT FRONT- 将连接螺钉穿过安装托架和机架托架。

text_image
Technical diagram of a battery pack with labeled components and polarity indicatorstext_image
Technical diagram of a computer chassis with labeled components and a screwdriver inserted into the top panel安装到机架上
natural_image
Technical line drawing of a mechanical assembly with mounting flanges and a central housing (no text or symbols)natural_image
Technical line drawing of a mechanical assembly with mounting flanges and internal components (no text or symbols)natural_image
Technical line drawing of a metal bracket assembly with mounting holes and internal compartments (no text or symbols)放置放大器
text_image
Technical diagram showing connection between a device labeled 'BOSE' and its internal components, with annotations for component identification.natural_image
Technical line drawing of a Bose-branded electronic device with mounting brackets and mounting holes (no text or symbols)text_image
MAX MOUNT UP WALL MOUNTtext_image
BREAK MOUNT FRONT UP WALL MOUNT连接放大器
natural_image
Top-down diagram of a device layout with four square components arranged around a central square (no text or symbols)放大器的底部 安装架

text_image
INOMD INOMD YEAR UP WALL MOUNTnatural_image
Diagram showing two views of a device with internal components and light indicators, no text or symbols present.natural_image
Pure electrical circuit lines without any symbolstext_image
LINE OUT BASS RESET A B C D L L R R L L R R L L R R 1 2 3 SPEAKER SETTING DINE PAIR - AD MIN EA, TWO PAIRS - AD MIN EA, CLASS 2 WIRING POWER <...> LINE IN R OPTICAL IN SERVICEnatural_image
Simple line drawing of a plug with radiating lines, enclosed in a circle (no text or symbols)www.Bose.com/compliance

natural_image
Front view of a BOSE-branded electronic device casing (no text or symbols visible)Bose Music Amplifier
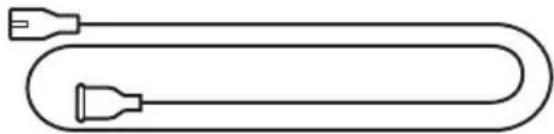
natural_image
Simple line drawing of a U-shaped tube with two connectors (no text or symbols)電源線 *
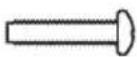
用於機架安裝的機架螺釘(3個)

用於機架安裝的連接螺釘(3個)

text_image
BACK MOUNT UP WALL MOUNT安裝架 機架托架

natural_image
Simple line drawing of a rectangular panel with three circular holes, no text or symbols present.text_image
Diagram of an electronic device with labeled ports and connectors, showing a zoomed-in view of the internal components.- 將揚聲器線連接至接線端子 A。
text_image
Diagram of an electronic device showing power input, switch, and LRR terminal with labeled ports and connection points- 將揚聲器線的另一端連接到您的揚聲器。
text_image
POWER (<<+) LINE OUT RASS RESET A RCP OPTICAL R SERVICE ADVANCED SETTINGS THE REP - 42 NCES, TANTUM - REFLECTA CLASSIFER L L R P L L B D L L R P L L R P L L R P L L R P L L R P L L R P L L R P L L R P L L R P L L R P L L R P L L R P L L R P L L R P L L R P L L R P L L R P L L R P L L R P L L R P L L R S L L R S L L R S L L R S L L R S L L R S L L R S L L R S L L R S L L R S L L R S L L R S L L R S L L R S L L R S L L R S L L R S L L R S L L R S L L R S L L R M L L R M L L R M L L R M L L R M L L R M L L R M L L R M L L R M L L R M L L R M L L R M L L R M L L R M L L R M L L R M L L R M L L R M L L R M L L R M L L R N L L R N L L R N L L R N L L R N L L R N L L R N L L R N L L R N L L R N L L R N L L R N L L R N L L R N L L R N L L R N L L R N L L R N L L R N L L R N L L R M L L R M L L R M L L R M L L R M L L R M L L R M L L R M L L R M L L R M L L R M L L R M L L R M L L R M L L R M L L R M放大器背面的指示燈緩慢閃爍琥珀色。