
TWD2501B - Kettle Tomado - Free user manual and instructions
Find the device manual for free TWD2501B Tomado in PDF.
| Product type | Hot water dispenser |
| Brand | Tomado |
| Model | TWD2501B |
| Tank capacity | 2.5 liters maximum / 0.5 liter minimum |
| Dispensing types | 1 cup (200 ml) or continuous |
| Light indicator | Blue for 1 cup mode, Green for continuous mode |
| Power | 2200 W (estimated) |
| Power supply | 220-240 V ~ 50/60 Hz |
| Water filter | Included, replace after 150 liters of water |
| Descaling | Recommended monthly, with vinegar or citric acid |
| Main material | Heat-resistant plastic, stainless steel for heating elements |
| Safety | Overheat protection, reset button |
| Cleaning | Exterior: damp cloth; drip tray and grid: hot water and mild dish soap |
| Included accessories | Drip tray, drip grid, water filter, rubber drain plug |
| Warranty | 24 months |
| Repairability | Spare parts available at tomado.com/support |
Frequently Asked Questions - TWD2501B Tomado
User questions about TWD2501B Tomado
0 question about this device. Answer the ones you know or ask your own.
Ask a new question about this device
Download the instructions for your Kettle in PDF format for free! Find your manual TWD2501B - Tomado and take your electronic device back in hand. On this page are published all the documents necessary for the use of your device. TWD2501B by Tomado.
USER MANUAL TWD2501B Tomado
natural_image
Black TOMADO water dispenser with digital water drop and clear glass, no visible text or symbols on device body- Carefully read the instruction manual in full prior to using the appliance and store the manual in a safe place for future reference.
- Only use this appliance for the purposes described in the instruction manual. Only fill the appliance with water, not with other liquids.
- Caution! Avoid contact with hot surfaces when the appliance is switched on. The exterior of the appliance and the water outlet can become hot. Never test by touch whether the water flowing out is hot enough, you will burn yourself.
- Avoid burns due to hot steam. Do not block the steam outlet and carefully open the water reservoir lid when the appliance is on.
- Only connect the appliance to alternate current, to an earthed wall socket, with a mains voltage that corresponds with the information provided on the information plate of the appliance.
- Never bend the power cord sharply or allow it to run across hot parts.
- Fully unwind the cord to prevent it from overheating.
- Never place the appliance near appliances that give off heat, such as ovens, gas cookers, hotplates, etc. Keep the appliance away from walls or other objects that could catch flame, such as curtains, towels (cotton or paper), etc.
- Always make sure the appliance is placed on an even, flat surface and is only used indoors.
- Do not leave the appliance unsupervised if the appliance is operational.
- Do not use the appliance if the plug, cord or appliance are damaged, or if the appliance is no longer functioning properly, or has been dropped or damaged in any other way. If this is the case, consult the retailer or our maintenance service.
- Never replace the plug or cord yourself. Repairs to electrical appliances should only be performed by skilled persons. Incorrect repairs may expose the user to serious hazards. Never use the appliance with components that are not recommended or supplied by the manufacturer.
TOMADO®
- Do not pull the cord and/or appliance to remove the plug from the wall socket. Never touch the appliance with wet or damp hands.
- Keep the appliance out of reach of children. Children do not see the dangers associated with handling electrical appliances. Therefore, never allow children to operate electrical appliances without supervision. Keep the appliance and cord out of reach of children younger than 8 years of age.
- The appliance can be used by children of 8 years and older and by persons with limited physical, sensory or mental capacities or lack of experience or knowledge, provided they use the appliance under supervision or have been instructed about its safe use and understand the hazards it may involve.
- Children must not play with the appliance.
- The appliance may not be cleaned or maintained by children, unless this is done under supervision.
- If the appliance is not being used or is being cleaned, switch off the appliance and remove the plug from the socket.
- If the appliance does not function after it has been switched on, it is possible that the fuse or earth leakage circuit breaker has been activated in the electrical distribution box. The group may be overloaded or an earth leakage current may have occurred.
- In case of a breakdown, never make repairs yourself; a tripped safety device in the appliance could indicate a defect that cannot be remedied by removing or replacing this safety device. Only original parts should be used.
- Never submerge the appliance, cord or plug in water.
- This appliance is intended for household and similar use, such as:
- in staff kitchens, in shops, offices and other work environments;
- by guests of hotels, motels and other residential environments;
- in Bed&Breakfast type environments;
- farms.
- If the appliance is not used as intended, no compensation can be claimed in case of defects or accidents and the warranty will be invalidated.
TOMADO®
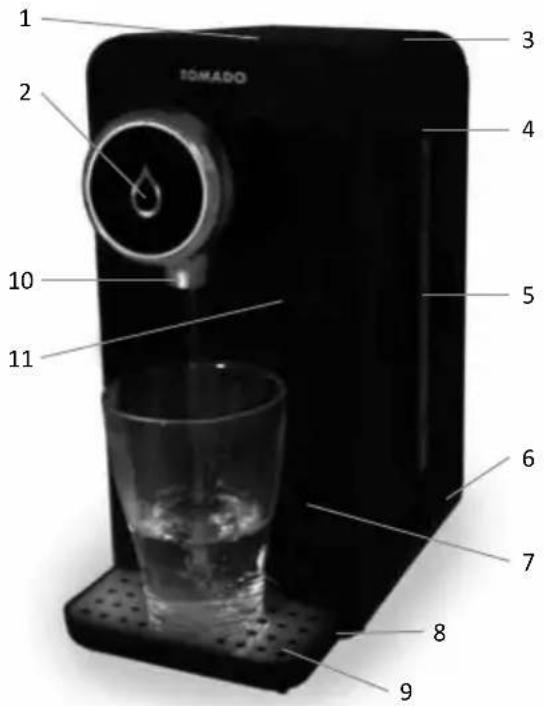
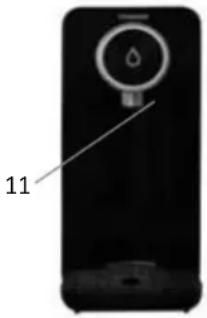
PRODUCT DESCRIPTION
- ON/OFF button with indicator led
- Extra indicator led (blue/green)
- Lid
- Water reservoir
- Water level indicator
- Bottom plate
- Drip tray height adjustment
- Drip tray
- Cup grille
- Water outlet
- Reset button (top right in the recess at the front)
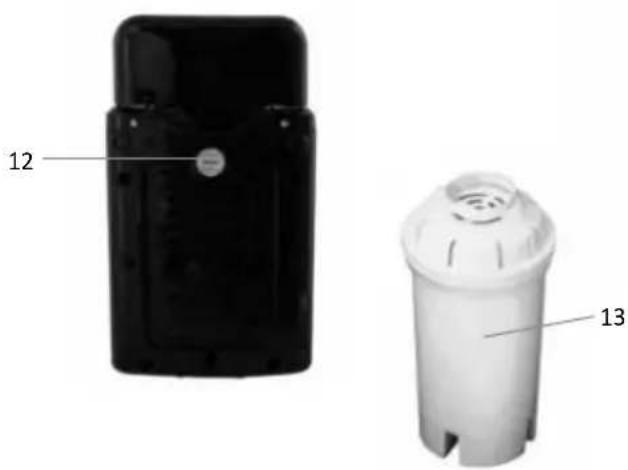
- Rubber cap for water drain (bottom side)
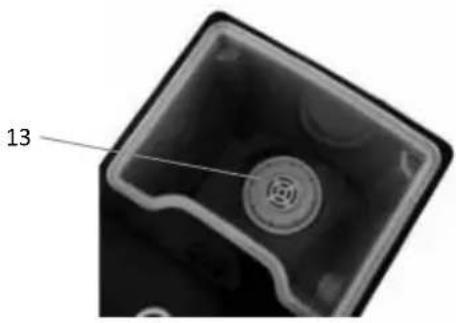
- Water filter
PRIOR TO FIRST USE
Before using the hot water dispenser for the first time, proceed as follows: carefully unpack the appliance and remove all packaging material as well as any promotional stickers. Keep the packaging (plastic bags and cardboard) out of reach of children. After unpacking the appliance, carefully check it for external damage that may have occurred during transport.
Place the hot water dispenser on a flat, heat-resistant surface.
Check that the voltage stated on the information plate matches the voltage used in your region. Insert the plug of the hot water dispenser in a suitable wall socket.
Caution: This appliance does not have a separate switch that allows you to switch the power supply to the appliance on or off. When the plug is in the socket, the appliance is connected directly to the mains voltage and ready for use. Always first remove the plug from the socket and allow the appliance to cool before cleaning it or performing maintenance.
Placing the drip tray
The drip tray can be snapped in place in two positions. The top position is for cups and glasses. The bottom position is for large mugs and jugs. First, snap the drip tray in place in the bottom position, to be able to rinse the appliance more easily.
TOMADO®
Placing the water filter
Open the lid of the water reservoir and place the water filter in the reservoir.
natural_image
Close-up of a mechanical component with a circular feature and labeled part '13' (no text or symbols beyond label)Cleaning and filling the water reservoir
Rinse the water reservoir, and therefore the appliance, prior to use.
- Snap the drip tray in place on the bottom two ridges.
- Place a large heat resistant tray or bowl under the water outlet.
- Fill the water reservoir to maximum level and press the ON/OFF button twice to switch on the appliance. The indicator led now lights up in green. After a few seconds, there is hot water coming out of the water outlet.
- Caution: press the ON/OFF button to switch the appliance off when the tray or bowl is full. Empty the full bowl in the sink and place it back under the water outlet.
- Press the ON/OFF button twice to switch on the appliance once more.
- Repeat these steps until the appliance has been rinsed with a full water reservoir twice.
- Fill the water reservoir with fresh cold water. The minimum water filling volume is 0.5 litres. The maximum filling volume is 2.5 litres.
• The appliance is now ready for use.
The hot water dispenser is only suitable for boiling water. Never fill the hot water dispenser with milk, tea, coffee or other liquids.
USING THE APPLIANCE
FILLING THE HOT WATER DISPENSER
- Open the lid of the water reservoir.
- Fill the water reservoir of the appliance. Use a measuring cup or a water jug with fresh cold water.
- Fill the water reservoir with maximum 2.5 litres of cold water.
- Close the lid.
TAPPING A GLASS OR CUP OF HOT WATER
- Place a glass or cup under the water outlet on the cup grille.
- Press the ON/OFF button once to switch on the appliance.
- When pressed once, the indicator led lights up in blue and the appliance taps 1 cup of hot water (200 ml)
- After a few seconds, there is hot water coming out of the water outlet.
- If necessary, press the ON/OFF button once more to stop the water flow.
- When filling several glasses, repeat the above steps.
When the reservoir is empty, the indicator led starts to flash in blue and green alternately. Refill the water reservoir with fresh cold water.
Caution: The water and steam are hot and could cause burns in case of contact with your skin.
TAPPING A JUG OR LARGE MUG OF HOT WATER
- Place a jug or mug under the water outlet on the cup grille.
- Press the ON/OFF button twice to switch on the appliance.
- When pressed twice, the indicator led lights up in green and the appliance taps hot water continuously until you switch it off again.
- After a few seconds, there is hot water coming out of the water outlet.
- Press the ON/OFF button once more to stop the water flow.
- When filling several jugs or mugs, repeat the above steps.
When the reservoir is empty, the indicator led starts to flash in blue and green alternately. Refill the water reservoir with fresh cold water.
Caution: the water and steam are hot and could cause burns in case of contact with your skin.
Remove the drip tray when it is becoming full and empty it above the sink.
- Remove the cup grille.
- Place one hand on the appliance and press the drip tray upwards with your other hand in order to snap it loose.
- Empty the drip tray above the sink and rinse it.
- Snap the drip tray in place again on the top or bottom ridges.
CLEANING AND MAINTENANCE
We recommend cleaning the hot water dispenser regularly, e.g. once per month. This is not only beneficial for the life span of the appliance, but also ensures optimum use and, of course, nice water. Prior to cleaning, always remove the plug from the wall socket and allow the appliance to cool down.
CLEANING
Regularly wipe the outside with a damp cloth. Never use detergents or abrasive cleaning agents! Clean separate components such as the drip tray and cup grille with warm water and a mild washing-up liquid. Dry these components thoroughly.
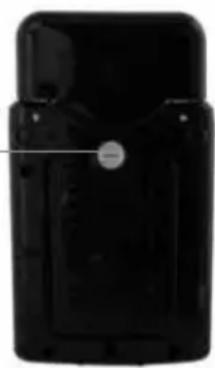
After cleaning the hot water dispenser, also remove any excess water via the water drain at the bottom. Unscrew the rubber cap [12] of the water drain at the bottom of the appliance and allow the excess water to run out of the appliance above the sink. Properly re-tighten the rubber cap. Attach the separate components and the appliance will be ready for use again.
REPLACING THE WATER FILTER
After every 150 litres of water, the water filter must be replaced. In case of moderate use, this will be about 3 times per year. A new water filter is available via the Tomado webshop.
DE-SCALING
In spite of using a water filter, it is necessary to de-scale the appliance each month. Also if the flow speed of the water is not as it was, the appliance may have to be de-scaled. Use a de-scaling agent without chemicals, such as kitchen grade vinegar or citric acid.
- Fill the water reservoir with 2 litres of water and add 50ml of de-scaling agent.
- Place a jug or large mug under the water outlet on the cup grille.
- Press the ON/OFF button twice to switch on the appliance.
- When pressed twice, the indicator led lights up in green and the appliance taps hot water continuously until you switch it off again.
• After a few seconds, there is hot water coming out of the water outlet.
- Press the ON/OFF button once more to stop the water flow when the jug or mug is full. Empty the jug in the sink and place it back under the water outlet.
- Repeat this until the water reservoir with de-scaling agent is empty.
- Fill the water reservoir with clean water and allow all this water to flow through the appliance, in the same way as described above.
- Fill the appliance once more with clean water.
- The hot water dispenser is ready for use again.
TIP: After every 10 hours of use, the green indicator led starts to flash to remind you to de-scale the appliance. After de-scaling, hold down the ON/OFF button for 5 seconds to stop the green indicator led from flashing.
12
natural_image
Black rectangular electronic device with a circular button labeled 'SAR' (no visible text or symbols beyond the label)TOMADO®
STORAGE
Empty the water reservoir in the sink and clean the hot water dispenser before storing it. Preferably store it in the original box to prevent corrosion and damage as a result of moisture.
PROBLEMS & SOLUTIONS
If there is a problem, please first check the following solutions before contacting customer service.
| Problem Possible cause Solution | ||
| The flow-through speed has reduced. | Scaling reduces the heating speed. The appliance must be de-scaled. | |
| The green indicator led flashes. After 10 hours of use, it is time to de-scale the appliance. | De-scale the appliance as described above. After de-scaling, hold down the ON/OFF button for 5 seconds to stop the green indicator led from flashing | |
| Water is leaking from under the appliance. | The rubber cap on the bottom has not been properly tightened. | Properly tighten the rubber cap at the bottom. |
| The appliance no longer works. It is possible that the overheating safety device has been activated. | Use a small pin to press down the reset button in the top right side of the recess at the front, in order to reset the appliance. | |
 | ||
RECYCLING
This symbol means that this product should not be disposed of with regular household waste (2012/19/EU). Observe the rules that apply in your country for the separated collection of electric and electronic products. Correct disposal of the product prevents negative consequences for the environment and for public health. The packaging material of this product can be recycled 100%, return packaging material separately.
TOMADO®
natural_image
Close-up of a mechanical component with a circular feature and labeled part '13' (no text or symbols beyond label)natural_image
Black rectangular electronic device with a circular button and mounting holes (no visible text or symbols)DEN WASSERFILTER AUSTAUSCHEN
natural_image
Two views of a black and white plastic device casing, labeled 12 and 13 (no text or symbols on the body)
AVANT LA PREMIÈRE UTILISATION
natural_image
Close-up of a mechanical component with a circular feature and labeled part '13' (no text or symbols beyond label)natural_image
Black rectangular electronic device with a circular button and metallic contacts (no visible text or symbols)natural_image
Two views of a black and white plastic device casing, labeled 12 and 13 (no text or symbols on the body)
PRIMA DEL PRIMO UTILIZZO
natural_image
Close-up of a mechanical component with a circular feature and labeled part '13' (no text or symbols beyond label)natural_image
Close-up of a mechanical component with a circular feature and labeled part '13' (no text or symbols beyond label)T∅MNING AF DRYPBAKKEN
natural_image
Close-up of a mechanical component with a circular feature and numbered label (13), no readable text or symbols beyond the number.PROBLEMY I ROZWIAZANIA
natural_image
Close-up of a mechanical component with a circular feature and labeled part '13' (no text or symbols beyond label)natural_image
Close-up of a mechanical component with a circular feature and labeled part '13' (no text or symbols beyond label)natural_image
Black rectangular electronic device with a circular button and metallic contacts (no visible text or symbols)VÝMENA VODNÉHO FILTRA
Go to www.tomado.com/support to purchase accessories or spare parts.
WARRANTY CONDITIONS
A 24 month warranty is provided for this product. Your warranty is valid if the product has been used in accordance with the user instructions and for the purpose for which it was made. Also the original proof of purchase must be submitted, stating the date of purchase, the name of the retailer and the item number of the product. For extensive warranty information you are referred to our website: www.tomado.com/support
CONDITIONS DE LA GARANTIE


- TOMADO®
- PRODUCT DESCRIPTION
- PRIOR TO FIRST USE
- Placing the drip tray
- Placing the water filter
- Cleaning and filling the water reservoir
- USING THE APPLIANCE
- FILLING THE HOT WATER DISPENSER
- TAPPING A GLASS OR CUP OF HOT WATER
- TAPPING A JUG OR LARGE MUG OF HOT WATER
- CLEANING AND MAINTENANCE
- CLEANING
- REPLACING THE WATER FILTER
- DE-SCALING
- STORAGE
- PROBLEMS & SOLUTIONS
- RECYCLING
- DEN WASSERFILTER AUSTAUSCHEN
- AVANT LA PREMIÈRE UTILISATION
- PRIMA DEL PRIMO UTILIZZO
- T∅MNING AF DRYPBAKKEN
- PROBLEMY I ROZWIAZANIA
- VÝMENA VODNÉHO FILTRA
- WARRANTY CONDITIONS
- CONDITIONS DE LA GARANTIE
Brand : Tomado
Model : TWD2501B
Category : Kettle