
MUM50131 - Food Processor BOSCH - Free user manual and instructions
Find the device manual for free MUM50131 BOSCH in PDF.
| Product type | Food processor |
| Brand | Bosch |
| Model | MUM50131 |
| Power supply | Electric, mains (approx. 230 V) |
| Power | Not explicitly specified, typically 500-800 W |
| Mixing bowl capacity | Up to 750 g of flour plus ingredients |
| Blender capacity | Up to 1.25 L of liquid, 0.5 L for hot or foaming liquids |
| Main functions | Mix, knead, whisk, grate, slice, blend (with accessories) |
| Included accessories | Mixing whisk, whisk beater, dough hook, stainless steel bowl, lid, grater/slicer attachment with discs, blender, storage bag |
| Speeds | 4 speeds + pulse position (M) |
| Safety | Safety lock, overload protection, anti-restart, protective covers |
| Cleaning | Bowl, accessories and blender are dishwasher safe. Base unit wiped with a damp cloth |
| Bowl material | Stainless steel |
| Weight | Not specified, about 4-5 kg |
| Dimensions (W x H x D) | Not specified, typical dimensions: 30 x 30 x 25 cm |
| Cord length | Approx. 1 m (integrated storage) |
| Warranty | According to the conditions of the country of purchase |
| Repairability | Spare parts available through Bosch after-sales service |
| Intended use | Domestic, standard culinary quantities |
| Optional accessories | Citrus juicer, meat grinder, disc kits, etc. |
Frequently Asked Questions - MUM50131 BOSCH
User questions about MUM50131 BOSCH
0 question about this device. Answer the ones you know or ask your own.
Ask a new question about this device
Download the instructions for your Food Processor in PDF format for free! Find your manual MUM50131 - BOSCH and take your electronic device back in hand. On this page are published all the documents necessary for the use of your device. MUM50131 by BOSCH.
USER MANUAL MUM50131 BOSCH
Universal kitchen machine
MUM50...
[de] Gebrauchsanleitung Universal-Kuchenmaschine 3
[en] Instruction manual Universal kitchen machine 16
[fr] Mode d'emploi Robot menager universel 29
[it] Istruzioni per l'uso Robot da cucina universale 43
[n] Gebruiksaanwijzing Universele keukenmachine 56
[da] Brugsanvising Universalalkokkenmaskine 69
[no] Bruksanvising Universal kjokkenmaskin 81
[sv] Bruksanvising Universalalkoksmaskin 93
[fi] Kayttöohje Yleiskone 105
[es] Instrucciones de uso Robot de cocina universal 117
[pt] Instruções deServiço Maquina de cozinha universal 131
[el] Odyiecxpno Kouovomxav 144
[tr] Kullanim kilavuzu Universal mutfak robotu 159
[pl]Instrukcja obstugi Uniwersalny robot kuchenny 174
[uk]Ihctpykci3ekcnayataui YHIBepcaBHNKyXOHHN KOM6aH 188
[ru]Инстукшип NOэклуataиуНьерcaльна Кхонная Maшина 201
[ar] p|aaiwaii iuiu! ggiall p|aaiaaii aaiSla 231
This appliance is intended for domestic use only. Use the appliance only for processing normal amounts of food and for normal amounts of time for domestic use. Do not exceed permitted maximum quantities ( "Application examples" see page 25).
The appliance is suitable for mixing, kneading and beating food. The appliance must not be used for processing other substances or objects. Additional applications are possible if the accessories approved by the manufacturer are used. Only use the appliance with approved genuine parts and accessories. Never use the accessory parts for other appliances.
Only use the appliance indoors at room temperature and up to 2000m above sea level.
Important safety information
Read and follow the instruction manual carefully and keep for later reference! Enclose these instructions when you give this appliance to someone else. If the instructions for correct use of the appliance are not observed, the manufacturer's liability for any resulting damage will be excluded.
This appliance can be used by persons with reduced physical, sensory or mental capabilities or lack of experience and/or knowledge if they have been given supervision or instruction concerning use of the appliance in a safe way and if they understand the hazards involved. Keep children away from the appliance and connecting cable and do not allow them to use the appliance. Do not let children play with the appliance. Cleaning and user maintenance must not be performed by children.
Risk of electric shock and fire!
- Connect and operate the appliance only in accordance with the specifications on the rating plate. Do not use the appliance if the power cord and/or appliance are damaged. Only our customer service may repair the appliance, e.g. by replacing a damaged power cord, in order to avoid hazards.
- Use only the rotary switch to switch the appliance on or off. Never connect the appliance to timer switches or remote-controllable sockets. Never leave the appliance unattended while it is switched on!
-
Do not place the appliance on or near hot surfaces, e.g. hobs. The power cord must not come into contact with hot parts or be pulled across sharp edges.
-
Never immerse the base unit in water or place it in the dishwasher. Do not steam-clean the appliance. Do not use the appliance with damp hands.
- After each use, whenever the appliance is unsupervised, prior to assembly, prior to disassembly, prior to cleaning and in the event of an error, the appliance must always be disconnected from the mains.
Risk of injury!
Before replacing accessories or additional parts which move during operation, the appliance must be switched off and disconnected from the power supply. After switching off, the drive continues for a short time. Wait until the drive has come to a standstill.
- Do not adjust the swivel arm while the appliance is switched on.
- Only use tools when the bowl is inserted, the lid is fitted and the protective drive covers are in place! When using accessories, fit the bowl, lid and drive covers according to the instructions!
- While operating the appliance, never reach into the bowl or filling shaft with your hands. Do not insert any objects (e.g. wooden spoon) into the bowl or filling shaft. Keep hands, hair, clothing and other utensils away from rotating parts.
- Never use tools and accessories or 2 accessories at the same time. When using the accessories, follow the individual operating instructions enclosed.
- The accessory must be completely assembled before use. Never assemble the accessory on the base unit. The accessory should only be used in the intended operating position.
- Do not grip the sharp blades or edges of the cutting discs. Take hold of cutting discs by the edge only.
■ Do not touch blender blades with bare hands.
- Never reach into the attached blender! Never use the blender without the lid in place.
- Care shall be taken when handling the sharp cutting blades, emptying the container and during cleaning.
Risk of scalding!
If processing hot liquids, steam escapes through the funnel in the lid. Add a max. 0.5 litres of hot or frothing liquid.
Risk of suffocation!
Do not allow children to play with packaging material.
Caution!
We recommend that the appliance is never switched on for longer than is necessary to process the ingredients. Do not operate at no-load.
Important!
It is essential to clean the appliance thoroughly after each use or after it has not been used for an extended period ( "Cleaning and servicing" see page 23).
Explanation of the symbols on the appliance or accessory

Follow the instructions in the operating instructions.

Caution! Rotating blades.

Caution! Rotating tools.
Do not place fingers in the feed tube.
Congratulations on the purchase of your new Bosch appliance. You can find further information about our products on our web page.
Contents
Intended use 16
Important safety information. 16
Safety systems 18
Overview. 19
Operating positions. 19
Operation 20
Cleaning and servicing 23
Storage 24
Troubleshooting 24
Application examples. 25
Disposal 26
Guarantee 26
Optional accessories 27
Safety systems
Start lock-out
See "Operating positions" table.
The appliance can be switched on in pos. 1 and 3 only:
- when the bowl (10) has been inserted and turned until it locks into place.
Restart lock-out
If the power is interrupted, the appliance remains switched on but the motor does not start running again when the power is restored. To switch the appliance on again, turn the rotary switch to 0/off, then switch on.
Overload protection
If the motor switches itself off while the appliance is being used, the overload protection feature has been activated.
A possible cause may be that too much food was processed at one time.
If a safety system is activated, see "Troubleshooting".
The appliance requires no maintenance.
Overview
Fig. A:
Base unit
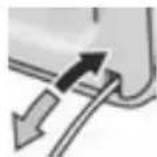
1 Release button
2 Swivel arm
"Easy Armlift" function to support the upward movement of the arm (see "Work positions").
3 Rotary switch
When the appliance has been switched off (position 0/off), the appliance runs automatically to the optimum position for changing the tools.
$$ 0 / o f f = S t o p $$
M = Instantaneous switching at maximum speed, hold switch for required blending duration.
Settings 1-4, Operating speed:
1 = low speed - slow,
4 = high speed - fast.
4 Drive cover
To remove the drive cover, press on the rear area and remove cover.
5 Drive for
-
Continuous-feed shredder and
-
Citrus press (optional accessory*).
When not in use, attach the drive cover.
6 Drive for tools (stirrer, whisk, kneading hook) and mincer (optional accessory*)
7 Blender drive cover
8 Drive for blender (optional accessory*)
When not in use, attach the blender drive cover.
9 Cord store
Stow the cord in the cord store
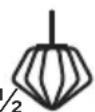
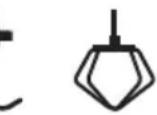
Bowl with accessories
10 Stainless steel stirring bowl
11 Lid
Tools
12 Stirrer
13 Whisk
14 Kneading hook with dough deflector
15 Accessories bag
For storage of the tools and cutting discs.
Continuous-feed shredder
16 Pusher
17 Cover with filling shaft
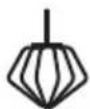
18 Cutting discs
a Reversible slicing disc - thick / thin
b Reversible shredding disc - coarse / fine
c Grating disc - medium-fine
19 Disc holder
20 Housing with outlet opening
Blender*
21 Blender jug
22 Lid
23 Funnel
* If an accessory is not included in the product package, it can be purchased via the trade or customer service.
Operating positions
Fig. 3:
Attention!
Before operating the appliance, attach the tool / accessory to the correct drive and in the correct position and place in the operating position according to this table.
The swivel arm must be engaged in every operating position.
Note
The swivel arm features an "Easy Armlift" function which supports the upwards movement of the swivel arm.
Selecting the operating position:
Press the Release button and move the swivel arm. Support movement with your hand.
- Move the swivel arm until it engages in the required position.
Position Drive MUM50..
| 1 | 6 | 1-4 | |
| 1-4 | |||
| 1-2 | |||
| 2 | 6* | ||
| 3 | 5 | 2-4 | |
| 2-3 | |||
| 4 | 8 3-4 | ||
| 6 | 3-4 |
- Insert / remove whisk, stirrer or kneading hook. Add large quantities of ingredients.
Operation
Risk of injury!
Do not insert mains plug until all preparations for working with the appliance are complete.
Attention!
Do not operate the appliance without an accessory/tool in the operating position. Do not operate the appliance empty. Do not expose appliance or accessories to heat sources. Parts are not microwave-safe.
Before operating the appliance and accessories for the first time, clean thoroughly; see "Cleaning and servicing".
Important information
These operating instructions contain a sticker with reference values for the operating speed of the appliance when using the tools or accessories. We recommend attaching this sticker to the appliance (Fig. ①).
Preparation
- Place the base unit on a smooth, clean surface.
Pull out the power cord (Fig. D).
Cord store: Pull out cable to the required length.

Warning!
Do not twist the cord when inserting it.
Insert the mains plug.
Bowl and tools

Risk of injury from the rotating tools
While the appliance is operating, never place fingers in the mixing bowl. Attach the cover (11) before operating the appliance! Do not change tools until the drive has come to a standstill - when the appliance is switched off, the drive continues running briefly and stops in the tool change position.
Do not move the swivel arm until the tool has come to a standstill.
Always secure unused drives with protective drive covers.
Attention!
Use bowl with this appliance only.
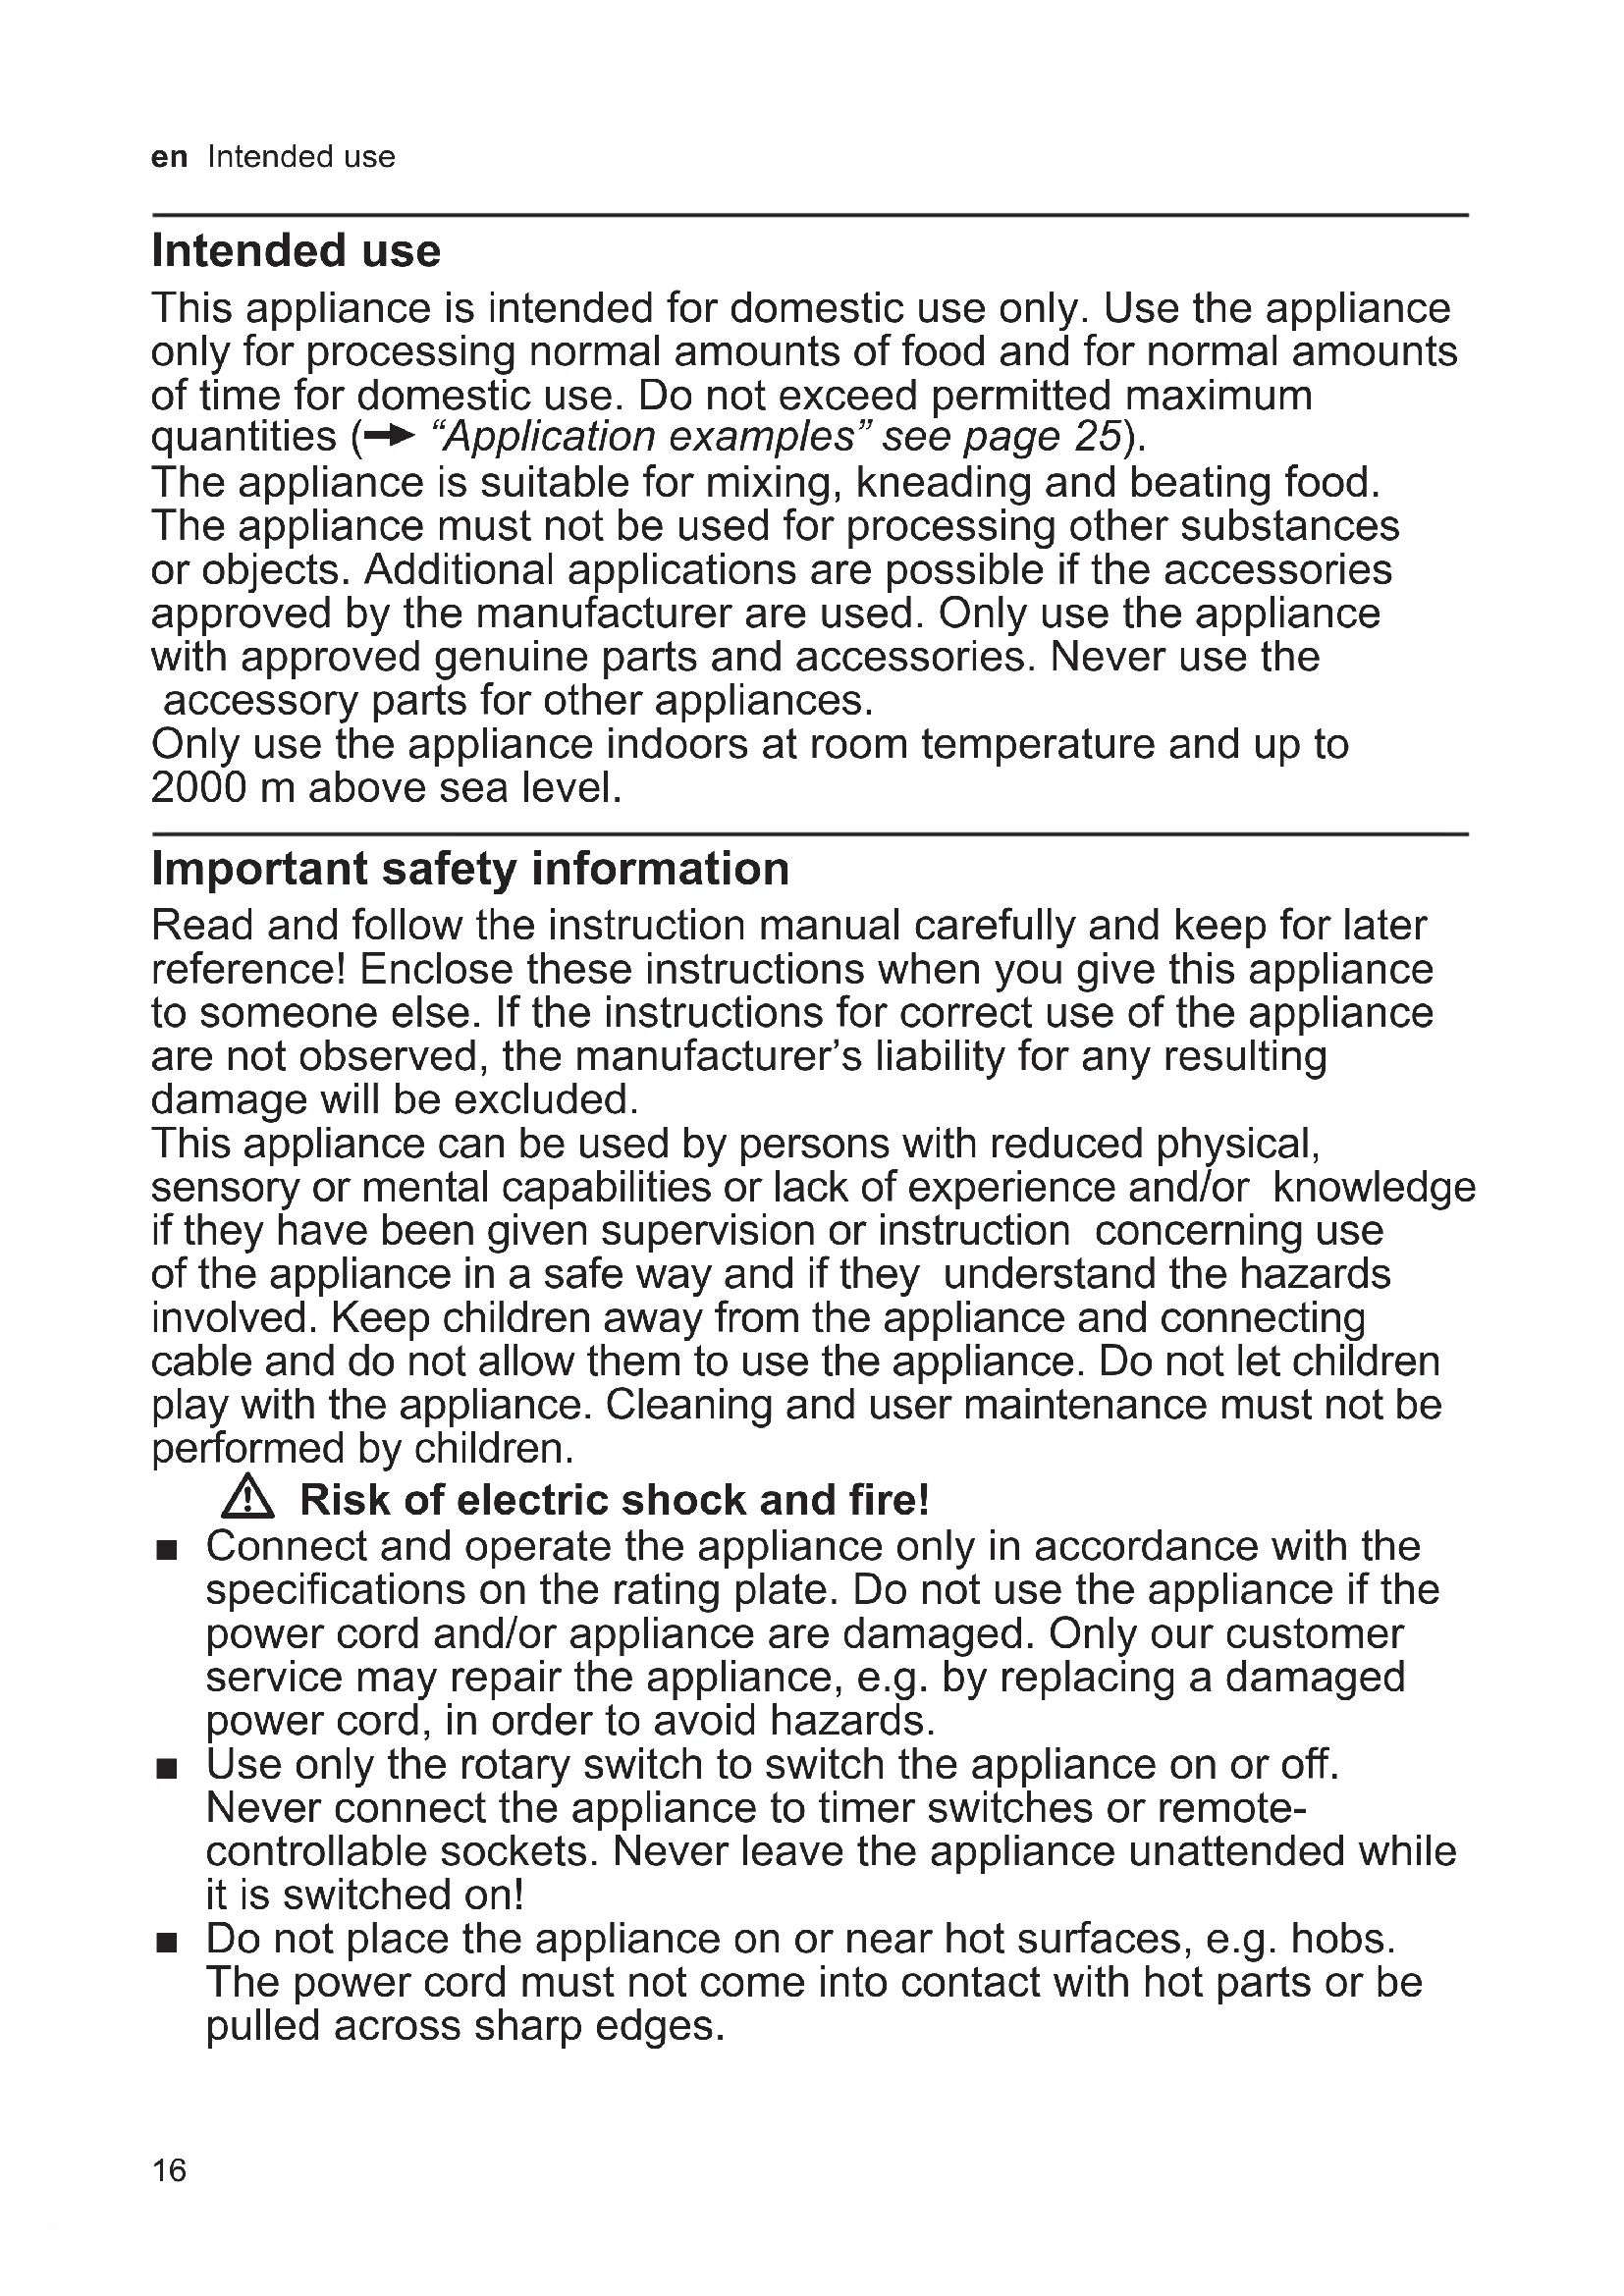
Stirrer (12)
for stirring dough, e.g. cake mixture
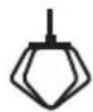
Whisk (13)
for whisking egg whites, cream and light dough, e.g. sponge mixture
Kneading hook (14)
for kneading heavy dough and mixing in ingredients that ought not be cut (e.g. raisins and chocolate chips)

Working with the bowl and the tools
Fig. 1:

Press the Release button and move the swivel arm to position 2.
Insert the bowl:
Tilt the bowl forwards and then set it down. Turn anti-clockwise until it locks into place.
Depending on the processing task, insert the stirrer, whisk or kneading hook until it locks into position.
Note:
If using the kneading hook, rotate the dough deflector until the kneading hook can lock into position (Fig. 3-4b).
Put the ingredients to be processed into the bowl.
Press the Release button and move the swivel arm to position 1.

- Attach the cover.
- Set the rotary switch to the desired setting.
Our recommendation:
- Stirrer:
first stir in at setting 1, then select setting 4
- Whisk:
setting 4, mix in at setting 1
Kneading hook:
first stir in at setting 1, knead at setting 2
Adding more ingredients
- Switch off the appliance with the rotary switch.
- Add more ingredients through the feed tube in the cover.
or
Remove lid.
Press the Release button and move the swivel arm to position 2.
Add ingredients.

After using the appliance
- Switch off the appliance with the rotary switch.
Remove mains plug.
Remove lid.
Press the Release button and move the swivel arm to position 2.
Take the tool out of the drive.
Remove the bowl.
Clean all parts, see "Cleaning and servicing".

Continuous-feed shredder
Risk of injury
Do not grip the sharp blades or edges of the cutting discs. Take hold of cutting discs by the edge only. Before attaching / removing the continuousfeed shredder, wait until the drive has come to a standstill and pull out the mains plug. Do not reach into the feed tube.
Warning!
The continuous-feed shredder must be completely assembled before use. Never assemble the continuous-feed shredder on the base unit. Operate the continuous-feed shredder in the indicated operating position only.
Predetermined breaking point
Fig. 1:
The built-in predetermined breaking point protects the drive of the appliance. If an overload occurs, the drive shaft of the continuous-feed shredder breaks. However, the drive shaft can easily be replaced. A new disc holder with drive shaft is available from customer service.
Reversible slicing disc - thick / thin
for slicing fruit and vegetables.
Process at setting 3.
Designation on the reversible slicing disc:
"1" for the thick slicing side
"3" for the thin slicing side

en Operation
Warning!
The reversible slicing disc is not suitable for slicing hard cheese, bread, rolls or chocolate. Slice boiled, waxy potatoes only when they are cold.
Reversible shredding disc - coarse / fine
for shredding vegetables, fruit and cheese, except for hard cheese (e.g. Parmesan).
Processing at setting 2 or 3.
Designation on the reversible shredding disc:
"2" for the coarse shredding side
"4" for the fine shredding side
Warning!
The reversible shredding disc is not suitable for shredding nuts. Shred soft cheese with the coarse side only at setting 4.
Grating disc - medium-fine

for grating raw potatoes, hard cheese (e.g. Parmesan), cooled chocolate and nuts.
Process at setting 4.
Warning!
The grating disc is not suitable for grating soft cheese and cheese slices.
Working with the continuous-feed shredder
Fig. 6:
Press the Release button and move the swivel arm to position 2.
Insert the bowl:
Tilt the bowl forwards and then set it down. Turn anti-clockwise until it locks into place.
Press the Release button and move the swivel arm to position 3.
- Remove drive cover from the drive of the continuous-feed shredder (Fig. 6-5a).
Hold disc holder at the lower end, ensuring that the two tips are face up.
- Carefully place the required slicing or shredding disc onto the tips of the disc holder (Fig. 6-6a).
In the case of reversible discs, ensure that the required side is face up.
Grip disc holder at the upper end and insert into the housing (Fig. 6-6b). - Attach the cover (note mark) and turn all the way in a clockwise direction.
Place continuous-feed shredder on the drive and rotate all the way in a clockwise direction, as illustrated in Fig. G-8. - Turn rotary switch to recommended setting.
Put food to be processed in the feed tube and push down with the pusher.
Warning!
Prevent the cut ingredients from building up in the outlet opening.
Tip: To ensure even cutting results, process thin ingredients in bunches.
Note: If the food to be processed sticks in the continuous-feed shredder, switch food processor off, pull out mains plug, wait until the drive comes to a standstill, remove cover from the continuous-feed shredder and empty feed tube.
After using the appliance
- Switch off the appliance with the rotary switch.
- Rotate the continuous-feed shredder in an anti-clockwise direction and remove.
- Rotate the lid in an anti-clockwise direction and remove.
- Remove disc holder with disc. To do this, press finger from below against the drive shaft (Fig. H).
Clean parts.
Blender
Risk of injury from sharp blades / rotating drive!
Never place fingers in the attached blender!
Do not remove / attach the blender until the drive is at a standstill! Operate the assembled blender only and with the lid attached.
Risk of scalding!
If processing hot liquids, steam escapes through the funnel in the lid. Add a max. 0,5 litres of hot or frothing liquid.
Warning!
Blender may be damaged. Do not process deep-frozen ingredients (except ice cubes). Do not operate blender when empty.
Working with the blender
Fig. 1:
Press the release button and move the swivel arm to position 4.
Remove the blender drive cover.
- Attach blender jug (mark on the handle on mark on the base unit) and turn all the way in an anti-clockwise direction.
Add ingredients.
Maximum amount of liquid = 1.25 litres; maximum amount of frothing or hot liquids = 0.5 litres;
Optimal processing capacity - solids = 50 - 100g
- Attach the cover and turn anti-clockwise all the way into the blender handle. The cover must be locked in position.
- Set the rotary switch to the desired setting.
Adding more ingredients
Fig. 1-8:
- Switch off the appliance with the rotary switch.
Remove the lid and add ingredients
or
remove the funnel and gradually add solid ingredients through the refill opening
or
- pour liquid ingredients through the funnel.
After using the appliance
- Switch off the appliance with the rotary switch.
- Rotate the blender in a clockwise direction and remove.
Tip: It is recommended to clean the blender immediately after use.
Cleaning and servicing
The attachments and accessories used must be thoroughly cleaned after each use.
Attention!
Do not use abrasive cleaning agents.
Surfaces may be damaged.
Cleaning the base unit
Danger of electric shock!
Never immerse the base unit in water or place under running water. Do not use a steam cleaner.
Remove mains plug.
- Wipe the base unit and drive cover with a damp cloth. If required, use a little detergent.
Then dry the base unit.
Cleaning the bowl and tools
The bowl and tools are dishwasher-proof. Do not wedge plastic parts in the dishwasher, as they could be permanently deformed during the washing process!
Cleaning the continuous-feed shredder
Risk of injury from sharp blades!
Do not grip the sharp blades or edges of the cutting discs. Clean them with a brush.
All parts of the continuous-feed shredder are dishwasher-proof.
Tip: To remove the red film after processing e.g. carrots, pour a little cooking oil on a cloth and rub the film off the continuous
feed shredder (not the cutting discs). Then rinse the continuous-feed shredder.
Cleaning the blender
Risk of injury from sharp blades!
Do not touch blender blades with bare hands.
The blender jug, lid and funnel are dishwasher-proof.
en Storage
Tip: After processing liquids, it is often sufficient to clean the blender without removing it from the appliance. Pour a little water and washing-up liquid into the attached blender. Switch on the blender for several seconds (setting M). Pour out the water and rinse out the blender with clear water.
Important information
If required, clean accessories bag. Follow care instructions in the bag.
Storage
Risk of injury!
When the appliance is not in use, pull out the mains plug.
Fig. K:
- Store tools and cutting discs in the accessories bag.
- Keep accessories bag in the bowl.
To store in the original packaging, see Fig. L.
Troubleshooting
Risk of injury!
Before eliminating a fault, pull out the mains plug.
The swivel arm must be engaged in every operating position.
Initially try to eliminate the problem which has occurred with the help of the following information.
Fault
Appliance does not start.
Remedial action
Check the power supply.
Check the mains plug.
- Check swivel arm. Correct position? Engaged?
Screw on blender or bowl as far as possible.
- Attach the blender cover and screw on as far as possible.
- Attach drive cover to unused drives.
The safety lock is active. Switch appliance to 0/off and then back to the required setting.
Fault
Appliance switches off during use. The overload protection feature has been activated. Too much food was processed at one time.
Remedial action
Switch off the appliance.
Reduce processing quantity.
- Do not exceed permitted maximum quantities (see "Application examples").
Fault
While the drive was running, the release button was inadvertently pressed. The swivel arm moves up. The drive switches off, but does not stop in the tool change position.
Remedial action
Set the rotary switch to 0/off.
Move swivel arm to position 1.
- Switch on appliance (setting 1).
Switch off appliance again.
Tool stops in tool change position.
Fault
Blender does not start working or stops during use, the drive is "humming". Blade is blocked.
Remedial action
- Switch off the appliance and pull out the mains plug.
- Detach the blender and remove the obstruction.
Re-attach the blender.
Switch on the appliance.
Important information
If the fault cannot be eliminated, please contact customer service.
Application examples
Whipped cream
-100-600g
Whip cream with the whisk for 112 to 4 minutes at setting 4 depending on the quantity and properties of the cream.
Egg white
-1 to 8 egg whites
- Beat egg white with the whisk for 4 to 6 minutes at setting 4.

Sponge mixture
Basic recipe
-2 eggs
-2-3 tbs. hot water
- 100 g sugar
- 1 packet of vanilla sugar
-70gflour
- 70 g cornflour
Baking powder if required
- Beat the ingredients (except flour and cornflour) with the whisk for approx. 4-6 minutes at setting 4 until frothy.
- Rotate switch to setting 1 and spoon in the sifted flour and cornflour within approx. 12 to 1 minute.
Maximum quantity: 2 × basic recipe
Cake mixture
Basic recipe
-3-4 eggs
-200-250g sugar
- 1 pinch of salt
- 1 packet of vanilla sugar or peel from 12 lemon
- 200-250 g butter or margarine (room temperature)
-500gflour
- 1 packet of baking powder
- 125 ml of milk
Mix all ingredients with the stirrer for approx. 12 minute at setting 1, then for approx. 3-4 minutes at setting 4.
Maximum quantity: 1,5 x basic recipe

Short pastry
Basic recipe
- 125 g butter (room temperature)
- 100-125 g sugar
-1 egg - 1 pinch of salt
-A little lemon peel or vanilla sugar
-250gflour
Baking powder if required
Using the stirrer, process all ingredients for approx. 12 minute at setting 1, then for approx. 2-3 minutes at setting 3.
From 500g flour:
- Knead the ingredients with the kneading hook for approx. 12 minute at setting 1, then for approx. 3-4 minutes at setting 2.
Maximum quantity: 2 × basic recipe
Yeast dough
Basic recipe
-500gflour
-1 egg
- 80 g fat (room temperature)
-80g sugar
- 200-250 ml lukewarm milk
- 25 g fresh yeast or 1 packet of dried yeast
- Peel of 12 lemon
- 1 pinch of salt
Process all ingredients for approx. 12 minute at setting 1, then for approx.
3-6 minutes at setting 2 using the kneading hook.
Maximum quantity: 1,5 x basic recipe
Pasta dough
Basic recipe
- 300 g flour
-3 eggs - 1-2 tbs. (10-20 g) cold water as required
Process all ingredients for approx.
3-5 minutes at setting 2 until a dough forms.
Maximum quantity: 1,5 x basic recipe


Bread dough
Basic recipe
-750gflour
- 2 packets of dry yeast
-2 tsp.salt
- 450-500 ml warm water
Process all ingredients for approx.
12 minute at setting 1, then for approx.
4-5 minutes at setting 2 using the kneadinghook.
Mayonnaise
-2 eggs
-2 tsp.mustard
-1/4 oil
- 2 tbs. lemon juice or vinegar
- 1 pinch of salt
- 1 pinch of sugar
Ingredients must be at the same temperature.
- Process the ingredients (except the oil) in the blender for several seconds at setting 2 or 3.
- Switch the blender to setting 4 and slowly pour the oil through the funnel and mix until the mayonnaise emulsifies.
Eat the mayonnaise immediately, do not store.
Disposal
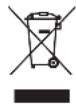
Dispose of packaging in an environmentally-friendly manner. This appliance is labelled in accordance with European Directive 2012/19/EU concerning used electrical and electronic appliances (waste electrical and electronic equipment - WEEE). The guideline determines the framework for the return and recycling of used appliances as applicable throughout the EU. Please ask your specialist retailer about current disposal facilities.
Guarantee
The guarantee conditions for this appliance are as defined by our representative in the country in which it is sold. Details regarding these conditions can be obtained from the dealer from whom the appliance was purchased. The bill of sale or receipt must be produced when making any claim under the terms of this guarantee.
Changes reserved.
Optional accessories
| MUZ5ZP1 Citrus press | For squeezing oranges, lemons and grapefruits. | |
| MUZ5CC2 Dicer | For cutting fruit and vegetables into equally sized cubes. | |
| MUZ5FW1 Mincer | For cutting fresh meat for steak tartare or meat loaf. | |
| MUZ45LS1 Perforated disc set fine (3 mm), coarse (6 mm) | For the mincer MUZ5FW1. Fine disc for pasties and spreads, coarse disc for sausages and bacon. | |
| MUZ45SV1 Viennese whirl attachment | For the mincer MUZ5FW1. With metal template for 4 different pastry moulds. | |
| MUZ45RV1 Grater attachment | For the mincer MUZ5FW1. For grating nuts, almonds, chocolate and dried bread rolls. | |
| MUZ45FV1 Juicer attachment | For the mincer MUZ5FW1. For pressing soft fruit, except raspberries, tomatoes and rose hips, to a pulp. At the same time e.g. currants are automatically stemmed and pitted. | |
| MUZ45PS1 Chipper disc | For the continuous-feed shredder MUZ5VL1. For slicing raw potatoes for chips. | |
| MUZ45AG1 Asian vegetable disc | For the continuous-feed shredder MUZ5VL1. Slices fruit and vegetables into fine strips for Asian vegetable dishes. | |
| MUZ45RS1 Grating disc coarse | For the continuous-feed shredder MUZ5VL1. For grating raw potatoes, e.g. for potato pancakes or dumplings. | |
| MUZ45KP1 Potato fritter disc | For the continuous-feed shredder MUZ5VL1. For grating raw potatoes for rostis and potato fritters, for cutting fruit and vegetables into thick slices. | |
| MUZ5ER2 Stainless steel stirring bowl | Up to 750 g of flour plus ingredients can be processed in the bowl. | |
| MUZ5KR1 Plastic mixing bowl | Up to 750 g of flour plus ingredients can be processed in the bowl. | |
| MUZ5MX1 Plastic blender attachment | For blending drinks, for pureeing fruit and vegetables, for preparing mayonnaise, for cutting fruit, nuts, for crushing ice cubes. | |
| MUZ5MM1 Multi-mixer | For chopping herbs, vegetables, apples and meat, for shredding carrots, radishes and cheese, for grating nuts and cooled chocolate. |
If an accessory is not included in the product package, it can be purchased via the trade or from customer service.
Prudence! Lames rotatives.

Sécurité anti-surcharge
Sous reserve de modifications.
Accessoires en option
"2" for den grove raspside
"4" for den fine raspside
OBS!
Fare for at k af skarpe knife!
www.bosch-home.com/tr
www.bosch-yetkiliservisi.com
PekomeHnyeTbcra Hi B yKOMy pa3i He 3aJIuShaTu npJaad BBIMKHeHm DoBwe, HIX ue notpi6Ho dIy nepepo6Kn npOdyKTIB. He BMnKaIte npJaad BXoNoCTy.
BaxJnBo!
He BCTpOMJIaTn pyK Do 3aBaHTaJxUyBaJIbHOrO OTBOpY.
Unpo Bitaem Boac 3 nokynkoHOBOr npnlaDy fipmB Bosch. OdaTkoBy iNopmaio npo hau npodykuio Bu 3HandeTe Ha haui ctopinu B lntepheTi.
3mict
BnKOpncTaHHa 3a npH3NaueHHaM.188
IpaBnlaTexHikn6e3neKn 188
CncTeMn 6e3neKn 190
KopoTkn orJ.. 191
Po6oyi noJoxeHHra 191
Unpablinna 192
OuHueHHiDorla. 195
36epirahnra 196
DOnomora npn HeNoJaKax. 196
PpNKpaN dJa BnKOpncTaHHa 197
Utni3aia 199
YMOBn rapaHTii 199
CneuiabHi npuaandra 199
CnCTeMn 6e3neKn
3axnct BiD nepeBaHTaXeHHa
B pa3i camoctiHoro BmKHeHHa DnuryHa nid yac ekcnnyatau, 3axnt BiD nepeBaHTaxeHHA kTINBOBaHn. Lc moKe 6ytn CnpuHHe OndHouacHOIO nepepo6ko1o 3aHaADTo BENIKOI KINbKOCTI npOdyKTIB.
3axoB pa3i BBimKHeHHcntEmn 6e3neKn onncahi B po3diJI «IOnomora npn HenoJaKax>.
Пилад He noTppe6ye TeXHiUHOrO DoIgIaIy.
KopotknoIgIaD
MaJIHOHOK A:
OCHOBHn6Jok
1 Khonka po36JokyBaHHa
2 NobopoTHn BaXijb
6 PnpBIDnna HacaOK (BiHnOcK-
MiwaIka, BiHnUOK-36NBAJka, rauok dIa 3amIyBaHHa) I M'acopy6kn (CneiJIbHI npIIaIaI*
7 3axncha kpiuka npnbody 6JeHepa
8ПиВIDДЯ6JIeHDEpa(CneuiJIbHi npIaIaI*)
Iprn HeBnkOpncTaHHi 3akpnTu npuBiD 6JIeHepa 3axNCHO KpNkoIO.
9 Bičík Ján 36epirānna Ka6eJIO
Po3mictb ka6eIb y BiDcIky IJRA ka6eIIO
Ua7a 3 npnlaam
10 Yawa 3 HepkaBIOyoCTani
11 Kpnka
Hacadkn
12 BiHnOk-MiwaJka
13 BiHnOk-36nBaJka
14 Tachok ДдяЗamiyBaHHa 3 BiDxHIOBauem TicTa
15 CymkaДл npnlaDЯ
a BoCTOpOHHi DNCK IJI Hapi3aHHa - Ha TOBCTi / ToHki CKN6KNI
bДBOCTOPOHHAATKIBHnca-KpynHO/dpi6Ho
cДиCK-Teptka-cepeHbO
19 Tpimau nckiB
20 Kopnyc 3 BInnyckHm OTBOPOM
Бленьдер*
21 KeJnx 6JeHepa
22 Kpnwka
23 BopoHka
* DeTani, kI He BXoJrTb DO KOMnJIeKTy NOCTaBKN, MoKHa 3aMOBHTu TOpRIBNI Ta Cnyx6i cepBicy.
Poboyi noJoxeHn
MaJIHOHOK B:
ybara!
Ppnilad cpiid ekcnnyaTyBaTn TiIbKn, kku npnilaandra/Hacaikn BCTaHOBneHi do npabNtBHO npINBOy Ta y npabINbHOMy noJoxeHHi y BiIDNOBIDHOCTi 3 ciEIO Ta6NIcEo Ta 3NaXODaTBcRy po6OomY noJoxeHHi. NOBOPOTnBaxinb NOBHeH 6ytN 3aΦIKCOBAHm B Na3y BV KOKHOMy po6OomY noJoxeHHi.
Bka3iBka
ПоворOTньвжь yctaTKOBaHn Функцю «Easy Armlift», ра пдтрмус pyх NOВОРТHorO BaxkeIIO DoBepxy.
YcTaHOBka po6oyoro noJoxeHHa:
HaTnchTyN KHOJky po36JIOkyBaHHa
Ta NOBepHyTNI NOBOPOTNIBaXJIb.
IiTpmyBaTn pyx OndHieO pykoHO.
■ NobepHyTu NOBOpOTnBaxiNb B 6aXaHe noIOXeHHa DO φikcauii.
| Положения | Проблем MUM50.. | ||
| 1 | 6 | 1-4 | |
| 1-4 | |||
| 1-2 | |||
| 2 | 6* | ||
| 3 | 5 | 2-4 | |
| 2-3 | |||
| 4 | 8 3-4 | ||
| 6 | 3-4 | ||
* YcTaHOBka / 3HiMaHHaBiHnUka-36BbAkn, BiHnUka-MiHaJKn IraUka dJa 3aMiUsyBaHHa; OdaBaHHa BeNkoI KInbKOCTI npOdyKTIB dJa nepepo6Kn.
YnpaBnHn
He6e3neKa TpaBMyBaHHa!
BmkaTn wTeNceJIbHy BUNKy Do po3eTKn TiIbKn NiCJr 3aKiHueHHe Ycix NiIgROTOBOK Do pO6OTn 3 npuJaOM.
YBara!
Ppnilad cniid ekcnnyaTyBaTN tInbKn 3
ppniladm/HacaKamn B po6oyomy
noIooJHHi. He ekcnnyaTyBaTN npnilad
nopoxhim. TpImatn npnilad Ta npniladn
noIani BiD dxepeN tenla. Detani He moXHa
BVKOpncTOByBaTN B MIKPOXBnIbOBI neyi.
■ Npeed nepshm BnKOpncTaHHM npuad Ta npnaandcnpetelbNooHCTNTN, DnB.《OunueHn i dOrnA}.
BaxKnBa Bka3iBka
IaHa IInCTpyKci3 ekCnnyatauii MicNTb HAKNeiKy 3 yCTaHOBkAmn po6Oooi WBNdkocTi npnAdy npn BnKOpNCtAHHi HacaDOK Ta akcecyapib. Mn peKomeHdyemo npNKneiTn CuHo HAKNeiKy Ha npnJa (MaIIIOHOK C).
PiIroTOBka
BcTaHOBnTo OCHOBnH 6Jok Ha pIBHi Ta YnCTi NOBepxHi.
BntaHytn Ka6eJb
(MaJIHOHOK D).
Bicik dny ka6eIIO: BntarHyTu Ka6eIb do 6aKaHOI DOBXINH.
Ybara!
He nepekpybattn kaebnb iD yac noro 3MOTyBaHHa.
BcTaBnTuIeNceBHy BnIKy Bpo3eTKy.
Uawa i npnilaand
He6e3neKa npaHeHHy o6epTOBmH HacaKamn
Пд час роботи НIKОЛп He BCTPOMЯТИpyКДо чашi. ПрацюВати Лшe 3i BCTaHOBNeHOIO KPNUKOIO (11)! HacaIGN MoxHa MInrTIN TINbKN PICN 3yINHKn PpNBODY - npVBID PPOOBKYE pyxATNCI SE DeAkn Yac NicNBAIMKHeHHa Ta 3yINHAcTBcR B NOpOKeHHI DJIa 3MiHN HacaDOK. Baxjlb pyxatNiNe nicNPOBHOI 3yINHKn HacaDN. PpNBODI, SO He BVKOPNCTOBYIOTBcR, 3aBXdN 3akpNBaTe 3axNCHMN KPNUKAMN.
Ybara!
Uauy MoxHa BnKOpNCTOByBaTn IINue dIpaO6OTn 3 cIM npNJaOM.
BiiHnuok-MiwaIka (12)
ДяЗamiyBaHHBaxKOroTicTa Ta nidmiWyBaHHIHRpeiCHTIB,Як He NOBHHI NOpi6HIOBaTnCra (Hanp.: pOd3INHOK, WOKOJaDHNX PnaCTIB)

Po6ota 3 yαseHTo Ta HacaKaMn MaIHOK E:
HaTnchTyHa KHONKy po36NokyBaHHa Ta nepeBc NOBOPOTNn Baxijb B nOIOKeHH 2.

YcTaHOBka Ya: BCTaHOBtN YaIy HaxInJeHOIO Bnepei Ta NoCTaBHTn pIBHO, NOBepHyTn npOTn rOdINHHKOBoi CTpiIKN Do fikcaii.
B 3anexhocti BiD metn nepepo6kn BCTaBHTN y npNBiD BiHcNK-MiwaIky, BiHcNK-36BaIky qn rayok dny 3amiuBaHHaDo φikcaii.
Bka3iBka:
NobepHtB BiXnIOBaU Ticta Ha rauKy JIy 3amiSyBaHH TaK, 06 raOK MIR BBInTb Bna3 (MaHOHc E-4b).
3aBaHTaJNTn npOdyKTn dJa nepepo6Kn do Yaashi.
HaTnchTyHa KhoNky po36NoKyBaHHa Ta nepeBecTu NOBOpOTn BaxiNb B noJoxeHHa 1.

BcTaHOBtN KpnUky.
BCTaHOBHTI NOBOPOTHn NEpeMnKaU Ha 6axaHn CTyniHb.
Hawa pekomendaui:
-BiHnuok-miwaIka: cnouatky nepemiiyBaTu Ha CTyneni 1, NOTIM BBIMKHyTu CTyniHb 4
-BiHnOk-36nBaJka: CTynIb 4, nIMiWyBAtn Ha CtyneHi 1 -Tayok dny 3amWyBaHHa: cnoatky BMiwyBatn Ha CtyneHi 1, BmIWyBatn Ha CtyneHi 2
ObaHTaxeHHIhprpeiHtIB
■Виимкунп пилад за дономого поворот horo nepemkaça.
IdoaBaTn iHrpediEHTN uepe3 OTBip IJRA 3aBaHTaXyBaHHB KpNiUci.
a60
3HЯТиКршку.
HaTnCHyTu Ha KhoNkpyo36NoKyuBaHHa Ta nepeBecTu NOBOpOTnBaxiNb B NoIOxKeHHa 2.
3aBaHTaXHTn iHrpeiHTN.

Picjra po6otn
Bumkhytn npnila3a donomoroIIO noboporTHoro nepemnkaa.
BnHrTn wTeNceJbHy BnKy 3 po3eTKn.
3HЯТиКрИшky.
HaTnCHyTu Ha KhoNkuyo36NoKyuBaHHa Ta nepeBecTu NOBOPOTHm BaxiNb B NoJIOKeHHa 2.
BnHraTn HacaKky 3 npNBOy.
■ BnHraTn YaSy.
■Поунсти Всдетаи,ДИВ.«Очшени i Dorлд》.
BaratoФункцioHaJIbHa Hapi3ka
He6e3neKa TpaBMyBaHHa
He TopkaTnca roctpnx HOxIB i KaHTiB DnCKiB dIa noDi6HeHHa. NsCKn IJra noDi6HeHHa MoXHa 6paTu TInbKn 3a KpaI!
BaratoФункцioHaNbHy Hapi3ky MoxHa BCTaBnTn/3HimAtu TiIbKn NiCJy 3yNnHKn npNBOdy i nicJy BnMAmHry BnIKn 3 pO3eTKn. He BcTpomJrtn pyK Do npNOMHOro 6yHkepy.
ybara!
BaratoФункцioHaNbHy Hapi3ky
BVKOpNCTOByBaTn TiIbKn B NOBHiCtIO
3i6paHomy cTaHI. BaratoФункцioHaNbHy
Hapi3Ky HIKoJIH He 3bupaTH Na OCHOBHOMy
6Loci. BaratoФункцioHaNbHy Hapi3Ky
BVKOpNCTOByBaTn NIISe B 3a3HaueHOMy
po6OohMy nOJoxeHHI.
3axnCT BiD nepeBaHTaXeHHaMaHohok F:
Ioo6 nonepdntn 3NaHni nooKoJKeHH npnaNy B pa3i nepeBaHTaKeHHa 6araToOpyHKioHaJIbHOi Hapi3Kn, Ha npBODHomBy BaNy 6araToOpyHKIOHaJIbHOi Hapi3Kn 3po6JIeHa HacIyka (MICe 3aDaHoro 3lOMy). Y BnPaNky nepeBaHTaKeHH npVBiHN B aI 3IamYcTBcR B UcOMy MiCi. HOBn BaI dIa DnCKIB 3 npVBiDnM BaIOM MoXHa npIa6aTn B cnyk6i cepBicy.
ДвocToPOHHiДИСКДЯHapi3aHHa -HaTOBCTI/TOHKiCKn6Kn
Длну Hapi3aHHафуктIB Ta OBOчIb.
Ipepeo6ka Ha cTyniHi 3.
Hikon He BCTpomnpykdo BCTaHOBHeHO 6IeHepy! BneHep MOxHa 3HIMATN/BCTaHOBIOBaTN TiNbKN icJra 3yINHK npNBOy! BneHep MOxHa BIKOPNCTOByBaTN TiNbKN y 3i6paHomy cTaHi Ta 3i BCTaHOBHeHO KpnKoIO.
He6e3neka oTpmaHn onikib!
Пд уас посякг rapячх npodyktib 6gneHepi 3 BOPOHKВ KpnuBnCTynae napa.ЗanOBHIOBaTN MaKcIMyM 0,5 NiTpIB rapaoyoi abo nIHnctOi piHNH.
ybara!
IobaHTaxeHHIhprpeiEHTiB
MaJIHOK J-8:
Bumkhytn npnla3a donomoroIO NOBOPOTHO nepemkaua.
3HrTn KpNkky i 3aNoBHTn iHRpeDiEHTn a6o
■ BИНHArTN BOPOHky i 3aNoBHOBaTN TBeRdi INHpeDiEHTN NOCTynoBO uepe3 3aBAHTaJxByBaJIbHn OTBip 50
3aJIHTn piKl iHrpeDiEHTn Uepe3 BOpOHky.
Picna po6oTo
Bumkhytn npnila3a donomoroIO NOBOPOTHO nepemkaaya.
■ NobepHyTu 6IeHdep 3a roHNHHKOBOIO CTpiIKOTo Ta 3HrTt.
Iopada:BleHepHaikpaae nouchntu Bida3yXnCJBAKOpNCtAHN.
OuHnHnI dOgJaD
BnKOpNCToyBaHe npJaIaI Heo6xIdHo rpyHTOBH OuCTNTn IicJia KoxHOro BnKOpNCtAHHa.
ybara!
He 3actocobybatn hiaknx abpa3nbnX 3ac06ib dIy quHnHa nobepxHax MOxyTb BHNKHyTN NOWKoJKeHHa.
OuHnHnOcHOBHOro 6Joky
He6e3neka ypaXeHHra eJeKtpnHm cTpyMOM!
Hi B ykomy pa3i He 3aHyprobatn OCHOBHNI 6IOK B BOy Ta He TpIMaTNI iI npOTouHO BOIOJ. He KOpNCtYBaTnCn NapooOuSyBaUem.
■ BnHraTn wTeNceIbHy BnIKy 3 po3eTKN.
■ПрOTePTN OCHOBн 6JOK Ta 3axnchy KpIshKpy npINBOdy BOJoroIO raHupkoIO. 3a noTppe6m MoJHa cKOpNCtYBaTnCn HeBeJIHKOIO KiIbKiCTHO MInOuO 3acO6y.
■Псляцboro npoteptn npnilaH acyxo.
OuHsEHHaWiTaHaCAdOK
aay Ta hacaik MoxHa MNTn B nocydomnHi MaunHi. He 3atnckata nllactmacoBi elementn B nocydomnHi MaunHi, ce MOxe npn3BecTn do ix ctaIo! deopmaui iid yac mTTra!
YnueHna 6araToOpyHKcioHaJIbHOI Hapi3Kn
He6e3neKa npaHeHHra roCTpIMN HOxamn!
He TopkaTnca roctpnx HOxIB i KaHTiB DnCKIBdI npDi6Henn. Ira OunuEHHa KopnCTyBaTnca 1tKOIO.
Bci detani 6araToOpyHKcioHaJIbHOi Hapi3KIMOJHAMITN B NocydomnHi MaunHi.
Iopada:ДяусунучepBOHOro
Haiboty nicЯперобкn, Hanp., MOpKBn,
HaINTu TPOXn XapUOoi OJIi Ha TkaHNHy
i npoteptn HeIo BaratoФyHKQUHaNbHy
Hapi3ky (3a BInrTkOM DnCKIB dIЯ noDiPbHeHHry).ПicЯ zuBOrO BaratoФyHKQUHaNbHy
Hapi3ky cNoLoCHyTu.
OuHnHn 6JeHdepy
He6e3neKa npaHeHHr roCTpIMN HOxamn!
He TopkaTnca HOxIB 6IeHepa OroJIeHIMPykami KeInx 6IeHepy, KpIuKy Ta BOpOHky MOJHa MNTB NocydomNHi MaUNHi.
Iopada:Дя OunuHn6JeHepa nicna nepepo6kn piinu YacTo Heo6OB'3KOBO 3Himatn Ioro 3 npnilady.ДЯ zuboro HAnITn TPOxN BODN 3 MIOUcM 3aco6om Do BCTAHOBHeHOrO 6JeHepa.BBIMKHyTN 6JeHep Ha JeKInbKa cekyHd (ctyniHb M). BInITn NonockanbHy Body Ta npomITn 6JeHep qnCTOu BOdo.
BaxKnBa Bka3iBka
CymkyДЯ npnlaДЯ NOUcTITb 3a noTppe6n.ДOTpMMyTeCЯ peKOMeHdaui 3 DOrJaDy B cymci.
36epiraHnra
He6e3neKa TpaBMyBaHHa!
Ipn HeBnKOpncTaHHi npnJaDy BnHrTNI 1TeNcJIbHy BNkY 3 pO3eTKN.
MaJIHOHOK K:
■PoknaiTb HacaKn i DnCKn dny noDpi6HeHHa DO cyMKn dny npuadJa.
36epiraTe nIDcTaBky dny npnlaDy B yawi.
Udo 36epiraHHB opuHaJIbHiyNAKOUI DnBiTbcra ManHOHOK
IHRpeDiEHTN NOBHHi MaT N OHaKOBy TemnepaTypy.
IHRpeiEHTN (Kpim OJI) DekeIbKa cekyHnepepo6JrN B 6JeHepi Ha cTyniHi 2 afo 3.
■Бленьдерперашичтугь 4iЗаивати NOВьно ONIO uepe3 BOPONky - 3бивати Do Tnx nip, nOKn MaioHes He emyIbryc.
Maiohe3 BnKOpncTaTn kHaBnDme, He 36epiratn Ioro.


Ytulizia

Ley npna MapkipoBaHO 3iHNOIIOXeHbBpOeNcBkoI DnpeKtNB2 2012/19/EU cTocOBHO eNeKtpoHHx Ta eNeKtpoPnPnAdiB, 6yJny BnKOpNCaHHi (waste electrical and electronic equipment - WEEE). DnpeKTHBOHO BV3HaauToBcM MoJNBOCTi, kI e DiINCHmY mexax CbponeCboKOco3y, 6oDo npnHrTTa Ha3aT a Tynl3auii 6yBux y BnKOpNCaHHi npnaDIB. Ipo akTyalbHi MoXNBOCTI dJa BVdaJIeHHa MoXHa dI3HaTncB CneziAli3OBAHOMy mara3HHI.
YMOBN rapaHTii
CTOCOBHNO zboRo npnilady diIOb yMOBNapaHTII, 6o6 6yIIn ony6NIkOBaHI haIIMKOMnTeHTHM npedCTabHNtBOM B KpaIHi, B aKi BN npnd6aII npnilad. Bn MoKeTeB 6yb-akn Yac OdepKaTH yMOBN rapaHTIy cneiaI3OBAHOMy mara3HHi, B kKomBynpd6aII npnilad, a6o 6e3nocepEnbOB HnaWOMy npedCTabHNtBi y Bac B kpaHi. yMOBN rapaHTI dJa HimeuHn Ta apecnBn 3HaJDeTe Ha octAHIX YoTnpboxctopihkax uei 6poUpyn. Kpim TORO, yMOBNrapaHTI po3Miuehi TakoK i B lHTepHeti 3a3a3NaHeHO aDpecoIO. DnA KopNCtBuHNRapaHTINMn nocnyramn Heo6xIDHO 6yDb-akOMy BnApdky NOKa3ATN KBNTaHIO npo OnlataY.
MOxJIiBi 3MiHn.
CneuaJIbHi npJaIaIaIaIaIaIaIaIaIaIaIaIaIaIaIaIaIaIaIaIaIaIaIaIaIaIaIaIaIaIaIaIaIaIaIaIaIaIaIaIaIaIaIaIaIaIaIaIaIaIaI
He ncknoyeha onachoctb TpaBMnpoBaHna!
■IpeE3aMeHOn npHaJnHexKHOe HIN DOONHHTeJIbHbIX
DeTanei, KOtOpBie BO BpEmpa6Otbl PpNBOJrTCs B DvHXeHne,
PpN6Op DoJXeH 6bITb OTKnUoyeh N OTCoeDInHeH OT CETn.
IOcNe BbIKJIOueHnepnBOd eue DBNXeTcH HeKOToPOe BpEm.
DOxDNTEcB NOHOn OCTaHOBKN PpNBOJa.
He n3MeHnTe noLoXeHne NOBOPOTHO KPOHHTeHa, NOKa np6Op BkIoueH.
■ПользуITEcB HacaKaMn TOnbKO npN BCTaBJIeHHoH CMEcNTeNbHOu YaSe, C yCTaHOBJIeHHOu KpbIshKoN 3aUHTbIMN KpbIshKAMnpNBODa! PpN pONb3OBAHN HaCAKaMn yCTaHOBNTe CMEcNTeNbHyU OaUy, KpbIshKU N 3aUHTHBle KpbIshKn npNBODa CORlaCHO INHCTpyKUnn!
■Bo BpeMa pa60tbl np60pa Hn B Koem cIyuae He onyckaIte pyKn I naIbIbI B CMEcITbHyIO qaUy IIN B 3aRpy3OHyBn CTBOJ. He BboIte kaKne-lNo6o ppeMTebl (HaNPmep, pa3JIbAteIbHyIO JOKKy) B CMEcITbHyIO qaUy IIN B 3aRpy3OHyBn CTBOJ. BepeHnte pyKn, BOLOcbl, ppeMTebl OJeKDbI N dpyrIe ppeMTebl OT KOHTaKTA C BpauHOUMNCS DeTaJIaMn.
Kateropnueckn 3anpeaetcnaONb3OBaTb HacaKn n npHaJneXHOCTn IIn6o2 npHaJneXHOCTn OndHOBpeMeHNO. Pnp NcNoJIb3OBAHn npHaJneXHOCTe pyKOBOdCTByIteCb daHHoINHCTpyKcneN NO 3KcNpyaTaCnN IN DpyrIMN IHCTpyKcYAMN, BXODaUMN B KOMPJIeKT NocTAbKN.
■Пинадлжно MoЖHO ИСоЛьЗОВаТь TOЛьКВ NOЛНOCТью COбpaHOM BИд! HnВ Koem cIvyae He COБирайTe пинадлж-HOCTn Ha OCHOBHOM 6Ioke Ппбopa.ИсоЛьЗУte пинадлж-HOCTb TOЛьКВ IпeДуСМOTpeHHOM pa6oyem NOLOXeHIN.
He Tporatb octpblc Hoxn N Bblctynbl DnCKOB-n3MeIbYnteJeN. nckn-n3MeIbYnteJI6paTb TOlbKO 3a Kpa!
He Tporatb Hoxn 6JIeHepa roIbIMn pykamn.
■ Hn B Koem cnyuae He onyckaTb pyKn B yCTaHOBJIeHHbI 6JIeHdep! Kateropnueckn 3anpeuaetcra NOpb3OBaTbCra 6JIeHdepom 6e3 yCTaHOBJIeHHoK PblkN.
CobIouaTe ocToPOxHocTb npn o6paUeHN C ocTpblMn HOXAMN, npn ONOpOxHeHN pe3epByapa n npn OunchKe.
Onachoctb ownapnbHnra!
He n03BOJrB DeTm nIgpaTb C yNaKOBOUHbIM MaTePnaIOM.
Bнманne!
PekomehnyeTcH N B Koem cIyuae He ocTabJrTpN6Op BKJIIOUeHHbIM DoJIbSe, Yem 3TO Heo6XoJMo dJa pepepa6OTKn npOdyKToB. He BKJIIOuayTe np6Op BXOJocTyU.
! BaxHo!
Pa3bIcHHe cIMBOJIOB Ha np6ope nJI npHaJexKHOCTaX

Co6IIOdaTb yka3aHnB INHCTpyKcnn No 3KcNlyaTaCn.

OctopoJHo! BpaaiouIeScn HOxN.

OctopoJHo! BpaaIouIeScnHaCaIKn. He onyckaTb pyky B 3arpy30uHoe OTBepCTne.
OT BCero cepda no3dpabnem Bac c NOKyIKOHOBORO np6opa qnpMb Bosch. DOnoJIHrTeJbHyU INΦOpMaunO haWei npOdyKcNn Bbl HaJeTe Ha haWei cTpaHnue B INTEpHeTe.
CopepkHne
IcnoJb3ObaHnne no Ha3HaueHnIO.201
Baxkhble npabunlaTexnkn
6e3oNaChocTn 201
CnCTembl 6e3oNaChOCTn. 204
KomnneKTHbI O63op 204
Pa6oyne noJoxeHnra 205
3Kcnpnyatauia 206
Ynctka n yxo.. 209
Xpahene 210
POMOuB npuycTaHHeHH
HencnpaBHOCTeI 210
PpimepbI nCnoJIb3OBAHnra. 211
Ytuln3a.. 213
YcnoBra rapaHTnHoro 6cbnyKbAHna..213
CneuNaBHeI npHaIeXHocTn 213
CnCTeMbI 6e3OpaCHOCTN
Блорвка Влоченя
Cm. Ta6nucy «Pa6oue noJoxeHna»
Pnp6op BkIouaetcB nOJ.1n3ToIbKOBTOM cnUyae:
ecn cmecntelbnaa (10)
BCTaBnHa NIOBepHyTa Do QnkcauN.
OTcEKДЯхpaHEnHaKa6eJb: BbITaHyTb Ka6eJb Ha KeJaEMyO dInHy.

BHHMaHHe!
He nepekpyuBaTb ka6eIb npn ero 3anpaBke.
BcTaBnTbIeNceJIbHyIO BnIKy Bpo3eTKy.
CmeCNTelbHaayaHaHaHacaKn
OnachocTb TpaBMnpoBaHna O BpaaIOuIeecHaCaKn!
Bo Bpem 3KcnpnyaTaunn HNKoRa He onyckaTb pyKn B CmecnteJbHyU qaSu. Pa60TaTb TOnbKO C yCTaHOBHeHHo KpbIshkoi (11)!
HacaKy MoXHo 3aMeHЯTb TOnbKO NocJe OCTaHOBKn PnVBODa -PnVBOD DvNKeTcE eue HeKOTOpoe Bpem NaocJe BbIKIIOUeHn I OCTaHaBnBaEtCra B NpOJKeHn DJIa CMeHbI HacaDOK. N3MeHrTa NpOJKeHne NOBOPoTHOrO KPOHHTeHn MaOxHO ToNbKO NocJe OCTaHOBKn HacaDkn. HenCpONb3yeMbIe PnVBODbl O6ra3aTeJIbHO DoJXHbI 6bITb 3aKpbITbI 3aUHTbIMN KpbIShkAmn.
BHMMaHne!
CmecnteIbHyu qaUy nCNoIb3OBA Tb TOnbKO dIpa60TbIC daHHbIM npnbopom.
BenchkIJIpeMeuBaHn (12) IJIe NepemeuBaHn TecTa,Ha np., Cdo6Horo Tecta
Bench B36nBaHna (13)
ДЯВ36иВаняЯЧьIX 6eIkoB, CINBOKИДЯВ36иВаняЛeRKOTeCTa,Hanp.,6uCKBHTHO
MecnIbHaHa HacaKa (14)
ДлЯ 3aMeuBaHnTJKeJOrTo TcTa
IДлЯ NOdMeuBaHnU INHpe-
DIneHTOB, KOTOpbI He DoJXHbI
N3MeJIbYaTbC8 (HaNP.: N3IOMa, WOKO
ПпаCTиHOK)
Pa6ota co cmeCNTelbHou yauwei HacaKaMn
PncyHOK E:
HaKaTb Ha KhoNky pa36NoKIpObKn I nepeBecTn NOBOpTHbIKPOHHTeH B NoJIOKeHne 2.
YcTaHOBka CmecnteIbHOn YaShn: HAKNoHEHHyO BnepeD YaSy yCTaHOBtB N 3aTeM ONyCTNtB, NOBepHyTb ee npOTNB YacOBoC TpeJKN Do fNKcaUIN.
B 3aBnCmOCTN OT BnDa nepepa6aTbIBaEMbIX npoDyKTOB BCTaBnTB B npuBOd DO fHKcaU IN BEHnK dIpy nepMeunBaHH, BeHnK IJI B3bNAHH nn MeCNbHyHO HacdKy.
PpimmeaHne:
Ipn yctaHOBKe MeCNbHOn HacaKn OTKIOHNTeJIb TcTa NOBepHyTb, TaK 7TO6bl MeCNbHaay HacaKa CMOrJa 3aΦNKcnpoBaTbca (pncyHok E-4b).


3arpy3ntb BCMEcNTeJIbHyIO yaUy npedHa3HaueHHbIe InI nepepa6OTkn INHrpEaHEtbl.
HaKaTb Ha KhoNky pa36noknpOBKn npeBecTu NOBOPHTbIKPOHHTeIN B noLoKeHne 1.
YcTaHOBNTb KpbIuKy.
YcTaHOBnTb NOBOpTHbI nepeKIOuHaTeJIb Ha JeJaEMyIO CTyneHb.

Hawa pekomendaçya:
- BeHnK dIy nepeMeunBaHn:
Chayana BMeuBaTb Ha CTyneH 1, 3aTeM nepeKIOHTb Ha CTyneHb 4
- BeHnK IJRA B36NBAHNA:
CTyneHb 4, NOdMeuBHe Ha CTyneH1
-MecnIbnaHa hacaKa:
Chayana BMeunBaTb Ha CTyneHn 1, 3aTeM 3aMeunBaTb Ha CTyneHn 2
I06abJIeHne HnHrpeJeHToB
BbIKIOuHTb npI6Op c nomOu bIO NOBOPOTHO nepeKIOUaTeJI.
Ido6aBnTb INHpeDneHTbl Upe3 3arpy3OuHoe OTBepCTne B KpbIwke.
NIN
- ChЯть Крblшky.
HaKaTb Ha KhoNky pa36nokpOBKn n nepeBecTu NOBOpOTbI KPOHHTeH B noJoxKeHne 2.
3arpy3nTb INHpeDneHTbl.

PocJe pa6oTbI
BbIKIOHTb np6Op c nOMOJIbIO NOBOPOTHO nepeKIOUaTeJ.
I3Bneueb wTeNCeJIbHyIO BUNKy n3 pO3ETKN.
- ChЯть Крblшky.
HaKaTb Ha KhoNky pa36nokpOBKn I nepeBecTu NOBOPOTbI KPOHHTeIN B noJoxKeHne 2.
I3BneuHaCaKU 13 npNBOda.
N3BneYb CmecNTeNbHyu YaUy.
■Побети чсту BCex DeTaJIeN, CM. «ЧИСТКИ YXOD».

YHnBepcaJIbHaJa pe3Ka
OnachocTb TpaBMnpoBaHna
He Tporatb octpblc Hoxn N BbICTynbI DnCKOB-n3MeJbUHTeJe. Nscknn3MeJbUHTeJI6paTb ToNbKO 3a Kpa!
YHnBepcaJbHyO pe3ky MOxHO yCTaHaBnBaTb / CHImaTb TOJbKO NocNe OCTaHOBKN npNbOda I N3BJeHEny BnIKN I3 p03eTKN. He onyckaTb pyKn B 3arpy3oHbI CTBOJ.
BHHMaHHe!
YHnBepcaJIbHyO pe3Ku nCNoJIb3OBaTb TOJIbKO B NOJIHOCTbIO CO6paHHOM BVIDE. HNkorDa He CO6upaTb YHnBepcaJIbHyO pe3Ky Ha OCHOBHOM 6Ioke. YHnBepcaJIbHyIO pe3Ku MOxHO nCNOJIb3OBaTb TOJIbKO BVka3aHHOM pa6ooyem noJoxKeHN.
3aunta ot neperpy3kn
PncyHOK F:
YTo6bl npedotBpaTnTB 3NaHTeNbHbIe NOBpeXdEHHaWero np6opa BO Bpemr Npeperpy3Kn yHNBepcaIbHOJ pe3KN, PnIBoHDNoBaI yHNBepcaIbHOJ pe3Kn CHa6KeH HaceyKO (3aDaHHOe MeCTO cIOMa).BcIyuae neperpy3Kn npIBoHDNo BAJI IOMaETcB b 3Tom MecTe. HOBBI DEpkataJIb DIIA DINCKOB C npIBoDHBIM BAJOM MOxHO npIOObpeCTN B cepBnCHOH cIyX6e.
Дысторони диck-pe3ka -TOJICTbIe / TOHKe JOMTNKn
ДЯнape3KNФpyKTOBиОBOUeN.
Ipepepa6oTka Ha cTyneHn 3.
O6o3HaueHnHa DByCTOpOHHeM DNCKepe3Ke:
Ipepepa6oTKa Ha cTynen 2 nn 3.
O6o3haueHnHa DByctOpOHem DnCKeUHHKOBKe:
《2》-CTOPOHaДЛЯКрУнHOИshNKOBKN 《4》-CTOPOHaДЛЯМeЛКОIMSHNKOBKN
BHHMaHHe!
ДByCTOpOHnДИСК-шнКOBKa He npriOdoHДЯшнКOBKn opexOB.MяrkN CBip MOxHoShINKOBaTb TOIbKO Ha CTopoHeДЯKpynHOJшнКOBKnHa CTypeHn4.
Диck-Терка -срднe

ДлгHaTnpaHnЯ cblpOro KapTopeJIЯ, TВерdOrO cblpa (Hanp., «Пармe3aHa»), OXlaJxdeHnOro WOKoJaIa I opexOB. Пepepa60tka Ha cTypeHn 4.
BHHMaHHe!
ДиCK-Терка He npiroDeHдЯ HabTnpaHnmaMЯrkOro И Hape3HOrO cbipa.
Pa6ota c yHnBepcaIbHoN PncyHOK G:
HaKaTb Ha KhoNky pa36JIOKNpOBNi nepeBecTN NOBOPOTbIKPOHHTeIN B NOJIOKeHne 2.
YcTaHOBka CmecnteHbHOu YAuN:HaKIOHeHHyO BnepeD YaUy YcTaHOBnTbI 3aTeM ONyCTnTb, NOBepHyTb ee npOTNB acOBoC TpeKN Do fNKcaun.
HaKaTb Ha KhoNky pa36JoknpoBKn I nepeBecTN NOBOpTHbIKPOHHTeH B NoJIOKeHne 3.
CHaTb 3aUHTHyU KpbIuKy c npBODa yHnBepcaJbHOn pe3Kn (pncyHOK-5a).
YdepxnBaTb depxkATEIb IJIa DnCKOB 3a HIXHNI KOHeU, pni 3Tom o6a BbICTyna DOJXHbl yka3blBaTb BBepx.
JKeJaEmbI DnCK-pe3ky nINn DnCKWHKOBKY OCTOPOXHO NOLOXHTb Ha BbICTybl DEpKaTeJIa DnCKOB (PncyHok G-6a). Pnp nCNoIb3OBAHN N DBYCTOPOHHX DnCKOB, CJIeDITb 3a TeM, YTO6bl JKeJaemar CTOpOHa yKa3bIBaJa BBepx.

B3aTb DepeXaTeIb IJra DnCKOB 3a BepxHn KOHeu N BCTaBNTb B Kopnyc (pncyHok G-6b).
YcTaHOBnTb KpbIshKy (O6paTnTb BHIMaHHe Ha MapKnIpOBky) N NOBepHyTb no YacBOB cTpEJIke do yNopa.
YCTaHOBnTe yHnBepCaJIbHyIO pe3Ky Ha npIBOe TaK, KaK n3o6paKeHo Ha pncyHke 8, n NOBepHnTe ee no XoNy YacOBoi CTpeJIKn Do yNopa.
YcTaHOBnTb NOBOpOTbI nepeKIOuAteJIb Ha peKOMeHdyEmyIO CTyneHb.
3arpy3ntb npoodykTbI dnynepepa60TKB 3arpy3OHyBn CTBOJ N NODTaJIKNBaTbTOJKAteJeM.
BHHMaHHe!
I36eraTb cKoJIpeHnHaape3aHHbIX npOdyKTOB B BblNyCKHbIM OTBepCTIN.
PekomeHaa: IJnnoJyHnpaBHO-MepHbIX pe3yNbTaTOB TOHKne npOdyKtbl Jnna Hape3Kn nepepa6aTbIBaTb nykam.
PpmeHne: B cnyae 3aKnHbHaHna nepepa6aTbIBaEMbIX npOdyKTOB yHnBepcaJIbHO pe3Ke CneIyET BbIKJIOHTb KxOHbI KOM6aH, n3BNeYb WTeNCEJIbHyO BNJKy I3 PO3eTKI, DOXdA TbC8 OCTaHOBKn npINbOda, CHaTB KpbIShy C yHNBepcaJIbHO pe3KN IN ONyCToUHTb 3arpy3OuHbI CTBOJ.
Pocne pa60TbI
BbIKIOuHTb np6Op c nomOu bIO NOBOPOTHO nepeKIOUaTeIa.
■Повернту уньерсань hyю pe3ky npOTив уасOBОВ CTpeKNI n CHaTb.
■ NobepHyTb KpbIuKy npOTnB YacOBoN CTpeKN I CHaTb.
■ИЗВLEЧБДЕРЖATEЛБДПЯДИСКOB BMECTE CДИСКOM.ДПЯЗТOrO HaJXaTb Ha ПИВОДнOH BaJI CHN3Y NaJIbUeM (pncyHOK H).
PpOBeCTN YnCTKy DeTaJIeN.
Бленьдер
OnacHOCTb TpaBMnpoBaHna 06 OcTpblE HOxN / BpaaIoUncn npBOD!
HnkOrda He onyckaTb pyKn B yctahOBJIeHHbI 6JIeHdep! BJIeHdep MOxHO CHIMATb/YcTaHaBnBaTb TOJbKO Nocne OCTaHOBNiPnBOJa! BJIeHdep MOxHO IcNoJIb3OBA Tb TOnbKO B Co6paHHOM BnDe n C YCTaHOBJIeHHo KpbIshKoN.
Onachoctb ownapuBaHnra!
Ipn nepepa6oTke B 6IeHndepe ropaynx npOdyKTOB uepe3 BOPOHKy B KpbIuKe BbIXOJNT nap. 3aONnYb MaKcMym 0,5 IITpa ropayen nll CNbHOneHaeiCs JNkKOCTN.
BHHMaHHe!
Oo3aRpy3ka INHrpeDneHTOB
PncyHok J-8:
BbIKIOuHTb np6Op c nomoubIO NOBOPOTHO nepeKIOUaTeJI.
CnTb KpbIuKy N 3aRpy3NTb INHrpEIneHTbl IIN
IIN3BJIeYB BOpOHky INoCTeNEHHO 3aRpyXaTb TBepDble INHrpeDneHTb Upe3 3aRpy3OuHoe OTBepCTne
NNI
3aJIITb XnIckne INHrpEIneHTbl Ype3 BOPOHky.
Pocne pa60TbI
BbIKIOuHTb np6Op c nOMOuIIO NobOPoTHOro nepeKIOuataTena.
■ NobepHyTb 6IeHep no yacOBoN cTpeJKe H CHrTb.
PekomeHa: BneHep nyuwe BCero nouchTb cpa3y nocne nCNoB3OBAHn.
Ynctka n yxoid
Iocne KaJDoRo npImeHnra NcNoJb30BaHHbIe qactn npHaJnxKHOte JOnXHbI6bTb TuaTeNbHO OunuHebl.
BhmuHne!
He nCnoJIb3OBAb a6pa3nBHbIe YnCTaUne cpeIcTbA. NobepxHocTn npnbopa MoryT 6bITb NOBpeKdEhl.
YnCTka OCHOBHOro 6JOKa
Onachoctb nopaxeHnra TOKOM! OchoBHO6IOK HN B KOem clyuae He norgykaTB B BOdy N He depkaTb NOI npotoHNO BDOJ. He nCnoJIb3OBaTb napooUcHTteJIb.
N3BneYb WTeNCeIbHyIO BUNKy N3 p03ETKN.
■PpOTepeTb OCHOBH06IOK n 3aUHThBIE KpbIuKN pINBOOD BnaxHOJ TkaHbIO. Ppi Heo6XoIMOCtN IcNoJIb3OBaTb HEMHOrO CpeIcTBa DnI MbITbЯ NocyDbl.
B 3aklioueHne BbITepetb npnbop hacyxo.
YncTka CmeCnTeJbHOn YaShn HacaIok
CmeCNTeIbHyu YaSy HacaKm MOxHOMbITb B NocydomOeHOn MaunHe.
Пл actmaccobbie DeTaJIH He 3axmAtb B NocydomoeuHoi MaunHe, TaK KaK B npouceCeMbITbY BO3MOxHa IX NOCTOHHa deΦopMaun!
Ynctka yHnBepcaJIbHOJ pe3KN
Onachoctb TpaBMnpOBaHn o6octpbie HOxN!
He Tporatb octpbl HeoKn N BbICTynbl DnCKOB-n3MeJbUHTeJe. JIy nCCTKN IcNoJIb30BaTb 1eTKy.
Bce deTaHn yHnBepcaJbHoN pe3Kn MoXHO MbITb B NocyDOMoEChO MaUHe.
PekomeHdaun:Ja yctpaHeHHKpachoro Haeta nocne nepepa6oTKn, Hanp., MOPKOu, HAnITb HEMHO r pactNTeJbHORO Macna Ha Tprkny I npotepeTb eIo yHnBepcaIbHyIO pe3Ky (He DNCKn- N3MeJIbUHTeN). Pocne 3TOrO npomblb yHnBepcaIbHyIO pe3Ky.
Ynctka 6JeHepa
OnachocTb TpaBMnpoBaHna 06 ocTpbie HOxN!
He Tporatb Hoxn 6JeHepa roIbIM npKaMn.
CTaKaH 6JIeHepa, KpbIuKU IN BOpOHky MOxHO MbITb B NOCyDOMOeHOn MaunHe.
PekomeHaacn: Pocne nepepa60Kn Xnd-KoCTe 3aacTyO DOCTaTOUHO NOUCNTb 6IeHep, He cHmam erc npnbopa. IJRA 3TOrO 3aIITb B yCTaHOBHeHHbI 6IeHep HEMHOrO BObl CO CpeDCTBOM DJI MaITbIPOcydbI. BKIOHTb 6JeHep Ha HeCKoJIbKO cekyHd (CTynEhM). BblNTbMbIbHyO BOdy n Ipomblb 6IeHep YNCTO BDOJ.
BaxkHoe npImeuaHne
Cymky Дяп再一次进到HOCTeиСТИТьnpи Heo6xOДIMOCtN.CJeIDOBaTb yka3aHnЯm no yXODY BCymKe.
XpaheHne
Onachoctb TpaBMnpoBaHna!
Pn HeNcNoJIb3OBAHm np6opa n3BneYb 1TeNCeIbHyIO BnKy n3 po3eTKn.
PucyHOKK:
YJIOXHTb HacaDN N INCKNIN3MeINbUHTeIN B Cymky DnI npHaADNeXHOCTeI.
CymkyДЯпинадлжноTeXpaHNTB CBmecHTeMbHO YAWe.
ДяхраеньВоригинавьнураковс CM.pucyHOK
Ipeed yctpaHHeM HeNCnpaBHOCTN 13BneYb WTeNceIbHyIO BNIKy I3 pO3eTKN.
IIOBOPOTbI KPOHHTeIN DOJKeH 6bITb 3aФИКСИРОВАн B KaXdOM pa6Oyem NOLOXKeHN.
PonbTaIteCb ChauJala yCTpaHnTb BO3HnKUO npo6JIeMy C NOMouBIO CNeDuOx Yka3aHn.
HeCnpaBHOcTb
Pn6Op He BKnIouaetc.
YcTpaHeHne
■PnoBepntb Hannuye 3JIeKtpoCha6KeHnI.
PpOBepuTb wTeNceIbHyIO BnKy.
■Пюверпь поворотькронштейн.Вправильбом положен?Заф尼克сюразн?
■Пикpyтntb 6нeндер nIи CmecnteIbHyu qaшу do ynpa.
YcTaHOBnTb KpbIuKy 6JIeHepa I npIKpyTnTb Do ynpa.
HaKpbItb 3aUHTbIMN KpbIuKaMn JI npB0IOB HeNCNoB3YeMbIe npNB0DbI.
■ AkTbBnPoBaHa 6IoknPoBka NOBtOpHOro BKIOUeHna. IepKIOuHTb np6Op B noJoxHe 0/off n 3aTeM Ha3aD Ha XeJaemyo CTyneHb.
HeCnpaBHOcTb
Pp6op BbIKIOaETcB O BpeMa nCNoIb-3ObaHn. AKTNBnPoBaHa 3aunTa ot nepeRpy3Kn. OndOBpeMeHHo nepepaTbIBaNoccCNIuKOM 60JIbIoE KOJNUeCTBO npOdyKTOB.
YcTpaHHeHne
OTKJIIOUHTb npn6op.
Cokpatntb KOINueCTBO nepepa6aTbIBaEMbIX npOdyKTOB.
He npebbIaTb MaKcImaJIbHo DOnyCTUMO KoJIuYeCTBa npOdyKTOB (cm. «PpIMepbl NcNoJIb3OBAHnra»)!
HencnpaBHOCTb
Bo Bpempa60bI npnBoda cnyaHNO 6blna Haxkata KhoNka pa36lOKnOpBKN. NOBOPTHBI KPOHTeHN npeDbNraeTcB BBePx. PnBOD OTKIOUaETc, HO He OCTaHaBnBaETcB NOJIOKeHN dIg CMeHbI HaCaADOK.
YcTpaHHeHne
■ NpeBecTn NOBOpTHbI nepeKIOuAteJIb B noJoxHe 0/off.
■IpeBecTn NOBOpOTbIn KPOHSTeINH B NOJoxKeHne 1.
BkIIOuHTb np6Op (ctyneHb 1).
CHOBa BbIKHouHTb npn6op.
HacaKa ocTaHaBnBaETCa B NOJoxeHn DnA CMeHbI HacaDOK.
HencnpaBHOCTb
Бленьдер He Naunhaet pa6oTaB nIIH octa-HaBnBaetc BO BpeMЯ nCNoIb3OBaHnI, npuBoD «rJNT». Hox 3a6NoKIpObaH.
YcTpaHeHne
OTKIOUHTb np6Op n 3BJeCb WTeNCeIbHyIO BUNKy I3 pO3eTKN.
ChrB 6JIeHep n ydaIITb npenTCTBne.
CHOBA yCTaHOBnTB 6JIeHnep.
BkIIOuHTb np6Op.
BaxkHoe npImeuaHne
EcnTakmO6pa3OM He ydaNoCb ycTaHnTB HencnpaBHOCTb, NOkaNyIcTa, 6paTntecb B cepBnCHyO cnjK6y.
INHrpEaHeNTbI DOJXHbIMeTb OINHaKOByIO TEMepaTypy.
IINrpeDneHTbI (KpOme pactnteHoro macna) nepepaBaTbIBaTb B TeueHne HeCKoJIbKnx CeKHyd Ha CTypeHn 2 nnn 3 B 6JeHdepe.
■ NpeeknouHTb 6IeHep Ha cTyneHb 4, MeIeHHO BnBaTb MaCNo uepe3 BOPOHKy I npoJOnKaTb nepemeWnBaTb Do Tex NOP, noka MaHOHe 3MyIbInpyeTc.
Maiohe3 cJeNyEt yNoTpe6NtB B CxatbIe cPOKn, He xpaHNTb erO.
ytnnn3aun

yTnIn3npuYte ynaKOBky c nCnoJb30BAHNEM 3KOJOnueckn 6e3OanChbIX MeToIDOB. DaHbI np6Op nMeET OTMeTKy O COOTBeTCTBn Ebponeckm HopMaM 2012/19/EU yTnIN3aun 3JIeKTPnuCeKnx n 3JIeKTPoHNbIX np6OpOB (waste electrical and electronic equipment - WEEE). DaHbIe HopMbI onpeJeIOT DeNCTByIOUne Ha TeppNTopn EbpocOIO3a npaBnla Bo3Bpata N yTnIN3aUnn CTapbIX np6OpOB. INΦopMaUno o6 aKTy-aNbHbIX BO3MOXHOCTx yTnIN3aUnn Bbl MoKeTe noJyHTb B MaRa3InHe, B KOTOpOM Bbl npNo6peNn np6Op.
YcnoBna rapaHTnHoro 06cnyxnbHn
IOnyHTb NcYeepnbBaHOuHnΦOpMaUHO 06 yCIOBnX rapaHTnHOrO 06cLyKnBAHNr Bb MoKeTe B BaWeM 6JnxKaWem ABTOpN3OBaHHOM cepBnCHOM cHTpe, ININ B cepBnCHOM cHTpe OT npON3BOAnTEJI OOO «BCX BbITobBe Pnp6Opbl》, ININ B COpBOAnTEJIbHOJ DOKymeHTaUN.
MblocTabnem3aco6oI npaboHa BHeceHne N3MeHeHn.
CneuaJIbHbIe npHaJexKHOCTn
Kpyrnocytouhbl Telefoh cnjx6bI nopekkn*: 8 (800) 200-29-61
OΦnuaJIbHbI caHT B INHTepHeTe: www.bosch-home.ru
Adepea ABTOPH03OBAHbIX cepBnCHbIX ueHTPOB, a TAKKc BcHΦopMaunr No cepBnCHOMy 6cnykBaHHIO doCTynHa Ha oHuaanbHom caIte B INTEpHETe: www.bosch-home.ru.
Pekomehnyem Bam nonb3oBaTcR yCnyramn TOnkO ABTopH3OBAHHbIX cepBnchbIX cHTPOB.
OpHnHaIbHbIe akceccyapbI h cpeCTBa no yxody IJIa 6blTOBIOI TexHHKn Bosch Bbi MoXeTe npHO6peCTn B haWeM pHmEHOM HHTepHemar3HHe: www.bosch-home.ru/store.C ycNoBHMAI 3aka3, onlAHI IOCTABKN BBI MOXeTe OHAkOMMTbcra Ha caTe. TaKe opHnHaIbHbIe akceccyapbI h cpeCTBa no yxody BBI MoXeTe npHO6peCTn B ATOPTOBAOHBHbIX cepBCHbIX eOHTPax.
1.ИЗдениe
- Moqenb
IyHKtI 1-2 3anolHIOCToTbKO Bcnyae,ecn3n DaHHble He coepXaTcB DoKymeHTax O nokynke n3dennn (kaccobbl uek n/nn TOBapHbI ueK,TOBAPHa HknaHa).
3.Данн haHФмuaHnPacnpocTpaHreHaMaIbe 6bToBObI npHbopb ToBapHorO 3haka Bosch: Koebapkn, KcemmaHnbl, KcpeMOnKn, BeCbI, KyxHbIe Kom6aHbI, MHKcepbl, PbIecobc, pe3kn, TocTebl, yTOHn, pAcpPmTEnI nBO1oc, 3KeKTPoayuHnKn, COKOBbXMMaKN, H3MeNbHTenN, 6bHeDpebl, rAnDInbHbIe DoCKN, BaHouKn, HanOnbHbIe BeCbe, yTOHn, napOpBle cTaHcunN, rAnDInbHbIe DoCKN iHaONrHNVHbIe Hm H3deHnI.

- YBaXaembIe DAmbl IrocnoDa, coo6uaem Bam, yTo noTBePjXeHHe COOTBcTBnHaWeI npOdyKun O83aTeNbHbIM Tpe6oBaHHM B COOTBcTbnC 3aOKHOaTeNbCTBOM OcyueCTBnEaTcBΦpme O83aTeNbHo CeTpNkauu N DeKnapnpoBaHHCOOTBcTBNr.
HΦopmaunO6ob3aTeBnHmnoTBePckHeHH COOBetCTBnHaunx npbOpOB,B TOM cncne daHbIe O HOMpe ceptnfHKata COOBetCTBn(deKnapaunn O cooTBetCTBn)n cpoke er (ee) DeNCTBn Bbl MoKeTe nolyuNb B OOO «BCX bItobble PnpbOpbl
Haapanyukn npon3bointcno kontpome TaPCHaHOnbHON KOpnpauN 5CX XaycrepeTe rM6X, aDpec 7a6-KBapTnpbl: 81739 MHOxen, Kapn-Bepn UTPacce 34, FepmaHn (BSH Hausgerate GmbH, Carl-Wery-Str. 34, 81739 Munchen, Germany).
OraHnaaue, BbIOHnHoueIyHKunu HIOCTPAHHORHO3rTOBtEny, yONHOMOeHNH3rTOBtEnm Ha OCHOBAHN DOrOBopa C HIM, ABnTeC OOO «BCX BbIOBte Ipn6bpbl, 198515, CaKrt-TepeBypr, r. TepeProf, yN. Kapna CImHehca, d.l nT. A, fnnn an B r. MockBa, 119071, yn. Manan Kanyckan, d.l, TenePon (495) 737-2777, faKc (495) 737-2798.
- 063aTeBbIe CBeHnO TeXHuecknx XapaKTePncTnKax np6opa npBedeHb Ha TnOBo Ta6nUKe np6opa nnHa erO 3TNKeTke H/nn B cOpBoDntelHoJ DoKymeHTaun.
6. AkceccyapbI n cpeidCTBa no yxody
IJa 63ynpueHOrO yHKnUHOBoAH BaWe I TeXnKn H xOda 3a He npOnBDOInTeB peKOMeHyET nCnONb3oBaTb TOnbKO opRnHnAbHbIe AkccecCyapI bxCedCTBaNo xOxyOpRnHaNbHbIe akccecCyapBI papaBcTaHbI ppoN3BOInTeMe, OHI NdeAalHo NoDxOAnr HmEHO Ta Baaero np6opA. OpRnHaNbHbIe akccecCyapBI n CpeCTBaNo NO xOxy CoOTBeTCTBYOT cAmbl BILcOKHM Tpe6OBaHNM KaueCTBA TobAPHRo 3haka Bosch, OH npoxoJr 3aBOckne HcNtAtnHra dJe oceCneHeHH MaKcHMaBHO HaeKHeCHTo B paBote. N O BCM BonPocam, CBraaHHbIM c AkccecCyapAMn H cpeCTBaMn no yOxy dJI BAwe 6bITobO IO texHnKn, Bbl MoKeTe ObpaTHbcB a ABTopu30BaHNbIe cepBNCbIe ceHTpbI INI NO TenefoHcy Cnyk6bl NDepKKn.
7. rapaHTHn3rTOBNTeTn
Hnma n3rotobnten npedocablanr Ha npno6peteHHB Bamn B Poccncko Fedepaunn 6b10bo np6op rapahtno B cootbetCTBN C deNCTBOUIM 3aKohOnaTbeCBOM P cPcOKom 1 Ro. Ha npno6peteHHB B Pecny6nke 6b10bo np6op K KOtOPOy npn NOKynke 6bln BBdAn rapaHTnHb TaTOH, DeiCTBYOT rapaHTnHbie YCNOBn, he npToHBOpaeuae 3aKOHDatelbCTBy Pecny6nkn Benapycb.
8. Bhumahne! Baxhara HOpmaqna INa noTpe6ntene
Danb npn6op npedha3aueH nIcnoB3oBaHnN KcHIOHTbHO nIuHbIX, CEmeHbIX, DomaunHX N HbIX HyKd, He CBra3aHbIX C Ocy ictbnneHem npednpHHMaTeNbckO DeTbeHbOCTn IIO6 yOBnetBOpEHm 6bTObbNOTpebOCTe B OFnce npedpnnrhy, ypeXekHeHHn oprahnaun. NcnoB3oBaHne np6oba B ceJnx, OTnHbIX OT BbiyeKa3aHHbx, ABnErcn HapyWeHem npabn HndNekauen
HaHnuee HpmeHHo3aBODCKoTINOBoTa6nuknHa np6ope 083atebHO! IoxkanyIcTa, y6eIntecb E ee HaJIuNN coxpaHHe ee Ha np6ope BteueHne Bcero CpoKa cnK6bI np6opa. YdaneHHe Ta6nukn Beet K o6e3nueHIO np6opa n K BO3MOXHBm HapUweHnM npabN erO 3Kcnnyatau.
H3roBntb He Hecet OTBeTBeHHocb 3a HeOCTaTKn B np6ope, ecn cepBcHOn cnyKb6yDetdoKa3aHO, TTO OH BO3HKnI NOcne nepeDaun np6opa Notp6bntbIO BCNECTBHe HApUeHNm I npabN nONb3oBAHN, TpaHcnpTIPOBKN, XpaHEHN, DeiCTBN TpeBHX NII, HenpeODINMOI cnbl (noXapa, npipOAnOH KaataCtpoBHy t.n.). NonaHaHN b6tOBbIX haceKOMbIX n Tpb3yHOB, BO3JeCTBnHbIX NOCTOpOHNX DaTOpOB, a Takke BCNECTBWe CyueCTeBBHbIX HApUeHNm TexHccknx TpeBOAHN, OROBOpEHbIX B HhCTpykUnn NO EKcnNyatauun, B TOM YHCNE HeCTabNbHbOCTn napameTpOB 3JekrPoCeTN, yCTaHOBNeHHbx FOCT 32144-2013.
Ia nOHTBepKdHn DaTb NOKyNk Pnp6opa npra rapaTHnHOM peMOHTe Hn PpeBbNeHN HhIx PpeYCMOTpeHHx 3aKOHm Tpe6oBaHn y6eHtEnbHO npocm Bac coXpaHrTa DOKymEtbl O NOKynke (ueK, KBTaHcHIO, HhIbe DOKymEtbl, NOdTBePjDaUOuE daTy n MeTO nOKynK).
C6bIeHJnpeKoMeHauzuiN uKa3aun, CoepKuauXcB HnCTpykUuN IO kCpnuTaUu (npaBnnaX npb3oBaHn), NMOxETn6eKaTbpO6nEM B KcPnuatau npbopa n er 06cbnykaBau.
HeCnpaBHe y3Ib np6obop B rapaHTnHb nepno 6ecnnaTHo pmoHTpyOTc HIN 3aMeHrOTc HObIMn. PeueHne Bonpoca o cenecoo6pa3HOCTN X3aMeHb HIN peMOHTa ocTaetca 3a cnkybAmn cepBnca.
9.Инфомрази O cepBuce
B nepno nd nocne hcteueHHraapHTHoro cpoka haaHa Cnyk6a CepBnca, a taKke MaCTepCKHe HauHX npTHePOB BcERda rTOOBbl npEINOxHTb Bam cBOH ycynr. Cnncok adpecoB yOnOHMOeHHbIX 3rTOBOTeIeM NyHKTOB aBTOP3OBAHHO CEPBHCHO 0cbNyXKBaHn HaXoDHTc Ha odHuaNBHom caite B INTEpHete: www.bosch-home.ru.
Cpok cnykbbl mblx 6bIb0x npnbopob (Kpome KkyoHbIX KOM6aHOB n binecoob) coctabnre 2 roda. Cpok cnykbbl kxyohbbk Kom6aHOB n binecooc coctabnaet 5 net. Cpok cnykbbl n3dennn HcHcneTcra c dabl erO NKynnn, N6o npn HeBO3MOXHOCTn ee onpepeene, c DaTb I3rTOBNEHn HAHeceHHo Ha TnOByo Tabnue H3dennn B COOTBeTcBn co CTaNapToM n3rTOBNTeN daTa n3rTOBNEHn Mapkpnyerca FD FMM, rde f - ro n3rTOBNEHn Mmuc 1920, a MM - mecau n3rTOBNEHn. Dn onpepeene Hroda n3rTOBNEHn np6opa Heo6xoHmO K 1920 npnoabntb unclo fT.
*BecnnaTbI KpyrnoCyTouHbTeNefoH dA 3BOHkoB Ha TeppntOpn PΦ.
B34C065N1-1M00 03/2017
Информацяо 6ьITOBOI TeXHnke,прОЗБeDEHNOI NOД KOHTPOJEM KOHucepHa BCX XaycrepeTe Гm6X, KapI-Bepn-ILTp.34,81739 MIOHXeH,ГерманьВ COOTBETCTBnC Tpe6OBaHnMn 3aKoHOdaTeJIbCTBa O TeXHnueCKOM peRyInpOBAHnN I 3aKoHOdaTeJIbCTBa O 3aUNTe npaB nOTpe6bTeJePocsnckoФeDEDpaCnN
Ipoodykun:kyxohhbcKo6aHbI, kxyoHHbcMaunHbI,MKKcepbI,N3MeJbYHTeJI
ToBapHbI 3HaK:Bosch
BHIMAHIE!AccopTImeHT npOkyuHmnoocToHHo o6hOBnREc. TexHueckne XapaKepntKn npOdyuHm, B TOM uCNE 3hePoo3pFKeTMBHOCTN, NOCTOHNO COBepHcHTBOYOTc. PPOyUHpeRHO pOxOaNT O63aTeNbHyIO pOceDpyoNDTBepXDEHn COOTBeCTBN CoIacHO DeIcTByHOeM 3AKoHOaTeBcBTy. INOpmauO peKbUNrax AKTyAJIbHbCEpTNPHKATOB COOTBECTBn I cPOKAX Nc DECTBn, HDPOMAUO 6kTAyALbHM accOPTIME TPOyUHmMOJNoIyUHbY OPAHm3aun, BIIONHnIOeJ FyHKUIN HOCTpaHHO n3ROTOBtEHa TeppntOpn PoCCmCKo Fe-epaunoo OO C5CX BtBoTBePi6Opbl, 198515, CaHT-Tepe6ypr, r. PeTeprof, yn. Kapna Cmehca, d.1 nIT.A, fnnnab B r. MockBa, 119071, yN. Manar Kanyckcra, d.15, tenefoh (495) 737-2777, fakc (495) 737-2798.
KoMaHnO OOC 6CX BbIOBle Pnp6pbl,198515.CaHKT-PeTepepr, r. TeTeprof, yN. Kapna CmmeHca, d.1 nT.A, fHnnA B r. MockBa, 119071, yN. MaJra KaNyckcA, d.15, Tenefoh (495) 737-2777, fakc (495) 737-2798 ocyueCTbnreT cBOIO deTaeTbHOCTb no NOITBePKeHHIO COOTBeTcTBnI npOdyuKmOn OT mHeH pOmo3BoHTErHa eDmHou TaMOxEHHo TepPTOpMn EBpaAnCKORO 3KOHomMHecCKORO COHO3a B COOTBeTcTBnC DeHCTBYUChIMM TexHueckmN peIamEnTaMn, B KaueCTBe yONHOMOeHHoro N3rTOBHTem Niua, a TaIOKe BbINONHReT TpeOBaHN, npDeYCMOTpeHHbte 3aKOHOM P N184-Φ3 «O TexHueckom perylnopBaHmN » DnI IINa, BbINONHIOe foHKmN IHOCtpanHO H3rTOBHTen Ha TepPTOpN PoCCmicko Fedepaun.
IMnopTePOM B Pocnckylo Fepdepaunno npOdykunm, cepHdNmuropoBaHHO B KaueCTBe cepHIO npOn3BDOImoR, AJIaETcO OOO «BCX BbIOTBIE Pnp6obby', 198515, CaHKT-PeTep6ypr, r. PeTeproφ, yπ. Kapna CmmeHca, d.l Jnt.A, φηιπαινι B r. MockBa, 119071, yπ. Manαa KaŋyKKKaJ d.15, Tenepeon (495) 737-2777.
OraHnaaueH, yka3bIbaemoi Ha npDyKuMn B cIeJx IeHTNfUkaumnpDyKuMn N ocUyIeCTBIAHOeepBmHHOe pa3MeJeHne npDyKuMn H a bInke Ebpoeckoro co1o3a, bIaeTcR Po6epT BoW XaycrepeTe Fm6X Kapn-Bepn-lltp. 34, 81739 MIOHXeH, FepMaHnA (Robert Bosch Hausgerate GmbH, Carl-Wery-Str. 34, 81739 Munchen, Germany).
OpHmHecknMIuOM (HrTOBtTeM),OcUeCTBnIooHMOT CBOero HMeHN M3rTOBnHEHpe PNOyKUNN O TBeTCTBEHHbIM 3a ee COoTBETCTBHe Tpe6OBaHnPnMEHbIX TeXnuecknx perIemaHTOB,ABnErcs BCX XaycrepeTe FMx, Kapn-Bepn-Itp. 34, 81739 MIOHXen, FepMaHn (BSH Hausgerate GmbH, Car-Wery-Str. 34, 81739 Munchen, Germany).
Pn npebo3ke, nppy3ke np4yKuN cJeDyET pyKOoCTBOBaTcR, NOMMIO 3IOKeHHbIX B INHCTpyKUIN NO 3KcnPyTaUIM, CJeDyUOUMn Tpe6oBAHmM:
3anpeaetcnoBepraT npOdyKmIO cyueCTBeHHbIM MexAHuecknM Harpy3kam, KOtOpbie MoryT npBBeCTN K NOBpeJdeHIO npOdyKmN HApuyenHIO ee ynaKOBKn.
Heo6xoJIMO n36eraTb nonaHa Ha ynaKOBky npOdyKun BObln npyRnx KInKocTei.
Ipeep nepebo3koi nnn nepeauei Ha xpaHHe 6bIWei B 3KcNpyatau nn npOdykuu nn pni OtpncaTeBHO TEmnpaType Heo6xOIMo y6eHTbcB BOTCYTCTBNI B PNOykuu BObl.
IpoDyKU npEHa3HaeHa K cNoB3OBAHnO B yCNoBnX TempePaTypb BiIe 0^ n OTHOCTbHOB BlaXHOCTN, He pEBbiAioJe 93%.
IpeaHauanom 3KcNpyataunnpdykun, dnttehboe Bpemra haoonbueierca nD BO3deiCTBnEM OTpuatbno TEmnepaTpybl, Heo6xmo BbIdepkahtbe y BCNOBHX KOMHaTHOH TemnepaTpybl HeckOJIbKO YacOB.
Ppabnna pean3aun npdykunonpepeTcnpnepnntmpo3nHOTropBn B COOTBCTBn C Tpe6oBaHmNeiCTByOe 3aKHO daTeNbCTBA.
Yka3aHnno yTnnaa n npOyKcuN coepKaTcB uHCTpykun no 3KcnnyatauMMyHnuaJbHbIX opraHOB NCNOHNTeNbHO Bnactn.
Ipyoynu,peaHn3obAHno n3roBntenB mTeHne cpoKa DeiCTBna cepTnOknata COOTBeCTBna, 3TOcTnOknat DeiCTBnTeH npie ee nocTaBe, npoJaKe Hncnolb3oBAHH (npumHeHH) B TeHne Cpoka cnKbIy, yCTahOBnEHOro B COOTBeCTBm Co CTaTBeN 18 3aKHOa P0 o 3auitene npab noTpeBnTeH. Cpok cnKbHa npoDykuYka3an npo3BODHTenB nictoBke «VHOpMaunr n3rotOBtten o rapaHTHMn H cepBuHOM 06cnkBaHHn
PpOdyKUma MoKeT 6bIb NdeHTnHmnpoBaHa NO moDeBHO My oO3HaueHNO (none «E-Nr.»), anpoBaunOHMy TnHy (noJe «Type») n TobapHOmy 3NaKy Bosch, HaeceHHbIM Ha npOduKUIO, ynaokOBy, u (n) codepkauxcB 3xckpyaTuAOHbIX DOkyMeHtAX. B COOTBeCTBm C BYHTpeHHM CTaHdApTOM 3NTOBMTeJIb 6bIbTOBaA NdeHTnHmnpuPyETc No cIeDuXeI cxeme:
E-Nr.
MATEPNAHbHmOppeTcABnep6oBkyBHeHO-uaPPOoe 063aueHne npOdyKun dInHO He 6onee 10 cMMBOOB, MCnoNbayEmoe npnpOdaKe (mHEyEMOE moEJIbHM o63aueHne Hnn MOnEJIb b6tTOBO rnp6opa) Toproob mapKn Bosch. MaTePnaJIbHbH homep (MOeJIb) yka3BaBAeTc MeKdy KOOBbM CNOBm E-ErN m KcoO YeToT 已 / 己
HnDekc cepBnCHoCnyk6bl- DBy3NaHoe cnppOBe o603aueHne, npncBaHbEMoe eHNHe pOdyKuB B npouecce npOn3BOcTBa N nCnONb3yeMoe cepBnCHo Cnyk6bo.
3Kcnnyaatauohhie dokymehtb pa3pa6abtbaioTcB yHnHnunpoBaHHo foPme nla Hnpokoro accopTmHa TPOyKUN, no3TOMy n3rTOBHTeEM npedycmtopeHO yka3aHne TpOBO r O603aueHNr np60ba B 3KnNpyatauOnHHx DOkymeHTAX KAK NOJIOCTbO, TAK NactuHO, pniYcNOBN, 3TO nO3BOJraonOpEniB npHnAedXhoCTb DAnHORO 3KnNpyatauOnHHo DOkymeHTK 6bTOBOMy np60by, cnpoboxdAmom TY 3KnNpyataUHnhBIO kDOKMHTOM. YctahOBHeNe B npOeCEe NteHnFpKaACn COOTBETCTBNA XapaKTepnCTNK 6bTOBTO np60ba NOONKeHnMRC oepjAaUMCBA B npNJaraembIX K HeMy 3KnNpyatauOnHHbx DOkymeHTax, npOBOnTC nyTe mAnaIIaIaHfOpMaIIN, n3IOKeHNo B 3KnNpyataUaONHbIX DOkymeHTAX.
B coCTa 3KcIpyatauHbIX DOkymeHOB, npEynCMOTpeHHbIX N3ROBtTeEM IIN PNOyKUNM, MOrY TBXoNDt HAcTOnAa INHOpMaun, INCTpyKUN (pykoBDCTBO) NO 3KcIpyatauHm, INHOpMaunO6 ycNoBnRr rapaHTnHoro n cepBnCHORO oCclyKnBaHn.
MapKIOBAnHe npOdykUmm OcyIeCTBnIeTc H3rTObITeMeH Na TINOBo TaBnUe KpIMbOp,Ha YNAKOBOuHOH 3THKeTke, HENOCpeDCTBeHHo Ha yNaKOBke PnBOpa, aTaKke MoKet IpnON3BOOnITbcra NbHMn CnOcObaMn, ObecneuBaIOUmm DoctynHoe HnAHRJdHoe ppeCTabJIeHne INHΦopMaun o npInboge Bmectax npOdoak.
EAC IpoDyKzH, KOTOPa IPOWJNa IPOUeDpy NoTBePjXeHnA COOTBcTcBnA CORIaCHO Tpe6OBAHNm TexHnuecknx perIaMeHTOB TaOxKeHHo ro coIO3a n/nn TeXnuecknx perIaMeHToB EbpaznCKoro 3KOHOMueckoro coIO3a, MapKnpyetcEINbIM 3HaKOM oBaJIeHnI pOdoKzHn HA pbIHKe rocydapCTB-ueHOB TaOxKeHHOrO coIO3a (EBpa3NCKoro 3KOHOMueckoro coIO3a).
PpOdykuncooTBcTByeT CNeDyUOnmTexHnuecknMpeJlAmeHTam TaMOxehHOcoIO3a:
TP TC 020/2011 3JneKtpomarHHTHaCobMecTImOcTB TexHnuecknx CpeIcTB
- TP TC 004/2011 O 6e3oNaCHOCTH HN3KOBJbTHOTO 06OpyDObAHNA
TP EA3C 037/2016 O6 orpaHneHn npImeHn onaChbIX BeueCTB u3JeJnx 3neKtpoTexHnK n paDno3JeKtpoHnK
3KcPnpyaTauOnHbIe DOKymEtbl Ha npOdyKuIO BblONHryOTcH a PyccKOM r3bIke. 3KcPnpyaTauOnHbIe DOKymEtbl Ha roCyapCTBeHHbIX r3bIKax RocydapCTB-NeHOB Ebpasckoro 3KOHOMUeCKORo CO103a, OTNHybIX OT pycckoro, pR HAnuHcN COOTBeCTBYIOXx Tpe6oBaHIN B 3akoHOdaTeNbCtBE MoKHO 6e3BO3Me3dHIO NpUHTb y Topryouei OprAHn3aunpe3nDEHa COOTBeCTByIOJeRO CcydapCTBa-NeHa Ebpasckoro 3KOHOmUeCKORO co103a.
HΦopmaqua O KOMIIeKtauIN PNOyUcIN IpeCTaBneHa B TropOBbIX 3aJax, MoKet 6bITb 3anpoWeHa NO TeIefoHy 6ecPiAtHOI《rOpueJInHHN》 (800)200-2961,a TaKke DoctynBa INTePheHe Ha caTte Ipon3BODnteJIhtp://www.bosch-home.ru.
| Toproboe obochaueHne | AnpobauonHb | TIN | Cerriukskat cooTBeTcBn | Ctpana- H3rotobntel | Hc*, B Hn**, Tc Hm*** | BT | ||
| Per. homep Data B | Dauy Diéy CteBye | do | ||||||
| Kuxohnble Kombaih, kuxohnble Mauhni | ||||||||
| MC812M865 | CNCM30 | C-DE.AR46.B.73522 | 12.02.2016 | 11.02.2021 | CNoBHeN | 50/60 | 220-240 | 1250 |
| MC812S814 | CNCM30 | C-DE.AR46.B.73522 | 12.02.2016 | 11.02.2021 | CNoBHeN | 50/60 | 220-240 | 1250 |
| MC812W501 | CNCM30 | C-DE.AR46.B.73522 | 12.02.2016 | 11.02.2021 | CNoBHeN | 50/60 | 220-240 | 1000 |
| MC812W620 | CNCM30 | C-DE.AR46.B.73522 | 12.02.2016 | 11.02.2021 | CNoBHeN | 50/60 | 220-240 | 1100 |
| MC812W872 | CNCM30 | C-DE.AR46.B.73522 | 12.02.2016 | 11.02.2021 | CNoBHeN | 50/60 | 220-240 | 1250 |
| MCM3100W | CNCM12 | C-DE.AR46.B.73522 | 12.02.2016 | 11.02.2021 | CNoBHeN | 50/60 | 220-240 | 800 |
| MCM3110W | CNCM12 | C-DE.AR46.B.73522 | 12.02.2016 | 11.02.2021 | CNoBHeN | 50/60 | 220-240 | 800 |
| MCM3200W | CNCM12 | C-DE.AR46.B.73522 | 12.02.2016 | 11.02.2021 | CNoBHeN | 50/60 | 220-240 | 800 |
| MCM3201B | CNCM12 | C-DE.AR46.B.73522 | 12.02.2016 | 11.02.2021 | CNoBHeN | 50/60 | 220-240 | 800 |
| MCM3401M | CNCM12 | C-DE.AR46.B.73522 | 12.02.2016 | 11.02.2021 | CNoBHeN | 50/60 | 220-240 | 800 |
| MCM3501M | CNCM12 | C-DE.AR46.B.73522 | 12.02.2016 | 11.02.2021 | CNoBHeN | 50/60 | 220-240 | 800 |
| MCM4000 | CNCM20 | C-DE.AR46.B.73522 | 12.02.2016 | 11.02.2021 | CNoBHeN | 50/60 | 220-240 | 700 |
| MCM4100 | CNCM20 | C-DE.AR46.B.73522 | 12.02.2016 | 11.02.2021 | CNoBHeN | 50/60 | 220-240 | 800 |
| MUM4406 | CNUM5ST | C-DE.AR46.B.73522 | 12.02.2016 | 11.02.2021 | CNoBHeN | 50/60 | 220-240 | 500 |
| MUM4426 | CNUM5ST | C-DE.AR46.B.73522 | 12.02.2016 | 11.02.2021 | CNoBHeN | 50/60 | 220-240 | 500 |
| MUM44R1 | CNUM5ST | C-DE.AR46.B.73522 | 12.02.2016 | 11.02.2021 | CNoBHeN | 50/60 | 220-240 | 500 |
| MUM4657 | CNUM5ST | C-DE.AR46.B.73522 | 12.02.2016 | 11.02.2021 | CNoBHeN | 50/60 | 220-240 | 500 |
| MUM4855 | CNUM5ST | C-DE.AR46.B.73522 | 12.02.2016 | 11.02.2021 | CNoBHeN | 50/60 | 220-240 | 600 |
| MUM4856 | CNUM5ST | C-DE.AR46.B.73522 | 12.02.2016 | 11.02.2021 | CNoBHeN | 50/60 | 220-240 | 600 |
| MUM4875EU | CNUM5ST | C-DE.AR46.B.73522 | 12.02.2016 | 11.02.2021 | CNoBHeN | 50/60 | 220-240 | 600 |
| MUM4880 | CNUM5ST | C-DE.AR46.B.73522 | 12.02.2016 | 11.02.2021 | CNoBHeN | 50/60 | 220-240 | 600 |
| MUM485L | CNUM5ST | C-DE.AR46.B.73522 | 12.02.2016 | 11.02.2021 | CNoBHeN | 50/60 | 220-240 | 600 |
| MUM52120 | CNUM50 | C-DE.AR46.B.73522 | 12.02.2016 | 11.02.2021 | CNoBHeN | 50/60 | 220-240 | 700 |
| MUM54D00 | CNUM51 | C-DE.AR46.B.73522 | 12.02.2016 | 11.02.2021 | CNoBHeN | 50/60 | 220-240 | 900 |
| MUM54G00 | CNUM51 | C-DE.AR46.B.73522 | 12.02.2016 | 11.02.2021 | CNoBHeN | 50/60 | 220-240 | 900 |
| MUM54I00 | CNUM51 | C-DE.AR46.B.73522 | 12.02.2016 | 11.02.2021 | CNoBHeN | 50/60 | 220-240 | 900 |
| MUM54P00 | CNUM51 | C-DE.AR46.B.73522 | 12.02.2016 | 11.02.2021 | CNoBHeN | 50/60 | 220-240 | 900 |
| MUM54Y00 | CNUM51 | C-DE.AR46.B.73522 | 12.02.2016 | 11.02.2021 | CNoBHeN | 50/60 | 220-240 | 900 |
| MUM58020 | CNUM51 | C-DE.AR46.B.73522 | 12.02.2016 | 11.02.2021 | CNoBHeN | 50/60 | 220-240 | 1000 |
| MUM58225 | CNUM51 | C-DE.AR46.B.73522 | 12.02.2016 | 11.02.2021 | CNoBHeN | 50/60 | 220-240 | 1000 |
| MUM58231 | CNUM51 | C-DE.AR46.B.73522 | 12.02.2016 | 11.02.2021 | CNoBHeN | 50/60 | 220-240 | 1000 |
| MUM58243 | CNUM51 | C-DE.AR46.B.73522 | 12.02.2016 | 11.02.2021 | CNoBHeN | 50/60 | 220-240 | 1000 |
| MUM5824C | CNUM51 | C-DE.AR46.B.73522 | 12.02.2016 | 11.02.2021 | CNoBHeN | 50/60 | 220-240 | 1000 |
| MUM58252RU | CNUM51 | C-DE.AR46.B.73522 | 12.02.2016 | 11.02.2021 | CNoBHeN | 50/60 | 220-240 | 1000 |
| MUM58420 | CNUM51 | C-DE.AR46.B.73522 | 12.02.2016 | 11.02.2021 | CNoBHeN | 50/60 | 220-240 | 1000 |
| MUM58720 | CNUM51 | C-DE.AR46.B.73522 | 12.02.2016 | 11.02.2021 | CNoBHeN | 50/60 | 220-240 | 1000 |
| MUM58920 | CNUM51 | C-DE.AR46.B.73522 | 12.02.2016 | 11.02.2021 | CNoBHeN | 50/60 | 220-240 | 1000 |
| MUM58B00 | CNUM51 | C-DE.AR46.B.73522 | 12.02.2016 | 11.02.2021 | CNoBHeN | 50/60 | 220-240 | 1000 |
| MUM58K20 | CNUM51 | C-DE.AR46.B.73522 | 12.02.2016 | 11.02.2021 | CNoBHeN | 50/60 | 220-240 | 1000 |
| MUM58L20 | CNUM51 | C-DE.AR46.B.73522 | 12.02.2016 | 11.02.2021 | CNoBHeN | 50/60 | 220-240 | 1000 |
| MUM59343 | CNUM51 | C-DE.AR46.B.73522 | 12.02.2016 | 11.02.2021 | CNoBHeN | 50/60 | 220-240 | 1000 |
| MUM59M55 | CNUM51 | C-DE.AR46.B.73522 | 12.02.2016 | 11.02.2021 | CNoBHeN | 50/60 | 220-240 | 1000 |
| MUM5XW10 CNUM51 C-DE.AR46.B.73522 12.02.2016 11.02.201 | ||||||||
| MUM5XW20 CNUM51 C-DE.AR46.B.73522 12.02.2016 11.02.201 | ||||||||
| MUM5XW40 | CNUM51 | C-DE.AR46.B.73522 | 12.02.2016 | 11.02.2021 | CNoBHeN | 50/60 | 220-240 | 1000 |
| MUM9A32S00 | CNUM60A | C-DE.AR46.B.77956 | 21.12.2016 | 20.12.2021 | CNoBHeN | 50/60 | 220-240 | 1200 |
| MUM9Y3S12 | CNUM60B | C-DE.AR46.B.81253 | 28.07.2017 | 27.07.2022 | CNoBHeN | 50/60 | 220-240 | 1500 |
| MUM9YX5S12 | CNUM61B | C-DE.AR46.B.81253 | 28.07.2017 | 27.07.2022 | CNoBHeN | 50/60 | 220-240 | 1500 |
| MUMP1000 | CNUM55ST | C-DE.AR46.B.73522 | 17.02.2016 | 11.02.2021 | CNoBHeN | 50/60 | 220-240 | 600 |
| MIXcepbl, kizemenu | ||||||||
| MFQ22100 | CNHR30 | C-DE.AR46.B.76049 | 17.08.2016 | 16.08.2021 | CNoBHeN | 50/60 | 220-240 | 375 |
| MFQ2210D | CNHR30 | C-DE.AR46.B.76049 | 17.08.2016 | 16.08.2021 | CNoBHeN | 50/60 | 220-240 | 375 |
| MFQ221OK | CNHR30 | C-DE.AR46.B.76049 | 17.08.2016 | 16.08.2021 | CNoBHeN | 50/60 | 220-240 | 375 |
| MFQ221OP | CNHR30 | C-DE.AR46.B.76049 | 17.08.2016 | 16.08.2021 | CNoBHeN | 50/60 | 220-240 | 375 |
| MFQ221OY | CNHR30 | C-DE.AR46.B.76049 | 17.08.2016 | 16.08.2021 | CNoBHeN | 50/60 | 220-240 | 375 |
| MFQ24200 | CNHR30 | C-DE.AR46.B.73534 | 30.12.2015 | 29.12.2020 | CNoBHeN | 50/60 | 220-240 | 375 |
| MFQ36300Y | CNHR30 | C-DE.AR46.B.73534 | 30.12.2015 | 29.12.2020 | CNoBHeN | 50/60 | 220-240 | 375 |
| MFQ36340Y | CNHR30 | C-DE.AR46.B.73534 | 30.12.2015 | 29.12.2020 | CNoBHeN | 50/60 | 220-240 | 375 |
| MFQ36460 | CNHR30 | C-DE.AR46.B.73534 | 30.12.2015 | 29.12.2020 | CNoBHeN | 50/60 | 220-240 | 375 |
| MFQ36460 | CNHR30 | C-DE.AR46.B.73534 | 30,12.2015 | 29.12.2020 | CNoBHeN | 50/60 | 220-240 | 375 |
| MFQ36470 | CNHR30 | C-DE.AR46.B.73534 | 30.12.2015 | 29.12.2020 | CNoBHeN | 50/60 | 220-240 | 375 |
| MFQ36480 | CNHR30 | C-DE.AR46.B.73534 | 30.12.2015 | 29.12.2020 | CNoBHeN | 50/60 | 220-240 | 375 |
| MFQ4020 | CNHR22 | C-DE.AR46.B.73534 | 30.12.2015 | 29.12.2020 | CNoBHeN | 50/60 | 220-240 | 450 |
| MFQ403OK | CNHR22 | C-DE.AR46.B.73534 | 30.12.2015 | 29.12.2020 | CNoBHeN | 50/60 | 220-240 | 500 |
| MFQ4070 | CNHR22 | C-DE.AR46.B.73534 | 30.12.2015 | 29.12.2020 | CNoBHeN | 50/60 | 220-240 | 500 |
| MFQ4080 | CNHR22 | C-DE.AR46.B.73534 | 30.12.2015 | 29.12.2020 | CNoBHeN | 50/60 | 220-240 | 500 |
| MFQIP1000 | CNHR19 | C-DE.AR46.B.73534 | 30.12.2015 | 29.12.2020 | CNoBHeN | 50/60 | 220-240 | 375 |
| MMR8A1 CNM13ST1 CNM13ST1 CNM13ST1 CNM13ST1 CNM13ST1 CNM13ST1 CNM13ST1 CNM13ST1 CNM13ST1 CNM13ST1 CNM13ST1 CNM13ST1 CNM13ST1 CNM13ST1 CNM13ST1 CNM13ST1 CNM13ST1 CNM | ||||||||
- HU - homnha hna yactota n nn dnaa30H OMnHaIbHbX qactOT nepemehoro TOKa nTatae cetn B rpeax
** HH-HOMHnHaJIbHoe HAnpJxKeHHe NnI dNan3OH HOMHnHaJIbHOrO HAnpJxKeHnB BoJIbTx
*** HM - HOMHahbHaNoTpe6nemMaMoUHocTb INI DnAna3OH HOMHahbHbIX NoTpe6nembIX MoUHocTeB BaTTax
| .MUZ5VL1 多種類型的多種類型的多種類型的多種類型的多種類型的多種類型的多種類型的多種類型的多種類型的多種類型的多種類型的多種類型的多種類型的多種類型的多種類型的多種類型的多種類型的多種類型的多種類型的多種類型的多種類型的 . | MUZ45RS1 الصطعه بورسون | |
| .MUZ5VL1 多種類型的多種類型的多種類型的多種類型的多種類型的多種類型的多種類型的多種類型的多種類型的多種類型的多種類型的多種類型的多種類型的多種類型的多種類型的多種類型的多種類型的多種類型的多种類型的多種類型的多種類型的多種類型的多種類型的多種類型的多種類型的多種類型的多種類型的多種類型的多種類型的多種類型的多種類型的多種類型的多種類型的多種類型的多種類型的多種類型的多種類型的多種類型的多种類型的多種類型的 . | MUZ45KP1 الصطعه بورسون | |
| .JR750 750 g JR750 g JR750 g JR750 g JR750 g JR750 g JR750 g JR750 g JR750 g JR750 g JR750 g JR750 g JR750 g JR750 g JR750 g JR780 g JR780 g JR780 g JR780 g JR780 g JR780 g JR780 g JR780 g JR780 g JR780 g JR780 g JR780 g JR780 g JR780 g JR780g JR780g JR780g JR780g JR780g JR780g JR780g JR780g JR780g JR780g JR780g JR780g JR780g JR780g JR780g L23 | MUZ5ER2 الصطعه بورسون الصطعه بورسون الصطعه بورسون الصطعه بورسون الصطعه بورسون الصطعه بورسون الصطعه بورسون الصطعه بورسون الصطعه بورسون الصطعه بورسون L23 | |
| .JR750 750 g JR750 g JR750 g JR750 g JR750 g JR750 g JR750 g JR750 g JR750 g JR750 g JR750 g JR750 g JR750 g L23 | MUZ5KR1 الصطعه بورسون الصطعه بورسون الصطعه بورسون الصطعه بورسون الصطعه بورسون L23 | |
| .JR750 750 g JR750 g JR750 g JR750 g JR750 g JR800 g JR800 g JR800 g JR800 g JR800 g JR800 g JR800 g JR800 g JR800 g JR800 g JR800 g JR800 g JR800 g JR800 g JR800g JR800g JR800g JR800g JR800g JR800g JR800g JR800g JR800g JR800g JR800g JR800g JR800g JR800g JR800g L23 | MUZ5MX1 الصطعه بورسون الصطعه بورسون الصطعه بورسون L23 | |
| .JR750 750 g JR750 g JR750 g JR750 g JR750 g JR750 g JR750 g JR750 g Jr750 g Jr750 g Jr750 g Jr750 g Jr750 g Jr750 g Jr750 g Jr750 g Jr750 g Jr750 g Jr750 g Jr750 g Jr750 g Jr750 g Jr780 g Jr780 g Jr780 g Jr780 g Jr780 g Jr780 g Jr780 g Jr780 g Jr780 g Jr780 g Jr780 g Jr780 g Jr780 g Jr780 g Jr780g Jr780g Jr780g Jr780g Jr780g Jr780g Jr780g Jr780g Jr780g Jr780g Jr780g Jr780g Jr780g Jr780g Jr780g L23 | MUZ5MM1 الصطعه بورسون الصطعه بورسون الصطعه بورسون L23 |
J 1
S_all jia 1 -
y
b11 () 12c
3 2
bI 1
blll lalcc 4 1
J 1
.
g
j
jglllnol
jolal jolal jolal jolal jolal
aalgall lba jgeall 1a aill
y 19/2012
y 11
aaiial a,gj≤1g1
(waste electrical and electronic equipment - WEEE).
1gol pall 1yly 12aal goll
y
111 1
aill lla aaiil aaiy
aaii jy 10
Jaaal
Lilao jno jolal lgljlaaall
jll
J 1
j 1
j 1
Jlalll 4jbs
i
#
auiu 1 aai
-
·s + 1
一
一
-
-1
a1 = 2,a2 = - 4
1
- c^1 + 1
1
3-6 1
2 1
1.5 15
aow

aigss
auiuui 1
-1
一
10-20 1-2
5 3 3dol cllgall j
2 1
1.5 15
aol

#
auiuui 1 aai
-1
a_5 = 10
一
450-500
1
4-5 1
. 2
a + b = 1
J 1
J 1
1 1
jll jilililal gall 1d
a aae ae ae ae ae ae ae ae ae ae ae ae ae ae ae ae ae ae ae ae ae ae ae ae ae ae ae ae ae ae ae ae ae ae ae ae ae ae ae ae ae ae ae ae ae ae ae ae ae ae ae ae ae ae ae ae ae ae ae ae ae ae ae ae ae ae ae ae ae ae ae ae ae ae ae ae ae ae ae ae ae ae ae ae ae ae ae ae ae ae aaee
)
a a 1 (g)
.

2j1j1j1j1j1j1j1j1j1j1j1j1j1j1j1j1j1j1j1j1j1j1j1j1j1j1j1j1j
4
b < 1
a 1000000000000000000000000000000000000000000000000000000000000000
1.25 = aIilw 100 50 = 50
yI JyJy yclll jac
jaiu jy jy cbll .bly jiaao
. klaia
billy Jooil
:J
1 1
1
1
1
1
1
1
1. Clll all aiaa jie 1e iiai jie aie aill jie c jlrj sll
jell jclal
2gac 1c baiial l 121 piai y
1 !
1 !g
1
0.5
1
1
1
1
1
i 1
.
Joo
Pn acll l jlrac n nnolol alal 1
1yabll 1j! Jaiy jao: 2alr
aagai aayraai aal jao
G

aagjllg jldg g
.2
1
slllalgogacllllb
gill 4200 g

a 1
.3
(C-5a)
n nn nnnn nnnn nnnn nnnn nnnn nnnn nnnn nnnn nnnn nnnn nnnn nnnn nnnn nnnn nnnn nnnn nnnn nnnn nnnn nnnn nnnn nnnn nnnn nnnn nnnn nnnn nnnn nnnn nnnn nnnn nnnn nnnn nnnn nnnn
1
iiaell 1c a g ge jall
(6a)
i
1
1
gaiy
.(G-6b
aai 1
8-8 8
a a a a a a a a a a a a a a a a a a a a
alay
L
1
.
!pa
1 1

-
e 1
1 50! jj j j j j j j j j j j j j j j j j j j j j j j j j j j
3 1
J 1
:elegllj j 1
1
3
!pa 4
1
a aai jiaiie 1j g jiai i jai jai jai
Uulllgglu (uull) Uulll.
()
20 1
1
J 1
Jlall
1 1
.3 2
J 1
:
《2》
(4)
1
J 1
1
1
aagill bwo gio -
1
()
()
4 1 1 1 1 1 1 1 1 1 1 1
- p10 4.
1
e
Joo
法一法二
1
1
1. 1
1 1

a gl jaii g jil 1y jy g d
.2
ab = 12
n 1
1
(但-4b)
.
Jc 1j j Jw
()
a
A
aal al gllg l klll 1 1 1 1 1 1 1 1 1
- f( x) = x - ax^2 + bx + c .
J 15 JolS g o Sic Lndic
jieell ie yirr jyrrnll abl jilbo
y
4 15c uaiall g 2y
.014 123
i j 1
:
jll j
abj j j j j j j j j j j j j j
e e 1
()
124 100
s d j 1 j 1
.
aJjll 1 jll y jy g d
1
S OBC = S BOC + S_ CDF
E
- 1
A( 1,0) .B( -34,34)
:y
1 1
4 4
1 4
-:
:
一:
1 1
2 1
1
m = 311
9
B
P
山
山
a gl jll 1jll y g
.2
Jai gglggl

jil
J 111 111 111 111 111 111 111 111 111 111 111 111 111 111 111 111 111 111 111 1
jiee Jiee Jaeel 5y! ecl pluiuip

(12) 1

(13)

(14)
JaaJI 1gJgIgIgJaaJI

a gl jll 1 jll 2 g
1 1 1 1 1 1 1 1 1 1 1 1 1 1 1 1 1 1 1 1 1 1 1 1 1 1 1 1 1 1 1 1 1 1
Jglll p1
Jglal 1
Jglal 1
Jglal 1
Jglal 1
Jglal 1
Jglal 1
Jglal 1
Jglal 1
Jglal 1
111 111 111 111 111 111 111 111 111 111 111 111 111 111 111 111 111 111 1
(C
jgl 1

aai j 1
Jg jll 1111111111111111111111111111
1 1 1 1 1 1 1 1 1 1 1 1 1 1 1 1 1 1 1 1
!pala 1
1
1ic
.
pksj jzjj
:ele all
ar-4
边 k2x0
«Easy Armlift» jjg jjgljll
:
E 1 j 1 1 1 1 1 1 1 1 1 1 1 1 1 1 1 1 1 1 1 1 1 1 1 1 1 1 1 1 1 1 1 1 1 1 1 1 1
| MUM 50.. | |||
| 1-4 | 7 | 1 | |
| 1-4 | |||
| 1-2 | |||
| - | * | 7 | 2 |
| 2-4 | 6 | 3 | |
| 2-3 | |||
| 3-4 | 9 | 4 | |
| 3-4 | 7 | ||
i j 1j j j j j j j j j j j j j j j j j j j j j j j j j j j j j j j j j j j j j j j j j j j j j j j j j j j j j j
9
y j 11 11 11 11
auiusci ciia 10
10
11.
Jaa
12
13
14
15 aLusit
1 1
16
17
18
a
b pcl/
C iogzill
1
20
by 的一个
22.
20
jll jll jll jll jll jll jll jll jll jll jll jll jll jll jll jll jll jll jll jll jll jll jll jll jll jll jll jll jll jll jll jll jll jll jll jll jll jll jll
6 Jaaallyy jaiyagc y. iljy<ll Jilil 0dgc 2
7 bll 8 jdl 8 ggl gll lgl
8 一 1
5 5 5 5 5 5 5 5 5 5 5 5 5 5 5 5 5 5 5 5 5 5 5 5 5 5 5 5 5 5 5 5 5 5 5 5 5 5 5 5 5 5 5 5 5 5 5 5
山
aJ 1.
g 1 2
1b0j 1y jy
1
alba bll jy! 5rall bll y
.
.
!
a bll l 1 1 0 0 0 0 0 0 0 0 0 0 0 0 0 0 0 0 0 0 0 0 0 0 0 0 0 0 0 0 0 0 0 0 0 0
!
jll 1iill g iill l g jy
!pa
J 1 J 1 J 1 J 1 J 1 J 1 J 1 J 1 J 1 J 1 J 1 J 1 J 1 J 1 J 1
J 1 J 1 J 1 J 1 J 1 J 1 J 1 J 1 J 1 J 1 J 1 J 1 J 1 J 1 J 1 J 1 J 1 J 1 J 1 J 1 J 1 J 1 J 1 J 1 J 1 J 1 J 1 J 1 J 1 J 1 J 1 J 1 J 1 J 1 J
!
1
Kundendienst - Customer Service
AE United Arab Emirates,
BSH Home Appliances FZE Round About 13, Plot Nr MO-0532A
Jebel Ali Free Zone - Dubai Tel.: 04 881 44 01*
mailto:service.uae@bshg.com
www.bosch-home.com/ae
- Sun-Thu 8am to 5pm (exclude public holidays)
AL Republika e Shqiperise, Albania Elektro-Service sh.p.k Rruga Kasem Shima, Kodi postar-1050
Prane Ures Mezezit
1023 Tirane
Tel.: 42278130; -131
mailto:info@elektro-servis.com
EXPERT Service
Rruga e Kavajes
Kulla B Nr 223/1 Kati I
1023 Tirane
Tel.: 44806061; 42274961
Cel: +355 069 60 45555
mailto:info@expert-servis.al
AM Armeniajununtu ZIGZAGLLC
Charenci str. 25
Yerevan 375025
Tel.: 010 55 60 10
mailto:service@zigzag.am
www.zigzag.am
Gate 1, 1555 Centre Road
Clayton, Victoria 3168
Tel.: 1300 369 744*
mailto:customersupport.au@bshg.com
www.bosch-home.com.au
- Mo-Fr: 24 hours
AZ Azarbaycan Respublikasi, Azerbaijan
Baku Service Company MMC
Azadlig Pr. 116
Baku
Tel.: 125309035
mailto:info@ser-cen.az
www.ser-cen.az
Yurd Service MMC
- Bakikhanoy Str.
Baku, AZ1007
Tel.: 124803301
mailto:info-service@yurd.az
www.yurd.az
Optimal Elektronika MMC
Hasanoghlu 7B
Baku, AZ1072
Tel.: 12954
mailto:xanim.muradova@optimal.az
www(optimal.az
BA Bosna i Hercegovina, Bosnia-Herzegovina
"HIGH" d.o.o
Gradačačka 29b
71000 Sarajevo
Tel./Fax: 033 21 35 13
mailto:centralniservis@yahoo.com
BE Belgique,Belgié,Belgium
BSH Home Appliances S.A. - N.V.
Business center FPI, floor 5,
CherniyrahBlvd.51B
1407 Sofia
Tel.: 0700 208 17
mailto:informacia.servis-bg@bshg.com
www.bosch-home.bg
BH Bahraia
Khalaifat Est.
BLD 898, R 533, TASHAN 405
Manama
Tel.: 017400553*
mailto:service@khalaifat.com
- Sat-Thu 7am to 5pm (exclude public holidays)
BY Belarus, Benapycb
OOO“BCX BbITOBaTexHnka"
ten.: 495 737 2961
mailto:mok-kdhl@bshg.com
CA Canada
BSH Home Appliances Ltd.
Tel.: 800 554 9043
www.bosch-home.ca
CH Schweiz, Suisse, Svizzera, Switzerland
BSH Hausgeräte AG
19F, Jinling Asia Pacific Tower,
No.2 Hanzhong Road, Gulou District,
210005 Nanjing, Jiangsu Province
Service Tel.: 400 8855 888*
mailto:careline.china@bshg.com
www.bosch-home.cn
- phone rate depends on the network used
CY Cyprus, KUppos
BSH Ikiakes Syskeves-Service
39, Arh. Makaariou III Str.
2407 Egomi/Nikosia (Lefkosia)
Tel.: 777 78 007
mailto:EGO-CYCustomerService@bshg.com
CYN Turkish Rep. Of North Cyprus
Argas Limited Company
37 Osman Pasa Cad. K. Çiltlik
Lefkosa
Tel.: 02284070
mailto:argas.tenik@yar-group.com
Semson Ticaret Sti, Ltd.
Bedrettin Demirel Cad. no 17
Girne
Tel.: 0816 04 94
mailto:m.defterali@ercantangroup.com
CZ Ceska Republika, Czech Republic
Vice informaci (napi. zaručni podmíky,
prodlouzena zaruka aj.) naleznete na webo -
vych strankach www.bosch-home.com/cz/
To arrange an engineer visit, to order spare parts and accessories or for product advice please visit
www.bosch-home.co.uk
or call Tel.: 0344 892 8979*
- Calls are charged at the basic rate, please check with your telephone service provider for exact charges.
GE Georgia,
Elit Service Ltd
Vake-Saburtalo district,
Intersection of Al. Kazbegi ave.
and Kavtaradze Str. 0186
Kavtaradze str. 1
Tbilisi
Tel.: 32 300 020
mailto:info@es.ge
GR Greece, Eλας
BSH Ikiakes Siskeves A.B.E.
Central Branch Service
17 km E.O. Athinon-Lamias & Potamou 20
14564 Kifisia
TnAeewo:2104277500-701
mailto: nkf-CustomerService@bshg.com
www.bosch-home.gr
HK Hong Kong港
BSH Home Appliances Limited
Unit 07,23/F,CDW Building
388 Castle Peak Road
Tsuen Wan, New Territories,
Hong Kong
Tel.: 2626 9655 (HK)
Toll free 0800 863 (Macao)
mailto:bosch.hk.service@bshg.com
www.bosch-home.com/hr
www.bosch-home.com/hu
IE Republic of Ireland
BSH Home Appliances Ltd.
M50 Business Park
Ballymount Road Upper
Walkinstown
Dublin 12
To arrange an engineer visit, to order spare parts
and accessories or for product advice please call
Tel.: 01450 2655*
www.bosch-home.ie
- Calls are charged at the basic rate, please check with your telephone service provider for exact charges.
IL Israel
C/S/B/ Home Appliance Ltd.
1, Hamasger St
North Industrial Park
Lod, 7129801
Tel.: 089777222
mailto:csb-serv@csb-ltd.co.il
www.bosch-home.co.il
IN India, Bharat.
BSH Household Appliances Mfg. Pvt. Ltd.
Arena House, Main Bldg, 2nd Floor
Plot No. 103, Road No. 12
MIDC, Andheri East
Mumbai 400 093
Toll Free 1800 266 1880*
www.bosch-home.com/in
Mo-Sat 8am to 8pm (exclude public holidays)
IS Iceland
Smith & Norland hf.
Noatuni 4
105 Reykjavik
Tel.: 0520 3000
www.sminor.is
IT Italia, Italy
www.bosch-home.com/it
KG Kyrgyzstan, Kbipb3 Pecny6nkaCbi
OcOO Alfa Systems
Jibek Jolu str. 40
Bishkek
Tel.: 0702 98 53 53
mailto:alfas-service@mail.ru
KR Republic Korea, Daehan Minguk,
Empel Co.,Ltd
1201 ACE Hightechcity 1-Dong 775
Gyeonglin-ro Yeongdeungpo-gu
Seoul
Tel.: 1899-4636
mailto:hshim@empel.co.kr
Dongsuh Foods Corporation
Dongsuh Bldg., 324, Dongmak-ro, Mapo-gu
Seoul
Tel.: 080-023-9114
mailto:khjo@dongsuh.co.kr
KZ Kazakhstan, Ka3akCTaH
BSH Home Appliances LLP
Dostyk 117/6,
Business Center "Khan Tengri"
Almaty
Hotline: 5454*
mailto:ALA-Service@bshg.com
- Toll free from mobile only
LB Lebanon
Teheni, Hana & Co.
Boulevard Dora 4043 Beyrouth
P.O.Box 90449
Jdeideh, 1202 2040
Tel.: 01 255 211
mailto:Info@Teheni-Hana.com
LT Lietuva, Lithuania
Senuku prekybos centras UAB
Jonavos g.62
44192 Kaunas
Tel.: 037 212 146
www.senukai.lt
UAB "AG Service"
R. Kalantos g. 32
52494 Kaunas
Tel.: 0700 556 55
mailto:servisas@agservice.lt
www.agservice.lt
Baltic Continent Ltd.
Luk\$io q.23
09132 Vilnius
Tel.: 870 055 595
mailto:info@balticcontinent.It
www.balticcontinent.It
UAB Emtoservis
Savanoriu pr.1 (Centrine bustine)
03116 Vilnius
Tel.: 870 044 724
mailto:svc@emtoservis.lt
www.emtoservis.it
LU Luxembourg
S.R.L. "Rialto-Studio"
Lintel Investments and
Management Services Pvt. Ltd.
Ma. Maadheli, Majeedhee Magu
Malé
Tel.: 03 010 200
mailto:mohamed.zuhuree@lintel.com.mv
www.lintel.com.mv
NL Nederlande, Netherlands
Level 3, Air NZ Building,
Smales Farm Business Park
74 Taharoto Road, Takapuna
Auckland 0622
Tel.: 0800245700*
mailto: aftersales.nz@bshg.com
www.bosch-home.co.nz
- Mo-Fr 8.30am to 5pm (exclude public holidays)
PK Pakistan,
MEGA Home Appliances
Plaza 46-A, Commercial Sector XX
Phase 3, DHA
Lahore
- Mo-Sat 9am to 6pm (exclude public holidays)
PL Polska, Poland
SA Kingdom Saudi Arabia,
1
Abdul Latif Jameel Electronics and
Airconditioning Co. Ltd.
BOSCH Service centre, Kilo 5 Old Makkah Road
(Next to Toyota), Jamiah Dist.,
P.O.Box 7997
Jeddah 21472
Tel.: 800 127 9999*
mailto:ALJECC8@ALJ.COM
www.aljazeera.com.sa
- Sat-Thu 8.00am to 11.00pm (exclude public holidays)
SE Sverige, Sweden
BSH Home Appliances AB
Landsvagen 32
169 29 Solna
Tel.: 0771 19 70 00 local rate
mailto:Bosch-Service-SE@bshg.com
www.bosch-home.se
SG Singapo新加坡
BSH Home Appliances Pte. Ltd.
38C Jalan Pemimpin, #01-01
Singapore 577180
Tel.: 6751 5000*
mailto:bshsgp.service@bshg.com
www.bosch-home.com.sg
- Mo-Fr 9am to 6pm, Sat 9am to 1pm
(exclude public holidays)
SI Slovenija, Slovenia
BSH Hišni aparati d.o.o.
Litostrojska 48
1000 Ljubljana
Tel.: 015830700
mailto:informacije.servis-slo@bshg.com
www.bosch-home.com/si
SK Slovensko, Slovakia
Ital Thai Tower, 2034/31-39, 1st floor,
New Petchburi Road
Bangkapi, Huay Kwang
Bangkok, 10310
Tel.: 02 495 2424*
www.bosch-home.com/th
- Mo-Sat 8am to 6pm (exclude public holidays)
TJ Tadschikistan, yymxypn
ToUKKCTOH
P.E. Suhrob Muhitdinov
Shamsi street no: 67/A
Dushanbe
Tel.: 0918678043
mailto:sino2003@list.ru
Vostok Co. Ltd.
Yakkacinarskaya street No: 144/4
Dushanbe
Tel.: 446007872
mailto:Lola.Mirzoeva@vostok.tj
www.volna.tj
TM Turkmenistan, Turkmenistan
Bayram Anna Yuryewna
Stariya marka, Atabeyeva str.
Spectrum magaza
Ashgabat
Tel.: 012 26 94 16
mailto:steptm@mail.ru
TR Türkiye, Turkey
BSH Ev Aletleri Sanayi
ve Ticaret A.S.
Fatih Sultan Mehmet Mahallesi
Balkan Caddesi No: 51
34771 Umraniye, Istanbul
Tel.: 02164446333*
mailto:careline.turkey@bshg.com
www.bosch-home.com/tr
- Cagli merkezini sabit hatlardan aramanin bedeli
BSH Home Appliances Private Limited
台北市內湖區洲子街80號11樓
11F., No.80, Zhouzi St., Neihu Dist.
Taipei City 11493
Tel.: 0800 368 888
mailto:bshtzn-service@bshg.com
Republic of Uzbekistan
Elektronik Magnat
Beruni street No: 5/6
Tashkent
Tel.: 712 156 333
mailto:magnet.service.uzb@gmail.com
KK Kosovo
Service-General SH.P.K.
rr.Magjistralja Ferizaj Prishtine
70000 Ferizaj
Tel.: 00381 (0) 290 330 723
mailto:servicegeneral527@gmail.com
XS Srbija, Serbia
BSH Kucni aparati d.o.o.
Milutina Milankovica br. 9ž
11070 Novi Beograd
Tel.: 011 353 70 08
mailto:informacije.servis-sr@bshg.com
www.bosch-home.rs
ZA South Africa
BSH Home Appliances (Pty) Ltd.
96 Fifteenth Road, Randjespark
1685 Midrand-Johannesburg
Tel.: 086 002 6724
mailto:bsh@jopen.co.za
mailto:applianceserviceza@bshg.com
www.bosch-home.com/za
bosch-infoteam@bshg.com
Thank you for buying a Bosch Home Appliance!
Register your new device on MyBosch now and profit directly from:
- Expert tips & tricks for your appliance
- Warranty extension options
- Discounts for accessories & spare-parts
- Digital manual and all appliance data at hand
- Easy access to Bosch Home Appliances Service
Free and easy registration - also on mobile phones:
www.bosch-home.com/welcome
BOSCH HOME APPLIANCES SERVICE
Looking for help? You'll find it here.
Expert advice for your Bosch home appliances, need help with problems or a repair from Bosch experts.
Find out everything about the many ways Bosch can support you:
www.bosch-home.com/service
Contact data of all countries are listed in the attached service directory.