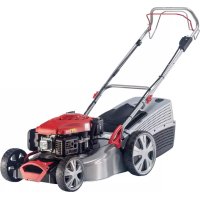
SF 4036 - Lawn mower AL-KO - Free user manual and instructions
Find the device manual for free SF 4036 AL-KO in PDF.
Download the instructions for your Lawn mower in PDF format for free! Find your manual SF 4036 - AL-KO and take your electronic device back in hand. On this page are published all the documents necessary for the use of your device. SF 4036 by AL-KO.
USER MANUAL SF 4036 AL-KO
3.1.5 Use and handling of the rechargeable battery-operated tool .................................. 38
1 ABOUT THESE OPERATING
The German version is the original operating instructions. All additional language versions are translations of the original operating in- structions.
It is essential to carefully read through these operating instructions before start-up. This is essential for safe working and trouble-free handling.
Always safeguard these operating instruc- tions so that they can be consulted if you need any information about the appliance.
Only pass on the appliance to other persons together with these operating instructions.
Comply with the safety and warning informa- tion in these operating instructions.
1.1 Legends and signal words
DANGER! Denotes an imminently dangerous situation which will result in fatal or serious injury if not avoided. WARNING! Denotes a potentially dan- gerous situation which can result in fatal or serious in- jury if not avoided. CAUTION! Denotes a potentially dan- gerous situation which can result in minor or moderate injury if not avoided. IMPORTANT! Denotes a situation which can result in material dam- age if not avoided. NOTE Special instructions for ease of under- standing and handling. 2 PRODUCT DESCRIPTION These operating instructions describe a re- chargeable battery scarifier.
This scarifier is intended for loosening and aerat- ing a lawn (scarifying) in private applications, and is only allowed to be used on dried lawns which have been mown short. Any other use, as well as unauthorised conver- sions or add-ons, are regarded as contrary to the intended use and will result in invalidation of the warranty as well as loss of conformity (CE mark); the manufacturer will thus decline any responsi- bility for damage and/or injury suffered by the us- er or third parties.
2.2 Possible foreseeable misuse
The appliance is not designed for commercial use in public parks and sports facilities or for use in farming and forestry. It must not be used for trimming bushes and hedges or for levelling the ground.
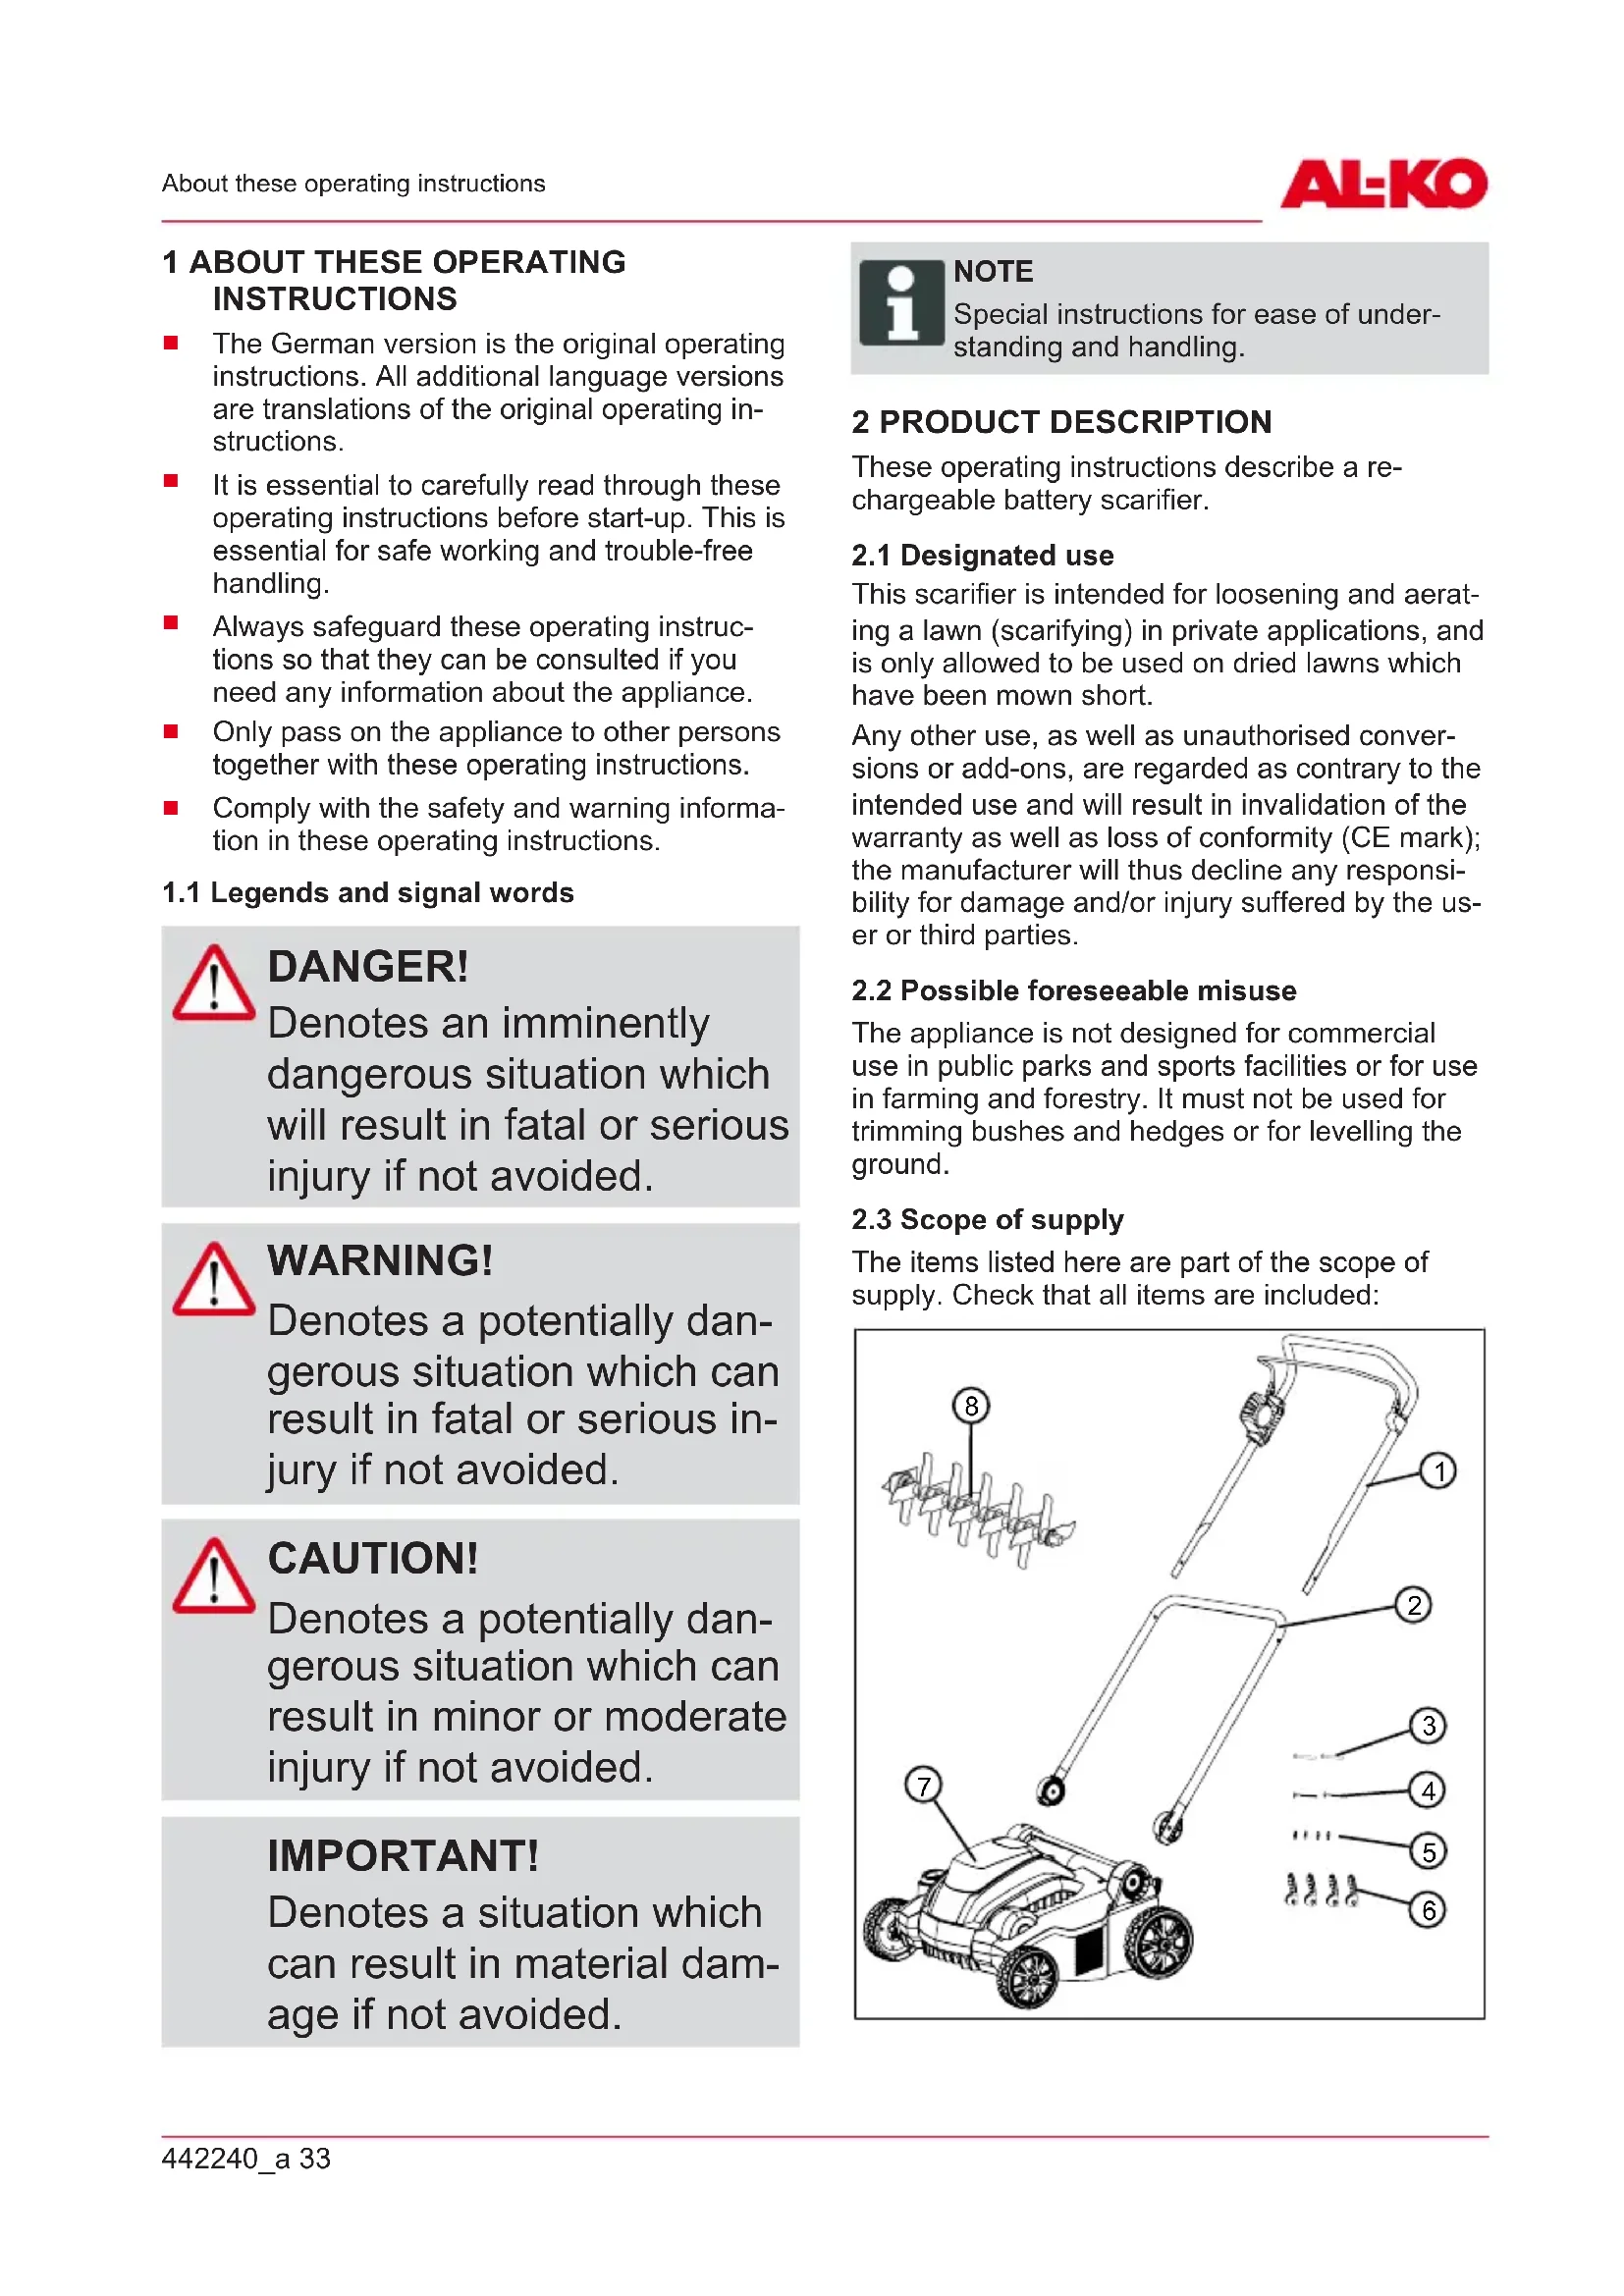
The items listed here are part of the scope of supply. Check that all items are included:
8GB 34 SF 4036 Product description No. Component 1 Upper handlebar with motor switch bracket and motor switch 2 Lower handlebar 3 Lower handlebar push-through pin for quick release (2x) 4 Upper handlebar push-through pin for quick release (2x) 5 Washer (4x) 6 Quick release for handlebar (4x) 7 Scarifiers 8 Scarifying roller Available as optional accessories:
Aeration roller, Article No.: 113621
Grass collector, Article No.: 113622 NOTE The rechargeable battery and charging unit are not included in the scope of de- livery and must therefore be purchased separately. The rechargeable battery and charging unit must be purchased separately: Lithium ion rechargeable battery, 40V max., 4.0Ah Order No. rechargeable battery 113280, Order No. charging unit 113281 Lithium ion rechargeable battery, 40V max., 5.0Ah Order No. rechargeable battery 113524, Order No. charging unit 113281
2.4 Symbols on the machine
Sym- bol Meaning Read the operating instructions before starting operation. Sym- bol Meaning Keep other people out of the danger area. Maintain a safety distance. Keep your hands and feet away from the blade system. Always switch off the power supply with the key switch and take out the rechargeable battery before working on the appliance. Do not reach or step into rotating parts. Protect the appliance from rain and moisture! Procedure for starting the motor see
chapter 6.5 "Starting and stopping the
2.5 Safety and protective devices
WARNING! Risk of injury Defective and disabled safety and protective de- vices can lead to serious injury.
Have any defective safety and protective devices repaired.
Never disable safety and protective devices. Key switch The key switch is located next to the recharge- able battery compartment under the cover of the battery compartment. Use this to switch off the power supply before maintenance work or breaks in work to avoid injuries caused by unintentional switching on.442240_a 35 Safety The key of the key switch can be removed in the Off position. Motor switch bracket The appliance is equipped with a motor switch bracket which stops the appliance when it is re- leased. Safety button In order to switch on the motor by means of the motor switch bracket, the safety button must be pressed beforehand. Overload protection If the appliance is blocked by overload or picked- up foreign objects, the overload protection trips and the motor stops. Baffle The appliance is provided with an impact cap that prevents grass and objects being thrown out when the grass collector box is removed.
No. Component 1 Upper handlebar, folding 2 Lower handlebar, rotatable 3 Motor switch bracket on motor switch 4 Motor switch with safety switch No. Component 5 Quick release for folding back the han- dlebar 6 Rotary/snap-in joint with quick release for the handle height adjustment 7 Rechargeable battery compartment cov-
8 Rechargeable battery compartment 9 Key switch on the rechargeable battery compartment 10 Adjuster wheel for working depth 11 Blade system with scarifier roller or aer- ator roller 12 Baffle 13 Grass collector bag*
- Not included in the scope of delivery 3 SAFETY
instructions for power tools WARNING! Read all safety instruc- tions, instructions, illus- trations and technical data that are provided with this power tool. Failure to comply with the following instructions can lead to an electric shock, fire and/or series injuries.
Keep all safety instruc- tions and other instruc- tions for future refer- ence.GB 36 SF 4036 Safety The term "power tool" used in the safety instructions refers to mains-operated power tools (with mains line) and to battery- operated power tools (without mains line).
Avoid physical contact with earthed surfaces such as on pipes, heaters, cookers and refrigerators. There is an increased risk of electric shock if your body is earthed.
Keep electrical tools out of the rain and away from moisture. Water getting into an electrical tool increases the risk of an electric shock.
3.1.2 Personal safety
Be alert, pay attention to what you are doing and take a cautious approach to working with a power tool. Do not use a power tool if you are tired or under the influence of drugs, alcohol or medicines. A moment's in- attentiveness when using the power tool can result in seri- ous injury.
Wear personal protective equipment, and always use safety goggles. The injury risk can be reduced by wear- ing personal protective equip- ment such as a dust mask, non-slip shoes, a protective helmet or ear defenders, de- pending on the type and appli- cation of the power tool.
Avoid starting to operate the appliance inadvertently. Ensure the switch is in the off-position before connect- ing to power source and/or battery pack, picking up or carrying the power tool. Ac- cidents can be caused by leaving your finger on the switch when you carry the power tool or when you con- nect it to the power supply.
Remove the adjusting tools or spanner before you switch on the power tool. A tool or spanner that is in a ro- tating part of the power tool can cause injury.
Avoid an abnormal bodily posture. Make sure you can stand safely and keep your balance at all times. This will enable you to control the pow- er tool better if something un- expected happens.
Wear suitable clothing. Do not wear baggy clothing or jewellery. Keep your hair and clothing away from442240_a 37 Safety moving parts. Loose cloth- ing, jewellery or long hair can be snagged on moving parts.
If dust extraction and catch- ment devices can be mount- ed, then these must be con- nected and correctly used. Using a dust extraction sys- tem can reduce the risk caused by dust.
Do not give yourself a false sense of safety; do not ig- nore the safety rules for power tools even if you are familiar with the power tool after using it many times. One careless action can lead to serious injuries within sec- onds.
3.1.3 Use and handling of the
Do not overload the power tool. Use the appropriate power tool for the job you are doing. Using the appro- priate power tool will enable you to work more effectively and safely in the specified performance range.
Do not use a power tool if it has a defective switch. A power tool that can no longer be switched on or off is dan- gerous and must be repaired.
Disconnect the plug from the socket and/or remove the battery before you make adjustments to the appli- ance, replace parts or put the power tool away. This precautionary measure will prevent the power tool from starting inadvertently.
Keep unused power tools out of the reach of children. Do not allow people to use the power tool if they are not familiar with it or have not read these instructions. Power tools are dangerous if they are used by inexperi- enced people.
Look after power tools and the insertion tool with care. Check whether moving parts function perfectly and do not stick, whether there are any broken parts or parts that are damaged in such a way that the function of the power tool is im- paired. Have damaged parts repaired before using the power tool. Many accidents are caused by failure to main- tain power tools properly.
Keep cutting tools sharp and clean. Carefully main- tained cutting tools withGB 38 SF 4036 Safety sharper cutting edges are less likely to stick and are easier to control.
Use power tools, accesso- ries, insertion tools, etc. ac- cording to these instruc- tions. When doing so, take account of the working con- ditions and the activity to be undertaken. Using power tools for applications other than the intended purpose can result in dangerous situa- tions.
Keep the grips and grip sur- faces dry, clean and free from oil and grease. Slippery grips and grip surfaces pre- vent safe operation and con- trol of the power tool in un- foreseen situations.
3.1.4 Safety in the workplace
Keep your working area clean, and make sure it is well illuminated. Untidiness or dimly lit working areas can lead to accidents.
Do not work with the power tool in a potentially explo- sive atmosphere with the presence of flammable liq- uids, gases or dust. Power tools give rise to sparks that can ignite the dust or vapours.
Keep children and other people away from the power tool when using it. If you are distracted, you may lose con- trol of the power tool.
3.1.5 Use and handling of the
rechargeable battery- operated tool
Only recharge batteries with chargers that are recom- mended by the manufactur- er. Using a charger intended for one particular type of re- chargeable battery with a dif- ferent type of rechargeable battery represents a fire risk.
Only use batteries in the power tools that are intend- ed for this purpose. Using other batteries can lead to in- juries and represents the risk of fire.
Keep the unused recharge- able battery away from pa- per clips, coins, keys, nails, screws or other small metal objects that could short-cir- cuit the contacts. A short cir- cuit between the rechargeable battery contacts can result in burns or fire.
Incorrect use can result in fluid leaking out of the re- chargeable battery. Avoid coming into contact with it. In case of inadvertent con-442240_a 39 Safety tact, rinse off with water. If the fluid gets into your eyes, additionally seek medical assistance. Leaking rechargeable battery fluid can lead to skin irritations or burns.
Do not use a damaged or changed rechargeable bat- tery. Damaged or changed batteries can behave unpre- dictably and lead to fire, ex- plosion or a risk of injury.
Do not expose a recharge- able battery to fire or high temperatures. Fire or tem- peratures over 130°C can cause an explosion.
Comply with all of the in- structions for charging, and never charge the recharge- able battery or the re- chargeable battery-operated tool outside of the tempera- ture range specified in the operating instructions. In- correct charging or charging outside of the permissible temperature range can de- stroy the rechargeable battery and increase the risk of fire.
For your own safety, only have your power tool re- paired by qualified special- ist personnel using genuine spare parts. This ensures that the power tool remains safe.
Never maintain damaged batteries. All rechargeable battery maintenance should only ever be undertaken by the manufacturer or autho- rised customer service points.
3.2 Safety instructions for
Young people under 16 years of age and people who do not know the operating instruc- tions are not allowed to use the appliance. Observe any country-specific safety regula- tions concerning the minimum age of the user.
Do not operate the appliance if you are under the influence of alcohol, drugs or medica- tion.
3.2.2 Safety in the workplace
Before working, remove any dangerous objects from the working area, e.g. branches, glass or metal pieces, stones.
Work only in daylight or under very bright artificial light.
Operate the appliance only on solid and level ground and not on sharp inclines.GB 40 SF 4036 Safety
Pay attention to stability.
3.2.3 Safety of persons,
animals and property
Note that the user is responsi- ble for accidents and damage that may befall other persons or their property.
Use the appliance only for the purposes for which it is in- tended. Any non-intended use can lead to injury and property damage.
Switch on the appliance only when there are no other per- sons or animals in the working area.
Maintain a safe distance to persons or animals, or switch off the appliance if persons or animals approach.
3.2.4 Appliance safety
Use the appliance only under the following conditions:
The appliance is not soiled.
The appliance show no signs of damage.
All controls function proper- ly.
Do not overload the device. It is intended for light work in the private sector. Overload can lead to damage to the ap- pliance.
Never operate the appliance with worn or defective parts. Always replace defective parts with original spare parts from the manufacturer. If the appliance is operated with worn or defective parts, guar- antee claims against the man- ufacturer are excluded. NOTE Repair work is only al- lowed to be carried out by expert workshops or our AL-KO service centres.442240_a 41 Safety
3.2.5 Vibration load
WARNING! Danger due to vibration The actual magnitude of the vibration emissions during the use of the appli- ance may deviate from that stated by the manu- facturer. Observe the fol- lowing influencing factors before or during use:
Is the appliance being used as intended?
Is the material being cut or processed in the proper manner?
Is the appliance in a proper condition of use?
Is the cutting tool prop- erly sharpened or is the correct cutting tool in- stalled?
Are the handle grips and any optional vibra- tion grips mounted, and are they firmly attached to the appliance?
Only operate the appliance at the motor speed required for the respective work. Avoid us- ing the maximum speed in or- der to reduce noise and vibra- tions.
The noise and vibrations of the appliance can increase due to improper use and maintenance. This leads to damage of the health. In this case, immediately switch off the appliance and have it re- paired by an authorised ser- vice workshop.
The stress level due to vibra- tion is dependent on the work being performed and the use of the appliance. Estimate the stress level and plan appropri- ate breaks. This reduces the stress load due to vibration over the entire working time.
Extensive use of the appli- ance exposes the operator to vibrations, which can lead to circulatory issues ("white fin- gers"). To avoid this risk, wear gloves and keep your hands warm. If any symptoms of "white fingers" occur, immedi- ately consult a physician. These symptoms include: Numbness, loss of feeling, tin- gling, itching, pain, reduced muscular strength, changes in the colour or condition of the skin. Normally these condi- tions affect the fingers, hands or pulse. The risk increases at low temperatures.GB 42 SF 4036 Assembly
Take long breaks during your working day so you can re- cover from the noise and the vibrations. Plan your work in such a way that the use of de- vices that generate strong vi- brations is spread over sever- al days.
If you notice an unpleasant sensation or discolouration of the skin on your hands when using the device, stop work immediately. Take sufficient work breaks. Without suffi- cient breaks, a hand/arm vi- bration syndrome can occur.
Minimise your risk of being exposed to vibrations. Main- tain the appliance according to the instructions in the oper- ating instructions.
If the appliance is used often, contact your dealer to pur- chase anti-vibration accesso- ries (such as handles).
Avoid working with the device at temperatures below 10°C. Define how the vibration load can be limited in a work plan.
3.2.6 Noise pollution
A certain level of noise exposure from this device is inevitable. Carry out noisy work at ap- proved and specified time peri- ods. Observe rest periods as necessary and restrict the dura- tion of the work to a minimum. For your personal protection and protection of persons in the vi- cinity, appropriate hearing pro- tection must be worn. 4 ASSEMBLY Assembly: See images (01) to (04). WARNING! Danger if assembly is not carried out complete- ly! Operation of an incom- pletely assembled appli- ance can result in serious injury.
Only operate the appli- ance when it is fully as- sembled.
Do not insert the battery into the appliance until it is fully assembled.
Check that all safety and protective devices are in place and func- tioning correctly before switching on. 5 START-UP
5.1 Carrying out visual inspection
1. Check the appliance for damage and loose
screws. Replace the defective appliance parts and tighten the screws.
2. Check the appliance for coarse soiling. Re-
Charging the rechargeable battery (05, 06) The rechargeable battery and the charging unit are not included. The following li-ion recharge- able batteries and charging units from AL-KO can be used: Product Designation Art. no. Li-ion re- chargeable battery B150 Li (B05-3640) 113280 Li-ion re- chargeable battery B200 Li (B05-3650) 113524 Charging unit C05-4230 113281 The rechargeable battery is partially charged. Fully charge the rechargeable battery before us- ing it for the first time. The rechargeable battery can be charged in any charge status. Interrupting charging does not damage the rechargeable bat- tery. NOTE For detailed information, heed the sepa- rate operating instructions for the re- chargeable battery and for the charging unit. CAUTION! Danger of fire during charging! Due to heating of the char- ger, there is a danger of fire if it is placed on an in- flammable surface and is not adequately ventilated.
Always use the charger on a non-inflammable surface or in a non-com- bustible environment.
1. Insert the rechargeable battery (05/1) in the
charging unit (05/2) and plug the power plug (05/3) into the power outlet. The charging process begins and the LED for indicating the operating status (05/4) flashes green.
2. Observe the LED (05/4). The charging pro-
cess takes approx. 1.5 – 2.0hours until fully charged. The charging process ends auto- matically when the rechargeable battery is fully charged. The LED (05/4) then lights per- manently green.
3. Disconnect the power plug (05/3) when the
LED (05/4) permanently lights green.
4. Press and hold the engaging button on the
bottom of the rechargeable battery.
5. Pull the rechargeable battery (05/1) out of the
charging unit (05/2). Status displays on the charging unit (06) The LED (06/1) on the charging unit indicates the charge status of the rechargeable battery and the operating condition of the charging unit. The sym- bols (06/2) on the charging unit indicate these states: Symbol LED and charge status LED lights green: The rechargeable battery is fully charged. LED flashes green: The recharge- able battery is charging. LED lights red: There is no recharge- able battery in the charging unit. LED flashes red: The rechargeable battery is too hot and will therefore not charge.
5.3 Determining the charge status of the
rechargeable battery (07) There is a control panel with a pushbutton (07/1) and LED charge status displays (07/2 to 07/5) on the front of the rechargeable battery.
1. Press the pushbutton (07/1). The charge sta-
tus displays light according to the charge sta- tus of the rechargeable battery.
2. To read the charge status, see section
"Charge status displays on the rechargeable battery".GB 44 SF 4036 Start-up Charge status displays on the rechargeable battery LEDs Battery charge level Green (05/2) Rechargeable battery is fully charged, i.e. to 100 %. Green (05/3, 05/4) Rechargeable battery is charged to over 50 %. Green (05/4) Rechargeable battery is charged to less than 50 %. Red (05/5) The rechargeable battery is fully discharged or the rechargeable battery has been overheated/un- dercooled.
5.4 Inserting and pulling out the
rechargeable battery (08) IMPORTANT! Danger of damage to the rechargeable battery If the rechargeable battery is left in the appliance after use, it may damage the re- chargeable battery.
Immediately after use, pull the rechargeable battery out of the appli- ance and store in a frost-protected area.
Only insert the re- chargeable battery in the appliance immedi- ately before starting work. Inserting the battery
1. Open the cover (08/1) of the rechargeable
battery compartment (08/a).
2. Push the rechargeable battery into the re-
chargeable battery slot (08/2) from above un- til it engages (08/b).
3. Close the cover of the rechargeable battery
compartment. Pull out the rechargeable battery
1. Press and hold the unlock button on the re-
2. Pull out the rechargeable battery.
5.5 Switching the power supply on and
off(09) The key switch on the rechargeable battery com- partment can be used to switch the power supply for the entire appliance on and off. WARNING! Risk of injury Inadvertent switching on of the appliance can lead to serious injuries.
Always switch off the power supply of the de- vice with the key switch before maintenance work or breaks in work. Switching on the power supply
1. Open the cover (09/1) of the rechargeable
battery compartment (09/a).
2. Turn the key switch (09/2) to the On position
(positionI) (09/b). The appliance is supplied with operating voltage, but does not yet begin to operate.
3. Close the cover of the rechargeable battery
4. Switch on the appliance: see chapter 6.5
"Starting and stopping the motor (14)", page46.442240_a 45 Operation Switching off the power supply
1. Turn the key switch (09/2) to the Off position
(position0) (09/b). NOTE The key of the key switch can be re- moved in the Off position.
2. Immediately after use, pull the rechargeable
battery out of the appliance, charge and store in a frost-protected area. Only insert the re- chargeable battery in the appliance immedi- ately before the next use. 6 OPERATION NOTE Always mow the grass before scarifying (max. grass height: 4cm). Remove any foreign bodies from the grass surface.
6.1 Opening the impact flap ( 10)
The appliance can be operated with or without grass collector. The grass collector is available as an accessory. Scarifying without grass collector NOTE The impact flap is closed on delivery. Al- ways open the impact flap before scari- fying so that the scarified material can be discharged at the impact flap.
1. Fold the impact flap (10/1) back until it audi-
bly engages at an angle of approx. 30°. Scarifying with grass collector Fold the impact flap completely up. Using the grass collector: see chapter 6.6 "Attaching and removing the grass collector [optional] (15)", page46.
6.2 Folding the handlebar in and out (11)
CAUTION! Danger of crushing Fingers or other parts of the body can be crushed between the loose parts of the handlebar.
Hold the loose parts of the handlebar tightly.
Do not hold any fingers or other parts of the body between the loose parts. Folding in the handlebar
1. Release the quick release (11/1) and fold the
top handlebar (11/2) downwards (11/a).
2. Release the quick release on the rotary/snap-
in joints (11/3) until the entire handlebar (11/4) can be folded forward into the horizon- tal position (11/b).
3. Slightly tighten all quick releases.
Folding out the handlebar Proceed in reverse order.
6.3 Adjusting the handlebar to the body
1. Loosen the quick release on the rotary/snap-
2. Adjust the entire handlebar to the desired
height (12/a) at the handle (12/2). The move- ment is limited by the end stops (12/3) of the rotary/snap-in joints.
3. Tighten the quick releases (12/1).
6.4 Setting the working depth(13)
The setting of the working depth depends on:
Grass condition (well-kept: low working depth, overgrown: large working depth)
Blade wear (new: low working depth, worn: large working depth) If the working depth is too large: The appliance stands still and the motor does not run.GB 46 SF 4036 Operation IMPORTANT! Danger of damage to the appliance Setting the working depth with the appliance running causes damage.
Only set the working depth when the motor and blade system have stopped.
1. Turn the adjusting wheel (13/1) to HIGH. The
blade system is raised to the maximum.
2. Checking the working depth:
Start the appliance see chapter 6.5 "Starting and stopping the motor (14)", page46.
Move a little way onto the grass and check the result. If the grass is too short or irregularly scarified, the blade system must be lowered.
3. Stop the appliance and wait until the blade
4. Turn the adjuster wheel (13/1) a little towards
LOW. The blade system is lowered.
5. Repeat the previous steps until the grass is
uniformly scarified.
6.5 Starting and stopping the motor (14)
IMPORTANT! Danger of damage to the appliance The motor and blade sys- tem can be damaged by consecutively switching on and off briefly several times.
Only switch the motor on when the blade sys- tem has stopped. Starting the engine
2. Pull the motor switch bracket (14/2) towards
the handlebar (14/3) (14/b). Start the motor and blade system.
3. Release the safety button (14/1) and hold the
motor switch bracket (14/2). NOTE The motor switch bracket does not lock in place. Hold it tight against the handle- bar during the entire working period. Stopping the motor
1. Release the motor switch bracket (14/2). It
automatically returns to its initial position. The motor stops immediately. The blade system keeps running until it stops. CAUTION! Danger of cutting inju- ries There is a danger of lacer- ations when reaching into the blade system while it is running on.
Wait until the blade sys- tem has stopped.
6.6 Attaching and removing the grass
collector [optional] (15) Assembly: See images (03) to (04). The appliance can be operated with or without grass collector. Attach the grass collector
1. Raise the impact flap (15/1) (15/a).
2. Attach the grass collector (15/2) in the hold-
ers (15/b) from behind.
3. Release the impact flap.
Remove and empty the grass collector
1. Stop the appliance and wait until the blade
3. Lift the grass collector (15/2) out of the hold-
ers and take off to the rear.442240_a 47 Maintenance and care
6.7 Moving the appliance on the grass
Watch out for objects in the grass and re- move them from the working area.
Only control the appliance by the handlebar.
Move the appliance at walking speed.
Always move the appliance across the slope.
In the following cases, visit the customer ser- vice workshop:
Motor no longer starts.
Appliance has moved onto an obstruction.
Appliance vibrates and does not run smoothly.
The blades of the scarifier roller or steel spring prongs of the aeration roller are bent.
7 MAINTENANCE AND CARE
WARNING! Danger of cutting injuries Danger of cutting injuries when reaching into sharp- edged, moving appliance parts and into cutting tools.
Before maintenance, care and cleaning work, always switch off the appliance. Remove the rechargeable battery.
Always wear protective gloves during mainte- nance, care and clean- ing work.
Perform visual inspection.
Check the safety devices, control elements and all screw connections for damage and secure fitting.
Replace damaged parts before operation. After each use
Remove the rechargeable battery from the appliance and store in a frost-protected area.
7.2 Replacing the scarifier roller and
aeration roller (optional) (16) The scarifier roller is intended for coarse scarify- ing work and the aeration roller (optional) for fine scarifying work (see chapter 2.3 "Scope of sup- ply", page33). Removing the roller
1. Stop the appliance and wait until the blade
2. Turn the key switch off and remove the bat-
tery from the appliance.
3. Turn the appliance over.
4. Press (16/a) the locking bar (16/1) until the
6. Gently push the roller (16/2) towards the
7.3 Cleaning the blade system
IMPORTANT! Danger from water Water in the appliance caus- es short-circuits and destroys electrical components.
Do not spray the appli- ance with water.
Only use a broom or a brush for cleaning.
1. Stop the appliance and wait until the blade
2. Turn the key switch off and remove the re-
chargeable battery from the appliance.
3. Remove the grass collector see chapter 6.6
"Attaching and removing the grass collector [optional] (15)", page46.
4. Tip the appliance onto the side and clean the
blade system with a broom or brush.GB 48 SF 4036 Storage 8 STORAGE Storing the appliance
1. Turn the key switch off and remove the bat-
tery from the appliance.
2. Turn the adjuster wheel for the working depth
to the highest level (see chapter 6.4 "Setting the working depth(13)", page45).
3. Fold in the handlebar (see chapter 6.2 "Fold-
ing the handlebar in and out (11)", page45).
4. Thoroughly clean the appliance (see chapter
7.3 "Cleaning the blade system", page47).
5. Rub a thin coat of oil or silicon onto all metal
parts for corrosion protection.
6. Store the appliance:
Store the appliance in a dry, clean location protected from frost.
Cover with a breathable tarpaulin to protect against dust.
Do not use plastic film in order to avoid the accumulation of moisture. Storing the rechargeable battery and charging unit NOTE Heed the separate operating instructions for the rechargeable battery and for the charging unit. 9 TRANSPORT IMPORTANT! Danger of damage to the appliance The blade system will be damaged if the appliance is moved over a solid sur- face with the blade system lowered.
To raise the blade sys- tem, turn the adjuster wheel for the working depth to the highest level.
1. Stop the motor and wait until the blade sys-
2. Turn the adjuster wheel for the working depth
to the highest level.
3. Turn the key switch off and remove the bat-
tery from the appliance. Transporting the appliance between two working areas
Move the appliance to the working area with the blade system raised.
To carry the appliance: Lift the appliance by the carrying handle. Transporting the appliance in a vehicle
Fold in the handlebar see chapter 6.2 "Fold- ing the handlebar in and out (11)", page45.
Secure the appliance in the vehicle against falling over and sliding.
Secure the appliance against impacts from loose objects.
Do not place objects on the appliance. 10 DISPOSAL Information on the German Electrical and Electronic Equipment Act (ElectroG)
Electrical and electronic appliances do not belong in household waste, but should be collected and disposed of separately.
Used batteries or rechargeable batter- ies that are not installed permanently in the old appliance must be removed be- fore disposal. Their disposal is regulat- ed by the battery law.
Owners or users of electrical and elec- tronic appliances are obliged by law to return them after use.
The end user bears personal responsi- bility for deleting his personal data from the old appliance to be disposed of. The symbol of the crossed-through rubbish bin means that electrical and electronic appliances may not be disposed of in the household rubbish.442240_a 49 After-Sales / Service Electrical and electronic appliances can be hand- ed in at no charge at the following places:
Public service disposal or collection points (e.g. municipal building yards)
Points of sale of electrical appliances (sta- tionary and online) provided traders are obliged to take them back or offer this volun- tarily. These statements only apply to appliances that are installed and sold in the countries of the Eu- ropean Union and are subject to European Direc- tive 2012/19/EU. Different provisions may apply to the disposal of electrical and electronic appli- ances in countries outside the European Union. Information on German Battery Act (BattG)
Used batteries and rechargeable bat- teries do not belong in household waste, but should be collected and dis- posed of separately.
For safe removal of batteries or re- chargeable batteries from the electrical appliance and for information on their type or chemical system, follow the fur- ther information within the operating or installation instructions.
Owners or users of batteries and re- chargeable batteries are obliged by law to return them after use. The return is limited to the handover of customary household quantities. Used batteries can contain harmful substances or heavy metals that can cause damage to the envi- ronment and human health. Reuse of the used batteries and use of the resources contained therein contributes to the protection of these two essential commodities. The symbol of the crossed-through rubbish bin means that batteries and rechargeable batteries may not be disposed of in household rubbish. In addition, if the symbol Hg, Cd or Pb appears under the rubbish bin, this stands for the follow- ing:
Hg: Battery contains more than 0.0005% mercury
Cd: Battery contains more than 0.002% cad- mium
Pb: Battery contains more than 0.004% lead Rechargeable batteries and batteries can be handed in at the following places at no charge:
Public service disposal or collection points (e.g. municipal building yards)
Points of sale of batteries and rechargeable batteries
Disposal points of the common take-back system for the used batteries of appliances
Disposal point of the manufacturer (if not a member of the common take-back system) These statements apply only to rechargeable bat- teries and batteries that are sold in the countries of the European Union and that are subject to European Directive 2006/66/EU. Different provi- sions can apply to the disposal of rechargeable batteries and batteries in countries outside the European Union. 11 AFTER-SALES / SERVICE In the event of questions of warranty, repair or spare parts, please contact your nearest AL- KOService Centre. These can be found on the Internet at: www.al-ko.com/service-contactsGB 50 SF 4036 Help in case of malfunction
12 HELP IN CASE OF MALFUNCTION
CAUTION! Risk of injury Sharp-edged and moving appliance parts can lead to injury.
Always wear protective gloves during maintenance, care and cleaning work. Malfunction Cause Remedy Engine does not run. The power supply is switched off at the key switch. Switch the power supply on at the key switch. Rechargeable battery missing or not seated correctly. Insert the rechargeable battery correctly. Rechargeable battery is flat. Charge the rechargeable battery. The blade system is blocked by lawn felt or moss.
Set a lower working depth.
Clean the blade system. Cables or switches are defec- tive. Do not operate the appliance. Contact an AL-KO service centre. The blade system does not turn. The blade system is blocked by lawn felt and moss.
Set a lower working depth.
Clean the blade system. Motor and scarifier power decreases Rechargeable battery is flat. Charge the rechargeable battery. The blade system is braked.
Set a lower working depth.
Mowing the grass. Scarifier blades are worn.
Replace the scarifier blades. Appliance vibrates and does not run smoothly Scarifier blades are damaged.
Contact a customer service workshop. Rechargeable battery operating time is sig- nificantly shorter. The blade system is braked.
Set a lower working depth.
Clean the blade system. The service life of the re- chargeable battery has ex- pired. Replace the rechargeable battery. Only use genuine accessories from the manufacturer. Rechargeable battery cannot be charged. Rechargeable battery contacts are dirty. Clean the rechargeable battery contacts with a non-metallic object and spray with a contact spray. Important: Do not short-circuit the re- chargeable battery contacts with a metallic object. Rechargeable battery or charging unit is defective. Order spare parts from AL-KO. Rechargeable battery is too hot. Allow the battery to cool down.442240_a 51 Guarantee NOTE If you encounter any malfunctions that are not listed in this table or that you cannot rectify yourself, please contact our customer service. 13 GUARANTEE We will resolve any material or manufacturing faults on the appliance during the legal warranty period for claims relating to faults, in accordance with our choice either to repair or replace. The legal warranty period is determined by the legislation of the country in which the appliance was purchased. Our warranty promise applies only if:
These operating instructions are heeded
The appliance is handled correctly
Original spare parts have been used The warranty becomes void in the case of:
Unauthorised repair attempts
Unauthorised technical modifications
Non-intended use The guarantee excludes:
Paint damage that can be attributed to normal wear and tear
Wear parts that are marked with a frame xxxxxx (x) on the spare parts card The guarantee period commences with purchase by the first end user. The date on the proof of pur- chase is decisive. In the event of a guarantee claim, please take this guarantee declaration and the original proof of purchase, and contact your dealer or the nearest authorised customer service centre. This statement does not affect the purchaser's statutory claims for defects against the vendor.