
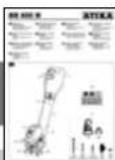
BH 800 N - Electric tiller ATIKA - Free user manual and instructions
Find the device manual for free BH 800 N ATIKA in PDF.
| Product type | Electric tiller |
| Brand | ATIKA |
| Model | BH 800 N |
| Motor power | 800 W |
| Supply voltage | 230 V ~ / 50 Hz |
| Mains protection | 10 A delayed |
| Rotation speed | 400 min⁻¹ |
| Working width | 280 mm |
| Tool diameter | 200 mm |
| Number of blades | 16 |
| Dimensions (L × W × H) | approx. 1320 × 365 × 330 mm |
| Weight | approx. 7,9 kg |
| Protection class | II (double insulation) |
| Protection type | IPX4 |
| Sound pressure level (LPA) | 79,3 dB(A) |
| Measured sound power level | 89,03 dB(A) |
| Guaranteed sound power level | 93 dB(A) |
| Hand-arm vibration | 1,415 m/s² (K = 1,5 m/s²) |
| Extension cable cross-section | 1,5 mm² (up to 25 m) / 2,5 mm² (beyond) |
| Recommended cable type | H07 RN-F |
| Safety devices | Safety switch, electronic brake, motor circuit breaker |
| Intended use | Turning and loosening soil in private gardens |
| Delivery contents | Pre-assembled unit, upper and lower handlebar, bag of screws, original manual, assembly and operating instructions, warranty declaration |
| Periodic maintenance | Lubricate transmission after 20 h then every 40-50 h; replace blades; clean after each use |
Frequently Asked Questions - BH 800 N ATIKA
User questions about BH 800 N ATIKA
0 question about this device. Answer the ones you know or ask your own.
Ask a new question about this device
Download the instructions for your Electric tiller in PDF format for free! Find your manual BH 800 N - ATIKA and take your electronic device back in hand. On this page are published all the documents necessary for the use of your device. BH 800 N by ATIKA.
USER MANUAL BH 800 N ATIKA
Original instructions - Safety instructions - Spare parts
Bineuse
| Extent of delivery 13 | |
| EC-Declaration of conformity 13 | |
| Symbols original instructions 13 | |
| Symbols machine 14 | |
| Operating times 14 | |
| Proper use 14 | |
| Residual risks 14 | |
| Vibrations 15 | |
| Safety advices 15 - Electrical safety 16 | |
| Description of device / Spare parts | 17 |
| Assembly 17 - Safety switch 17 - Handle hoop 17 | |
| Start-up 17 - Mains connection | 17 |
| - Mains fuse | 17 |
| - Mounting of the extension cable | 17 |
| - Switching on / off | 17 |
| Before start of work | 18 |
| Working with the device | 18 |
| - Working depth | 18 |
| - Work instructions | 18 |
| Maintenance and cleaning | 18 |
| - Maintenance | 18 |
| - Replacing the hoeing tools | 19 |
| - Lubricate the gearbox | 19 |
| Transport | 19 |
| Storage | 19 |
| Possible faults | 20 |
| Technical data | 21 |
| Guarantee | 21 |
Extent of delivery
After unpacking, check the contents of the box
That it is complete
Check for possible transport damage
1 pre-assembled device
1 lower handle hoop
1 upper handle hoop
1 screw bag
1 original instructions
1 assembly and operating instruction sheet
1 warranty declaration
Report any damage or missing items to your dealer, supplier or the manufacturer immediately.
EC Declaration of Conformity
No. (S-No.): 14266
according to EC directive: 2006/42/EC We,
ATIKA GmbH
herewith declare under our sole responsibility that the product
Bodenhacke (Tiller) type / model BH 800 N
Serial number: 000001 - 020000
is conform with the above mentioned EC directive as well as with the provisions of the guidelines below: 2014/30/EU, 2000/14/EC and 2011/65/EU.
Following harmonized standards have been applied:
EN 60335-1:2012+A11; EN 62233:2008; EN 709:1997+A4; EN ISO 12100:2010; EN 55014-1:2006+A1+A2; EN 55014-2:2015; EN 61000-3-2:2014; EN 61000-3-3:2013
Conformity assessment procedure: 2000/14/EC - Appendix V.
| Measured level of the acoustic output LWA | 89.03 dB (A) |
| Guaranteed level of the acoustic output LWA | 93 dB (A) |
Keeping of technical documents at:
ATIKA GmbH - Technical department - Josef-Drexler-Str. 8 89331 Burgau - Germany
Burgau, 18.01.2017
i.A. G. Koppenstein, Engineering design management
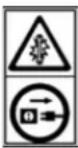
Symbols original instructions

Potential hazard or hazardous situation. Failure to observe these instructions may lead to injuries or cause damage to property.

Important information on proper handling. Not observing this instruction can lead to faults in the machine.

User information. This information helps you to use all the functions optimally.

Assembly, operation and servicing. Here you are explained exactly what to do.
A Please refer to the attached assembly B and operating instruction sheet for C references to figure numbers in the text.
··
Symbols machine
| Read and follow the operating instructions and safety advices before starting up the machine. |
| Wear eye and ear protection. |
| Protect against moisture. |
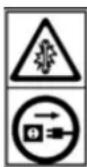
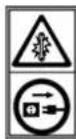
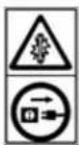
| Switch off the motor and disconnect the mains plug before performing cleaning, maintenance or repair work. |
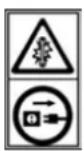
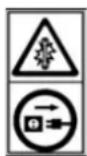
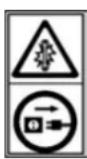
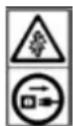
| Beware of rotating blades or tines. Do not keep hands and feet near or under rotating parts while the machine is running. Caution: The hoeing tools stop delayed. |
| Danger – objects may be thrown out at high speed when motor is running - keep bystanders as well as pets and domestic animals away from the danger zone. |
| Keep the mains cable free from the tines or blades. Tines or blades may damage the cables and cause contact with live parts. When connecting cable is damaged or cut through immediately pull out the power plug. |
| This product complies with European regulations specifically applicable to it. |
| Electrical devices do not go into the domestic rubbish. Give devices, accessories and packaging to an ecofriendly recycling. According to the European Directive 2002/96/EC on electrical and electronic scrap, electrical devices that are no longer serviceable must be separately collected and brought to a facility for an environmentally compatible recycling. |
Operating times
Please observe as well the regional regulations for noise protection.
Proper use
- This device is suited for dig over and mix up of ground areas on private house and hobby gardens.
-
This machine is only designed for outdoor use (garden) and must be held with both hands during operation.
-
The device is not allowed to be used in public gardens, parks, sports centres or at roadsides as well as in agriculture and forestry. The device is not allowed to be used in public gardens, parks, sports centres or at roadsides as well as in agriculture and forestry.
The device may not be used: on plastered or gravelled areas Risk of injuries existing! - Always use hoeing tools suited for the machine as designated in the operating instructions.
- The intended usage also includes compliance with the operating, servicing and repair conditions prescribed by the manufacturer and following the safety instructions included in the instructions.
- The relevant accident prevention regulations for the operation as well as the other generally acknowledged occupational medicine and safety rules must be complied with.
- Any other use is deemed not to be use as prescribed. The manufacturer is not liable for any type of damage resulting from this: the user bears the sole risk.
- Arbitrary modifications on the device exclude a liability of the manufacturer for damages of all kinds resulting from it.
- Only persons who are familiarised with the device and informed about possible risks are allowed to prepare, operate and service this device. Repair works may only be carried out by us or by a customer service agent nominated by us.
- Shut off engine and remove power cord before performing cleaning, maintenance or repair work.
- The machine may not be used in a potentially explosive environment or be exposed to the rain.
Residual risks
! Even if used properly, residual risks can exist even if the relevant safety regulations are complied with due to the design determined by the intended purpose.
Residual risks can be minimised if the "Safety information" and the "Intended usage" as well as the whole of the original instructions are observed.
Observing these instructions, and taking proper care, will reduce the risk of personal injury or damage to the equipment.
- Risk injury of hands and feet if they come close to or under the rotating parts.
- Risk of injury of fingers and hands during assembly and cleaning activities on the blade drum.
- Stones and soil may be thrown off.
Inhalation of dust (soil). - Risk of injury by entangling and winding up roots, ropes, wires or pieces of clothing when contacting the hoeing tools.
- Risk of serious injuries when operating the machine without suited protective equipment.
- Risk of injury to the fingers and hands, when carrying out assembly work and cleaning on the hoeing tools.
- Contact of the skin with operating substances (gasoline/oil)
- Risk of injury to the hands and feet when transporting the unit.
Noncompliance with safety instructions may result in injuries of the operator or property damages.
- Danger resulting from electric current, if improper connecting wires are used.
- Touching live parts of opened electrical components.
- Impairment of hearing when working on the machine for longer periods of time without ear protection.
In addition, in spite of all the precautionary measures taken, non-obvious residual risks can still exist.
Vibrations (hand arm vibrations)
1.415 m/s²; K = 1.5 m/s²
Warning!
The actual vibration emission level during the use of the machine may differ from that indicated in the operating instructions or indicated by the manufacturer. This may be caused by the following factors to be minded before and during the use:
- Proper use of the machine
- Correct operating of the machine
- Proper condition of the machine for use
- Sharpness and correct assembly of the hoeing tools
- Proper assembly of the operating handles on the machine body
When you feel uncomfortable or notice discoloration of skin on your hands during the use of the machine, stop working immediately. Observe sufficient break times to rest. Failure to have sufficient break times may result in a hand-arm vibration syndrome.
The extent of exposure depending on the type of work or machine use should be estimated and appropriate breaks taken. In this way, the extent of exposure can be considerably reduced over the entire work time. Minimise the risk caused by vibrations. Maintain this machine according to the instructions in the manual.
Avoid the use of this machine at temperatures under 10^ .
Create a work schedule in order to minimise vibration exposure.
Safety advices
The device can be dangerous when used improperly. The use of electrical tools requires the observation of basic safety precautions to eliminate risk of fire, electrical shock and personal injuries.
Before commissioning this product, read and keep to the following advice. Also observe the preventive regulations of your professional association and the safety provisions applicable in the respective country, in order to protect yourself and others from possible injury.
Pass the safety instructions on to all persons who work with the machine.
① Keep these safety instructions in a safe place.
- Make yourself familiar with the equipment before using it, by reading and understanding the original instructions.
- Be attentive. Be careful what you do. Behave sensibly when working. Do not use the device when you are tired or under
the influence of drugs, alcohol or medicaments. One moment of carelessness when using the device can result in serious injuries.
- Do not use the device for purposes it is not intended for (see "Intended use").
- Familiarize yourself with your environment and pay attention to possible dangers which you may not be able to hear because of the motor noise.
- Within his area of work the operator is responsible for third parties.
- Children and young persons under 16 years of age as well as persons who have not read the instruction manual are not allowed to operate this product.
- Physically, sensorially or mentally handicapped persons or persons who have no relevant experience and/or knowledge are not allowed to operate the device, unless a person responsible for their safety supervises them or instruct them on how to use the device.
- Children must be supervised to make sure that they do not play with the device.
- Keep bystanders and animals away from your working area. Do not allow other persons, especially children, to touch the tool or cable.
- Switch off the machine if persons, in particular children or pets, are close to you or if you change your working area.
- Never leave the device unattended.
-
Wear protective clothing:
-
safety goggles
-
ear protection (Sound intensity level at workplace can exceed 85 dB (A))
Dust mask with work activities generating dust -
Wear suitable work clothes:
-
do not wear loose-fitting clothes or jewellery; they can catch in moving parts.
Solid shoes or boots with a nonskid sole
Trousers to protect the legs
Hairnet in case of long hair -
Do not work with the device barfooted or only with thongs on your feet.
Take into consideration environmental influences: -
Do not use the device in moist or wet ambience.
- Do not expose the device to rain.
- Do not work directly near swimming pools or garden ponds
- Do only work with sufficient visibility conditions. Provide for good illumination.
-
Do not operate the device when the ground is wet, if possible.
-
Before working, remove all foreign objects (e.g. stones, branches, wires, etc.). While working watch out for further foreign objects.
- If you come across to foreign objects, power off the device, disconnect the mains plug and remove those foreign objects. However before you restart the device, check it for possible damages and have it repaired if necessary.
- Do not overload the device! You work better and safer in the given performance range.
- Only operate the machine with complete and correctly attached safety equipment (e.g. blade guard) and do not alter anything on the machine that could impair the safety.
GB
- Do not modify the device or parts of the device respectively.
- Before turning on the motor, make sure that your feet are at a safe distance from the cutting tools.
- Never keep hands or feet close to or under rotating parts. Keep away from the ejection slot.
- Work very careful on difficult soils (stony, hard, etc.). Reduce the working speed and firmly hold the machine.
- Pay attention to sure footing especially when working on slopes or on wet ground and keep your balance at all times. Guide the device only a walking speed.
- Do not work on steep slopes.
- When working on slopes, always work perpendicular to the slope and never up and down.
- Be especially careful when changing the operating direction on a slope.
- Observe the safety distance given by the handle bar.
Always push the device forward while it is operating. Do not pull it to yourself or behind you.
While the motor is running, do not lift or carry the device about - Caution! The tool runs after. Do not try to slow down the tool by hand.
- Make sure that the protective cover is properly attached.
-
Turn off the device and wait until the tools are stationary when:
-
tilting the device
crossing hard ground -
transporting the device to and from the work area
-
Switch the machine off and remove the mains plug from the socket when
-
carrying out repair works
- maintenance and cleaning
- removing malfunctions and blockages
- transport and storage
-
leaving unattended (even during short interruptions)
when the device begins to exhibit unusual vibrations when you have hit an obstacle with the device. -
Do not wash down device with water. (origin of danger electric current).
- Store unused equipment in a dry, locked place out of the reach of children.
-
Check the machine for possible damage:
-
Before continuing to use the machine, the protective devices must be inspected to ensure that they work perfectly and with their intended function.
- Check whether movable parts function perfectly and do not stick or whether parts are damaged. All parts must be correctly installed and fulfil all conditions to ensure perfect operation.
Damaged guards and parts must be properly repaired or exchanged by a recognized, specialist workshop; insofar as nothing else is stated in the instructions for use. -
Damaged or illegible safety warning labels should be replaced immediately.
-
Maintain your device with care:
-
Ensure that all nuts, bolts and screws are tight.
- Make sure that the ventilation apertures are free.
- Keep handles free of oils and grease.
Follow the maintenance instructions.
Electrical safety
- 1.5mm^2 for cable lengths up to 25m
-
2.5mm^2 for cable lengths over 25m
-
Design of the connection cable according to IEC 60245 (H 07 RN-F) with a core cross-profile section of at least
- Long and thin connection lines result in a potential drop. The motor does not reach any longer its maximal power; the function of the device is reduced.
- Plugs and coupler outlets on connection cables must be made of rubber, non-rigid PVC or other thermoplastic material of same mechanical stability or be covered with this material.
- The connector of the connection cable must be splash-proof.
- When running the connection line observe that it does not interfere, is not squeezed, bended and the plug connection does not get wet.
- Wind off completely the cable when using a cable drum.
- Do not drive the device across the extension cable. Make sure that it is behind you in a secure position. Place the cable on a path or area that has already been worked.
- Do not use the cable for purposes for which it is not meant. Protect the cable against heat, oil and sharp edges. Do not use the cable to pull the plug from the socket.
- Protect yourself against electric shocks. Avoid touching earthed parts with your body (e.g. pipes, heating apparatus, cookers, fridges etc.).
- This device generates an electromagnetic field during operation. Such a field may affect active or passive medical implants under certain circumstances. To reduce the risk of serious injuries we recommend persons who carry medical implants to consult their doctor and the manufacturer of the medical implant before operating this device.
- Regularly check the extension cables and replace them if they are damaged.
- Do never connect a damaged cable to the mains. Do not touch a damaged cable before it is disconnected from the mains. A damaged cable may cause contact with live parts.
- Do not use any defective connection cables.
- When working outdoors, only use extension cables especially approved and appropriately labelled for outdoor use.
- Do not set up any provisional electrical connections.
- Never bypass protective devices or deactivate them.
- Only hook up the machine by means of a fault-current circuit breaker (30 mA).
The electrical connection or repairs to electrical parts of the machine must be carried out by a certified electrician or one of our customer service points. Local regulations - especially regarding protective measures - must be observed.
Damaged mains leads must be replaced by the manufacturer or one of their service workshops or a similar qualified person to prevent dangers.
Repairs to other parts of the machine must be carried out by the manufacturer or one of his customer service points.
Use only original spare parts, accessories and special accessory parts. Accidents can arise for the user through the use of other spare parts. The manufacturer is not liable for any damage or injury resulting from such action.
Description of device / spare parts
A Please refer to the attached assembly and operating instruction sheet.
| Pos. | Denomination | Order-no. |
| 1 | Upper handle hoop | 381856 |
| 2 | Switch handle | |
| 3 | Safety knob | |
| 4 | Switch-plug combination | 381855 |
| 5 | Cable strain relief | 381858 |
| 6 | Cable clip | 381859 |
| 7 | Lower handle hoop | 381857 |
| 8 | Body cover | |
| 9 | Screw bag | 381853 |
| 10 | Safety label | 381854 |
| 11 | Handle hoop holder | 381861 |
| 12 | Protective cover | |
| 13 | Hoeing tool - right | 381859 |
| 14 | Hoeing tool - left | 381860 |

Assembly
Safety switch
B Open the holder for the switch-plug combination (4). Slide the switch-plug combination (4) over the holes on the upper handle hoop (1) and secure it using the provided screws (2x ST3.9x19).
Handle hoop
c Secure the lower handle hoop (7) on the hoop holders (11) on the motor housing. Use the supplied fasteners (2x screw M5x25, 2x lock nut M5).
D Fasten the upper handle hoop (1). Use the supplied fasteners (2x screw M6x45, 2x flying nut M6). Fix the cable on the handle hoop using the cable clips (6). Make sure that the cable has enough free motion.
E Attach the cable strain relief (5) on the lower handle hoop (7).
Start-up
Mains connection
Compare the voltage given on the machine model plate e.g. 230 V with the mains voltage and connect the machine to the relevant and properly earthed plug.
Connect the machine via a circuit breaker switch (residual-current-operated circuit switch) 30mA .
-
Design of the connection cable according to IEC 60245 (H 07 RN-F) with a core cross-profile section of at least
-
1.5mm^2 for cable lengths up to 25m
- 2.5 mm² for cable lengths over 25 m
Mains fuse
10 A inert

Mounting of the extension cable
Plug the female connector of the extension cable on the male connector of the switch-connector combination (4). Thread the extension cable through the strain relief (5) as a loop and hang it up.
Make sure that the extension cable has enough free motion.
Switching on / off
Do not use any device where the switch can not be switched on and off. Damaged switches must be repaired or replaced immediately by the customer service.
The device is equipped with a safety circuitry preventing inadvertent switching on.
Only start the machine when it is placed on a flat ground area without obstacles.
Switching on
Tilt the device slightly towards you.
F Push the safety button (3) and keep it depressed. Next, pull the switch lever (2) toward the handle (1). The device starts and the blade drum can rotate freely.
Now release the safety button (3).
Switching off
When you release the switch lever (2) it returns automatically to its original position.
Motor protection
The motor is equipped with a protective circuit breaker and switches off automatically in case of overloading. After a cooling-down break (approx. 15 min), the motor may be restarted.
Release the switch lever (2) because the device will otherwise restart immediately after it has cooled down. Risk of injury!
Before start of work
Before starting any work ensure the following:
- You may not start to operate the machine until you have read these operating instructions, observed all the instructions given and installed the machine as described!
- Provide for a safe and cleaned workplace. Remove from the working area objects which might be thrown off.
Before starting your work make sure that:
the tools and bolts are not worn or damaged. To avoid any unbalance worn or damaged tools and bolts must only be replaced as a whole set.
the hoeing tools are in a proper condition
all screw connections are firmly tighten
- no other persons (children) or animals stay close the working area
you can always step back without any barriers,
you have always a secure standing position.
Working with the tiller
The device can be used for digging over and for mixing up of ground areas.
Risk of injury by flying around objects. Make sure that the blade guard is attached.
- Place the device at the edge of the ground near the receptacle.
- Move the cable after each turn to the opposite already worked side.
- Make sure not to place excessive strain on the device.
In case of excessive strain, the motor speed drops and the motor noise changes.
- Move the device at an appropriate uniform speed in straight lines across the ground.
- Be especially careful when turning and pulling up the device device.
- When working on slopes, always position yourself perpendicular to the incline and ensure safe footing. Do not work on steep slopes.
In any case, adhere to all safety notes (see "Safe working").
Working depth
- The sense of rotation of the hoeing tools drives the device in forward direction. It is possible to increase the working depth (depending on the soil conditions) by deceleration of this forward movement.
Adjust the working depth to the relevant soil conditions.
When working in very wet loamy and clayey soils it may happen that the soil is compacted and water draining is prevented.

Reduce the working depth when the motor is overloaded (motor speed drops and motor noise changes).
Work instructions

Always keep your hands and feet at a safe distance to the rotating tool.
- Always hold the machine firmly with both hands when working.
- Push the device down using the handle until your desired working depth is reached. Then, exercise only the pressure that is needed to keep the working depth.
-
Do not operate the machine directly along walls or pavers. Otherwise the toeing tools may be damaged.
-
G Operate the machine with a reasonable uniform speed in straight lines across the soil.
- G To achieve a very loose and crumbly soil it is recommended to work the soil several times. Perform the 2nd pass either perpendicular to the 1st one (A) or parallel to it but offset (B).
When working on slopes work only perpendicular to them (B)!
-
Be careful when changing the direction or on obstacles! Guide the machine around carefully.
If the toeing tools are blocked or you feel too much vibration on the machine, immediately stop the engine and wait until the toeing tools come to a dead stop. Check the machine: -
Clean the hoeing tools using suited aids. For this, tilt the machine backwards and lay it on its steering handles.
- Replace any damaged hoeing tools (sets of tines).
Electronic brake
The device is equipped with an electronic brake that stops the hoeing tools within 2 seconds from releasing the switch handle (2).
Maintenance and cleaning
Before each maintenance and cleaning work:
- switch off device
- wait until the hoeing tools is stationary
- pull out main plug
Maintenance and repair work other than those described in this chapter is only allowed to be carried out by service staff.
For maintaining and cleaning, removed security devices must unconditionally be mounted properly and proved again.
Only use genuine spare parts. Other than genuine parts may result in unpredictable damages and injury.
Maintenance
The tool will not come to a standstill immediately after cut-off. Before starting any service work wait until all parts are stationary.
Pull out mains plug.
To guarantee a long and reliable usage of the product carry out the following maintenance works regularly.
Check the device for obvious defects such as
- loose fastening elements
- worn or damaged components
- correctly assembled and faultless covers and protective devices.
Necessary repair works or maintenance have to be carried out before using the machine.
Replacing the hoeing tools

Risk of injury! Wear protective gloves when working on the hoeing tools.
Worn blades reduce the performance of the device and put excessive strain on the motor. Therefore check the condition of the blades before each use.
Have the hoeing tools sharpened by your service workshop or replace them by new ones if required.
Remove the hexagon screws M 8 x 40 and the hexagon nuts M 8. Pull then the hoeing tools (13, 14) from the axle.
Pay attention to the correct position of the hoeing tools. (The tool blades must show towards the working direction.)
Lubricate the gearbox
Lubricate the gear after the first 20 operating hours, then every 40-50 operating hours.
Put the device on its side and remove the hoeing tool (14).
Clean the gear housing from dirt and foreign objects.
Remove the drain plug (15).
Put the grease gun onto the grease filling plug (17).
Press some grease in.
1 Do not fully fill the gearbox. Grease expands due to heat generated during operation. There is the risk of damages to seals and grease leakage when the gearbox is fully filled with grease.
Use SHELL Albida Grease EP 2, for example, or an equivalent grease brand.
Check the sealing ring (16) for damages and replace it if required.
Re-install the drain plug (15) and the hoeing tool (14).
Cleaning
Clean the device carefully after each use to ensure faultless function to be maintained.

Risk of injury! Wear protective gloves when working on the hoeing tools.
- Remove the dirt with a cloth or brush.
Clean the device immediately after finishing the work.
Clean the bottom of the device and the sets of tines. - Clean the housing, especially the vent slots, from dirt stuck to it.
- Do not clean the machine with running water or high-pressure cleaners.
- Do not use solvents for the synthetic parts (petrol, alcohol, etc.) as these can damage the synthetic parts.
Transport
For each Transport
- switch off device
- wait until the cutting device does not longer move
- pull out mains plug

The sets of tines can be damaged during transport, e.g. on hard ground, even when the motor is switched off. Therefore carry the device.
Storage
Pull out main plug.
- Store unused equipment in a dry, locked place out of the reach of children.
In case of extended storage (e.g. during winter) ensure that the device is protected against frost and corrosion. -
Before extended storage, please observe the following to increase the service life of the device and to ensure smooth operation:
-
thoroughly clean the device
Treat metal parts after each use against corrosion using an environmentally friendly biologically degradable spray oil.
To store the device space-saving it is possible to fold down the upper handle hoop (1). For this, loosen the thumb nut (M6) until you can fold down the handle hoop (1).
Possible faults
Before each fault clearance
- switch off device
- wait until the hoeing tools is stationary
- pull out main plug
After each fault clearance, put into operation and recheck all security installations.
| Fault | Possible cause | Remedy |
| Device doesn't start | No power | Check power supply, power socket and fuse protection |
| Extension cable defect | Check extension cable, exchange defect cable immediately | |
| Main plug, motor or switch defect | Have main plug, motor or switch checked by an approved electrician or replaced by original spare parts | |
| Protective motor switch has tripped | 1. Excessive working depth reduce the working depth2. Hoeing tools blocked remove the blockageAllow the motor to cool down approx. 15 minutes before continuing to work | |
| The device operates with interruptions | Extension cable defectInternal fault.ON/OFF button defective. | Check extension cable, exchange defect cable immediatelyPlease contact the after sales service.Please contact the after sales service. |
| Unusual sounds | Sets of tines are blockedLoose screws, nuts or other fastenersLack of lubricantLubricant emerges | Remove the blockageTighten all parts; contact customer service if the noises continue to occur.Refill lubricant.Please contact the after sales service. |
| Unusual vibrations | Sets of tines damaged or dullExcessive working depth | Please contact the after sales service.Reduce the working depth. |
| Unsatisfactory result | Dull sets of tinesInsufficient working depth | Please contact the after sales service.Increase the working depth. |
Technical data
| Type / Model | BH 800 N | |
| Year of construction see last page | ||
| Motor power P1 | 800 W | |
| Mains voltage / Mains frequency | 230 V~ / 50 Hz | |
| Mains fuse | 10 A inert | |
| No-load speed n0 | 400 min-1 | |
| Working width | mm | 280 mm |
| Diameter of working tools | 200 mm | |
| Number of blades | 16 | |
| Hand-arm vibration | 1.415 m/s2K = 1.5 m/s2 | |
| Sound levels at the work-place LPA | 79.3 dB (A)K = 3 dB (A) | |
| Sound levels LWA (according to 2000/14/EC)measured sound power level | 89.03 dB (A) | |
| guaranteed sound power level | 93 dB (A)K = 1.37 dB (A) | |
| Dimensions | approx.1320 x 365 x 330 mm | |
| Weight | kg | approx. 7.9 kg |
| Protection class | II (protective insulated) | |
| Degree of protection | IPX4 |
Guarantee
Please observe the enclosed terms of guarantee.
Sommaire
(Bn6paun Ha nlaHTa npkaTa)
1,415 m/s²; K = 1,5 m/s²
PpeDynpexkdeHne:
ДeиctВNTeHNo HAnuHATA CToHOCT Ha Bn6paHOnHInTe emCvN IIO BpeMe Ha yNtpeBa Ha MaunHInTe He MoKe Ja ce pa3NuaBa OT NocOeHaTa B yNbTBaHETO 3a O6cJyXbAHe N OT npOn3BODHTeJI.
MaHHaTnPaBnHOJN Ce N3NOJ3Ba
- npaBnneH n e NaHbT Ha p3aHe Ha MaTePnana, CbOTBeTHO NaHbT Ha 6pa60kHa MaTePnaja
MaHHaBn3pJHO CbCTOHNHe 3a yNtpe6a Jne
IIOCTaTbUHO 3aTOUeHIN pa3dpo6BaUHTe INHCTpyMeHTN, CbOTBETHO MOHTnpaH Ie npabUNHnT pa3dpo6BaUHcHCTpyMeHT
- 06cnykBauntpe pameHa 3dpaBO MOHTnpaHn Jn Ca Ha MaunHHN KOpNyC
Ako no BpeMe Ha yNtpe6a Ha MaunHaTa yCTaHOBe He npraTHO CyBCTBO Nn IpomHa B CBeta Ha KOxata Ha pBuTe, BeHara npeKpaTe pa6To. PpaBeTe DoCTaBHyo NouBKn. Pn HEOCTaBHyn NouBKn MoKe da Ce NOnyHn BbopaNoHeh CnHdpom Ha DnHaTn PbKaTaN.
Tp6Ba Da ce Hapabn IpeueHka Ha HatoBapBaHeTo B 3aBncMocT ot pa6oTa n yNtpe6aTa Ha MaunHaTa N da Ce HapabTcBOTBeTHnTe NOUBKn. Taka cTeNEHTa Ha HatoBapBaHe MoKe CbIeCTBeHO da Ce HamaN IO BpeMe Ha cyAata pa6oTHa npDbJnxTeJIHoCT. CBeDeTe Do MInHMym pNCKa, Ha KoITo CTe N3IOXeHn Pn Bn6paUu. PoIDbPkaJeMaunHaTa Cnped Yka3aHnTa B yNTBaHeTO 3a OScnyXbaHe. IV36raBaiTe Da n3NoJ3BaTe MaunHaTa Pn Tempeatpyt t=10°C nIIN No-HnCKn. HapabTe pa6oTe nIaan, c KOnTo MoKe da ce OrpaHmH HatoBapBaHeTo C Bn6paUu.
HCTpykun 3a 6e3onacHOCT
Pn HnpabHnHa ynoTpe6a ypeBt MoKe Da 6bDe onaceH. Korato ce n3non3Bat eNeKtpueeckn HNCTpyMeHTn, Tp6Ba da ce cna3Bat OCHOBHnTe MEPKn 3a 6e3oNaChocT, 3a Da ce n3KJIouat PnCKOBete OT noXap, eNeKtpueeKn Ydap n HapaHraBaHe Ha Xopa.
3aTOBA npoTeTe n B3eMeTe NOB BHIMAHHe CNeDHnTe yka3aHnI N pa3nope6n 3a npedeTbpaTBAhe Ha 3lononyKn Ha BaWata npocchoHaHa opraHn3aunn Hn DeiCTBaUnTE B cBoTBeTHa TcPana pa3nope6n 3a 6e3onacHOCT npedn NyckaHeTo B EKcnloataunn Ha To3n npOdyKT, 3a da npedna3HTe ce6e cn n Dpyrnte OT Bb3MOxHn HapaHABHH.
IpeoocTabraTe HNCTpykunnte 3a 6e3onacHocT Ha BCNUKNIUca, KOITOPa6OTcypeda.
CbXpaHraBaIte Do6pe HnCTpyKuInTe 3a 6e3OnacHOcT.
- PpeiynyIOTpe6a ce 3an03HaIe C ypea c NOMOuTa Ha pBkoBOdCTBOTO 3a EKcIIJIOATAUIA.
БьдTe BHMateJIHn. BHIMaBATE KaKBO npaBHTe. IoxdaTe pa3ymHO KbM pa6oTata. He n3noJ3BaIte ypeDa, aKO cTe ymopeHn nn CTe noD BInyHneTo Ha HapKOTnU, anKoxOJ nn MeNkAmEHTn. MomeHTOto HeBHIMaHHe npu n3noJ3BaHe Ha ypeDa MoKe da DoBeDe do cepNo3Hn HapaHbAHn.
He n3no13BaIte ypeJa 3a uei, 3a KOIO TO ToH e npedHa3NaueH (BnK ,PiabunHa yNoTpe6a").
3aNo3HaIte ce c o6ctaHOBkaTa HAOKOLO N BHIMaBaIte 3a Bb3MOxHn ONaCHOCTN, KOINT eEBeHTyaJIHo He MOKeTe Da YyeTe Nopadu Wyma OT DBnraTeJ. - 06cnyxbauoTo Jnue e OTRObOPHo Cnpmo TpeTn Jnua B obcera Ha paobota Ha ypea.
- Deça mλaèχn noid 16 ròdùnH n xopa, Kɔnto He ca npocêŋ pβkOBODCTBOTO 3a ekCπlloataúŋra, He 6bNa da o6cnyKBa ypeda.
Xopa c orpaHnueHn n3nueckn, ceH3OpHn nn yMCTBeHH cnoc6hoCTn nn 6e3 onNT n/nn 3HaHnre He 6nBa da o6cnykBAT ypeDa, ocBHe aKO Te He ca NOKoHTpOJa Ha IInCe, KOMneteHTHO 3a TExhata 6e3OnachOCT nn He nOlyuBaT OT Hero yka3AHn KaK Ce N3NoJ3Ba ypeDbT. - Deuata Tpra6Ba Da ca NaoJ KOHTPOJI, 3a Da ce rapaHTnpa, Ye He nIgpaTc ypeda.
-ДрьхтЕ надалеу ot obcera Bn ha pa6ota dpyru xopa n JKNBOTHN. - П配电и cheу ynotpe6ata Ha MaunHata, ako xopa, npedn BCNUKO Deua NIN DOMaun HxNBOTHN, ca B 6NJ3OCT N, KOrato npomehTe obcera ha pa6ota.
He pa3peuabaTe DpyrXopa, B yacthoct Deua, da ce doKocBat Do NHctpymenta nn Do Ka6ena. DpbkTe n HactpaHa ot Baunpa6oTeH yactbk.
He octabraIte ypeHa HnKora 6e3 Ha3Op.
HoceteIiUHnIpeDnA3HnCpeDCTBa:
-3aunTHOuJla;
aHTnfoHn (HNBOTo Ha 3ByKOBOTo HanaHahe Ha pa60THOTOMrCTO MoKe Da npBnuJaba 85 dB(A))
- pecnnpatop npa6ota, cBbp3aHa cOtdeJHHe Ha npax
Hocete noDxOaIypo pa6oTHo oBneKIO:
- He shinpokn npexn nIn 6nkyta, 3aUTo Te Morat da 6bDat 3axBaHaTN OT NOBnKHnTE eIeMeHTN
-3dpabnobyBknnn60tywnCHeHnB3raa ce noDMETka
-ДылгпаNTаLOHиЗпpeДпaЗBaHeНКраKaTa
aKo IMATEbJIIN KOCN, CNOXKeTe CN MpeKNUka 3a KOCA
He pa6oTeTe cypea 6ocn nC neKn caHdaJI.
BHHMaaTe 3a Bb3eIcTBnTa Bbpxy OkonHaTa cpea:
- He n3noi3BaIte ypeDa BbB BnaJHa IJI MOKpa OKoJHa cpeJa.
He n3naarate ypea Ha IbXk. - He pa6oTeTe DnpeKTHo Ha 6aceHn nn Do rpaHnckn e3epa.
Pa6oTeTe eINHCTBeHO npN DoCTaTbHNO do6pa BnIMOcT,OCnIpyeTe Do6po OCBetJIeHne. -
No Bb3MOxHOCHe pa6oTeCe CypeDa BMOKpaNoBa.
-
Ppei pr3aHe MaxHete BCnKu YyKd TeNa (Ha npimep KaMbH, KIOH, TeI n dp.). No Bpeme Ha pa60Ta BHIMabaTe 3a DpyuYyKd TeJa.
Ako nonaHete Ha yxkDn TeLa, n3KnOyTe ypeDa, dpbHete uencena n MaxHeTe yxJDoTo TAno. IpeDu BA KInOHTe ypeDa OTHOBo, To npOBepTe 3a EBeHTyaJIHn IOBpeDu N daIte Da 6bJe N3BbPWeH Heo6XoDMnT peMOHT.
He npetobapbaite ypea! 1e pa6oTne no-dObe n noCnrypno B daenHnaanana3OH Ha MoUHOCTTa. - Ⅲποπ3BaTe ypeDa cAmO cIyIocTHo I npaBnHOMHTnpaHn IpeDnA3Hn YcTpoiCtBa (HaNP. 3aunTa Ha HOka) HHe npomeHaeIe No MaunHata HnU, KoETo 6n MOrNo da HapyuN 6e3onacHOCTTa.
He n3MeHnTe ypeDa, cBtBtHo uactnte Ha ypeDa. - Ппдддддддддддддддддддддддддддддддддддддддддддддддддддддддддддддддддддддддддддддддддддддддддддддддддддд徳ае OTe Pekeunite INHCTpyMeHTN.
- Hnkora He cnaaTe pueTe nn KpaKaTa Ha nn nOd BbpTae ci Ce qactn. CToIe BNHaHn Ha pa3ctoHne ot N3XBpJIaun OTBop.
Pa6oTeTe N3KIIIOHTeJIHO BHNMaTeJIHO BTexKn (KaMeHInCTN, TBbpIIN np.) NOBn. HamaIeTe pa6oTHOTo TEMNo IdpbXTe ypeDa 3dpaBO.
Iorpxte Ce, Hau-Beue Bbpy HaKIOHeH NOBbpxHOCTN IIN MOKpa NoBa, 3a 6e3oNa cToKa n NO BCaKO BpeMe Na3ePa paBHOBeCne. BoTe yPeDa cAmO cbc CKOpocTtHa BbPbeHe.
He pa6oTeHa CTpbMHN CKHOHOBe.
Ha cTpbMHN CKIOHOBE pa6oTeHe HAppeHn Ha HAcIHOHa n HNKORA Harope n HADONY no Hero.
Бьдete ocobeho BHIMaTeHn, KOrato npomeHrTe NocokaTa Ha DBIXeHne NO CKIOHa.
CnazBaIe 6e3oNaChOTo pa3CToRHe, 3aJaDeHO OT pbKoXBaTKata.
Pp npapobTa BnHa n DnBxKeTe ypeHa Hnpei. He ro DbprnaIte KbM c6e cn nn CneJ c6e cn.
Korato DnuratneT pa6oTn,ypebT He 6nBa: - da ce NOBnra nHocn
BHHMaHHe! HNCTpyMeHTbT pa60Tu no nHepeuHa! He cnpaaiTe HNCTpyMeHTa c pbka.
BHHIMaBaiTe 3auNTata dae MOHTnpaHa. -
ɪЗкнουеуpeдаи Ṭзчакайт, Ṭдокатинспат, korato:
-
o6pb7aTe ypeDa
- npecnuata TBbpdaTa OCHOBA
-
TpaHcnpoptpate ypea do n ot pa60THy yactbk
-
N3KIIHcTe ypeDa n 13BaTe EeIeCeJa 3a eIeKTpUeCKaT aMpeKa OT KOHTaTApN:
peMOHTn pa60TN
TEXHnuecka nOdpbXka INoouCTBaHe
OTCTpaHraBaHe Ha HEm3npaBHOCTn 6IOKIpOBKN
TpaHcnpTnCbxpanHeHne
Hanyckahe Ha ypea (cbso npn KpaTkoBpeMeHHn npeKbCbaHna)
aKo ypeBbT 3aOnue He da Bn6pnpa HeoBuHNo.
akocyepa nonanheHa npenTCTBne.
He npbckaIte ypea c BOda (n3TOUHNIK Ha ONaCHOCT e eJIeKTPuueCKNrT TOK). (n3TOUHNIK Ha ONaCHOCT eJIeKTPuueCKN TOK).
- YpeiN, KOnTo He Ce NOn3BaT CbXpaHraBaiTe B cyxo, 3aKlIOUeHO NOMEueHne, N3BbH O6cera Ha Deua.
BbB BCnKn Cnyan Cna3BaTe BCnKu yKa3aHn 3a 6e3oNaCHOCT (BIX,Be3oNaCha pa6Ota").
Pa6oTHaIbJb6OuHnHa
- Iocokata Ha BbptHe Ha pa3dpob6rauTe HOKOBe Dbpna ypeHa Hnpe. Ype3 HamaJIbaHe Ha CKOPoCTTa Ha DBHXeHHe Hnpe Pa60THa Ta Dbl6OuHa MoKe Da ce yBeInu (B 3abucmOcT OT XapaKTepnCTknte Ha NoYbata).
PerynpaTe pa6oTHata ⅡbIbOuHa cnopeD Oc06eHocHTte Ha NoCbTa.
I Ipn o6pa6oTkata Ha MHO BnaxHN rINHeCTN NOyBN NoYBaTAMOKe Da Ce yNtTHN n Da ce NOppeH Na N3TuHaTeTo Ha BOdaTa.

HamaTe pa6oTHaT aBn6OuHa, aKo DnuratEnrT ce npetobapn (obopOTte Ha DnuratEnr HamaJIbAt N WymbT Ha DnuratEnr Ce npomeH).
Yka3aHnna 3pa6oTa
Дрьхтepьцeteи Кракata BUNHnHa 6e3onacho pa3ctOЯнHe OT BbptraunCe HNCTpymENT.
- Ppi pa6oTa BnHaRn dpjxTe ypeDa 3dpaBO C DBe pbCe.
HaTnchete pkoXBatkata Ha ypeHa HApony,doKaTo 6bde doCTnHata JeHaHata pa6oTHa Dbl6OuHa. Cnei ToBa ynpaxHbaIte cAmo TOnKOba HAnraHe, KOIKOTO e Heo6xoIMo 3a NoDlbpxaHe Ha pa6oTHa Tbl6OuHa.
He BoTe UpeDa NipeKTHo Do CTeHN IIN KAmEHn PInOuH, TbN KaTO B IpOTuBEN CnyaH pa3DpO6BaUHTe HnCTpyMeHTn Ce NOBpeJkDaT.
B OBeTe UpeDa C nOxOJa, paBHomepHa cKOpocT no npabn nnHn Bbpx NoBaTa.
3a da ce noIyUncO6eHo Jeka n poKabaNoYBa,ce npenopbUba noUbata da ce o6pa60n HraKoNk ObTn. 3BbPseTe BTOPOTo IpemHHaBe Heo npab bTbn CnpA Mo 1 (A) nn ycnopeHn Ha Hero (B).
Ha cKnHObe pa6oTeTe camo HAppeHn Ha HAKnoHa (B)!
BHMMaHHe npc cMaHa Ha nocokata nn npenrTCTBn! BoTe ypea BHMaTeJIHO.
Ako pa3dpob6raaHTe HNCTpyMeHTn 6nOKnpa Tnn ypeTb Bn6pnpa Heo6uauHo CnHIO, BeDnHa r3KnUoyTe Dniratena n N3yaKaIte pa3dpob6raaHTe HNCTpyMeHTn Da cnpat. PpOBepete ypeDa:
-Почисте pa3дрбявашип снчтугенти с похогшпимошни срдства.зацета поставete урда длген Ha3aД Вьрху KОрMuJHЯн HaДьЖИK.
-CmeheTe NOBpeDeHnTE pa3dpo6BaUu INHcTpymEnTu
EneKtpoHnCa cnnpaYka
YpeIbTe o6oOpOyBaH C eJEnKTPoHHa cNpaUka, KOaTO cNeiD OTnycKaHe Ha IocTa (2) cNIPA pa3dpo6BaUHTe NHCtpymENTB pAMKITe Ha 2 cekyHnn.
TexHnuecka nOdpbXka nNouchTahe
IpeiBcKaTexHueckaIOdpbXka INouchTbaHe:
-da6bdeu3Klnouehypeda
-ИЗчakайTe OKOHаTeJIHOTO cПираHe HaBAЛЯka
- da ce N3BaDn ⅢeNcENa 3a eJekTpueckaT aMpexa
Pa60Tn NO TexHnueckKaTa NODpBxKa N NOuHCTBaHeTO, pa3NHyN OT ONuCaHnTe B HactoIyra Pa3JeN, MORa Tda Ce n3BbPbWBat CaMO OT CepBu3a.
3aunTHnTe npncoc6nHn, KOTo ca cBaehn C ZeI n3BbPbBAHe Ha TexHnuecka NOpDpBxKkN NouchTbaHe, Tpr6Ba da 6bDat OTHOBo HndJexHo MOHTnpaHn I npOBepHn.
Ia ce n3non3BaT cAmO opuHnHaHn YactN. Ipyr Yactn MoRaT aI npEi3BnKaT HeIpeBnDnIM NOBpeDN HapaHraBaHn.
TexHnuecka noDpBxKka
HCTpymEnbT He cnpa BeDnara CneI N3KIOUbaHeTo. IpeN da 3anOHTe pemOnTa INI NOIDpBkKaTa N3uKaAte BCNUKu Yactn Da cnpa.T
n3dbpnaite enceena!
3a da ce rapaHTnpoDbJKNTeHNO HaJeKdHO n3noJI3BaHe Ha ypeNa, npOBekdaIte peoBHO TexHuecka noDnPbXka.
PpOBepBaIe BepxHata pe3aKa 3a OyeBnHN HeoctaTbU
- xna6abn 3akpenBaHn
N3HOCEHN NIN NOBpeDEH YactN - npabnHO moHTnpaHn n 3npabHn Kaanu nn 3auNTn npncoc6JIeHn.
Heo6xOaUMTe peMOHTn Hn pa60Tu no TexHueckata nOdpbXka Tp6Ba da ce npOBexdAT npedn ynotpe6ata Ha ypeda.
CmHaHa pa3do6BaUte HOKOBe

Onachoct ot HapaHbAhe! Ipn pa6ota no pa3dpo6BaunTe HOXOBe HocTe 3aunTHn pbkabu.
H3HOCEHNTE HOXOBe BNOUbaT pa6oTaHa ypea n npTeOBapBaT DBraTeJ. 3aToBa npEn BCya ynoTp6a npOBepaIte CbCTOHNrTO Ha pa3DpO6BaUHTe HOXOBe.
Pn Heo6xOIMOCT daIte pa3dpo6raaunTe HOKOBe Ha 3aTOBaHe OT Baunr cepBn3 nn rncmehe Tc HOBn.
H Pa3BnTe WeCTOCTeHHnTe 6oTObE M8 x 40 n WeCTOCTeHHnTe raikn M8. CneT OBa n3DbpnaTepa3Dpo6BaunTe HoxOBe (13, 14) ot octa.
BnMaBaTe 3a npaBnHOTo nOIOKeHne Ha pa3np6BaUte HOKOBe! (OcTpneTata Ha HOXOBe Tp6Ba da coat B Iocokata Ha DBNKeHne)
Cma3BaHeHa peykTopa
① CmMaxTe cKOpocThaTa kyTna CneI nbpBnTe 20 yaca, CneI TOBa Ha BCEkn 40-50 pa6oTHn yaca.
H NocTaBete ypeDa JIeHaJI HAcTpaHN I DEMoHTnpaIte pa3Dpo6BaUH JOX (14).
OTctpaHete 3ambpcraBaHnraTa n UyKdnte TeHa ot Kopnyca Ha ckopocTHaTa kyTna.
Maxhete n3nyckaTeHHna 6oTt (15)
1 IocTaBeTe TaKaJIaMIta Ha npo6KaTa 3a nJIHe He C rpec (17).
BkapaTe MaIko rpec.
He nbJhepeDyKTopa MHO rpec. rpecTa ce pa3npoctpaHbBa B pe3yIaT Ha TOnnHaTa, KOrTO Bb3HKnBa npE kCpIIOatauMa OAnCHOCT yNtBTheHnra Ta da ce pa3pyuat n Da n3ne3e rpec, aKo peDyKTOpBT e N3qno 3aNbJIHe C rpec. N3non3BaTe HApPmep SHELL Albida Grease EP 2 nIN noO6Ha rpec.
I I npOBepTe yINbTHRAUIN npbCTeH (16) 3a NOBpeu IN npn Heo6xOAnMOCT TO CMEHeTe.
H MoHTnpaIte OTHOBO n3nyckaTeHHn8 6oJr (15) npa3dp06raBauuHOK (14).
Почистванe
I TOnuHCTBaIte ypea rpnKlnBO cneB Bcra Ka ynoTpe6a, 3a da ce 3ana3n 6eynpeHaTa fynkun.

OnachocOT hapaHbAhe! Ppu pa6ota no pa3dpo6BaunTe HoxOBe HocTe 3aunTHn pKaBn.
OTcTpaHbAaTe 3aMbpcBaHnTa C Kbpna NnYeTkA.
- Пουчирете урEDA вдна след пошонвано paбота.
- Пουистете донната стрва урда и ваякна на hoха.
IOnuCTeKOpnyca,Hai-Beue BeHTnauzIOHHNTEOTBOPNOT 3ambpcraBaHnR.
He nouchBaIte MaunHaTa C Teuaa Boda nn npoctpykn.
3a yactnte ot nactmaca He n3noJ3BaTe pa3TBopnte (6en3n, aKoxoJI, n. T. H.), TbN KaTO Te MoRat da yBpeIaT nactmacobite Yactn.
TpaHcnpoT
PpeiBcKaKo TpaHcnpToPaHe
- n3KnHouTe ypeDa
- n3yakaaiTe HOXOBeTe da cnpaT
n3dbpnbTe uecnema
I npn cnpjM MOTOp npn TpaHcnpTnpaHe, HapnpMeH naTbPda OCHOBA, BAnKbT MoKe Ja ce nOBpeN. 3aToBa TpaHCnpTnpaTe ypeJa Upe3 HocHe.
CbXpaHHeHne
N3BaTee eenceJa OT KOHTaKTHaTa KyTnHa eNEKTPuYeckaTa MpeKa.
-
YpeInte, KOnTo He ce N3IOJI3BaT, CbXpaHЯBaIte Ha cyxo, 3aTBopeHo MAcTo, HeDoCTbNHO 3a DeLa.
Pnno-npOdoIbJnxHTeJIHO cbXpaHeHne (HaNPmEp npes 3MaTa) ce nOrpIXKeTe ypeDbT da e 3aUHTeH OT 3aneJaBaHe n KOpO3n.
-ObpHeBnMaHne npEi NO-npoDbJxKnteHcBxApeHHe Ha cIeHNoTo, 3a da yDbJXKeTe JxBOTa Ha MaunHata n da rapaHTnpaTe JecHo o6CnyKbaHe: -
HanpaBete OCHOBHO NOUCTBaHe.
CneB Bcya ynope6a o6pa6oTaBnTe MeTaNHTe aactn Cpeu KOpO3Nc EKoJIoRnHe, 6NoIOrNuHo pa3rpaDNM ankoXoJ.
3a Da He 3aema ypeBt MHORO MRCTO npu CbXpaHeHne, MoKTe Da npu6epete ropHata pkoXBatka (1). 3a ceIpa3BnTE KpunuataTara Ka (M6) DOTONKOba, Ye pkoXBtKaTa (1) da moKe da ce npu6epe.
Bb3MOxHn HEn3npaBHOCTN
PpeuBcRAKO OTCpaHbAhe Ha Hn3npaBHOCT
- da 6bde n3KnHouen ypea
-ИЗЧаКУТЕ OKOHЧАТELHOTСПИРЕ HA BAЛЯKA - da ce H3BaDiI uenceJa 3a eNeKtpuYeckaTa MpeKa

CneI OTCpaHbAHe Ha Heu3npaBHOCTNe IyChTe OTHOB ynoTpe6a n npoBepe TBCnK oBe3OJaBaun ycTpoiCTBa.
| Hem3npabnoct | Възможна рprчина | Остразявае | |
| Уретьт не трува | » НаяТOK ИПТOKБТЕ СРЯЛ | » П robерете有很大 похашипановаго, контака,Prepondаимеля | |
| » УължITEЯТЕ DEФЕKTEN | » П robерете уължавашия有很大,有很大,有很大,有很大,有很大,有很大,有很大,有很大,有很大,有很大,有很大,有很大,有很大,有很大,有很大,有很大,有很大,有很大,有很大,有很大,有很大,有很大,有很大,有很大,有很大,有很大,有很大,有很大,有很大,有很大,有很大,有很大,有很大,有很大,有很大,有很大,有很大,有很大,有很大,有很大,有很大,有很大,有很大,有很大,有很大,有很大,有很大,有很大,有很大,有很大,有很大 | ||
| » Шени.T, моторь,T ИП Пгкьсвачь.T,EDEФЕKTEN | » Шени.T, моторь,T ИП Пгкьсвачь.T,ДСЕСРВЕРМТИПМЕМOTORь.T,ДСЕСРВЕРМТИПМЕМOTORь.T,ДСЕСРВЕРМТИПМЕМOTORь.T,ДСЕСРВЕРМТИПМЕМOTORь.T,ДСSEРВИЧАСТ. | ||
| » 3aшитни.T PгкьсвачиHa Motopа eЗадостван | 1. Рабоч納а дълбочиha eMHORO rolяма >HamaileteRobothata dълбочиna2. Валякьт eблочиä >Остразене有很大 no Зелегукьатa >OstabeteMotopа ДС Oхлadii 3a okolio 15Mнуту п徳д д рordьлжite paobota | ||
| Уретьт работи спгкьсваня | » УължавашияТ Кабел e DeФeKTEN | » П robерете有很大 похашия有很大,有很大,有很大,有很大,有很大,有很大,有很大,有很大,有很大,有很大,有很大,有很大,有很大,有很大,有很大,有很大,有很大,有很大,有很大,有很大,有很大,有很大,有很大,有很大,有很大,有很大,有很大,有很大,有很大,有很大,有很大,有很大,有很大,有很大,有很大,有很大,有很大,有很大,有很大,有很大,有很大,有很大,有很大,有很大,有很大,有很大,有很大,有很大,很大,有很大,有很大,有很大,有很大,有很大,有很大,有很大,有很大,有很大,有很大,有很大,有很大,有很大,有很大,有很大,有很大,有很大,有很大,有很大,有很大,有很大,有很大,有很大,有很大,有很大,有很大,有很大,有很大,有很大,有很大,有很大,有很大,有很大,有很大,有很大,有很大,有很大,有很大,有很大,有很大,有很大,有很大,有很大,有很大,有很大,有很大,有很大,有很大,有很大,很大,有很大 | » МогалеRobeheteСКьМСервиза»Monя obsphete ce КьМ Сервиза»Monя obsphete ce КьМ Сервиза |
| » Въtrightн�а Гешка | |||
| » Кюч за Въючын/ИЗКючын.deФeKTEN | |||
| Небочийи Шу mobe | » Валякьт eблочиä | »Остразене有很大 похашия有很大,有很大,有很大,有很大,有很大,有很大,有很大,有很大,有很大,有很大,有很大,有很大,有很大,有很大,有很大,有很大,有很大,有很大,有很大,有很大,有很大,有很大,有很大,有很大,有很大,有很大,有很大,有很大,有很大,有很大,有很大,有很大,有很大,有很大,有很大,有很大,有很大,有很大,有很大,有很大,有很大,有很大,有很大,有很大,有很大,有很大,很大,有很大,有很大,有很大 | |
| » Разларны винтоve, ragайки или крелекниelenementsп | |||
| » Ная смазka | »Наллеле смазka. | ||
| » Иллза смazka | »Monя obsphete ce КьМ Сервиза | ||
| Небочийи Вибраци | » Рожецяп.T HOЖ e Пов徕ень ИПЗАТМТВЛПЕ | »Monя obsphete ce КьМ Сервиза | |
| » РабочнATERДьлбочиа eMHORO rolяма | »HamaileteRobothata dълбочиna | ||
| Небочийи Вибраци | » 3aТьлесни Ножовe | »Monя obsphete ce КьМ Сервиза | |
| » РабочнATERДьлбочиа eMHORO малka | »УвалчeteRobothata dълбочиna |
TexHnueckn daHHN
conform directive: 2006/42/UE
Prin prezenta, noi
ATIKA GmbH
2014/30/UE, 2000/14/UE, 2011/65/UE.
Conformity assessment procedure 2000/14/UE - Appendix V