271773 - Ice Maker Arktic - Free user manual and instructions
Find the device manual for free 271773 Arktic in PDF.

| Product Type | Ice Machine |
| Brand | Arktic |
| Model | 271773 |
| Dimensions (W x D x H) | 398 x 546 x 682 mm |
| Net Weight | 28.1 kg |
| Power Supply | 220-240 V ~ 50 Hz |
| Rated Consumption | 210 W |
| Rated Current | 1.9 A |
| Refrigerant | R290 (65 g) |
| Ice Production | 26 kg / 24 h |
| Ice Basket Capacity | 7 kg |
| Climate Class | ST (18 °C to 38 °C) |
| Protection Class | Class I |
| Noise Level | < 60 dB(A) |
| Water Inlet Pressure | 1 to 8 kg/cm² |
| Included Accessories | Water supply hose, drain hose, 2 sealing washers, ice scoop |
| Main Functions | Automatic ice making, automatic stop when basket is full or water level low, fault detection |
| Maintenance and Cleaning | Clean after each use with a soft cloth and warm water; clean condenser every 2-3 months; do not immerse |
| Safety | Automatic stop in case of error, full basket and low water level detection, flammable refrigerant R290 |
| Warranty | 12 months |
Frequently Asked Questions - 271773 Arktic
User questions about 271773 Arktic
0 question about this device. Answer the ones you know or ask your own.
Ask a new question about this device
Download the instructions for your Ice Maker in PDF format for free! Find your manual 271773 - Arktic and take your electronic device back in hand. On this page are published all the documents necessary for the use of your device. 271773 by Arktic.
USER MANUAL 271773 Arktic
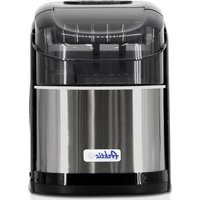
BULLET ICE CUBE MAKER
natural_image
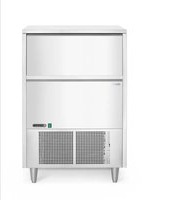
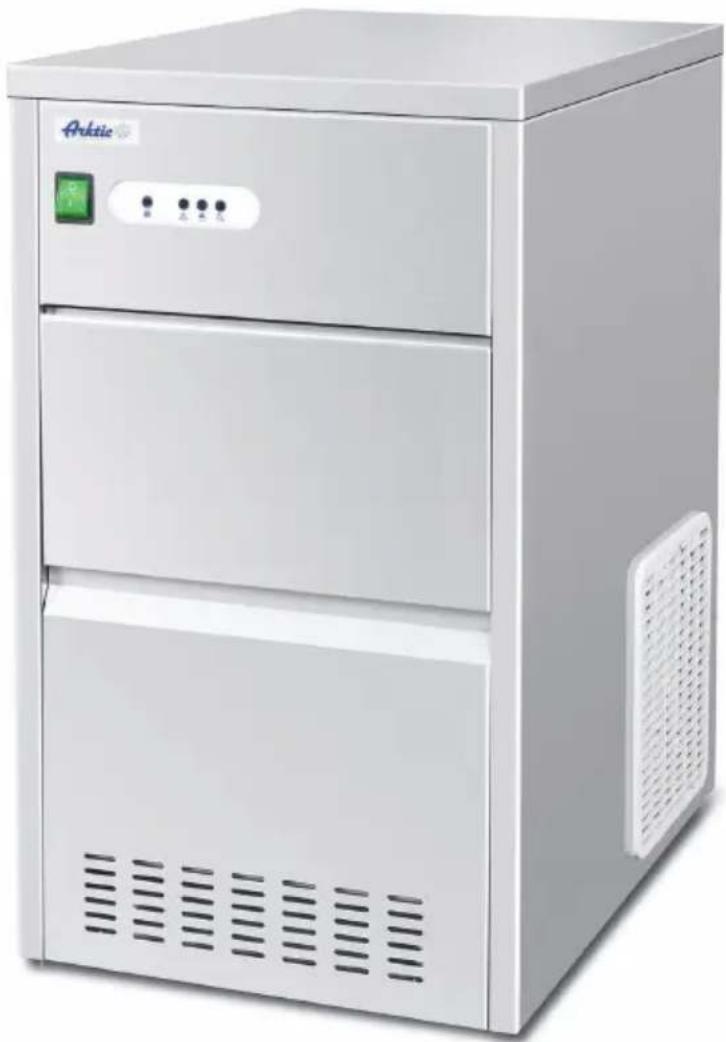
Exterior view of a modern white industrial refrigerator with ventilation grilles and control buttons (no visible text or symbols)Item: 271773
271780
You should read this user manual carefully before using the appliance.
Keep these instructions with the appliance.
natural_image
Simple icon of a house with an arrow pointing left, labeled 'INDOOR' below (no other text or symbols)For indoor use only.
natural_image
Symbol of a trash bin crossed with no text or numbers, enclosed in a square frame (no readable text)

Thank you for purchasing this Arktic appliance. Read this manual carefully, paying particular attention to the safety regulations outlined below, before installing and using this appliance for the first time.
Safety regulations
- This appliance is intended for buffet and household use.
- Only use the appliance for the intended purpose it was designed for as described in this manual.
- The manufacturer is not liable for any damage caused by incorrect operation and improper use.
- Keep the appliance and electrical plug away from water and other liquids. In the event the appliance falls into water, immediately remove the power plug from the socket. Do not use the appliance until it has been checked by a certified technician. Failure to follow these instructions will cause life threatening risks.
- Never attempt to open the housing of the appliance by yourself.
- Do not insert objects into the housing of the appliance.
- Do not touch the plug with wet or damp hands.
- DANGER OF ELECTRIC SHOCK! Do not attempt to repair the appliance by yourself, repairs are only to be conducted by qualified personnel.
- Never use a damaged appliance! When it's damaged, disconnect the appliance from the socket and contact the retailer.
- WARNING! Do not immerse the electrical parts of the appliance in water or other liquids.
- Never hold the appliance under running water.
- Regularly check the power plug and cord for any damage. When damaged it must be replaced by a service agent or similarly qualified person in order to avoid danger or injury.
- Make sure the cord does not come in contact with sharp or hot objects and keep it away from open fire. Never pull the power cord to unplug it from the socket, always pull the plug instead.
- Make sure that the power cord and/or extension cord do not cause a trip hazard.
- Never leave the appliance unattended during use.
- WARNING! As long as the plug is in the socket the appliance is connected to the power source.
- Turn off the appliance before unplugging it from the socket.
- Connect the power plug to an easily accessible electrical socket so that in case of emergency the appliance can be unplugged immediately.
- Never carry the appliance by the cord.
- Do not use any extra devices that are not supplied together with the appliance.
- Only connect the appliance to an electrical outlet with the voltage and frequency mentioned on the appliance label.
-
Never use accessories other than those recommended by the manufacturer. Failure to do so could pose a safety risk to the user and could damage the appliance. Only use original parts and accessories.
-
This appliance should not be operated by persons with reduced physical, sensory or mental capabilities, or persons that have a lack of experience and knowledge.
- This appliance should, under any circumstances, not be used by children.
- Keep the appliance and its power cord out of reach of children.
- WARNING: ALWAYS switch off the appliance and unplug from power socket before cleaning, maintenance or storage.
Special Safety Regulations
- This appliance is intended only for making ice cube. Any other use may lead to damage of the appliance or personal injury.
- Use the appliance only as described in this manual.
CAUTION! RISK OF FIRE! The refrigerant used is R290. It is a flammable refrigerant which is environmentally friendly. Although it is flammable, it does not damage the ozone layer and does not increase the greenhouse effect. The use of this coolant has, however, led to a slight increase in the noise level of the appliance. In addition to the noise of the compressor, you might be able to hear the coolant flowing around the system. This is unavoidable, and does not have any adverse effect on the performance of the appliance. Care must be taken during the transportation and setting up of the appliance that no parts of the cooling system are damaged. Leaking coolant can damage the eyes. - Do not place the appliance on a heating object (gasoline, electric, charcoal cooker, etc. Keep the appliance away from any hot surfaces and open flames. Always operate and place the appliance on a level, stable, clean, heat-resistant and dry surface.
- This appliance is not intended to be operated by means of an external timer or separate remote-control system.
- WARNING: Keep all ventilation openings in the appliance enclosure clear of obstruction.
- WARNING: Do not use mechanical devices or other means to accelerate the defrosting process, other than those recommended by the manufacturer.
- WARNING: Do not damage the refrigerant circuit.
- WARNING: Connect to portable water supply only.
- Do not store explosive substances such as aerosol cans with a flammable propellant in this appliance.
- Allow at least 15 cm spacing around the appliance for ventilation purpose during use.
- Do not use hard utensils to hit the outer surface. Do not use water jet, flush directly with water or steam cleaner as the parts will get wet and electric shock might be resulted.
- Do not expose it to direct sunlight. Avoid mechanical shocks and vibrations.
- Always move or transport the appliance in an upright position or it may damage the appliance.
- CAUTION! Securely route the power cord if necessary in order to prevent unintentional pulling or contact with the heating surface.
- Do not clean or store the appliance unless it is completely cooled down.
- No any parts are dishwasher safe.
Intended use
- This appliance is intended for buffet and household use.
- The appliance is designed only for making ice cubes. Any other use may lead to damage to the appliance or personal injury.
- Operating the appliance for any other purpose shall be deemed as misuse of the device. The user shall be solely liable for the improper use of the device.
Grounding installation
This appliance is classified as protection class I and must be connected to a protective ground. Grounding reduces the risk of electric shock by providing an escape wire for the electric current.
This appliance is fitted with a power cord that has a grounding wire and grounded plug. The plug must be plugged into an outlet that is properly installed and grounded.
Preparations before using for the first time
- Check to make sure the appliance is undamaged. In case of any damage, contact your supplier immediately and do NOT use the appliance.
- Remove all the packing material and protective film (if applicable).
- Clean the appliance with luke-warm water and a soft cloth.
- Place the appliance on a level and steady surface, unless mentioned otherwise.
- Make sure there is enough clearance around the appliance for ventilation purposes.
-
Position the appliance in such a way that the plug is accessible at all times.
-
Check that the ice basket and scoop are included. If any parts are missing, contact your supplier.
- Clean the inside of the appliance with lukewarm water and a soft cloth.
- Clean the ice basket.
- Do not place the ice maker in direct sunlight or close to a heat source.
- Do not use the ice maker within 24 hours after it has been transported and moved from one place to another.
- Keep the packaging if you intend to store your appliance in the future.
Main parts of the appliance
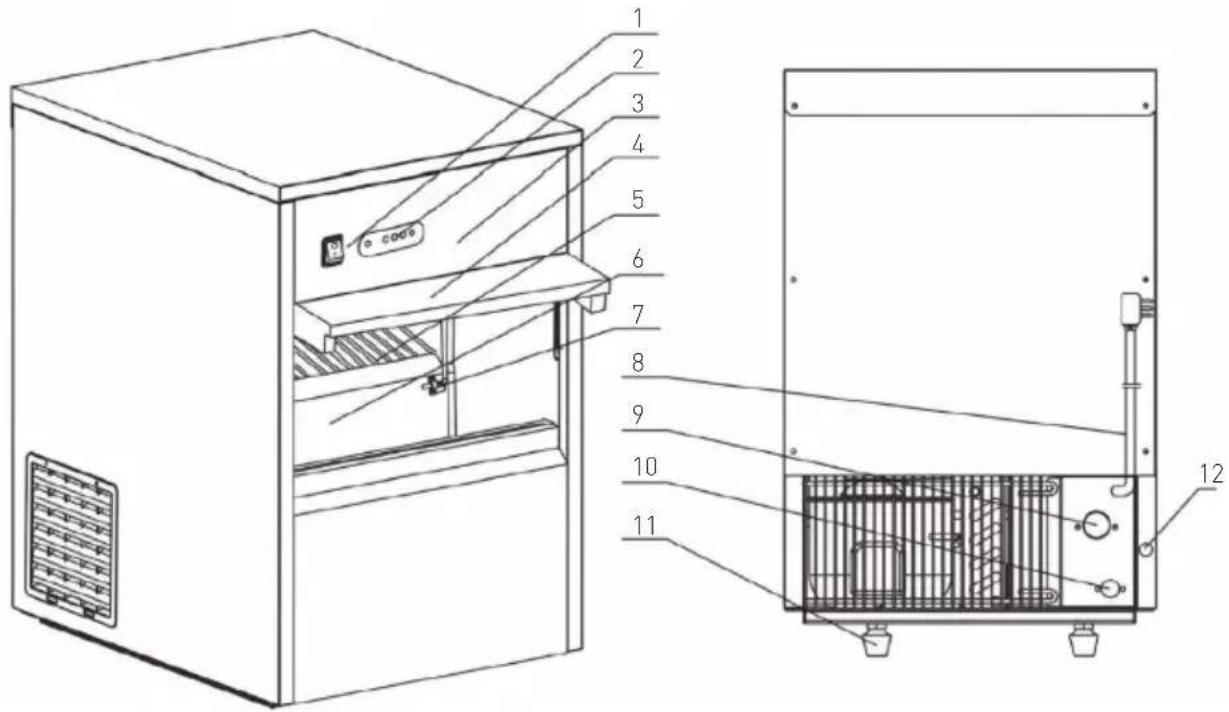
- ON / OFF switch with built-in indicator (Green)
- Display panel showing different function lamp
- Front panel
- Sliding door
- Ice shelf
-
Ice storage container
-
Ice capacity sensor
- Power cord
- Water supply inlet
- Drainage tube hole
- Feet
- Drainage cover
Control panel
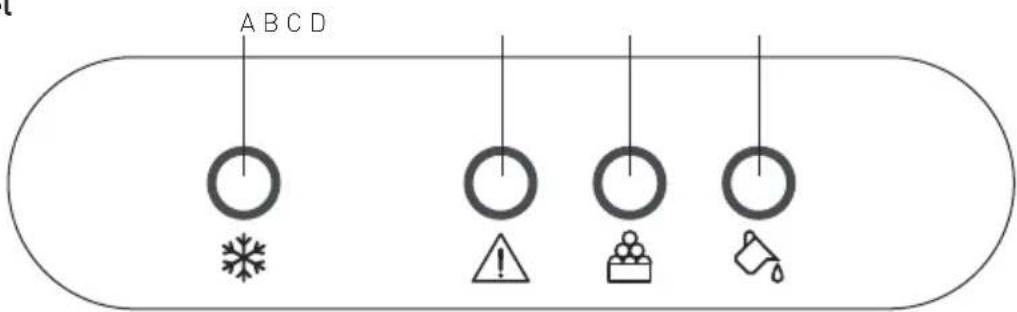
A). *Operation indicator (Green)
B). ▲ Display of fault (Red)
C). Storage tank is full (Yellow)
D). Water level is too low (Yellow)
Accessories

- Water inlet supply hose
-
Water drainage hose
-
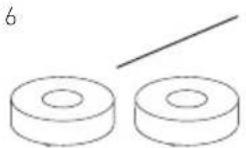
Spare sealing washer x2
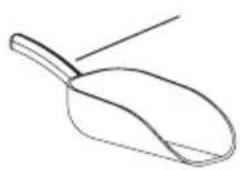
- Ice scoop
Installation of the appliance
Attention: Any installation, maintenance and repair work should be performed by qualified and authorized technician only.
- Check to make sure that the appliance is undamaged or complete delivery. In case of any damage or incomplete delivery, DO NOT use the appliance and contact the supplier immediately.
- Check that the accessories such as water supply hose, water drainage hose, 2 spare sealing washers & ice scoop are included.
- Remove all packing material and protective film (if applicable).
- Place the appliance on a level, steady and safe surface which can supports the weight of the appliance together with the ice cubes produced during use.
- Avoid expose to direct sunlight or direct source of heat such as cooker, heat oven, etc.
- Make sure that a minimum of 15 cm distance is kept around all sides of the appliance for ventilation purposes.
- Place the appliance in such a way that the plug is easily accessible and can be quickly removed from its socket in case of necessity.
- Set up the appliance near water supply connection.
Connection to the water supply
Attention: The appliance should be connected to a cold drinkable water supply only. Otherwise, a cleaning system or filter should be installed in advance.
- Connect one end of the water inlet supply hose (13) to the 3 / 4" screw type connector of the water tap supply so as to get the drinkable tap water. Then, connect the other end of this hose to the back of the appliance (9) by screwing clockwise. Be sure to put sealing washers (15) in both ends before connecting.
- Next, connect one end of the drainage hose (14) using the rubber drainage cuff to the rear of the appliance (10). Attach the other end to the sewage outlet / water container. The height of the sewage outlet / water container must be situated lower than the appliance, so that water can flow out.
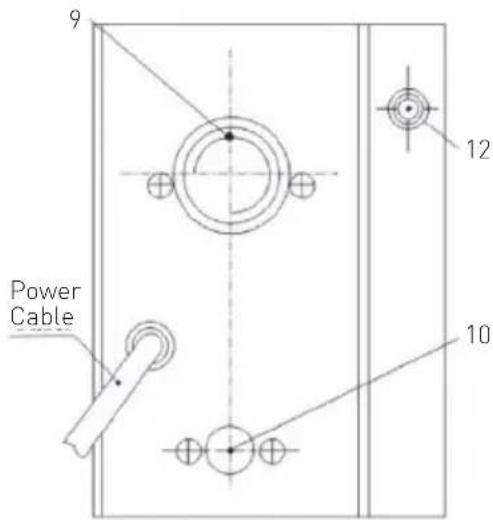
Note: The inlet water supply pressure range: 1-8 kg/cm². Pressure reducer should be installed if the pressure over this range.
Operation
- Before first use, clean the appliance interior and exterior surface with lukewarm water and a soft cloth.
- Position the appliance in a well-ventilated place, leaving at least 150 mm gap around all sides for ventilation purposes.
- Let the appliance stand alone for about one hour in order to settle the refrigerant. Make sure connect properly with the water supply system.
- Then, plug in to a suitable socket.
- Press down the ON/OFF switch (1) on the control panel in order start up.
- Then, the appliance will use water to clean up inside and water will flow out automatically. This time. the 3 light indicators “*” and “” lights up & blink for about 30 seconds.
- Also, the ON / OFF switch (1) lights up in green. The appliance starts to operate.
- The ice cubes making process is completely automatic, it consists of several stages as below: Water inlet ==> ice cubes production ==> ejection of ice cubes ==> storage of ice cubes.
- Then, push the slide door (4) and use ice scoop (16) to take out the ice.
- When the ice storage container is full, the indicator will light up in yellow and the appliance will stop operation automatically.
-
Once the ice cubes have been removed, the appliance continue production of ice tubes automatically.
-
Note: For sanitary reasons, you should dispose of the ice cubes produced in the first cycle for every use. Do not use them for beverages or cooling food.
- If the water supply is insufficient, the 🎨 indicator will light up in yellow and the appliance will stop operate automatically. Check the water supply (hose) connected to the appliance.
- If any error or failure occur, the ⚠️ indicator will light up in red and the appliance will stop operation automatically.
- Switch OFF the appliance by pressing down the ON / OFF switch (1) and unplug it from the electrical supply when not in use.
Notes:
- DO NOT switch ON again the appliance immediately after shut down automatically (caused by insufficient water supply, ice cube container too full, current interruption). Wait at least 3 \~ 5 minutes in order to avoid damages to the compressor.
- Check the connectors of the water inlet and outlet hose regularly for the leakage or overflow of water that may be present.
- If the appliance is not used for a long period of time, screw off the drainage cover (12) at the rear of the appliance. Wipe dry the water tank using a dry, clean cloth.
Cleaning & Maintenance
Attention: Always unplug the appliance from the electrical power outlet and let it cool down completely before cleaning or doing repair or maintenance work. And this should be performed by qualified and authorized technician only.
Cleaning
- Clean the appliance thoroughly after each use and after long period.
- The exterior and interior surfaces can be cleaned with a damp cloth and a little detergent.
-
Do not use water jet or steam cleaner for cleaning and do not immerse the machine under the water.
-
Clean the condenser for every 2 \~ 3 months.
- Use soft cloth only and make sure you never use any kind of abrasive agents or pads, which could scratch the surface.
- After the cleaning procedure, you should use a soft and dry cloth to wipe dry and polish the surface.
Maintenance
- Check the power cord for any damage from time to time to avoid electric shock. Never operate the appliance when the power cord is damaged. A damaged power cord must be immediately by a qualified and authorized technician.
- Only a qualified technician and original spare parts and accessories should be used to carry out the repair and maintenance work. DO NOT attempt to repair the appliance yourself.
Troubleshooting
If the appliance does not function properly, please check the below table for solution. If you are still unable to solve the problem, please contact the supplier/service provider.
| Problems Possible causes Possible solution | ||
| Appliance has no function. • Appliance is switched OFF.Not connected properly with the electrical supply. | • Switch ON the appliance.• Check the connection with electrical supply. | |
| Compressor does not work. • Water shortage from the water supply system.• Container is full of ice. | • Check the water supply system. If ok, restart the appliance.• Take out some ice. | |
| Compressor works, but no ice cube is made. | • Refrigerant leakage• The refrigerating system is blocked. | • Contact the supplier. |
| indicator is on. | • Water shortage from the water supply system.• Water valve is damaged.• Tap water pressure is too slow. | • Check the water supply system. If ok, restart the appliance.• Contact the supplier.• Be sure the tap water pressure is at least 1kg/cm^2 . |
| Indicator B is always on Water tank is loosing and not horizontal. Tighten the screws to the motor (water tank) | ||
| Indicator B is on 3 times per 5s Ice level sensor is not working. Contact the supplier. | ||
| Indicator B is on once per 5s | Water temperature sensor is not working. | Contact the supplier. |
| Indicator B is on 2 times per 5s Condenser sensor is not working. | Contact the supplier. | |
| Ice cube could not fall off | The connection of electromagnetic valve is loosing. | Contact the supplier |
| Water temperature sensor is defective. | Contact the supplier | |
| The motor (water tank) is not working. • Check the motor connection.• Contact the supplier. | ||
| Ice cube is not transparent | Water flow pump is defective. | • Check the water pump connection• Contact the supplier |
| Water tank filter is blocked. | Cleaner the filter. | |
| Water leakage | • The water tube is damaged.• The water inlet pressure is too high. | • Change the water tube.• Check and reduce the water inlet pressure. |
| Stagnant water inside the ice cube storage room | • The installation of drain tube is lower than horizontal water level.• The drain tube is blocked. | • Adjust the drain tube height.• Change the drain tube. |
Technical specification
| Item no. 271773 271780 | ||
| Operating voltage & frequency 220-240V~ 50Hz | ||
| Rated input power 241W 293W | ||
| Rated current 1,9A 2,2A | ||
| Refrigerant used and quantity R290 / 65g R290 / 85g | ||
| Climate class ST (18°C to 38°C) | ||
| Protection class Class I | ||
| Noise level < 60 dB (A) | ||
| Ice making capacity 26 kg / 24 hr 50 kg / 24 hr | ||
| Ice tank storage | 7 kg | |
| Net weight | 28.1 kg | 28.6 kg |
| Dimension 398 x 546 x (H) 682 mm | ||
Remark: Technical specification is subjected to change without prior notification.
Circuit diagram (Item 271773, 271780)
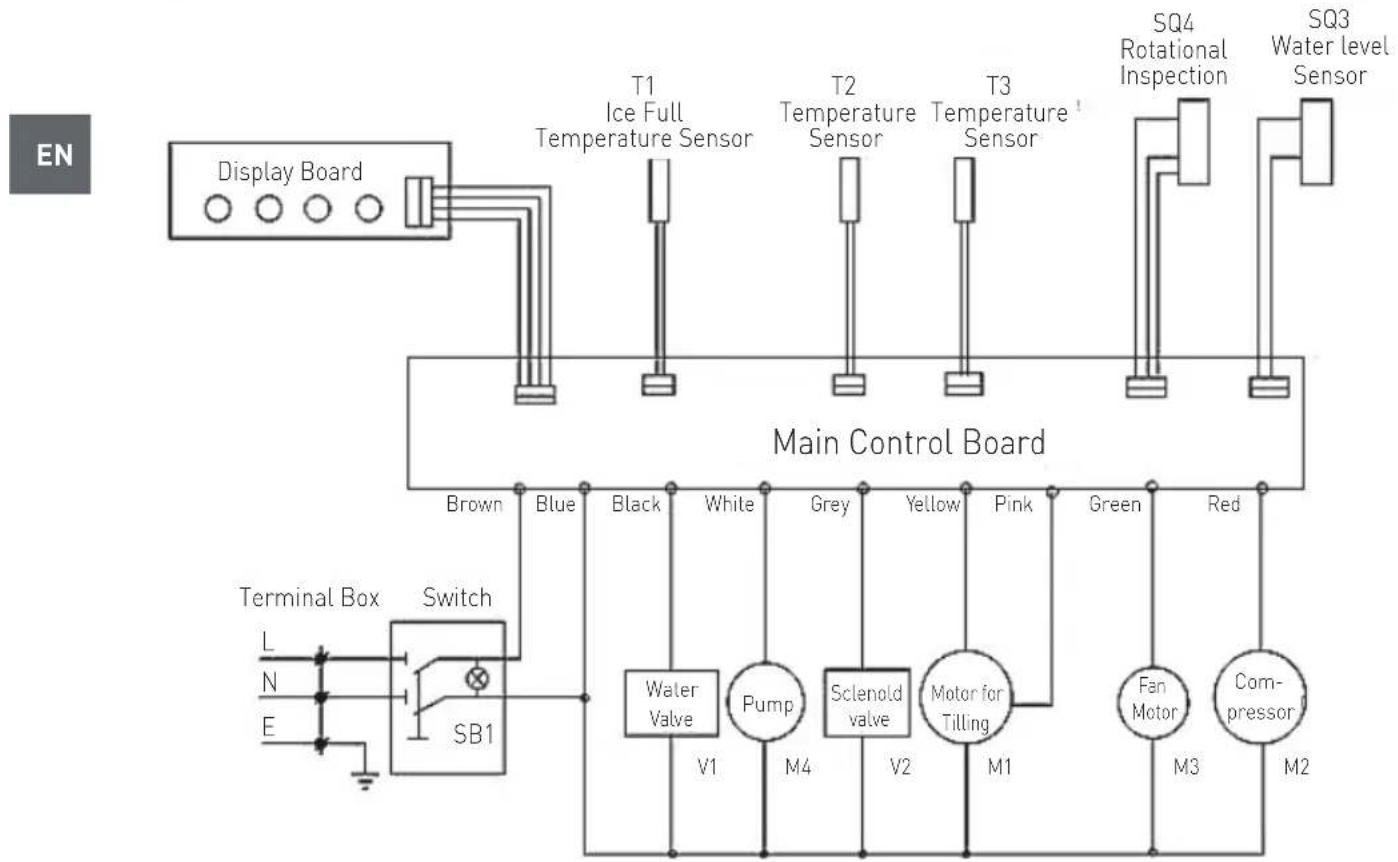
flowchart
graph TD
    A["Display Board"] --> B["Main Control Board"]
    B --> C["T1 Ice Full Temperature Sensor"]
    B --> D["T2 Temperature Sensor"]
    B --> E["T3 Temperature Sensor"]
    B --> F["SQ4 Rotational Inspection"]
    B --> G["SQ3 Water level Sensor"]
    H["Terminal Box L N E"] --> I["Switch SB1"]
    I --> J["Water Valve V1"]
    I --> K["Pump M4"]
    I --> L["Splenoid valve V2"]
    I --> M["Motor for Tilling M1"]
    I --> N["Fan Motor M3"]
    I --> O["Compressor M2"]
    style A fill:#f9f,stroke:#333
    style B fill:#ccf,stroke:#333
    style H fill:#cfc,stroke:#333
    style I fill:#fcc,stroke:#333
Warranty
Any defect affecting the functionality of the appliance which becomes apparent within one year after purchase will be repaired by free repair or replacement provided the appliance has been used and maintained in accordance with the instructions and has not been abused or misused in any way. Your statutory rights are not affected. If the appliance is claimed under warranty, state where and when it was purchased and include proof of purchase (e.g. receipt).
In line with our policy of continuous product development we reserve the right to change the product, packaging and documentation specifications without notice.
Discarding & Environment
When decommissioning the appliance, the product must not be disposed of with other household waste. Instead, it is your responsibility to dispose to your waste equipment by handing it over to a designated collection point. Failure to follow this rule may be penalized in accordance with applicable regulations on waste disposal. The separate collection and recycling of your waste equipment at the time of disposal will help conserve natural resources and ensure that it is recycled in a manner that protects human health and the environment.
For more information about where you can drop off your waste for recycling, please contact your local waste collection company. The manufacturers and importers do not take responsibility for recycling, treatment and ecological disposal, either directly or through a public system.
natural_image
Technical line drawing of a mechanical assembly with a coiled pipe and flange (no text or symbols)natural_image
Technical line drawing of a mechanical assembly with a coiled pipe and flange (no text or symbols)natural_image
Technical line drawing of a coiled pipe with a flanged connector and a bolt (no text or symbols)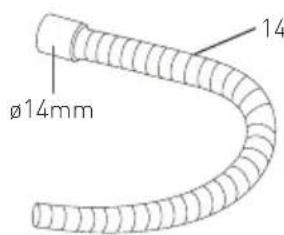
natural_image
Simple line drawing of a spoon or scoop with a handle and pointed tip (no text or symbols)natural_image
Technical line drawing of a coiled pipe with a flanged connector (no text or symbols)natural_image
Technical line drawing of a coiled pipe with a flanged connector and bolt (no text or symbols)natural_image
Simple line drawing of two circular objects with a diagonal line extending from them (no text or symbols)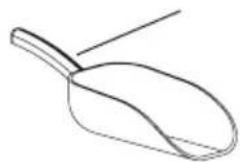
natural_image
Simple line drawing of a spoon or scoop (no text or symbols)natural_image
Technical line drawing of a mechanical assembly with a coiled pipe and flange (no text or symbols)natural_image
Simple line drawing of a spoon or scoop (no text or symbols)Hendi Food Service Equipment GmbH
Ehring 15
Hendi Food Service Equipment Romania S.R.L.
PKS Hendi South East Europe SA
5 Metsovou Str.
18346 Moschato, Athens, Greece
Tel: +30 210 4839700
Email: info@pks-hendi.com
Hendi Italia S.R.L.
Via Leonardo da Vinci 4
39100 Bolzano (BZ), Italy
Tel: +39 800 727 438
Email: office.italy@hendi.eu
Hendi HK Ltd.
1208, 12/F Exchange Tower
33 Wang Chiu Road, Kowloon Bay, Hong Kong
Tel: +852 2154 2618
Email: info-hk@hendi.eu
Find Hendi on internet:
www.hendi.eu
www.facebook.com/HendiToolsforChefs
www.linkedin.com/company/hendi-food-service-equipment-b.v.
www.youtube.com/HendiEquipment
- Changes, printing and typesetting errors reserved.
- Änderungen, Druck- und Satzfehler vorbehalten.
- Wijzigingen, druk- en zetfouten voorbehouden.
- Zastrzega się możliwość zmian, błędów w druku i składzie.
-
Sous réserve d'erreurs de modification, d'impression et de composition.
-
Con riserva di modifiche, errori di stampa e composizione.
- Rezervate modificările, tipărirea și erorile de tipărire.
- Мы оставляем за собой право вносить изменения, ошибки печати и набора.
- Επιφυλάσσονται αλλαγές, εκτύπωση και οτοιχειοθεσία.
- Změny, chyby tisku a sazby vyhrazeny.