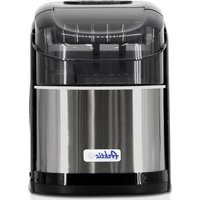
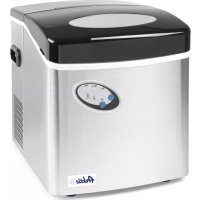
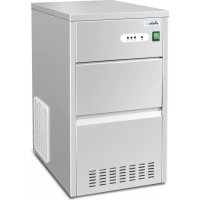
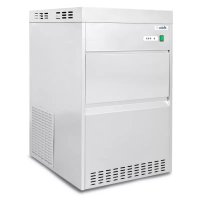
USER MANUAL 271292 Arktic
GB: Read user manual and keep this with the appliance.
GB: For indoor use only.
natural_image
Simple line drawing of a wine glass with a fork (no text or symbols)

GB: NOTE: This manual is translated from original English manual using AI and machine translations.
2
natural_image
White plastic pushpin with a labeled measurement line (10) on its side, no other text or symbols present.
3
GB: Technical specifications / DE: Technische Angaben / NL: Technische gegevens / PL: Dane techniczne / FR: Données techniques / IT: Parametri di base / RO: Parametrii de bază / GR: Bašukéç paráµetroč / HR: Tehnički podaci / CZ: Technická specifikace / HU: Můszaki adatok / UA: Texníční характеристики / EE: Tehnilised andmed / LV: Tehniskas specifikacijas / LT: Techninės specifikacijos / PT: Especificações técnicas / ES: Especificaciones técnicas / SK: Technické špecifikácie / DK: Tekniske specifikationer / FI: Tekniset tiedot / NO: Tekniske spesifikasjoner / SI: Tehnične specifikacije / SE: Tekniska specifikationer / BG: Texнически спецификации / RU: Texнические данные
| A 271292 |
| B 220-240V ~ / 50Hz / 220-240B ~ 50Гц |
| C 100W / BT |
| D 1,0A |
| E R600a / 21g |
| F SN -T |
| G Cyclopentane |
| H | I |
| I 242x358x(H)328mm / мм |
A: GB: Item no. / DE: Art.-Nr. / NL: Artikelnr. / PL: Nr pozycji / FR: N° d'article / IT: N. articolo / RO: Nr. articolului/ GR: Ap. εἰδους / HR: Broj stavke / CZ: Položka č. / HU: Cikkszám / UA: Номер елемента / EE: Artikli nr / LV: Vienums Nr. / LT: Prekès Nr. / PT: Item n.o / ES: N.o de artículo / SK: Č. položky / DK: Varenr. / FI: Kohteen nro / NO: Varenr. / SI: Št. izdelka / SE: Art.nr / BG: Номер на елемент / RU: Номер позиции
B: GB: Rated voltage and frequency / DE: Nennspannung und Frequenz / NL: Nominale spanning en frequentie / PL: Znamionowe napięcie i częstotliwość / FR: Tension et fréquence nominales / IT: Tensione e frequenza nominali / RO: Tensiune nominală și frecvență / GR: Ovojaotikn táon kai ouxvótnta / HR: Nazivni napon i frekvencija / CZ: Jmenovité napětí a frekvence / HU: Névleges feszültség és frekvencia / UA: Номінальна напруга та частота / EE: Nimipinge ja -sagedus / LV: Nominālais spriegums un frekvence / LT: Vardinė jtampa ir dažnis / PT: Tensão e frequência nominais / ES: Tensión y frecuencia nominales / SK: Menovité napätie a frekvencia / DK: Nominel spænding og frekvens / FI: Nimellisjännite ja -taajuus / NO: Nominell spenning og frekvens / SI: Nazivna napetost in frekvenca / SE: Märkspänning och frekvens / BG: Номинално напрежение и честота / RU: Номинальное напряжение и частота
C: GB: Rated input power / DE: Nenneingangsleistung / NL: Nominaal ingangsvermogen / PL: Znamionowa moc wejściowa / FR: Puissance d'entrée nominale / IT: Potenza nominale in ingresso / RO: Putere nominală de intrare / GR: Ovojaotikn ioxuç eioóbou / HR: Nazivna ulazna snaga / CZ: Jmenovitý vstupní výkon / HU: Névleges bemeneti teljesítmény / UA: Номінальна вхідна потужність / EE: Nimisisendvõimsus / LV: Nominālā ieejas jauda / LT: Vardinė jėjimo galia / PT: Potência de entrada nominal / ES: Potencia de entrada nominal / SK: Menovitý vstupný výkon / DK: Nominel indgangseffekt / FI: Nimellistuloteho / NO: Nominell inngangseffekt / SI: Nazivna vhodna moč / SE: Märkineffekt / BG: Номинална входяща мощност / RU: Номинальная входная мощность
D: GB: Rated Current / DE: Nennstrom / NL: Nominale stroom / PL: Prąd znamionowy / FR: Courant nominal / IT: Corrente nominale / RO: Curent nominal / GR: Ovojootikn' évtaon peújatoç / HR: Nazivna struja / CZ: Jmenovitý proud / HU: Névleges áramerősség / UA: Номінальний струм / EE: Hinnatud praegune / LV: Nominālā strāva / LT: Vardinè srové / PT: Corrente nominal / ES: Corriente nominal / SK: Menovitý prúd / DK: Vurderet aktuel / FI: Nimellisvirta / NO: Nominell ström / SI: Nazivni tok / SE: Nominell ström / BG: Номинален ток / RU: Номинальный ток
E: GB: Refrigerant used and injection quantity / DE: Verwendetes Kühlmittel und Injektionsmenge / NL: Gebruikte koelmiddel en hoeveelheid / PL: Czynnik chłodniczy i jego ilość / FR: Réfrigérant utilisé et quantité à injecter / IT:Refrigerante utilizzato e quantità di iniezione / RO: Agent frigorific utilizat și cantitate de injecție / GR: Ψυκτικό μέσο που χρησμποποείται και ποδότητα ένεσης / HR: Korišteno rashladno sredstvo i količina ubrizgavanja / CZ: Použité chladivo a množství vstříku / HU: Felhasznált hűtőközeg és befecskendezési mennyiség / UA: Використовуваний холодоагент і кількість впорскування / EE: Kasutatud külmutusagens ja injektsiooni kogus / LV: Izmantota dzesējoša viela un iesmidzināšanas daudzums / LT: Panaudotas šaltnešis ir jpurškimo kiekis / PT: Refrigerante utilizado e quantidade de injeção / ES: Refrigerante utilizado y cantidad de inyección / SK: Použité chladiace médium a množstvo injekcie / DK: Anvendt kølemiddel og injektionsmængde / FI: Käytetty kylmäaine ja injektiomäärä / NO: Kjølemiddel brukt og injeksjonsmengde / SI: Uporabljeno hladilno sredstvo in količina injekcije / SE: Köldmedium som används och injektionsmängd / BG: Използван хладилен агент и количество на инжектиране / U: Используемый хладагент и количество впрыска
F: GB: Climate class / DE: Klimaklasse / NL: Klimaatklasse / PL: Klasa klimatyczna / FR: Classe climatique / IT: Classe climatica / RO: Clasă climatică / GR: Kliumatikn klăon / HR: Klimatska klasa / CZ: Klimatická třída / HU: Klímaosztály / UA: Klímatичний клас / EE: Kliimaklass / LV: Klimata klase / LT: Klimato klasé / PT: Classe climática / ES: Clase climática / SK: Klimatická trieda / DK: Klimaklasse / FI: Ilmastoluokka / NO: Klimaklasse / SI: Podnebni razred / SE: Klimatklass / BG: Климатичен клас / RU: Климатический класс
G: GB: Foam blowing agent (Cyclopentan) / DE: Schaumtreibmittel (Cyclopentan) / NL: Schuimblaasmiddel (Cyclopentan) / PL: Piankowy środek wd muchujący (cyklopentan) / FR: Agent de gonflement de mousse (Cyclopentan) / IT: Agente espandente in schiuma (cicliopentan) / RO: Agent de suflare cu spumă (ciclopentan) / GR: Αφρώδες διογκωτικό μέσο (Κυκλοπεντάνη) / HR: Sredstvo za puhanje pjene (Cyclopentan) / CZ: Pěnové nadouvadlo (cyklopentan) / HU: Habfúvó szer (ciklopentán) / UA: Πιноутворювальна речовина (циклопентан) / EE: Vahupuhuv aine (tsüklopentaan) / LV: Putu veidošanas līdzeklis (ciklopāns) / LT: Putu pūtimo medžiaga (ciklopentanas) / PT: Agente de expansão de espuma (Ciclopentano) / ES: Agente espumante (ciclopentano) / SK: Penové nadúvadlo (cyklopentán) / DK: Skumblæsermiddel (Cyclopentan) / FI: Vahtoa puhaltava aine (sylopentaani) / NO: Skumblåsemiddel (Cyclopentan) / SI: Penasto pihalno sredstvo (cikloopentan) / SE: Skumblåsare (cyklopentan) / BG: Издухващ агент на пяна (Циклопентан) / RU: Вспениватель (циклопентан)
H: GB: Protection class (Class) / DE: Schutzklasse (Klasse) / NL: Beschermingsklasse (klasse) / PL: Klasa ochrony (klasa) / FR: Classe de protection (classe) / IT: Classe di protezione (classe) / RO: Clasă de protectie (clasă) / GR: Kláón proostasiaç (katnyopia) / HR: Klasa zaštite (klasa) / CZ: Třída ochrany (třída) / HU: Védelmi osztály (osztály) / UA: Клас захисту (клас) / EE: Kaitseklass (klass) / LV: Aizsardzības klase (klase) / LT: Apsaugos klasė (klasė) / PT: Classe de proteção (classe) / ES: Clase de protección (clase) / SK: Trieda ochrany (trieda) / DK: Beskyttelsesklasse (klasse) / FI: Suojausluokka (luokka) / NO: Beskyttelsesklasse (klasse) / SI: Razred zaščite (razred) / SE: Skyddsklass (klass) / BG: Клас на защита (Клас) / RU: Класс защиты (класс)
I: GB: Dimensions / DE: Abmessungen / NL: Afmetingen / PL: Wymiary / FR: Dimensions / IT: Dimensioni / RO: Dimensiuni / GR: Διαστάσεις / HR: Dimenzije / CZ: Rozměry / HU: Méretek / UA: Rozměry / EE: Möötmed / LV: Izměry / LT: Matmenys / PT: Dimensões / ES: Dimensiones / SK: Rozměry / DK: Mål / FI: Mitat / NO: Mål / SI: Mere / SE: Mått / BG: Размерi / RU: Размерý
GB: Remark: Technical specification is subjected to change without prior notification.
Thank you for purchasing this Arktic appliance. Read this user manual carefully, paying particular attention to the safety regulations outlined below, before installing and using this appliance for the first time.
Safety instructions
- Only use the appliance for the intended purpose it was designed for, as described in this manual.
- The manufacturer is not liable for any damage caused by incorrect operation and improper use.
- DANGER! RISK OF ELECTRIC SHOCK! Do not attempt to repair the appliance by yourself. Do not immerse the electrical parts of the appliance in water or other liquids. Never hold the appliance under running water.
- NEVER USE A DAMAGED APPLIANCE! Check the electrical connections and cord regularly for any damage. When damaged, disconnect the appliance from the power supply. Any repairs should only be carried out by a supplier or qualified person to avoid danger or injury.
- WARNING! When positioning the appliance, route the power cable safely if necessary to avoid unintentional pulling, being damaged, coming into contact with the heating surface, or causing a tripping hazard.
- WARNING! As long as the plug is in the socket the appliance is connected to the power supply.
- WARNING! ALWAYS switch off the appliance before disconnecting from the power supply, cleaning, maintenance or storage.
- Only connect the appliance to an electrical outlet with the voltage and frequency mentioned on the appliance label.
- Do not touch the plug/electrical connections with wet or damp hands.
- Keep the appliance and electrical plug/connections away from water and other liquids. If the appliance falls into water, remove the power supply connections immediately. Do not use the appliance until it has been checked by a certified technician. Failure to follow these instructions will cause life threatening risks.
- Connect the power supply into an easily accessible electrical outlet so you can disconnect the appliance immediately in case of emergency.
- Make sure the cord does not come in contact with sharp or hot objects and keep it away from open fire. Never pull the power cord to unplug it from the socket, always pull the plug instead.
- Never carry the appliance by its cord.
- Never try to open the housing of the appliance yourself.
- Do not insert objects into the housing of the appliance.
- Never leave the appliance unattended during use.
- This appliance should be operated by trained personnel in kitchen of the restaurant, canteens or bar staff, etc.
- This appliance should not be operated by persons with reduced physical, sensory or mental capabilities, or persons that have a lack of experience and knowledge.
- This appliance should, under any circumstances, not be used by children.
- Keep the appliance and its electrical connections out of reach of children.
- Never use accessories or any extra devices other than those supplied with the appliance or recommended by the manufacturer. Failure to do so could pose a safety risk to the user and could damage the appliance. Only use original parts and accessories.
- Do not operate this appliance by means of an external timer or remote-control system.
- Do not place the appliance on a heating object (gasoline, electric, charcoal cooker, etc.).
- Do not cover the appliance in operation.
- Do not place any objects on top of the appliance.
- Do not use the appliance near any open flames, explosive or flammable materials. Always operate the appliance on a horizontal, stable, clean, heat-resistant and dry surface.
- The appliance is not suitable for installation in an area where a water jet could be used.
- Leave a space of at least 20 cm around the appliance for ventilation during use.
- WARNING! Keep all ventilation openings on the appliance free from obstruction.
Special safety instructions
• This appliance is intended for commercial use.
- CAUTION! RISK OF BURNS! HOT SURFACES! The temperature of the accessible surfaces are very high during use. Touch only the control panel, handles, switches, timer control knobs or temperature control knobs.
• CAUTION RISK OF FIRE! The refrigerant

used is R600a / R290. It is a flammable refrigerant which is environmentally friendly. Although it is flammable, it does not damage the ozone layer and does not increase the greenhouse effect. The use of this coolant has, however, led to a slight increase in the noise level of the appliance. In addition to the noise of the compressor, you might be able to hear the coolant flowing around the system. This is unavoidable, and does not have any adverse effect on the performance of the appliance. Care must be taken during the transportation and setting up of the appliance that no parts of the cooling system are damaged. Leaking coolant can damage the eyes.
- If the supply cord is damaged, it must be replaced by the manufacturer, its service agent or similarly qualified persons in order to avoid a hazard.
- ATTENTION! Do not fill the load over MAX level.
- The foam blowing agent used is Cyclopentane in this appliance. It is highly flammable.
- CAUTION! RISK OF BURNS! Refrigerant liquid sprayed on the skin can cause critical burns. Keep eyes and skin protected. If refrigerant burns occur, rinse immediately with cold water. In case burns are severe, apply ice and contact medical treatment immediately.
- WARNING! Provide sufficient ventilation in the surrounding structure when building-in. Never block the air flow suction and air outlet in order to keep air circulation.
- WARNING! Do not use mechanical devices or other means to accelerate the defrosting process, other than those recommended by the manufacturer.
- WARNING! Do not damage the refrigerant circuit.
- WARNING! Do not use electrical appliances inside the food storage compartments of the appliance, unless they are of
the type recommended by the manufacturer.
- Do not place any dangerous products, such as fuel, alcohol, paint, aerosol cans with a flammable propellant, flammable or explosive substances, etc. inside or near the appliance.
- Once installed, the appliance must not be tilted at an angle greater than 5^ and it is necessary to wait 2h before connecting it to the power supply to switch it on. The same applies if the appliance is moved afterwards.
- If the appliance has been switched off or disconnected from the power supply, it is necessary to wait 5 minutes until switching on again.
- No other appliances should be plugged into the same socket as with this appliance.
Intended use
- This appliance is intended to be used in household and similar applications such as:
-staff kitchen areas in shops, offices and others working environment;
-farm houses;
-by clients in hotels, motels and other residential type environment;
-bed and breakfast type environment.
- The appliance is designed only for making ice cubes. Any other use may lead to damage of the appliance or personal injury.
- Operating the appliance for any other purpose shall be deemed a misuse of the device. The user shall be solely liable for improper use of the device.
Grounding installation
This appliance is classified as protection class I and must be connected to a protective ground. Grounding reduces the risk of electric shock by providing an escape wire for the electric current.
This appliance is fitted with a power cord with grounding plug or electrical connections with grounding wire. The connections must be properly installed and grounded.
Main parts of the product
(Fig.1 on page 3)
- Evaporator
- Ice scoop
- Ice full sensor
- Ice basket
- Back top panel
- Air exhausting
- Water drain cap: at front bottom side of the unit
- Top cover with transparent window
- Maximum water level marking
Spare parts or accessories
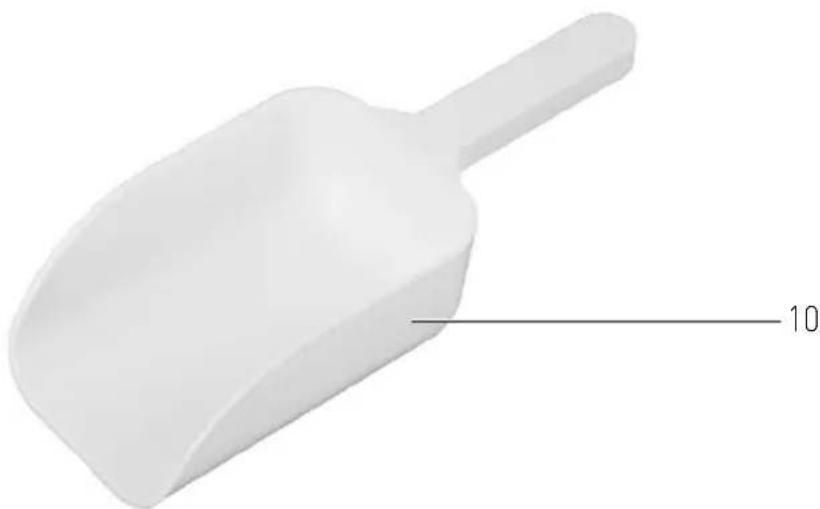
(Fig.2 on page 4)
- Ice scoop
Control panel
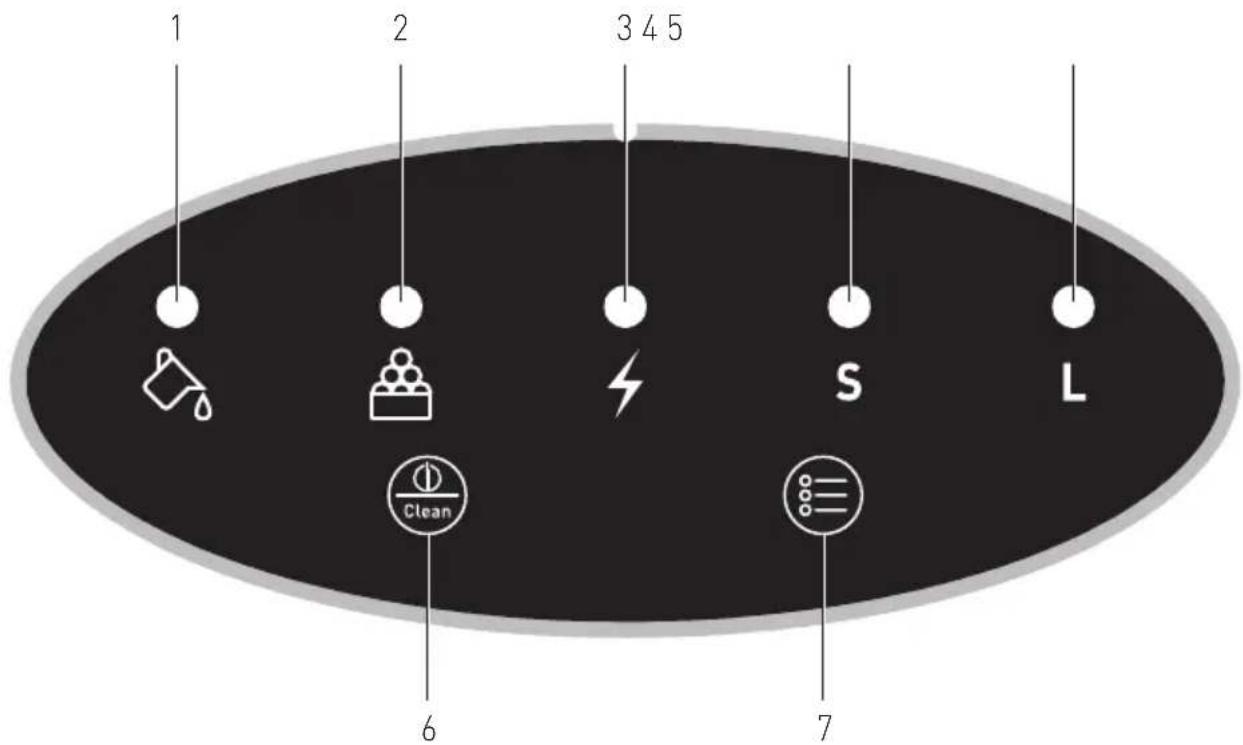
(Fig.3 on page 4)
- Add water indicator (water level is too low)
- Ice full indicator
-
Power indicator
-
Small ice cube indicator
- Large ice cube indicator
- Power ON/OFF / Clean button
- Size of ice selection
Preparation before use
- Remove all protective packaging and wrapping.
- Check that the device is in good condition and with all accessories. In case of incomplete or damaged delivery, please contact the supplier immediately. In this case, do not use the device.
- Clean the accessories and the appliance before use (See ==> Cleaning & Maintenance).
• Make sure the appliance is completely dry.
- Place the appliance on a horizontal, stable and heat resistant surface that is safe against water splashes.
- Keep the packaging if you intend to store your appliance in the future.
- Keep the user manual for future reference.
NOTE! Due to manufacturing residues, the appliance may emit a light odor during the first few uses. This is normal and does not indicate any defect or hazard. Make sure the appliance is well ventilated.
Operating instructions
Start the self-cleaning program
- Open the top cover, remove the ice basket and fill the tank with water. Do not fill beyond the maximum water level. Make sure the ice basket is above water
- Plug on the unit, press the "Power ON/OFF/Clean" button for more than 5 seconds to enter the self-cleaning program. Self-cleaning program need 30 mins. When the program is over, drain out the water and clean inside.
Using ice maker
- Open the cover, remove the ice basket and pour water into the tank. Keep water level below the maximum water level mark.
Note: Fill with potable water only. Only use drinking water.
- Press "ON/OFF/Clean" button to begin the ice making cycle.
- Press ice size selection button. If the room temperature is lower than 15^(59^) , it is recommended to select small ice size in order to avoid ice sticking together.
- The ice making cycle lasts approx 8 to 13 minutes, depending on the selection of ice size and the room temperature.
- If water pump can't inject water due to low water level, the ice maker will stop automatically. Add water indicator will be light up. Turn off the unit, fill water up to maximum water level. Then turn on the unit again. Allow the refrigerant liquid inside the compressor at least 3 minutes to settle before restarting.
- The ice maker stops when the ice basket is full and the ice full indicator will be light up.
WARNING: Direct sunlight or sunlight reflection may cause infrared sensor malfunction. If the unit doesn't stop even ice cubes obstruct sensor, move the unit where no sunlight.
- Change water in the water reservoir every 24 hours to ensure a reasonable hygiene level. If unit isn't to be used, drain all the water and dry the tank.
- Beware: Never tip the appliance more than 45^ and do not turn the appliance upside down. This will damage the appliance beyond repair.
Cleaning & maintenance
- ATTENTION! Always disconnect the appliance from the power supply and cool down before storage, cleaning & maintenance.
- Do not use water jet or steam cleaner for cleaning and do not push the appliance under the water as the parts will get wet and electric shock might be resulted.
- If the appliance is not kept in a good state of cleanliness, this can adversely affect the life of the appliance and result in a dangerous situation.
Cleaning
- Clean the cooled exterior surface with a cloth or sponge slightly dampened with a mild soap solution.
- For reasons of hygiene, the appliance should be cleaned before and after use.
- Avoid water contacting the electrical components.
- Clean the inside of container with a non-abrasive detergent and rinse with clean water.
- Never immerse the appliance in water or other liquids.
- Never use aggressive cleaning agents, abrasive sponges, or cleaning agents containing chlorine. Do not use steel wool, metallic utensils, or any sharp or pointed objects for cleaning. Do not use petrol or solvents!
- No parts are dishwasher safe.
- Clean the condenser for every 2 \~ 3 months.
Maintenance
- Check the operation of the appliance regularly to prevent serious accidents.
- If you see that the appliance is not working properly or that there is a problem, stop using it, switch it off and contact the supplier.
- All maintenance, installation and repair work must be carried out by specialised and authorised technicians, or recommended by the manufacturer.
Transportation and Storage
- Before storage, always make sure that the appliance has been disconnected from the power supply and completely cooled down.
- Store the appliance in a cool, clean and dry place.
- Never place heavy objects on the appliance as this could damage it.
- Do not move the appliance while it is under operation. Disconnect the appliance from power supply when moving and hold it at the bottom.
Descaling
This appliance should be cleaned and descaled frequently. To keep this appliance in optimum condition and to ensure its operation, it is crucial that you descale the appliance on a regular basis. Depending on the hardness of the water and the frequency of use, you need to repeat the following procedure regularly. To descale use a descaling agent that is suitable for the appliance. You can also use pure lemon juice, citric acid or cleaning vinegar as a de-scaling agent. To ensure the proper mixture, read the instructions supplied with the agent. For pure lemon juice or cleaning vinegar the general mixture applies of 1/3 cleaning vinegar or lemon juice to 2/3 water.
NOTE! Warranty is void if failure to decale regularly leads to reduced functioning or failure of the appliance.
Troubleshooting
If the appliance does not function properly, please check the below table for the solution. If you are still unable to solve the problem, please contact the supplier/service provider.
| Problems Possible cause Possible solution |
| “Add water” indicator light ups. | Not enough water. Switch off the appliance, fill up water before switch on the appliance again. |
| “Ice full” indicator light ups. | Too much ice in the appliance. | Remove the ice. |
| Ice cubes melt together. | The cycle is too long. Switch the appliance off and switch back on when the ice cubes melt. Select “Small” ice cubes. |
| Water temperature in the water tank is too low. | Change the water. The ideal water temperature is 8°C-32°C. |
| Appliance does not give an error message, but does not make any ice cubes. | Room temperature or water temperature is too high. | Put the appliance in a cooler place and change the water. |
| Leak in the cooling system. | Contact the supplier. |
| Blockage in the cooling system. |
Warranty
Any defect affecting the functionality of the appliance which becomes apparent within one year after purchase will be repaired by free repair or replacement provided the appliance has been used and maintained in accordance with the instructions and has not been abused or misused in any way. Your statutory rights are not affected. If the appliance is claimed under warranty, state where and when it was purchased and include proof of purchase (e.g. receipt).
In line with our policy of continuous product development we reserve the right to change the product, packaging and documentation specifications without notice.
Discarding & Environment
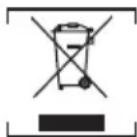
When decommissioning the appliance, the product must not be disposed of with other household waste. Instead, it is your responsibility to dispose to your waste equipment by handing it over to a designated collection point. Failure to follow this
rule may be penalized in accordance with applicable regulations on waste disposal. The separate collection and recycling of your waste equipment at the time of disposal will help conserve natural resources and ensure that it is recycled in a manner that protects human health and the environment.
For more information about where you can drop off your waste for recycling, please contact your local waste collection company. The manufacturers and importers do not take responsibility for recycling, treatment and ecological disposal, either directly or through a public system.
DEUTSCH
DE
Reserveonderdelen of accessoires
Uruchomić program samooczyszczania
HENDI Romania S.R.L.
39100 Bolzano (BZ), Italy
Tel: +39 800 727 438
Email: office.italy@hendi.eu
HENDI HK Ltd.
1201, 12/F Exchange Tower
33 Wang Chiu Road, Kowloon Bay, Hong Kong
Tel: +852 2154 2618
Email: info-hk@hendi.eu
Find HENDI on internet:
www.hendi.com
www.facebook.com/HendiToolsforChefs
https://www.linkedin.com/company/hendi-tools-for-chefs/
www.youtube.com/HendiEquipment
GB: Changes, printing and typesetting errors reserved.