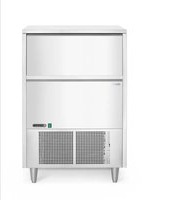
271360 - Ice Maker Arktic - Free user manual and instructions
Find the device manual for free 271360 Arktic in PDF.


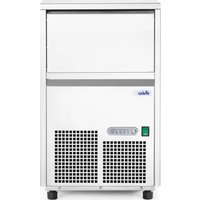
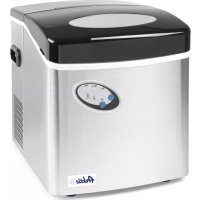
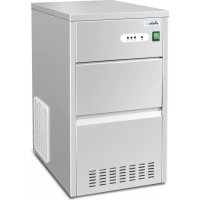
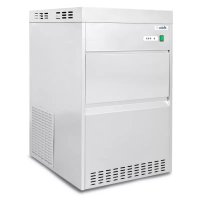
| Product type | Flake ice machine |
| Brand | Arktic |
| Model | 271360 |
| Usage | Indoor only, domestic and light professional use |
| Refrigerant | R290 (flammable, environmentally friendly) |
| Protection class | I (earthing mandatory) |
| Water supply pressure | 0.15 - 0.5 MPa |
| Ventilation clearance | Minimum 20 cm around the appliance |
| Functions | Continuous flake ice production, automatic stop when bin is full, water shortage detection, automatic cleaning cycle |
| LED indicators | Power, cleaning, fault, bin full, low water level |
| Automatic cleaning | 30-minute cycle with special cleaning liquid |
| Maintenance | Clean condenser every 2-3 months, regular cleaning of nozzles and filter |
| Warranty | 1 year |
| Supplied accessories | Water filter set, hoses, ice scoop, key, connectors |
| Safety | Automatic stop in case of fault, compressor protection (restart after 5 min), earthing, keep out of reach of children |
Frequently Asked Questions - 271360 Arktic
User questions about 271360 Arktic
0 question about this device. Answer the ones you know or ask your own.
Ask a new question about this device
Download the instructions for your Ice Maker in PDF format for free! Find your manual 271360 - Arktic and take your electronic device back in hand. On this page are published all the documents necessary for the use of your device. 271360 by Arktic.
USER MANUAL 271360 Arktic
GB: Read user manual and keep this with the appliance.
GB: For indoor use only.
natural_image
Simple line drawing of a wine glass with a fork (no text or symbols)

GB: NOTE: This manual is translated from original English manual using AI and machine translations.
2
3
4
5
natural_image
Technical line drawing of a mechanical assembly with internal components and a directional arrow (no text or symbols)6
natural_image
Technical line drawing of a mechanical assembly inside a circular frame (no text or symbols)7
natural_image
Isometric line drawing of a mechanical assembly with multiple components and directional arrows (no text or symbols)8
natural_image
Technical line drawings of two views of an internal appliance or enclosure, showing internal components and mounting features (no text or symbols present)271353 271360
91
natural_image
Technical line drawing of a mechanical component with an inset close-up showing internal components (no text or symbols)GB: Technical specifications / DE: Technische Angaben / NL: Technische gegevens / PL: Dane techniczne / FR: Données techniques / IT: Parametri di base / RO: Parametrii de bază / GR: Bašukéç paráµetpoi / HR: Tehnički podaci / CZ: Technická specifikace / HU: Můszaki adatok / UA: Texníční характеристики / EE: Tehnilised andmed / LV: Tehniskās specifikācijas / LT: Techninės specifikacijos / PT: Especificações técnicas / ES: Especificaciones técnicas / SK: Technické špecifikácie / DK: Tekniske specifikationer / FI: Tekniset tiedot / NO: Tekniske spesifikasjoner / SI: Tehnične specifikacije / SE: Tekniska specifikationer / BG: Texнически спецификации / RU: Texнические данные
| A 27 | 1353 271360 | |
| B 220-240V ~ 50Hz / 220-240B ~ 50Гц | ||
| C 260W / Вт 900W / Вт | ||
| D | I | |
| E 2A | 3.5A | |
| F R290 / 45g R290 / 116g | ||
| G N T | ||
| H < 60 dB (A) | ||
| I | 22 kg/кг / 24hr/час | 80 kg/кг / 24hr/час |
| J | 6 kg/кг | 45 kg/кг |
| K | 0.15 - 0.5 MPa | |
| L | Cyclopentane | |
| M | 380x520x(H)637mm/мм | 730x600x(H)1136mm/мм |
| N | 33kg/кг | 70kg/кг |
A: GB: Item no. / DE: Art.-Nr. / NL: Artikelnr. / PL: Nr pozycji / FR: N° d'article / IT: N. articolo / RO: Nr. articolului/ GR: Ap. ειδους / HR: Broj stavke / CZ: Položka č. / HU: Cikkszám / UA: Номер елемента / EE: Artikli nr / LV: Vienums Nr. / LT: Prekės Nr. / PT: Item n.o / ES: N.o de artículo / SK: Č. položky / DK: Varenr. / Fl: Kohteen nro / NO: Varenr. / Sl: Št. izdelka / SE: Art.nr / BG: Номер на елемент / RU: Номер позиции
B: GB: Rated voltage and frequency / DE: Nennspannung und Frequenz / NL: Nominale spanning en frequentie / PL: Znamionowe napięcie i częstotliwość / FR: Tension et fréquence nominales / IT: Tensione e frequenza nominali / RO: Tensiune nominală și frecvență / GR: Ovojootikn táon kai ouxvótnta / HR: Nazivni napon i frekvencija / CZ: Jmenovité napětí a frekvence / HU: Névleges feszültség és frekvencia / UA: Номінальна напруга та частота / EE: Nimipinge ja -sagedus / LV: Nominālais spriegums un frekvence / LT: Vardinė įtampa ir dažnis / PT: Tensão e frequência nominais / ES: Tensión y frecuencia nominales / SK: Menovité napätie a frekvencia / DK: Nominel spænding og frekvens / FI: Nimellisjännite ja -taajuus / NO: Nominell spenning og frekvens / SI: Nazivna napetost in frekvenca / SE: Märkspänning och frekvens / BG: Номинално напрежение и честота / RU: Номинальное напряжение и частота
C: GB: Rated input power / DE: Nenneingangsleistung / NL: Nominaal ingangsvermogen / PL: Znamionowa moc wejściowa / FR: Puissance d'entrée nominale / IT: Potenza nominale in ingresso / RO: Putere nominală de intrare / GR: Ovopastikn ioxuç eiuóbou / HR: Nazivna ulazna snaga / CZ: Jmenovitý vstupní výkon / HU: Névleges bemeneti teljesítmény / UA: Номінальна вхідна потужність / EE: Nimisisendvõimsus / LV: Nominālā ieejas jauda / LT: Vardinė jėjimo galia / PT: Potência de entrada nominal / ES: Potencia de entrada nominal / SK: Menovitý vstupný výkon / DK: Nominel indgangseffekt / FI: Nimellistuloteho / NO: Nominell inngangseffekt / SI: Nazivna vhodna moč / SE: Märkineffekt / BG: Номинална входяща мощност / RU: Номинальная входная мощность
D: GB: Protection class (Class) / DE: Schutzklasse (Klasse) / NL: Beschermingsklasse (klasse) / PL: Klasa ochrony (klasa) / FR: Classe de protection (classe) / IT: Classe di protezione (classe) / RO: Clasă de protecție (clasă) / GR: Kláðn proostaciąs (katnyopia) / HR: Klasa zaštite (klasa) / CZ: Třída ochrany (třída) / HU: Védelmi osztály (osztály) / UA: Клас захисту (klac) / EE: Kaitseklass (klass) / LV: Aizsardzības klase (klase) / LT: Apsaugos klasė (klasė) / PT: Classe de proteção (classe) / ES: Clase de protección (clase) / SK: Trieda ochrany (trieda) / DK: Beskyttelsesklasse (klasse) / FI: Suojausluokka (luokka) / NO: Beskyttelsesklasse (klasse) / SI: Razred zaščite (razred) / SE: Skyddsklass (klass) / BG: Клас на защита (Klac) / RU: Класс защиты (класс)
E: GB: Rated Current / DE: Nennstrom / NL: Nominale stroom / PL: Prąd znamionowy / FR: Courant nominal / IT: Corrente nominale / RO: Curent nominal / GR: Ovojaotikń évtaan peújatoç / HR: Nazivna struja / CZ: Jmenovitý proud / HU: Névleges áramerősség / UA: Номінальний струм / EE: Hinnatud praegune / LV: Nominālā strāva / LT: Vardinė srove / PT: Corrente nominal / ES: Corriente nominal / SK: Menovitý prúd / DK: Vurderet aktuel / FI: Nimellisvirta / NO: Nominell strøm / SI: Nazivni tok / SE: Nominell ström / BG: Номинален ток / RU: Номинальный ток
F: GB: Refrigerant used and injection quantity / DE: Verwendetes Kühlmittel und Injektionsmenge / NL: Gebruikte koelmiddel en hoeveelheid / PL: Czynnik chłodniczy i jego ilość / FR: Réfrigérant utilisé et quantité à injecter / IT:Refrigerante utilizzato e quantità di iniezione / RO: Agent frigorific utilizat și cantitate de injecție / GR: Ψυκτικό μέσο που χρησμποποείται και ποσότητα ένεσης / HR: Korišteno rashladno sredstvo i količina ubrizgavanja / CZ: Použité chladivo a množství vstřiku / HU: Felhasznált hűtőközeg és befecskendezési mennyiség / UA: Використовуваний холодоагент і кількість впорскування / EE: Kasutatud külmutusagens ja injektsiooni kogus / LV: Izmantota dzesējoša viela un iesmidzināšanas daudzums / LT: Panaudotas šaltnešis ir jpurškimo kiekis / PT: Refrigerante utilizado e quantidade de injeção / ES: Refrigerante utilizado y cantidad de inyección / SK: Použité chladiace médium a množstvo injekcie / DK: Anvendt kølemiddel og injektionsmængde / FI: Käytetty kylmäaine ja injektiomäärä / NO: Kjølemiddel brukt og injeksjonsmengde / SI: Uporabljeno hladilno sredstvo in količina injekcije / SE: Köldmedium som används och injektionsmängd / BG: Използван хладилен агент и количество на инжектиране / U: Используемый хладагент и количество впрыска
G: GB: Climate class / DE: Klimaklasse / NL: Klimaatklasse / PL: Klasa klimatyczna / FR: Classe climatique / IT: Classe climatica / RO: Clasă climatică / GR: Kliumatikn klăon / HR: Klimatska klasa / CZ: Klimatická třída / HU: Klímaosztály / UA: Klímatichniй клас / EE: Kliimaklass / LV: Klimata klase / LT: Klimato klasé / PT: Classe climática / ES: Clase climática / SK: Klimatická trieda / DK: Klimaklasse / FI: Ilmastoluokka / NO: Klimaklasse / SI: Podnební razred / SE: Klimatklass / BG: Климатичен клас / RU: Климатический класс
H: GB:Noise level (approx. dB(A)) / DE:Rauschpegel (ca. dB(A)) / NL:Geluidsniveau (ca. dB(A)) / PL:Poziom hatasu (ok. dB(A)) / FR: Niveau sonore (environ dB(A)) / IT:Livello di rumore (circa dB(A)) / RO:Nivel zgomot (aprox. dB(A)) / GR:Eninéðo őorúßou (něpinou dB(A)) / HR:Razina šuma (približno dB(A)) / CZ:Hluková hladina (přibližně dB(A)) / HU:Zajszint (kb. dB(A)) / UA:pívěny shumy (pribl. dB(A)) / EE:Müratase (ligikaudu dB(A)) / LV:trokšna līmenis (aptuveni dB(A)) / LT:triukšmo lygis (maždaug dB(A)) / PT:Nivel de ruído (aprox. dB(A)) / ES:Nivel de ruido (aprox. dB(A)) / SK:Hladina hluku (približne dB(A)) / DK:Stojniveau (ca. dB(A)) / FI:melutaso (noin dB(A))/ NO:Støynivå (ca. dB(A)) / SI: Raven hrupa (pribl. dB(A)) / SE:Ljudnivå (ca dB(A)) / BG: Ниво на шума (pribliz. dB(A)) / RU:Уровень шума (pribl. ob./мин.)
I: GB: Ice making capacity / DE: Kapazität zur Eisherstellung / NL: Capaciteit voor het maken van ijs / PL: Zdolność wytwarzania lodu / FR: Capacité de fabrication de glace / IT: Capacità di produzione del ghiaccio / RO: Capacitate de producere a gheții / GR: Хørntikótna paraywnç náyou / HR: Kapacitet za stvaranje leda / CZ: Kapacita na výrobu ledu / HU: Jégkészítési kapacitás / UA: Потужність виробництва льоду / EE: Jää valmistamise võimsus / LV: Ledus ražošanas jauda / LT: Ledo gamybos pajėgumai / PT: Capacidade de produção de gelo / ES: Capacidad de fabricación de hielo / SK: Kapacita výroby ľadu / DK: Kapacitet til is - fremstilling / FI: Jääntekokyky / NO: Kapasitet for isdannelse / SI: Zmogljivost izdelave ledu / SE: Kapacitet för istillverkning / BG: Капацитет за производство на led / RU: Производительность льда
J: GB: Ice tank storage / DE: Lagerung des Eistanks / NL: Opslag ijstank / PL: Przechowywanie zbiornika na lód / FR: Stockage des réservoirs à glace / IT: Stoccaggio del serbatoio del ghiaccio / RO: Depozitarea rezervorului pentru gheata / GR: Anothkouon deξαμενής náyou / HR: Skladištenje spremnika leda / CZ: Skladování nádrže na led / HU: Jégtartály tárolása / UA: Зберігання льодогенератора / EE: Jääpaagi hoiustamine / LV: Ledus tvertnes uzglabāšana / LT: Ledo bako laikymas / PT: Armazenamento do depósito de gelo / ES: Almacenamiento del depósito de hielo / SK: Skladovanie nádrže na lad / DK: Opbevaring af istank / FI: Jääsäiliön säilytys / NO: Oppbevaring av istank / SI: Shranjevanje posode za led / SE: Förvaring av istank / BG: Съхранение на резервоара за лед / RU: Хранение ледяного бака
K: GB: Water supply pressure range / DE: Druckbereich der Wasserversorgung / NL: Drukbereik watertoevoer / PL: Zakres ciśnienia zasilania wodą / FR: Plage de pression d'alimentation en eau / IT: Intervallo di pressione di alimentazione dell'acqua / RO: Interval presiune alimentare cu apă / GR: Eúroc níeònç napońc vépoù / HR: Raspon tlaka dovoda vode / CZ: Rozsah tlaku přívodu vody / HU: Vízellátás nyomástartománya / UA: Diapazon ticsky podачі води / EE: Veevarustuse rôhuvahemik / LV: Üdens padeves spiediena diapazons / LT: Vandens tiekimo slégio diapazonas / PT: Intervalo de pressão de fornecimento de água / ES: Rango de presión de suministro de agua / SK: Rozsah tlaku prívodu vody / DK: Trykområde for vandforsyning / FI: Vedensyötön painealue / NO: Trykkområde for vannforsyning / SI: Razpon tlaka dovoda vode / SE: Tryckområde för vattentillförsel / BG: Diapazon na naлягането на водоснабдяването / RU: Diapazon давления podачи воды
L: GB: Foam blowing agent (Cyclopentane) / DE: Schaumtreibmittel (Cyclopentan) / NL: Schuimblaasmiddel (Cyclopentane) / PL: Piankowy środek wd muchujący (Cyklopentan) / FR: Agent de gonflement de mousse (Cyclopentane) / IT: Agente espandente in schiuma (Cicloopentano) / RO: Agent de suflare cu spumä (Ciclopentan) / GR: Αφρώδες διογκωτικό μέσο (Κυκλοπεντανίου) / HR: Sredstvo za puhanje pjene (Ciklopentan) / CZ: Pěnové nadouvadlo (Cyklopentan) / HU: Habfúvó szer (Ciklopentán) / UA: Піноутворювальна речовина (Циклопентан) / EE: Vahupuhuv aine (Tsüklopentaan) / LV: Putu veidošanas līdzeklis (Ciklopentāns) / LT: Putu pūtimo medžiaga (Ciklopentanas) / PT: Agente de expansão de espuma (Ciclopentano) / ES: Agente espumante (Ciclo-pentano) / SK: Penové nadúvadlo (Cyklopentán) / DK: Skumblæsermiddel (Cyklopentan) / FI: Vaahtoa puhaltava aine (Syklopentaani) / NO: Skumblåsemiddel (Syklopentan) / SI: Penasto pihalno sredstvo (Ciklopentan) / SE: Skumblåsare (Cyklopentan) / BG: Издухваш агент на пяна (Циклопентан) / RU: Вспениватель (Циклопентан)
M: GB: Dimensions / DE: Abmessungen / NL: Afmetingen / PL: Wymiary / FR: Dimensions / IT: Dimensioni / RO: Dimensiuni / GR: Διαστάσεις / HR: Dimenzije / CZ: Rozměry / HU: Méretek / UA: Rozměry / EE: Möötmed / LV: Izměry / LT: Matmenys / PT: Dimensões / ES: Dimensiones / SK: Rozměry / DK: Mål / FI: Mitat / NO: Mål / SI: Mere / SE: Mått / BG: Размерi / RU: Размерi
N: GB: Net weight / DE: Nettogewicht / NL: Nettogewicht / PL: Waga netto / FR: Poids net / IT: Peso netto / RO: Greutate netă / GR: Košrapo Bápoç / HR: Neto težina / CZ: Čistá hmotnost / HU: Nettó tömeg / UA: Bara netto / EE: Netokaal / LV: Neto svars / LT: Grynasis svoris / PT: Peso líquido / ES: Peso neto / SK: Čistá hmotnost / DK: Nettovægt / FI: Nettopaino / NO: Nettovekt / SI: Neto teža / SE: Nettovikt / BG: Нетно тегло / RU: Вес нетто
GB: Remark: Technical specification is subjected to change without prior notification.
DE: Anmerkung: Die technische Spezifikation kann ohne vorherige Ankündigung geändert werden.
NL: Opmerking: De technische specificatie zijn onderworpen aan wijzigingen zonder voorafgaande kennisgeving.
PL: Uwaga: Specyfikacja techniczna może zostać zmieniona bez powiadomienia.
FR: Remarque: La spécification technique peut être modifiée sans notification préalable.
IT: Osservazione: Le specifiche tecniche sono soggette a modifiche senza preavviso.
RO: Observatie: Specificația tehnica se poate modifica fără notificare prealabilă.
GR: Σημείωση: Οι τεχνικές προδιαγραφές μπορούν να αλλάξουν χωρίς προειδοποίηση.
HR: Napomena: Tehničke specifikacije podložne su promjenama bez prethodne obavijesti.
CZ: Poznámka: Technická specifikace se může změnit bez předchozího upozornění.
HU: Megjegyzés: A műszaki adatok előzetes értesítés nélkül változhatnak.
UA: Зауваження: Технічні характеристики можуть змінюватися без попереднього повідомлення.
EE: Märkus: Tehnilisi andmeid võidakse muuta ilma eelneva teavitamiseta.
LV: Piezīme: Tehniskās specifikācijas var tikt mainītas bez iepriekšēja brīdinājuma.
LT: Pastaba: Techninė specifikacija gali būti keičiama be išankstinio įspėjimo.
PT: Observação: As especificações técnicas estão sujeitas a alterações sem notificação prévia.
ES: Observación: Las especificaciones técnicas están sujetas a cambios sin previo aviso.
SK: Poznámka: Technické špecifikácie podliehajú zmenám bez predchádzajúceho oznámenia.
DK: Bemærkning: Tekniske specifikationer kan ændres uden forudgående varsel.
FI: Huomautus: Teknisiä tietoja voidaan muuttaa ilman ennakkoilmoitusta.
NO: Merknad: Teknisk spesifikasjon kan endres uten forhåndsvarsel.
SI: Opomba: Tehnične specifikacije se lahko spremenijo brez predhodnega obvestila.
SE: Anmärkning: Tekniska specifikationer kan ändras utan föregående meddelande.
BG: Забележка: Техническите спецификации подлежат на промяна без предварително уведомление.
RU: Примечание. Технические характеристики могут быть изменены без предварительного уведомления.
Dear Customer,
Thank you for purchasing this Arktic appliance. Read this user manual carefully, paying particular attention to the safety regulations outlined below, before installing and using this appliance for the first time.
Safety instructions
- Only use the appliance for the intended purpose it was designed for, as described in this manual.
- The manufacturer is not liable for any damage caused by incorrect operation and improper use.
- DANGER! RISK OF ELECTRIC SHOCK! Do not attempt to repair the appliance by yourself. Do not immerse the electrical parts of the appliance in water or other liquids. Never hold the appliance under running water.
- NEVER USE A DAMAGED APPLIANCE! Check the electrical connections and cord regularly for any damage. When damaged, disconnect the appliance from the power supply. Any repairs should only be carried out by a supplier or qualified person to avoid danger or injury.
- WARNING! When positioning the appliance, route the power cable safely if necessary to avoid unintentional pulling, being damaged, coming into contact with the heating surface, or causing a tripping hazard.
- WARNING! As long as the plug is in the socket the appliance is connected to the power supply.
- WARNING! ALWAYS switch off the appliance before disconnecting from the power supply, cleaning, maintenance or storage.
- Only connect the appliance to an electrical outlet with the voltage and frequency mentioned on the appliance label.
- Do not touch the plug/electrical connections with wet or damp hands.
- Keep the appliance and electrical plug/connections away from water and other liquids. If the appliance falls into water, remove the power supply connections immediately. Do not use the appliance until it has been checked by a certified technician. Failure to follow these instructions will cause life threatening risks.
- Connect the power supply into an easily accessible electrical outlet so you can disconnect the appliance immediately in case of emergency.
- Make sure the cord does not come in contact with sharp or hot objects and keep it away from open fire. Never pull the power cord to unplug it from the socket, always pull the plug instead.
- Never carry the appliance by its cord.
- Never try to open the housing of the appliance yourself.
- Do not insert objects into the housing of the appliance.
- Never leave the appliance unattended during use.
- This appliance should be operated by trained personnel in kitchen of the restaurant, canteens or bar staff, etc.
- This appliance should not be operated by persons with reduced physical, sensory or mental capabilities, or persons that have a lack of experience and knowledge.
- This appliance should, under any circumstances, not be used by children.
- Keep the appliance and its electrical connections out of reach of children.
- Never use accessories or any extra devices other than those supplied with the appliance or recommended by the manufacturer. Failure to do so could pose a safety risk to the user and could damage the appliance. Only use original parts and accessories.
- Do not operate this appliance by means of an external timer or remote-control system.
- Do not place the appliance on a heating object (gasoline, electric, charcoal cooker, etc.).
- Do not cover the appliance in operation.
- Do not place any objects on top of the appliance.
- Do not use the appliance near any open flames, explosive or flammable materials. Always operate the appliance on a horizontal, stable, clean, heat-resistant and dry surface.
- The appliance is not suitable for installation in an area where a water jet could be used.
- Leave a space of at least 20 cm around the appliance for ventilation during use.
- WARNING! Keep all ventilation openings on the appliance free from obstruction.
Special safety instructions
• This appliance is intended for buffet and household use.
- If the supply cord is damaged, it must be replaced by the manufacturer, its service agent or similarly qualified persons in order to avoid a hazard.
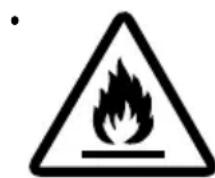
CAUTION! RISK OF FIRE! The refrigerant used is R290. It is a flammable refrigerant which is environmentally friendly. Although it is flammable, it does not damage the ozone layer and does not increase the greenhouse effect. The use of this coolant has, however, led to a slight increase in the noise level of the appliance. In addition to the noise of the compressor, you might be able to hear the coolant flowing around the system. This is unavoidable, and does not have any adverse effect on the performance of the appliance. Care must be taken during the transportation and setting up of the appliance that no parts of the cooling system are damaged. Leaking coolant can damage the eyes.
- CAUTION! RISK OF BURNS! Refrigerant liquid sprayed on the skin can cause critical burns. Keep eyes and skin protected. If refrigerant burns occur, rinse immediately with cold water. In case burns are severe, apply ice and contact medical treatment immediately.
- WARNING! Provide sufficient ventilation in the surrounding structure when building-in. Never block the air flow suction and air outlet in order to keep air circulation.
- WARNING! Do not damage the refrigerant circuit.
- WARNING! Do not use electrical appliances inside the food storage compartments of the appliance, unless they are of the type recommended by the manufacturer.
- Do not place any dangerous products, such as fuel, alcohol, paint, aerosol cans with a flammable propellant, flammable or explosive substances, etc. inside or near the appliance.
- Once installed, the appliance must not be tilted at an angle greater than 5^ and it is necessary to wait 2h before connecting it to the power supply to switch it on. The same applies if the appliance is moved afterwards.
- If the appliance has been switched off or disconnected from the power supply, it is necessary to wait 5 minutes until
switching on again.
- No other appliances should be plugged into the same socket as with this appliance.
- The foam blowing agent used is Cyclopentane in this appliance. It is highly flammable.
- WARNING! Connect to potable water supply only.
Intended use
- This appliance is intended to be used in household and similar applications such as:
- staff kitchen areas in shops, offices and others working environment;
- farm houses;
- by clients in hotels, motels and other residential type environment;
- bed and breakfast type environment.
- The appliance is designed for making flake ice continuously. Any other use may lead to damage of the appliance or personal injury.
- Operating the appliance for any other purpose shall be deemed a misuse of the device. The user shall be solely liable for improper use of the device.
Grounding installation
This appliance is classified as protection class I and must be connected to a protective ground. Grounding reduces the risk of electric shock by providing an escape wire for the electric current.
This appliance is fitted with a power cord with grounding plug or electrical connections with grounding wire. The connections must be properly installed and grounded.
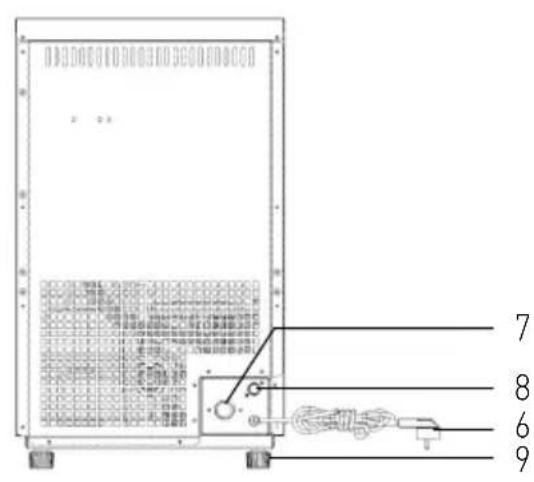
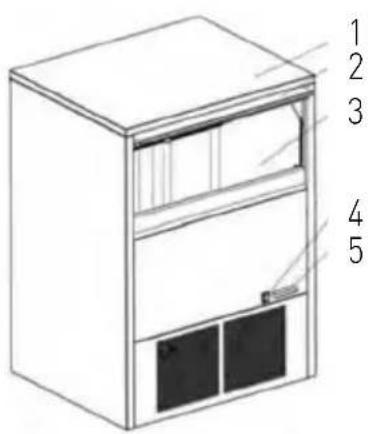
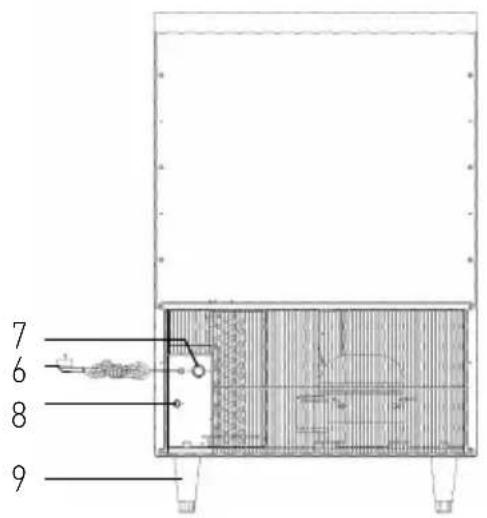
Main parts of the product
(Fig.1 on page 3)
- Top late
- Door
- Ice Storage Bin
- Power switch
- Display panel
- Power cord
- Water inlet valve
- Drainage tube
- Feet
Remark: The content of this manual applies for all listed items unless specified otherwise. The appearance may vary from the shown illustrations.
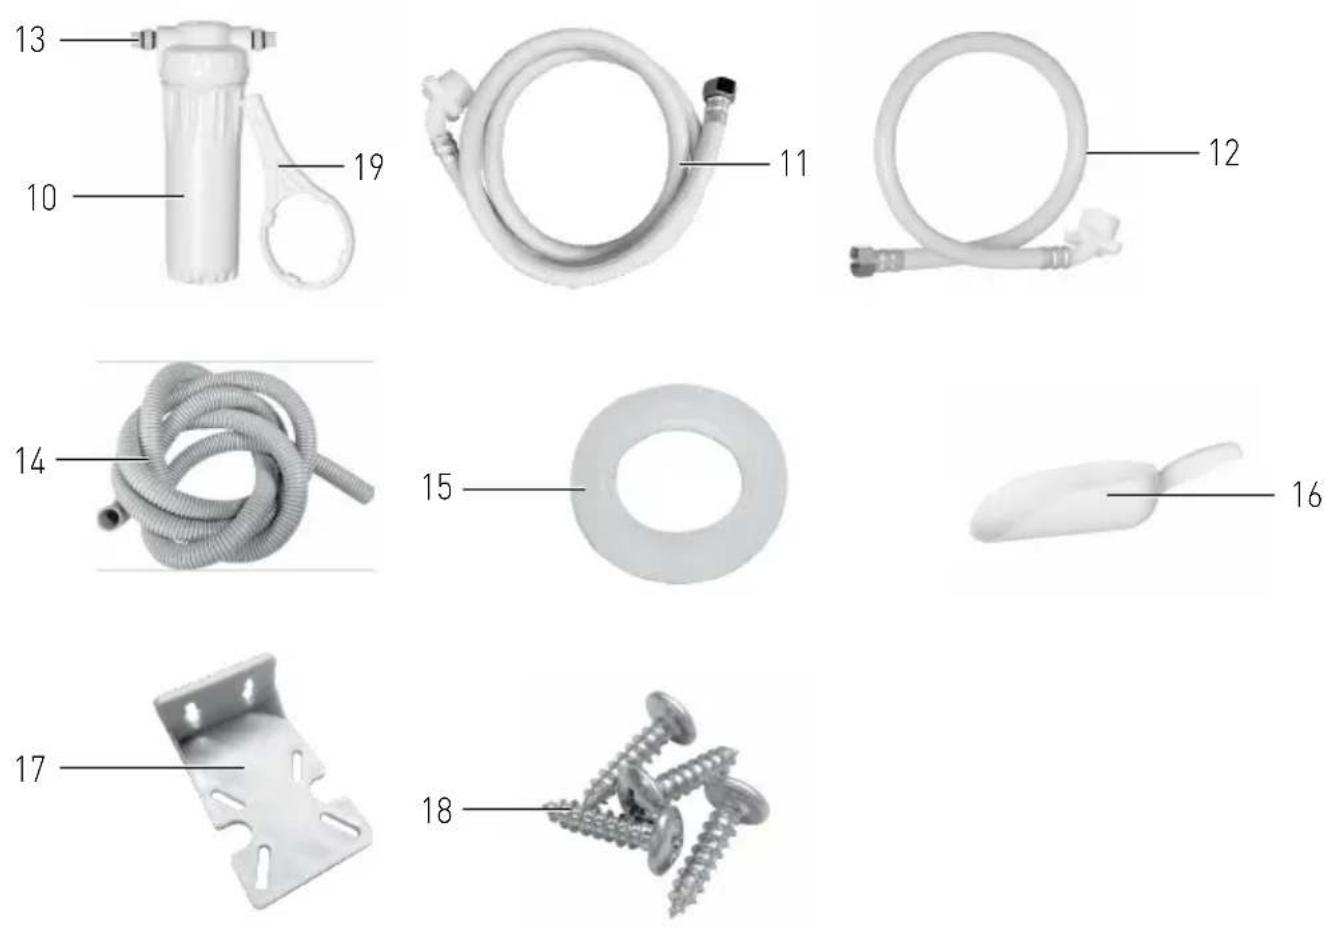
Spare parts or accessories
(Fig.2 on page 4)
- Water filter assembly
- Water filter inlet hose 1.5m long
- Water filter outlet hose 0.7m long
- Filter connector x 2
- Water drainage hose
- Spare hose sealing washer x 2
- Ice scoop
- Filter holder
- Screws x 4 for mounting filter assembly to filter holder
- Wrench
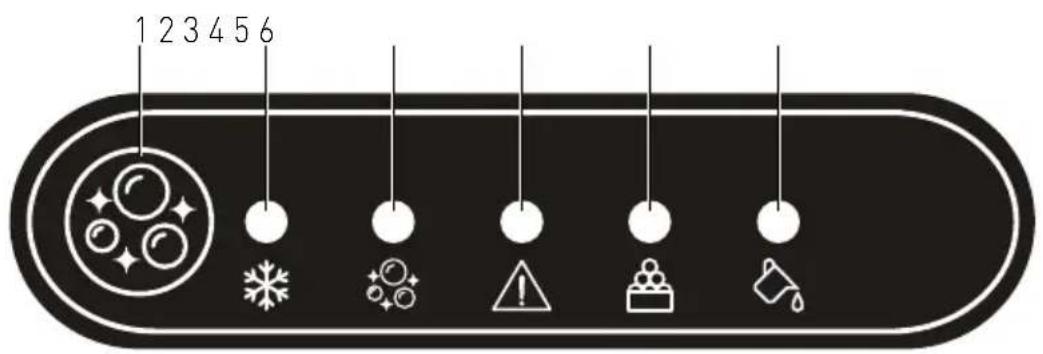
Control panel
(Fig.3 on page 4)
- CLEAN button to start cleaning process. Press it for 3s to enter into clean mode
- Running indicator
- Cleaning in progress indicator
-
Fault indicator
a. when the fault light flashes once regularly, the condenser is faulty
b. when the fault light flashes twice regularly, the evaporator sensor is faulty
c. when the fault light flashes three times regularly, the ice full sensor is faulty
d. when the fault light is continuously on, it turns out water shortage and deicing failure l -
Ice full indicator
-
Water level is tool low indicator
Preparation before use
- Remove all protective packaging and wrapping.
- Check that the device is in good condition and with all accessories. In case of incomplete or damaged delivery, please contact the supplier immediately. In this case, do not use the device.
- Clean the accessories and the appliance before use (See ==> Cleaning & Maintenance).
• Make sure the appliance is completely dry. - Place the appliance on a horizontal, stable and heat resistant surface that is safe against water splashes.
- Keep the packaging if you intend to store your appliance in the future.
- Keep the user manual for future reference.
NOTE! Due to manufacturing residues, the appliance may emit a light odor during the first few uses. This is normal and does not indicate any defect or hazard. Make sure the appliance is well ventilated.
Installation
ATTENTION: Any installation, maintenance and repair work should be performed by qualified and authorized technician only.
- Check to make sure that the appliance is undamaged or complete delivery. In case of any damage or incomplete delivery, DO NOT use the appliance and contact the supplier immediately.
- Check that the accessories are included.
- Remove all packing material and protective film (if applicable).
- Place the appliance on a level, steady and safe surface which can supports the weight of the appliance together with the flake ice produced during use.
- Avoid expose to direct sunlight or direct source of heat such as cooker, heat oven, etc.
- Make sure that a minimum of 20 cm distance is kept around all sides of the appliance for ventilation purposes.
- Place the appliance in such a way that the plug is easily accessible and can be quickly removed from its socket in case of necessity.
- Set up the appliance near water supply connection.
Assemble water filter assembly
- Open the cover of the water filter assembly. Take out the filter element and remove the plastic film. Put back the filter element.
- Screw the filter connectors to both ends of the water filter assembly
- Assemble filter assembly to filter holder by using 4 screws. Tighten the filter by using wrench
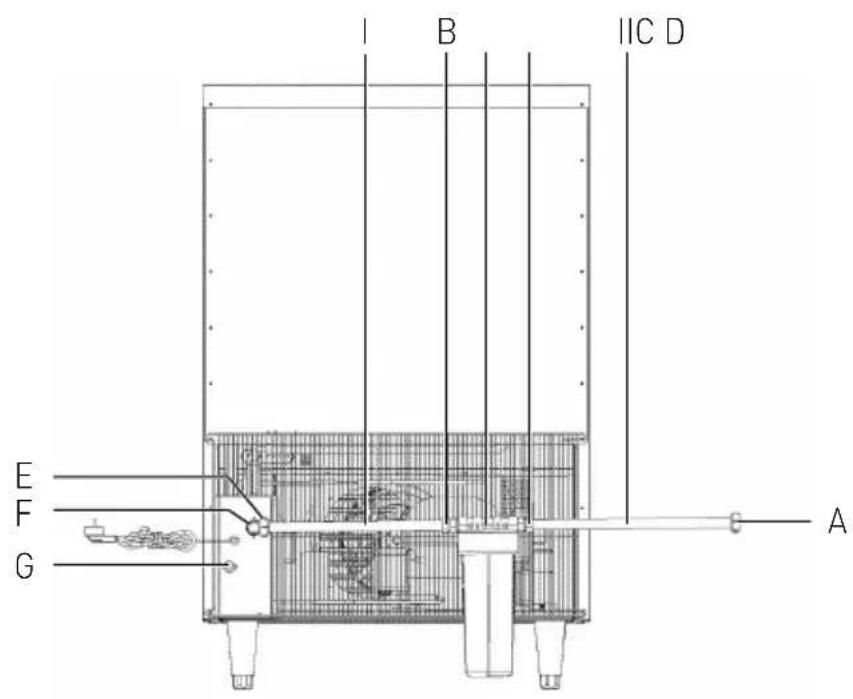
Install the water inlet system
(Fig 4 on page 5)
A. Hose connector diameter 3/4"
B. Hose connector diameter 1/2"
C. Water filter assembly
D. Hose connector diameter 1/2"
E. Hose connector diameter 3/4"
F. Water inlet valve diameter 3/4"
G. Drain valve. The height of the sewage outlet must be lower than the machine
I. Water filter inlet hose 1.5m long, part 11
II. Water filter inlet hose 0.7m long, part 12
- Connect A, B, C, D, E, F, I, II in sequence
- Connect Water drainage hose to drain valve. The height of the sewage outlet must be situated lower than the appliance, so that water can flow.
Note: The inlet water supply pressure range: 0.15 - 0.5 MPa. Pressure reducer should be installed if the pressure over this range.
Operating instructions
- Before first use, clean the appliance interior and exterior surface with lukewarm water and a soft cloth.
- Position the appliance in a well-ventilated place, leaving at least 150 mm gap around all sides for ventilation purposes.
- Let the appliance stand alone for about one hour in order to settle the refrigerant. Make sure connect properly with the water supply system.
- Then, plug in to a suitable socket.
- Press down the ON/OFF switch on the control panel in order start up.
- Press and hold the cleaning button 2 seconds to start cleaning. This time, the "CLEAN" indicator will flash, water pump turn on and clean for 30 minutes. After finish, the "CLEAN" light will go off.
- Turn off the appliance and re-start the appliance again to start to use.
- Also, the ON / OFF switch lights up in green. The appliance starts to operate.
- The ice making process is completely automatic, it consists of several stages as below:
Water inlet ==> ice production ==> ejection of ice ==> storage of ice.
Then, push the slide door and use ice scoop to take out the ice. - When the ice storage container is full, the "Storage tank is full" indicator will light up in red and the appliance will stop operation automatically.
- Once the ice have been removed, the appliance continue production of ice automatically.
- Note: For sanitary reasons, you should dispose of the flake ice produced in the first cycle for every use. Do not use them
for beverages or cooling food.
- If the water supply is insufficient, the "Water level is too low" indicator will light up in red and the appliance will stop operate automatically. Check the water supply (hose) connected to the appliance.
- If any error or failure occur, the "Display of fault" indicator will light up in red and the appliance will stop operation automatically.
- Switch OFF the appliance by pressing down the ON / OFF switch and unplug it from the electrical supply when not in use.
Notes:
- DO NOT switch ON again the appliance immediately after shut down automatically (caused by insufficient water supply, flake ice container too full, current interruption). Wait at least 3 \~ 5 minutes in order to avoid damages to the compressor.
- Check the connectors of the water inlet and outlet hose regularly for the leakage or overflow of water that may be present.
- If the appliance is not used for a long period of time, screw off the drainage cover at the rear of the appliance. Wipe dry the water tank using a dry, clean cloth.
Cleaning & maintenance
- ATTENTION! Always disconnect the appliance from the power supply and cool down before storage, cleaning & maintenance.
- Do not use water jet or steam cleaner for cleaning and do not push the appliance under the water as the parts will get wet and electric shock might be resulted.
- If the appliance is not kept in a good state of cleanliness, this can adversely affect the life of the appliance and result in a dangerous situation.
Cleaning
Automatic cleaning
- Fill some ice maker special cleaning fluid into the water box. Power on and press the clean button for 3 seconds to start the cleaning progress. The clean indicator light will flash in the process. Automatic cleaning process will lasts 30 minutes and it cannot be break unless you power off the machine. After finished, drain the water box. Start the automatic cleaning process again without cleaning fluid. If necessary, repeat it one more time to rinse the residual cleaning fluid. Pull out the drainage plug at the bottom of the water box, after water drained away, install it back.
- Clean the cooled exterior surface with a cloth or sponge slightly dampened with a mild soap solution.
- For reasons of hygiene, the appliance should be cleaned before and after use.
- Avoid water contacting the electrical components.
- Clean the inside of container with a non-abrasive detergent and rinse with clean water.
- Never immerse the appliance in water or other liquids.
- Never use aggressive cleaning agents, abrasive sponges, or cleaning agents containing chlorine. Do not use steel wool, metallic utensils, or any sharp or pointed objects for cleaning. Do not use petrol or solvents!
- No parts are dishwasher safe.
- Clean the condenser for every 2-3 months or when the inten-
sity of the water out of spray nozzle is weaken.
Recommended cleaning procedure for the spray water system:
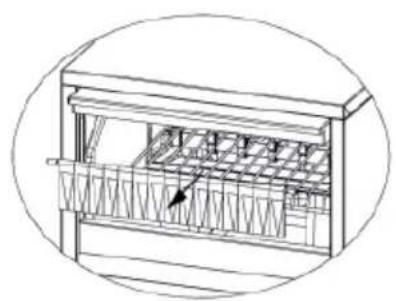
(Fig 5 on page 5)
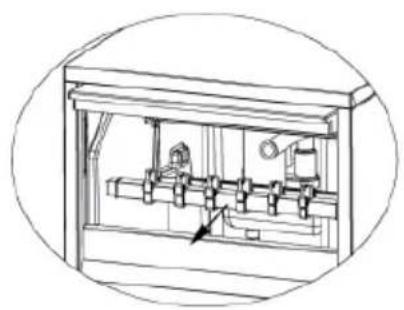
- Remove the block water board.
- Pull out the ice flopping shelf.
(Fig 6 on page 5)
- Take off the spray pipe connection (the silicone tube) then take out the spray pipe.
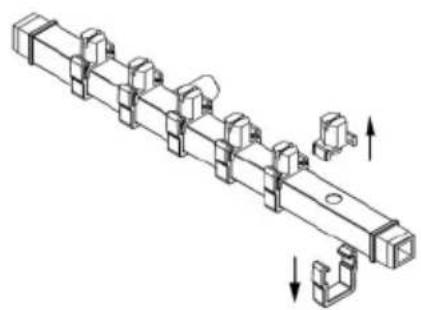
(Fig 7 on page 5)
- Use proper tools to remove the spray nozzles and the nozzle clamps as the direction one by one.
- Use water to clean the spray pipe and the nozzles with a soft brush.
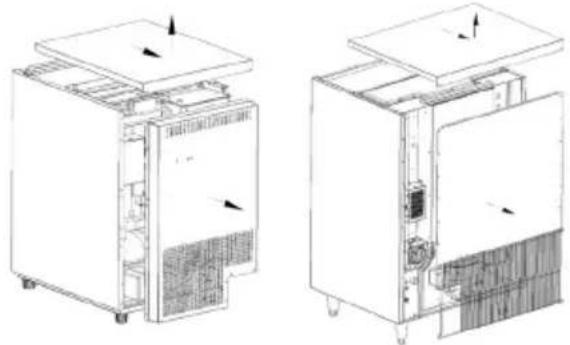
(Fig 8 on page 5)
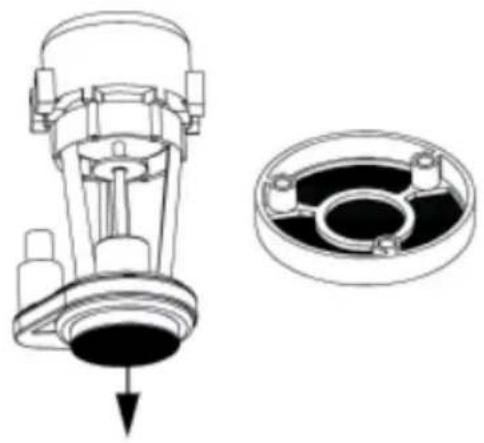
• How to take out the spray pump.
Step 1: Unscrew the related screws on the back of the top plate, then remove the top plate as the direction.
Step 2: The same way to remove the back plate.
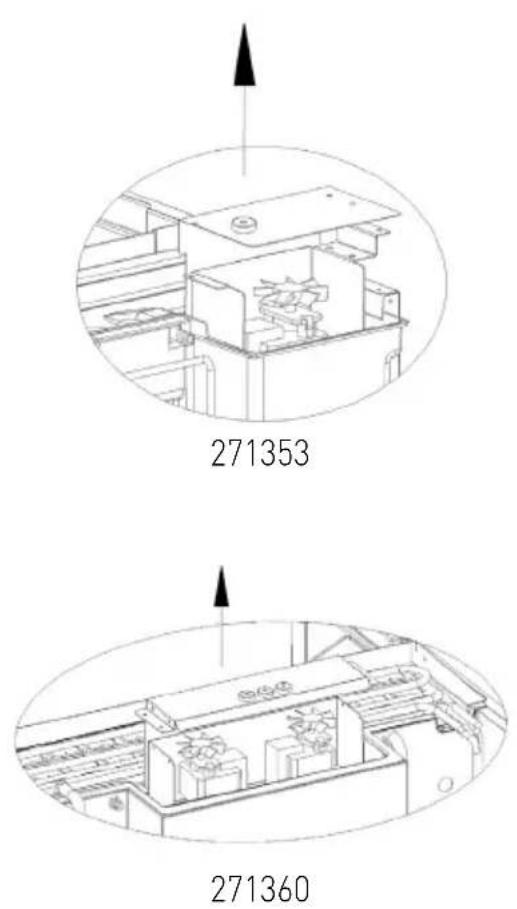
(Fig 9 on page 6)
Step 3: Unplugging the power plug of the spray pump.
Step 4: Unscrew the three screws on the pump cover according to the picture.
Step 5: Pull out the pump components.
(Fig 10 on page 6)
- Pull out the pump filter net as the direction.
- Use water to clean the filter net with a soft brush.
• Finally, install all of the parts back.
Maintenance
- Check the operation of the appliance regularly to prevent serious accidents.
- If you see that the appliance is not working properly or that there is a problem, stop using it, switch it off and contact the supplier.
- All maintenance, installation and repair work must be carried out by specialised and authorised technicians, or recommended by the manufacturer.
- If the compressor stops for any reasons like water shortage, ice full, power off, etc., don't restart it right away. You can restart it 5 minutes later to protect compressor.
- Check regularly the connectors of the water inlet and outlet tubes and drain the little surplus water that may occur.
- If the ice maker will be unused for long periods of time, please pull out the drainage plug at the bottom of the water box so as to drain the surplus water in the water box. Then install it back. Wipe the inner liner of the ice storage container with a clean rag.
- Drainage: Pull out the drainage plug at the bottom of the water box, after the water drained away, install it back.
Transportation and Storage
- Before storage, always make sure that the appliance has been disconnected from the power supply and completely cooled down.
- Store the appliance in a cool, clean and dry place.
- Never place heavy objects on the appliance as this could damage it.
- Do not move the appliance while it is under operation. Disconnect the appliance from power supply when moving and hold it at the bottom.
- Special care must be taken when moving or transporting the machine due to its heavy weight. With at least 2 persons or using a cart. Move the machine slowly, carefully, and never incline more than 45^ .
Troubleshooting
If the appliance does not function properly, please check the below table for the solution. If you are still unable to solve the problem, please contact the supplier/service provider.
| Problem Possible cause Possible solution | ||
| Ice maker does not work. | 1. The voltage is out of the limitation.2. The ambient temperature is too low (lower than 10°C). | 1. Turn off the machine, restart it when the voltage is normal.2. Try again when the ambient temperature is over 10°C. |
| Compressor works, but no ice was made. | 1. Refrigerant leaks.2. Refrigerating system blocks.3. Solenoid valve failure.4. Condensing fan does not work.5. Spray pump blocks or failure. | 1. Refill the refrigerant and test leakage.2. Replace filter for the N_2 filling system.3. Replace the sole-noid valve.4. Replace the condensing fan.5. Check the spray pump and its filter net. |
| Compressor does not work. | 1. Water shortage.2. Ice full.3. Compressor stops (the temperature of shell is too high). | 1. Check the water supply system (water inlet valve and water supply tube).2. Take some ice out.3. Turn off the machine and restart 1 hour later. |
| The indicator of water short-age lights. | 1. Water shortage in water supply system.2. Water inlet valve damaged.3. Tap water pressure too low. | 1. Check and make sure the water supply system is fine, then restart.2. Check the water inlet valve.3. If it is for tap water, the water pressure should not be lower than 0.15 Mpa. |
| The indicator of trouble lights. | 1. There is some ice has not dropped.2. Spray water system blocks or leakage. | 1. Check whether the solenoid valve could be open, if not, replace with a new one.2. Check the spray pump and its filter net, check the spray pipe and its nozzle, check the spray pipe connection. |
Warranty
Any defect affecting the functionality of the appliance which becomes apparent within one year after purchase will be repaired by free repair or replacement provided the appliance has been used and maintained in accordance with the instructions and has not been abused or misused in any way. Your statutory rights are not affected. If the appliance is claimed under warranty, state where and when it was purchased and include proof of purchase (e.g. receipt).
In line with our policy of continuous product development we reserve the right to change the product, packaging and documentation specifications without notice.
Discarding & Environment
When decommissioning the appliance, the product must not be disposed of with other household waste. Instead, it is your responsibility to dispose to your waste equipment by handing it over to a designated collection point. Failure to follow this rule may be penalized in accordance with applicable regulations on waste disposal. The separate collection and recycling of your waste equipment at the time of disposal will help conserve natural resources and ensure that it is recycled in a manner that protects human health and the environment.
For more information about where you can drop off your waste for recycling, please contact your local waste collection company. The manufacturers and importers do not take responsibility for recycling, treatment and ecological disposal, either directly or through a public system.
DEUTSCH
Reserveonderdelen of accessoires
HENDI Romania S.R.L.
39100 Bolzano (BZ), Italy
Tel: +39 800 727 438
Email: office.italy@hendi.eu
HENDI HK Ltd.
1201, 12/F Exchange Tower
33 Wang Chiu Road, Kowloon Bay, Hong Kong
Tel: +852 2154 2618
Email: info-hk@hendi.eu
Find HENDI on internet:
www.hendi.com
www.facebook.com/HendiToolsforChefs
https://www.linkedin.com/company/hendi-tools-for-chefs/
www.youtube.com/HendiEquipment
GB: Changes, printing and typesetting errors reserved.
- Dear Customer,
- Safety instructions
- Special safety instructions
- Intended use
- Grounding installation
- Main parts of the product
- (Fig.1 on page 3)
- Spare parts or accessories
- (Fig.2 on page 4)
- Control panel
- (Fig.3 on page 4)
- Preparation before use
- Installation
- Assemble water filter assembly
- Install the water inlet system
- (Fig 4 on page 5)
- Operating instructions
- Notes:
- Cleaning & maintenance
- Cleaning
- Automatic cleaning
- Recommended cleaning procedure for the spray water system:
- (Fig 5 on page 5)
- (Fig 6 on page 5)
- (Fig 7 on page 5)
- (Fig 8 on page 5)
- (Fig 9 on page 6)
- (Fig 10 on page 6)
- Maintenance
- Transportation and Storage
- Troubleshooting
- Warranty
- Discarding & Environment
- DEUTSCH
- Reserveonderdelen of accessoires
- HENDI Romania S.R.L.
- HENDI HK Ltd.
- Find HENDI on internet:
Brand : Arktic
Model : 271360
Category : Ice Maker