Quantum Pro - Cooker FALMEC - Free user manual and instructions
Find the device manual for free Quantum Pro FALMEC in PDF.
| Brand | Falmec |
| Model | Quantum Pro |
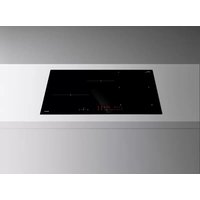
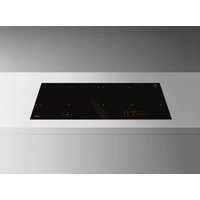
| Product type | Induction hob with integrated hood |
| Number of cooking zones | 4 |
| Heating technology | Induction |
| Usable surface per zone | 24.6 × 18.9 cm |
| Total power | 2.8 - 7.4 kW (adjustable) |
| Energy consumption (hob) | 183.9 Wh/kg |
| Supply voltage | 220-240 V~ / 380-415 V~ 50/60 Hz |
| Recommended cable cross-section | 3 x 4 mm² (220-240 V) or 4 x 1.5 mm² (380-415 V) |
| Main functions | Booster, Keep Warm, Pause, Timer, Bridge, Automatic heating, Lock, Child lock, Recall |
| Hood speeds | 9 speeds + boost (P) |
| Hood timer | Automatic shutdown after 15 min |
| Hood filters | Metal anti-grease filters (washable) + charcoal/zeolite filter (optional) |
| Hood maintenance alarm | Every 2000 hours (charcoal filter) |
| Safety | Pan detection, automatic shutdown in case of overheating, control lock, child lock, emergency stop |
| Surface material | Ceramic glass |
| Cleaning | Special ceramic glass cleaner, metal scraper, water and vinegar for limescale |
| Hood maintenance | Wash metal filters every month (30 h); clean oil tray monthly |
| Spare parts | Metal filters, charcoal filters, scraper, cleaning cloths |
| Installation | Reserved for qualified personnel; do not install above a refrigerator or washing machine |
| Electrical standards | Mandatory earth connection, compliant with current standards |
| Warranty and support | Original spare parts, approved technical assistance center |
Frequently Asked Questions - Quantum Pro FALMEC
User questions about Quantum Pro FALMEC
0 question about this device. Answer the ones you know or ask your own.
Ask a new question about this device
Download the instructions for your Cooker in PDF format for free! Find your manual Quantum Pro - FALMEC and take your electronic device back in hand. On this page are published all the documents necessary for the use of your device. Quantum Pro by FALMEC.
USER MANUAL Quantum Pro FALMEC
INSTRUCTIONS BOOKLET
LIBRETTO ISTRUZIONI
INSTRUCTIONS BOOKLET EN
EN - Motor and hob electrical connections (1).
-
Pentole in rame
-
Pentole in alluminio
- Pentole in ceramic
Pentole in terracotta - Pentole in acciaio inox
These warnings have been drawn up for your personal safety and those of others. You are therefore kindly asked to read the booklet carefully in its entirety before uscleaning the equipment.
The Manufacturer declines all responsibility for any damage caused directly, or indirectly, to persons, things and pets as a consequence of failing to comply with the safety warnings indicated in this booklet.
It is imperative that this instructions booklet is kept together with the equipment for any future consultation.
If the equipment is sold or transferred to another person, make sure that the booklet is also supplied so that the new user can be made aware of the hood's operation and relative warnings.
Insist on original spare parts.

Intended use
- This cooker is intended to be used in domestic environments to prepare and keep dishes warm.
- Do not install the cooker outdoors and do not expose it to outdoor environment (rain, wind, etc.).
- It is forbidden to use the cooktop on moving equipment.
- Any other use is not admitted.
- Do not use the cooker before installing it.
- Never open the case of the appliance.
- Falmec assures the compliance with the safety standards with original spare parts only.
- The appliance is not intended for use with external timer or remote control.
- The equipment can be used by children over the age of 8 and by persons with reduced physical, sensory and mental abilities, or with no experience or knowledge, as long as they do so under supervision or after having received relative instructions regarding safe use of the equipment and understanding of the dangers connected to it.
Children are not to play with the equipment. Cleaning and maintenance by the user must not be carried out by children without supervision. - Do not leave the cook top unmanned while it is working.
The equipment is solely intended to be used to extract fumes generated from cooking food in non-professional domestic kitchens: any other use is improper. Improper use can cause damage
to persons, things, pets and exempts the Manufacturer from any liability.

Danger of burns
- Use the control lock to avoid that unauthorised people can switch on the appliance by themselves.
- place handles of frying pans and saucepans in a way that children cannot touch them.
- Switch off the cooking areas after use.
- Do not place any metal object on cooking areas that are on.

Technical safety
- Installation operations are to be carried out by skilled and qualified installers in accordance with the instructions in this booklet and in compliance with the regulations in force.
If the power cable or other components are damaged, the cook top shall NOT be used: disconnect the cooker from the power supply and contact the Dealer or an authorised Servicing Department for repairs. - Do not modify the electrical, mechanical or functional structure of the equipment.
- Do not personally try to carry out repairs or replacements. Interventions carried out by incompetent and unauthorised persons can cause serious damage to the unit or physical and personal harm, not covered by the Manufacturer's warranty.
- Before installing the cooker, check the integrity and function of each part. Should anomalies be noted, do not proceed with installation and contact the Dealer.

Electrical safety
The electrical system to which the device is to be connected must be in accordance with local standards and supplied with earthed connection in compliance with safety regulations in the country of use. It must also comply with European standards regarding radio antistatic properties.
The connection data (voltage and frequency) shown on the data plate of the cooker must match with those of the electric network.
Compare these data before connection.
In case of doubts, refer to an electrician.
Before installing the hood, check that the electrical mains power supply corresponds with what is reported on the identification plate located inside the hood. The socket used to connect the installed equipment to the electrical power supply must be within reach: otherwise, install a mains switch to disconnect the hood when required.
Any changes to the electrical system must be carried out by a qualified electrician.
Do not try to solve the problem yourself in the event of equipment malfunction, but contact the Dealer or an authorised Servicing Department for repairs.
When installing the device, disconnect the equipment by removing the plug or switching off the main switch.
FUMES DISCHARGE SAFETY

Do no connect the equipment to discharge pipes of fumes produced from combustion (for example boilers, fireplaces, etc.).
Before installing the hood, ensure that all standards in force regarding discharge of air out of the room have been complied with.
USEWARNINGS

- Before powering the appliance for the first time, remove any protective films and adhesives.
While using, saucepans and kitchenware can cause noise that can depend on:
- a high power level.
-different materials of the bottom of saucepans.
- Never use water to put fire out. Deactivate the cooking area. Choke flames with a cover, a fireproofing blanket or something similar to it.
- Do not keep inflammable objects in the drawers below the cooker. The cutlery tray shall be made up of fire-resistant material.
- Do no keep metal objects directly below the cooker.
- Do not heat empty saucepans or frying pans and always check that saucepans have a minimum quantity of liquids inside.
- Possibly use always covers to avoid heat dispersion.
Cook with little water.
- After starting grilling or cooking dishes bring the power level to a lower one.
- Switch off the cooker after use.
- Continuously check the cooking in case of greases and oils used, as they can easily catch fire.
- Heat greases and oils at maximum for one minute and never use the Booster function.
- Avoid that sugar, synthetic materials of aluminium, films are in contact with the hot areas. During cooling, those substances can cause cracks or other alterations on the pyroceram surface: switch off the device and immediately remove from the cooking area that is still hot
- Pay attention not to burn yourself during and after using the device.
Make sure that no fixed or mobile power cable of the device is in contact with the glass or a hot frying pan.
- Do not use the cooker to heat pots.
- Do not apply any type of cover on the cooktop.
- Electrical cables are not to be in contact with the cooker.
- It is recommended to protect hands from heat using pot holders. Only use dry gloves or pot holders.
- Only use cookware with smooth and magnetic bottom suitable for induction hobs.
Always use a saucepan or frying pan on each cooking area, even with the BRIDGE function.
- Do not place hot saucepans on the sensor keys or the LEDs, as this could cause damage to the electronic components underneath.
- Keep controls and lamps always clean.
- When moving saucepans, make sure to lift them rather than slide them over the surface.
- Saucepans and cooker are to be perfectly cleaned before being in contact.
- Do not drop objects on the hob!

Only use saucepans with magnetic bottom. Other materials are not admitted.
Use saucepans of appropriate size to the desired cooking area.
SAUCEPAN SELECTION
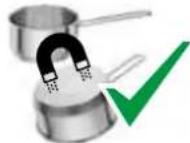
Saucepans suitable for induction hobs:
The bottoms can be completely ferrous, non-ferrous or a blend of both materials.
Only saucepans with a fully magnetic, sufficiently wide and perfectly flat bottom are suitable for use on induction hobs.
The bottom is magnetic if a magnet sticks to every point on the bottom of the saucepan.
The minimum diameter of the bottom of the pan may vary depending on the cooking zone (see information below); the minimum diameter means the part of the pan that rests on the hob.
In pans with an all-ferrous flat bottom, the heat spreads evenly and the flat bottom prevents damage to the surface of the hob.
Suitable saucepans (examples):
- Thick-bottomed enamelled steel saucepans
- Cast iron saucepans with enamelled bottom
- Multi-ply stainless steel saucepans
Ferritic stainless steel saucepans
Saucepan bottom size:
| Cooking area Minimum size | |
| Single ø120mm | |
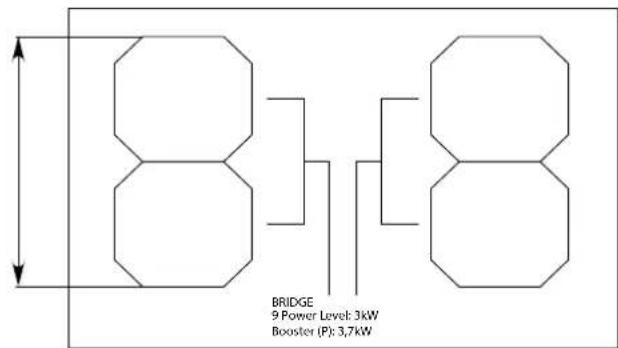
| Bridge 230mm |
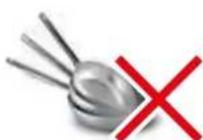
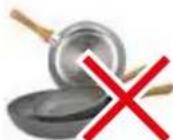
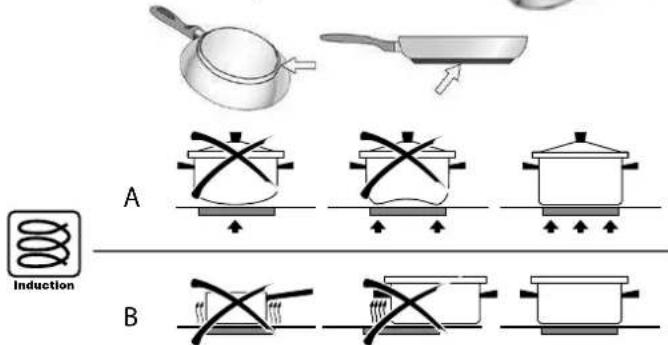
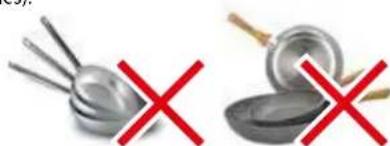
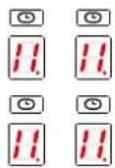
Saucepans not suitable for induction hobs:
Saucepans with non-magnetic or partially magnetic bottoms, with a size smaller than the indicated minimum and not perfectly flat are not suitable for use on induction hobs, even if bearing the symbol indicating them as suitable for induction.
In any case, these types of cookware have lower efficiency and lower cooking performance.
Bottoms with non-ferrous material (aluminium, copper, ...) cannot be used with induction hobs.
Bottoms with blended material might not heat evenly or therefore reach high temperatures. If bottoms mainly consist of non-ferrous material, the hob might not recognise the pan and the cooking zone does not switch on. Furthermore some of these materials tend to release material that bonds with the screen-printing of the glass, ruining it beyond repair.
The use of pans with uneven bottoms (e.g. with moulded pellets) can hinder the detection of the pan, does not guarantee homogeneity of heating and, again, can cause release of material as a result of thermal shock.
Unsuitable saucepans (examples):
Copper saucepans
Aluminium saucepans
- Ceramic saucepans
-Terracotta saucepans
- Stainless steel saucepans
Noise during cooking
Saucepans may generate noise during cooking: this is not a malfunction and does not affect the operation of the product.
The noise depends on the type of saucepan and the type of bottom;
If it is particularly unpleasant, it is recommended to replace the saucepan. Humming, hissing, crackling sounds and vibrations are due to the transfer of energy to the bottom of the saucepan, and are generated by the various materials it is composed of. This noise is produced when cooking on a high power level and decreases as the set power level decreases.
Internal ventilation noise: the appliance is equipped with a ventilation module to adjust the internal temperature of the induction hob. Ventilation can remain on even after switching off the appliance.
SAFETY AND WARNING INDICATIONS
Warning for people wearing pacemakers:
Keep in mind that when the appliance is being used an electromagnetic field forms in the immediate proximity. There is therefore a remote possibility that the operation of the pacemaker might be affected.
If in doubt, contact the pacemaker manufacturer or your GP.
The electromagnetic field of the hob during operation can affect the operation of magnetisable objects. Credit cards, life-saving devices, pocket calculators etc. should not be in the proximity of a hob when in operation.
Metal objects stored in the drawer underneath the appliance may become hot in case of prolonged use. Do not store metal objects in a drawer immediately underneath the hob.
If the appliance is built-in over an oven or an electric cooker fitted with pyrolytic system, do not operate it while the pyrolytic procedure is under way, as the hob overheating device could trip (see relevant paragraph).
The appliance is equipped with cooling fans. If there is a drawer under a built-in appliance, a separation must be ensured between the drawer and the bottom of the appliance, for appropriate hob ventilation and to make sure the fans are not be obstructed.
Never use two saucepans or pans on the same cooking zone, or a rectangular cooking zone, or a PowerFlex cooking area.

Before cleaning or carrying out maintenance operations, disconnect the equipment by removing the plug or switching off the main switch.
Do not use the hood with wet hands or bare feet.
Always check that all electrical parts (lights, extractor fan) are off when the equipment is not being used.

Do not rest objects on top of the motorised fins.
Always supervise the cooking process during the use of deep-fryers: Overheated oil can catch fire.
Never use the hood without the metal anti-grease filters: in this case, grease and dirt will deposit in the equipment and compromise its operation.
Accessible parts of the hood can be hot when used at the same time as the cooking appliances.
Do not carry out any cleaning operations when parts of the hood are still hot.
There can be a risk of fire if cleaning is not carried out according to the instructions and products indicated in this booklet.
Disconnect the main switch when the equipment is not used for long periods of time.

If other appliances that use gas or other fuels are being used at the same time (boiler, stove, fireplaces, etc.), make sure the room where the fumes are discharged is well-ventilated, in compliance with the local regulations.
PRODUCT DATA SHEET COOKTOP
Product information according to Regulation (EU) Nr. 66/2014
| Manufacturer Falmec S.p.a. | |
| Model identification Quantum Pro | |
| Type of hob Glass ceramic cooktop | |
| Number of cooking zones / cooking areas | 4 |
| Heating technology | Induction cooking zones and cooking surfaces |
| Usable surface area 4x(24,6x18,9 cm) |
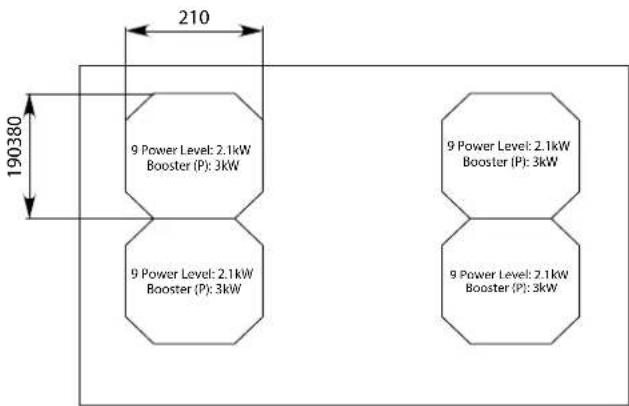
SIZE OF USABLE SURFACE
TOTAL POWER: 2,8 - 7,4 kW
ENERGY CONSUMPTION (Wh / Kg)
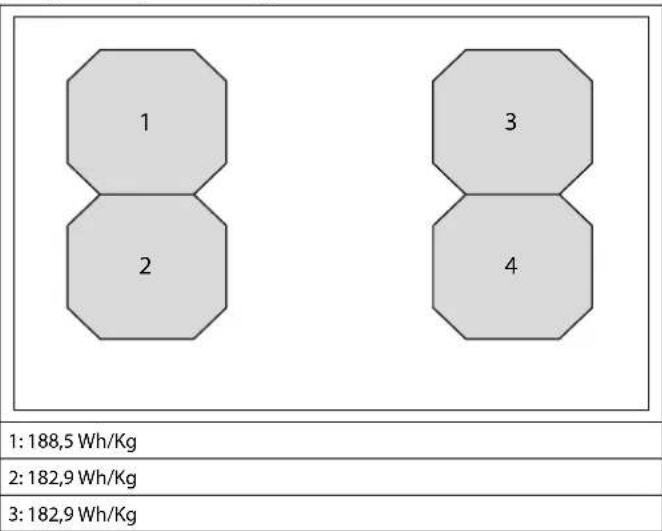
Energy consumption cooking zones:
4:181,5 Wh/Kg
Energy consumption of the hob: 183,9 Wh/Kg
INSTALLATION
only intended for qualified personnel

Before installing the hood, carefully read the chapter 'SAFETY INSTRUCTIONS AND WARNING'S.
TECHNICAL FEATURES
The technical specifications are exhibited on the labels located inside the hood.
SAFETY INSTRUCTIONS FOR ASSEMBLY
Install the cooker after installing kitchen cabinets and basis.
Make sure that worktops have been veneered with thermoresistant glue in order not to suffer deflections or detachments.
POSITIONING
Do not install the hood outdoors and do not expose it to outdoor environment (rain, wind, etc.).

It is forbidden to install the appliance on fridges or freezers, washing machines, dishwashers, or tumble driers.
COOKER
ELECTRICAL CONNECTION
(only intended for qualified personnel)

Disconnect the equipment from mains power network before carrying out any operation on the cooker.
Make sure that electric wires inside the cooker are not disconnect
ed or cut: in the event of damage, contact your nearest Servicing Department. Refer to qualified personnel for electrical connections.
Connection must be carried out in compliance with the provisions of law in force.
Before connecting the cooker to the mains power network, check that:
- the mains voltage corresponds with the voltage indicated on the data plate located inside the cooker;
- the electrical system is compliant and can withstand the load (see the technical specifications located inside the cooker);
- the power supply plug and cable do not come into contact with temperatures exceeding 70^ ;
- the power supply system is effectively and properly connected to earth in compliance with regulations in force.
- the socket used to connect the cooker is within reach.
In case of:
- devices fitted with cables without a plug: the type of plug to use is a "standardised" one. The wires must be connected as follows: yellow-green for earthing, blue for neutral and brown for the phase. The plug must be connected to an adequate safety socket.
- fixed equipment not provided with a power supply cable and plug, or any other device that ensures disconnection from the electrical mains, with an opening gap of the contacts that enables total disconnection in overvoltage category III conditions.
- Said disconnection devices must be provided in the mains power supply in compliance with installation regulations.
The yellow/green earth cable must not be cut off by the switch. The Manufacturer declines all responsibility for failure to comply with the safety
regulations.
Connection of the cooker
| network Connection Cable | sec- | tion | Power cable |
| 220V - 240V~ 50/60Hz 1P | +N / 2P 3 x 4 mm² | H 05 VV - F H 05 RR - F | |
| 380V - 415V~ 50/60Hz 2P | +N 4 x 1.5 mm² | H 05 VV - F H 05 RR - F | |
| 380V - 415V~ 50/60Hz 3P | +N 5 x 1.5 mm² | H 05 VV - F H 05 RR - F |
COOKER HOOD
FUMES DISCHARGE
EXTERNAL EXHAUST HOOD (SUCTION)
In this version the fumes and vapours are discharged outside through the exhaust pipe.
To this end, the hood outlet fitting must be connected via a pipe, to an external output.
The outlet pipe must have:
- a diameter not less than that of the hood fitting.
a slight slope downwards (drop) in the horizontal sections to prevent condensation from flowing back into the motor.
the minimum required number of bends.
the minimum required length to avoid vibrations and reduce the suction performance of the hood.
You are required to insulate the pipes if it passes through cold environ
Deviation for Germany:
when the kitchen hood is used at the same time as appliances that are powered by energy other than electricity, the negative pressure in the room must not exceed 4 Pa (4 x 10⁻⁵ bar).
HOOD WITH INTERNAL RECIRCULATION (FILTERING)

In this model, the air passes through the Carbon-Zeo (optional) filters to be purified and recycled in the environment.
Ensure that the Carbon-Zeo filters are assembled into the hood, if not, install them as indicated in the assembly instructions.
ASSEMBLY INSTRUCTIONS
only intended for qualified personnel

The hood can be installed in various configurations.
The generic assembly steps apply to all installations; for each case,
follow the specific steps provided for the required installation.
OPERATION
WHEN TO TURN ON THE HOOD?
Switch on the hood at least one minute before starting to cook to direct fumes and vapours towards the suction surface.
After cooking, leave the hood operating until complete extraction of all vapours and odours. By means of the Timer function, it is possible to set auto switch-off function which will allow the hood to turn off automatically after 15 minutes of operation.
WHICH SPEED IS TO BE SELECTED?
speed (1-3): maintains the circulation of clean air with low electricity consumption.
speed (4-5): normal conditions of use.
speed (6-7): presence of strong odours and vapours.
speed (8-P): rapid disposal of odours and vapours.
With a view to reducing environmental impact, it is suggested to always set the
minimum speed suitable for the required suction level.
WHEN SHOULD THE FILTERS BE WASHED OR REPLACED?
The metal filters must be cleaned every 30 hours of operation.
For further details see the "MAINTENANCE" chap.
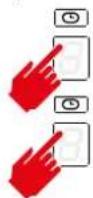
| ①A - 9 + ②A | |
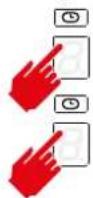
| ①A | ON/OFF Short pulse: Hood switch ON/OFF Long pulse: Hood operation automatic cycle activation (A) according to plate power. |
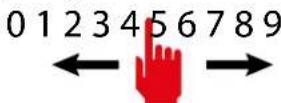
| + | Speed increase from 1 to...9 (up to "P"). Speed "P": active only for a few minutes, then speed 9. |
| - | Speed decrease from P to 1. |
| ○▼ | With hood active (short pulse): TIMER (flashing red LED) Automatic switch-off after 15 min. The function is disabled (red LED OFF) if: - The motor is switched off (button ①A). - Press the TIMER button ②▼ again. |
| With the hood OFF (long pulse 4s): opening the fins for hood and metal filter maintenance | |
| F | CARBON.ZEO FILTER ALARM Maintenance after approximately 2000 hours of operation. The display shows F alternating with the hood speed. To reset the alarm: with the motor running, press the ⑧▼ for 5 seconds. The display shows F for 2 seconds. To activate the alarm: With the hood off, press the and keys for 5 seconds The display shows F Press the + key to activate the alarm, the display shows F with the dot in the top left-hand corner flashing. Wait 3 seconds, the configuration is saved To deactivate the alarm: With the hood off, press the and keys for 5 seconds, The display shows F Press the ⑨ key to deactivate the alarm, the display shows F with the dot in the top left-hand corner switched off. Wait 3 seconds, the configuration is saved. |
If the pushbutton panel is completely inactive, before contacting the Technical assistance service, disconnect power temporarily to the appliance (about 5^ ), possibly by acting on the main switch, to restore normal operation. If this measure has no effect, contact the Techni
cal assistance service.
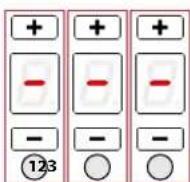
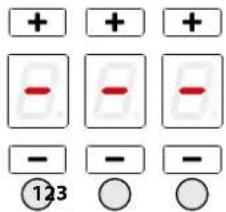
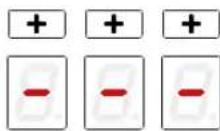
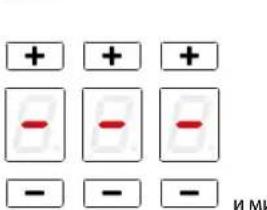
PUSH-B BUTTON PANEL
| + | + | + | |
| 0 | 1 | 2 | 3 |
| Control description | |
| 1 | Cooker top ON/OFF. In case no other control is enabled, the cooker switches off automatically after a few seconds |
| II | Pause key. It suspends cooking. See PAUSE function |
| -0 | Control block key. Keyboard lock to prevent accidental controls |
| XXX | KEEP WARM function key. Keeps cooking at a temperature of 44°C |
| X | Timer key. Activates the setting of a generic timer |
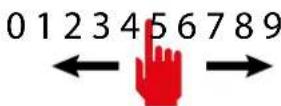
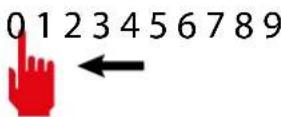
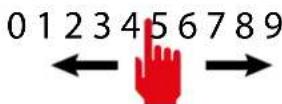
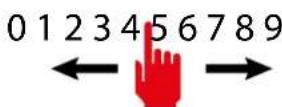
| 0 1 2 3 4 5 6 7 8 9 | Power level selector switch Sets the power of the selected cooking area on a scale of 0 to 9 |
| P | Booster key. Sets the power of the selected cooking area to the maximum available |
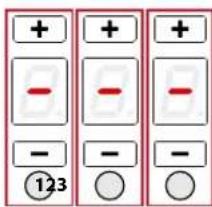
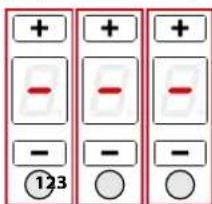
| + + + B B B - - - | Timer area. Displays the set timer. The and keys increase or decrease the value shown on the corresponding display. The figures correspond from left to right: Hours, tens of minutes, minutes. |
| B B B B B | Cooking area. Displays and selects the corresponding cooking area: - Front left - Rear left - Front right - Rear right |
| Cooking area timer. Displays the activation of the timer linked to the corresponding cooking area |
| Display description | |
| Cooking area in stand-by | |
| Selected cooking area | |
| Selected power level | |
| Power boost : maximum cooking power | |
| Residual heat indicator | |
| Keep warm function enabled |
| Bridge function enabled |
| Saucepan not present on the cooker top or not detected. |
| Pause function enabled |
| Child lock function enabled |
| Automatic heating function enabled |
OPERATION AND USE OF THE COOKTOP
ONLY USE COOKWARE SUITABLE FOR INDUCTION HOBS.
When a cooking are is turned on, the bottom of the saucepan heats. The cooking area only heats thanks to the heat given by the saucepan. The cooktop automatically detects the size of the saucepan. The heating power is to be chosen based on what shall be cooked. Please find below a short table:
SETTING AREAS
| 1-2 | Melt Heat | Sauces, butter, chocolate, gelatine Precooked dishes |
| 2-3 | Whisk Defrost | Rice, pudding and cooked dishes Vegetables, fish, frozen food |
| 3-4 | Steam | Vegetables, fish, meat |
| 4-5 | Boil | Boiled potatoes, soups, pasta Fresh vegetables |
| 6-7 | Cook over a low heat | Meat, liver, eggs, sausages Goulash, rilate, tripe |
| 7-8 | Cook Fry | Potatoes, donuts, cakes |
| 9 | Fry, bring to the boil | Steaks, omelettes Boil |
| P | Fry, bring to the boil | Bring to the boil big quantities of water |
Remark: heating time of cooktops is shorter than the gas cookers.
POWER CHANGE PROCEDURE

CAUTION: reducing power results in a limitation of the power levels that can be set in individual areas. These limitations are automatically managed by the device.
| Sequence description | |
| 13 sec. | With the top switched off Press the ON/OFF key |
| Within 3 seconds, press the ON/OFF key again. The key starts flashing | |
| 14 | Press and hold the pause key |
| 15 | The cooking area displays show: Press the four areas clockwise. |
| Sequence description | |
| II | Release the pause key |
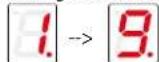
| I1 0123456789P ① | The cooking area display shows the symbol alternating with the parameter number The Timer area displays the current setting of parameter The parameter for setting the power is U0. |
| II 0123456789P ① | Press the Timer area to change the set power value. Press the power level selector: - left to decrease the value, - right to increase it |
| I1 0123456789P ① | Power Value Minimum: 1.4 2.8kW Maximum: 3.7 7.4kW Adjustment increment: 0.2kW |
| I1 0123456789P ① | Press to exit parameter setting |
| I1 0123456789P ① | To save changes and exit the menu: - press the ON/OFF key ① for 2 seconds. To exit the menu without saving changes: - press the Key |
AUTOMATIC SWITCH-ON OF THE COOKING AREA
- Turn on the cooker top 1
-
Place the saucepan, not empty, on the cooking area
-
The key corresponding to the area is automatically switched on
- The power level selector switch is activated by illuminating level 0
0123456789
- Press the key of the cooking area to be set. The bottom right-hand dot

- Adjust the desired power level.
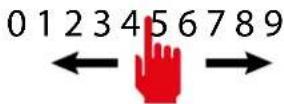
POWER LEVEL ADJUSTMENT:
- Slide your finger to the right in the power level selector switch and stop at the desired level.
- The display of the selected cooking area shows the set power level:
- Press the P key to activate the booster level.
The display of the selected cooking area shows
The booster level is maintained for a maximum of 5 minutes, after which the power level is raised to 9.
SWITCHING OFF THE COOKING AREA:
- Slide your finger to the left in the power level selector switch and stop at level 0.

- The display of the selected cooking area shows the power level 0:
NOTE: all cooking areas can be switched off at the same time: press key for 2 seconds..
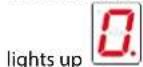
On the display of the cooking areas that are still too hot, the symbol is
displayed. Do not touch the cooking areas as long as the lamp

is on.
BRIDGE FUNCTION:
- This function allows for the simultaneous operation of the cooking areas: 1-2 and/or 3-4; for the use of fish kettles or large rectangular saucepans.
NOTES: Automatic BRIDGE detection: the appliance automatically suggests the BRIDGE function if a sufficiently large saucepan is placed over cooking areas 1-2 or 3-4.
- Press the keys of the two cooking areas to be paired simultaneously.
CAUTION: only the indicated pairs can be coupled: front and back right area (1-2) or front and back left area (3-4).
- An acoustic signal warns of the activation of the function, the displays show:

- Adjust the desired power level.
To disable the BRIDGE function:
- Press the buttons of the two paired cooking zones at the same time.
KEEP WARM FUNCTION
keeps food warm at a temperature of around 44^
- Press the key of the cooking area to be set.
The bottom right-hand dot lights up
- Press the Keep Warm Key - The cooking area display indicates the activi
vation of the function
To deactivate the KEEP WARM function:
- Press the cooking area key with the Keep Warm function active
- Press the Keep Warm Key.

PAUSE FUNCTION
suspends the operation of all cooking areas.
- Press the pause key II
- The cooking area displays indicate the activation of the pause function
The Pause function can only be activated for 10 minutes, after which the device switches off.
To deactivate the PAUSE function:
-
Press the pause key The key starts flashing Press any key except the Pause key.
-
The function is disabled and the cooking areas will resume operation prior to activation of the Pause function.
NOTE: Interruption and restoration of the power supply deactivates the PAUSE function.
CONTROL BLOCK FUNCTION:
disables all device keys to prevent accidental activation when cleaning the cooker top.
-Press the Control block key for 1 second
All keys except the Control block and ON/OFF keys are disabled.
To deactivate the CONTROL BLOCK function:
- Press the Control block key for 1 second
CHILD LOCK FUNCTION:
deactivates operation of all keys
-IMPORTANT: perform the entire procedure within 10 seconds
- Press a cooking area key for 3 seconds
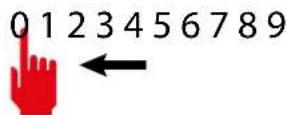
- Release the key and slide your finger to the right in the power level selector switch from 0 to 9


- The cooking area display indicates the activation of the function

To deactivate the CHILD LOCK function:
-IMPORTANT: perform the entire procedure within 10 seconds
-
Press a cooking area key for 3 seconds
-
Release the key and slide your finger to the left in the power level selector switch from 9 to 0
TIMER FUNCTION
allows you to set a time after which an acoustic alarm will sound.
- Press the Timer key
-
The Timer area is activated:
-
Press the and keys to set the timer.
Area 1: hours
Area 2: tens of minutes
Area 3: minutes
Maximum setting time: 9 hours 59 minutes
- After 10 seconds the timer will start the countdown.
- At the end of the countdown, an acoustic signal will sound.
- Press any key to deactivate the acoustic signal.
COOKING AREA TIMER FUNCTION:
allows a cooking area to be switched off after a set time
-Press the key of the cooking area to be set. The bottom right-hand dot
- Press on the Timer area.
- The timer area is activated:
flashes.
- Press the + and keys to set the timer.
and the symbol above the cooking area
Area 1: hours
Area 2: tens of minutes
Area 3: minutes
Maximum setting time: 9 hours 59 minutes
- After 5 seconds the timer will start the countdown.
- At the end of the countdown, the relevant cooking area will be switched off and an acoustic signal will sound.
- Press any key to deactivate the acoustic signal.
AUTOMATIC HEATING FUNCTION:
sets the maximum power for a preset time and returns to the previous power level.
-Press the key of the cooking area to be set. The bottom right-hand dot
lights up

- Slide your finger to the right in the power level selector switch and stop at the desired level. The function can only be activated for levels 1 to 8.
- Press and hold the selected level for 3 seconds

3 sec
This will also be the level to which the cooking zone will be returned at the end of the preset time, during which the cooking zone will run at maximum power.

- The cooking area display indicates the activation of the function
Function duration table:
| Power level | Automatic heating function time (seconds) |
| 1 | 48 |
| 2 144 | |
| 3 230 | |
| 4 312 | |
| 5 408 | |
| 6 120 | |
| 7 168 | |
| 8 210 | |
| 9 Function not available | |
| P Function not available | |
- When the time elapses, the function ends and the cooking area is reset to the previously set power level.
To deactivate the AUTOMATIC HEATING function:
1 - Wait for the end of the function time
or

2 - Press the cooking area key for 3 seconds
- the function ends and the cooking area is reset to the previously set power level.
or
3- If a lower power level is set than before the automatic heating function, the function is deactivated.
RECALL FUNCTION:
enables the recovery of cooking settings prior to an accidental cooker top switch-off.
- Perform the following steps within 6 seconds of an accidental switch-off
- Turn on the cooker top ①
- The pause key flashes
- Press the pause key
The RECALL function resets the operation of the cooking areas, timer functions and quick heating. Other functions will not be restored.
SAFETY DEVICES ON THE COOKER
Safety shutdown
If a cooking area exceeds the maximum time for operation at the same power, it is automatically switched off and the indication of the residual heat is shown.
To reset the cooking area, touch the necessary keys.
| Power level | 1 2 | 3 4 5 | 6 7 8 9 | P | ||||||
| Maximum duration of operation in hours | 6 6 5 | 5 4 1 | 5 1,5 | 1,5 1,5 | 5 min |
The cooker switches off automatically if one or more controls stay covered for more than 10 seconds.
To restore the proper operation:
- remove all objects from the control panel.
clean the control panel.
- restart the cooker and the concerned area.
Overheating device
Before items of the cooker can overheat, the control reduces the used power by following this procedure for protection measures:
- Deactivation of booster and power booster if turned on.
-Reduction of the power level set. - Shutdown of the cooking area concerned.
On the display of the cooking area the message "E2" is displayed.
It is possible to restore the cooking area when the default message is off.
CLEANING AND MAINTENANCE
Regular maintenance guarantees proper operation and performance over time.

ATTENTION!
For cleaning, never use a steam equipment.
Before cleaning the cooker, make sure that it is at room temperature.
Always clean the hob after each use with a specific glass-ceramic cleaner, taking care to remove food residues and any encrustations immediately.
A solution of water, preferably distilled, and white vinegar can be useful to remove limescale stains and soften encrustations before removing them with the appropriate scraper.
Never use alcohol on the hob surface.
Do not use products containing:
corrosive agents (soda, acids, ammoniac).
- abrasive agents (dusts or paste).
Do not use pointed or abrasive objects.
After cleaning, dry the appliance with a soft cloth.

Never drag the pans across the hob, but lift them, so as to avoid scratches.

Do not wash the flaps in a dishwasher.
USEFUL CARE TIPS
Clean your glassceramic cooktop regularly, preferably every time you use it. Avoid using abrasive sponges or scouring agents.
Harsh chemical cleaners like oven sprays or stain removers are also unsuitable, as are bathroom or household cleaners.
Accidents happen ...
Do not allow the hot hob to come into contact with plastic, tin foil, sugar or sugary food have fallen on the hot glass-ceramic cooktop. Please scrape it off the hot surface as quickly as possible. If these substances melt, they can damage the glass-ceramic cooktop.
Sparkling results in only three steps:
To thoroughly clean your glass-ceramic cooktop, first remove dirt and food with a suitable metal scraper.
Once the glass-ceramic cooktop has cooled, put a few drops of a suitable cleaner on it and rub it on with a paper towel or a clean cloth.
Then wipe the glass-ceramic cooktop with a damp cloth and dry it with a clean cloth.
How do I identify a suitable glass-ceramic scraper?
- Scaper made of metal (won't melt or catch fire)
- Scaper easy to lock / to unlock
- Blade is fixed precisely, it does not shift
- Blade is unbroken, clean and stainless
- Scaper certified by testing institute, if procurable (e.g. TÜV-GS seal)
- User manual and safety instructions available
CLEANING OF INTERNAL SURFACES

Do not clean electrical parts, or parts related to the motor inside the hood, with liquids or solvents.
For the internal metal parts, see the previous paragraph.
METAL ANTI-GREASE FILTERS
It is advised to frequently wash the metal filters (F) (at least once a month) leaving them to soak in boiling water and cleaning solution for 1 hour, taking care not to bend them.
Do not use corrosive, acid or alkaline detergents.
Rinse them well and wait for them to be completely dry before reassembling them.
Washing in a dishwasher is permitted, however, it may cause the filter material to darken: to reduce this, use washes at low temperatures (60°C max.) without detergent.
To extract and insert the metal anti-grease filters see the assembly instructions.
CARBON AND ZEOLITE FILTERS (OPTIONAL)
For the service life and regeneration of filters, refer to the specific instructions supplied with their packaging.
Wait until the filter cools before reassembling it.
GREASE DRIP TRAY
It is advisable to clean the tray every 1 month.
Do not use corrosive, acid or alkaline detergents.
For more thorough cleaning, remove the oil collection tray (see figure) and wash it with water and washing up liquid. Rinse it well and wait for it to be completely dry before reassembling it.

Do not wash the grease drip tray in a dishwasher.
WHAT TO DO IN CASE OF COOKERS PROBLEMS
The cooker or cooking areas do not turn on:
- The cooker is not connected to the electric network.
The protection fuse is released. - Check if the block is not active.
- Keys are covered with water or grease.
An object is placed on the keys.

The symbol is displayed
- There is no saucepan on the cooking area.
- The container used is not compatible with cooktops.
- The diameter of the saucepan bottom is too small compared to the cooking area.
The symbol [E] is displayed:
- Disconnect and connect the cooker.
- Contact the after-sales centre.
One of the area or the entire cooker turns off:
The safety overheating system is active;
The cooker or one cooking area remains on for too long;
one or more keys are covered;
- one of the saucepans is empty and the bottom overheated.
The fan keeps on working after the cooker shutdown:
- This is not a malfunction: the fan keeps on protecting the electronic power unit of the device.
The fan stops automatically.
COOKERS ERROR CODES
In case of error, the device displays error codes for support purposes.
The display of the cooking area shows the error code alternating 'E' with other symbols and numbers.
| Error code | Description Possib | e causes | Solution |
| E+0+3 | Continuous acti-vation of a key | - Metal objects above the keyboard - water over the keyboard | - Move the metal objects - Dry the water |
| E+2+1 | Internal tempera-ture above 85°C | - covered or insufficient ven-tilation areas | - Allow internal heat dissipation |
| E+H+3+1 | Incorrect configu-ration | - configuration error | - Contact Technical Supportstenza tecnica |
| E+H+4+2 | Internal supply voltages too high or low | Overcharging due to atmo-spheric discharge, electrical system failure or incorrect power connection | - Contact Technical Support |
| E+H+4+7 | No communi-cation between keyboard and inductor modules | - Communication cable damaged or disconnected - Damaged in-ductor module | - Contact Technical Support |
| E+H+2+0E+H+2+2E+H+3+5E+H+3+6 | Control keyboard internal error | - Contact Technical Support | |
| E+2 | Temperature limi-nts were exceeded in the cooking area | - Empty sauce-pan - unsuitable saucepan type - saucepan or glass too hot | - fill the saucepan - use a suitable saucepan - remove the sauce- pan and allow the area to cool down |
| E+3 | Unsuitable sau-cepan | - The saucepan has little ferritic material - The saucepan caused an error in the inductor module - Inductor failure | - Use a suitable saucepan - Remove the sauce- pan, wait 8 seconds and try again - Contact Technical Support |
| E+4 | Incorrect configu-ration | - inductor configu-ration error | - Contact Technical Support |
| E+5 | No communi-cation between keyboard and generator | - Faulty or disconnected LIN cable - Incorrect electrical con- nection - Internal fault - Configuration error | - Contact Technical Support - Check terminal board electrical connection - Contact Technical Support - Contact Technical Support |
| E+6 | Incorrect power supply | - Out-of-range supply voltage - Incorrect supply voltage frequency - Inductor failure | - Check that the supply voltage is correct: voltage and frequency. - Contact Technical Support |
| E+7 | Internal inductor failure | - Contact Technical Support | |
| E+8 | Cooling fan not working | - Dirty fan - Fan Failure | - Clean the air vents - Contact Technical Support |
| E+9 | Faulty inductor temperature probe | - Faulty inductor temperature probe | - Contact Technical Support |
| E+R | Internal inductor failure | - Contact Technical Support | |
| E+H | Inductor tempe- rature probe has a fixed value | - glass too hot - faulty probe | - Cool the glass - Contact Technical Support |
Note:
Not each failure can be detected automatically by the system, e.g. in case of defect of the User interface power supply.
DISPOSAL AFTER END OF USEFUL LIFE

The crossed-out wheeled bin symbol on the appliance means that the product is WEEE, i.e. "Waste electrical and electronic equipment", accordingly it must not be disposed of with unsorted waste (i.e. with
"mixed household waste"), but it must be disposed of separately so that it can undergo specific operations for its re-use, or a specific treatment, to remove and safely dispose of any substances that may be harmful to the environment and remove the raw materials that can be recycled. Proper disposal of these products contributes to saving valuable resources and avoid potential negative effects on personal health and the environment, which may be caused by inappropriate disposal of waste.
You are kindly asked to contact your local authorities for further information regarding the designated waste collection points nearest to you. Penalties for improper disposal of such waste can be applied in compliance with national regulations.
INFORMATION ON DISPOSAL IN EUROPEAN UNION COUNTRIES
The EU WEEE Directive was implemented differently in each country, accordingly, if you wish to dispose of this appliance we suggest contacting your local authorities or dealer to find out what the correct method of disposal is.
INFORMATION ON DISPOSAL IN NON-EUROPEAN UNION COUNTRIES
The crossed-out trash or refuse bin symbol is only valid in the European Union: if you wish to dispose of this appliance in other countries, we suggest contacting your local authorities or dealer to find out what the correct method of disposal is.

WARNING!
The Manufacturer reserves the right to make changes to the equipment at any time and without prior notice. Printing, translation and reproduction, even partial, of this manual are bound by the Manufacturer's authorisation.
Technical information, graphic representations and specifications in this manual are for information purposes and cannot be divulged.
This manual is written in Italian. The Manufacturer is not responsible for any transcription or translation errors.
Dispositif anti-surchauffe
FILTRES AU CHARBON-ZÉOLITE (EN OPTION)
YpOBeHbUyMaI3dEJIIN3aBcNITOTTnPaKaCTPIOINNOTTNAnDHa;
EcnI Wym HnnpAHTbI, peKOMeHdyETc3aMeHHTb KaCTpIOIO.
KyykKaHHe, CbCT, NotpeckBaHMe N B6paunn Bbl3BaHbIpepeaey 3heprnn Ha HDo KAcTPOJn N O6p3ayTOc pa3mUHbMn CoCTaBnIOuIMM MaTePAnAMN. OHN 3ameThb I PnB BICOKnx yOBPHX MOUHOCTN IOHNkaOTc Pn CNHXeHMn 3aAdHORO yOBBH MOnHCTn.
UyM BHytpHHeBHTnIaHm: np6op oChauEe BHTnIaHneJdna HactpOKn BHytpHHe TEmpeAtpyb INdyKuHOHOn NOBepxHOCTN. BeHTnIaHm MOKeT OCTaBaTbCBA KJIoueHHo Daxe NocLe BBKIIIOueHHa np6opa
YKA3AHNIOBE3OINACHOIT INPDEyIPEXKDEHNA
PpeynpexkdeHnIaNcKapdnoctmmyTOpom:
yUHTbBAIte, yTO B HENOCpeCTBeHHoB 6n3OcTn OT pa6oTaIOoero
OBOpYIOBaHINr reHepnPpyETCA NkTPOMarHHTHOe none. CyueCTByET
BO3MOXHOCTb TOrO, yTO KAPDIOCTUMyIaTOp erO BocpMmT DaJke Ha
daJIbHEM pAcCToAHIN.
B cnyae comHenn obaaTecb K nroTOBtEnIO KapnOCTmMyIaTopa NIN K neaemy Bpa.
3NeKtpomarHHTHOne NONE BKNIOUeHHoB apouHoi NaHEn MoKeT co3DaBaTb NOMEXI DnA paObToI HAMaHNUHBAuOeROc O6OpDObAHN. KpeINTHbe KapTbI, yCTpoiCTBa IyXpAHeHInHΦOpMaUN, KApMaHHBe KaIbKyIaTOpBi NT.D, He DOJIKHBI HAXoDITcBcB HENOCpeCDtBEHHO 01n3OCTOn OT BKNIOUeHHO BAPouHoi NaHEn.
Metallneckne npdmte, xpaHnueceB Aunke, paonoloxeHHOM noipnpbopom, moryt packaTbcB cnyae npdoJnKHTbHOro nCnObn3OBAHn np60pa. H xpaHnTe Metallneckne npdmteB Aunke, paonoloxeHHOM hncocpeCTBeHHo noD BapOCHno naHeIbIO.
Ecn np60p yctaHabnBaetc Hnd 3neKtpnuceckm DxyOBm WkaΦom C nCTeMoN pnpoNTuueckO ONUCTKN, He BkIIOuAte erO BO BPempa60tbl 3Toi CNCTeMb, T.K. 3TO MOKeT Bbl3bIBaTb Cpa6aTbBAHHe yCTpoNCTBa 3auNTbI OT neperpeBa (CM. COOTBETCTByUosn naparpa).
Pnp6op Chabxhen BHTnIATOPOM OxnaJdeHn. Ecnn noB CbTpoHHbIM np60pom HaxoNDTC RAUNK, Heo6xoDnMO nponoxNtB MeXy JauNKOM n HxHHe NactbIO np60pa pa3dEnITeBHyIO neperOpOky, UTO6bl 0ecneuNTb Heo6xoDnMBI BO3dyXoo6MeH INBapOHOI NaHn I He donyCTNTb 3aropaxINBaHn BEHTNIATOPOB.
Hikorda He nCnOJb3yIte OndHOBpeMeHHo DBe KAcTpHnn Nn DBe CkOBopoDbHa OndHo BapouHOn 3OHe Nn Ha npMoyroIbHn BapouHOn 3OHe, N6o B BapouHOn 3OHe PowerFlex.

Ipeep BbInonHeHem IIO6oI onepaunno uCTKe nIeTexoClyJIMBaHnO OTCoeHNHTb aannapat OJIeKTPoNtAHnB, BByHBBUNKy I3 PO3ETKNI N C NOMOsbIO rnaBHOrO BbIKIOuTaTeI.
He npKacbKa K BbTaXke MOKpbMn pykAMn H He IIOJIb3OBaTbCnE, cTcR 60- CNKOM.
Korla np60pe He nCnOlb3yertc, Bcerda npoepeTte, TTO BCE 3eKtpneckne KOMnoHETb (CaET, acnnpaTOp) bkknueHb.

3aIpeaaetc KnaCTb KaKne-1n6o npEIMeTbHa MexAHn3npoBaHhIe pe6pa.
Ha6nDnTb 3a φpntHpnHnAmn Bo Bpema nCnONbOBAHn: pa3orpeToe MaCNO MXXET BOCnIaMeHITbcR.
Hikorda He nolb30BaTcB BtTAAKo 6e3 MetaJIuueckx JxipoylaBnBAUOux
fNbTPOB;B3OTOM cnyae XnP N 3arpzHeHHn ocdaIOT B npioope,OTpuataNB
HO Bnna Ha eropaboty.
OCTyHbIe YACTn BITaKm MOrTy HarpeBaTbc npN nCOns3oBaHm BMeTe C BapouHbIMn PnDopAMn.
He ouuTb BtJkky, KOrdaee yacn eue He octbln.
EIN OYNCTKa BBNONHAErCe H B COOTBETCTBM CO CNOOCaMM N CNOIb30BaHNEM CPEDCTB, yKa3aHHbX B HACTOJIUX INHCTpyKLIAX, BO3MOKeH PNCK NOxapa.
KoJa BbTaKa He HcnoIb3yEtCB TeueHne DInTeBHOrO NepoJa BpEmHe, Heo6xOIMBOBkIOHTBnABHbBbKnIOaTeB.

B cnyae oJHOOBpeMeHoro nCnOJIb3oBAHnIpyrNx yctpoCTB (KOTNbI, neuKn, KAMNHbI n T.I), pa6OtaOHnx Ha rasy mIy dpyTOM tonNIBE, npedyCMOTpeTB COOTBeCTBYIOUyIO BEHTUNLIIO NOMEueHnI, B KOToPOM npOnABOITcB CAcBbAHne DbIMOB, corNaCHO DeIeCTByIOHM HopM Tpe6OBaHnI.
IACNOPT N3DEJIINBAPOUHAR IOBEPXHOCTb
HhOpMaqunO6 n3dennB COOTBeTCTBnC DupeKTHoB(EC) N66/2014
KXYOHHAR BbITRAKKA C BBIODOM HAPYKY (BCACbIBAOUIA)
B3TOBEPCN DHMbN NapbBbBOaTcHpe3 BtANBaOuIN BO3yXoCTBOJ HApKy.
IINI 301 NBIHIOHN HTPyBOK BITAKKNOJIXEN6bIb coeHN HCCpeCTOB TpyBc HApKyBH MBIxOOM.
BixoHnA Tpy6a DOnjHnA mETb.
-ДИАМЕТР He MeHHe ДИАМЕТpa NaTpy6Ka BbITaKKN.
JHKHAKIOBHHN(napeHHe)rOAP3oHTaIbHbXyactKOBBOI6eKaHne nonada HINKOHIDHCATA BDBATeJIb.
- MHANNAJIbHcE KOJMAeCTBO Heo6xOJIMbIX INr60B.
MHNMAJIbHO BO3MOXHyIO DNHYBO N36ExAHMe A6DaUIN COKpaueHn BcAcBBAOJeuC1OCO6HOCTN BtTRKNN.
He6xOpMnKoIIpOBaTb Tpy0y,ecm cHa npoxoHHT uepe3 xonodHbe nomeue HnR.
OmcynneHua TepMaHua
npu ohoepemehno paome a nomoeenu kxyohou bmykku npdyux npubopoe,pa
bamaioxna u cmoaunke hnepuo amnuhcm om 3nckmpoepauo,ompuaenbnoe
daanheue hympu nomuehen he doanho npebbwam 4 Pa (4x10-56ap).
BbITXKCA BHYTPEHHEI PEUIPPKJIAUENE (ΦNJIbTPYIOUJA)

B 3toBepCn B03dy npoxOHT cepE mbltpBl Carbon.Zeo (no XeIaHIO), 4TO6bI OCHNTBCn ONTb BEPHyBCB N omeJeHne.
PpOepeTe,TOΦmBToBlCarbon.Zeo yCTaHOBnHeB B bBTJAKKe, B npOTINHOM Cnyae,yCTaHOBnTE IX,KaYkA3aHO B HHTpyKIMAX NO MOHTAXy.
HHTPYKLIIMIIO MOHTAXY
pa3dien npedHa3nauen Tolbko KbaanfouropoAHomy nepcohany

BbTAAKMy MoXHO yCTaHaBnBaTb B pa3IINHbIX KOHpyrpaunx.
06uine 3aTbMoNTaka DeiCTBnteNbI dIra BcEx TnOB yCTaHOBKn; HE- 06xOIMo PnpdePknBaTc TaKke OTeNbHO Yka3aHbIX 3TaNOB, COOTBETCBYIOHXyHKOMY TnY yCTaHOBKn.
ФУHKЦИОНЮВАНЕ ВБТЯЖКИ
KOrDA BKNIOUATb BbITAXK?
BbTky cnyet Bknoytox0163aMHytydoHAYaPiHOTOBHeHHnDnOcbp3oBaBHNAHTOKABo3dyxaIHNapBHeHHaMaNapaKBCacBaOeJeNoBepXHOCT.
No 3abepueHHN pnpotOBnHn HNIu CnEpyET OCTaBbTB BKNIOeHHOH bblTAKKy DO NOH OH acnpuAHC BEX napOB INaXOB. Ppni NMOOIN FyHKUIM TaMepa MOKHO yCTaHO BHT abOTMaTHUeCKOE BbIKIOUeHHe BITBAKKI IO NCTeEHm 15 MHyT FyHKIAOHNPOBa-HNA.
KAKYIO BbIPATb CKOPOCTb?
CKopoctb (1-3): NOIeOKnBaET Bc3DyX HcCTbM C HmKm, NOTpe6HeHem EneKTpo3Hep
CKOpocb (4-5):cbhpepaohyeycIOBA.
ckopoctb (6-7):Hannue CnBbix 3aNaxOB 6oNBIO KOJIneCTBa npOB.
ckopoctb (8-P):6bIcTpoe ydaJIeHHe 3aIaxOB n napOB.
HIN CHINXEHNHERATMBHOBOBDEHCTMBHAOKpyxaiouyOcpdypeKOMENHYETC BcerIaYCTAHABINBbMHNMAHbHyO CKOPoCT,COOTBcTByIOUyIpeSyemoyypo3HOBCacblHn.
KOrDAMbITbNIMEHRTbΦNltpbl?
Metannueckne Hnltpbl Heo6xmo npoMbBaht kajdbie 30acobpa6otb.
DIOONHINTEbHnHCOPMaNpNBedeHaBn.“TEXOBCNJXKBAHNE".
CEHCOPHARIaHEJIb BbITAKKIN
| ①A - 9 + ⑤ | |
| ①A | ВКЛ./ВыКЛ. КорOTКИ IMПУьс: Выltочене Выltочене Выttяки Длиннь IMПУьс: Выltочenе abTomatческого уckла (A) разовы Выttяки в зависимостп OT моцhiocтNi KOnфорok. |
| + | Повышени SCkopoctи с 1 до ...9 (до "Р"). Сkopocstь "P": Выltочетс Толбko на HeCKOLБК MInHyT, 3aTeM ВыltочаETС SCkopoctь 9. |
| - | Понижени SCkopoctи с P до 1. |
| С Выltочен� Bыttякоь (КорOTКИ IMПУьс): TIMER (kpac- НьМIMТAKUПСИ IMIДКATOP) АВТOMATческoe Bыltочене спчетя 15 мInHyT. Зта Функциma OТКИЧаETС (Красьи IMДКATOP Выltочen), ecnln: - ВыltочаETС двигател (Кногka ①A). - НaxмITE Кногky TIMER ese pa3 ②F. | |
| При Выltочен�уь Bыttяжke (Длиннь IMПУьс 4s): OTKpyITNe peбердя ТхобсclуЖИВань Выttяки IM metalniuecknx ФпьтюВ | |
| F | ABAPINHbI CnIHAN UTOJIbHO-UEOIHTOBOFO ФИЛьТРА TEXNUECKOE OБСLYЖИВAHNE NOОп prIMeRHO 2000 YacOB ЖСПЛУАTUДС. НдсплгЕ NOЕРЕМEHNO OTOBPAXAETC BbTJAKH.N. ЧTo6blc6рocNTb CnIHAN TpeBOM: pri np robTaIoUeM DBrIaTeNe HajmITE KhoIKNY HIOJOKHBAJIte ee B TeuHne 5 cekyHd. Hd nCIIeB b TeuHne 2 cekyHd OTOBPAXAETC ЧTo6blakTbCnIHAN TpeBOM: При ВькIOчENHOr BbTЯKKE HAZKMITE KhoIKNI 4H уderЖИВaIte Nx B TeuHne 5 cekyHd Hd nCIIeE OTObPaxaETC HajmITE KhoIKNY, Ic6blakTb ACHINBIPoBaTB abAPINHbI CnIHAN, Hd nCIIeE OTObPazITcR C MIRAOUe TochKO B JeBOM BepXHeM yIpy. ПоJOxHdte 3 cekyHd, KOHФИrpyaUNI BydET coxpaHena ЧTo6blOTKlIOUHTb CnIHAN TpeBOM: ПriвькIOчENHOr BbTЯKKE HAZKMITE KhoIKNI 4H уderЖИВaIte Nx B TeuHne 5 cekyHd, Hd nCIIeE OTObPaxaETC HajmITE KhoIKNY IdN OTOKlIOUeHry ABAPINHOrO CnIHAN,Ha Hd nCIIeE NOABITcR HApIMCb C BbKIOUeHHO TochKO B JeBOM BepXHeM yIpy. ПоJOxHdte 3 cekyHd, KOHФИrpyaUNI BydET coxpaHena. |

Ecn KhoonouHn naHEnb noJHocTbIe HaeKTHBHa, nepeo6pa- uenHem Bcny6by TexHueckoi NoDJIepKKN BpeMeHHO OTKnIOHTte (npmepHO Ha 5 MnH) 3NEkTPoNTaHne OYCTPOITCTBA, Xe
IaTeBHO C NOMOUsbIO rnaBHorO BbIKnOuTaTEn, YTo6bI BOCCTaHOBNTb HOpMaIbHyIO pa6Oy.Ecnn 3a Mepa HeofoekTuBHa, OpaTntecb B cnyK-6y TexnueckoN noDnepkKn.
KHONOYHARI NAHEJIb
| + | + | + | |
| 0 | 1 | 2 | 3 |
PERYIIMPOBKA YPOBHRA MOUHOCTN:
- PpOBeIte NaIbIeM BnIpaBO no ceneKToP yPoBn MOUHocTm IOCTaHOBInTeCb Ha HyXHom yPoBHe.
- Ha DnCnIe Bb6paHNoB BapOuHOB 30HbI OTo6paXaETcYCTaHOBnHHbI yPoBeHb MoUHOCHT:
P -Haxmite KhoNky Hto6blakTNBupobatb ypoBeHb Booster.
Ha nncnnee Bbipahnoi Bapouho 30hbl oTo6paJaaetcnyoBeHb Booster noepKnaeTc He 6oone 5 MInyT, noce yero ypoBeHbMouHocn yctaHabnBaetc Ha 9.
BbIKJIIOUeyHE BAPOUHOH 3OHbl:
- PpOBeDnTe naIbIeM BIneBO no CeneKToP yPoBHa MOUHOCTH N octaHOBNTecb Ha yPoBHe 0.
-Haicnnee Bb6paHnoB aOpOH 30hblOTo6paJaeTc ypoBeH moHocTN

IPIMUEAHHE:YTO6bI BYIKIOHTb BCE BApOHybe 3OHbIOHOBpeMeHHo: HAKMITE KONky IyepKBAte ee B TeeyHne 2 cekyH..
Ha nncnnee eue ropeux 3oH harpeBa noaBnaetcra CmBON. He H npKacaiTecb K 3oHaM HarpeBa noka Hndnkatop eue roptnt.
ФУHKLИA BRIDGE:
-3a fynkunno3B0nreTynpaBnTb HeckonbKIMn BapOhyBMn 3oHaMn:1-2 w/wn 3-4; nna nCnoNb3oBaHnra TaKnx KAcTpKn, KaK KaCTpONn DnA pbl6bl nn 6oIbnne npmoyrobnhble KaCTpONn.
PnmuMeAHH: ABtOMaTneckoe 6hApyKeHne BRIDGE: npu6op abTomatueckn npednaer fynkuu BRIDGE, cnn Ha 30hpiuROBHeHn1-2 uN 3-4 nomeeHa doCTaTOHc 6oIbua KAcTpOJIa.
-HaxMnte OndHOBpeMeHNO KONKIN DByx ConpraeMbIX 30H npiroTOBNEHNA. BHMAHNE MOXHO COeMHrTb TOnbKO yKa3aHHBe npbl: nepeHnI n3aHnI npabIe 30HbI (1-2) nIi nepeHnI n3aHnI neBle 30HbI (3-4).
-3BykoBoCnHnPpeynpeKdaetO6akTnBaunmФyHKun, DnCnIeNnOKa3bBAHOt:

-HaKMnTe Ha KONky BapOuHoi 3OHbI, KOToPyIO Heo6xOJMo yCTaHOBnTb.

-HaKMITE KhoNkY Keep Warm Lcnnn BapouHOn 3Ohb yKa3bBaET Ha

aKTHBaCNIuΦyHKUIN
De3akTbauaФyHKuH KEEP WARM:
- HaxMMTE Ha KHOKNy BapOuHoi 30Hb C aKTHBHOI yHKUnei Keep Warm

Hakmte KhoNky Keep Warm
ФУHKUЯ NAY3bl
npuocTaHaBnBaeT pa60Ty BcexBapOuHbIX 3OH.
- Haxmnte KhoNky nay3bl
-ДиснелуВарочьx30Hуka3bIBAiOTHaakTnBaUIOФyHKuNny3bl

Функця Паузbl moKet octaBaTbcaakTNBHOJdo10MnHyT,ncne yero yCTPOICTBO BbIKIOUaETcR
De3aktnBauny yHKnn Nay3bI:
- HaKMITE KhoNky nay3by II KhoNka HaHaHaet MRatb
-HaXMMTeJIIO6yIO KHOIky,KpOMe KHOIKNI Pny3a.
-ФункиогTKIIOUaETcra,И 30HbI pnproToBHeHn BO3O6HOBpTa6Oly, KOTOPa 6bIy aYCTAHOBHeHa Do AKTINBaUNn FyHKUnn "Pay3a".
PIMME4AHHE: IpepbBaHne n BocCTaHOBJIeHne 3NeKtpOnNTAHnO kIouaet yHKunIO pAY3bl.
ФУHKUЯБЛOKИРОВКI KOMAHД:
OTKIOaET BCE KONKN YCTPOINCTBA, YTO6bl PpeoTbpATNTb CnyaHoe BKIOUHeHne npuNCTKe BapOCHNoNAHNI.
-HaKMnTe KhoNky 6noKupOBKn KOMaH B TeueHne 1 ceKyHdbi BCE KhoNkn, KpOme KhoNkn 6noKupOBKn KOMaH n ON/OFF ①OTKnIOUeHbI.
4to6bIOTKNIOHTbFHKUIO BLOKINPOBKN YNPABJIENHIA:
-HaKmTE KhoNky 6nokpOBKn KOMaHd Ha1 cekyHdy
ФУHKLIMBAJOKMPOBKNOTDETEH:
DeakTbBpyeTa pa6Oty Bcex KnaBnW
-BAXKHO: BbIopnHraTe BCIO npOeDpyB TeueHne 10 cekyHd

-HaKMITE Ha KONky BapOCHN 30HbHa 3 ceKyHdbI
- Otnnyctne KhoNky n npOBeaTe naIbueM BnpaBO no nepeKIOuATEH ypoBnMoUHOCTn OT 0 do 9


MaKcmaJIbHoe HAcTpaINBaEMoe BpeM: 9 YacOB 59 MInHyT
-Yepe3 10 cekyH TaIeMep HauHET o6paTHbI OTCuET.
-ПО OKOHuaHm OTCuTeA npO3ByuHT 3ByKOBoCnHaJ.
-HaxMMTeIIO6yIO KONky,HTo6bIOTKIOuHTb 3ByKOBOU CNrHaJ.
ФУHKUЯ TÄUMEPA BAPOUHÖN 3OHbI:
N03B0JIaRcOTKIOUHTb BApOCHyIO 3OHy NO NCTeueHm 3aDaHHoro BpeMeHN
-HaKMnTe Ha KhONkY BapOuHoi 30HbI, KOtOpyIO Heo6xOIMo yCTaHOBNTb.

-Haxmte Ha oBnactb TaMepa.
-AKTHBUNpyTc3OHa TaMepa: CMBON HAP BapOCHO3OH.
- Premere sui tasti + yctaHOBKn TaIMepa.
06naCTb 1:Yacbl
06NaCTb2:deCAtKN MmHyT
06naCTb 3: MmHyTbi
MaKcImaHbHoe HaCTpaNbAeMoE BpeM:9acob 59 MHyT
-Yepe35 cekyHd TaImep HaHTo6paTHbI OTCuET.
-ПО OOKHauHHn 6bpaTHOrO OTCuTeA COOTBeTCTByUoJaa BapOuyHa 30Ha
6ydtBbIKIOeHaHnP03ByuHT3ByKOBoCnHaJ.
-HaKMnTe IIO6yK KHONKy, YTO6bI OTKNIOHtB 3BYKOBO CNrHaI.
ФУHKUЯ ABTOMATNUECKOTO HAIPEBA:
yctaHabnBaet MaksmambHyIO MoohocTb Ha 3aDaHHoe Bpemr BO3BpaaaetcK npdebyuemy ypOBHIO MOoHocTn.
-HaKMnTe Ha KhoNky BapOuHoi 30HbI, KOToPyIO Heo6xOIMO yCTaHOBNTb.
3aropaeTpaBaaHxNnHToUka

-Поведип пальем Враро no сеелкту уpoьн мошюctи n octaHOBNTEcbl Ha hyxHOM ypoBHe.Функцma MOXeT 6bIb aKTNbPObaHa TOLko dnyypoBHe c 1 no 8.
-HaMMTe u yepKnBaTe Bb6paHbYpOBeHbB TeueHne 3 ckyHd 3 sec
3To TaKke 6ydt yPoBeHb, K KOTOpOMy BapOuHa 30Ha BepHeTcNo OKOHuaHH 3aDaHHOro BpeMeHN, B TeueHne KOTOpOro BapOuHa 30Ha
6ydtpa6oTaBHaMaKcImaJIbHOHMOUHOCTN.

B CNYaE, cCNI OJHOI N3 3OH HArpeBa IpeBbIaTeT BPeM RAKIOUeHIN PnMAKcIMaJIbHOI MOuHCTN, OHa ABOTAMTuYeCKN OTKIOuAeTcN 3aRopaTeT INHdKaTOPT OCTOATUHOr TENNA.
Для NOВТОРНО ВКИОЧЕНИ ДАнHоД 3ОнБи HARpeBa npИКОСHITeCb K COOT-BETCTBYOUIM KlnaBnIaM.
| Уровень Моцносту 1 2 | 345 | 678 | 9P | |||||||
| Мак. Вразма ВКлоч- ня,ч | 665 | 541 | 51,5 | 1,51 | 5min |
Bapouha naHene b ATOMaTnueckn OTKIOuaeTc, ccnn OHa IIN HeKOTOpbIe KnaBnI nepeKpbBaIOCT B TeueHe 6oJIbe 10 cekyHd.
ДлпnpибendeприбopaВHopmaьhoe pa6ooye coctoHHe:
- ydaJIte npedMeTbI, HaxoJrueNecra Ha ceHcOpHbI nepeKIOUaTeu.
- YIcNTMe 3OHy CeHcOpNbIX nepeKIIouaTeNei.
- BKNIOHTe BapouHyIO nHaHeJIb I XeJaEMyIO 3OHy HarpeBa.
YcTpoNCTBO 3aunTbI OT neperpeBa
UcpoCTBO NCKIOaET nepepeB 3eMeHToB BapOHeH naHeH nyTeM yEmbEHHyP0BHnCNOJb3yeMoM MoHocHTN B CneDyUoem NOPdKe:
-ДзakTnBaZnФункuи nHTeHcMbHoro harpeBa (booster, power booster), ecnO OH BkIIOUeHbI.
-ymeHbweHne3aHaHHoro ypoBHO MOOHOCn.
- BbIKIIOueHHe 3OHbI HarpeBa.
Ha dncnnee 30H HarpBa BbICBeynBaETc COO6eHHe o6 owN6Ke "E2".
3OHa HArpeBa MoKeT 6bItb BHOBb BKIOUeHa Iocne IcYe3HOBeHnR COo6IeHNr 06 Own6Ke.
OuHCTKA UYXOD
IocTOnHHbI yXoN I TexO6cIyKuBaHne rapaHTnpyET npaBnBHOe yHKIOHOHPOBAHNE N 0fEKeTMBHOCTb.

BHIMAHHE!
He nCnoB3yIte npoBbI MaunHbI dIra OcNCTK naHeJI.
Ipekde Hem npo3BODnTb ONUCTKY BapOuHoi NaHEny, y6eINTeCb, YTO OHa oxnaIauacb do TemnepaTypb oKpykaHOue cpebl.
Bcerda OuichuaTe BapOHyNoaHeb Nocse KaJDoNcNOb3OBAHnna CneUaJIbHbIM CpeCTBOM IaI YnCTKn TcKIOKepaMnK, CTapaCb Cpa3y Je ydaJIbTb OCTATKN MIIuN 3aTBePdEbuMe OTNoXeHn.
PacTBop BObl, npeINoHTeJIbHO INCTnllInpOBAHHO, H6Boro yKcyca MoKet 6bTb NOIeEH Iy dAJeHHeN I3BEcTKOBbIX NpTeH np3MaHrEHHa 3a- TBepeBwIX OCTaKOB Npeep INx ydaIeHNem C NOMoUbIO COOTBeTcTByUOero cCKpe6Ka.
Hnkorda He nCnONb3yTe cnnp Ta BapouhoN NOBepxHOCTN.
He npmeHnTe uCTaunne cpeCTBa coepkaune:
-Koppo3nOHhBie BeuEcTBa (C0da, KcNtObI, aMMnA).
- a6pa3nBhble BeuecTbA (nopoukNnnnaCTbl).
He nCnOJb3yIte OCTpybl nnA6pa3nBbHn INCHtpymeHT.
Iocne ouncTk npotupaTe nobepxHoctb npi6opa MraKo TkaHbIO.

TTo6bI He noUapanaTb ckOBOpOy, He TaunTe ee no BapouHoi NOBepxHOCTn, a npnnoDHMnTE.

HeMbItbKpbIbByBnocydomoeyHmMaunHe.
IIOJIe3HbIE COBETbI NO yXOyD
KenaTeNbHO OHuTaB NnTpy perynapH, Nyue Bcero - nocne KaKDoI npiroToB- HnHn. CtapaIteC np 3oM He NoB3OBaTbC4 LapanaOuMMy6kAMn IIN ABpa3NbHBnOuHuaQUmm CpeCTBaMn DIn OuHHeHn CTKeNIOkePamueckCoN BOxHcTnAe HnpriOHy TaKne CNHbIe OuHaIoUne CpeCTBa KAK aAp03oN bIIN YCHKTNDyOBKB, TITHOBbBOHnTeB, CpeCTBa DnN CHNTKN BaHHb INN yHNBeP CaIbHbNe UCHTHUKe CpeCTBa.
OuH pa3 He ycneIb ...
He npynckaTe KOntakTa Tropaye nnNTbC nactnKOM BapOHyo, AnomHneBaA fonbla, anomHneBaA fonbla, caxap nn
caxapocodepkaane npodykbl. PoxkaNtcta, kak moKHO cKopee ydaJIHTe 3arpaHHe Hne C ropeue
KOHΦoPKN C NOMOuBko YNCTAeero CKpe6Ka. EON 3n NpEaMeBb HauHyT NtABNTBCA, OHMOryT
noBpeDnTb CTeKIOKePaMHeeCKyIO NOBepxHOCTb. PO3OMy HAreCITE Ha Hee CneLAnbHoe HcTtuee
cpeCTBO neped npiroTOBneHem npOyKTOB, coepxauix 60nbioe KOJIueCTBO caxapa.
Bnctaune pe3yntbTaBtBCero Btpn npoctbx npneMa:
HIOOCHOBATENBHO OUIHEHNOBEPXHOCTCN CHaHApA ydaIe CINbHBe 3aRpa3He HNIOCTAKNI NIIIM NOJXDQIRIMM UCTRAUM CKPe6KOM.
3aTeMaHEcHTe HecKONbKO KAnBnIPOXoDJIeN CHCTAUEJ XIKIOKCTNaOCTBIUYIO BAPOHyIO NOBepxHOCTb N paoTpntE IV 6yMaKaHbIM IONOTEHcEM INI YICTOI TpRNI KOI.
B3aKnIOueHHe npoTpne BapOHyIO NobepxHOCTb BlaKHOI cAnfETKOIN BbITPte
Hacyxo. fTOBO!
Kak onpeDenTb npaBnBHy ckpe6ok dIy nCTKn CTKeNkepamnK?
CKpe60K3ROTOBHeH3MeTAnla(HEIJIABNTCAHHercpU)
Ckp6ok cha6keH npdoxpaHnTeIeM, KOTOpbIM IeTKOJIb30BaTbCa
-JIe3BnpepoBHOHnAedKHO3aФNKCnPOBaHO B KOpnyce,He CDBNHaTeTCA
-Ne3Bue uHcToe,6e3 cIeIOB NOBpeKneHHn npXaBUNHb
B Iueane Hannuie ceptnnkaT KaecTBA (Hanpumep, 3nak KauecTBA TUV)
Hannnne pykoobctBa noB3OBaTey n yka3AHn IO TexHnke 6eONacHOCTN
OuNCTKA BHYTPEHHNX NOBEPXHOCTEIN

3anpeaetc yHCTNTb 3eKtpueckne KOMnoHeTbI NnN qactn DBnraTeJI BHTPN BbITXKN C NcNoIb3OBAHNEM XmIKoCTe NnN paactBopuTenei.
OuIcTKa BHyTpEHnIX MetaIIHnueeCKNX yAcTe OINcHa B IpeBdyUeM
naparpahe.
METAJINUeCKNE XIPOYJABJIIBAIOUIE ΦNJIbTPbl
PeKoMeHdyTeCAyToMbTbMetaIINueckneΦnIbTpby(F)HE MeHee pa3aB MeCra)3amaUHBAHXPnBnHTeNBHO TteHHe 1 caca B OChEB rOpHrBoe BoCe pceCTBOM DnMaMbTbNOCyDc,CTapaCB He CnOaTbΦnIbTpbl.
He nCnOJIb3OBaTb Koppo3IOHbIe, KcNtOHbIe NIN UeIoUHbIe MOKUHcpeA-CTBa.
TtataeHbOONOCHyTB NDOXdTaCB, NOA OHN NOHOCbBbICOXHyT, npeXde HEM YCTaHaBnBaTb IN HA MeCTO.
Pa3peIaTeCmMbTbHbTpB B NocyDnOoeuHou MaHHe, HO 3TO MOKeT PnBcCTN K NOTHEHIO MATEPMAA HbTPOB. YTObblYMeHbNTB 3TN NOcEeCTBIA,NCIOJIb30BaTb MoeHbIe NpOpaMMb C H3KoI TempeTaPoI (MaKcIMMyM 60°C)
6e3 nCNoIb3OBAHnMoOuX cpeIcTB.
N3BneHnue H yCTaHOBkMaTeaIIuuecknx XmpoynabBaKoIINXΦnIbTpOB OIMCAHA B MHTCPyKUINX NO yCTaHOBKe.
ФИЛБТРВСУTGДМИЦЕОЛNTOM(ONLIMOHALHBHIE)
IOnpeHnCpKa CnyKbI pereHepaunn FnbTpoB opaTntc b K cneJuaJIbHbIM INCTpyKUAM, npuIaraeMbIM KxynapKBke.
Ipepe yctahOBKO fnnbTpa doKnttecb, noka OH octbHET.
JOTOKIINCBOPAXKINA
PeKOMEHdyETcR OUYUaTb NIOTK KaKdIe 1 MecAU.
He nCnOJb3OBaTb Koppo3HOHHbE, KcNtHbIe NIN UeOuHbIe MOUJIe cpeCTBa.
JnB60nee TuaTeNBHO OuchTKn CieDyET NOCTaTb NToK JINB C6paMa cna (CM, H3O6paKeHHe) H Bmblreroopuee BOOno Co pcdCTBOm DnB MItBaNocCybl.
TtataeHbO OONOCHy T IOKDaTbCn, NOKa OH NINHOCTbIO BbCOxHET, npeKdE yEM yCTaHaBJIbMaTb IN HA MeCTO.

HeMbITb NOTOKdNc6opa Knpa B nocydomoeuHmMaunHe.
ПОНБЛЕМыИ CNOCOBы INX PEWEHIN BTVJKA
BapouhnaHnblnn30HbHarpeBaHe BkluoayTc:
Bapouha naHelen He noKnluyeHa K3neKtpuuecko ceTn.
- PereropnpeoxpaHntenb.
KnaBnua 6IOKINPOBKN KOMaHd HaKaTa.
Hannue BOdbi nnr rpa3n Ha nobepxhoTknabni.
- NocToPOHHn IpeDMTe Ha KnaBnax.

NOBHeHne cMbOJa
- OTCYCTBnE nocydbI B 30He HarpeBa.
MaTePnA nocydu He noDxOuT dIa IHHdyKUHOHHO naHeJI.
MaJIeHbKm DnAmEtP dHa nocydbI NO OTHoWeHnIO K 3OHe HaPeBa.
TnBHeNcMbOaE [E]:
OTKIOUHTe IN BHOBB NOKIOUHTe BapouHyIO naHeIb.
- 06paTntecb B LcHTp CepBnCHoro 06cnyKuBaHna.
OHa H3 30H HarpeBa NnB Cn NaHeNb BbIKIOaIOTc:
- AktiBupoBaHa cncTeMa 3aunTbI OT nepepeBa;
Bapouha naHelen OHa H3 OH HarpeBa HaxOuINc b CInIKOM DOIRO B BKJIIOUeHHOM COCTOHN; - ODAHINHeKOTOpBIE KlaBnHcEM-To npNKpbTb;
nyctar nocynda n neperpeB dHa.
BentnlaTOp npoDOnkaaet pa6oTaTb nocne BbIKluoyHnaHeJIr:
-3To HopMaIbHo: BeHTnIaTOp 3aIuIaeT 3neKtpoHbI 6Iok ynpabNe Hnra np6opaO t BbcOKnx TempepaTyP.
- BeHTnIaTOp OCTaHOBNTcA ABTOMaTnueckn.
KOdbI OUNBOK BAPOHON PAHEJI
B cnyuae ouin6kn yctpoiCTBO oTo6paKaet kOjbl ouin6ok, nomorauuye yctahOBnTb npuHHy HeCNpabHOCTN.
Ha nCnnee BapouHoi 30Hb OTO6paXaTcKoD oWu6Kn, UpeyUOuNcra C mmbolom "E" u npYumm Cmbolamn u cipamn.
Niedozwolone sq innate materialy.
FILTRY WEGLOWE I ZEOLITOWE (OPCJONALNE)
PRODUKTDATABLAD KOGEPLADE
Produktinformationer iht. forordering (EU) nr. 66/2014
EMHAETTE MED INTERN RECIRKULATION (FILTRERENDE)

I donne version passerer luften gennem Carbon.Zeo -filtrene (valgfi) for at blive renset og ledt tilbage ud imiljøet.
Kontroller, at Carbon.Zeo -filtrene er monoteret pa emhaeten. I modsat fald anbringes de som vist i montageveiledingen.

HVORNAR SKAL EMHAETTEN TENDES?
SIKKERHED FOR KOGEPLADEN
Sikkerhedsslukning
VEILIGHEIDSINSTRUCTIES EN WAARSCHUWINGEN

AFZUIGKAP MET (ZUIG)AFVOER NAAR BUITEN