14102302L - Lighting Livarno Lux - Free user manual and instructions
Find the device manual for free 14102302L Livarno Lux in PDF.
User questions about 14102302L Livarno Lux
0 question about this device. Answer the ones you know or ask your own.
Ask a new question about this device
Download the instructions for your Lighting in PDF format for free! Find your manual 14102302L - Livarno Lux and take your electronic device back in hand. On this page are published all the documents necessary for the use of your device. 14102302L by Livarno Lux.
USER MANUAL 14102302L Livarno Lux
LED ZÁVESNE SVITIDLO
Assembly, operating and safety instructions
NL BE
LED-PENDELLAMP
Before reading, unfold both pages containing illustrations and familiarise yourself with all functions of the device.
FR BE
GB/IEAssembly,operating and safety instructionsPage 11
EDI Light Service Center
c / o RTS Service Solutions
Halle 17-1
EDI Light Service Center
Heiligkreuz 22
AT-6136 Pill/AUSTRIA
E-Mail: info@edi-light.com
Telefon: +43 5242 69960
Schweiz
EGLO Schweiz AG
Seetalstraße 142
CH-6032 Emmen
SCHWEIZ
E-Mail: info-switzerland@eglo.com
Telefon: +41 41 268 69 59
IAN 280204
List of pictograms used
Introduction
Intended use
Scope of delivery.
Parts Description.. Page 12
Technical Data
Safety
Safety Notices.. Page 13
Preparation Page 14
Required tools and material Page 14
Prior to installation
Initial use
Installing the light . Page 14
Dimming the light Page 14
Adjusting the light.
Maintenance and Cleaning
Disposal
Declaration of Conformity
Warranty/Service centre
Warranty Page 15
Service address.. Page 16
Warranty card.. Page 16
| List of pictograms used | |||
| i | Read the instructions! Safety class II | ||
| Safety instructions Instructions for use | Observe the warnings and safety no-tices! | ||
| This light is only suitable for indoor use in dry and enclosed spaces. | Accident hazard and risk of fatal injury for infants and children! | ||
| V~ | Volt (AC) Warning! Risk of electric shock! | ||
| Hz | Hertz (mains frequency) Warning - Hot surfaces! | ||
| W | Watt (effective power) | Dispose of the packaging and the product in an environmentally friendly manner! | |
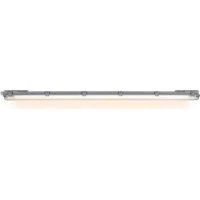
LED pendant lamp
Introduction

Congratulations on the purchase of your new product. You have chosen a high-quality product. Please be sure to care
fully read all the instructions for use. Fold out the page with illustrations. These instructions are part of the product and contain important information on setup and handling. Always observe all safety instructions. Before using this product for the first time, verify that the correct voltage is present and that all parts are properly mounted. If you have any questions or are unsure about operating the product, please contact your distributor or the service centre. Please keep these instructions in a safe place and pass them on to third parties if necessary.
Intendeduse
This light is only suitable for indoor use in dry and enclosed spaces. This product is only intended for private household use.
The light can be mounted to any surface of normal flammability.
- Scope of delivery
Check that all the parts are present and that the appliance is in perfect condition immediately after unpacking.
1 LED Pendant Light
2 Wall plugs
2 Screws
1 Set of assembly instructions and instructions for use, including warranty card
- PartsDescription
1 Wall plug
2 Mounting bracket
3 Screws (mounting bracket)
4 Connection box (electrical connection)
5 Connection housing
6 Locating screw (connection housing)
7 Mounting ring for light
8 Terminal block
9 Height adjustment
10 Button (for brightness control)
-TechnicalData
Item number: 54577/54578
Operating voltage: 220 - 240V 50Hz
Rated power max.: 28 W
Protection class: II/

Dimensions:
Length from
ceiling/length: 54577: 130 cm, length of
light: 60 cm, width: 40 cm
54578:130cm, Light:
40cm
Distributor:
EDI Light GmbH, Heiligkreuz 22, A-6136 Pill, www.edi-light.com
Safety

Safety Notices
Damage due to failure to comply with these operating instructions will invalidate the warranty! We assume no liability for consequential damage! We assume no liability for property damage or personal injury due to improper handling or failure to observe the safety notices!

RIS AD W R N I N G!
CIDENT AND DANGER TO LIFE FOR INFANTS AND CHILDREN!
This device may be used by children aged 8 years and up, as well as by persons with reduced physical, sensory or mental capacities, or those lacking experience and / or knowledge, as long as they are supervised or instructed in the safe use of the device and they understand the associated risks. Do not allow children to play with the device. Cleaning and user maintenance must not be performed by children without supervision.
Do not leave the light or packaging material lying unattended. Plastic film or bags, plastic parts, etc. can turn into dangerous toys for children.

Avoid the risk of fatal injury from electric shock
Ensure the electrical connection is carried out by a qualified electrician or a person trained in electrical installations.
We assume no liability for property damage or personal injury due to improper handling or failure to observe the safety notices!
Never use the light if any defects have been identified.
Remove the fuse or switch off the circuit breaker (0 setting) in the fuse box prior to installation.
- Be sure not to damage any wires during installation.
Ensure that the light does not come into contact with water or other liquids under any circumstances.
Never open any of the components of the electrical equipment or insert any objects into the same components. This will pose a risk of fatal injury from electric shock.
Before use, verify the available mains voltage matches the voltage required for operating the light (220 - 240V ,50Hz)

Preventing fire and injury hazards
CAUTION! RISK OF BURNS DUE TO HOT SURFACES! Ensure the light has been switched off and has cooled down before touching it to avoid burns. Lamps become very hot.
Do not attach the light to a damp or conductive surface.
Do not look directly into the light source (lamp, LED, etc.). Do not look into the light source (lamp, LED, etc.) with an optical instrument (e.g. magnifier).
The illuminant in this light is not replaceable; when the illuminant reaches the end of its life, replace the entire light.
RISK OF SHORT CIRCUIT! Ensure the cables do not touch during operation. This can damage the light.
Preparation
- Required tools and material
The tools and materials specified are not included. This information and these values are non-binding and are only provided as a reference. The nature of the material is determined by the individual local conditions.
- Pencil / marking tool
Voltage tester - Screwdriver
- Electric drill
- Bit (0 approx. 0.6 cm)
- Side cutting pliers
- Ladder
- Prior to installation
Important: The electrical connection must be established by a qualified electrician. This person must be familiar with the properties of the light and the connection regulations.
Familiarise yourself with all the instructions and diagrams in this manual, as well as with the light itself, before you install it.
Make careful preparations for mounting and allow yourself adequate time. Organise all parts and any necessary additional tools or materials before starting so they are easy to reach.
Always be attentive! Always pay attention to what you are doing and proceed with caution at all times. Never install the light if you are having difficulty concentrating or do not feel well.
Before installation ensure that the circuit to which the light will be connected is not energised. To do so, remove the fuse or switch off the circuit breaker in the fuse box (position 0).
Verify that the components are not energised using a voltage tester.
Ensure that you do not damage any electrical cables, gas or water pipes when you drill into the wall.
Please refer to the instructions for use for your power drill.
- Initial use
- Installing the light
WARNING! DANGER OF ELECTRIC SHOCK!
Remove the fuse or switch off the circuit breaker (O setting) in the fuse box prior to installation (see Fig. A).
Install the light as shown in Figure B. While doing so, ensure that you follow the order of the individual steps as stated in these instructions.
Reinstall the fuse or switch on the circuit breaker in the fuse box (I setting) (see Fig. C).
Dimming the light
You have the option of dimming the light using a button 10.
Press and hold the button 10 to reduce brightness.
Press and hold the button 10 again to increase brightness.
If you switch the light on or off using the wall switch, it will be at 100% brightness.
Adjusting the light
□ If the pendant does not hang down straight, you can adjust it at the connection housing 5.
Press the height adjustment 9 on the end of the cable back into the connection housing 5
Push the cable into the connection housing 5 to shorten it (max. 40~cm
Pull the cable out of the connection housing 5 to extend it.
- Allow the height adjustment 9 to return to its initial position. The cable is now secured.
- Maintenance and Cleaning
WARNING! RISK OF ELECTRIC
SHOCK! Disconnect the light from the mains circuit before cleaning. To do so,
remove the fuse or switch off the circuit breaker in the fuse box (position 0).

WARNING! RISK OF ELECTRIC
SHOCK! For electrical safety reasons do not clean the lamp with harsh deter
gents and never immerse it in water.

CAUTION! RISK OF BURNS DUE
TO HOT SURFACES! Allow the light
to cool down completely.
- Do not use solvents such as petrol and the like, as they could damage the lamp.
Only use a dry, lint-free cloth for cleaning.
Replace the fuse or switch on the circuit breaker in the fuse box (I position).
Disposal

The packaging is made of entirely recyclable materials, which you may dispose of at local recycling facilities. Contact your local community or municipal administration for more details on how to dispose of your worn-out product.

The symbol of the wheelie bin with a line through it means that the product has to be disposed of in a separate re
fuse collection within the European Union. This applies to the product and to all components bearing this symbol. Do not dispose of products bearing this symbol in your normal household waste, but instead take them to be recycled at a collection site for electrical and electronic appliances. Recycling helps to reduce the consumption of raw materials and protects the environment.
Declaration of Conformity

This product fulfils the requirements of the applicable European and national directives. The relevant declarations and
documents are held by the manufacturer. This product meets the requirements of the German Equipment and Product Safety Act.
We reserve the right to make technical and visual changes to the product in the interest of product improvement. Typographical and printing errors excepted.
Warranty/Service centre
Warranty
We provide a 3 year warranty from the date of purchase.
Our products are manufactured using modern production methods and are subject to precise quality control. We guarantee this product is of good quality. During the warranty period any defects in material or manufacture will be replaced free of charge. In the event of an unexpected defect, please return the carefully packaged product to the service address specified.
The warranty does not extend to damage due to improper handling as well as wear items and consumables. These can be ordered from the telephone number listed for a charge.
Repairs not covered by the warranty (e.g. light bulb) may also be requested at cost from the service address listed.
The product will be repaired at the specified service location. Timely processing and return can only be ensured by sending the product directly to this address.
For additional product information, to order accessories or have a question about the service process, please contact our Customer Service Department at the telephone number specified. Please include the item number (see Technical Data) when inquiring about the product.
-Serviceaddress
Great Britain/Irland
EGLO UK Ltd.
Unit 12 Cirrus Park
Lower Farm Road
Moulton Park Industrial Estate
Northampton NN3 6UR
T: +44 1604 790 986
E: info-greatbritain@eglo.com
IAN 280204
Please have your receipt and item number (e.g.
IAN 12345) ready as your proof of purchase
when enquiring about the product.
Warrantycard
Return address:
Name/First name:
Country/Postal code/City/Street address:
Phone:
Item number/Description:
Purchase date/Point of purchase:
Description of the defect:
Date/Signature:
Non-warranty cases:
Please return the unrepaired item, carriage paid.
Please provide pricing. Repair the product against charge.
Preparation. Page 20
NL-4906 AA OOSTERHOUT (NBR)
T: +31 162 48 28 30
E: info-nl@eglo.com
Belgic
EGLO BELGIUM B.V.B.A.
Antwerpsesteenweg 247
B-2950 KAPELEN
T: +32 3 250 60 80
E: info-belgium@eglo.com
IAN 280204
EGLO CESKO-MORAVSKÁ SVITIDLA SPOL. S.R.O.
Nachodska 2479/63
CZ-193 00 PRAHA 9 Horní Počernice
T: +420 281 924 163
E: info-czechrepublic@eglo.com
IAN 280204
Pro vsechny pozadavky si pripravtePokladni bloka cislo vyrobku (napr.IAN 12345) jakodklad o nakupu.
Záručnikarta
Odesilate:
Prijmenj/Jmeno:
Zeme/PSC/Messto/Ulice:
Telefonni cislo:
(Edf. Best Point) 2^ - 16A
San Fernando de Henares
E-28830 MADRID
T: +34 91 677 9044
E: info-spain@eglo.com