
IAN 339477 - Lighting Livarno Lux - Free user manual and instructions
Find the device manual for free IAN 339477 Livarno Lux in PDF.


| Product Type | LED Ceiling Light |
| Model Numbers | 55426, 55427, 55428, 55429 |
| Operating Voltage | 220–240 V~, 50/60 Hz |
| Dimensions (55426/55429) | Bar length approx. 54 cm |
| Dimensions (55427) | Diameter approx. 28 cm |
| Dimensions (55428) | Diameter approx. 21 cm |
| LED Bulbs (55426/55427/55428) | 3 × 4 W, E14 base |
| LED Bulbs (55429) | 3 × 5 W, GU10 base |
| Indoor Use | Dry, enclosed spaces only |
| Dimmer Compatible | No |
| Adjustable Spotlights | Yes, 320° rotation |
| Installation Materials Included | Wall plugs, screws |
| Warranty | 3 years |
| Maintenance | Dry, lint-free cloth; disconnect power |
| Safety Certification | GS Mark (Tested Safety) |
| CE Conformity | Yes |
| Weight | Not specified |
Frequently Asked Questions - IAN 339477 Livarno Lux
User questions about IAN 339477 Livarno Lux
0 question about this device. Answer the ones you know or ask your own.
Ask a new question about this device
Download the instructions for your Lighting in PDF format for free! Find your manual IAN 339477 - Livarno Lux and take your electronic device back in hand. On this page are published all the documents necessary for the use of your device. IAN 339477 by Livarno Lux.
USER MANUAL IAN 339477 Livarno Lux
natural_image
Wall display featuring a ceiling light fixture, framed artworks of various plant and branch designs (no text or symbols)LED CEILING LIGHT
GB CY
LED CEILING LIGHT
Assembly, operating and safety instructions
RS
LED PLAFONSKA LAMPA
Before reading, unfold both pages containing illustrations and familiarise yourself with all functions of the device.
HR
GB / CY Assembly, operating and safety instructions Page 5
HR Upute za montažu, uporabu i sigurnost Stranica 13
55427
55428
55429
List of pictograms used....Page 6
Introduction......Page 6
Intended use....Page 7
Delivery contents....Page 7
Parts description......Page 7
Technical data....Page 7
Safety Page 7
Safety notes....Page 7
Preparation......Page 8
Tools and materials required....Page 8
Prior to installation....Page 8
Initial use....Page 9
Installing the light Page 9
Directing the spotlight....Page 9
Changing light bulbs....Page 9
Maintenance and cleaning......Page 9
Disposal Page 10
Warranty and service....Page 10
Warranty Page 10
Service address......Page 10
Declaration of conformity....Page 11
Warranty card....Page 11
| List of pictograms used | |||
 | Read the instructions! |  | Risk of accidents and risk of fatal injury for infants and children! |
 | Volts (alternating voltage) Including LED li |  | |
 | Hertz (frequency) Observe warnings and |  notes! notes! | |
 | Watts (effective power) Warning! Danger |  electric shock! electric shock! | |
 | Protective conductor For your safety! |  | |
 | LED operating life |  | Dispose of the packaging and device in an environmentally friendly manner! |
 | This light is only suitable for indoor use in dry and enclosed spaces. |  | Caution - hot surfaces! |
 | Switching cycles | Safety instructionsInstructions for use | |
| ### | This light is not suitable for dimmer or electronic switches. | Only insert the light bulb in a dry environment. | |
 | Dimensions |  | The “Tested Safety” seal (GS Mark) confirms that the product conforms with the German Product Safety Act (ProdSG) and is safe when used as intended and expected. |
LED Ceiling Light
Introduction

Congratulations on the purchase of your new product. You have chosen a high-quality product. Please be sure to
carefully read all the instructions for use. Fold out the page with the diagrams. These instructions are part of the product and contain important information
on setup and operation. Always observe all safety instructions. Before using this product for the first time, verify that the correct voltage is available and that all parts are properly installed. If you have any questions or are unsure about operating the product, please contact your retailer or the service centre. Please keep these instructions in a safe place and include them when passing this product on to others.
Intendeduse

This light is only suitable for indoor use in dry and enclosed spaces. The electrician installing the product must not install the product on a moist or conductive surface! This product is intended to be used in private households only.
- Delivery contents
Always check that all the parts are present and that the product is in perfect condition immediately after unpacking.
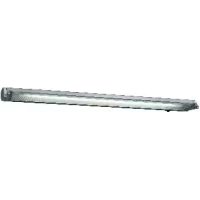
1 LED ceiling light, model 55426 / 55427 / 55428 / 55429
3 LED light bulbs (55426/55427/55428: E14, 4 W; 55429: GU10, 5 W)
Installation materials (wall plugs and screws)
1 Set of assembly instructions and instructions for use
- Parts description
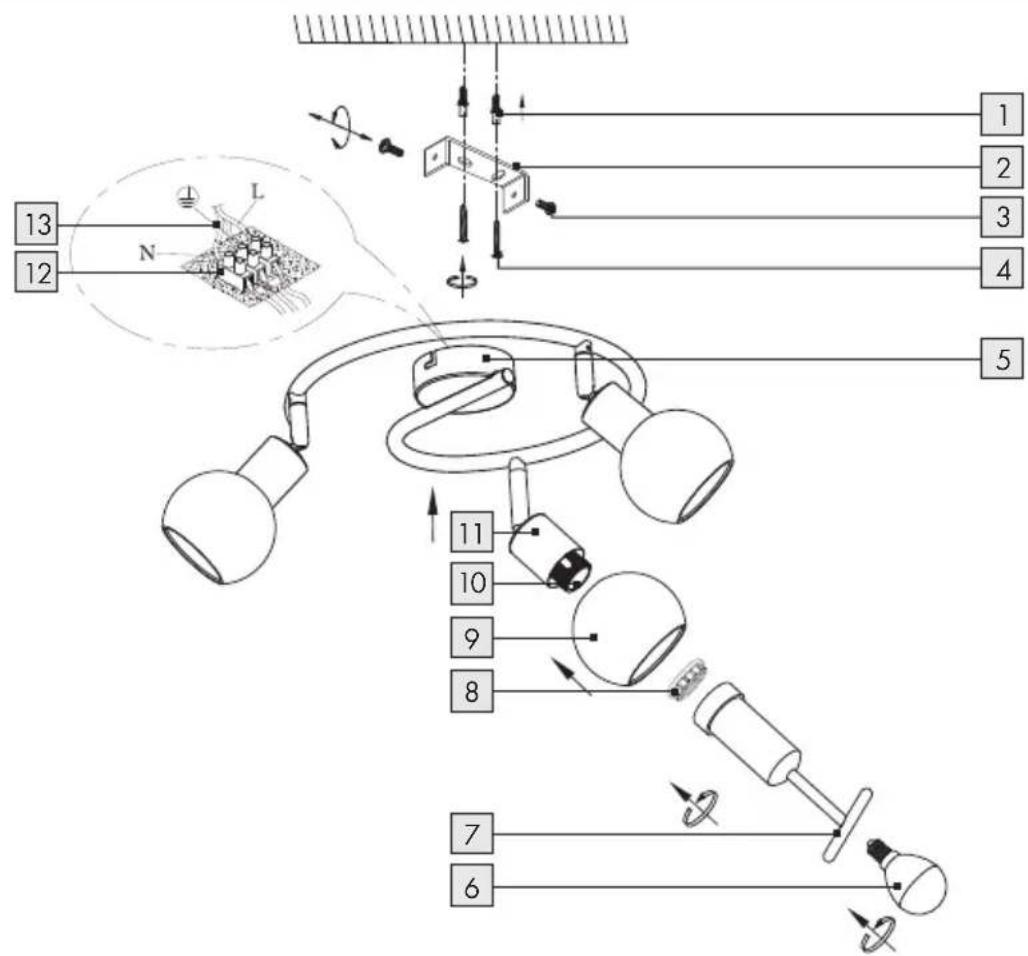
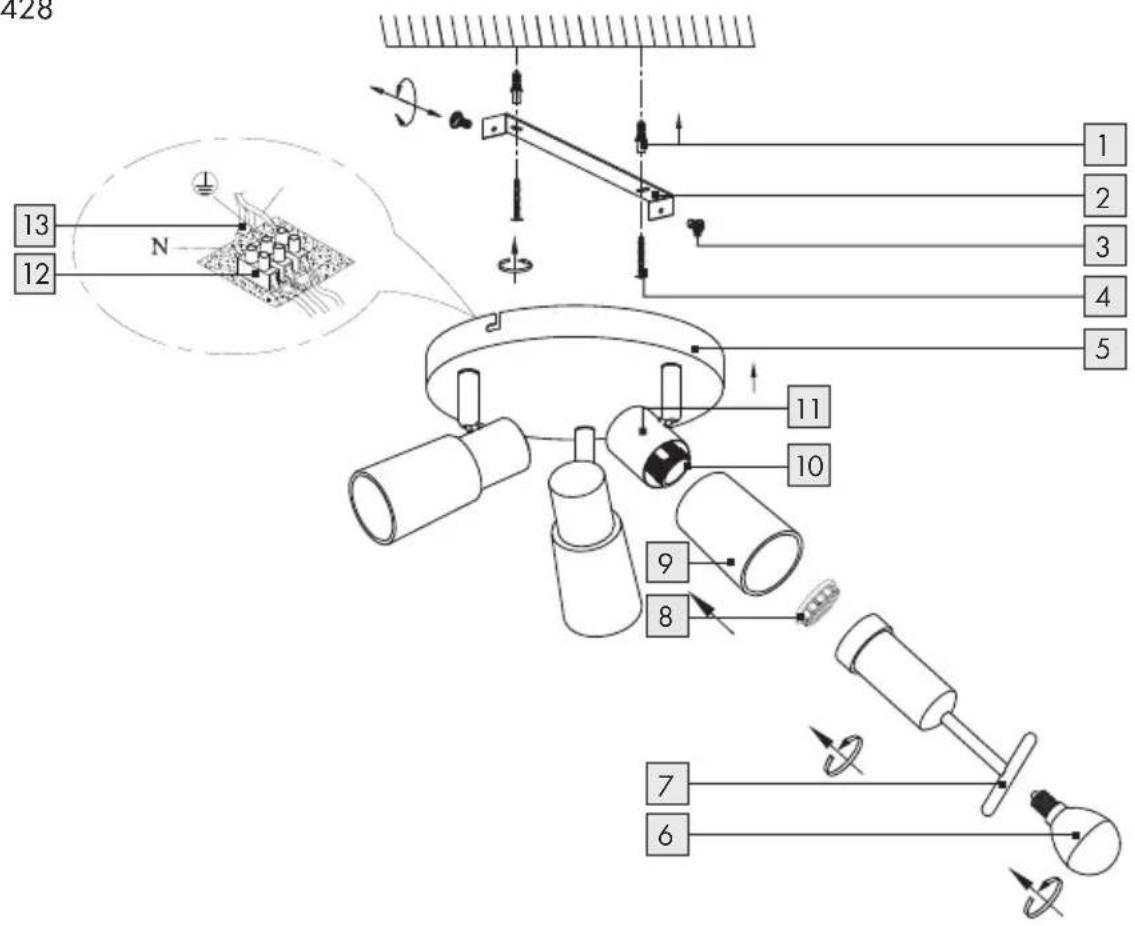
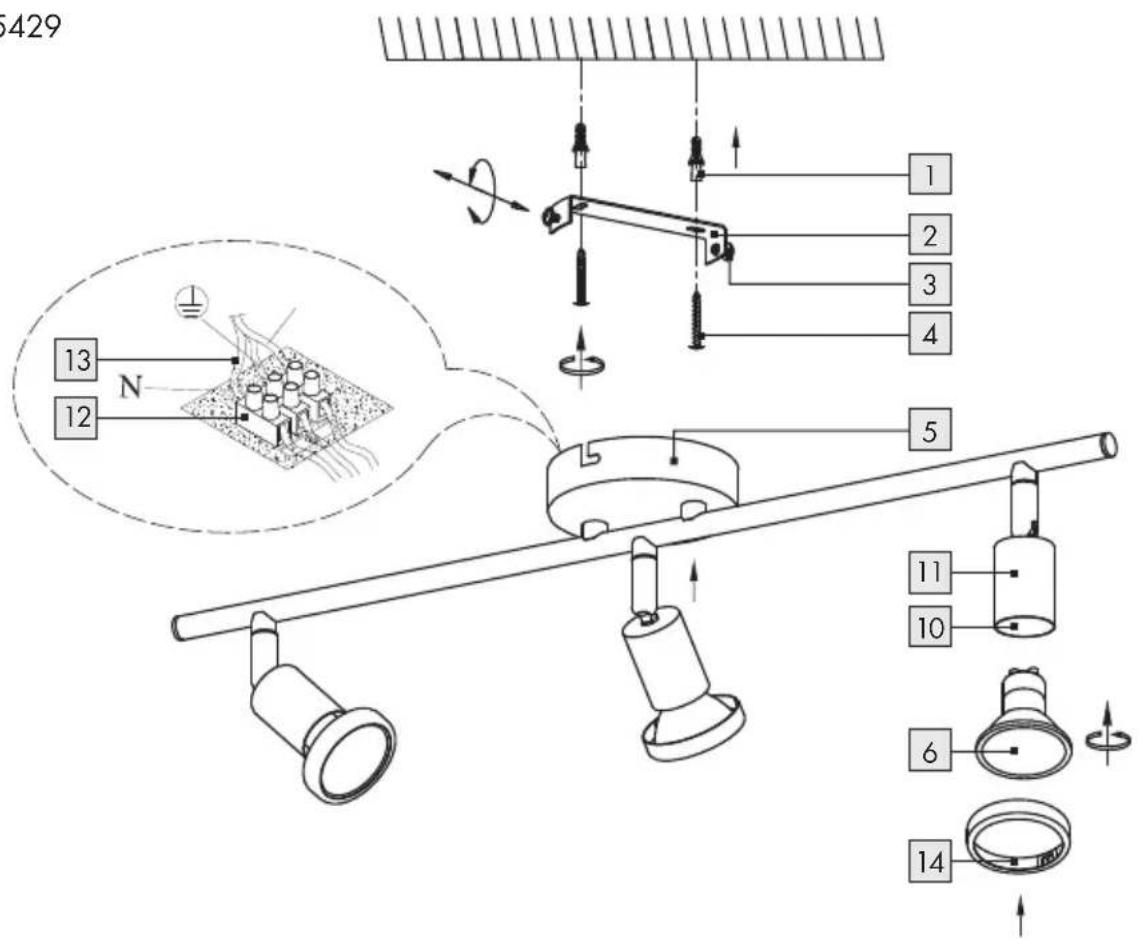
1 Dowel
2 Mounting bracket
3 Screw (connection housing)
4 Screw (mounting bracket)
5 Connection housing
6 Light bulb
7 Tool (model 55426/55427/55428)
8 Ring nut (model 55426/55427/55428)
9 Lamp glass (model 55426/55427/55428)
10 Socket
11 Spotlight
12 Lustre terminal
13 Mains connection cord (external)
14 Decorative ring (model 55429)
- Technical data
Model no.: 55426/55427/55428/55429
Operating voltage: 220-240V\~, 50/60Hz
Dimensions: 55426/55429:
Length of bar approx. 54 cm
55427: Diameter:
approx. 28 cm
55428:Diameter:
approx. 21 cm
LED light bulb: 55426/55427/55428:
E14, 3 × 4 W
55429: GU10, 3 x 5 W
●Safety

Safetynotes
Damage due to failure to comply with these operating instructions will void the warranty! We assume no liability for consequential damages! We assume no liability for property damage or personal injury due to improper handling or failure to observe the safety instructions!
WARNING! DANGER TO LIFE AND RISK OF ACCIDENT FOR INFANTS AND CHILDREN!
Never leave children unsupervised with the packaging material. The packaging material poses a suffocation hazard. Children frequently underestimate the dangers. Always keep children away from the product.
This product is not a toy and should be kept out of the reach of children. Children cannot recognise the dangers associated with the use of the product.
This product may be used by children aged 8 years and up, as well as by persons with reduced physical, sensory or mental capacities or lacking experience and knowledge, so long as they are supervised or instructed in the safe use of the product and understand the associated risks. Do not allow children to play with the product. Cleaning and user maintenance must not be performed by children without supervision.

Avoid the risk of fatal injury from electric shock
- Have the electrical installation performed by an electrician or a person trained in electrical installation.
■ Never use the light if you detect any damage.
■ Remove the fuse or switch off the circuit breaker (0 setting) in the fuse box prior to installation.
Prior to installation, verify the mains voltage on site corresponds with the operating voltage required for the light (220-240 V\~, 50 / 60 Hz).
■ Never open the housing of the light or insert any objects into it. Such interventions pose a risk of fatal injury from electric shock. - Only insert light bulbs of the correct type and do not exceed the maximum output of the bulb (see "Technical data").
■ Only parts provided by the manufacturer may be used. - Replace defective light bulbs immediately once they have cooled down.
- Do not install the light on a wet or conductive surface!

Prevent fire and injury hazards


CAUTION! RISK OF BURNS
DUE TO HOT SURFACES! Ensure
the light has been switched off and has cooled down before touching it to avoid burns. Light bulbs become very hot.
- When the light is in operation, individual parts may become hot. Allow the light to cool down completely before performing any work.
- Do not carelessly leave the light or packaging material lying around. Plastic film / bags, plastic parts, etc. are dangerous for children to play with.
■ To prevent a fire hazard do not operate the light in its packaging. - Do not cover the light with objects. Excessive heat build-up can result in fire.

For your safety
■ Prepare the installation with care and allow sufficient time. First organise all parts or materials so they are easy to reach.
■ Always be attentive! Always pay attention to what you are doing and always use common sense.
■ Never install the light if you are having difficulty concentrating or do not feel well.
●Preparation
- Tools and materials required
The specified tools and materials are not included. The information and values specified are non-binding and are only provided as a reference. The nature of the material is determined by the specific local conditions.
- Pencil / marking tool
- Voltage tester
- Screwdriver
- Electric drill
- Drill
- Hammer
- Ladder
- Prior to installation
Important: The electrical connection must be performed by a trained electrician or a person instructed in electrical installation. This person must be familiar with the properties of the light and connection regulations.
Note: Remove all packaging material before first use.
- Familiarise yourself with all the instructions and diagrams in this manual, as well as with the light itself, before you install it.
Before installation, ensure that the circuit to which the light will be connected is not energised. To
do so, remove the fuse or switch off the circuit breaker in the fuse box (0 setting).
■ Use a voltage tester to verify its de-energised status.
- Initial use
• Installing the light
☐ Loosen the screws visible at the side of the connection housing 5 and remove the mounting bracket 2 at the back.
Use the slotted holes in the mounting bracket intended for the screws to mark the drill holes.
Now drill the mounting holes (approx. 6 mm, depth approx. 40 mm). Be sure not to damage the supply line.
Insert the dowels into the drill holes.
Fasten the mounting bracket using the screws 4 provided.
Now connect the external lead of the light to the mains connection cord (external) 13 using the lustre terminal 12.
Note: Be sure to correctly connect each of the individual wires of the mains connection cord (external): live wire, black or brown = symbol L; neutral wire, blue = symbol N; earth wire, green-yellow = symbol ⊥.
Now use the screws to fasten the light to the mounting bracket 2.
Model 55426/55427/55428:
☐ Loosen the ring nut from the socket 10.
Place the lamp glass 9 carefully over the socket 10 and fasten it in place by tightening the ring nut 8 using the supplied tool 7. Be sure all are positioned correctly.
☐ Use a clean, lint-free cloth when inserting the light bulbs 6.
☐ Insert the appropriate light bulb (see "Technical data") by carefully screwing it in a clockwise direction. Ensure that it is positioned correctly.
☐ Your light is now ready to use.
Model 55429:
Place the decorative ring 14 on the light bulb 6.
☐ Use a clean, lint-free cloth to insert the light bulbs.
☐ Insert the light bulb by carefully screwing it in a clockwise direction. Ensure that it is positioned correctly.
□ Your light is now ready to use.
☐ Reinsert the fuse or switch the circuit breaker back on.
- Directing the spotlight
Only change the direction of the spotlights when the light is switched off.
Allow the light to cool off completely.
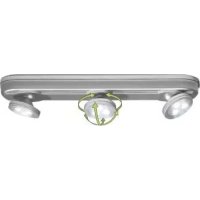
☐ Adjust the individual spotlights 11 to the desired position by their base. The spotlights can be turned approx. 320°.
● Changing light bulbs
WARNING! DANGER OF ELECTRIC
SHOCK! Disconnect the lights from the mains before replacing the light bulb. To do so, remove the fuse or switch off the circuit breaker in the fuse box (position 0).
Only use light bulbs as specified in chapter "Technical data".
Allow the light to cool off completely.
Use a clean, lint-free cloth to replace the bulb.
Model 55429: remove the decorative ring from the light bulb 6.
☐ Remove the defective light bulb by carefully unscrewing in an anticlockwise direction.
☐ Insert the new light bulb by carefully screwing it in a clockwise direction.
Model 55429: Place the decorative ring on the light bulb 6.
☐ Verify it is positioned correctly.
☐ Reinsert the fuse or switch the circuit breaker back on.
● Maintenance and cleaning
WARNING! DANGER OF ELECTRIC
SHOCK! Disconnect the light from the power supply before cleaning. To do so, remove the
fuse or switch off the circuit breaker in the fuse box (0 setting).
- Do not use solvents, petrol, etc. These would damage the light.
- Allow the light to cool down completely.
WARNING! DANGER OF ELECTRIC
SHOCK! For electrical safety reasons, never clean the light with water or other liquids, or immerse it in water.
☐ Only clean with a dry, lint-free cloth.
■ Then replace the fuse or switch on the circuit breaker in the fuse box (I setting).
●Disposal
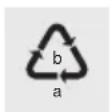
Observe the marking of the packaging materials for waste separation, which are marked with abbreviations (a) and numbers (b) with following meaning: 1–7: plastics / 20–22: paper and fibre-board / 80–98: composite materials.

The product and packaging materials are recyclable, dispose of it separately for better waste treatment. The Triman logo is valid in France only.

Contact your local refuse disposal authority for more details of how to dispose of your worn-out product.
To help protect the environment, please dispose of the product properly when it has reached the end of its useful life and not in the household waste. Information on collection points and their opening hours can be obtained from your local authority.
- Warranty and service
Warranty
We provide a 3 year warranty from the date of purchase. Our products are manufactured using
modern production methods and are subject to precise quality control. We guarantee that this product is in perfect condition. During the warranty period we will remedy any defects in material or manufacture free of charge. In the event of an unexpected defect, please return the carefully packaged product to the service address specified. The warranty does not extend to damage due to improper operation, or to wear parts and consumables. These can be ordered from the telephone number listed for a charge. Repairs not covered by the warranty (e.g. light bulbs) may also be requested at cost from the service address listed.
The product will be repaired at the specified service location. Timely processing and return can only be ensured by sending the product directly to this address.
If you would like additional product information, need to order accessories or if you have a question about the service process, please contact our Customer Service Department at the telephone number specified. Please include the item number (see "Technical data") when inquiring about the product.
Serviceaddress
Great Britain / Irland
EGLO UK Ltd.
Unit 12 Cirrus Park
Lower Farm Road
Moulton Park Industrial Estate
Northampton NN3 6UR
T: +44 1604 790 986
E: info-greatbritain@eglo.com
Cyprus
Pierides Electrical Ltd.
AY. Athanasios Industrial Area
- Falea Street
3507 Limassol, CYPRUS
Please have your receipt and the item number (IAN 339477_1910) ready as your proof of purchase when enquiring about your product.
- Declaration of conformity C€
This product fulfils the requirements of the applicable European and national directives. Conformity has been verified. The relevant declaration and documents are held by the manufacturer.

Serbian mark of conformity
Warrantycard
Return address:
Name / First name:
Country / Postal code / City / Street address:
Phone:
Item number / Description:
Purchase date / Point of purchase:
Description of the defect:
Date / Signature:
Non-warranty cases:

Please return the unrepaired item, carriage paid.

Please provide pricing. Repair the product against charge.
Broj modela: 55426/55427/55428/55429
Radni napon: 220–240V\~, 50/60Hz
Model 55426/55427/55428:
Br. modela: 55426/55427/55428/55429
Radni napon: 220-240V\~, 50/60Hz
Model 55426/55427/55428:
☐ Odvrnite navojni prsten 8 sa okvira 10.
Pažljivo postavite staklo lampe 9 preko okvira 10 i pričvrstite ga pritezanjem navojnog prstena 8 pomoću isporučenog alata 7 Obratite pažnju na ispravno naleganje.
Za postavljanje rasvetnog teđa koristite čistu krpu, bez vlakana.
Postavite odgovarajuće rasvetno telo (vidi „Tehnički podaci“) okretanjem u smeru okretanja kazaljke na satu. Proverite da li ispravno naleže.
□ Vaša lampa je sada spremna za rad.
Model 55429:
Stavite ukrasni prstel4 na rasvetno telo 6.
□ Za postavljanje rasvetnog tela koristite čistu krpu, bez vlakana.
Postavite rasvetno telo okretanjem u smeru kretanja kazaljke na satu. Proverite da li ispravno naleže.
□ Vaša lampa je sada spremna za rad.
Ponovo postavite osigurač ili opet isključite zaštitni prekidač voda.
• Usmeravanje svetlosnog snopa
Nr. model: 55426/55427/55428/55429
Tensiune de lucru: 220-240 V\~, 50/60 Hz
Becuri cu LED: 55426/55427/55428:
E14, 3 × 4 W
55429: GU10, 3 x 5 W
Siguranță

Model 55426/55427/55428:
Main Road Burgas-Sofia,
5-th kilometer,
Building KACHIKA
8000 Burgas, BULGARIA
T: +359 56 960 403
E: info-bulgaria@eglo.com
IAN 339477_1910
13671 Athens, ΕΛΛΑΔΑ
E-Mail: info-greece@eglo.com
Phone: +30-210-2407710
Cyprus
Pierides Electrical Ltd.
AY. Athanasios Industrial Area
- Falea Street
3507 Limassol, CYPRUS
1 LED-Deckenleuchte, Modell 55426/55427/55428/55429
3 LED-Leuchtmittel (55426/55427/55428: E14, 4 W; 55429: GU10, 5 W)
Modellnr.: 55426/55427/55428/55429
Modell 55426/55427/55428:
Ident.-No.: 55426/55427/55428/55429122019-7
IAN 339477_1910
7+
- LED CEILING LIGHT
- LED PLAFONSKA LAMPA
- HR
- List of pictograms used....Page 6
- Introduction......Page 6
- Safety Page 7
- Preparation......Page 8
- Prior to installation....Page 8
- Initial use....Page 9
- Maintenance and cleaning......Page 9
- Disposal Page 10
- Warranty and service....Page 10
- Introduction
- Intendeduse
- - Delivery contents
- - Parts description
- - Technical data
- ●Safety
- Safetynotes
- WARNING! DANGER TO LIFE AND RISK OF ACCIDENT FOR INFANTS AND CHILDREN!
- Avoid the risk of fatal injury from electric shock
- Prevent fire and injury hazards
- CAUTION! RISK OF BURNS
- DUE TO HOT SURFACES! Ensure
- For your safety
- ●Preparation
- - Tools and materials required
- - Prior to installation
- - Initial use
- • Installing the light
- Model 55426/55427/55428:
- Model 55429:
- - Directing the spotlight
- ● Changing light bulbs
- WARNING! DANGER OF ELECTRIC
- ● Maintenance and cleaning
- ●Disposal
- - Warranty and service
- Warranty
- Serviceaddress
- Great Britain / Irland
- Cyprus
- - Declaration of conformity C€
- Warrantycard
- • Usmeravanje svetlosnog snopa
- Siguranță
- Modell 55426/55427/55428:
Brand : Livarno Lux
Model : IAN 339477
Category : Lighting