Reer BabyCam XL 80440 - Baby monitors

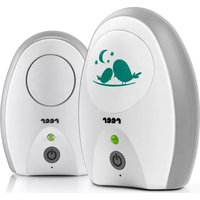
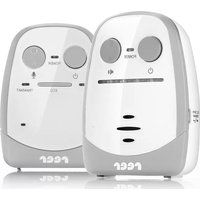
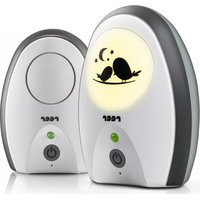
BabyCam XL 80440 - Baby monitors Reer - Free user manual and instructions

Find the device manual for free BabyCam XL 80440 Reer in PDF.

📄 128 pages English EN 💬 AI Question
Notice Reer BabyCam XL 80440 - page 23

User questions about BabyCam XL 80440 Reer

0 question about this device. Answer the ones you know or ask your own.

Ask a new question about this device

L'email reste privé : il sert seulement à vous prévenir si quelqu'un répond à votre question.

No questions yet. Be the first to ask one.

Download the instructions for your Baby monitors in PDF format for free! Find your manual BabyCam XL 80440 - Reer and take your electronic device back in hand. On this page are published all the documents necessary for the use of your device. BabyCam XL 80440 by Reer.

USER MANUAL BabyCam XL 80440 Reer

BBabyCam XL Congratulations on purchasing your new reer BabyCam XL. The BabyCam XL consists of a parent unit with screen (hereinafter also referred to as the display) and a baby unit with movable camera (hereinafter also referred to as the camera). Your new BabyCam XL uses a highly sensitive microphone to provide you with clear and reliable feed of any sounds your baby makes, with a high-definition display that also lets you keep an eye on your little one at all times. The modern FHSS technology ensures interference-free transmission and guarantees a secure and private connection. Thanks to the parent unit‘s optional battery operation, the baby monitor can be used both in a stationary position or while moving around. We are sure you will enjoy the quality of our product for many years to come. Please take a few minutes to read through the safety instructions carefully. The reer video baby monitor can only be used in a carefree manner reservations if all of the points listed here are fulfilled. Please keep the instruction manual in a safe place for future reference. Technical data Technology Digital, FHSS, 2,4 GHz Frequency 2,4 GHz Number of channels 19 Transmitter baby unit camera Power supply with mains adaptor Receiver parent unit display Power supply with mains adapter or optional 3.7 V 1400 mAh Li-polymer battery/rechargeable (integrated in parent unit) Field of view of the lens 60° Camera movement horizontal 330° Camera movement vertical 110° Range Up to 300 m Operating temperature -10°C – +50°C Maximum battery life of the parent unit (display; on stand-by) Up to 20 hoursGeneral safety instructions ! Check the unit for visible damage before each use. If you detect any damage, do not use the unit. ! Only use the supplied chargers and mains adapters. Make sure that the operating voltage of the power outlet matches that of the mains adapter. Check - especially when travelling abroad - that the local mains voltage matches the voltage specified on the units and/or mains adapters. ! Except for the battery compartment cover, never open the units or mains adapters, as there is a risk of electric shock. If a unit does not work cor- rectly, please do NOT try to fix the problem yourself. Please contact your dealer in the case of any problems. ! Avoid bringing the battery and/or electrical connection contacts on the units into contact with metal objects. ! This product is not a toyDo not allow children to play with the unit. ATTENTION ! This baby monitor was designed exclusively for monitoring your baby. It may neither be regarded as a substitute for parental supervision nor as a medical device. Safety instructions for installation ! Always place the baby unit out of your child´s reach (minimum distance: 1 meter). ! Never place the baby monitor inside the crib, cot or playpen. ! The power lead must be secured out of the reach of children to avoid any risk of strangulation. Do not use extension cables. ! To ensure optimal transmission, the units must be kept upright at all times and placed in an elevated position. ! DO NOT place the receiver in the vicinity of radio transceivers or mic- rowaves. Radiant emissions from these devices can significantly affect radio reception. ! Do not use the units near water or in humid places. Do not submerge the units in water. ! Do not rinse the units under running water. ! Do not cover the baby monitor with towels, clothes or blankets. ! Avoid extreme heat and direct sunlight ! The socket used for connecting the mains adapter must be located close to the baby monitor and kept freely accessible at all times. ! Disconnection from the mains supply is only allowed if the mains adap- ter is disconnected from the power socket.Camera (baby unit/transmitter)

6. Micro USB slot for power

7. Increase night light brightness

8. Reduce night light brightness

11. Suspension points for wall

5Display (parent unit/receiver) Menu and symbols

15. Status light (operation/

and remote control of camera movements

7. Automatic movement following

1. Fully charge the battery before using the parent unit for the first time,

until the battery level indicator on the display shows a full charge.

2. Connect the camera using the mains adapter supplied.

3. Place the camera on a stable table or mount it on a wall.

5. Switch on the display by setting the switch (25) to | or

Kamera VOX Modus Alarm Schlaieder Licht Bewegung Einstellung Zoom 2x The status light (15) now remains constantly green. In Kamera VOX Modus Alarm Schlaieder Licht Bewegung Einstellung Zoom 2x mode, you will receive a vibration as soon as the device records a noise, in | mode, there will be no vibration.

6. The devices are pre-coupled in the factory, enabling you see the ca-

mera’s picture on the screen and hear the sound picked up by the microphone through its speaker. If this is not the case, please proceed with the steps described under Adding/deleting additional cameras.Functional possibilities: Camera

1. When the camera is transmitting, the transmission indicator (3) lights

up blue. As soon as your baby becomes quiet and makes no more sound, the camera stops transmitting. It then goes into stand-by mode until noises are detected again. This reduces the radiation exposure to a minimum.

2. The night light can be switched on and off using the display. You can

select whether it should be on, off, or in VOX mode. The brightness can be adjusted on the back of the camera (7+8).

3. The display can be used to control the playback of lullabies. 6 different

songs are factory preinstalled. They can be played once, repeatedly or in a continuous loop. The volume can be adjusted in the menu navi- gation.

4. When lighting is sufficient, the camera transmits a colour image to

the display. If the surroundings are no longer bright enough, the night vision mode is automatically activated. In this case, only a black and white image will be transmitted.

5. You can rotate the camera continuously by 330° and tilt it 110° using

follows the movement within the movement radius. Adding/deleting additional cameras

(14) to confirm. Remove: Use the arrow keys to select Remove Camera and press the OK key to confirm.

3. Use the arrow keys to select the camera you want to add or remove

and confirm your selection with the OK key (14).

4. Now press the pairing button (10) on the underside of the camera

within 30 seconds and then wait for about 5 seconds. A successful coupling is then confirmed by a double beep and a confirmation mes- sage on the screen. If the confirmation does not appear, please repeat steps 2–4.

5. Repeat the steps for all other cameras. Please note: If you select a save

location that is already occupied, the existing data willDisplay

1. If the parent unit status light (15) starts flashing green, the built-in

battery is empty. This means the display needs to be recharged.

2. Adjust the volume using the Volume Control key (27). The volume is

displayed on the screen in the form of a bar chart. To mute the speaker, press and hold the key to decrease the volume until the Kamera VOX Modus AlarmSchlaieder Licht Bewegung Einstellung Zoom 2x icon appe- ars. To cancel muting, press and hold the key to increase the volume until it reaches the desired level.

3. To move the camera within the movement radius, use the arrow keys.

Please note that only one key can be pressed at a time.

4. To be able to talk to your baby, use the intercom function:

a. Press and hold the intercom button (14). As long as the icon Kamera VOX Modus AlarmSchlaieder Licht Bewegung Einstellung Zoom 2x Camera Screen Alarm Lullaby Setting Tracking Light Zoom 2x appears on the display, you can speak in the direction of the microphone on the bottom of the unit. b. Now you can speak towards the microphone on the bottom of the unit c. Your voice will now be transmitted to the camera‘s speaker. You can adjust the volume via the menu. d. To hear your baby again, exit the intercom mode by releasing the button intercom button (14). The microphone is then deactivated and you can hear your baby through the speaker again.

5. If required, the display unit can also be placed on a flat surface (table

or similar). To do this, fold out the stand on the back. To increase the range of the unit, you can fold out the antenna on the rear side.

6. Press the button briefly (21) to enter the main menu. You can

select the desired sub-item by navigating with the arrow keys. Pres- sing the confirmation key (4) confirms the selection and goes to the sub-item. Press the button to return to the previous menu item or exit the menu.

qqqq qqbutton 14,15,16 and 17 to select the functions to be set, then short press OK button 19 to confirm. After performing the setting, short press menu button 25 to return to upper menu or exit from menu mode. This function is to select the camera to be viewed. If PU is paired to more than one camera, parent can select to view two cameras on screen at the same time or view each camera sequentially under auto scan mode. Use button 14 15 to select the camera no. to be viewed. Short press OK button 19 to confirm. Setting LightWith multiple paired cameras, you can select the cameras individually, see two cameras together on the screen side by side, or select „Auto scan”. If you select two cameras, you will see both images next to each other, but you will only hear the sound of the camera displayed on the left side of the screen. To change the audio source, briefly press the confirm button (14). In „Auto scan“ mode, the camera pans from one camera to another in ascending order every eight seconds. If no camera detects noise or movement, the screen switches to stand-by after 32 seconds until one of the cameras detects noise or movement again. When multiple cameras detect noise or movement, the camera with the higher number is indicated on the display by the number flashing. Press the confirmation key (14) to go to it immediately. You can either choose for the display to be on permanently or use the low-radiation VOX mode. To do so, select the desired mode using the arrow key navigation and confirm with the OK key (14). In VOX mode, the screen automatically turns on as soon as the camera picks up any sounds and turns it off automatically as soon as the baby stops making any noise. For this, you can select the time delay (between 5-25 seconds) before the screen switches off. 10 seconds before the screen switches off, a message appears on the display. The VOX mode keeps camera radiation to a minimum and reduces the display’s battery consumption. When the screen is in continuous operation, it remains permanently switched on or can be set to switch itself off at a number of different intervals. In this mode, the battery life is reduced.

7. The noise level indicator (12) indicates the volume of the sounds from

the baby. The louder the sounds, the more LEDs light up. This function is particularly useful if you prefer a quiet volume for the display and still want to monitor your baby‘s activities. Camera Screen Alarm Lullaby Light Tracking Setting Zoom 2x Camera Screen Alarm Lullaby Light Tracking Setting Zoom 2xYou can choose whether alarm tones and key tones should be played. You can play the pre-installed lullabies and nature sounds. You can select which songs to play and at what volume. To repear a particular song, select . If you have set a song to play it will be played for 20 minutes. If the aby does not make any noise adterwards, e.g. because it has fallen asleep, playback stops automatically. When the baby strats making noises again, the music is played for another 20 minutes. You can also navigate here using the arrow keys and the confirmation key (14). You can choose between regular and double magnification of the screen. At this point the night light of the camera can be adjusted. You can choose between On, Off, or the VOX mode. In VOX mode, the night light is on when the camera is transmitting baby sounds and turns off when the environment becomes quiet. You can set the camera to follow the movement of your baby. To do this, point the camera in the direction of your baby. When the baby starts to move the camera will follow the movement. Please note, if you want to monitor several babies with this function, the automatic motion detection can only used to a limit extent.Furthermore you can acticate a motion alarm. As soon as the camera detects any movement, the parent unit begins transmission and an acoustic signal is given. When the motion alert is activated, the symbol Kamera VOX Modus Alarm Schlaieder Licht Bewegung Einstellung Zoom 2x appears on the display. In this menu you can make various settings. Camera Screen Alarm Lullaby Light Tracking Setting Zoom 2x Camera Screen Alarm Lullaby Light Tracking Setting Zoom 2x Camera Screen Alarm Lullaby Light Tracking Setting Zoom 2x Camera Screen Alarm Lullaby Light Tracking Setting Zoom 2x Camera Screen Alarm Lullaby Light Tracking Setting Zoom 2x Camera Screen Alarm Lullaby Light Tracking Setting Zoom 2xDisplay: Indicator: Select 1 of the 5 available brightness levels and optionally rotation of the image by 180°. Temperature: You can monitor the room temperature of the room in which the camera is located. In addition, you can set upper and lower limit values, and display an optional visual and acoustical indication of values extending below or above these limits. Please note that these temperature limits are also applied to retrofitted cameras. Camera microphone sensitivity and volume for the intercom: The higher you set the sensitivity of the camera microphone, the more sensitive to noise it becomes. You can also adjust the volume of the intercom here. This volume is independent of the playback volume of the music. Change to night vision mode: If the camera’s surroundings become too dark, it automatically switches to night vision mode and transmits only in black and white. This menu item allows you to set the brightness level at which night vision mode is activated. Reset to factory settings: If you select this menu item, all settings will be reset, but the coupling remains. Symbols: Camera Screen Alarm Lullaby Light Tracking Setting Zoom 2x

AA) Signal strength The further away the display and camera are from one another, the weaker the signal will be and the fewer bars will be displayed. If the camera is out of range, this is clearly indicated on the screen and an audible alarm will sound until a connection can be re-established. If the signal is weak, the image may occasionally freeze. B) Camera number: Number of the camera currently displayed on the screen. C) Temperature indicator: Temperature indicator of the location of the connected camera. If the previously set temperature limits are exceeded, this will be indicated on the screen and acoustically. D) Zoom: When the Zoom function is activated, this icon appears and the image is enlarged twofold. E) Battery level indicator: The status of the battery is indicated here. When the battery level falls below 20%, the icon will start flashing and an audible alarm will sound. When charging, the icon will flash and the status light (15) will light up in red until the battery is fully charged. When this is achieved, it changes colour and turns green. Camera Stand-By: Even if the camera is in stand-by mode (VOX mode or screen auto off), you can always take a quick look at your baby – even if is no sound is picked up. Press one of the arrow buttons, the confirmation button, the volume control, or the menu button. The camera image will be displayed for 10 seconds. Mute alarm: If you want to mute an audible alarm, press one of the arrow keys, the confirmation key, the volume control, or the menu key. The alarm tone will then stop, but the reason for the alarm will continue to be displayed as text on the screen until you confirm it by pressing the confirmation key (14).Troubleshooting Problem Possible cause Action No audio or video signal is transmitted

  • Camera microphone sensitivity is too low
  • No power supply to the camera
  • Adjust the sensitivi- ty in the menu
  • Test the power sup- ply Constant transmission • Camera microphone sensitivity is too high
  • Continuous opera- tion of the screen is activated without Auto off
  • Adjust the sensitivi- ty in the menu
  • Set a time limit for continuous opera- tion or activate VOX mode Constant range alarm • Camera is turned off or power is not supplied
  • Distance between the units is too large
  • The coupling is faulty or no longer there
  • Switch on the camera and test the power supply
  • Reduce distance between units
  • Carry out coupling again Unclear image or image standstill or sudden black and white image
  • Brightness at came- ra location too low, camera switches to night vision mode
  • Interference from other electronic devices, e.g. WiFi router, microwave...
  • Reduce distance between units
  • Adjust the bright- ness sensitivity in the menu or increa- se the brightness at the camera location
  • Increase distance to other electronic devices, switch off unused devices if possible instead of switching to stand- by modeProblem Possible cause Action Low battery indicated on the display
  • Built-in battery is empty
  • Continuous opera- tion of the screen is activated without Auto off
  • The speaker is muted
  • Increase volume using the key Range too small • Too much signal in- terference between camera and display
  • Reposition the ca- mera and display No sound in split- screen mode (only possible if at least two camera are operated simultaneously)
  • The display is con- nected to an other camera
  • Change the con- nected camera by pressing confirm button Warranty Please retain your receipt, the user manual and item number. Warranty claims or claims from promises of guarantee must be processed by the dealer. The technical specification, information and characteristics of the product described herein have been compiled to the best of our knowledge and belief and are correct at the time of printing. Any information provided by reer should be correct and authoritative. Nevertheless, reer does not accept liability for potential errors in this document and reserves the right to make changes to the product design and/or specifications without prior notice. Reproduction and disclosure of information contained in this copyrightprotected document, in any form or by any means - graphical, electronic or mechanical by photocopying, recording on tape or storage in a data retrieval system (even in part), require prior written consent from reer.At the end of its life, this product must not be disposed of as normal domestic waste, but should be recycled at a collection point for electrical appliances. Please see the relevant symbol on the product, in the user manual and packaging. Materials can be recycled as specified. An important contribution to the protection of the environment can be made by reusing the unit, recycling its components or otherwise reusing old appliances. Please contact your local council to find out more about an appropriate disposal centre.
  • Always disconnect the mains adapters from the wall power socket be- fore cleaning the unit.
  • Only use a slightly dampened cloth.
  • Do not submerge the unit in water.

qqqq qqbutton 14,15,16 and 17 to select the functions to be set, then short press OK button 19 to confirm. After performing the setting, short press menu button 25 to return to upper menu or exit from menu mode. This function is to select the camera to be viewed. If PU is paired to more than one camera, parent can select to view two cameras on screen at the same time or view each camera sequentially under auto scan mode. Use button 14 15 to select the camera no. to be viewed. Short press OK button 19 to confirm. Setting Light

Manual assistant
Powered by Anthropic
Waiting for your message
Product information

Brand : Reer

Model : BabyCam XL 80440

Category : Baby monitors