Neo 50040 - Baby monitors Reer - Free user manual and instructions
Find the device manual for free Neo 50040 Reer in PDF.


| Brand | Reer |
| Model | Neo 50040 |
| Product type | Baby monitor (digital baby monitor) |
| Technology | Digital |
| Frequency | 2.4 GHz |
| Maximum range | 250 m in open field |
| Power supply baby unit | Micro USB adapter 5V/500mA or 3 NiMH AAA batteries (not included) |
| Power supply parent unit | Micro USB adapter 5V/500mA |
| USB cable length | Approximately 1.55 m |
| Operating temperature | 10°C to 40°C |
| Storage temperature | 0°C to 55°C |
| Power consumption | Transmitter 50 mA, receiver 130 mA |
| Standards | EN 300 220-1, EN 301 489-1, EN 301 489-3 |
| Main features | Audio monitoring, ECO mode (stops emissions in standby), range control with alarm, volume adjustment, integrated night light |
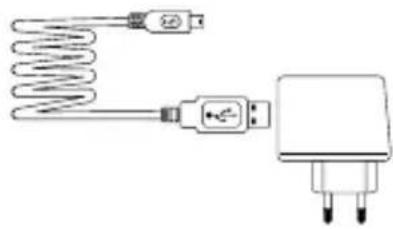
| Included accessories | 1 USB power adapter, 2 USB cables, baby unit, parent unit, belt clip |
| Care and cleaning | Clean with a slightly damp cloth, unplug before, do not use chemical products |
| Safety instructions | Keep at least 1 meter away from child, do not place in the crib, do not use near water, do not open, use only the provided accessories |
| Recommended batteries | Only NiMH AAA rechargeable batteries (not included) |
| Warranty | See retailer (keep proof of purchase) |
Frequently Asked Questions - Neo 50040 Reer
User questions about Neo 50040 Reer
0 question about this device. Answer the ones you know or ask your own.
Ask a new question about this device
Download the instructions for your Baby monitors in PDF format for free! Find your manual Neo 50040 - Reer and take your electronic device back in hand. On this page are published all the documents necessary for the use of your device. Neo 50040 by Reer.
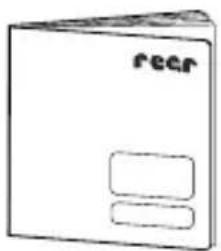
USER MANUAL Neo 50040 Reer
natural_image
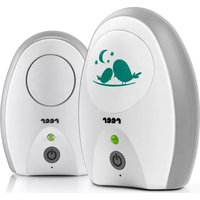
Illustration of two connected devices labeled 'reer', showing circular design with bird silhouettes and power button (no text or symbols beyond branding)DE Babyphone Neo Digital
General safety instruction .....14
Safety instructions regarding installation . . 15
Technical specification....15
Scope of delivery ..... 16
Description of babyphone .....16
Before first use. 17
Settings, Battery operation ..... 18
Range control, ECO mode ..... 19
Volume control / parent unit ..... 19
Tips for extending the range ..... 20
Cleaning and maintenance ..... 20
Warranty, Disposal instructions ..... 21
Troubleshooting 22
ES Índice
natural_image
Illustration of a stylized device with two birds perched on a branch, emitting stars (no text or symbols)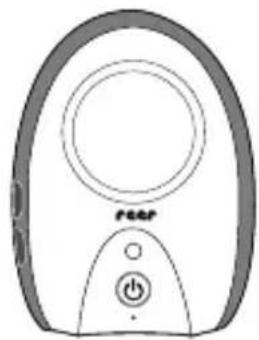
natural_image
Line drawing of a remote control device with a circular dial and power button (no text or symbols)
text_image
RoerGebrauchsanleitung
natural_image
Simple line drawing of a plug connected to a coiled spring and USB plug (no text or symbols)natural_image
Technical diagram of a mechanical component with labeled parts (no text or symbols present)natural_image
Simple diagram of a gray oval shape with a dashed circular outline and four corner dots, no text or symbols present.natural_image
Illustration of two hand-drawn electrical devices with switches and a bird graphic, no text or symbols presentflowchart
graph TD
    A["1: Initial treatment"] --> B["2: Treatment step"]
    B --> C["3: Blood donation using battery"]
natural_image
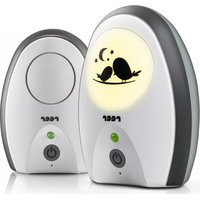
Symbol of a trash bin crossed with no text or labels, accompanied by a black rectangular block below (no readable text or symbols)Congratulations on the purchase of your new reer baby monitor. This intuitive unit's highly sensitive microphone transmits the sounds your baby makes clearly and reliably. The baby unit's soothing night light helps your child settle to sleep, and the unit then automatically switches to „ECO mode“ as soon as your baby is quiet. In this ECO mode, the baby unit no longer emits any radiation. The baby unit starts to send again only when noises are received. Thanks to its optional battery operation and robust belt clip, the baby monitor is handy for use as a stationary or mobile unit. We are sure you will enjoy the quality of our product for many years to come.
Please take a few minutes to read through the safety instructions carefully. You will only be able to use the reer baby monitor with confidence if all of the points mentioned here have been checked. Please keep the instruction manual in a safe place for future reference.
! Check the unit for visible damage before each use. If you detect any damage, do not use the unit.
! Only use the supplied chargers and mains adapters. Make sure that the operating voltage of the power outlet matches that of the mains adapter. Check - especially when travelling abroad - that the local mains voltage matches the voltage specified on the units and/or mains adapters.
! Except for the battery compartment cover, never open the units or mains adapters, as there is a risk of electric shock. If a unit does not work correctly, please do NOT try to fix the problem yourself. Please contact your dealer with any problems.
! Keep the battery out of the reach of children. In order to avoid any risk of swallowing.
! Avoid bringing the battery and/or electrical connection contacts on the units into contact with metal objects.
! This product is not a toy! Do not allow children to play with the unit.
NOTE: This baby monitor was designed exclusively for monitoring your baby. It may neither be regarded as a substitute for parental supervision nor as a medical device.
! Always place the baby unit out of your child's reach (minimum distance: 1 meter).
! Never place the baby monitor inside the crib, cot or playpen.
! The power lead must be secured out of the reach of children to avoid any risk of strangulation. Do not use extension cables.
! To ensure optimal transmission, the units must be kept upright at all times and placed in an elevated position.
! DO NOT place the receiver in the vicinity of radio transceivers or microwaves. Radiant emissions from these devices can significantly affect radio reception.
! Do not use the units near water or in humid places. Do not submerge the units in water. Do not rinse the units under running water.
! Do not cover the baby monitor with towels, clothes or blankets.
! Avoid extreme heat and direct sunlight.
Technical specification
- Technology: digital
• Transmitter: Power supply with micro USB power supply or optionally with AAA NiMH power pack (not included in the scope of delivery) - Receiver: Power supply with micro USB power supply
- Input: 100 – 220 V 50 Hz 0.15 A max.
• Output: 5 V / 500 mA max.
• transmitter power: TX 50 mA, RX 130 mA
- frequency: 2,4 GHz
- range: 250 m
• cable length: approx. 1.55 m
• working temperature: 10 °C - 40 °C
• storage temperature: 0 °C - 55 °C
- standards: EN 300 220-1, EN 301 489-1 and EN 301 489-3

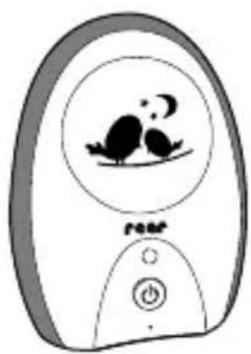
natural_image
Illustration of a stylized device with two birds inside a circle, connected to a power button (no text or symbols)
natural_image
Line drawing of a remote control device with a circular dial and power button (no text or symbols)
text_image
Roerinstruction manual
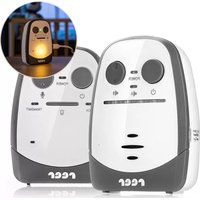
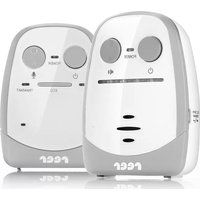
baby unit (transmitter) parent unit (receiver)
natural_image
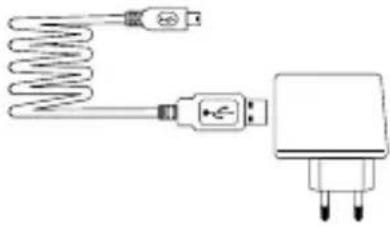
Simple line drawing of a coiled spring connected to a plug (no text or symbols)1 x USB power adapter 2 x USB charging cable for baby unit and parent unit
Description of babyphone
PARENT UNIT

text_image
speaker status LED selection (+) selection (-) on-/off switch microphone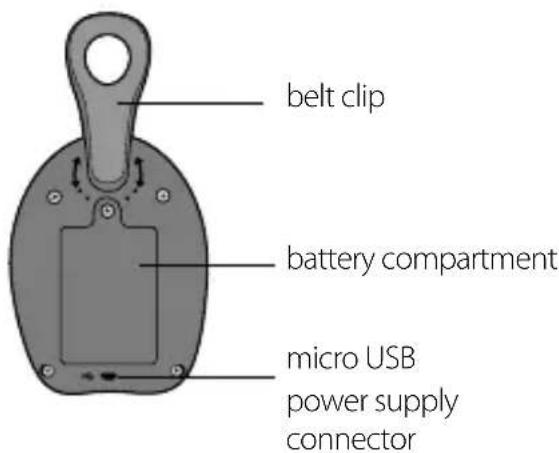
text_image
belt clip battery compartment micro USB power supply connectorBABY UNIT
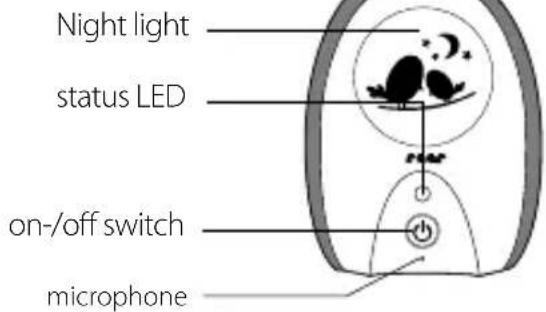
text_image
Night light status LED on-/off switch microphone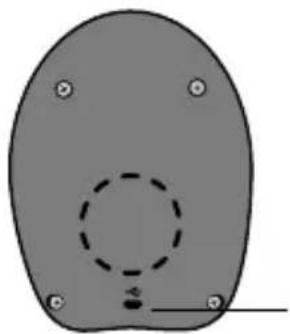
natural_image
Simple diagram of a gray oval shape with a dashed circular center and four corner dots, no text or symbols present.micro USB power supply connector
1
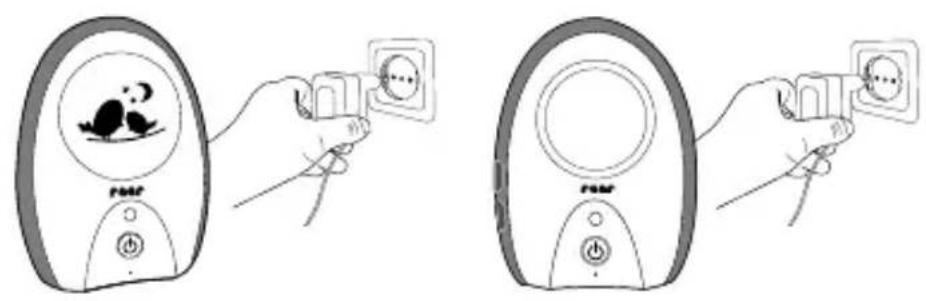
natural_image
Illustration of two hand-drawn electrical devices with switches and a cat illustration, no text or symbols present
Only the supplied adapter (5 V DC / 500 mA) may be used.
NOTE: Only use rechargeable NiMH AAA batteries! Never use non-rechargeable batteries in the baby monitor. Using unsuitable battery types poses an explosion hazard!
2
text_image
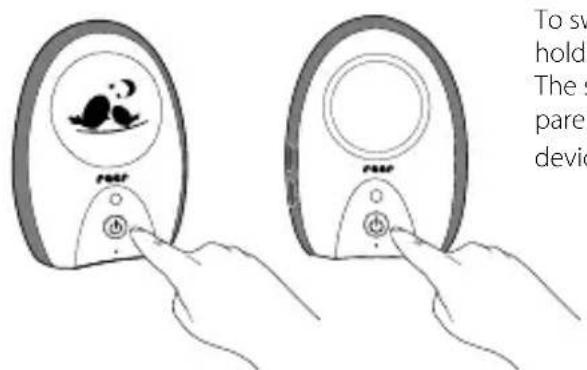
To sw hold The s parent devidTo switch on the devices, press and hold the on / off button for 2 seconds. The status LED on the baby and parent unit lights up green. The two devices automatically connect.
3
If the highly sensitive microphone on the baby unit detects a sound, the unit will begin transmitting to the parent unit. When noise is received, the status LED on the parent unit begins to flash orange.
4
When your child is quiet and the baby unit does not receive any noise, the device automatically switches to standby mode (ECO mode). When ECO mode is switched on, the baby unit does not emit any radiation in standby mode. The baby unit starts to send again only when noises are received.
TIP You can attach the units to your belt using the belt clip, or hang them on a wall using a suitable fastening material.
NOTE: The parent unit can optionally be operated also with three AAA NiMH cells (not included).
Status LED Baby unit
The status LED above the on/off switch indicates the status of the baby unit.
| Status LED Power Status | |
| Green on device is switched on |
Status LED parent unit
The status LED above the on/off switch shows the status of the parent unit.
| Status LED Power Status | ||
| Green | on device | is switched on |
| green flashing on batteries are charging | ||
| orange flashing | on noise is | being received from the baby unit |
| red flashing | on | short flashing: maximum range is exceeded;long flashing: batteries are flat |
| red | off batteries are charging | |
Battery operation
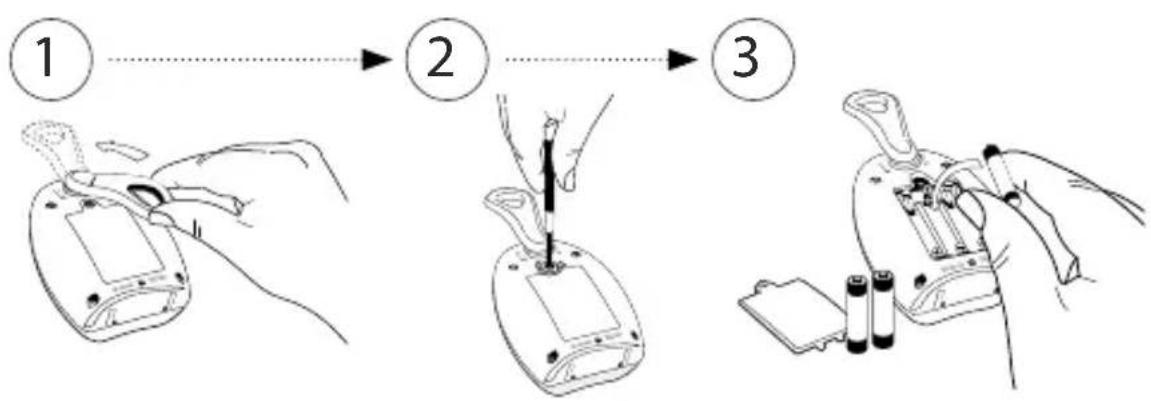
flowchart
graph TD
    A["1: Initial treatment"] --> B["2: Treatment step"]
    B --> C["3: Blood donation using battery"]
IMPORTANT: Only use rechargeable NiMH AAA batteries! Switch the units off and disconnect the power lead before changing the batteries.
As soon as the batteries are too weak, the status LED in the switched on state begins to flash red. If the device is not connected to a power supply, the connection will worsen and eventually cut off automatically. Rechargeable batteries can be charged directly in the baby monitor. To do this, connect the device to the wall power supply using the supplied mains adapter. The batteries take approximately 10 hours to charge (with the device switched off).

Range control
This baby monitor is equipped with an optical and acoustic range control system. At regular intervals, check the baby unit and the parent unit for two-way communication (also in standby mode, if the baby unit is not receiving any noise). If the range is exceeded, the status LED on the parent unit begins to flash red and an alarm tone sounds at regular intervals.
NOTE: To activate range control, ECO mode must be switched off on both devices.
ECO mode
As soon as you place the parent unit at a fixed site at which you have checked reception on a previous occasion, we recommend that you switch ECO mode on. In ECO mode, range control is switched off and therefore in standby mode (whenever your child is quiet) the baby unit does not emit any radiation. The baby unit then goes to send only when noises are received.
Volume control / parent unit
To increase or decrease the receiver volume on the parent unit, press + (for louder) or - (for down).
The reception range depends on the environment and other factors which may interfere with or block the transmission signal:
- large metallic objects such as fridges, mirrors, wardrobes, metal doors and reinforced concrete
- fixed structures (walls) or radio, electrical and electronic appliances such as TVs, PCs, mobile phones or dimmer switches
NOTE: We recommend keeping a minimum distance of one metre between the baby unit and interfering devices, or switching the latter off. In case of weak signal, we recommend moving the parent and/or baby unit to a different place in the room.
Cleaning and maintenance
Always disconnect the mains adapters from the wall power socket before cleaning the unit. Only use a slightly dampened cloth. Do not submerge the unit in water. Do not use chemical detergents.
Remove the batteries from the unit if it is not to be used for a long period of time. This product does not require any special maintenance. Repairs to the unit must be carried out by skilled personnel only.
Please retain your receipt, the user manual and item number.
Warranty claims or claims from promises of guarantee must be processed by the dealer.
The technical specification, information and characteristics of the product described herein have been compiled to the best of our knowledge and belief and are correct at the time of printing. Any information provided by reer should be correct and authoritative. Nevertheless, reer does not accept liability for potential errors in this document and reserves the right to make changes to the product design and/or specifications without prior notice. Reproduction and disclosure of information contained in this copyright-protected document, in any form or by any means - graphical, electronic or mechanical by photocopying, recording on tape or storage in a data retrieval system (even in part), require prior written consent from reer.

Disposal instructions
natural_image
Symbol of a trash bin crossed with no visible text or labelsAt the end of its life, this product must not be disposed of as normal domestic waste, but should be recycled at a collection point for electrical appliances. Please see the relevant symbol on the product, in the user manual and packaging. Materials can be recycled as specified. Do not put used batteries into household waste. Instead they should be disposed of as hazardous waste or with a battery collection station provided by the
dealer. An important contribution to the protection of the environment can be made by reusing the unit, recycling its components or otherwise reusing old appliances. Please contact your local council to find out more about an appropriate disposal centre.
The status LED does not light up
→ Make sure that both units are switched on.
Check the connection of the mains adapter to the wall power socket and the unit.
Exchange the batteries and/or check the polarity.
The status LED flashes orange
The parent unit receives sounds. Turn up the volume on the parent unit to make sure that you hear the sounds from your baby.
The status LED flashes red
Long flashing: Batteries are flat. Replace the batteries or connect the unit to the power supply.
Short flashing: maximum range is exceeded. Reduce the distance between the baby and parent unit.
No sound transmission despite established connection
The volume is set too low. Press the + button to increase the volume.
Loud whistling tone from the parent unit (feedback)
The baby unit is too close to the parent unit. Increase the distance between the baby unit and the parent unit.

No connection between parent and baby unit / random noise / connection is lost
Make sure that both units are switched on.
The maximum range has been exceeded. Move the baby monitor to a different position and/or reduce the distance between the baby and parent unit.
The baby/parent unit is close to interfering devices (e.g. microwave) or metal objects. Try to find the source of interference and move the units to a different position.
The batteries are almost depleted. Replace the batteries or connect the units to the power supply.
natural_image
Illustration of a stylized device with two birds and a crescent moon inside, emitting stars (no text or symbols)
natural_image
Line drawing of a portable electronic device with a circular top and power button (no text or symbols)
text_image
Roernatural_image
Diagram of a coiled cable connected to a plug with a USB port (no text or symbols)text_image
Technical diagram of a mechanical component with labeled parts and directional arrows indicating motion or flow.pinza para cinturón
natural_image
Simple diagram of a gray oval shape with a dashed circular center and four corner dots (no text or symbols)natural_image
Illustration of two hands inserting a wall-mounted power socket into a device (no text or symbols present)flowchart
graph TD
    A["1: Initial Treatment"] --> B["2: Treatment with Blood Donutary"]
    B --> C["3: Blood Donutary with Battery Storage"]
natural_image
Symbol of a trash bin crossed with no text or labels, accompanied by a black rectangular block below (no readable text or symbols)natural_image
Illustration of a stylized bird and moon inside a circular device (no text or symbols)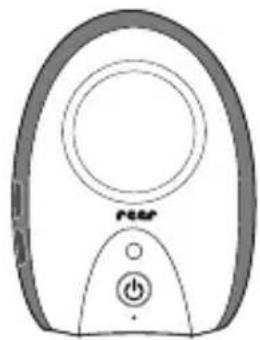
natural_image
Line drawing of a remote control device with buttons and a power button (no text or symbols)
natural_image
Simple line drawing of a rectangular box with two side windows and the letter 'Roer' on top (no additional text or symbols)natural_image
Simple line drawing of a coiled spring connected to a plug with two pins (no text or symbols)natural_image
Pure diagram of a device with concentric circles and a power button, no text or symbols present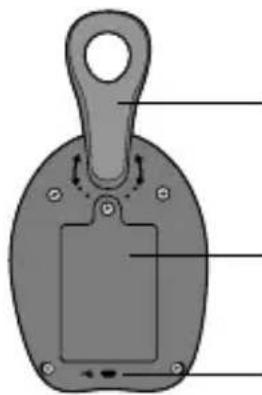
text_image
Technical diagram of a mechanical component with labeled parts and directional arrows indicating motion or movement.clip da cintura
scomparto batterie
micro USB
natural_image
Simple line drawing of a computer monitor with a bird silhouette inside, no text or symbols present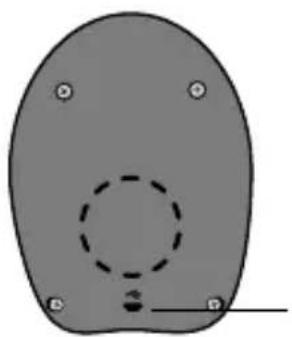
natural_image
Simple diagram of a gray oval shape with a dashed circular center and four corner dots (no text or symbols)micro USB
natural_image
Illustration of two hand-drawn electrical devices with switches and a cat illustration, no text or symbols presentnatural_image
Symbol of a trash bin crossed with no text or labels, accompanied by a black rectangular block below (no readable text or symbols)natural_image
Illustration of a stylized device with two birds inside a circle and a power button (no text or symbols)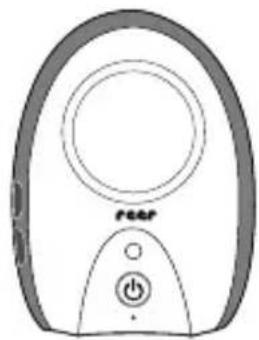
natural_image
Line drawing of a portable electronic device with a circular top and power button (no text or symbols)
text_image
Roermode d'emploi
natural_image
Diagram of a connected electrical plug with coiled spring and USB port (no text or symbols)natural_image
Pure technical diagram of a mechanical component with no visible text, numbers, or symbols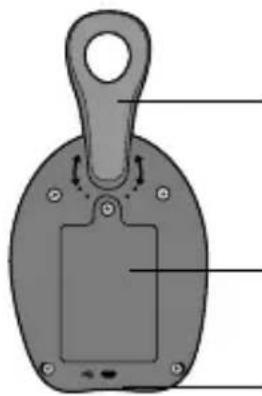
natural_image
Diagram of a mechanical component with labeled parts, showing a handle and internal structure (no text or symbols)natural_image
Diagram of a stylized bird perched on a branch inside an oval frame, with no text or symbols present.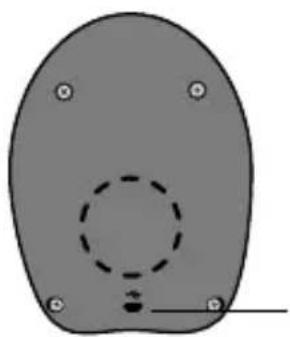
natural_image
Simple diagram of a gray oval shape with a dashed circular cutout and four corner dots (no text or symbols)natural_image
Illustration of two hands inserting a wall-mounted power socket into a device (no text or symbols present)flowchart
graph LR
    A["1: Initial treatment"] --> B["2: Treatment device with needle inserted"]
    B --> C["3: Discharge device with battery and test tube"]
natural_image
Symbol of a trash bin crossed with no text or labels, accompanied by a black rectangular block below (no readable text or symbols)natural_image
Illustration of a stylized device with two birds and a crescent moon inside, emitting stars (no text or symbols)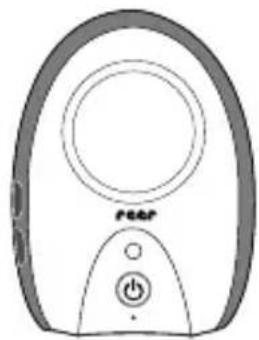
natural_image
Line drawing of a portable electronic device with a circular top and power button (no text or symbols)
text_image
Roergebruiksaanwijzing
natural_image
Simple line drawing of a coiled spring connected to a plug (no text or symbols)1 x USB-voedingsadapter
2 x USB-oplaadkabel
voor babyeenheid
en oudereenheid
natural_image
Illustration of two hands inserting a wall-mounted power socket into a device (no text or symbols present)flowchart
graph LR
    A["Step 1: Contact with pen"] --> B["Step 2: Pen inserted into blood"]
    B --> C["Step 3: Blood donation using pen and battery"]
natural_image
Symbol of a trash bin crossed with no text or labels, accompanied by a black rectangular block below (no readable text or symbols)natural_image
Illustration of a stylized bird and moon inside a circular device with a button (no text or symbols)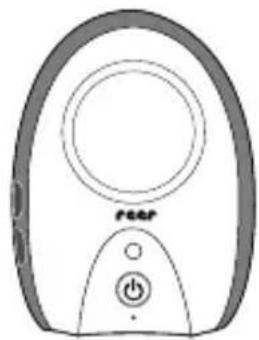
natural_image
Line drawing of a remote control device with a circular dial and power button (no text or symbols)
natural_image
Simple line drawing of a rectangular box with two side windows and the word 'Roer' on the top (no additional text or symbols)Instrukcja obsługi
natural_image
Simple line drawing of a coiled cable connected to a plug with two pins (no text or symbols)1 x zasilacz USB
text_image
Technical diagram of a mechanical component with labeled parts and directional arrows indicating motion or flow.natural_image
Simple diagram of a gray oval shape with a dashed circular center and four corner dots (no text or symbols)natural_image
Illustration of two hands inserting a wall socket into a device, showing different electrical contact configurations (no text or symbols present)flowchart
graph LR
    A["Step 1: Initial Treatment"] --> B["Step 2: Discharge with Blood Pressure Monitor"]
    B --> C["Step 3: Discharge with Battery Cells"]
natural_image
Symbol of a trash bin crossed with no text or labels, representing waste sorting or recycling (no text present)natural_image
Illustration of a stylized device with two birds and a crescent moon inside, emitting stars (no text or symbols)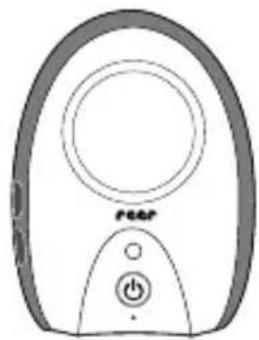
natural_image
Line drawing of a portable electronic device with a circular top and power button (no text or symbols)
text_image
Roernávod k použití
natural_image
Simple line drawing of a coiled spring connected to a plug with two pins (no text or symbols)natural_image
Pure diagram of a mechanical or electrical component with no visible text, numbers, or symbols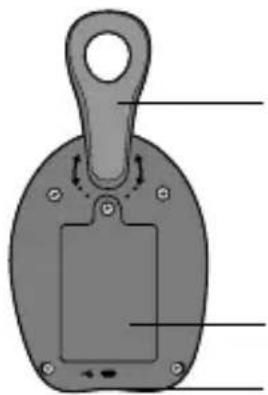
text_image
Diagram of a mechanical component with labeled parts and directional arrows indicating motion or movement.spona na opasek
natural_image
Simple line drawing of a bird perched on a branch inside an oval frame, with no text or symbols present.
natural_image
Simple diagram of a gray oval shape with a dashed circular center and four corner dots, no text or symbols present.natural_image
Illustration of two hand-drawn electrical devices with switches and a bird graphic, no text or symbols presentflowchart
graph TD
    A["1: Initial measurement"] --> B["2: Measurement device"]
    B --> C["3: Blood donation device"]
natural_image
Symbol of a trash bin crossed with no text or labels, accompanied by a black rectangular block below (no readable text or symbols)natural_image
Illustration of a stylized device with two birds and a crescent moon inside, emitting stars (no text or symbols)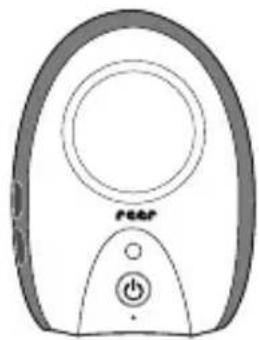
natural_image
Line drawing of a portable electronic device with a circular top and power button (no text or symbols)
text_image
Roeruputstvo za upotrebu
bebi jedinica (predajnik) roditeljska jedinica (prijemnik)
natural_image
Simple line drawing of a coiled cable connected to a plug with two pins (no text or symbols)1 x USB prilagodnik napajanja
2 x USB kabel za punjenje
za dječju jedinicu
natural_image
Pure diagram of a device interior with no text, numbers, or symbols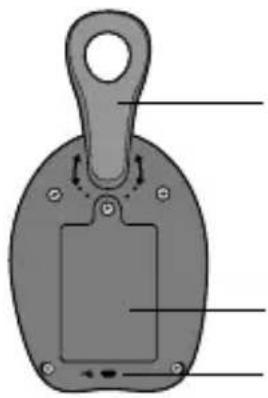
text_image
Diagram of a mechanical component with labeled parts and directional arrows indicating motion or movement.štipaljka za kaiš
odeljak za baterije
natural_image
Diagram of a stylized bird perched on a branch inside an oval frame, with no text or symbols present.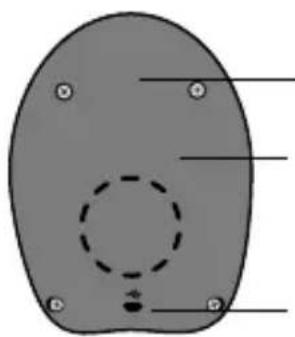
text_image
Diagram of a biological or anatomical structure with labeled components, including a dashed oval and circular features.štipaljka za kaiš
odeljak za baterije
natural_image
Illustration of two hand-drawn electrical devices with switches and a cat illustration, no text or symbols presentKoristite samo ispravljače koji se nalaze u obimu isporuke (5 V DC / 500 mA).
flowchart
graph LR
    A["Step 1: Measurement"] --> B["Step 2: Hand-drawn device"]
    B --> C["Step 3: Blood donation with battery"]
natural_image
Symbol of a trash bin crossed with no text or labels, accompanied by a black rectangle below (no readable text or symbols)Ovaj proizvod na kraju svog životnog veka ne može se odlagati sa običnim kućnim otpadom, već se mora odložiti na sabirnom mestu za recikliranje električne opreme. Pogledajte simbol na proizvodu, u uputstvu za upotrebu ili na pakovanju koji ukazuje na to. Materijali se mogu reciklirati u skladu sa oznakama. Istrošene baterije nemojte da bacate u kućni otpad, već ih odložite u poseban otpad ili u mesto za sakupljanje baterija u specijalizovanim prodavnicama. Ponovnim korišćenjem, reciklažom i drugim oblicima obrade dotrajalih uređaja pružate važan doprinos zaštiti životne sredine. Od lokalnih vlasti zatražite informaciju o odgovarajućem mestu za odlaganje.
Statusna LED lampica ne svetli
Proverite da li su uključena oba uređaja.
Proverite da li je ispravljač dobro priključen na utičnicu i uređaj.
Zamenite ili napunite punjive baterije i proverite polaritet.
Treperi narandžasta statusna LED lampica
natural_image
Illustration of a stylized device with two birds inside a circle, connected to a power button (no text or symbols)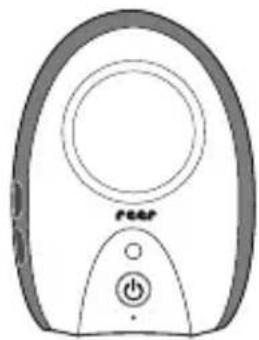
natural_image
Line drawing of a remote control device with a circular dial and power button (no text or symbols)