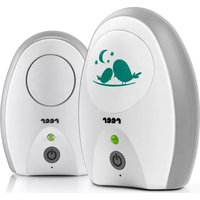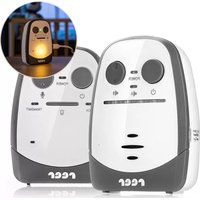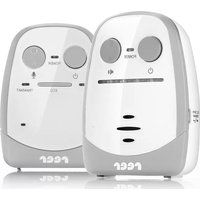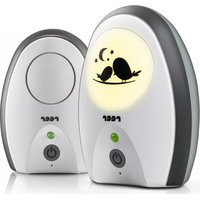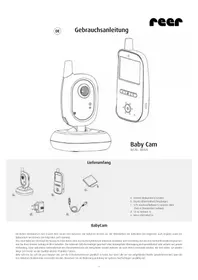
Care&Talk 50133 - Baby monitors Reer - Free user manual and instructions
Find the device manual for free Care&Talk 50133 Reer in PDF.


User questions about Care&Talk 50133 Reer
0 question about this device. Answer the ones you know or ask your own.
Ask a new question about this device
Download the instructions for your Baby monitors in PDF format for free! Find your manual Care&Talk 50133 - Reer and take your electronic device back in hand. On this page are published all the documents necessary for the use of your device. Care&Talk 50133 by Reer.
USER MANUAL Care&Talk 50133 Reer
natural_image
Illustration of two Reer walkiehios with antenna and keypad (no text or symbols)
Care&Talk
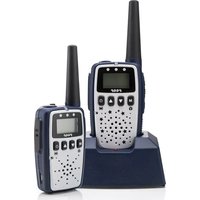
2in1 baby monitor and walkie talkie
Instruction manual // item. no.: 50133

Care&Talk
2dans1 Babyphone et Talkie-Walkie
| Technical data and functions. | 22-23 |
| General safety instructions. | 24 |
| Safety instructions regarding installation. | 24-25 |
| Scope of delivery/Device description. | 25 |
| Device description baby unit. | 26-27 |
| Before first use. | 28 |
| 2 in 1: baby monitor or walkie talcie operating modes. | 28 |
| Chapter 1: Use in „baby monitor"operating mode | 29-34 |
| Chapter 2: Use in „walkie talkie"operating mode | 34-37 |
| Cleaning and maintenance | 37 |
| Troubleshooting | 38 |
| Service Address And Technical Holline | 38 |
| Warranty/Environmental protection | 39 |
FR
natural_image
Illustration of a walkie-talkie with a digital display and antenna (no text or symbols visible)natural_image
Illustration of a walkie-talkie with a black tower and control buttons (no text or symbols visible)
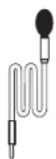
1 × Kabel-Mikrofon
text_image
8:00:00 VOX CT DC reertext_image
Black Rednatural_image
Illustration of a radio receiver with earphones and signal waves (no text or symbols)natural_image
Three black-and-white icons depicting people engaging in different activities: a trash bin, a recycling symbol, and a trash bin (no text or labels)Care&Talk 2 in 1 baby monitor and walkie talkie\_

Congratulations on the purchase of your new beer baby monitor. Care&Talk is an analog baby monitor which can also be used as a walkie talkie. When set to the baby monitor operating modem, the device reliably transmits your baby's sounds in combination with the included cable microphone. Thanks to the cable microphone, electrical radiation in the child's proximity is reduced by up to 90 %. On top of that, it is possible to adjust the sensitivity of the microphone to different degrees. After activation of the VOX function, the device automatically switches to "sleeper mode" during the child's sleep. Thanks to its optional battery operation, the baby monitor can be used as a stationary or mobile unit. We are confident that you will enjoy the quality of our product for many years to come.
Please take a few minutes to read through the safety instructions carefully. You will only be able to use the rear baby monitor with confidence if all of the points mentioned here have been B3 checked. Please keep the instruction manual in a safe place for future reference.
Technical data and functions
| Technology PMR 446 | |
| Frequency range 446.00625 - 446.09375 MHz | |
| Number of channels 8 PMR446 channels, 38 CICSS lones, 18 pre-sel channels/CTCSS combinations for the „baby monitor" operating mode | |
| Transmitter baby unit Charging network and battery: 950 mAh 3.7 V Li-Ion | |
| Receiver parental unit Charging network and battery: 950 mAh 3.7 V Li-Ion | |
| Input 100-240V, 50/60 Hz, 0,2A | |
| Output 5V, 500mA | |
| Transmitter power 500 mW | |
| Range up to 5000 m | |
| Length of power source cable approx. 1.15 m | |
| Length of microphone cable approx. 2 m | |
| Attachment for audio accessories Mikrolon 2,5 mm, headset 3,5 mm | |
| Operating temperature range | -20°C to +55°C |
| Applied technical Standard | EN 300 296-2 |
Frequency table PMR 446
| Channel | Frequency table (MHz) | Channel | Frequency table (MHz) |
| 1 | 446.00625 | 5 | 446.05625 |
| 2 | 446.01875 | 6 | 446.06875 |
| 3 | 446.03125 | 7 | 446.08125 |
| 4 | 446.04375 | 8 | 446.09375 |
CTCSS Code Table
| No. | Freq. | No. | Freq. | No. | Freq. | No. | Freq. |
| 1 | 67.0 | 11 | 97.4 | 21 | 136.5 | 31 | 192.8 |
| 2 | 71.9 | 12 | 100.0 | 22 | 141.3 | 32 | 203.5 |
| 3 | 74.4 | 13 | 103.5 | 23 | 146.2 | 33 | 210.7 |
| 4 | 77.0 | 14 | 107.2 | 24 | 151.4 | 34 | 218.1 |
| 5 | 79.7 | 15 | 110.9 | 25 | 156.7 | 35 | 225.7 |
| 6 | 82.5 | 16 | 114.8 | 26 | 162.2 | 36 | 233.6 |
| 7 | 85.4 | 17 | 118.8 | 27 | 167.9 | 37 | 241.8 |
| 8 | 88.5 | 18 | 123.0 | 28 | 173.8 | 38 | 250.3 |
| 9 | 91.5 | 19 | 127.3 | 29 | 179.9 | OF | - |
| 10 | 94.8 | 20 | 131.8 | 30 | 186.2 |
General safety instructions

! Check the unit for visible damage before each use. If you detect any damage, do not use the unit.
! Make sure that the operating voltage of the power outlet matches that of the mains adapter. Check - especially when travelling abroad - that the local mains voltage matches the voltage specified on the units and/or mains adapters.
! Except for the battery compartment cover, never open the units or mains adapters, as there is a risk of electric shock. If a unit does not work correctly, please do NOT try to fix the problem yourself. Please contact your dealer with any problems.
! Keep battery out of reach of children.
! Avoid contact between metallic objects and the battery contacts or power leads on the devices.
! Do not allow children younger than 36 months to play with the device.
CAUTION! This baby monitor was designed exclusively for monitoring your baby. It may neither be regarded as a substitute for parental supervision nor as a medical device.
For both devices, use only the batteries that are included with the purchase! Using unsuitable battery types poses an explosion hazard!
Safety instructions regarding installation
• Always place the baby unit out of your child's reach (minimum distance: 1 metre).
- Never place the baby monitor inside the crib, cot or playpen.
- To prevent strangulation on the microphone fasten and secure the microphone cable in such a way that the child cannot pull it and use it for playing. It is best to use the included cable clips for this purpose.
- The power lead must be secured out of the reach of children to avoid any risk of strangulation. Do not use extension cables.
- To ensure optimal transmission, the units must be kept upright at all times and placed in an elevated position.
- DO NOT place the receiver in the vicinity of radio transceivers or microwaves. Radiant emissions from these devices can significantly affect radio reception.
- Do not use the units near water or in humid places. Do not submerge the units in water.
- Do not rinse the units under running water.
- Do not cover the baby monitor with towels, clothes or blankets.
- Avoid extreme heat and direct sunlight.
Keep removable belt buckle out of the reach of children under 36 months of age. This is a
small piece that can be swallowed and there is a risk of sullocation.
- Do not allow children under 36 months of age to play with the device. The rubber accessory cover is a small piece that can be swallowed and there is a risk of suffocation.
Scope of delivery
natural_image
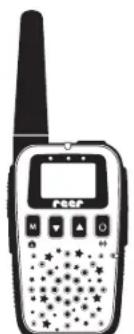
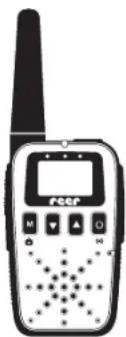
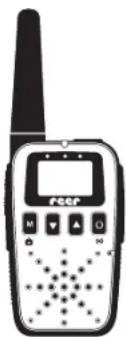
Black and white illustration of a walkie-talkie with antenna, no visible text or symbols on the device body1 × child unit (transmitter) 1 × parental unit (receiver)

2 × battery 2 × charger
natural_image
Illustration of a walkie-talkie with a black tower and control buttons (no text or symbols visible)
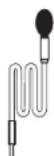
1 × cable microphone
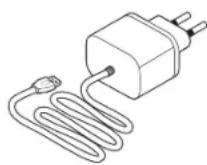
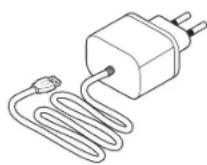
2 × power source 1 × manual
5 × cable channels/binders

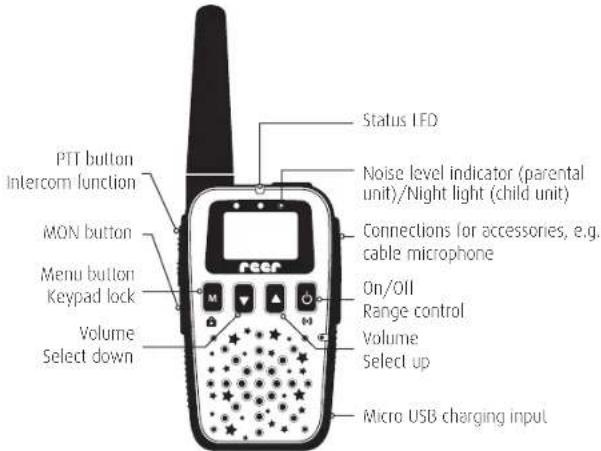
Device descriptio baby unit/parent unit Symbol and display

text_image
PTT button Intercom function MON button Menu button Keypad lock Volume Select down Status IFD Noise level indicator (parental unit)/Night light (child unit) Connections for accessories, e.g. cable microphone On/OII Range control Volume Select up Micro USB charging inputDifference between child and parental unit consists of the motif on the child unit.
text_image
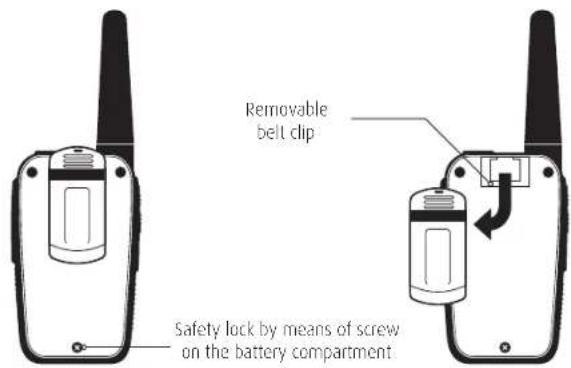
Removable belt clip Safety lock by means of screw on the battery compartment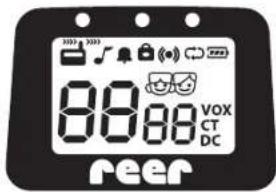
text_image
8:00:00 VOX CT DC reer
| Reception: device receives sounds of other unit. Can be heard through loudspeaker. | |
| Transmission: The transmission (PTT) button is pressed and the device transmits in automatic mode (VOX see below) | |
| Roger Beep is activated. | |
| Key tones are activated. | |
| Keypad lock is activated. | |
| Range control is activated (automatically: AU or manually: Pb) | |
| Search: Device searches channels (only in walkie talkie mode). | |
| Battery status indicator: 3 lines = battery is fully charged, 1 line = battery is almost discharged (check during or immediately after broadcast!) | |
| "Parent" symbol: parental unit. The device is set as the parent unit. It does not appear in walkie talkie mode (PMR446). | |
| "Baby" symbol: child unit. The device is set as the child unit. It does not appear walkie talkie mode (PMR446). | |
| VOX | Intelligent audio activation (VOX) is activated: the device is transmitting automatically (without pressing the PTT button) if a sound is heard in the baby's room. |
| CT | CTCSS is activated. |
| DC | DCS is activated. |
Before first use

Insert Battery
- Remove the bell clip. Pull the eye and pull the bell clip downward.
- Open the battery compartment by releasing it and removing the screw with a screwdriver and with light pressure and a parallel sliding movement downward, remove the compartment.
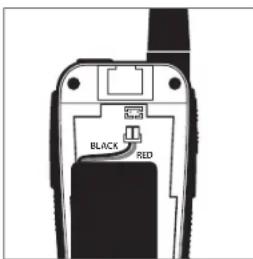
- Carefully connect the Li-Ion battery plug to the female connector in the battery compartment (red lead on the right).
-
Insert battery into device. Both cables should be between battery and male connector.
-
Slide the cover back onto the battery compartment back and screw it on again.
-
Connect the two chargers with the power supplies that are included in the purchase and plug them into a 230 V outlet.
-
Place the devices into the charger. During charging, the line blinks on the charging status indicator light and the light on the charger is red.
text_image
Black RedWarning: Before first use, fully charge both devices until the charging status light shows 3 lines. During first charging, this can last 4 hours.
When the battery is fully charged, the message "FULL" appears on the display.
You can also charge the battery without a charger directly via the micro USB charging connector on the device.
2 in 1: baby monitor or walkie talkie operating modes
Do not forget that due to the two functions of the device, this instruction manual consists of two chapters. In the first part (chapter 1) you will find instructions on how to use the devices in the baby monitor mode; the second section provides information on how to use your device as a transmitter (a normal PMR 446 hand-held radio) that you or your children may later want to use.
Chapter 1: Use in „baby monitor“ operating mode
Cable microphone
For use as a baby monitor, an external microphone also forms part of the package. Using this cable microphone has the following advantages: it is more sensitive than the built-in microphone and can capture sounds from a greater distance. In this way you can extend the distance between the child unit and the baby's bed. This greatly reduces radiation in the child's proximity. In addition, you can place the child unit in such a way as to achieve the best possible reach - for example, on the bedside or a cupboard.
Warning: If you use Care&Talk as a baby monitor, always connect the cable microphone.
Installation of child unit
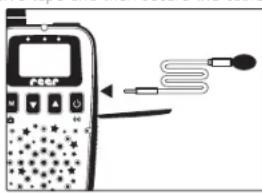
Attach the supplied cable microphone near the baby's bed, but out of reach of your child. To secure the microphone securely use the supplied adhesive tape and then secure the cable
with the supplied cable clips and cable guides. Open the rubber cover for connection accessories (MIC/FAR connector) on the right side of the device, and plug the male cable microphone connector into the top female connector.
text_image
PeerStandard settings
Turn on the devices by pressing the power switch for about 3 seconds. Check standard settings. You will find precise information about each setting in the next chapter.
Child unit (star motif):
- Baby mode: 😊
- Channel: 01b
• Sensitivity control: VOX
• Talk Back function: OFF
Parent unit:
- Parental mode:
- Channel: 01P
- Range control: ◀

Check the broadcast function of the child unit by tapping on the supplied cable microphone. The tone is now being transmitted on the parental unit and, in addition, the white LED lights up above the display. These have the function of optically displaying the sound level.
Caution: With insufficient distance between both devices, squealing tones may be produced. In this case, lower the volume of the parental unit and increase the distance.
Warning: In the event of a breakdown, choose a different channel.
Volume
Use the ▲/▼ buttons to set the parental unit to the desired volume. 00cc to 15cc will appear on the display.
In this way, you can also set the volume on the child unit. It is important to set the volume on the child unit if you want to talk to your child (speaking function). Otherwise, we recommend setting the child unit volume to the lowest level.
Set Channel
Press the button in the menu and use buttons ▲/▼ to set the channel. Press the PTT button to save settings. Or you can wait for several seconds.
There are 18 possible settings, 01b to 18b for the child unit and 01P to 18P for the parental unit. Numbers 1 through 18 are intended for pre-set combinations of PMR446 channels and CTCSS tones. These numbers are valid only for radio devices of this type. Communication between baby monitors of other brands is not possible.
Warning: The numbers of channels on both devices must match!
Microphone sensitivity and VOX function
The baby monitor is equipped with smart sound activation (VOX). The transmitter switches to minimum energy consumption and reduces radiation if there is no sound in the room. If the child unit registers sounds, it activates the radio link and transmits the sounds to the mobile parental unit.
The baby monitor has four elective levels of microphone sensitivity. The device is factory-set to level 4 (maximum sensitivity). To change the sensitivity of the microphone, briefly press button twice. Vo box appears on the screen and 04 vox blinks. With buttons ▲/▼ you can choose the level 01-04. To save the settings, briefly press the PTT button or wait 5 seconds.
If you want to be notified even about the smallest sound, turn the microphone sensitivity on the child unit to 04. If the microphone is set to sensitivity 01, you will be alerted when louder sounds occur.
By selecting Vo of, you can turn off the VOX function.
oF VOX is deactivated
- low sensitivity
- medium sensitivity
- high sensitivity
- highest sensitivity
Intercom function/Talk Back function
When your child starts to cry, you can talk to him to calm him down and show to him that you are already on the way. Essentially, you can always talk to your child when he is calm. If your child talks or cries, you have to wait until he pauses. In case of persistent crying, the Talk Back function will interrupt the transmission. This will happen after 10 seconds of uninterrupted transmission. In this way, you have the chance to talk your child for a period of 10 seconds.
In order to be able to use the Talk Back function, the child unit must be turned on. Turn Talk Back function off or on as follows: Hold the MON button on the child unit for 2 seconds. tb will briefly appear on the display and then new on or off settings.
Make sure that the desired volume is set on the child unit.
For optimal use of the Talk Back Function, you have three available possibilities. These are set on the child unit by briefly pressing the button in the menu 5× until rb appears in the display. Then, with the ▲/▼ buttons, select the required setting:
- rb tb: You will hear a beep if the child unit interrupts the transmission after 10 seconds, even if the baby is still crying. You now have 10 seconds for talking to your child.
- rb on: At the end of each transmission, you will hear a beep.
- rb of: Beeps are deactivated.
If you wish to regularly use the speaking function, we recommend using the rb tb setting.

Range control

This baby nursery is equipped with an optical and acoustic range control system. The parental unit checks two-way contact at regular intervals. When range is exceeded or interruption of connection due to other breakdowns, the LED status starts blinking red on the parental unit and a signal tone sounds at regular intervals.
When checking the range, you can choose automatic or manual range control or turn it off.
To do so, press the button 3× on to the parental unit until Appears on the left side of the display. Current settings (available only on the parental unit), AU, Pb, or of Ilashes to the right of the display. Press ▲/▼ to select either AU for automatic range control or Pb, if you need to manually check the range. Select of to completely turn off the range control function. To save the settings, briefly press the PTT button or wait for 5 seconds.
1) automatic range control (AU)
Automatic range control is automatically activated in baby monitor mode. This function automatically, checks in minute intervals, whether the child and parental unit are out of reach. The parental unit sends a signal to the child unit. This repeats the signal. If the parental unit does not receive a reply for more than 2 minutes, the radio connection is interrupted. The reason may be that both devices are out of reach, that the batteries of the other device are too weak, that the device is turned off, or that the set radio channel is faulty. While connection is active, the symbol is constantly displayed. When the connection is interrupted, the symbol flashes and 5 beeps sound, which means that the child unit is not responding to the signal. Once the two devices are connected, the symbol appears permanently after two minutes.
2) manual reach control (Pb)
You can also check manually if you are finding the child unit within range. For this, the reach function must be set to Pb on the parental unit. Press the Button and wait for several seconds. The child unit will answer your question and the parental unit will react with a melody. Now you can be sure that both devices are within range.
3) deactivation of range control (oF)
Range control can be deactivated if it is not needed.
Warning: We recommend that if you know the surrounding environment and have tried the baby monitor several times in this environment, you re-set the range control to manual, or to deactivate it. If you want to minimize radiation and energy consumption (ECO mode), deactivate range control or use manual range control.
Display of noise level (parental unit)
The visual control of the noise level in a child's room is provided 3 LEDs above the display.
Press button 4×, until FL appears to the right of the display. The current setting, AU or 01-03 is flashing on the right side of the display.
Pressing ▲/▼ buttons will change the setting.
- If you wish to activate visualisation of noise level, select AU. If the baby cries little, only 1 LEDs light up. If the baby cries louder, 2 LEDs light up. If the baby cries very loud, all 3 LEDs light up.
- If you select 01, 02 or 03, the number of LEDs lighting up does not depend on the baby's loudness. The selected number of LEDs will always light up.
Night light (baby unit)
The night light integrated in the child unit creates a soothing environment for your child thanks to its warm light. Night light can be activated only on the child unit.
Press ▼ button 4×, until FL appears to the left of the display. Current settings, oF or 01-03 flashes to the right of the display. If you wish to choose among 1-3 LED, press ▲/▼ buttons and select 01-03. In order to turn off all LED, select oF.
Switching over to „baby monitor“ operating mode
This step is only necessary in the case that the devices were previously used as as PMR446 radio devices.

Child unit (star motif)

Hold down button while turning on device. (Hold down both outer buttons in parallel). Press ▲/▼ buttons and select bA. The child symbol 🧑 will be displayed. In order to save the settings, briefly press the PTT button.
Parental unit (without motif)
Hold down button while turning on device. (Hold down both outer buttons in parallel). Press ▲/▼ buttons and select PA. The parental symbol 📞 will be displayed, In order to save the settings, briefly press the PTT button.
Now the channel (01 to 18) is displayed, which, on the child unit, is supplemented by the letter b, or on the parent unit, by the letter P. Then, the corresponding symbols 🙏 or 📄 will be displayed.
Using several child units
With the help of several child units, you can monitor multiple children, event, multiple rooms. For this, all devices must be set to the same channel. When using in this way, we recommend deactivating reach control, as due to various devices, false alarms may occur.
Keep in mind that in the parental unit, you can hear only one child at a given time. Besides this, you should lower the volume on child units to 0, as otherwise, the children could mutually listen to each other or disturb each other.
Chapter 2: Use in „walkie talkie“ operating moden
Both devices are factory-set to the „baby monitor operating mode. If you wish to re-set the devices to the operating mode „radio device PMR446“, execute the following steps.
Hold down the ▪ button while turning on the device (hold down the OFF/ON button for several seconds). By pressing the ▲/▼ button, select ro. In order to save the settings, briefly press the PTT button.
Selection of PMR446 channel
This broadcasting/receiving system has 8 PMR446 channels available. On top of this, you can select individual PMR446 coding for each channel individually through CTCSS tones (38 possible codes). The code will appear to the right of the number of the channel as a small two-digit number between 01 and 38 or oF.
Make sure that all devices are set to the same channel and CTCSS tone.
Press button ▪ 1× and then choose the required PMR446 channel with the help of ▲/▼ buttons.
Setting CTCSS or DCS code
Additional CTCSS or DCS codes serve to prevent listening in on other conversations on the same channel. This does not mean, however, that the transmission is protected against interception. There is always the possibility that unencrypted analog radio signals will be intercepted. CTCSS (Continuous Tone Coded Squelch Signal) or DCS (Digital Coded Squelch) tones are tones beyond the low frequency audibility threshold, which are transmitted together with the microphone signal. In case of reception, the device will check whether a CTCSS or DCS tone is transmitted and will turn on the speaker only when the correct code is received.
Setting the CTCSS code:
Press □ button once. 01-38 or oF lashes on the display. For setting the required code, press ▲/▼ buttons. In order to save the settings, briefly press the PTT button.
Setting the DCS code:
Press the button 2×. 01-38 or of flashes on the display. For setting the required code, press ▲/▼ buttons. In order to save the settings, briefly press the PTT button.
Warning: it is possible to activate only CTCSS or DCS.
Transmission
To broadcast, press and hold down PTT button. To receive, let go the button again.
Searching for channels
This function will search all PMR446 channels according to signal. To start search, hold down button for a long time. The search is interrupted as soon as the signal is captured. You can then listen to the channel for a period of 8 seconds, until the search continues. After ending the search, hold down button for a long time once again.
Warning: searching channels is available only in the „PMR446“ operating mode.
Ringtone selection
Press button 9×.C will appear on the display, as well as current settings, which will flash. To select ringtone from possibilities 01-03 or oF, press ▲/▼ buttons. In order to save the settings, briefly press the PTT button.
Call
Briefly press 📷 button.

The device will send ringtone to all other devices within reach on this channel. You can select the ringtone in the selection or turn it off.
Warning: calling function is available only in the „PMR446“ operating mode.
Keypad lock
All buttons except for PTT button can be turned off, to prevent accidental re-setting.
Locking buttons: Press and hold ■ button for roughly 3 seconds, until the button lock symbol appears.
Unlocking buttons: Press and hold button once again for roughly 3 seconds, until the button lock symbol disappears.
VOX as hands-free
This is the sensitivity setting for hands-free. The device automatically recognizes when you speak - you don't need to press the PTT button. This can be useful at a moment when your hands are not free to press the PTT button.
Levels 1-4 correspond to the same sensitivity levels as under the „baby monitor" operating mode.
oF VOX is deactivated; normal operation with the help of PTT button (standard setting)
-
low sensitivity
-
medium sensitivity
-
high sensitivity
-
highest sensitivity
Monitoring functions
For reception of very weak signals, it is possible to deactivate automatic noise gate. This may be useful in the border area of reception or when communication is faulty. Besides this, you can easily listen to what is going on on the selected channel. To activate or deactivate monitoring functions, hold down MON button (on the left side of the device under the PTT button) for a long time. Monitoring function is available only in the "PMR446" operating mode.
Roger-Beep
The device can broadcast a tone sequence after releasing the PTT button.
Press the button 5x, until rb appears on the display.
Press ▲/▼, by which you will set on or of F.
For saving settings, briefly press the PTT button.
When Roger Beep is activated, the "appears." Roger Beep is available only in the „PMR446" operating mode.
Button tone
When pressing the buttons, a short signal tone sounds. For turning the sound of the buttons on or off:
Press the button 6×, until bP appears on the display.
Press ▲/▼, by which you can choose on or of.
For saving settings, briefly press the PTT button.
When the key sound is activated, the symbol 🎨 appears. Key sound is only available in "PMR446" operating mode.
Range control in PMR446 operating mode
choose between AU (automatic), Pb (only manual range control) or ofF, by which you will turn offthe range control function. Activation or deactivation of range control is done on the device on which you wish to effect range control. Even if the range control function is deactivated on another device, you can undertake range control on your device...
In radio networks that consist of more than 2 of the same device, there is no sense in range control because it is not possible to determine which device corresponds to it. This is why no reach control exists for multiple devices in network.
Cleaning and maintenance
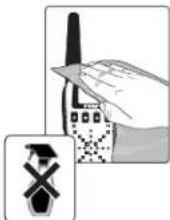
Always disconnect the mains adapters from the wall power socket before cleaning the unit. Only use a slightly dampened cloth. Do not submerge the unit in water. Do not use chemical detergents. This product does not require any special maintenance. Repairs to the unit must be carried out by skilled personnel only.
Troubleshooting
| Problem Possible cause Action | ||
| Loud squealing (feedback) | • The baby unit is too close to the parent unit. | • Increase the distance between the baby unit and the parent unit. |
| Signal noise/connection inter-rupted | • The baby/parent unit is close to interfering devices (e.g. micro-wave) or metal objects.• The maximum range has been exceeded.• Battery of child/parental unit is too weak. | • Try to find the source of interference and move the units to a different position.• Reduce the distance between the baby unit and the parent unit.• Connect device to power source. |
| Belated/answering back function | • Your baby is crying, but you are trying to talk him outside of the "free" interval. | • It is best to switch the Talk Back function to rb tb or rb on and talk after the tone sounds. |
| No function for answering back | • talk Back function is not activated. | • Turn on Talk Back function on the child unit. |
| Baby unit reacts upon noises that are too quiet | • The microphone sensitivity is set too high. | • Please select a low VOX level. The volume on the child unit is set too low. |
| Baby unit only reacts upon noises that are loud | • The microphone sensitivity is set too low. | • Please choose a higher level of VOX |
| LED light up red | • Parent unit is broadcasting.• The parent unit is in the charger, the battery is charging. | • No action required.• No action is required, the LED lights up as soon as the battery is fully charged. |
| LED lights up green | • The parent unit receives sounds. | • No action required. |
| the LED on the child unit is off, even when the device is charging | • There is no LED on the child un so the light wouldn't disturb your little darling. | • Fully charged battery signaled by FULL on the display, event, by the appropriate number of lines. |
Service Address And Technical Hotline
reer GmbH
Muehlstraße 41
71229 Leonberg

The technical assistance hotline may be contacted at +49 (0)7152 / 92852-0 (standard price for calling a fixed line), or at the e-mail info@reer.de. Before submitting a supposedly malfunctioning device to a claim, contacting the technical assistance hotline may save you time and costs.
Warranty
Please retain your receipt, the user manual and item number. Warranty claims or claims from promises of guarantee must be processed by the dealer. The technical specification, information and characteristics of the product described herein have been compiled to the best of our knowledge and belief and are correct at the time of printing. Any information provided by reer should be correct and authoritative. Nevertheless, reer does not accept liability for potential errors in this document and reserves the right to make changes to the product design and/or specifications without prior notice. Reproduction and disclosure of information contained in this copyright-protected document, in any form or by any means - graphical, electronic or mechanical by photocopying, recording on tape or storage in a data retrieval system (even in part), require prior written consent from reer.
The manufacturer/distributor provides a 2-year warranty on this device from the date of purchase. This warranty covers all flaws due to defective components or defective functions during the warranty period, with the exception of wear, e.g. dead batteries, scratches on the display, damaged housing, defective antenna and flaws due to external influences such as corrosion, poor external power supply or use of inappropriate accessory parts. Defects caused by inappropriate use are also excluded from the warranty. Please retain your bill/payment receipt, manual, and product number. Claims arising from the warranty and product liability must be exercised exclusively through the distributor.
Environmental protection

At the end of its life, this product must not be disposed of as normal domestic waste, but should be recycled at a collection point for electrical appliances. Please see the relevant symbol on the product, in the user manual and packaging. Materials can be recycled as specified. Do not put used batteries into household waste. Instead they should be disposed of as hazardous waste or with a battery collection station provided by the dealer. An important contri-
bution to the protection of the environment can be made by reusing the unit, recycling its components or otherwise reusing old appliances. Please contact your local council to find out more about an appropriate disposal centre.
Instructions for battery use: If the devices are not used for longer time, it is recommended to disconnect the plug of the battery pack from the radio. Recharge the Li-Ion Batteries every six month when stored.


Care&Talk 2dans1 Babyphone et Talkie-Walkie
natural_image
Illustration of a walkie-talkie with antenna, no visible text or symbols on the device itselfnatural_image
Illustration of a walkie-talkie with a black tower and control buttons (no text or symbols visible)
text_image
8:00 AM VOX CT DC reer
text_image
Black Rednatural_image
Illustration of a digital radio with an earbuds emitting sound waves (no text or symbols)Réglage standard
natural_image
Three black-and-white icons depicting people engaging in different activities: a trash bin, a recycling symbol, and a trash bin (no text or labels)natural_image
Illustration of a walkie-talkie with antenna and control buttons (no text or symbols)
natural_image
Black and white illustration of a walkie-talkie with antenna and control buttons (no text or symbols)text_image
8:00:00 VOX CT DC reer
text_image
Black RedCapitolo 1: Uso nella modalità operativa „Baby monitor“
Microfono con cavo
natural_image
Illustration of a digital radio with an earplifier and earphones, no text or symbols presentnatural_image
Three black-and-white icons depicting people engaging in recycling activities: a trash bin, a recycling symbol, and a trash bin (no text or labels)natural_image
Illustration of a walkie-talkie with a digital display and antenna (no text or symbols visible)natural_image
Illustration of a walkie-talkie with antenna and control buttons (no text or symbols visible)text_image
8888 VOX CT DC reertext_image
Black Rednatural_image
Illustration of a digital radio with an earplifier and ear jack (no text or symbols)Ajuste estándar
natural_image
Three black-and-white icons depicting people engaging in recycling activities: a person collecting trash, a person holding a recycling symbol, and a person standing at a table (no text or symbols present)natural_image
Illustration of a walkie-talkie with antenna and control buttons (no text or symbols)1 × baby-unit (zender) 1 × ouderunit (ontvanger)

2 × batterij 2 × oplaadstation
natural_image
Illustration of a walkie-talkie with a black tower and control buttons (no text or symbols visible)
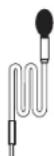
1 × microfoonkabel
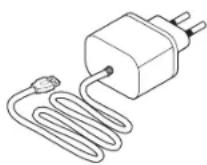
2 × voedingstransformator
1 × handleiding

text_image
8:00:00 VOX CT DC reertext_image
Black Redtext_image
Diagram of a digital radio device with signal flow and earplifier, showing connections to an ear.Standaardinstellingen
natural_image
Three black-and-white icons depicting people engaging in different activities: a trash bin, a recycling symbol, and a trash bin (no text or labels)natural_image
Two gray telephones with antenna designs and control buttons, no visible text or symbols on the devices themselves.By this reer GmbH declares that this type of radio equipment Care&Talk baby monitor and walkie talkie (item no.: 50133) is in compliance with Directive 2014/53/EU. The full text of the EU Declaration of Conformity can be found at the following website:
www.reer.de
reer GmbH
Muehlstr. 41 • 71229 Leonberg • Germany
www.reer.de

Operation is permitted in the following countries:
AT, BE, BG, CH, CY, CZ, DE, DK, ES, EE, FR, FI, GB, GR, HU, HR, IT, IE, IS,
LI, LU, LT, LV, MT, NO, NL, PL, PT, RO, SM, SE, SK, SI