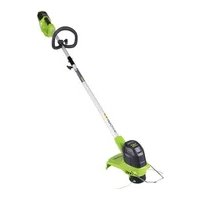
GD60LT - Grass trimmer GREENWORKS - Free user manual and instructions
Find the device manual for free GD60LT GREENWORKS in PDF.

Pick your language and provide your email: we'll send you a specifically translated version.
| Product type | String trimmer (brush cutter) |
| Brand | Greenworks |
| Model | GD60LT |
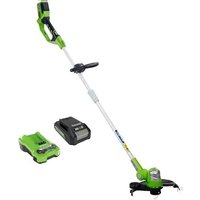
| Power source | 60 V lithium-ion battery (sold separately) |
| Recommended battery type | Greenworks 60 V, 2.0 Ah or 4.0 Ah |
| Cutting diameter | 40 cm |
| Cutting type | Twisted nylon line |
| Line diameter | 2.0 mm |
| Rotation speed | Variable up to 7000 rpm |
| Weight (without battery) | 4.5 kg |
| Weight (with 4.0 Ah battery) | 5.2 kg |
| Total length | 120 cm |
| Handle type | Straight, adjustable |
| Sound level (acoustic pressure) | 78 dB(A) |
| Sound level (acoustic power) | 92 dB(A) |
| Vibration (front handle) | 4.2 m/s² |
| Estimated runtime (4.0 Ah battery) | 35 minutes |
| Main functions | Edging, weeding, lawn trimming |
| Maintenance and cleaning | Clean the cutting head after each use, check screws and line regularly |
| Safety | Eye protection required, do not use in rain, stop before clearing the line |
| Spare parts and repairability | Cutting line, cutting head, batteries, chargers available on greenworks.fr |
| General information | Cordless device, 3-year warranty, domestic use |
Frequently Asked Questions - GD60LT GREENWORKS
What type of battery to use with the Greenworks GD60LT?
Use exclusively a Greenworks 60 V lithium-ion battery (models GBA80200, GBA80400, etc.). Never use a battery of another brand or voltage.
Is the GD60LT delivered with a battery and charger?
No, the GD60LT is sold as a bare tool without battery or charger. They are to be purchased separately in the same 60 V system.
How to replace the cutting line?
Disconnect the battery. Remove the empty spool from the cutting head. Wind new 2.0 mm line in the indicated direction, then replace the spool. Cut the line to the correct length.
What line diameter to use?
Use a 2.0 mm twisted nylon line diameter. Do not use thicker line, as this could damage the head.
Can I use a metal line or blade?
No, the GD60LT is designed only for nylon line. Using a blade or metal line is prohibited and dangerous.
Is the runtime sufficient for a large garden?
With a 4.0 Ah battery, the runtime is about 35 minutes in normal use. For very large areas, plan for an extra battery.
How to reduce vibrations?
Make sure the cutting head is well balanced and the line is not too long. Wear anti-vibration gloves and take regular breaks.
Can the string trimmer be used in the rain?
No, the device is not waterproof. Never use in rain or on wet ground. Risk of electric shock and damage.
What spare parts are available?
You can find cutting heads, spools, lines, batteries, chargers and other parts on the Greenworks website or from authorized dealers.
My device does not start, what should I do?
Check that the battery is charged and correctly installed. Check the safety lock. If the problem persists, contact Greenworks customer service.
User questions about GD60LT GREENWORKS
0 question about this device. Answer the ones you know or ask your own.
Ask a new question about this device
No questions yet. Be the first to ask one.
Download the instructions for your Grass trimmer in PDF format for free! Find your manual GD60LT - GREENWORKS and take your electronic device back in hand. On this page are published all the documents necessary for the use of your device. GD60LT by GREENWORKS.