
WMD44MB - Microwave WHIRLPOOL - Free user manual and instructions
Find the device manual for free WMD44MB WHIRLPOOL in PDF.
| Brand | Whirlpool |
| Model | WMD44MB |
| Product type | Microwave oven |
| Power supply | 230 V ~ 50 Hz |
| Microwave power | 1000 W (max) |
| Grill power | Not specified (integrated grill) |
| Capacity | 25 L (estimated) |
| Dimensions (W x H x D) | Not specified |
| Weight | Not specified |
| Main functions | 6th Sense, Reheat, Cooking, Crisp, Defrost, Grill, Hydraulic self-cleaning, Microwave |
| Automatic functions | Reheat (meals, lasagna, milk/water, soup), Cooking (roast chicken, gratin, stuffed vegetables, pork chops, scrambled eggs, popcorn), Crisp (pizza, bread, fries, nuggets, fish sticks), Defrost (meat, poultry, fish, crispy bread) |
| Control panel | Double display, rotary knob + 6th Sense button, Pause, Back, On/Off, Start, Time, Power buttons |
| Supplied accessories | Glass turntable, turntable support, metal rack, Crisp plate, handle for Crisp plate |
| Maintenance and cleaning | Exterior and interior surfaces: damp microfiber cloth + neutral pH detergent. Self-cleaning grill by heat. Turntable and support dishwasher safe. Crisp plate: hand wash with mild detergent. |
| Safety | Key lock, automatic safety lock when door opens, emergency stop by holding On/Off button |
| Spare parts and repairability | Turntable, support, metal rack, Crisp plate available from customer service. Contact Whirlpool After-Sales Service. |
| General information | Manual available in multiple languages. Product code on rating plate. Reference WMD44MB. |
Frequently Asked Questions - WMD44MB WHIRLPOOL
User questions about WMD44MB WHIRLPOOL
0 question about this device. Answer the ones you know or ask your own.
Ask a new question about this device
Download the instructions for your Microwave in PDF format for free! Find your manual WMD44MB - WHIRLPOOL and take your electronic device back in hand. On this page are published all the documents necessary for the use of your device. WMD44MB by WHIRLPOOL.
USER MANUAL WMD44MB WHIRLPOOL
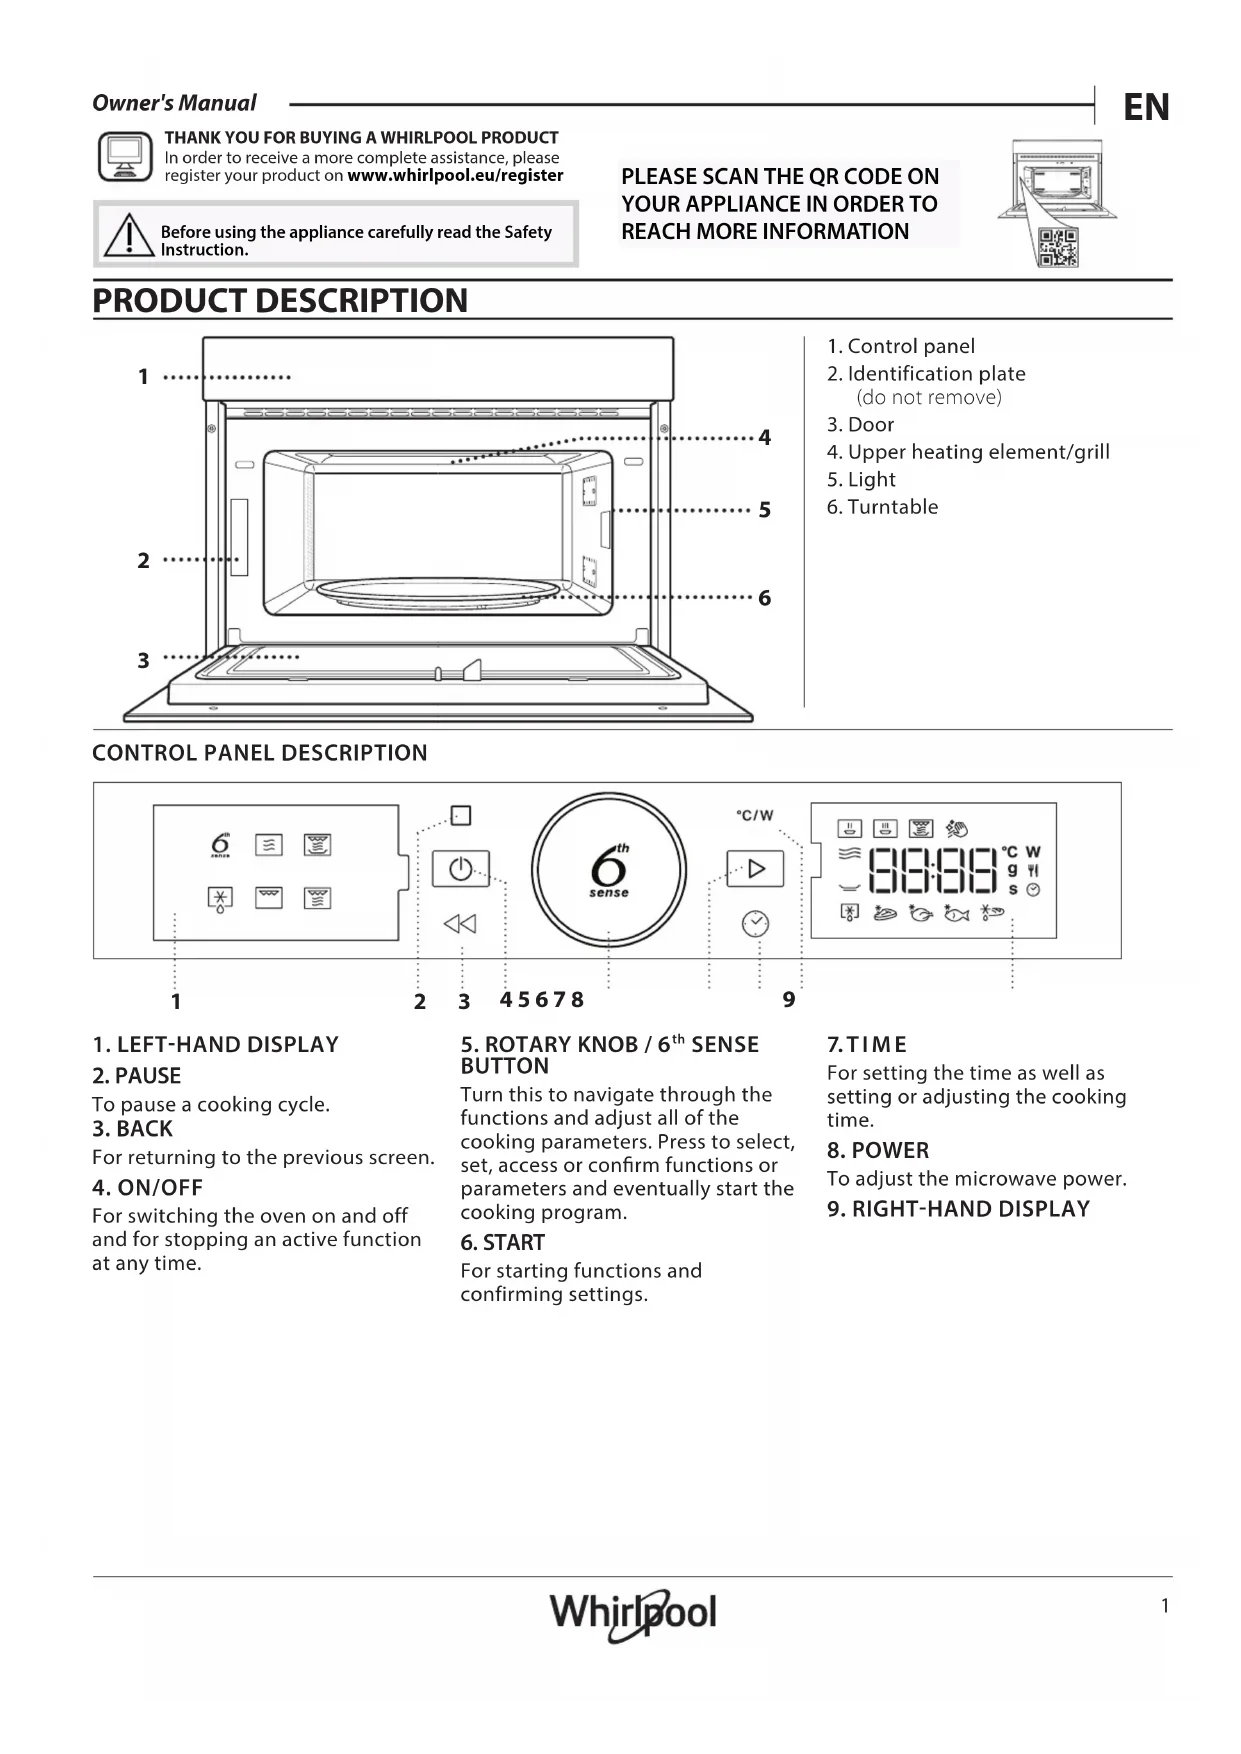
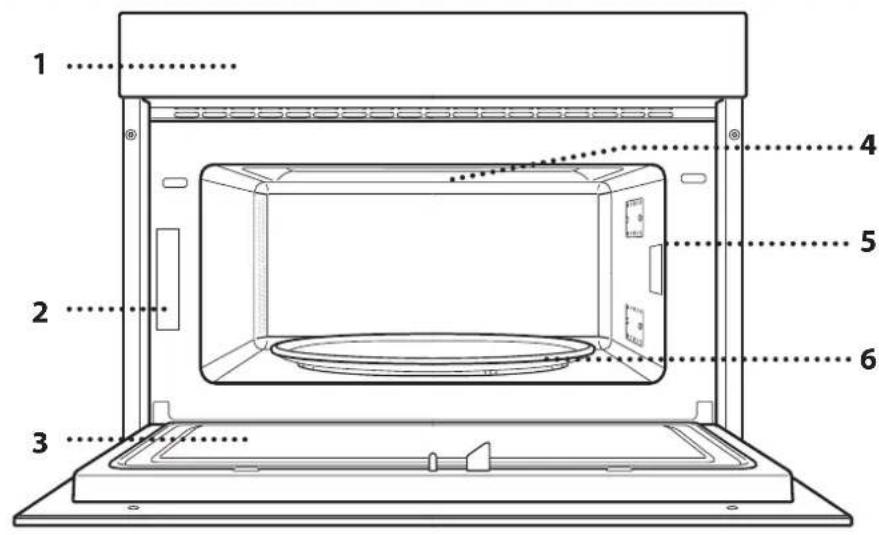
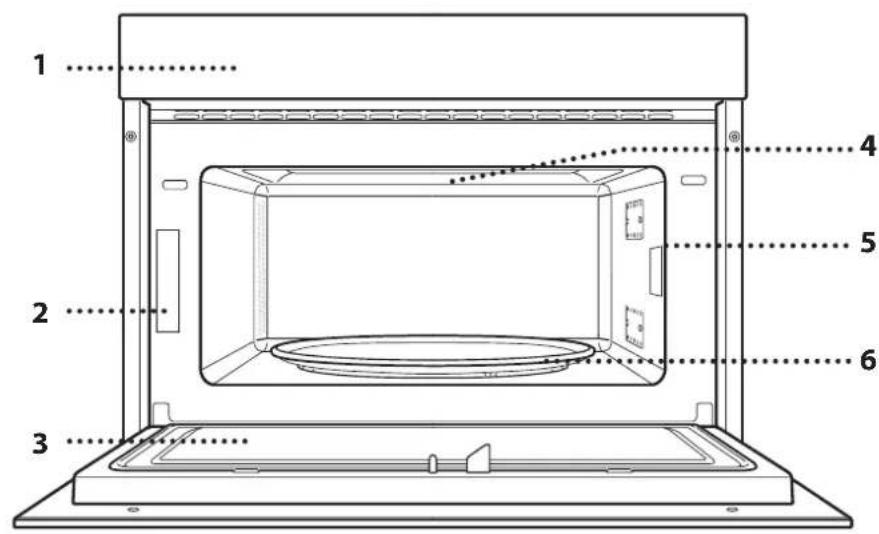
- Control panel
- Identification plate (do not remove)
- Door
- Upper heating element/grill
5.Light - Turntable
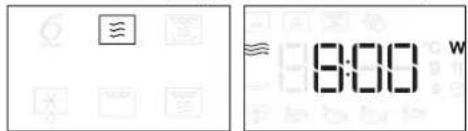
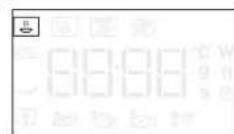
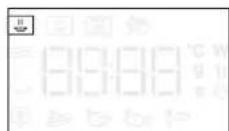
CONTROL PANEL DESCRIPTION
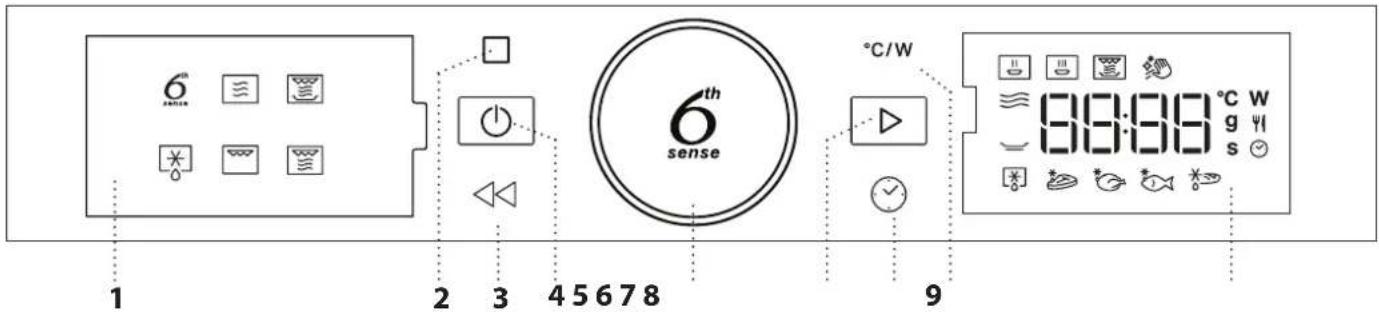
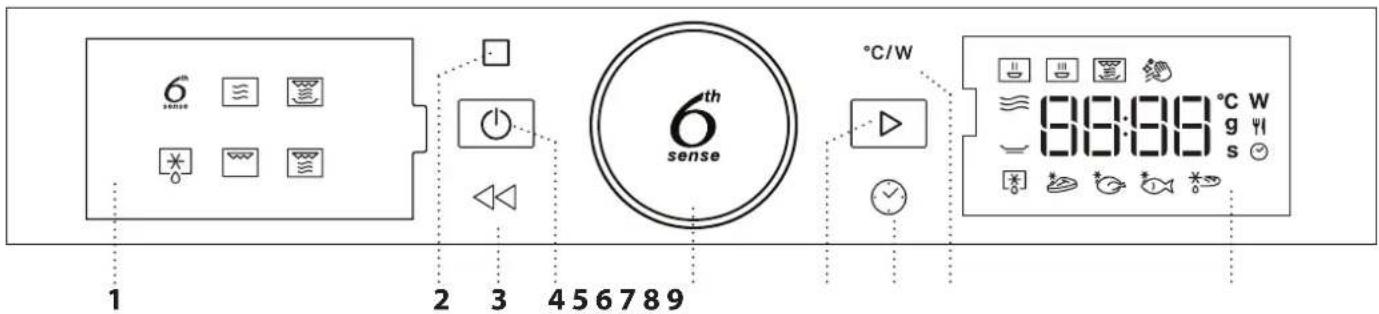
1. LEFT-HAND DISPLAY
2. PAUSE
To pause a cooking cycle.
3. BACK
For returning to the previous screen.
4. ON/OFF
For switching the oven on and off and for stopping an active function at any time.
5. ROTARY KNOB / 6th SENSE BUTTON
Turn this to navigate through the functions and adjust all of the cooking parameters. Press to select, set, access or confirm functions or parameters and eventually start the cooking program.
6. START
For starting functions and confirming settings.
7 TIME
For setting the time as well as setting or adjusting the cooking time.
8. POWER
To adjust the microwave power.
- RIGHT-HAND DISPLAY
ACCESSIONS
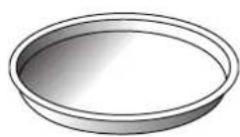
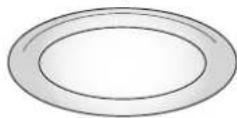
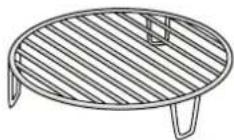
TURNTABLE
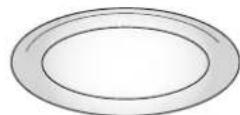
Placed on its support, the glass turntable can be used with all cooking methods.
The turntable must always be used in containers or accessories.
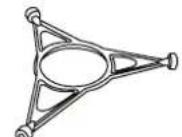
TURNTABLE SUPPORT
Only use the support for the glass turntable.
Do not rest other accessories on the support.
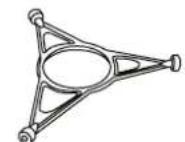
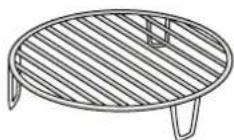
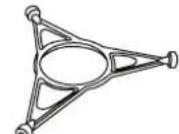
WIRE RACK
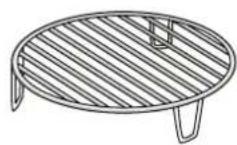
This allows you to place food closer to the grill, for perfectly browning your dish.
Place the wire rack on the turntable, making sure that it does not come
into contact with other surfaces.
The number and the type of accessories may vary depending on which model is purchased.
There are a number of accessories available on the market. Before you buy, ensure they are suitable for microwave use and resistant to oven temperatures.
Metallic containers for food or drink should never be used during microwave cooking.
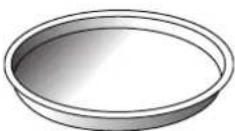
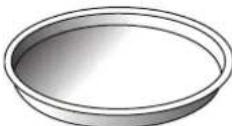
CRISP PLATE
Only for use with the designated functions.
The Crisp plate must always be placed in the centre of the glass turntable and can be pre-heated
when empty, using the special function for this purpose only. Place the food directly on the Crisp plate.
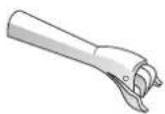
HANDLE FOR CRISP PLATE
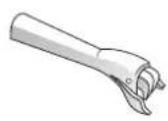
Useful for removing the hot Crisp plate from the oven.
Other accessories that are not supplied can be purchased separately from the After-sales Service.
Always ensure that foods and accessories do not come into contact with the inside walls of the oven.
Always ensure that the turntable is able to turn freely before starting the oven. Take care not to unseat the turntable whilst inserting or removing other accessories.
FUNCTIONS

6TH SENSE
These functions automatically select the best cooking method for all types of food.

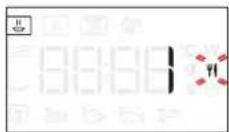
REHEAT
For reheating ready-made food that is either frozen or at room temperature. The oven automatically calculates the settings required to achieve the best results in the shortest amount of time. Place food on a microwave-safe and heatproof dinner plate or dish.
| FOOD WEIGHT (g) | ||
| 1 | PLATED MEAL 250 - 500 | |
| 2 | FROZEN LASAGNA 250 - 500 | |
| 3 | MILK/WATER 100 - 500 | |
| 4 | SOUP 200 - 800 |

COOK
For cooking foods quickly and achieving optimal results. Use a heatproof container suitable for microwave use.
| FOOD WEIGHT (g) | ||
| ROAST CHICKEN 800 - 1500 | ||
| POTATOES GRATIN 200 - 1000 | ||
| STUFFED VEGETABLES 200 - 800 | ||
| PORK RIBS 200 - 800 | ||
| SCRAMBLED EGGS 100 - 500 | ||
| POPCORN 90 |

CRISP
For quickly reheating and cooking frozen foods and giving them a golden, crunchy top. Only use this function with the crisp plate provided. Turn the food when prompted.
| FOOD WEIGHT (g) |
| PIZZA [FROZEN] 200 - 800 |
| BURGER PATTIES 200 - 600 |
| POTATOES FRIED [FROZEN] 200 - 500 |
| CHICKEN NUGGETS [FROZEN] 100 - 500 |
| FISH FINGERS [FROZEN] 100 - 500 |
Required accessories: Crisp plate, handle for crisp plate

Hydro Self Clean
The action of the steam released during this
special cleaning cycle allows dirt and food residues to
be removed with ease. Pour a cup of drinking water into a microwave proof container and activate the function.

MICROWAVE
For quickly cooking and reheating food or drinks.
| ACTION | FOOD | POWER (W) | DURATION (min.) |
| Reheat | 2 cups | 1000 | 1-2 |
| Reheat | Mashed potatoes (1 kg) | 1000 | 9-11 |
| Defrost | Minced Meat (500 g) | 160 | 13-14 |
| Cook | Sponge cake | 800 | 6-7 |
| Cook | Egg custard | 650 | 11-12 |
| Cook | Meat loaf | 800 | 18-20 |

CRISP
For perfectly browning a dish, both on the top and bottom of the food. This function must only be used with the special Crisp plate.
| FOOD | DURATION (min.) |
| Leavened cake | 7 - 10 |
| Hamburger | 8 - 10* |
- Turn food halfway through cooking.
Required accessories: Crisp plate, handle for the Crisp plate

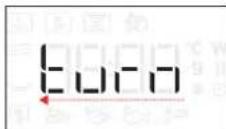
DEFROST
For quickly defrosting various different types of food simply by specifying their weight. Food should be placed directly on the glass turntable, except for Crisp Bread Defrost. Turn the food when prompted.
CRISP BREAD DEFROST
This exclusive function allows you to defrost frozen bread. Combining both Defrost and Crisp technologies, your bread will taste and feel as if it were freshly baked. Use this function to quickly defrost and heat frozen rolls, baguettes & croissants. The Crisp Plate must be used in combinator with this function, directly placed on wire shelf.
| FOOD WEIGHT (g) |
| TIMED DEFROST - |
| MEAT 100 - 2000 |
| POULTRY 100 - 2500 |
| FISH 100 - 1500 |
| CRISP BREAD DEFROST 50 - 500 |
GRILL For perfectly browning a dish, both on the top and bottom of the food. This function must only be used with the special Crisp plate.
FOOD DURATION (min.)
Leavened cake 7 - 10
Hamburger 8 - 10*
- Turn food halfway through cooking.
Required accessories: Wire rack
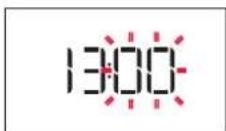
FIRST TIME USE
. SETTING THE TIME
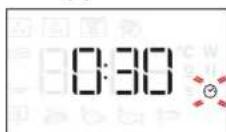
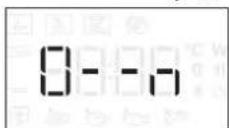
You will need to set the time when you switch on the oven for the first time.

The two digits for the hour will start flashing: Turn the rotary knob to set the hour and then press to confirm.
DAILYUSE
1. SELECT A FUNCTION
When the oven is off, only the time is shown on the display. Press and hold to switch the oven on. Turn the rotary knob to view the main functions available on the left-hand display. Select one and press
To select a sub-function (where available), select the main function and then press to confirm and go to the function menu.
GRILL+MW For quickly cooking and gratinating dishes, combining the microwave and grill functions.
| FOOD POWER (W) DURATION (min.) | ||
| Potatoes gratin | 650 | 20-22 |
| Roast chicken | 650 | 40-45 |
Recommended accessories: Wire rack
The two digits for the minutes will start flashing. Turn the rotary knob to set the minutes and press to confirm.
Please note: To change the time at a later point, press and hold for at least one second while the oven is off and repeat the steps above.
You may need to set the time again following lengthy power outages.

Turn the rotary knob to select from amongst the subfunctions available on the right-hand display and then press to confirm.
2. SET A FUNCTION
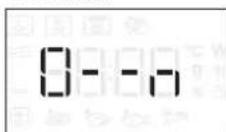
.6TH SENSE/DEFROST
FOOD CLASS
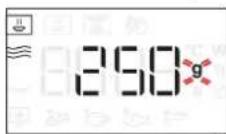
Once you have chosen one of the automatic functions, you will need to select a category for the food you are cooking.
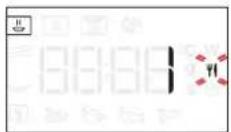
When the iron flashes, turn the rotary knob to select the category you require and then press to confirm. WEIGHT
To achieve the best results, the 6^th Sense (and Jet Defrost) require you to enter the weight of the food, selecting from amongst the default settings: the oven will calculate the ideal length of time for the function to run for each category of food.
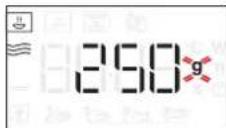
When the default setting appears on the display and the 9 icon flashes, turn the rotary knob to set the weight and then press to confirm.
. MANUAL FUNCTIONS
After having selected the function you require, you can change its settings.
The display will show the settings that can be changed in sequence.
MICROWAVE POWER
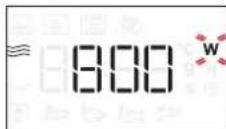
When the Mn flashes on the display, turn the rotary knob to adjust the power setting and then press to confirm and continue to alter the settings that follow (if possible).
Please note: Once the function has been activated, the power can be changed by pressing to access the settings menu, then turning the rotary knob to change the setting.
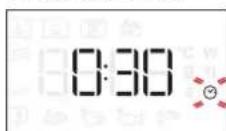
DURATION

When the icon flashes on the display, use the rotary knob to set the cooking time you require and then press to confirm or press to confirm and start the function.
Note: During cooking, you can adjust the cooking time by turning the rotary knob; each time you press , the cooking time increases by 30 seconds.
3. ACTIVATE THE FUNCTION
Once you have applied the settings you require, press to activate the function.
Every time the button is pressed again, the cooking time will be increased by a further 30 seconds.
Please note: You can press at any time to stop the function that is currently active.
JET START
When the oven is switched off, it is possible to press to activate cooking with the microwave function set at full power (1000 W) for 30 seconds.
. SAFETY LOCK
This function is automatically activated to prevent the oven from being switched on accidentally.

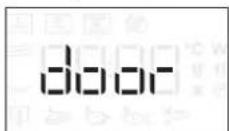
Open and close the door, then press to start the function.
4. PAUSE
To pause an active function, for example to stir or turn the food, simply open the door.
To start it up again, close the door and press.
AUTOMATIC PAUSE
(TURN OR STIR FOOD)
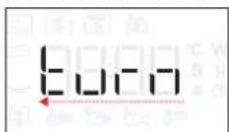
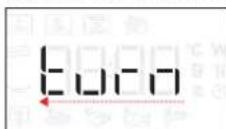
Certain functions will pause to allow you to turn or stir the food.
Once the oven has paused cooking, open the door and carry out the action you are prompted to perform before closing the door again and pressing to continue with cooking.
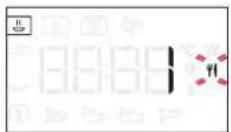
5. COOKING END
An audible signal will sound and the display will indicate that cooking is complete.

To extend the cooking time without changing the settings, turn the rotary knob to set a new cooking time and press + .
. KEY LOCK
To lock the keypad, press and hold for at least 5 seconds.
Do this again to unlock the keypad.
Please note: The key lock can also be activated while cooking is in progress. For safety reasons, the oven can be switched off at any time by pressing and holding.
CLEANING
Make sure that the appliance has cooled down before carrying out any maintenance or cleaning.
Never use steam cleaning equipment.
Do not use wire wool, abrasive scourers or abrasive/ corrosive cleaning agents, as these could damage the surfaces of the appliance.
INTERIOR AND EXTERIOR SURFACES
- Clean the surfaces with a damp microfibre cloth. If they are very dirty, add a few drops of pH-neutral detergent. Finish off with a dry cloth.
- Clean the glass in the door with a suitable liquid detergent.
- At regular intervals, or in case of spills, remove the turntable and its support to clean the bottom of the oven, removing all food residue.
- The grill does not need to be cleaned as the intense heat burns away any dirt. Use this function on a regular basis.
ACCESSIONS
All accessories are dishwasher safe with the exception of the Crisp plate.
The Crisp plate should be cleaned using water and a mild detergent. For stubborn dirt, rub gently with a cloth. Always leave the Crisp plate to cool down before cleaning.
TROUBLESHOOTING
| Problem Possible cause Solution | ||
| The oven is not working. | Power cut. | Check for the presence of mains electrical power and whether the oven is connected to the electricity supply. Turn off the oven and restart it to see if the fault persists. |
| Disconnection from the mains. | ||
| The oven makes noises, even when it is switched off. | Cooling fan active. | Open the door or hold or wait until the cooling process has finished. |
| The display shows the letter “F” followed by a number. | Software fault. | Contact the Call Center and state the number following the letter “F”. |
Policies, standard documentation and additional product information can be found by:
- Using the QR on your product
- Visiting our website docs.whirlpool.eu
- Alternatively, contact our After-sales Service (See phone number in the warranty booklet). When contacting our After-sales Service, please state the codes provided on your product's identification plate.
PRODUKTBESCHREIBUNG
5.DREHKNOPF/6THSENSE-KNOPF
. FONCTIONS MANUELLES
BJIATOAPIM B, YE 3AKYINXTE IPOyKT HA WHIRLPOOL
3a da nonyuabaTe no-ntbIHO cBdeIcTBne, MoJIa, pernCTpnpaIte BaIINr npOyKT Ha www.whirlpool.eu/register

PpeDn Da n3non3BaTe ypeDa, npooyete BHNMaTeHNO HNCTpyKunnte 3a 6e3onacHOCT.
MOJI,CKAHIPAITe QR KOДA HA BAISHY UPED, 3A DA NOJUHTE NOBEYE INΦOPMALIЯ
ONICAHNE HA YPEDA
- Ta6no 3a ynpabJeHne
2.ⅡeHTnΦnKaunHnTa6enKa (da He ce cBa) - BpaTnUka
- Topen HargBaTeHee enemEn/rgn
5.OcbetneHne - Bbptra ca neoctabka
ONICAHNE HA KOMAHHOTO TABLO
1. JIAB IINCIIEN
2. NAY3A
3a noctabareHa nay3a roTbapckata nporpama.
3.HA3A
3a Bpbuane KbM npedxodnnaekpaH.
4.BKJI./N3KJI.
3a BKNIOUbaHe n N3KNOUbaHe Ha cyphHaTa n He3a6abHO cnnpaHe Ha n3nblNHaBaHaTa yHKcIy.
5.BbPTAùCE ByTOH/ ByTOH 6th SENSE
3aBbptete ro, 3a da ce npnDbNkBaTe NO yHKunnte n 3a hActpoikKa Ha napametpnte ha rotBeHe. HatncheTe 3a n36npaHe, hActpoBaHe, Doctbn n NOTBbpxJaBaHe Ha yHKunTe nnnapametpnte, a cbso n 3a Hauano Ha nporpaMaTa 3a rotBeHe.
6. START
3a BKNIOUbaHe Ha YHKUNN I NOTBbPjDaBaHe HA CTOHOCHTNE Ha napaMeTpnte.
7. BPEME
3a HactpoBbAe Ha Yaca, KaKTo N 3a HactpoKa Nn 3aDaBaHe Ha BpeMeTo 3a RotBeHe.
8. MOUHOCT
3a HacpoBaHe Ha MKNPOBbHOBaTa MOUHOCT.
9. DECEH DUCNJIEN
ПИHAДЛЕЖHOCTN
BbPTaCA CE NOCTABKA
IocTaBeHa Bbpxy CToiKaTa cn, CTbKLeHaTa BbptTua Ce NoctaBka MOKe Da Ce N3NoJ3Ba Pn BCuKN MeToDn Ha RotBeHe.
Bbptraata ce noctabka Tp86Ba BnHa rna da ce n3no3Ba KaTO OCHOBA 3a dpyrncbdoBe nn npHaadexKHOCTN.
CTOUKA HA BbPTaIATA CE NOCTABKA
N3noJ3BaIe cToKaTa cAmO 3a CTbKHeHaTa BbPTaCa ce NoCTaBka. He noCTaBnTe dpyr npHAdJeXHoCTn BbPxy cToiKaTa.
PEWETbyeH PAOT
ToBa Bn no3BOLrBa da noctabnte XpaHata no-6n3o do rpnna, 3a nepfekTHO npennuhe Ha BaunTe ACTNA.
IocTabete peweTbHnpaTHa
BbptTaaTa Ce NoctabKa, KaTo ce yBepnte, Ye He Bn3a BOKHTAKT C npyI NOBbpxHOCTN.
BpoT N BvIbT Ha npHaJIeXHOCTNe MoKe Da e pa3JIuHcB 3aBNCIMOCT OT 3aKyIeHnMoJeI.
B TbproBckata Mpeka ca HauuHr oJam 6poi npHaadnexKHOCTn. IpeNi nokynKa ce yBepTe, ye ca noXoJaun 3a ynoTpe6a B MmKpObblHOBa fypHa u cytOuHBn Ha Temnepatypnte BB bypHaTa.
Hnkora He n3noJ3BaIte MeTaJIHcBdoBe 3a XpaHa nn HAnNTKn npu MmKpOBoJIHOBO rOTBeHe.
TABU4KA CRISP
I3noJ3Ba ce cmo 3a nocoueHnte
Tabnukata 3a 3annuhe Tp6Ba BnHaN da CE NOCTABB U cHTbpa Ha CTbkneHaTa BbpTua Ce nOCTabKa
mOKeJaCeNoIgPraBa npeBapuTeHObKorato e npa3Ha,CbCcneuaHnHaTa yHKuncaMoTa3a Ta3n cen. NocTabrnte xpaHata HnPaBO Bbpx TabuKhata Crisp.
PbKOXBATKA 3A TABU4KATA CRISP
Ydo6Ha 3a n3BaKaDaHe Ha ropeuata TaBnUka Crisp or ypHata.
Ipyr npHnAdJnxHOCTN, KOINT He ca BKNIOyeHN B IOCTaBkata, MoT a 6bdaT 3aKyHeH OTdEJIHO OT dEJa 3a CneInpoadaK6eHo o6cnyXbaHe.
BnHaHc ce yBepaBaTe, ye xpaHnte n npHaJnxKHOCTNe He Bn3aT BdoNp C BbTpewHnTe cTeHN Ha cyphHata.
BnHaH npOBepaBte daN BbPTaTa ce noCTaBAce BbPTncBO6oAnO, npEdu Da BkIIOuHTe yPhaTa. BnMaBaTe da He OTMeCTnte BbPTaTa ce nocTabKa, DOKATO NOCTaBte Hnn IpemaxBaTe dpyrnpnHaDneXHOCTn.
ФУHKUIM

6TH SENSE
sense Te3n fynkunn abTomatnuho n36upat Ha-ido6pna MeTOd 3a rotBeHe 3a BCNUK BNDOBE xpaHn.

PNETONJIHE
3a npetonnHe Ha noIyrotOBxpaHn, KOUTO ca 3ampa3eHN nnHa cTaNHa TemnepaTypa. OypHaTa aBTOMaTHUHO n3YncIbA Heo6XoDmnte HAcTpOKn 3a NOCTnRaHe Ha Han-Do6pnte pe3yIaTn 3a Han-KpaTKO BpeMe. IocTabete xpaHATA Bbpxy OrHeynopHa YHHN nn Dpyr CbD, PnpEHa3HaueH 3a MKNPOBbIHOBn OypHn.
| XPAHA TEGINO (g) | |
| 1 CH | ХРАНВЧИΝΗ 250 - 500 |
| 2 | ЗМРАЗЕHA ЛAЗАнг 250 - 500 |
| 3 | МЛЯКО/BOДА 100 - 500 |
| 4 | СУПА 200 - 800 |

TOTBEHE
3a 6bp30 npurotBHe Ha xpaHn nocTuHa Ha ONTmamHn pezylTaH.3nON3BaIe ToNIOyCTOnuHB CbD, NOxOJa3 a MKNPOBbJHObN yPHN.
| XPAHA TEGINO (g) | |
| 1 | ПЕЧЕНО ПИЛЕ 800 - 1500 |
| 2 | КAPTOФЕН ORPETEH 200 - 1000 |
| 3 | ПьлHEн 3ЕLEHЧУЦ 200 - 800 |
| 4 | СВИСКИ PEBРЦА 200 - 800 |
| 5 | ББРКAHИ РИЦА 100 - 500 |
| 6 | ПУКАНКИ 90 |

CRISP
3a 6bp30 npetonnHe n npiroTbHe Ha 3ampa3eHn xpaHn u 3naTnCTa u xpynkBa Ka KopuKa. N3noJ3BaIte Ta3n oYHKpUcA cMo C npedocTaBeHaTa TabuKa Crisp. O6bpHete xpaHata, Korato 6bTe NOkaHeHn.
| XPAHA TEGINO (g) | |
| ПИЦА [3AMPA3EHА] 200 - 800 | |
| КIOФTEHЦА 3A БУРЕР | 200 - 600 |
| ПьХЖЕН KAPTOФКИ [3AMPA3EHИ] | 200 - 500 |
| ПИЛЕШКИ XANКИ [3AMPA3EHИ] | 100 - 500 |
| РИБН ПОЛЦА [3AMPA3EHИ] | 100 - 500 |
Heo6xOIMn npHaJnxHocTn:TabuKa Crisp,dpjka 3a TabuKa Crisp

Hydro Self Clean
DeiCTBneto Ha npaTa, KOrTO ce OTdEeNo Bpeme Ha TO3N CneuaneH uKbHa HauoNCtBaHe N03BOJBA Ha MPcOTnraTn OCTaTBuNTe OT XpaHa Da CE OTcTpaHbAT CLekota. HaneTe yawa BOda 3a PneHe B NOxOJa 3a MKNPOBbHOBa CyPHa cbn aKTNBpapte yHKnraTa.

MICROWAVE (MUKPOBJIHN)
3a 6bp3o npiroTBaHe n npetOnnHa HxpaHn
HANITKIN.
| MOUHOCT (W) | ПЕРОРБУHA 3A |
| 1000 | Бызо петоглелуно Ha habитки идругххраши с виско сыдьржане Ha Вда. |
| 800 | Говене Ha зеленчци. |
| 650 | Говене Ha месо и рпб. |
| 500 | Говене Ha месн сocolve ил сocolve CBС сорони ил Ялц.Финална phаiza за мechни поюе ил посяпа наст. |
| 350 | Бавно,шадяшо Говен.Иdeално за разарaningуно Ha Maclo илшokолад. |
| 160 | Размразаяване Ha замразснхраши ил размckванe Ha масо и соронe. |
| 90 | Разогаяванe Ha садалад. |
| Дем base | ХраHA | Mоlfиов (W) | ПОНьлжITEЛHОС (MIN.) |
| П配电онянe | 2 чаши | 1000 | 1-2 |
| П配电онянe | Картофени пюре (1 kg) | 1000 | 9-11 |
| Раимразувае | Кайma (500 g) | 160 | 13-14 |
| ГOTBEнe | Пандшалов Кейк | 800 | 6-7 |
| ГOTBEнe | Ячesen Керм | 650 | 11-12 |
| ГOTBEнe | Руло "Сteфан" | 800 | 18-20 |

CRISP
3a nepfektho 3aHnueHa Ha nCTne OT rOpHaTa IN OJHata cTpaHa Ha XpaHata. Ta3n fYHKunr Tpr6Ba da ce IN3no3Ba cMo Cbc CneuaHata TabuKa Crisp.
| ХраHA | ПОДьЖИTEЛHOCT (MH.) |
| Пандшпанов keи | 7-10 |
| Hamburger (Xam6yprep) | 8-10* |
- O6bphTe xpaHaTa npn IN3TuHaHe Ha NIOBnHaTa OT BpeMeTo 3a RotBeHe. Heo6xOIMn npnHaJnxKHOCTn: TabuKa Crisp, npbXkka 3a TabuKa Crisp

PA3MPA3RAHE
3a 6bp30 pa3Mpa3BaHe Ha pa3NnHn BnOBe npOdykTu cAmo C nocOyBaHe Ha terlnoTo m. XpaHaTa cneDbA da ce NOCTABn HAnpabo Bbpxy CTbKNeHaTa BbPTaHa ce NoCTabKa, OCBen 3a Crisp Pa3Mpa3BaHe Ha xna6. 06bpheTe xpaHata, KOrato 6bDeTe noDkaHeHn.
XPyπKAB XJIb PA3MPA3EH
Ta3n ekckny3nBHa yHKunBn no3BOJBA da pa3mpa3raBe 3ampa3eH xna6. CbyeTaba TexHOJOrnTe Defrost n Crisp, xna6bT Bu uce n Ma Bkyc n yceuane KaTo npacHo n3neueH.
I3noJ3BaIe Ta3n 0yHKuJra 3a 6bp3o pa3Mpa3BaHe
I 3aarpBaHe Ha 3aMpa3eHn pyna,6areTN N KpoacAH. TabuKata Crisp Tpr6Ba Da ce n3non3Ba B Kom6Haucn C Ta3n FyHKU, DnpeKTHO NOCTaBeHa Bbpxy peWeTbHn paΦT.
| XPAHA TEGINO (g) |
| PA3MPA3RABAHE C BPEME - |
| MECO 100 - 2000 |
| ПТИЧЕ MECO 100 - 2500 |
| P涅БА 100 - 1500 |
| ХУПКAB XЛЯБ PA3MPA3EH 50 - 500 |

PNI
3a nepkeKTHo 3annuHaHe Ha JCTne OT rOpHaTa N
dONHaTa cTpaHa Ha xpaHata. Ta3n fYHKunr Tp86Ba da ce n3NON3Ba camo cbc CneunaHaTa TabuKa Crisp.
XPAHA IPOДынгИTEЛHOCCT(MN.H.)
PAnHnwnaHOB KeK 7-10
Hamburger (Xam6yprep) 8-10*
- O6bpeHrE XpaHaTa npn H3TtUaHe Ha NOnOBuHaTa CT BpeMeTo 3a TOTBeHe.
Heo6xOIMn npHaJnxKHOCTn: PeWetbueH paOT

ΓPNI+ MKNKPOBbJIHN
3a 6bp3o npnroTbHe Ha aCTn, KOM6HnpaKn
MnKpoBbHOBaTaΦyHKcNc rpnI.
XPAHA MOUHOCT (W) IPOODJIKHTEJIHOCCT (MnH.)
| Kaptoфен orpehen | 650 | 20 - 22 |
| Пechero рile | 650 | 40 - 45 |
PpeopbunHn npHaJnxKHOCT: PeWteBueH paOf
MINKPOBbJIHOBA MOUHOCT

Korato NKOHaTa W DnCnIe 3aNoUHe da Mura, 3aBbPTe BbPTaunCe 6yToH, 3a Da perynpaTe HAcTPOknte 3a MouHocT, HaTNCHeTe , 3a Da NOTBbPdNTe IN PpOdbNknte C npOMHaTa Ha NocneDbauHTe HAcTPOkN (aKo E Bb3MOxHo).
Mona, nmaTe npedBn; CneI kato fynKcnaTa 6bJe
akTINBnPaHa, MoKeTe Da IpnOmeHrTe MOUHOCTTa, KATO
HaTNCHeTe 3a DOCTbN Do MEHOTOC HAcTPOkN, a CneI TOBa
3aBbPNTe 6yToHa, 3a Da IpnOmeHrTe HAcTPOkKaT.
NPOdJIIXHTENHOCT
Korato NKOHATA 3aNoUHe Da Mura Ha DnCnIe,
n3no3BaInTe BbptTnA Ce 6yToH, 3a Da 3aDnTe
Heo6xOaMTO BpeMe 3a RotBeHe, H aTnCHete , 3a
da NOTBbpNTe, nHaHTnCHete , 3a Da NOTBbpNTe n CTapTnpate yHKnIra.
3a6eJekka: Io BpeMe Ha rotBeHe MoKTe Da HAcTpOnte BpeMeTo 3a rotBeHe, KaTO 3aBbPTNTe BbptTnIa Ce 6yToH; BCEKn IIbT, UOM HAITNCHETe , BpeMeTo 3a rotBeHe Ce yBEnuaba c 30 cekyni.
3.AKTUBUPAHE HA FYHKUNTA
CneK KaTo npnOxNte Heo6XoDnMnte HAcTPOuKn, HAChHeTe ,3a Da aKTbBnpate yHKnraTa.
BceKn nT KOrato HataChHe 6yToHa ,KbM BpeMeTo 3a rotBeHe ce np6abrt Oue 30 ckyHn.
MOnaIte npeBnD: MoKeTe da HaTucHeTe NO BcKaO BpeMe, 3a Da CnpTe aKTHBHaTa B MOMeHTa fYHKuN.
.JET START
Korato cyphatae n3KnHoueHa, HaTnChete,3a da aKTNBnpaTe roTBeHeTo C MmKpObJnHOBa fYHKuia, 3aadaeHa Ha NblHa MoUHocT (1000 W) 3a 30 cekyHn.
3AUHTHO 3AKJIIOUBAHE
Ta3n yHKunCe aKTNbnpa ABTomTuHc cen 3aunTa OT CnyauHO BKJIOUbaHe Ha ypHaTata.
OTBOpTe N 3aTbOpTe BpaTuKaTa, cNeI KOeTo HATnCHete , 3a Da CTapTpNaTe fYHKunraTa.
4. NAY3A
3a da noctabnTe Ha nay3a akTnBHa yHKu,Ha npMep 3a da pa36bpkate nn O6bpHeTe xpaHata, npocTo OTbOpete BpTuKkata.
3aДастарпаTe OTHOBO, 3aTBopete BpaTnukataиHaTnCHeTe
ABTOMATNUHAIAY3A
(OBpIaHE INI PA3bPKBAHE HA XPAHATA)
HЯко abTomatnHH yHKunu ige cnpaT ha nay3a, 3a da mokeTe da o6bphete nn pa36bkate xpaHata.
CneI KaTo OyPHaTa NoCTaBn RotBeHrTo Ha NaY3a, OTBOpTe BpaTuKkTa N N3NbJIHeTe DeJCTBHeTO, KOeTO CTe NOKaHEn Da N3NbJIHrTe, PpeDn Da 3aTbOpHTe BpaTuKkTa OTHOBO, N HaTNCHeTe , 3a Dn npoDbJxHrTe ROTBeHrTo.
5.KPAHAROTBEHETO
PpO3ByuBa CnHaI N DnCnpeT Noka3Ba, Ye rotBeHeTo e 3aBbPunIO.

3a da ynbjxnte Bpemeto 3a rotbehe 6e3 da npomehTe Hacptpoiknte, 3abpTeTe BbpTae nCe 6ytoH, 3a da 3daandeTe HOBA npoBnKntenHOCT, nHaTNCHEt e
3AKJIIOUYBAHE HA BYTOHNTE
3a da 3akIIOHTe 6yTOHnTe, HATNCHeu 3aApbXkTe 3a nohe 5 cekyn.
HanpaBete cbuTo, 3a da ne6loKnpuTe 6yToHnTe.
MOnI,IMaIte IpeBnD:ByToHITe MoIa Da Ce 3aKIOUOBaT n NO Bpeme Ha RotBeHe.OT CbO6paKeHn 3a 6e3oNaCHOCT fypHaTa MOKe Da Ce N3KnIOHn PO BCaKO Bpeme C HATNCKaHe n 3aNbPkaHe Ha O
ПОЧИСТВАЕ
Ipeu da npncbnte KbM nodpbkka nnn noocmbaHe Ha ypeDa, ce y6eTe, ye Toi He e ropeu.
Hnkora He n3noJ3BaIte ypei 3a noocTbaHe c npa.
He n3noJ3BaIte CTomAHeHa BbIHa, CTbpraIkn nn
6pa3nBn/pa3xJaun noocTbaUn npenapatn,
TbN KaTo Te Morat Da NobpejT NOBbPxHOCTNe Ha
ypeia.
BbTPEWHN IN BbHWHN IOBbPXHOCTN
-Почистаite NOBbpxHOCHTe CBnaxHa MmKpoΦn6bpyHa Kbpna. Ako ca MHOro 3aMbpcEH,do6abete HAKONKO kankn nouchTbaun npenapat C Heytpalno pH. Hakpar 3a6bpwe Te cbc cyxa Kbprna.
-Почисте CTькnotо Ha BpaTnukaTa C NOДхODЯТ TeueH npenapat.
Ha paBHN INTEpBaII NIN B CnyaH Ha pa3nBaHe OTCTpaHbAaTe BbpTaaTa Ce NoCTaBka N CTOnKaTaN 3a Da NOUcNTe DbHOTo Ha fypHaT, IpemaxBaKn BCuKN OCTaTBcN OT XpaHa.
- FrpnlbT Hma Hykda OT NOUcTBaHe, TbN KATO CnHaTa TOnnHa n3rapr 3ambpcaBaHnra. N3noJ3BaIte Ta3n fYHKcua peoBHO.
ПИHAДЛЕЖHOCTN
Bcnukn npnHaJneKHOCTn, cn3KnIooHne Ha TaBnUkaTa Crisp, ca noDxOJaun 3a nooNCTBaHe B cbDomnHa maunHa.
TabuKaTc Crisp Tp6Ba Da ce nouchTa c Boda n Cna6 npenapat. 3a ynpntn 3ambpcBaHn TaBpkAte BImateJHo C KbpNa. BuHarn OCTabYTe TabuKaTa Crisp da ce oxlaDi npdi nouchTahe.
OTKPNBAHE N OTCTPAHRAHE HA HEN3INPABHOCTN
| ПюбLEM Вьзможнaja ручина Рецениe | ||
| Фурнata не павOTи. | Ная мазханвае сеелковсяпгеля.Уреьт e поочен OT мразжата. | Пюверete дали有很大是可以 ворожение в мразжата и дали Фурнata e вклочени Към мразжата.NЗлочete и вклочete уреда отоно, за на видит дали пюбLEMыт He e о остранен. |
| Фурнata Шуши дори korato e在其лочени. | Венилatable对接 STа oxлajданe павOTи. | Отурete вратчкота有很大在其лочаиме позсангп.Tа oxлajданe有很大在其лочаимe pозсан. |
| Надиславая сизисва 6уквата F undno. | Софтуерна сеньларовост. | Свържete с сцентbra за обслужвае на клиенти и поочete Homepa сеньдбухвата "F". |
Ppabnata, cTaNapTHaT aOKMeHtau n DonbHnTeHa HOpMaun 3a npOyKTA MoKeTe da HamepuTE, KaTo:
- ɪnənɪərɪsHa QR bɒpʌy BaɪnɪŋpɒdɪkT
- Nocetnte haun yebcaat docs.whirlpool.eu
IIN KaTo Ce CbPKeTe COTeJa 3a CneDnpoKa6EHO 06CnyKBAe (BnKTe TeJeOHHN HOp E RapaHIOHHaTaNHNK).Ipn KOtAeT COTeJa 3a CneDnpoKa6EHO 06CnyKBAe Cbo6uaBaTe KODoBeTe, NocouEHHa IeHTnOKnauOHnHaTa TabeknHa Baunr ype.
POPIS PRODUKTU

(OTOCENI NEBO PROMICHANI JIDLA)
.6TH SENSE / OPTØNING
MADKATEGORI
Gentag proceduren for at oplas tastaturet.
SISE- JA VÄLISPINNAD
. MANUALISED TOIMINNOT
5. KYPSENNYKSEN PAATTYMINEN
= 0 = 0 = 0 = 0 = 0 = 0 = 0 = 0 = 0 = 0 = 0 = 0 = 0 = 0 = 0 = 0 = 0 = 0 = 0 = 0 = 0 = 0 = 0 = 0 = 0 = 0
TARTOZÉKOK
1.6TH SENSE/DEFROST
MATKATEGORI
Nár du har valgtén av de automatiske funksjonene, ma du velge hvilken matvarekategori du tilbereder.
Nár ilonet blinker, vri pa bryteren for a velge hvilken kategori du onsker og trykk deretter pa for a bekrefte.
VEKT
VAMULTUMIMCAATI ACHIZITIONATUN PRODUS WHIRLPOOL
Pentru a beneficia de servicii complete de asistenta,va rugam sa va inregistrati produsul pe www.whirlpool.eu/register

Inainte de a'utiliza aparatul, cititi cu atentie instruciunile privind sigurantha.
SCANATI CODUL QR DE PE APARATUL DUMNEAVOASTRA PENTRU A OBTINE MAI MULTE INFORMATII
DESCRIEREA PRODUSULUI

TACK FOR ATT DU HAR KÖPT EN PRODUKT FRAN WHIRLPOOL
- YBIMKHEHH / BUMKHEHH
Дя BMнKaHH Ha BmKaHH
dYXOBoI WaФи Ta JIЯ 3yINHKn
akTNBHOI yHKuB B6yDb-akn Yac.
- IOBOPOTHA KHONKA / KHONKA 6th SENSE
IobepTaIe II nIpexOy MIX
fYHKiAmn Ta HanaWTyBaHH
BCix napameTpib npiroToYBaHH.
HaTnckaIte Inra Bn6Opy,
BCTaHOBHeHH, OtpMaHH DoCTyn
do fYHKui a6o napameTpib Ta
ix niTBePdJxHHeHH, a TAKoX dJI
3anyCky nporpamn npiroToYBaHH.
- Nyck
3anyckyHKuii nTBepeKeHHaHaTaYBaHb.
- yAC
ДяВстановпнгчacy,а takож налштуваньнгабopereулобаньнг чacynpurotybaHH. - NOTYKHICTb
IpyrnyIOBaHHpIBHnotyXHOCTi MIKPOXBnB. - INPABIN DUCNPEI
ПИЛАДЯ
OBEPTOBEBJIO

Cknahe o6epTOBe 6nIO, zo
po3aWOByETbCa Ha niInpoi, MoXHa
BnKOpNCTOByBaTu 3i BCima
MeToaMn rOryBaHH.
O6epToBe 6IIOo 3aBxu cnId BnKOpncTOByBaTu B JKOcTi OCHOBn DnI ONOpn IHnx KOHTeHepiB Ta npua.
ONOPA OBEPTOBOBO BJIODA
Bukopustoyte niDnopy Iuwe dIaCKnaHoro o6eptOBoro 6Iouda. He knaiTb Ha niDnopy iHwi akcecyapu.
PEUITKA
Oo3BOJnE po3miUyBaTu npOdyKTu 6nnxue do rpnna dna ideaIbHoro niDpym'raHOBaHH cTpaBn. Nomicttb pewiTy Ha o6eptObe 6nIO, cnIKkyuOn 3a Tm, uO6 BOHO
He KOHTaKtYaBaNo 3 IHuMn NOBepxHMyN.
Kibkictb Ta Tn npnaadma MoKe BiDiPi3HrTncs 3aIeXHO BIn npua6hoi moeni.
DEKOДЛЯ OTPUMAHHХPYCTKoi CKOPUHKN
Iiue dna BnKOpncTaHHa 3 BiINOBiHm yHKciAMy. Deo nla 3anikaHn Crisp (nla xpycTKoi cKopnKn) 3abKn cnid po3miuBaTu y ceHTpi cknHoro
6eptoboro 6nOda, Ta noro moXHa nonepedHbO Harpitn, nOKn BOHO npoxHc, BnKOpncTOBvoun CneuaIbHy fYHKciIO np3NaueHy tiIbKn dIra ciEi Metn. KnaITb npodykTn 6eNocepeHbo Ha deKO dIa 3aniKaHHa Crisp.
Hikon He BnKOpNCToBnyTe MeTaneBi KOHTeHepn dIyixi Ta HanoIB niD yac roTyBaHHa B mIKPOxBunboBni nevi.
Ihui BnDn npinlaHr He BXoJrB Do KOMnJIeKTy NOCTaHaHH, npote ix MoXHa npu6bAtn OkpMo B ceHTpi nicnnpoDaXHO 06cnyroByBaHH.
3aBKnnepeBipRte, HHe TopKaetbca ixA npnnaDn BHyTpiHix CTiHOK dyXOBoI wa.
Ipeep nyckom 7afo 3abxnn nepebipnyte, 0o6 o6eptObe 6nIO BInbHO o6eptanocr. BybTe o6epekhi, 0o6 He 3cyHyTu 3 Micra o6eptObe 6nIOo, yctabnaouy n 3Himaoun iHwi akcecyapu.
ФУнкцii

6TH SENSE
Li fyHKui nepe6aaytob aTOMaTHH ni6ip
HaiKpaIoro cnoocobyrotyBaHHnBnBcix BnDIB npOdyKTtB.

ПДИРIBAHн
BnKOpncTObyEcTaIpa03irpiBaHHraTObux
CTpaB, kI MaOTb KIMHaTHy TemnepaTy p a60 3AmOpOxeni. DyxOba waΦa aBTOMaTHuHO Bn3HauaE Heo6XiHi npaMeTpN dJa DoCraHHeHHaHKePaunx pe3ynbTaTIB 3a HaKOpOTuH quac. NoklaIb TcPaby Ha TepMoCTiIKy TapINKy a6No, npn3HaueHe dJI BnKOpNCtAHH B MIKPOxBnIbOBi Neui.
| ПОНДУКТ MACA (r) | |
| 1 | СТРABAHA TAPILILI 250 - 500 |
| 2 | ЗМОРОЖЕHA ЛAZAHь 250 - 500 |
| 3 | MOЛOKO/BOДА 100 - 500 |
| 4 | СУП 200 - 800 |

TOTYBAHH
Длшвиdkoro npnroTyBaHHaTdoCgarHeHHA
ONTUMaIbHnX pe3yIbTaIb. BnKOpNCToBvIe TepMoCTiIKN KOHTeHep, npndaTHn dJa MIkPOxBuNbBOOJI neyi.
| ПОНДУКТ MACA (r) | |
| СМAXЕНЕ KИРЧА 800 - 1500 | |
| КAPTOПЛЯHA 3АПКANKA 200 - 1000 | |
| ФAPSHИРОBAHI OBOчI 200 - 800 | |
| СВИХЧI PЕБЕЦА 200 - 800 | |
| ОМЛET 100 - 500 | |
| ПОПКOPH 90 |

CRISP
Дяшвидаю розirpiBaHн i npriroTuBaHHa
3amopoxeHnx npOdykTIB i HadaHHIIM 30JOTnCTOi, xpyctkoi ckopunHKn. BnkOpncTOBynte zuo fyHKciIO nIwe 36nIOM dna 3aIkaHH, zo BXODNTb DO KOMnEkynei. IpepebpHtB npOdykTn, konN 6yde 3anponOHBOHaHO.
| ПОНДУКТ MACA (r) | |
| ПИЦА [3AMOPOЖЕHA] 200 - 800 | |
| КOTЛETИ ДЛЯ БУРЕРIB | 200 - 600 |
| СМАЖЕHA KAPTOПЛЯ [3AMOPOЖЕHA] | 200 - 500 |
| КУРЧI HARETCN [3AMOPOЖЕHI] | 100 - 500 |
| ПИБHI ПАЛNUЧИ [3AMOPOЖЕHI] | 100 - 500 |
IipabnuehecamoouueHH
Ii npn, 0o BndinraTbcn iD yac uboro
cneiaibhoro zukny ouuueHH,do3boJereKOBudanr6pyi 3aunuKnixi.HannIte cknHkynTHoi BOIN B nocyDHy dny MIKPOXBnloBOOI neyi TaakTbBynte fYHKciio.

MIKPOXBNIJI
IIJIaIbUdIKOro rotYBaHHaT a po3irpipBaHHaIXi TaB.
| ПOTУЖHICTь (Вт) | PEKOMEHДОBAHO ДЛЯ |
| 1000 | Швдke розirрівань наюв abо счр в звсokим уmicTom Bodи. |
| 800 | Готувань овочь. |
| 650 | Приgotувань мясан ta риби. |
| 500 | Приgotувань мясан coусь abо coусь, до мicitрав сир чу яиц. Довedingу do rotoьноши пирогib 3 мясом abо залидану 3 мakapонам. |
| 350 | Приgotувань на nobinьhamу bory hi. Ideaелно пidxodntь ду розлambеня macna abошокалу. |
| 160 | Розморожавань заиморожени рожуктib abо розмякшени macna ta сиру. |
| 90 | Розмякшени морозиba. |
3BepHtbybary: 63miHHTn hac n3Hlwe, HATNCHt b i ytpmMyTe npHaHMHI ONDy CeKHyDy, NOKI DyXOBA WaaB BMKHeHa I NOBTOPiB KPOKN Bnue.
Iicra Tpmbano rno nepioy BiCyTHOCTi KMBeHHa MoKe 3HaIO6NTnCBACTaHOBtN Yac NOBtOPHO.
SUOJEHHE BUKOPUCTAHNRA
1.BNBIPOYHKUII
Ha dncnnei BmKHeHOI neei BiO6paKaeTbcra Nnwe qac .HaTNCHTb iYtpMnyTe, 06 yBIMKHyTN dYXOBy wa.ObepTaHrTe NOBOPOTHy KONkY dna nepERJy OCHOBHX fHKui, DOCTynHnx Ha nIBOMy dncnnei. O6epitb oNDy fHKciIO Ta HATNCHTb


Длвбору друropадноi Функii (якwoDocTynHa), o6epitb ochOBHy fynKciIO, a NOTIM HATNCHITb DnI niTBePdxeHHI npeenDiTb Do MeHIO fynKciII.

NobepHtB NOBOPHTy KONKy, 0o6 o6paTn ONDy 3 dpyropaHnx FyHKciJ, DOCTynHnx Ha npabomy nncnlei, Ta notim HATNCHTb DJI NITTBepdKeHH.
2. HANAHTYBAHHA ΦYHKUII
.6TH SENSE / PO3MOPO3KA
KJAC PPOyKTIB
K TlbKn Bu OepeTe Ondy 3 ABTomuHnx yHKciin, Bam 6ye Heo6xioHO o6paTu KaTeropio DnI iKi, kKy Bu RotyTe.
KoH noUHe MuroTiu 3HaouK, HOBepHiB NOBOPOTHy KHONKy, Oo6 o6paTu nOtpi6Hy Bam KaTeOpio, Ta Notim HAtnCHItb IINPiTBePdxKeHH.
BAGA
IЯdoCgarHeHHaHKePauNxpe3yNbTaTiB,ДЯ 6th Sense(Ta Jet Defrost) Heo6xIDHO,06 Bn BBenu Bary npOdyKTIb,OBpaBUn OINH 3i CTaNapTnX npaMeTpib: niu po3paxye IdeaIbHy TpUBAIncTbpo6OTn FyHKui IJn KoxHoI KaTERopiI npOdyKTIB.
KoHa DaCnnei 3'ABnTbCtAaDapTHi npaMeTpTa NoHc MroTITu 3HaOc9, nobepHtB NobopoTHy KhoNky, 06 BCTAHOBHTu Bary, i ToDi HaTNCHtB DnI niTBePdKeHH.
.PUYHIΦYHKLII
Bn6paBwn Heo6xidHy fynKciIO, BN MoXeTe 3miHtN ii HanaTuBaHHa. Ha dncnnei noeproBO 3'raTmYbCra HanaTuBaHHa, kI MOXHa 3miHtN.
NOTYKHICTb MIKPOXBnJIbBOOI EHEPRII

KoJn 3HaQk Mrotitme Ha dncnnei, nobepHitb NOBOPOTHy KhoNky, u6 BiDperynIOBaTu napaMeTp, Ta notIM HAtNCHTb DnI niTBePdxKeHHa, nCra yboRO MoXHa HalaWTyBaTu NaCTynHm NapaMeTp (AkuO ce MOxNBO).
3BepHItb ybary: RaTinbKn FyHKcJia 6yJe aKTHBOBaHa, NOTyxHCTb MoXHa 3MiHHTn, HATNCHyBUn cW dIa IpeXOy B MeHIO HaJIaWTyBaHb, a NOTIM HAITCNHByuIN NOBOPOTHy KHONKy dIa 3MIHNapamETpy.
TPUBALICTb
KoHa dnCnnei 6nMae 3HaQOK, BnKOpNCTOBynte NOBOPOTHy pyuKy dIra HanaWtYBaHHa NOTpiHoro Yacy npuroTsyBaHHa a Notim HaTncHtB dIy niITbepdxKeHHa 60 HATNCHT b dIy 3anycky fynkuii.
PnIMtKa:PiIac npriroTyBaHHIiKi Bm MoKeTe IerKO HalaTsyBAtN ac npriroTyBaHH, NOBepHyBwn NobopoTHy KHONKy; KOxHe HaTnCKaHHI 36InbWc ac npriroTyBaHHHa 30cekyHd.
3.AKTUBAICIyHKUII
3actocybaBnnotpi6HHaHaHTyBaHHaTNCHiTb 106akTNByBaTu yHKciio.
3 KOxHm HaCTynHm HaTnCKaHHM KHONK qac npuroTybaHH 36inbSyBaTaUMeTbcra Ha 30 ckyH.
3BepHtbybary: Bn moKTe B 6yNb-akn HaC HATNCHYTHO, 106 3ynHHnTn aKTNBHy yHKUIO.
.JET START (MUTTEBNI 3ANYCK)
KoIyOBy 7afoB BMMKHyTo,HaTNCHiB KHONky 20
Io6 3anyctnTpuroTyBaHHra 3 fYHKJIeIO MikpoxBnbl
3a NobHoi NotyKHOCTi (1000 Bt) npotraFOM 30 cekyHd.
.БLOKYBAHHB6E3NEKN
Lc yHKci aBtOMaTHNO aKTbcyTbc, 06 3ano6irtn BnnaKObOMy BMkaHHO dYXOBoi wa.

BiKpnTe Ta 3akpuTe DBepeTa, a NOTIM HATNCHTb KHONKY dIa 3anycky yHKuii.
4. NAY3A
Ioo npn3ynHHTn aKTHBHy fYHKciIO, HApnPKlaI, 0o6 nomiwaTn a6o nepeBepHytn npOdyKTn, npocTo BIDkPnTe DBepaTa.
IINIOBTOPHORO 3anycky fYHKuii 3aKpniTe DBepuTa Ta 3HOBY HAITCHITb KHONKy
ABTOMATNUHAIAY3A
(NEPEBEPTAHRABOPO3MIUIYBAHHIPOJNYKTY)
IeBHI yHKuii 6yDytb npn3ynHeH, 0o6 Bm Man MoKlnBicTb nepeBepHyTu a6o nepemiwatn ctpaby.
KoI np60ty dYxOBoi 7afo 6yne np3ynHeHO, BiDkpuTe DBePcraTa Ta BIKOHaite 3anponoHOBaHy iIO neped Tm, k3HOBy 3akpuTn DBepcraTa, iHaTncHtB KHONky , 106 npoOBKHTn FOyBaHH.
5.3ABEPUHHI TOTYBAHHI (COOKING END)
PpOlyHae 3ByKOBn CnHai I Ha DnCnIei 3'ABNTbcn NobiDomLeHHa nPo Te, 10 npoec npiroToYBaHHa 3aBepweHo.

Ioo npoobkntu cac npirotybaHH 6e3 3miHn HanaHTyBaHb, o6epTaTe nobopoTHy pyky dny HanaHTyBaHHHOBOrO yacy npiroTOBAHH, iHaTNCiTb
.БLOKYBAHHA KHONOK
Uo6 3a6nokyBaTu KnaBiaAtpy,HaTncHt b i yTpmyTe KHONky I npOTAROM OOHaimHe n'RTn CeKHyD.

NobtopitbIOIIO,06po36nokyBaTNKHOKN.
3BepHtbybary:blIOyBaHHKHOIOK TAKOX MOKe AKTNByBaTnca nI qac roTyBaHH. 3 MIPkyBaHb 6e3neKn DxyOBy WApMy MoKHb BmMKHyTn 6yDb-KoJI, HATNCHYBn N yTpmyoun KHOIny
Nepu Hix BnKohyBaTu 06cnyroByBaHH a6o OunueHH, nepekoHaTecra, o npnaOxonoHyB.
Hikon He BnKopncToByte 6naHaHHa Ounuennnnapoio.
3a60oHReTbCBAKOpNCtOByBaTu dpoTHi MoaJIKN a6o 3acO6n IJRA YIuSeHHra 3 a6pa3NBHOU OIKoP3iHIO DiEIO, OCKINbKn BOHN MOKyTb NowKOdNTn NOBepXHi npNJady.
BHYTPIUHI TA 3OBHIUHI NOBEPXHI
- PpOtpiB nobepxHBoIoroTo raHupko3 MIKPOBOLOKHa. KaIO BOHn DyKe 6pydHi, DoaTe KInbKa KpaneB pH-HeITpaIbHorO MnHoro 3ac06y.Ha 3aBepWeHH npoTpib cyxoIO cepBeTkoIO.
Ouynte cknIO DBepaT 3 BnKOpncTaHHM BiNobiDHoro pIKOROMmHoro 3ac06y. - Pepioiunuho a6o B pa3i po3nHy piziHn cnid 3Himatu o6eptObe 6nOto Ta noRo nInpoy, uo6 matu 3mory ouHCTNTU dHO dYxOBoi wa, BuJaUNBUn 3 Hei yci 3aJnKu iKi.
He notpi6Ho ouuuyBaTu rpnIb, ockIbKu BHaCnIdOK cnJbHOro HarpiBaHH BeCb 6pyd BuropaE. BnkOpncToBvUte cio yHKuio perylraPHO.
PUNJADJ
y nocyuomnHi MaunHm MoxHa 6e3neuHO MNTu yce npuaa3a BuHrKOM Deko dna 3anikaHH Crisp. Deko nra 3anikAH Crisp cniMnTn po3unHom M'akoro MnHoro 3ac06y y BoDi. JnBuaJeHH 6pydy o6epexHo npotpiB noro TkaHNO. Nepw hix MtTu deko nra 3anikAH Crisp, 3abXdn daTe my cnepuy oxoHOHTN.
NOWyK I YCYHEHHRA HECnPABHOCTEIN

- CONTROL PANEL DESCRIPTION
- LEFT-HAND DISPLAY
- PAUSE
- BACK
- ON/OFF
- ROTARY KNOB / 6th SENSE BUTTON
- START
- TIME
- POWER
- ACCESSIONS
- TURNTABLE
- TURNTABLE SUPPORT
- WIRE RACK
- CRISP PLATE
- HANDLE FOR CRISP PLATE
- FUNCTIONS
- 6TH SENSE
- REHEAT
- COOK
- CRISP
- Hydro Self Clean
- MICROWAVE
- DEFROST
- CRISP BREAD DEFROST
- GRILL For perfectly browning a dish, both on the top and bottom of the food. This function must only be used with the special Crisp plate.
- FIRST TIME USE
- SETTING THE TIME
- DAILYUSE
- SELECT A FUNCTION
- SET A FUNCTION
- .6TH SENSE/DEFROST
- MANUAL FUNCTIONS
- MICROWAVE POWER
- DURATION
- ACTIVATE THE FUNCTION
- JET START
- SAFETY LOCK
- PAUSE
- AUTOMATIC PAUSE
- COOKING END
- KEY LOCK
- CLEANING
- INTERIOR AND EXTERIOR SURFACES
- PRODUKTBESCHREIBUNG
- 5.DREHKNOPF/6THSENSE-KNOPF
- FONCTIONS MANUELLES
- BJIATOAPIM B, YE 3AKYINXTE IPOyKT HA WHIRLPOOL
- ONICAHNE HA YPEDA
- ONICAHNE HA KOMAHHOTO TABLO
- JIAB IINCIIEN
- NAY3A
- 3.HA3A
- 4.BKJI./N3KJI.
- 5.BbPTAùCE ByTOH/ ByTOH 6th SENSE
- BPEME
- MOUHOCT
- DECEH DUCNJIEN
- ПИHAДЛЕЖHOCTN
- BbPTaCA CE NOCTABKA
- CTOUKA HA BbPTaIATA CE NOCTABKA
- PEWETbyeH PAOT
- TABU4KA CRISP
- PbKOXBATKA 3A TABU4KATA CRISP
- ФУHKUIM
- PNETONJIHE
- TOTBEHE
- MICROWAVE (MUKPOBJIHN)
- PA3MPA3RAHE
- XPyπKAB XJIb PA3MPA3EH
- PNI
- ΓPNI+ MKNKPOBbJIHN
- MINKPOBbJIHOBA MOUHOCT
- NPOdJIIXHTENHOCT
- 3.AKTUBUPAHE HA FYHKUNTA
- .JET START
- 3AUHTHO 3AKJIIOUBAHE
- NAY3A
- ABTOMATNUHAIAY3A
- 5.KPAHAROTBEHETO
- 3AKJIIOUYBAHE HA BYTOHNTE
- ПОЧИСТВАЕ
- BbTPEWHN IN BbHWHN IOBbPXHOCTN
- OTKPNBAHE N OTCTPAHRAHE HA HEN3INPABHOCTN
- POPIS PRODUKTU
- .6TH SENSE / OPTØNING
- SISE- JA VÄLISPINNAD
- MANUALISED TOIMINNOT
- KYPSENNYKSEN PAATTYMINEN
- TARTOZÉKOK
- 1.6TH SENSE/DEFROST
- VEKT
- VAMULTUMIMCAATI ACHIZITIONATUN PRODUS WHIRLPOOL
- DESCRIEREA PRODUSULUI
- TACK FOR ATT DU HAR KÖPT EN PRODUKT FRAN WHIRLPOOL
- ПИЛАДЯ
- OBEPTOBEBJIO
- ONOPA OBEPTOBOBO BJIODA
- PEUITKA
- DEKOДЛЯ OTPUMAHHХPYCTKoi CKOPUHKN
- ФУнкцii
- ПДИРIBAHн
- TOTYBAHH
- IipabnuehecamoouueHH
- MIKPOXBNIJI
- SUOJEHHE BUKOPUCTAHNRA
- 1.BNBIPOYHKUII
- HANAHTYBAHHA ΦYHKUII
- .6TH SENSE / PO3MOPO3KA
- BAGA
- .PUYHIΦYHKLII
- NOTYKHICTb MIKPOXBnJIbBOOI EHEPRII
- TPUBALICTb
- 3.AKTUBAICIyHKUII
- .JET START (MUTTEBNI 3ANYCK)
- .БLOKYBAHHB6E3NEKN
- 5.3ABEPUHHI TOTYBAHHI (COOKING END)
- .БLOKYBAHHA KHONOK
- BHYTPIUHI TA 3OBHIUHI NOBEPXHI
- PUNJADJ
- NOWyK I YCYHEHHRA HECnPABHOCTEIN
Brand : WHIRLPOOL
Model : WMD44MB
Category : Microwave