
PAPS 208 A1 - Battery PARKSIDE - Free user manual and instructions
Find the device manual for free PAPS 208 A1 PARKSIDE in PDF.

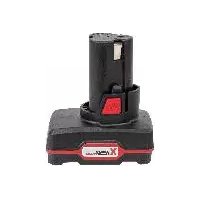
| Product Type | Smart Li-Ion Rechargeable Battery |
| Brand | Parkside |
| Model | PAPS 208 A1 |
| Nominal Voltage | 20 V |
| Capacity | 8.0 Ah |
| Energy | 160 Wh |
| Number of Cells | 10 |
| Technology | Lithium-Ion |
| Connectivity | Bluetooth® (2400-2483.5 MHz, power ≤ 20 dBm) |
| Operating Temperature | -20 °C to 50 °C |
| Charging Temperature | 0 °C to 50 °C (max current 12 A) / 0-10 °C or 50-60 °C (max current 4 A) |
| Storage Temperature | -20 °C to 45 °C (3 months) / 0 °C to 25 °C (1 year) |
| Charging Time (with Smart PLGS 2012 A1) | Approx. 50 minutes |
| Compatible with | Parkside X 20 V Team devices and compatible chargers (e.g., PLG 20 A3, PLG 20 C1, PLG 20 A4, PDSLG 20 A1, Smart PLGS 2012 A1) |
| Charge Status Display | 3 LEDs (red, orange, green) with push button |
| Functions via Lidl Home app | Display of temperature, current, capacity; operating modes (Performance, Balance, ECO, Expert); PIN lock; notifications; cycle statistics |
| Maintenance | Maintenance-free; clean with a dry cloth or brush |
| Safety | Protection against short circuits, overheating, excessive discharge; do not open, expose to fire or water |
| Approximate Weight | Approx. 0.6 kg |
| Warranty | 3 years |
| Replacement Parts Available | Yes, replacement battery (ref. 80001153) and chargers via after-sales service |
Frequently Asked Questions - PAPS 208 A1 PARKSIDE
User questions about PAPS 208 A1 PARKSIDE
0 question about this device. Answer the ones you know or ask your own.
Ask a new question about this device
Download the instructions for your Battery in PDF format for free! Find your manual PAPS 208 A1 - PARKSIDE and take your electronic device back in hand. On this page are published all the documents necessary for the use of your device. PAPS 208 A1 by PARKSIDE.
USER MANUAL PAPS 208 A1 PARKSIDE
natural_image
Black industrial battery casing with visible label and port (no readable text or symbols beyond branding)
Smart Akku 20 V / 8 Ah / Smart Battery 20V / 8Ah / Batterie Smart 20 V / 8 Ah PAPS 208 A1
DE AT CH
Smart Akku 20 V / 8 Ah
Translation of the original instructions
NL BE
Smart accu 20 V / 8 Ah
DE AT CH
Before reading, unfold the page containing the illustrations and familiarise yourself with all functions of the device.
FR BE
natural_image
Two black-and-white symbolic icons: a crossed book and a flame, both with no text or symbols.
PLG 20 A4; UK....80001352
PLG 20 C1; EU....80001353
PLG 20 C1; UK....80001354
PLG 20 C3; EU 80001355
PLG 20 C3; UK....80001356
PDSLG 20 A1; EU 80001339
PDSLG 20 A1; UK....80001340
SmartPLGS2012A1, EU 80001247
Smart PLGS 2012 A1; UK......80001248
Content
Introduction......35
Intended Use ......35
General Description 36
Extent of the delivery......36
Overview ......36
Technical Data ......36
Charging time .....37
Safety information..38
Graphical symbols 38
General Safety Directions ......39
Operation ......43
Removing/inserting the Battery .....43
Checking the charge status of the rechargeable battery......44
Connecting the rechargeable battery to the Lidl Home app ..45
Activating/ deactivating Bluetooth®......47 Features of the app 47 Privacy policy ......50 Disconnecting the device and deleting data from the app .50 Problems with the app? - FAQ......51 Used batteries......51
Storage......51
Cleaning ....52
Maintenance .....52
Waste Disposal/Environmental
Protection......52
Guarantee......54
Repair Service .....57
Service-Center .....58
Importer......58
Spare Parts/ Accessories......59
Translation of the original EC declaration of conformity......262
Introduction
Congratulations on the purchase of your new device. With it, you have chosen a high quality product. During production, this equipment has been checked for quality and subjected to a final inspection. The functionality of your equipment is therefore guaranteed.
The operating instructions constitute part of this product. They contain important information on safety, use and disposal. Before using the product, familiarise yourself with all of the operating and safety instructions. Use the product only as described and for the ap- plications specified. Keep this manual safely and in the event that the product is passed on, hand over all docu- ments to the third party.
Intended Use
The rechargeable battery is compatible with all devices from the PARKSIDE X 20 V TEAM series. The batteries may only be charged using chargers from the PARKSIDE X 20 V TEAM series. Any other use can damage the device and thus pose a substantial risk to the user. This device is not suitable for commercial use. The warranty is
GB IE
void in the case of commercial use. The manufacturer is not liable for damage caused by improper use or incorrect operation.
General Description
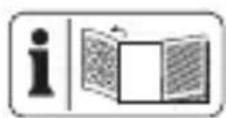
The illustrations can be found on the front fold-out page.
Extent of the delivery
- Rechargeable battery
- Instruction manual

The charger is not included in delivery.
Dispose of the pack- aging material correctly.

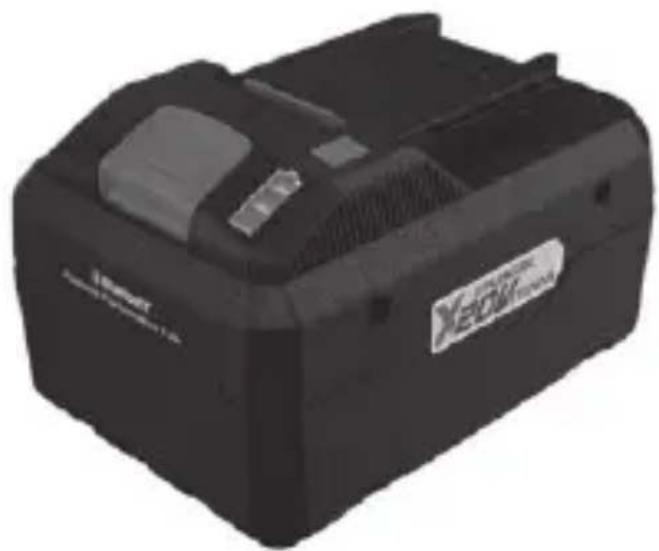
Overview
1 Release button
2 Button for the charge status display
3 Battery charge level indicator
4 Rechargeable battery
Technical Data
Battery (Li-Ion) ..... Smart PAPS 208 A1 Battery cells..... 10 Nominal voltage ..... 20 V== Capacity..... 8.0 Ah Energy..... 160 Wh Frequency performance.≤20 dBm Frequency band ... 2400 - 2483.5 MHz Temperature.max. 50 °C
Charging process
0 - 10 °C,
resp. 50 - 60 °C
with a charging
current of max. 4 A
10 - 50 °C bei with
a charging current of
max. 12 A
Operation -20 - 50 °C
Storage
3 months..-20 - 45 °C
1 year ..... 0 - 25 °C
We recommend
charging these
batteries with the
following chargers:
PLG 20 A3, PLG 20 C1,
PLG 20 C3, PLG 20 A4,
PDSLG 20 A1,
Smart PLGS 2012 A1.
An up-to-date list of battery compatibility
can be found at:
www.lidl.de/akku
Charging time
| Battery | ||
| Smart PAPS 208 A1 | ||
| Char-ger | PLG 20 A1 | 210 Min |
| PLG 20 A4 | ||
| PLG 20 C1 | ||
| PLG 20 A2 165 Min | ||
| PLG 20 A3 | 120 Min | |
| PLG 20 C3 | ||
| PDSLG 20 A1 120 Min | ||
| Smart PLGS 2012 A1 | 50 Min | |
GB IE
Safety information
Graphical symbols
Symbols in the manual
Warning symbols with information on damage and injury prevention.
Hazard symbol with information on the prevention of personal injury caused by electric shock.
i Help symbols with information on improving tool handling.
Symbols on the Battery

This re-
chargeable battery is part of the Park- side X 20 V TEAM series
Read through the instruction manual carefully.
Button for the charge status display
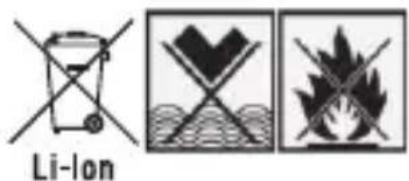
Do not
dispose of batteries in household waste, fire or water.

Do not sub- ject the bat- tery to strong ht over long ds and do not it on a heater 50 °C).

Bluetooth
The
Bluetooth® name and logos are registered trademarks owned by the Bluetooth SIG, Inc. and any use of such brands by Grizzly Tools GmbH & Co. KG is subject to a license. Other trademarks and brand names are the property of
their respective owners.

Take batteries to an old battery collection point where they will be recycled in an environmentally friendly manner.

Electrical ap- pliances must not be disposed of with the domestic waste.
General Safety Directions

Caution!
When using power tools, observe the following basic safety meas-
GB IE
ures for the prevention of electric shocks and the risk of injury and fire. Please read all these instructions before using this electric tool and please keep the safety instructions.
Careful hand- ling and use of battery devices
- Only recharge batteries using chargers belonging to the PARKSIDE X 20 V TEAM series. If a charger that has been designed for a particular type of battery is used
to charge other batteries, there is a risk of fire.
- In the power tools, use only the batteries designed for the purpose. The use of other batteries may result in injuries and risk of fire.
- Keep the unused battery away from paper clips, coins, keys, nails, screws and other small metal objects, which could cause bridging of the contacts.
A short circuit between the bat- tery contacts may cause burns or fire.
- If used incorrectly, liquid may leak from the battery. Avoid contact with this. In the event of accidental contact, rinse off with water. If the liquid gets into eyes, seek medical assistance. Leaking battery fluid may cause skin irritations or burns.
- Do not use damaged or altered batteries. Damaged or altered batteries can be unpredictable and lead to fire, explosion or risk of injury.
- Do not expose
batteries to fire or elevated temperatures. Fire or temperatures over 130 C° can cause an explosion.
- Follow all instructions for charging and never charge the battery or the battery-powered tool outside the temperature range stated in the operating instructions. In-correct charging or charging outside the permitted temperature range may destroy the battery and increase the risk of fire.
Service
- Never repair damaged batteries. All battery repairs should be carried out by the manufacturer or authorised customer service centres only.
Special safety directions for battery- operated tools
- Ensure that the device is switched off before inserting the battery. Inserting a battery into a power tool that is switched on may result in ac-
cidents.
- Recharge the batteries indoors only because the battery charger is designed for indoor use only.
• To reduce the electric shock hazard, unplug the battery charger from the mains before cleaning the charger.
- Do not subject the battery to strong sunlight over long periods and do not leave it on a heater. Heat damages the battery and there is a risk of explosion.
- Allow a hot bat- tery to cool be-
fore charging.
- Do not open up the battery and avoid mechanical damage to the battery. Risk of short circuit and fumes may be emitted that irritate the respiratory tract. Ensure fresh air and seek medical assistance.
- Do not use any accessories that are not recommended by PARKSIDE. This can result in electric shock or fire.
i Observe the safety information and notes on charging in the in-
struction manual for your Parkside X 20 V Team series tool and charger.
Operation
Removing/ inserting the Battery
Only insert the rechargeable battery once the battery-operated tool is ready for use. Risk of injury!
-
To remove the battery (4) from the appliance, press the release button (1) on the battery and pull out the battery.
-
To insert the battery
GB IE
(4), place it on the guide track and push it into the appliance. It will audibly snap in.
Checking the charge status of the rechargeable battery
The battery charge status indicator (3) signalises the state of charge of the battery (4).
Press the button (2) on the battery. The state of charge of the battery is displayed by illuminating the 3-colour LED lights of the state of charge display.
3 LEDs light up (red, orange and green): Battery is fully charged. 2 LEDs light up (red and orange): Battery has a residual charge. 1 LED lights up (red): Battery has to be charged
i Only charge the battery (4) when the red LED on the charge status indicator (3) is on.
During charging, the charge status is continuously shown on the charge level indicator (3).
Connecting the rechargeable battery to the Lidl Home app

Only Smart Performance re-
chargeable batteries can be connected to the Lidl Home app.
-
Press the button for the charge level indicator (2) on the smart battery for 3 seconds to ensure that Bluetooth® is activated on the battery. Also see the section "Activating/deactivating Bluetooth®".
-
Enable Bluetooth® on your smartphone.
- Open the Lidl Home App.
From here there are options ①, ② and ③ to connect the battery.
① If the battery is the first device you want to connect to the app:
- On the , select the option „Add device”. The app scans the area for available devices and indicates if available devices have been found.

If this is not the case, read possible ③.
-
If you select „Go to add“, the available devices are displayed in a list.
-
Select the battery
GB IE
by setting the check mark ⏻. Select only one device at a time. If there are other check marks for other devices, clear the check marks by pressing them.
-
Now press the + , that has the same colour as the set check mark.
-
Confirm the successful connection with "Finish". The battery is now listed in the tab and can be selected.
② If you have already connected other devices to the app:
- On the tab 🔍, select the + in the upper right. The app
scans the area for available devices and indicates if available devices have been found.
If this is not the case, read on if possible ③.
- Proceed as with 1 from point 5.
③ If a list of available devices is not automatically suggested to you:
If the battery is not sug- gested automatically, follow these steps:
-
On the tab 🔍, select the + in the upper right.
-
Select „Other“ in the bar on the left.
-
Select „Other-2“.
-
Confirm that the display is flashing
rapidly. The app now searches for avai- lable devices and suggests them to you.
- Select the desired battery by pressing the + to add it to the app.
- First confirm with „Next“, then with „Finish“.
i Upgrading the firmware can change the features of the app.
Activating/deactivating Bluetooth®
To activate Bluetooth®, press and hold the button for the charge level indicator (2) for 3 seconds until only the central LED is lit up, this means Bluetooth® is enabled and you can release the button for the charge level indicator (2).
If you hold the button for the charge level indicator (2) for 10 seconds until the single yellow LED goes out, Bluetooth® is deactivated.
The battery is shown in the Lidl Home app as "offline".
Features of the app
If you select a battery, this will take you to the overview page.
- Brief overview (above)
Here, in the window above, a brief over-
GB IE
view of the recharge- able battery is provi- ded with a picture. The current temperature, status, discharge to empty time and charge level in % are shown. If you swipe right in the top window, you will scroll through one dia- gram after another indi- cating the temperature curve, charging current curve, the discharge cur- rent curve and capacity curve of the battery. The red line in the temperature diagram shows the threshold to overheating. The black line shows the current battery temperature.
- Locking the battery
Here you can lock the battery against use by specifying and confir- ming a PIN.
You will then need the PIN again to unlock the battery.
- Battery work mode
Here you can select between the different work modes: Performance, Balance, ECO and Expert.
The low discharge voltage and max. continual discharge current change depending on the work mode.
You can set the low discharge voltage and max. continual discharge current yourself in Expert mode by selecting this mode and then setting and confirming the desired value in the list provided.
- Notification
Here you can select to receive a notification on your smartphone if the battery exceeds the overheating threshold. To do this, select the
"Overheated Alarm Switch" field.
You can illuminate the battery's charge level indicator using the „Battery identifier“ field. The battery charge level indicator stops lighting up automatically after a short time.
- °F/°C switch
Here you can select between displaying the temperature in degrees Celsius and degrees Fahrenheit
• Information
Here you will find an overview of information about the battery.
• Statistics
Here you will find the number of charging cycles, discharging cycles and total runtime of the battery.
- Settings
You will find the ⏻ at the top right after you have selected the battery.
Press the 🔊 icon again and you can assign a new image to the battery under „Symbol“, you can rename the battery under „Name“
or assign a „Location“ to the battery.
You can also access "Device info" from this menu.
Under „Enable device“, you can authorise another user from the
GB IE
same household to use the battery via the Lidl Home app. You can also find the frequently asked questions here under „FAQ“. In this menu, you can check whether the firmware needs to be upgraded and also perform the upgrade via „Check for firmware upgrade“. The battery can also be removed under „Remove device“. See also chapter „Disconnecting the device and deleting data from the app“.
Privacy policy
The complete data protection guideline can be found under the tab 📁 in the field „Data protection guideline“.
Disconnecting the device and deleting data from the app
- In the 📄 tab, select the device that you want to remove and whose data you want to delete.
- Select the 🔊 icon in the top right.
- Select „Remove device“.
- To delete the data, select „Disconnect and delete data“. If you just want to disconnect the device without deleting the data, select „Disconnect“.
Problems with the app? - FAQ
- Select the battery you have questions about from the device list.
- Select the 🔊 icon in the top right.
- Under „Other“ select the option „FAQ“ (Frequently Asked Questions).
Used batteries
- If a fully recharged battery lasts for considerably shorter operating times, the battery is used up and needs to be replaced. Only use an OEM battery pack replacement available from our
Customer Service.
- Always take heed of the applicable safety instructions as well as the environmental protection regulations and information (see "Cleaning and Maintenance").
Storage
- Remove the battery before storing the unit for longer periods of time (e.g. hibernation).
- Store the battery only in a partially charged state. During prolonged storage, 2 to 3 LEDs should be illuminated.
- During a longer storage period, check the state of charge
GB IE
of the battery and recharge if neces- sary roughly every 3 months.
- In order to keep the battery well charged, avoid exposing the appliance to extreme heat or cold in storage.
- The storage temperature for the battery is between -20°C and 45°C for 3 months, and between 0 - 25°C for a year. Avoid extreme cold or heat during storage to ensure the battery output is not adversely affected.
- You can select the "Storage" charging function in the app settings of the smart charger for stor-
age. This optimally charges the battery for storage.
Cleaning
Clean the battery with a dry cloth or with a paint brush.
Do not use water or metal objects.
Maintenance
The equipment is main- tenance free.
Waste Disposal/ Environmental Protection
Remove the battery from the device and recycle the battery and packaging in an
environmentally-friendly manner. Dispose of the packaging material properly.

Electric units do not belong with domestic waste.

Do not dispose of batteries in household waste, fire (risk of ex- plosion) or water. Dam- aged batteries may damage the environ- ment and your health if toxic fumes or liquids leak out.
• Defective or used batteries must be recycled in accordance with Directive 2006/66/EC.
- Return the unit and
the recharger to a recycling centre. The plastic and metal parts employed can be separated out and thus recycled use can be implemented. Ask our Service-Center for details.
- Dispose of batteries in discharged condition. We recommend covering the pole with adhesive tape to prevent a short circuit. Do not open up the battery.
- Dispose of batteries in accordance with the local regulations. Take batteries to an old battery collection point where they will be recycled in an environmentally friendly manner. For
GB IE
information about this, ask your local waste management company or our ser- vice centre.
• Defective units re-turned to us will be disposed of for free.
Guarantee
Dear Customer, This device comes with a three-year warranty from the date of pur- chase. In case of defects, you have statutory rights against the seller of the product. These statutory rights are not restric- ted by our guarantee presented below.
Terms of Guarantee
The term of the guaran- tee begins on the date of purchase. Please retain the original re- ceipt. This document is required as proof of purchase.
If a material or manufacturing defect occurs within three years of the date of purchase of this product, we will repair or replace – at our choice – the product for you free of charge. This guarantee requires the defective equipment and proof of purchase to be presented within the three-year period with a brief written description of what constitutes the defect and when it occurred.
If the defect is covered
by our guarantee, you will receive either the repaired product or a new product. No new guarantee period begins on repair or replacement of the product.
Guarantee Period and Statutory Claims for Defects
The guarantee period is not extended by the guarantee service. This also applies for replaced or repaired parts. Any damages and defects already present at the time of purchase must be reported immediately after unpacking.
Repairs arising after expiry of the guarantee period are chargeable.
Guarantee Cover
The equipment has been carefully produced in accordance with strict quality guidelines and conscientiously checked prior to delivery.
The warranty is only valid for material or manufacturing defects. This warranty does not extend to consumable parts exposed to normal wear and tear (e.g. battery capacity). This guarantee shall be invalid if the product has been damaged, used incorrectly or not maintained. Neither does it extend to damage resulting from water, frost, lightning and fire or improper trans-
GB IE
port. Precise adherence to all of the instructions specified in the operating manual is required for proper use of the product. Intended uses and actions against which the operating manual advises or warns must be categorically avoided.
The product is de- signed only for private and not commercial use. The guarantee will be invalidated in case of misuse or improper handling, use of force, or interventions not un- dertaken by our author- ised service branch.
Processing in Case of Guarantee
To ensure efficient handling of your query, please follow the direc- tions below:
- Please have the receipt and item number (IAN 388782_2104) ready as proof of purchase for all enquiries.
- Please find the item number on the rating plate.
- Should functional errors or other defects occur, please initially contact the service department specified below by telephone or by e-mail. You will then receive further information on the processing of your complaint.
• After consultation with our customer service, a product
recorded as defective can be sent postage paid to the service address communicated to you, with the proof of purchase (receipt) and specification of what constitutes the defect and when it occurred. In order to avoid acceptance problems and additional costs, please be sure to use only the address communicated to you. Ensure that the consignment is not sent carriage forward or by bulky goods, express or other special freight. Please send the equipment inc. all accessories supplied at the time of purchase and ensure adequate, safe trans- port packaging.
Repair Service
For a charge, repairs not covered by the guarantee can be carried out by our service branch, which will be happy to issue a cost estimate for you. We can handle only equipment that has been sent with adequate packaging and postage.
Attention: Please send your equipment to our service branch in clean condition and with an indication of the defect. Equipment sent car-riage forward or by bulky goods, express
GB IE
or other special freight will not be accepted.
We will dispose of your defective devices free of charge when you send them to us.
Service-Center
GB
Service Great Britain
Tel.: 0800 404 7657
E-Mail:
grizzly@lidl.co.uk
IAN 388782_2104
Importer
Please note that the following address is not a service address. Please initially contact the service centre specified above.
Spare Parts/Accessories
Spare parts and accessories can be obtained at www.grizzlytools.shop
If you have issues ordering, please use the contact form. If you have any other questions, contact the "Service-Center" (see page 58).
Battery
Smart PAPS 208 A1 80001153
Charger
PLG 20 A3; EU 80001323
PLG 20 A3; UK....80001324
PLG 20 A4; EU 80001351
PLG 20 A4; UK....80001352
PLG 20 C1; EU....80001353
PLG 20 C1; UK....80001354
PLG 20 C3; EU....80001355
PLG 20 C3; UK....80001356
PDSLG 20 A1; EU 80001339
PDSLG 20 A1; UK....80001340
SmartPLGS2012A1, EU 80001247
Smart PLGS 2012 A1; UK......80001248
Sommaire
Introduction......61
Domaine
Service-Center .....93
natural_image
Two black-and-white symbolic icons: a crossed book and a flame, both with no text or symbols.PLG 20 A4; UK....80001352
PLG 20 C1; EU 80001353
PLG 20 C1; UK......80001354
PLG 20 C3; EU 80001355
PLG 20 C3; UK....80001356
PDSLG 20 A1; EU 80001339
PDSLG 20 A1; UK....80001340
SmartPLGS2012A1, EU 80001247
Smart PLGS 2012 A1; UK......80001248
NL BE
Inhoud
Inleiding......97
Gebruik ......97
Algemene
deactiveren .....109
Functions van
de app....110
Service-Center .....121
Importeur......122
Reserveonderdelen 123
Vertaling van de
originele
CEconformiteits-
verklaring ......264
Inleiding
spanning.....20 V ===
natural_image
Two black-and-white symbolic icons: a crossed book and a flame, both with no text or symbols.Werp de accu's
PLG 20 A4; UK....80001352
PLG 20 C1; EU....80001353
PLG 20 C1; UK....80001354
PLG 20 C3; EU 80001355
PLG 20 C3; UK....80001356
PDSLG 20 A1; EU 80001339
PDSLG 20 A1; UK....80001340
SmartPLGS2012A1, EU 80001247
Smart PLGS 2012 A1; UK......80001248
PL
Spis tresci
Wstep......125
akumulatory .....144
Service-Center......152
Importer......152
Częścizamienne/
Akcesoria......153
PLG 20 A4; UK....80001352
PLG 20 C1; EU....80001353
PLG 20 C1; UK....80001354
PLG 20 C3; EU....80001355
PLG 20 C3; UK....80001356
PDSLG 20 A1; EU 80001339
PDSLG 20 A1; UK....80001340
SmartPLGS2012A1, EU 80001247
Smart PLGS 2012 A1; UK......80001248
Obsah
Úvod ......155
natural_image
Two black-and-white symbolic icons: a crossed book and a campfire, both without any text or labels.Nevy-hazuj-te
akumulátory do
PLG 20 A4; UK....80001352
PLG 20 C1; EU....80001353
PLG 20 C1; UK....80001354
PLG 20 C3; EU....80001355
PLG 20 C3; UK....80001356
PDSLG 20 A1; EU 80001339
PDSLG 20 A1; UK....80001340
SmartPLGS2012A1, EU 80001247
Smart PLGS 2012 A1; UK......80001248
SK
Obsah
Úvod......181
Používanie podlá
určenia......181
Service-Center .....204
Dovozca......204
Náhradné diely /
natural_image
Two black-and-white symbolic icons: a crossed book and a flame, both with no text or symbols.Aku- mulá- tor
Li-Ion
neodhadzujte do
PLG 20 A4; UK....80001352
PLG 20 C1; EU....80001353
PLG 20 C1; UK....80001354
PLG 20 C3; EU....80001355
PLG 20 C3; UK....80001356
PDSLG 20 A1; EU....80001339
PDSLG 20 A1; UK....80001340
SmartPLGS2012A1, EU 80001247
Smart PLGS 2012 A1; UK......80001248
Indhold
Service-Center .....230
Importør......230
Reservedele/ Tilbehør ......231
Reparations- service
PLG 20 A4; UK....80001352
PLG 20 C1; EU....80001353
PLG 20 C1; UK....80001354
PLG 20 C3; EU....80001355
PLG 20 C3; UK....80001356
PDSLG 20 A1; EU 80001339
PDSLG 20 A1; UK....80001340
SmartPLGS2012A1, EU 80001247
Smart PLGS 2012 A1; UK......80001248
ES
Contenido
Service-Center......259
Importador ......259
natural_image
Two black-and-white symbolic icons: a crossed book and a fire, both with cross lines, against a wavy background (no text or symbols)No bote
PLG 20 A4; UK....80001352
PLG 20 C1; EU 80001353
PLG 20 C1; UK....80001354
PLG 20 C3; EU 80001355
PLG 20 C3; UK....80001356
PDSLG 20 A1; EU 80001339
PDSLG 20 A1; UK....80001340
SmartPLGS2012A1, EU 80001247
Smart PLGS 2012 A1; UK......80001248
| GB IE Translation of the original EC declaration of conformity | |
| We hereby confirm that the battery Smart PAPS 208 A1, Serial number 000001 - 245000 conforms with the following applicable relevant version of the EU guidelines: | |
| 2014/53/EU • 2011/65/EU* & (EU) 2015/863 | |
| In order to guarantee consistency, the following harmonised standards as well as national standards and stipulations have been applied: | |
| EN 55014-1:2017/A11:2020 • EN 55014-2:2015 EN IEC 61000-3-2:2019 • EN 61000-3-3:2013/A1:2019 EN 62841-1:2015 Appendix K EN 301 489-1 V2.2.3:2019 • EN IEC 63000:2018 EN 301 489-17 V3.2.4:2020 • EN 62133-2:2017 EN 300 328 V2.2.2:2019 • EN 50663:2017 | |
| This declaration of conformity is issued under the sole responsibility of the manufacturer: | |
| CE Grizzly Tools GmbH & Co. KG Stockstädter Straße 20 63762 Großostheim, Germany, 01.01.2022 | Christian Frank Documentation Representative |
* The object of the declaration described above satisfies the provisions of Directive 2011/65/EU of the European Parliament and the Council of 8 June 2011 on limiting the use of certain harmful substances in electrical and electronic appliances.


- Smart Akku 20 V / 8 Ah / Smart Battery 20V / 8Ah / Batterie Smart 20 V / 8 Ah PAPS 208 A1
- DE AT CH
- FR BE
- Content
- Introduction
- Intended Use
- GB IE
- General Description
- Extent of the delivery
- Overview
- Technical Data
- Safety information
- Graphical symbols
- Symbols in the manual
- Symbols on the Battery
- Bluetooth
- General Safety Directions
- Caution!
- Careful hand- ling and use of battery devices
- Service
- Special safety directions for battery- operated tools
- Operation
- Checking the charge status of the rechargeable battery
- Connecting the rechargeable battery to the Lidl Home app
- Only Smart Performance re-
- Activating/deactivating Bluetooth®
- Features of the app
- - Brief overview (above)
- - Locking the battery
- - Battery work mode
- - Notification
- "Overheated Alarm Switch" field.
- - °F/°C switch
- • Information
- • Statistics
- - Settings
- Privacy policy
- Disconnecting the device and deleting data from the app
- Problems with the app? - FAQ
- Used batteries
- Storage
- Cleaning
- Maintenance
- Waste Disposal/ Environmental Protection
- Guarantee
- Terms of Guarantee
- Guarantee Period and Statutory Claims for Defects
- Guarantee Cover
- Processing in Case of Guarantee
- Repair Service
- Service-Center
- GB
- Service Great Britain
- Importer
- Spare Parts/Accessories
- Spare parts and accessories can be obtained at www.grizzlytools.shop
- Battery
- Charger
- Sommaire
- NL BE
- Inhoud
- Inleiding
- PL
- Spis tresci
- Obsah
- SK
- Indhold
- Reparations- service
- ES
- Contenido
Brand : PARKSIDE
Model : PAPS 208 A1
Category : Battery