KM 8550 R Bp Pack 2SB - Vacuum Cleaner Kärcher - Free user manual and instructions
Find the device manual for free KM 8550 R Bp Pack 2SB Kärcher in PDF.
Download the instructions for your Vacuum Cleaner in PDF format for free! Find your manual KM 8550 R Bp Pack 2SB - Kärcher and take your electronic device back in hand. On this page are published all the documents necessary for the use of your device. KM 8550 R Bp Pack 2SB by Kärcher.
USER MANUAL KM 8550 R Bp Pack 2SB Kärcher
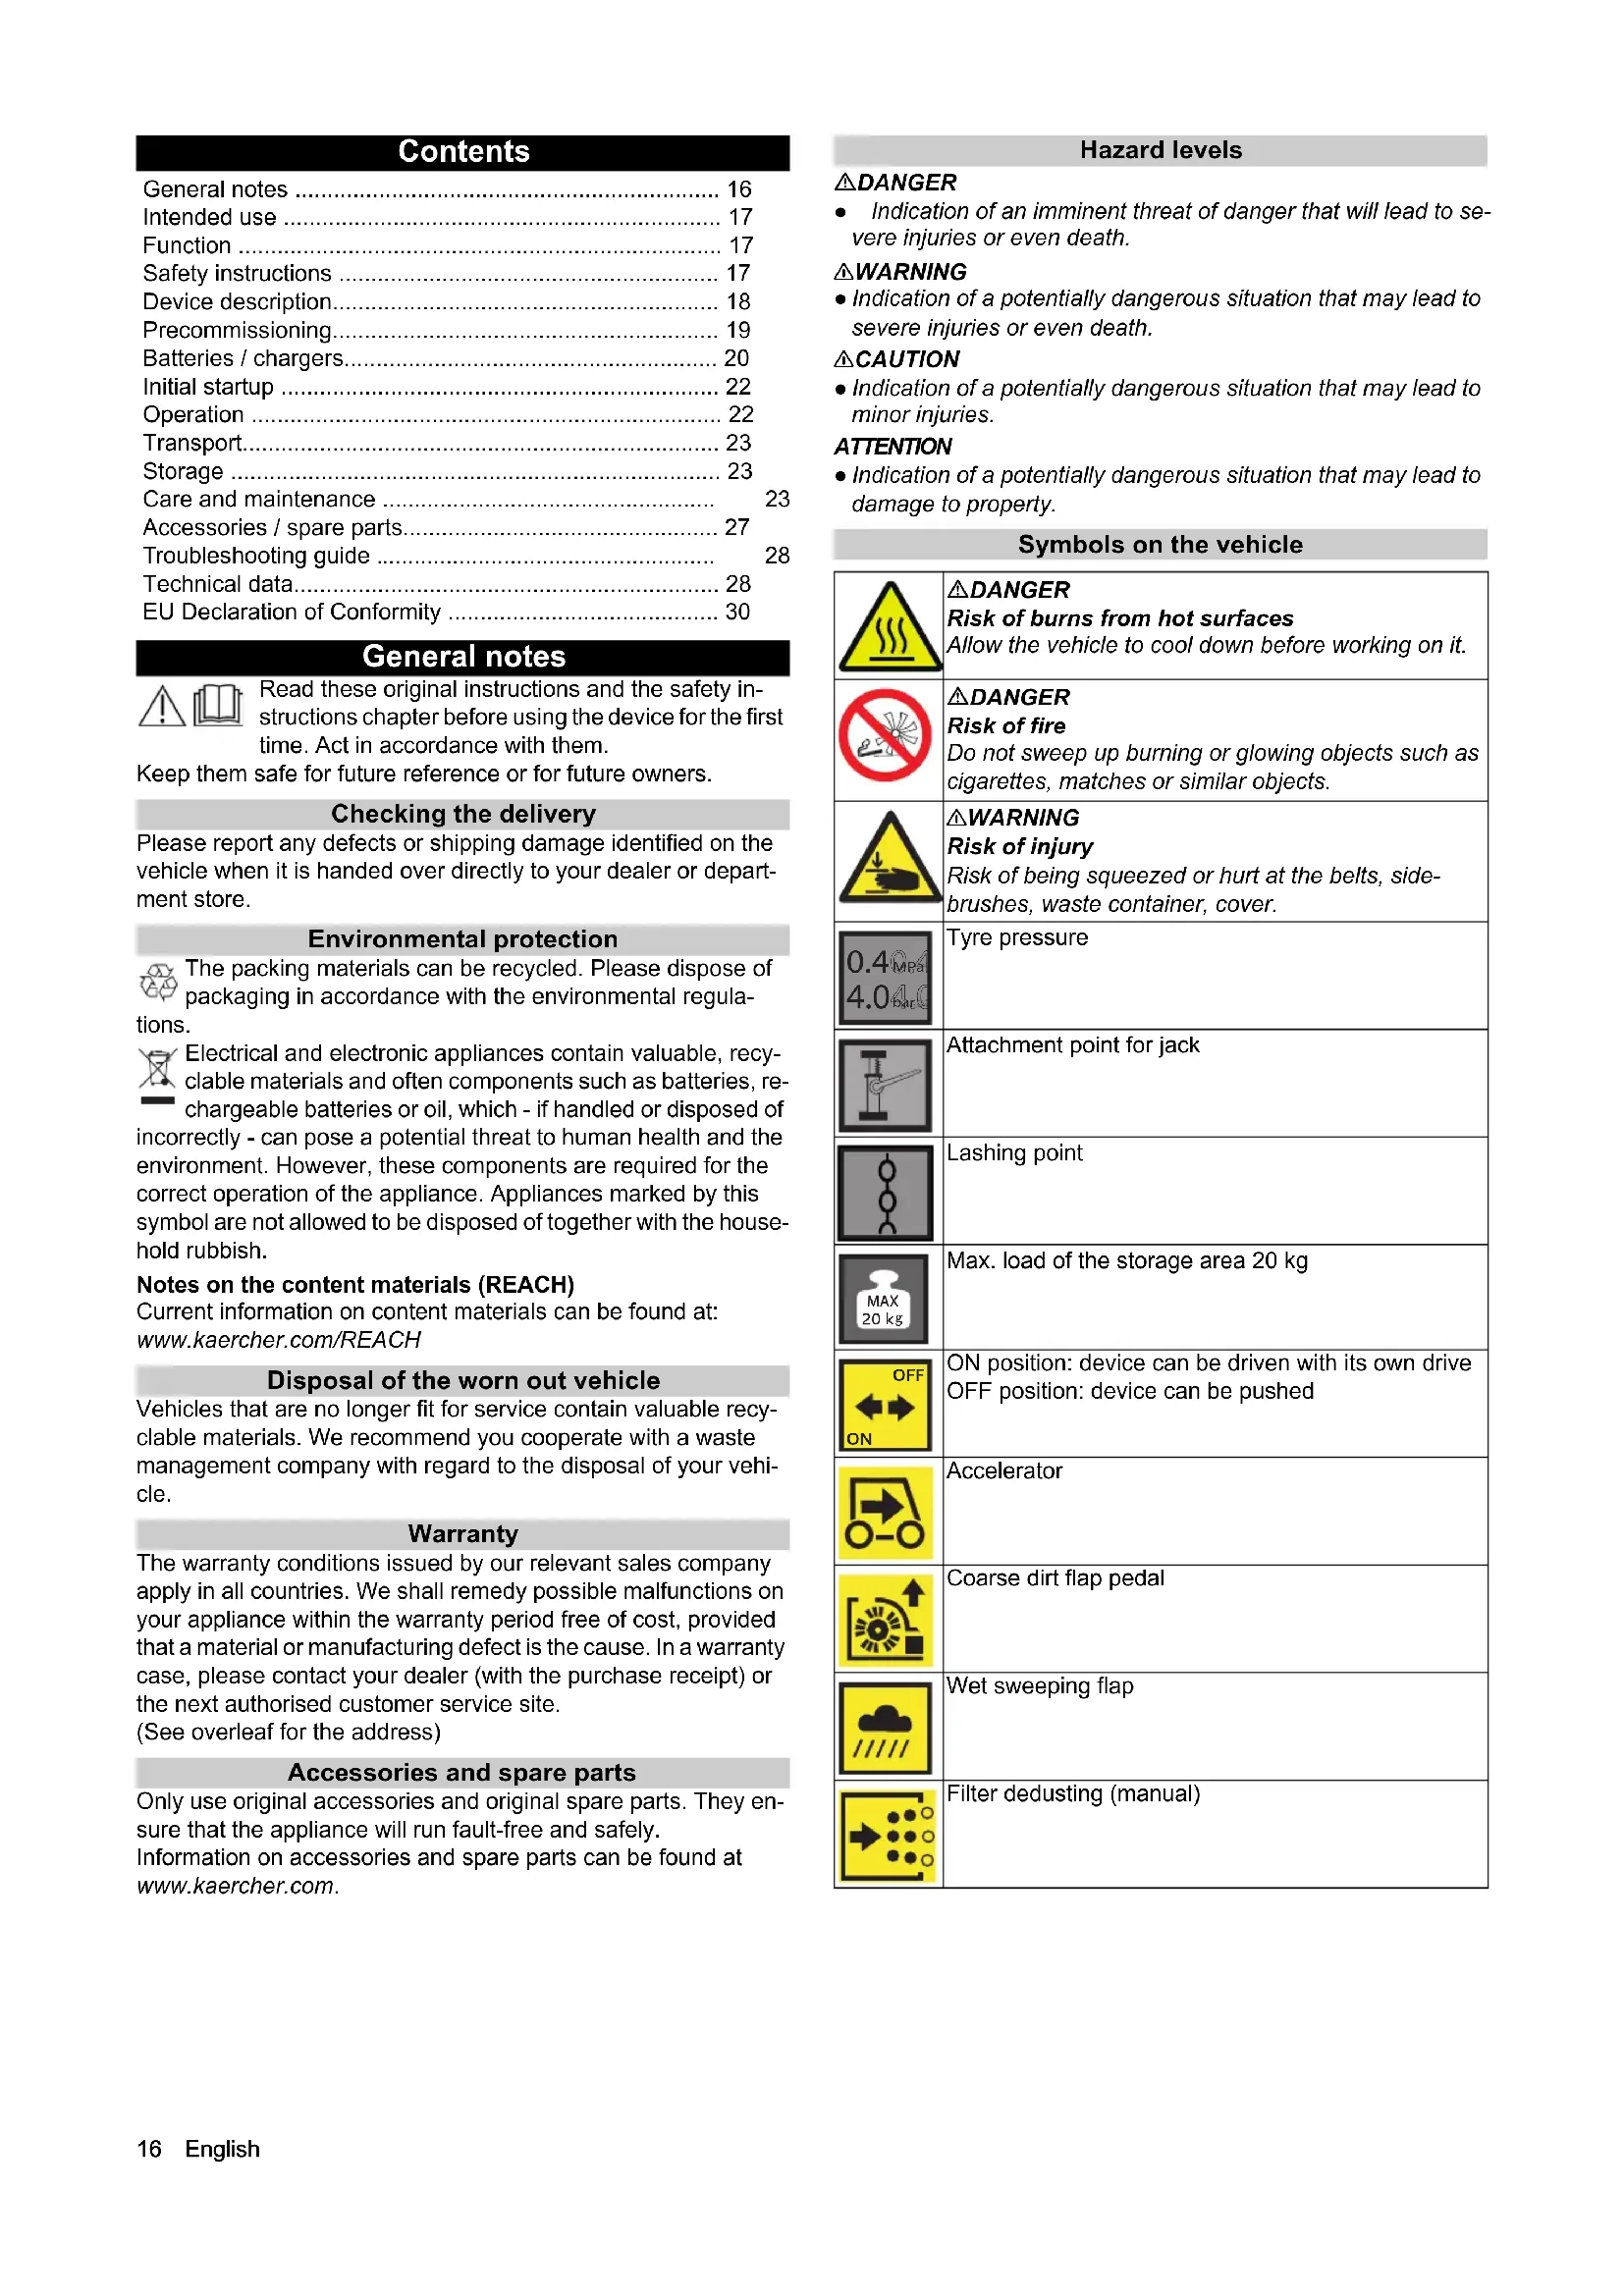
- dB(A)333 KM 85/50 R Bp 1.351-126.0 KM 85/50 R Bp Pack 1.351-127.0 KM 85/50 R Bp Pack 2SB 1.351-128.0 Funkmodul Frequenz MHz Sendeleistung Watt GSM 824,2-848,8 1510 1850,2-1909,8 870 WLAN 2400-2483 96 Chairman of the Board of Management Director Regulatory Affairs & Certification H. Jenner S. Reiser16 English Contents General notes Read these original instructions and the safety in- structions chapter before using the device for the first time. Act in accordance with them. Keep them safe for future reference or for future owners. Checking the delivery Please report any defects or shipping damage identified on the vehicle when it is handed over directly to your dealer or depart- ment store. Environmental protection The packing materials can be recycled. Please dispose of packaging in accordance with the environmental regula- tions. Electrical and electronic appliances contain valuable, recy- clable materials and often components such as batteries, re- chargeable batteries or oil, which - if handled or disposed of incorrectly - can pose a potential threat to human health and the environment. However, these components are required for the correct operation of the appliance. Appliances marked by this symbol are not allowed to be disposed of together with the house- hold rubbish. Notes on the content materials (REACH) Current information on content materials can be found at: www.kaercher.com/REACH Disposal of the worn out vehicle Vehicles that are no longer fit for service contain valuable recy- clable materials. We recommend you cooperate with a waste management company with regard to the disposal of your vehi- cle. Warranty The warranty conditions issued by our relevant sales company apply in all countries. We shall remedy possible malfunctions on your appliance within the warranty period free of cost, provided that a material or manufacturing defect is the cause. In a warranty case, please contact your dealer (with the purchase receipt) or the next authorised customer service site. (See overleaf for the address) Accessories and spare parts Only use original accessories and original spare parts. They en- sure that the appliance will run fault-free and safely. Information on accessories and spare parts can be found at www.kaercher.com. Hazard levels DANGER ● Indication of an imminent threat of danger that will lead to se- vere injuries or even death. 몇 WARNING ● Indication of a potentially dangerous situation that may lead to severe injuries or even death. 몇 CAUTION ● Indication of a potentially dangerous situation that may lead to minor injuries. ATTENTION ● Indication of a potentially dangerous situation that may lead to damage to property. Symbols on the vehicle General notes p. 16
- Intended use p. 17
- Function p. 17
- Safety instructions p. 17
- Device description p. 18
- Precommissioning p. 19
- Batteries / chargers p. 20
- Initial startup p. 22
- Operation p. 22
- Transport p. 23
- Storage p. 23
- Care and maintenance p. 23
- Accessories / spare parts p. 27
- Troubleshooting guide p. 28
- Technical data p. 28
- EU Declaration of Conformity DANGER Risk of burns from hot surfaces Allow the vehicle to cool down before working on it. DANGER Risk of fire Do not sweep up burning or glowing objects such as cigarettes, matches or similar objects. 몇 WARNING Risk of injury Risk of being squeezed or hurt at the belts, side- brushes, waste container, cover. Tyre pressure Attachment point for jack Lashing point Max. load of the storage area 20 kg ON position: device can be driven with its own drive OFF position: device can be pushed Accelerator Coarse dirt flap pedal Wet sweeping flap Filter dedusting (manual) p. 30
MPaMPa barbar MAXMAX2020 k
OFF ONEnglish 17 Intended use Use the battery-operated sweeper for cleaning surfaces indoors and outdoors. The sweeper is designed for commercial use. Only use the sweeper in accordance with the information in these operating instructions. Any other use is considered improper use. The manufacturer assumes no liability for any resultant damage. The user is solely responsible for the risk. No modifications must be made to the sweeper. Only the areas approved by the company or the company's rep- resentatives must be driven on and cleaned. Foreseeable misuse The device is not designed for continuously driving on slopes. Do not drive on slopes with a gradient of 12% for longer than 3 minutes. Never sweep or suction up explosive liquids, gases, non-diluted acids or solvents (e.g. petrol, paint thinner, heating oil). They form explosive vapours or mixtures in conjunction with the suction air. Never sweep or suction up acetone, non-diluted acids or sol- vents, as they will corrode and damage the materials used on the device. Never sweep or suction up reactive metal dusts (e.g. aluminium, magnesium, zinc). They form explosive gases in conjunction with highly alkaline or acidic cleaning agents. Do not sweep or suction up burning or smouldering objects. There is a risk of fire. Do not sweep up any harmful substances. Standing in hazard zones is prohibited. Operation in explosive spaces is prohibited. Carrying passengers is prohibited. This device must not be used to push / pull or transport objects. Suitable surfaces The device is suitable for the following surfaces: ● Asphalt ● Industrial floors ● Screed ● Concrete ● Paving stones ● Carpets (only with optional kit) Function The sweeper operates using the direct-throw principle.
1. The rotating side brush cleans corners and edges of the
sweeping surface, and conveys the waste into the path of the roller brush.
2. The rotating roller brush conveys the swept material directly
into the waste container.
3. The dust which is swirled up in the waste container is separat-
ed by a dust filter, and the suction fan suctions the filtered clean air.
4. The dust filter is cleaned manually by the user.
Safety instructions Safety devices Safety devices protect the user and may not taken out of opera- tion or functionally circumvented. Adhere to the safety instructions in the chapters! Safety instructions for operation 몇 WARNING ● Only use the device for its proper use. Take into account the local conditions and beware of third parties, in par- ticular children, when working with the device. ● Check the de- vice with the operating devices to make sure it is in proper condition and operational safe and reliable. If it is not in perfect condition, you must not use it. ● Adhere to the respective safety regulations in hazard zones (e.g. service stations). Never operate the device in explosive spaces. ● The device is not intended for use by persons with restricted physical, sensory or mental abili- ties or those lacking in experience and / or lacking in knowledge. ● Only people who have been instructed on how to use the de- vice, or have proven their ability to operate it, and have been ex- plicitly instructed to use it, must use the device.ATTENTION ● Before starting work, the operator must check whether the safe- ty devices have been attached properly and are fully functional. ● The device operator is responsible for accidents with other peo- ple and their property.WARNING ● The operator must wear close-fitting clothing and sturdy footwear. Avoid loose-fitting clothing. ● Children must be supervised to prevent them from playing with the appliance. ● Children and minors must not use the device.ATTENTION ● Check the immediate vicinity before setting off (e.g. children). Make sure you have a sufficient view. ● Never leave the device unsupervised as long as the device is secured to prevent unintentional movement. The parking brake is applied when the device is stationary. ● Remove the ignition key or KIK (Kärcher Intelligent Key) to prevent unauthorised use of the device.CAUTION ● Do not use the device in areas in which there is a possibility of being struck by falling objects. Safety instructions for driving Note ● The list on the risk of overturning is not necessarily com- prehensive.DANGER ● Danger of tilting if hill or slope is too steep! Observe the maximum permissible values in the technical data when driving up hills and slopes. ● Danger of tilting in case of excessive tilting at side! Observe the maximum permissible values in the technical data when driving lateral to the travel di- rection. ● Danger of tilting on unstable subsurfaces! Only use the device on firm subsurfaces. 몇 WARNING ● Risk of accident due to not adapting speed. Ap- proach corners slowly. Battery-operated devices DANGER ● Risk of explosion! Only charge batteries with a suitable charger ● Highly explosive gas is produced when charg- ing batteries in confined spaces. Only charge batteries in well ventilated spaces. ● Keep naked flames away from the battery or the battery charging room, and do not generate sparks or smoke in the vicinity of a battery of a battery charging room. ● Risk of explosion and short circuits. Do not place tools or similar items on the battery. 몇 CAUTION ● Risk of injury from battery acid. Adhere to the re- spective safety regulations. ATTENTION ● Adhere to the operating instruction of the manu- facturer of the battery and charger. Adhere to the recommenda- tions of the legislature regarding the handling of batteries. ● Never leave batteries in a discharged state. Charge batteries again as soon as possible. ● Keep batteries clean and dry in or- der to avoid leakage currents. Protect batteries from contamina- tion, e.g. from metal dust. ● Dispose of used batteries in an environmentally friendly manner in accordance with the EC Di- rective 91/157/EEC or the respective national regulations. Safety instructions for transportation 몇 CAUTION ● In order to prevent accidents or injuries, you must take into ac- count the weight of the device, see chapter Technical data in the operating instructions. ● Shut the motor down prior to transportation. Secure the device, taking into account its weight. See chapter Technical data in the operating instructions. Care and service 몇 WARNING ● Disconnect the battery before working on the electrical system. ● Before cleaning, maintenance, replacing parts and resetting to another function, you must switch off the device and remove the ignition key. 몇 CAUTION ● Repairs may only be carried out by approved customer service sites or staff qualified in this area who are famil- iar with all relevant safety instructions.18 English ATTENTION ● Adhere to the safety inspection requirements for mobile devices for industrial use in accordance with the locally applicable regulations (e.g. in Germany: VDE 0701). ● Short-cir- cuits or other damage. Do not clean the device with a hose or high-pressure water jet. ● Always wear suitable gloves when working on the device. Device description Device illustration 1 Front wheel 2 Side brush, right 3 "Hombase System" mount (optional) 4 Accelerator 5 Pedal for lowering/raising side brushes 6 Steering wheel 7 Manual filter cleaner – for cleaning the dust filter 8 LED flashing beacon (optional) 9 Driver's seat (with seat contact switch) 10 Cover 11 Rear wheel 12 Pedal for lowering/raising the roller brush – with roller brush wear indicator 13 Coarse dirt flap 14 Side brush, left (optional) 15 LED driving light – Is activated when the device is switched on 16 Charger – Only included with the scope of delivery for the KM 85/50 R Bp Pack 17 Batteries (already installed) – Only included with the scope of delivery for the KM 85/50 R Bp Pack Control elements 1 Side brush speed – Continuously variable 2 Screen display for: – Operating hours – Battery charge – Next service – Software version 3 Ignition key – Remove the ignition key: Every time you leave the device – Position 0: Device is off – Position 1: Device is ready for operation 4 Wet sweeping flap – Open for sweeping wet or damp surfaces 5 Selector switch for direction of travel – Push switch back: reverse – Push switch forward: forwards 6 Horn – Press switch to warn of danger 7 Seat adjuster – Pull lever to adjust seat horizontally 8 Steering wheel height adjustment – Open the nut to adjust the height Waste container 1 Transport rolls 2 Waste container 3 Waste container lock 4 Storage area – Max. load 20 kg 5 Fastening lugsEnglish 19 Precommissioning Opening / closing the cover 몇 CAUTION Risk of crushing fingers Only use the recessed grip provided to open and close the cover. Note It is necessary to open the cover: 1 to connect / install the batteries. 2 to charge the batteries. 3 to clean / replace the dust filter. 4 to replace the roller brush. 1 Recessed grip 2 Cover 3 Cover in rest position 4 Closing the cover
1. To open the cover, take hold of the recessed grip at the front
and pivot it backwards.
2. The cover is held at the end of the elongated hole in the rest
position by the locking rod.
3. To close the cover, push the locking rod upwards so that it
does not engage in place, then slowly pivot the cover down. Unloading instructions DANGER Risk of accidents when unloading the device Use a suitable ramp when unloading the device. Do not use a forklift to unload / load the device. Be aware of the weight of the device when unloading / loading. DANGER Risk of overturning in case of improper handling Do not drive onto or from the ramp at an angle. Do not turn on the ramp. Drive at an adapted speed.
1. Connect the battery and charge it as necessary (see chapter
2. When delivered on a pallet, the parking brake of the device is
disabled. The neutral lever is in the OFF position (see chapter "Pushing / driving the device"). a When the parking brake is deactivated, the device can be pushed off the pallet. To drive, pull the neutral lever up to the ON position. b If the device is to be moved from the pallet, pull the neutral lever up to the ON position. If the device is delivered on a pallet, build a ramp to drive the de- vice down using the boards included. 1 Cut the plastic packing strips and remove the film. 2 Connect the battery (see chapter "Batteries / chargers"). 3 Remove the tightening strap fasteners. 4 Unscrew 4 marked flooring boards fastened with screws to the pallet. 5 Position these 4 boards on the edge of the pallet; align the boards such that they are beneath the wheels when driving the device off the pallet. 6 Place wooden blocks and a board and secure them using screws beneath the flooring boards to support them (see illus- tration). 7 Drive or push the device off the pallet using the ramp created (see chapter "Precommissioning | Pushing / driving the de- vice"). Pushing / driving the device DANGER Risk of accidents due to absence of braking power Secure the device to prevent it from rolling away before you ac- tuate the neutral lever. 1 Neutral lever A position: device can be driven with its own drive B position: device can be pushed
1. To push the device, push the neutral lever down (OFF).
2. After pushing, pull the neutral lever up (ON).20 English
Installing the side brush Note The side brush(s) are attached to the driver's seat with a cable tie when delivered. 1 Side brushes 2 Cable ties
1. Attach the side brushes to the device before initial startup. See
chapter "Changing the side brushes". Batteries / chargers ATTENTION Only use the batteries and chargers recommended by the manufacturer Only replace batteries with batteries of the same type. Before disposing of the vehicle, remove the battery and dispose of it in accordance with national or local regulations. Warning symbols Observe the following warnings when handling the batteries: Safety instructions DANGER Risk of fire and explosion Do not place tools or other objects on the battery. Naked flames and smoking must be strictly avoided. Ensure the room is well ventilated when charging batteries. Only use batteries and chargers approved by Kärcher (original spare parts). 몇 WARNING Environmental risk due to improper disposal of batteries Ensure that defect or used batteries are disposed of safely (con- tact a waste management company or Kärcher Service). Procedures in the event of unintentional release of battery acid When used normally, and when observing the instructions, lead- acid batteries do not pose any risk. However, keep in mind that lead-acid batteries contain sulphuric acid which can cause serious chemical burns and corrosion.
1. If there is spillage or, if the battery is leaking, acid is escaping,
lay down a binding agent such as sand. Do not let it reach the sewer system, soil or a body of water.
2. Neutralise the acid with lime/baking soda and dispose of it ac-
cording to local regulations.
3. Contact a waste management company to dispose of faulty
4. Rinse out your eyes or rinse off your skin with copious
amounts of fresh water if acid splashes into your eyes or onto your skin.
5. Then consult a doctor immediately.
6. Wash any contaminated clothing with water.
Order numbers and dimensions of batteries and
argers Note The 85/50 R Bp Pack sweeper variant is supplied with batteries and charger. ● Kärcher order numbers for recommended batteries and charg- ers Observe notes in the instructions for the battery, on the battery and in these operating instructions. Wear eye protection. Keep acids and batteries away from children. Risk of explosion Fire, sparks, open flames and smoking are prohibited. Risk of acid burns First aid. Warning Disposal Do not throw batteries in the bin. Battery Maintenance- free Order no. * Volume
- Device requires 2 batteries ** Minimum volume of battery charging room *** Minimum airflow between battery charging room and environ- ment Maximum dimensions when using other batteries L x W x H 408x348x284 mm Charger Order no. Required quantity 24 V / 12 A 6.654-367.0 1English 21 Installing / connecting batteries (KM 85/50 R Bp) ATTENTION Risk of damage as a result of incorrect polarity Make sure you connect the cables to the correct terminals. Note The following description shows the installation / connection of the 105 Ah batteries that we recommend. 1 Battery plug connector 2 Battery negative terminal connection 1 3 Connection cable 4 Battery positive terminal connection 2 5 Retaining strap 6 Cover locking rod 7 Device controller plug connector
1. Remove the ignition key from the device.
2. Open the cover and secure it with the locking rod.
3. Place both batteries in the mount.
4. Fasten the batteries with the retaining strap.
5. Connect the cables as shown. Make sure that the terminal
caps are installed correctly.
6. Connect the battery plug connector to the device controller
plug connector for commissioning. Installing / connecting batteries (KM 85/50 R Bp pack) ATTENTION Risk of damage as a result of incorrect polarity Make sure you connect the cables to the correct terminals. Note The batteries and charger are part of the scope of delivery for the KM 85/50 R Bp Pack version. Connect the batteries as described below. 1 Battery plug connector 2 Battery negative terminal connection 1 3 Connection cable 4 Terminal bolt 5 Retaining strap 6 Cover locking rod 7 Charger 8 Battery positive terminal connection 2
1. Remove the ignition key from the device.
2. Open the cover and secure it with the locking rod.
3. Place both batteries in the mount.
4. Fasten the batteries with the retaining strap.
5. Connect the cables as shown. Make sure that the terminal
caps are installed correctly.
6. Fasten the minus terminal and connecting cable with terminal
bolts. Tightening torque 20 Nm. Note: The terminal bolts may only be used once (order number 6.654-405.0).
7. Connect the battery plug connector to the device controller
plug connector for commissioning. Charging batteries DANGER Risk of fatal injury from electric shock Only operate the charger from an appropriate power supply with sufficient fuse protection. Only use the charger in dry rooms with sufficient ventilation. ATTENTION Risk of damage due to deep discharge The device has deep discharge protection, i.e. when the permit- ted minimum capacity level is reached, you have to drive the de- vice directly to the charging station and avoid slopes. ATTENTION Risk of damage caused by charger Do not connect the charger to the device controller plug connec- tor. Note Adhere to the safety instructions for charging batteries. 1 Mains cable with IEC connector 2 Charger 3 LED displays – yellow = battery charging – green = battery > 80% charged – green = battery fully charged – red = fault 4 Charger plug connector 5 Battery plug connector
1. Shut down the device safely.
2. Open the cover completely.
The cover must remain open during the charging process.
3. Connect the charger plug connector to the battery plug con-
4. Connect the IEC connector to the charger. Connect the mains
cable to the domestic mains socket. The charging process be- gins. Carry out the charging process in accordance with the infor- mation in the operating instructions for the charger.22 English
5. Charge the batteries for 10-12 hours.
The recommended chargers (for the respective batteries) are electronically controlled and stop the charging process auto- matically. Initial startup Before startup
1. Check the charging state of the battery.
a As necessary: Charge the battery.
2. Check the roller brush and side brush for any tangled pieces
of tape. a The inspection can be made with the waste containers re- moved. b For safety reasons, tangled pieces of tape must only be re- moved when removed.
3. Clean the dust filter with the manual filter cleaner.
4. Empty both waste containers.
5. Check the steering wheel to make sure the lock nut is firmly
6. As necessary: Set the driver's seat and the steering wheel.
Operation Safety devices The device has a seat contact switch as a safety device. It brings the device to an abrupt halt if the driver gets up out of the driver’s seat whilst the vehicle is in motion. The safety devices must not be removed or modified. Setting the driver's seat DANGER Danger of accident Only adjust the driver’s seat when the device is standing. 1 Lever for horizontal seat adjustment 2 Driver's seat
1. Pull the seat adjustment lever to the left (in the direction of
2. Shift the driver's seat, release the lever and allow the seat to
click into place. Move back and forth to check whether the driver's seat has clicked into place. Setting the steering wheel position DANGER Danger of accident Only adjust the position of the steering wheel when the device is standing. 1 Lock nut for steering wheel height adjustment 2 Steering wheel
3. Unfasten the lock nut.
4. Set the steering wheel to the desired height.
1. Sit in the driver's seat (seat contact switch).
2. Ignition key in position 1, device is ready for operation.
3. Select the direction of travel with the selector switch for the di-
4. Carefully press the accelerator.
Driving over obstacles
1. Drive over fixed obstacles of up to 40 mm in height slowly with
the coarse dirt flap open.
2. Drive over fixed obstacles of more than 40 mm in height with
a suitable ramp. Information on sweeping operation DANGER Risk of injury from abrupt stopping Do not get out of the driver's seat while driving or carrying out cleaning work (the seat contact switch brings the device to an abrupt halt). DANGER Risk of injury from stones or chippings When the coarse dirt flap is open, beware of people, animals and objects in the vicinity (projectile stones or chippings are danger- ous). Do not carry out any cleaning work with the waste container re- moved. 몇 CAUTION Risk of damage due to parcel tape or similar material Do not sweep parcel tape, pieces of string or similar items (dam- age to the sweeping mechanics). ATTENTION Lack of traction due to wrong choice of tyres If there is a lack of traction, switch to pneumatic tyres (standard tyres). Note Adjust the sweeping speed to the conditions in order to achieve optimum cleaning results. Note When driving in reverse, a warning sound is emitted.English 23 Note If the battery voltage in the screen display drops to one bar, a warning sound is emitted every 2 minutes. In this case, you must charge the battery. Note After a certain time (battery voltage), switch off the sweeping ag- gregates and charge the battery urgently. Sweeping with roller brush and side brush 1 Accelerator 2 Side brush foot pedal (lower/raise) 3 Wet sweeping flap 4 Ignition key 5 Manual filter cleaner 6 Selector switch for direction of travel 7 Twist knob for side brush speed 8 Roller brush foot pedal (lower/raise) 9 Coarse dirt flap
1. For cleaning work, select the forwards direction of travel.
2. Lower the roller brush by pushing the foot pedal inwards. The
roller brush and the suction fan start up.
3. For wet or damp surfaces, open the wet sweeping flap.
4. For cleaning near to edges, lower the side brush. To do so,
push the foot pedal inwards. a Set side brush speed to suit the sweeping job. b The side brush speed can be reduced to a minimum using the twist knob in order to minimise the swirling up of dust. c The side brush only starts up if the roller brush is switched on.
5. To take on larger objects (50 mm), briefly open the coarse dirt
6. Clean the dust filter from time to time. To do so, move the man-
ual filter cleaner several times back and forth. Emptying the waste container 1 Transport rolls 2 Waste container 3 Waste container lock
1. Clean the dust filter with the manual filter cleaner.
2. Open the lock on the waste container.
3. Pull out the waste container.
4. Empty the waste container.
When emptying the waste container, make sure that the seal- ing strip does not become damaged.
5. Raise the waste container at the front and push it in all the way.
6. Check whether the waste container has clicked into place.
Stopping and parking the device
1. Take your foot from the accelerator.
2. Raise the roller brush and side brush.
3. Remove the ignition key.
4. Charge the battery.
5. Empty the waste container.
6. Only park the device on an even surface (< 2% gradient).
Transport 몇 CAUTION Risk of injury and damage Be aware of the weight of the device during transportation.
1. The device has 4 marked lashing points. They are for use
when fastening the device.
2. When transporting the device on vehicles, secure it to prevent
it from slipping or overturning in accordance with the respec- tive valid guidelines. Storage 몇 WARNING Risk of injury and damage Note the weight of the device.
1. Place the device in a dry, protected place on an even surface.
2. Remove the ignition key.
3. Clean the vehicle inside and out.
4. Disconnect the battery plug connector.
5. Recharge the battery every 2 months.
Care and maintenance General notes DANGER Risk of accidents and injuries due to unintentional move- ment of the device Switch off the device before carrying out any care and mainte- nance work, and remove the ignition key. Disconnect the central battery plug connector. Note ● Adhere to the safety instructions for care and maintenance. Cleaning the device 몇 CAUTION Risk of short circuits due to water stream Do not clean the device with a hose or high-pressure water jet. DANGER Health risk from dust Wear a dust mask and safety goggles when cleaning with com- pressed air. ATTENTION Risk of damage to the surfaces Do not use any scouring agents or aggressive cleaning agents for cleaning purposes.
1. Blow out the inside of the device with compressed air.
2. Clean the inside and outside of the device with a damp cloth,
soaked in mild washing lye.24 English Maintenance intervals Service hours counter / operating hours / battery charge ATTENTION Observe the displays on the display screen when switching on the device. 1 Display of next service time for customer service 2 Battery charge display E - Empty F - Full 3 Operating hours display Maintenance by the customer Note All servicing and maintenance work must be performed by a qual- ified specialist. If necessary, you can consult a Kärcher specialist dealer at any time. ● Daily maintenance 1 Check the roller brush and side brush for any tangled pieces of tape. 2 Check the tyre pressure. 3 Check that the operative elements are fully functional. 4 Clean the dust filter. ● Weekly maintenance 1 Check the moving parts to make sure that they move smooth- ly. 2 Check the sealing strips in the sweeping area to make sure they are set correctly and to check for wear. 3 Check the roller brush and side brush for wear. 4 Check the dust filter and clean the filter box as necessary. 5 Check the seat contact switch to make sure it is fully function- al. 6 Check the tension of belts, check for wear and check that they are functional. ● Maintenance after wear 1 Replace the sealing strips. 2 Replace the roller brush (observe the wear indicator). 3 Replace the side brush. Note See chapter "Maintenance work" for descriptions. Maintenance by Customer Service Note In order to preserve warranty entitlements, all servicing and main- tenance work during the warranty period has to be performed by an authorised Kärcher Customer Service, in accordance with the inspection check list. The next service time is displayed when switching on the KM 85/ 50 R Bp. ● Maintenance every 200 operating hours 1 Have maintenance work carried out as per inspection check list 5.950-051.0. Maintenance work Checking for wear on the roller brush 1 New roller brush 2 Roller brush worn 3 Roller brush foot pedal
1. Read the roller brush wear.
2. If the foot pedal is set to the MIN position: Replace the roller
brush. Checking the roller brush for entangled pieces of tape
1. Check the roller brush and side brush for any tangled pieces
of tape. a The inspection can be made with the waste containers re- moved. b For safety reasons, tangled pieces of tape must only be re- moved when removed. Replacing / inspecting the roller brush Removing the roller brush 1 Knurled screw, left 2 Bearing plate 3 Cover plate 4 Knurled screw, right
1. Open and secure the cover.
2. Lower the roller brush.
3. Unscrew the left-hand knurled screw.
4. Remove the bearing plate.
5. Unscrew the right-hand knurled screw.
6. Remove the cover plate.English 25
Installing the roller brush 1 Roller brush 2 Brush roller mount 3 Forwards direction of travel
1. Pull out the roller brush.
2. Check for wear and entangled pieces of tape.
3. As necessary: Install the new roller brush.
4. When installing, make sure that it is installed in the correct po-
sition (the brush roller mounts are identical).
5. Install the cover plate and bearing plate in reverse order.
Replacing the side brush 1 Side brush 2 Screws
1. Unscrew the 3 screws on the underneath.
2. Remove the side brush.
3. If necessary, clean the mount.
4. Connect the new side brush to the driver and fasten it in place
with the screws. Replacing the dust filter DANGER Health risk from dust Wear a dust mark and safety goggles when working on the filter system. 1 Dust filter (flat filter) 2 Frame 3 Hold-down plate
1. Shut down the device safely.
2. Clean the dust filter with the manual filter cleaner.
3. Completely open and secure the cover.
4. Remove the hold-down plate.
5. Remove the dust filter upwards.
6. As necessary: Clean the dust filter. (vacuum or carefully tap it
out) or insert a new dust filter. Replacing / setting the sealing strips Note The trailing distance of the front and rear sealing strip defines how much the sealing lip folds backwards when driving the de- vice forwards. When set correctly, there must be a gap between the side sealing strips and the floor. 1 Fastening 2 Side sealing strip 3 Front sealing strip 4 Rear sealing strip
1. Unfasten the fastening of the sealing strips.
2. Set the sealing strip by shifting it in the elongated holes.
3. Refer to the table for the values.
4. Once the settings are correct, fasten the sealing strips.
Sealing strips Settings Side sealing strips Distance from floor 2 - 3 mm Front sealing strip Trailing distance 10-15 mm Rear sealing strip Trailing distance 5-10 mm26 English Fuses Checking the main fuse 1 Main fuse, 125 A 2 Positive terminal connection 3 Terminal cover
1. Remove the terminal cover.
2. Check the main fuse.
3. If the main fuse is faulty, there are various possible causes. In
2. Check the main fuse.
3. If the main fuse is faulty, there are various possible causes. In
such a case, contact Customer Service. Replacing the rear wheel 1 Jack 2 Rear wheel 3 Washer 4 Screw 5 Sleeve
1. Unfasten the screw a little, do not completely unscrew it.
2. Lift the device with the jack at the attachment point.
3. Unscrew the screw, remove the washer from the sleeve.
4. Remove the rear wheel from the axle.
5. Put on a new rear wheel and tighten the screw, washer and
sleeve. Beware of the feather key! Replacing the front wheel 1 Front wheel 2 Nut and washer 3 Wheel fork 4 Attachment point for jack
1. Unfasten the nut on the left and right front wheels a little (do
not unscrew completely).
2. Raise the device 6-8 cm at the attachment point, and support
3. Remove the front wheel with the axle downwards.
4. Insert a new front wheel into the wheel fork and tighten it.
The washer is placed between the wheel fork and the nut. Checking the tyre pressure 몇 CAUTION Never exceed the maximum permissible tyre filling pressure.
1. See the "Technical data" for the tyre pressure.English 27
Accessories / spare parts The following is an overview (excerpts thereof) of wear parts or optionally available accessories. Accessories Description Order no. Side brush, stand- ard For indoor and outdoor surfac-
6.906-132.0 Side brush, soft For fine dust, on indoor and outdoor surfaces Moisture resistant 6.905-626.0 Side brush, hard For removal of stubborn dirt, for outdoor use Moisture resistant 6.905-625.0 Roller brush, standard For indoor and outdoor surfac-
Wear and moisture resistant 4.762-430.0 Roller brush, soft For fine dust, on indoor and outdoor surfaces Moisture resistant 4.762-442.0 Roller brush, hard For removal of stubborn dirt, for outdoor use Moisture resistant 4.762-443.0 Roller brush, anti- static For cleaning surfaces which are susceptible to static charg- es (e.g. carpets) 4.762-441.0 Dust filter Replace the flat filter at least 1x annually Moisture resistant, washable 5.731-585.0 Sealing strip, side Left and right 5.394-833.0 Sealing strip, front 5.394-834.0 Sealing strip, rear 5.394-832.0 Tyre set, solid rub- ber Fail-safe For sweeping metal shavings, glass fragments etc. 2.852-501.0 Carpet cleaning set For cleaning carpets 2.852-499.0 Side brush attach- ment kit, left Has to be installed by Custom- er Service 2.852-321.0 Attachment kit for LED flashing bea- con Has to be installed by Custom- er Service 2.852-500.0 Home Base ac- cessories Description Order no. Adapter For securing to Home Base rail (device) 5.035-488.0 Double hook Can only be used in conjunc- tion with adapter 6.980-077.0 Bottle holder Can only be used in conjunc- tion with adapter 4.070-006.0 Coarse dirt pliers set Coarse dirt pliers, including waste bag and fastening for device 2.852-497.028 English Troubleshooting guide You can remedy minor faults using the following overview. If in any doubt, please contact your authorised Customer Service. DANGER Risk of accidents and injuries due to unintentional move- ment of the device Switch off the device before carrying out any care and mainte- nance work, and remove the ignition key. Disconnect the central battery plug connector. DANGER Risk of electric shock Disconnect the central battery plug connector when working on electrical components. Repair work and work on electrical components must only be per- formed by your authorised Customer Service. Technical data Malfunction Remedy Device not running Charge the battery. Check/replace the fuse protection on the battery terminal. Sit in the driver's seat (seat contact switch). Ignition key to position 1. Check the position of the neutral lever. Check the connected battery terminals. Check the battery plug connector. Dust when sweeping / insuffi- cient suction power Empty the waste container. Switch on the roller brush or suction fan. Check / replace the seals. Check / clean / replace the dust filter. a Check that the dust filter is firmly in place. b In case of light soiling, clean the dust filter. c In case of damage or heavy soiling, replace the dust filter. Check the sealing strips for wear / set / replace them. Close the wet sweeping flap. Reduce the speed of the side brush. Completely raise the side brush. Sweeping performance not satisfactory Check the roller brush and side brush for wear, replace them as necessary. Check the sealing strips for wear, replace them as necessary. Check that the coarse dirt flap is fully functional. Check that the roller brush is correctly in place. Activation of roller brush / side brush not working The side brush only runs if the roller brush is switched on > lower the roller brush. Contact Customer Service. The roller brush / side brush are not running Check the roller brush / side brush for any tangled pieces of tape. Have the micro switch checked by Customer Service. KM 85/50 R Bp 1.351-126.0 KM 85/50 R Bp Pack 1.351-127.0 KM 85/50 R Bp Pack 2SB 1.351-128.0 Device performance data Travel speed km/h 6 6 6 Recommended sweeping speed km/h 4 4 4 Climbing ability (max.) % 12 (max. 3 min- utes) 12 (max. 3 min- utes) 12 (max. 3 min- utes) Working width without side brushes mm 615 615 615 Working width with 1 side brushes mm 850 850 850 Working width with 2 side brushes mm 1085 Turning circle m 2,5 2,5 2,5 Theoretical surface performance Surface performance without side brushes m
/h 3690 3690 3690 Surface performance with 1 side brushes m
/h 5100 5100 5100 Surface performance with 2 side brushes m
dB(A)333 KM 85/50 R Bp 1.351-126.0 KM 85/50 R Bp Pack 1.351-127.0 KM 85/50 R Bp Pack 2SB 1.351-128.0 Radio module Frequency MHz Transmission power Watts GSM 824.2-848.8 1510 1850.2-1909.8 870 WLAN 2400-2483 9630 English EU Declaration of Conformity We hereby declare that the machine described below complies with the relevant basic safety and health requirements in the EU Directives, both in its basic design and construction as well as in the version placed in circ ulation by us. This declaration is invali- dated by any changes made to the machine that are not ap- proved by us. Product: Sweeper vacuum Type: 1.351-xxx Currently applicable EU Directives 2006/42/EC (+2009/127/EC) 2014/30/EU 2000/14/EC 2014/53/EU (TCU) Harmonised standards used EN 60335-1 EN 60335-2-72 EN 60335-2-29 EN 62233: 2008 EN 55012: 2007 + A1: 2009 EN 61000-6-2: 2005 TCU EN 301 511 V9.0.2 EN 300 440 V2.1.1 EN 300 328 V2.1.1 EN 300 330 V2.1.1 National standards used
Applied conformity evaluation met hod 2000/14/EG: Annex V Sound power level dB(A) Measured: 85 Guaranteed: 88 The undersigned act on behalf and under the power of attorney of the company management. Documentation supervisor: S. Reiser Alfred Kärcher SE & Co. KG Alfred-Kärcher-Str. 28 - 40 71364 Winnenden (Germany) Ph.: +49 7195 14-0 Fax: +49 7195 14-2212 Winnenden, 2018/09/01 Chairman of the Board of Management Director Regulatory Affairs & Certification H. Jenner S. Reiser Declaration of Conformity We hereby declare that the product de-scribed below complies with the relevant provisions of the following UK Regulations, both in its basic design and construction as well as in the version put into circulation by us. This declaration shall cease to be valid if the product is modified without our prior approval. Product: Sweeper vacuum Type: 1.351-xxx Currently applicable UK Regulations S.I. 2008/1597 (as amended) S.I. 2016/1091 (as amended) S.I. 2001/1701 (as amended) S.I. 2017/1206 (as amended) (TCU) Designated standards used EN 60335-1 EN 60335-2-72 EN 60335-2-29 EN 62233: 2008 EN 55012: 2007 + A1: 2009 EN 61000-6-2: 2005 TCU EN 301 511 V12.5.1 EN 300 440 V2.1.1 EN 300 328 V2.2.2 EN 300 330 V2.1.1 National standards used