BSE79228BM - Electric oven AEG - Free user manual and instructions
Find the device manual for free BSE79228BM AEG in PDF.
| Product type | Built-in electric oven |
| Brand | AEG |
| Model | BSE79228BM |
| Dimensions (H × L × P) | 594 × 549 × 567 mm |
| Recess dimensions (H × L × P) | 600 × 550 × 546 mm (min.) |
| Weight | 38.5 kg |
| Volume | 70 L |
| Energy efficiency class | A++ |
| Energy consumption (fan-heated) | 0.52 kWh/cycle |
| Energy consumption (conventional) | 0.99 kWh/cycle |
| Power supply | Electric, 230 V ~ 50 Hz |
| Power cable length | 1500 mm |
| Cooking functions | Fan oven, Grill, Turbo grill, Top/Bottom heat, Pizza function, Bottom heat, Frozen dishes, Low temperature cooking, Keep warm, Defrost, Dehydrate, Yogurt, Sterilization, Gratin |
| Steam functions | Steamify (100% steam, steam braise, steam brown, steam roast), Sous-vide cooking, Steam rehydration, Bread making, Dough proving, Intense steam, High/medium/low humidity |
| Cleaning | Steam cleaning (30 min), Steam Plus cleaning (75 min), Descaling, Rinsing, Drying |
| Safety | Child safety, Automatic shut-off, Key lock, Cooling fan |
| Included accessories | Wire rack, Baking tray, Roasting pan, Food probe, Steam set (perforated and non-perforated container) |
| Interior lighting | Halogen lamp (class G), replaceable |
| Maximum temperature | 230 °C (for some functions) |
| Product reference (PNC) | 944188654 |
Frequently Asked Questions - BSE79228BM AEG
User questions about BSE79228BM AEG
0 question about this device. Answer the ones you know or ask your own.
Ask a new question about this device
Download the instructions for your Electric oven in PDF format for free! Find your manual BSE79228BM - AEG and take your electronic device back in hand. On this page are published all the documents necessary for the use of your device. BSE79228BM by AEG.
USER MANUAL BSE79228BM AEG
3. BESCHRIJVING VAN HET PRODUCT....9
12.PROBLEEMOPLOSSING. 41
Rauw of Minder
Medium
- Gaar of Meer
12. PROBLEEMOPLOSSING

WAARSCHUWING!
Thank you for choosing this AEG product. We have created it to give you impeccable performance for many years, with innovative technologies that help make life simpler – features you might not find on ordinary appliances. Please spend a few minutes reading to get the very best from it.
Visit our website to:

Get usage advice, brochures, trouble shooter, service and repair information: www.aeg.com/support

Register your product for better service: www.registeraeg.com

Buy Accessories, Consumables and Original spare parts for your appliance: www.aeg.com/shop
CUSTOMER CARE AND SERVICE
Always use original spare parts.
When contacting our Authorised Service Centre, ensure that you have the following data available: Model, PNC, Serial Number.
The information can be found on the rating plate.
Warning / Caution-Safety information
i General information and tips
Environmental information
Subject to change without notice.
CONTENTS
1.SAFETY INFORMATION. 54
1.1 Children and vulnerable people safety 54
1.2 General Safety 55
2.SAFETYINSTRUCTIONS. 56
2.1 Installation 56
2.2 Electrical connection.. 57
2.3 Use 58
2.4 Care and cleaning.. 58
2.5 Steam Cooking 59
2.6 Internal lighting 59
2.7 Service 59
2.8 Disposal 59
3.PRODUCT DESCRIPTION. 60
3.1 General overview.. 60
3.2 Accessories 60
4. HOW TO TURN OVEN ON AND OFF.... 61
4.1 Control panel 61
4.2 Display 62
5. BEFORE FIRST USE 63
5.1 Initial Cleaning 63
5.2 First connection 63
5.3 Initial preheating 64
5.4 How to set: Water hardness 64
6.DAILYUSE 65
6.1 How to set: Heating functions....65
6.2 Water drawer 66
6.3 How to use: Water drawer 66
6.4 How to set: Steamify - Steam heating function 67
6.5 How to set: SousVide Cooking.... 69
6.6 How to set: Assisted Cooking....69
6.7 Heating functions. 70
6.8 Notes on: Moist Fan Baking. 73
7. CLOCK FUNCTIONS 73
7.1 Clock functions description.. 73
7.2 How to set: Clock functions.. 74
8. HOW TO USE: ACCESSORIES 75
8.1 Inserting accessories.. 75
8.2 Food Sensor 76
9. ADDITIONAL FUNCTIONS 78
9.1 How to save: Favourites 78
9.2 Function lock. 79
9.3 Automatic switch-off.. 79
9.4Cooling fan. 79
10. HINTS AND TIPS 80
10.1 Cooking recommendations..80
10.2 Moist Fan Baking 80
10.3 Moist Fan Baking - recommended accessories..81
10.4 Cooking tables for test institutes..81
11. CARE AND CLEANING 84
11.1 Notes on cleaning. 84
11.2 How to remove: Shelf supports ...85
11.3 How to use: Steam Cleaning.... 85
11.4 Cleaning Reminder.. 86
11.5 How to clean: Water drawer...... 86
11.6 How to use: Dscaling.. 87
11.7 Descaling reminder.. 88
11.8 How to use: Rinsing. 88
11.9 Drying reminder.. 88
11.10 How to use: Drying 89
11.11 How to remove and install: Door.....89
11.12 How to replace: Lamp....90
12. TROUBLESHOOTING 91
12.1 What to do if 91
12.2 How to manage: Error codes.....93
12.3 Service data.. 94
13. ENERGY EFFICIENCY 94
13.1 Product Information and Product Information Sheet* .94
13.2 Energy saving.. 96
14.MENU STRUCTURE. 96
14.1 Menu. 96
14.2 Submenu for: Cleaning..97
14.3 Submenu for: Options.. 97
14.4 Submenu for: Setup. 98
14.5 Submenu for: Service 98
15. IT'S EASY! 98
16. TAKE A SHORTCUT! 100
17. ENVIRONMENTAL CONCERNS. 101
1. SAFETY INFORMATION
Before the installation and use of the appliance, carefully read the supplied instructions. The manufacturer is not responsible for any injuries or damage that are the result of incorrect installation or usage. Always keep the instructions in a safe and accessible location for future reference.
1.1 Children and vulnerable people safety
- This appliance can be used by children aged from 8 years and above and persons with reduced physical, sensory or mental capabilities or lack of experience and knowledge if
they have been given supervision or instruction concerning the use of the appliance in a safe way and understand the hazards involved. Children of less than 8 years of age and persons with very extensive and complex disabilities shall be kept away from the appliance unless continuously supervised.
- Children should be supervised to ensure that they do not play with the appliance.
- Keep all packaging away from children and dispose of it appropriately.
- WARNING: The appliance and its accessible parts become hot during use. Keep children and pets away from the appliance when in use and when cooling down.
- If the appliance has a child safety device, it should be activated.
- Children shall not carry out cleaning and user maintenance of the appliance without supervision.
1.2 General Safety
- This appliance is for cooking purposes only.
- This appliance is designed for single household domestic use in an indoor environment.
- This appliance may be used in, offices, hotel guest rooms, bed & breakfast guest rooms, farm guest houses and other similar accommodation where such use does not exceed (average) domestic usage levels.
- Only a qualified person must install this appliance and replace the cable.
- Do not use the appliance before installing it in the built-in structure.
- Disconnect the appliance from the power supply before carrying out any maintenance.
-
If the mains power supply cable is damaged, it must be replaced by the manufacturer, its Authorised Service Centre or similarly qualified persons to avoid an electrical hazard.
-
WARNING: Ensure that the appliance is switched off before replacing the lamp to avoid the possibility of electric shock.
- WARNING: The appliance and its accessible parts become hot during use. Care should be taken to avoid touching heating elements.
- Always use oven gloves to remove or insert accessories or ovenware.
- Use only the food sensor (core temperature sensor) recommended for this appliance.
- To remove the shelf supports first pull the front of the shelf support and then the rear end away from the side walls. Install the shelf supports in the opposite sequence.
- Do not use a steam cleaner to clean the appliance.
- Do not use harsh abrasive cleaners or sharp metal scrapers to clean the glass door since they can scratch the surface, which may result in shattering of the glass.
2. SAFETY INSTRUCTIONS
2.1 Installation

WARNING!
Only a qualified person must install this appliance.
- Remove all the packaging.
- Do not install or use a damaged appliance.
- Follow the installation instructions supplied with the appliance.
- Always take care when moving the appliance as it is heavy. Always use safety gloves and enclosed footwear.
- Do not pull the appliance by the handle.
- Install the appliance in a safe and suitable place that meets installation requirements.
- Keep the minimum distance from other appliances and units.
- Before mounting the appliance, check if the oven door opens without restraint.
- The appliance is equipped with an electric cooling system. It must be operated with the electric power supply.
- The built-in unit must meet the stability requirements of DIN 68930.
| Cabinet minimum height (Cabinet under the work-top minimum height) | 600 (600) mm |
| Cabinet width 550 mm | |
| Cabinet depth 605 (580) mm | |
| Height of the front of the appliance 594 mm | |
| Height of the back of the appliance 576 mm | |
| Width of the front of the appliance 549 mm | |
| Width of the back of the appliance 548 mm | |
| Depth of the appliance 567 mm | |
| Built in depth of the appliance 546 mm | |
| Depth with open door 1017 mm | |
| Ventilation opening minimum size. Opening placed on the bottom rear side | 550 x 20 mm |
| Mains supply cable length. Cable is placed in the right corner of the back side | 1500 mm |
| Mounting screws 4 x 12 mm |
2.2 Electrical connection

WARNING!
Risk of fire and electric shock.
- All electrical connections should be made by a qualified electrician.
- The appliance must be earthed.
- Make sure that the parameters on the rating plate are compatible with the electrical ratings of the mains power supply.
- Always use a correctly installed shockproof socket.
- Do not use multi-plug adapters and extension cables.
- Make sure not to cause damage to the mains plug and to the mains cable. Should the mains cable need to be replaced, this must be carried out by our Authorised Service Centre.
- Do not let mains cables touch or come near the appliance door or the niche below the appliance, especially when it operates or the door is hot.
- The shock protection of live and insulated parts must be fastened in such a way that it cannot be removed without tools.
- Connect the mains plug to the mains socket only at the end of the installation. Make sure that there is access to the mains plug after the installation.
- If the mains socket is loose, do not connect the mains plug.
- Do not pull the mains cable to disconnect the appliance. Always pull the mains plug.
-
Use only correct isolation devices: line protecting cut-outs, fuses (screw type fuses removed from the holder), earth leakage trips and contactors.
-
The electrical installation must have an isolation device which lets you disconnect the appliance from the mains at all poles. The isolation device must have a contact opening width of minimum 3 mm.
- This appliance is supplied with a main plug and a main cable.
2.3 Use

WARNING!
Risk of injury, burns and electric shock or explosion.
- Do not change the specification of this appliance.
- Make sure that the ventilation openings are not blocked.
- Do not let the appliance stay unattended during operation.
- Deactivate the appliance after each use.
- Be careful when you open the appliance door while the appliance is in operation. Hot air can release.
- Do not operate the appliance with wet hands or when it has contact with water.
- Do not apply pressure on the open door.
- Do not use the appliance as a work surface or as a storage surface.
- Open the appliance door carefully. The use of ingredients with alcohol can cause a mixture of alcohol and air.
- Do not let sparks or open flames to come in contact with the appliance when you open the door.
- Do not put flammable products or items that are wet with flammable products in, near or on the appliance.

WARNING!
Risk of damage to the appliance.
-
To prevent damage or discoloration to the enamel:
-
do not put ovenware or other objects in the appliance directly on the bottom.
- do not put aluminium foil directly on the bottom of cavity of the appliance.
- do not put water directly into the hot appliance.
- do not keep moist dishes and food in the appliance after you finish the cooking.
-
be careful when you remove or install the accessories.
-
Discoloration of the enamel or stainless steel has no effect on the performance of the appliance.
- Use a deep pan for moist cakes. Fruit juices cause stains that can be permanent.
- Always cook with the appliance door closed.
- If the appliance is installed behind a furniture panel (e.g. a door) make sure the door is never closed when the appliance operates. Heat and moisture can build up behind a closed furniture panel and cause subsequent damage to the appliance, the housing unit or the floor. Do not close the furniture panel until the appliance has cooled down completely after use.
2.4 Care and cleaning

WARNING!
Risk of injury, fire, or damage to the appliance.
- Before maintenance, deactivate the appliance and disconnect the mains plug from the mains socket.
-
Make sure the appliance is cold. There is the risk that the glass panels can break.
-
Replace immediately the door glass panels when they are damaged. Contact the Authorised Service Centre.
- Be careful when you remove the door from the appliance. The door is heavy!
- Clean regularly the appliance to prevent the deterioration of the surface material.
- Clean the appliance with a moist soft cloth. Use only neutral detergents. Do not use abrasive products, abrasive cleaning pads, solvents or metal objects.
- If you use an oven spray, follow the safety instructions on its packaging.
2.5 Steam Cooking

WARNING!
Risk of burns and damage to the appliance.
-
Released Steam can cause burns:
-
Be careful when you open the appliance door when the function is activated. Steam can release.
- Open the appliance door with care after the steam cooking operation.
2.6 Internal lighting

WARNING!
Risk of electric shock.
- Concerning the lamp(s) inside this product and spare part lamps sold separately: These lamps are intended to withstand extreme physical conditions in household appliances, such as temperature, vibration, humidity, or are intended to signal information about the operational status of the appliance. They are not intended to be used in other applications and are not suitable for household room illumination.
- This product contains a light source of energy efficiency class G.
- Use only lamps with the same specifications.
2.7 Service
- To repair the appliance contact the Authorised Service Centre.
- Use original spare parts only.
2.8 Disposal

WARNING!
Risk of injury or suffocation.
- Contact your municipal authority for information on how to dispose of the appliance.
- Disconnect the appliance from the mains supply.
- Cut off the mains electrical cable close to the appliance and dispose of it.
- Remove the door catch to prevent children or pets from becoming trapped in the appliance.
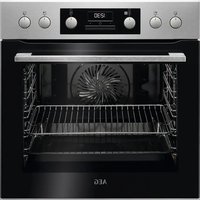
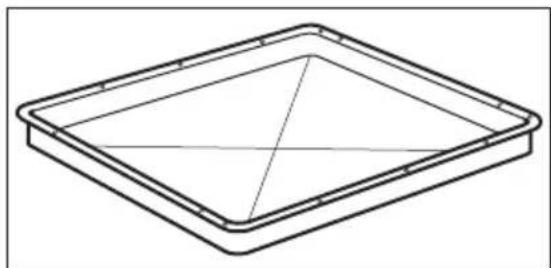
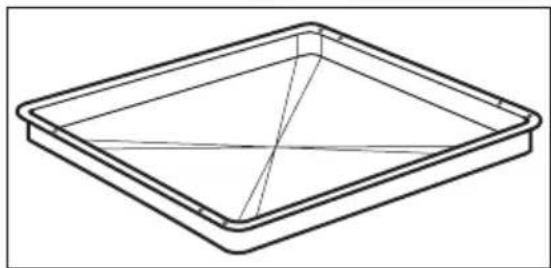
3.PRODUCT DESCRIPTION
3.1 General overview
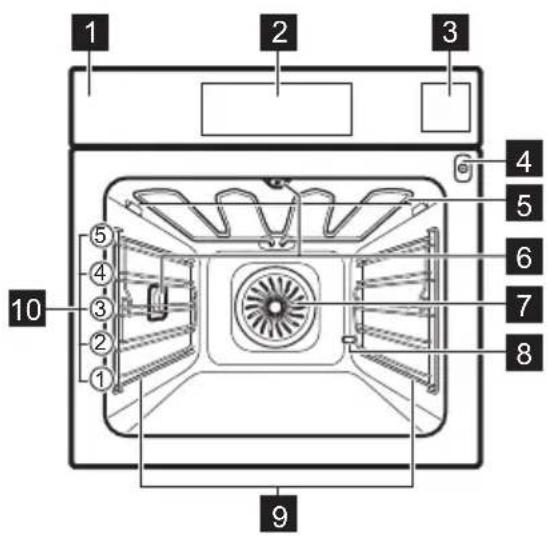
Control panel
Display
Water drawer
Socket for the food sensor
Heating element
Lamp
Fan
D escaling pipe outlet
Shelf support, removable
Shelf positions
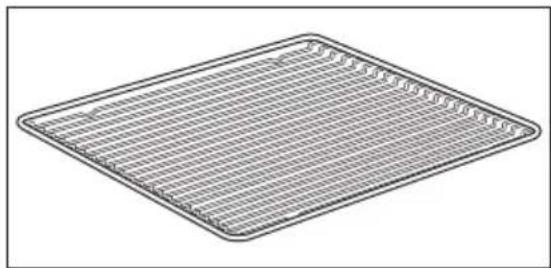
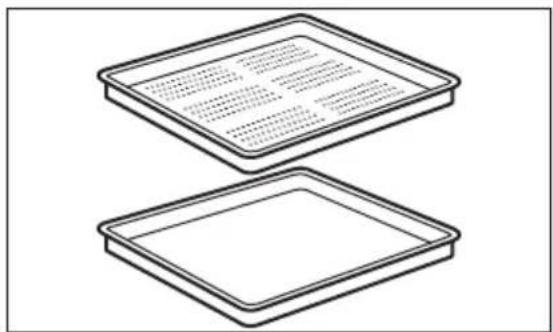
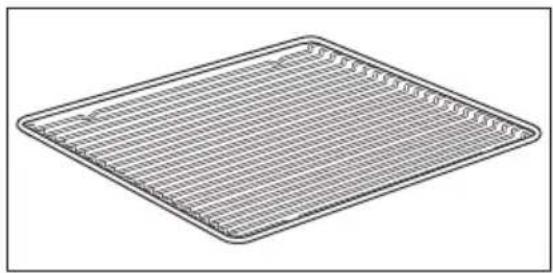
3.2 Accessories
Wire shelf
For cookware, cake tins, roasts.
Baking tray
For cakes and biscuits.
Grill-/Roasting pan
To bake and roast or as a pan to collect fat.
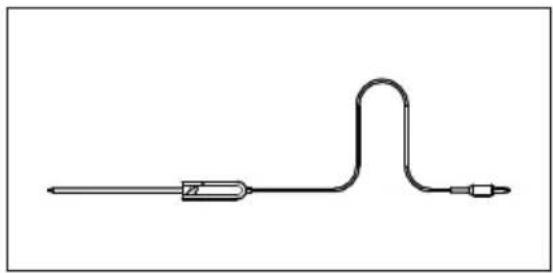
Food sensor
To measure the temperature inside food.
Steam set
One unperforated and one perforated food container.
The steam set drains the condensing water away from the food during steam cooking. Use it to prepare vegetables, fish, chicken breast. The set is not suitable for food that needs to soak in the water e.g. rice, polenta, pasta.
4. HOW TO TURN OVEN ON AND OFF
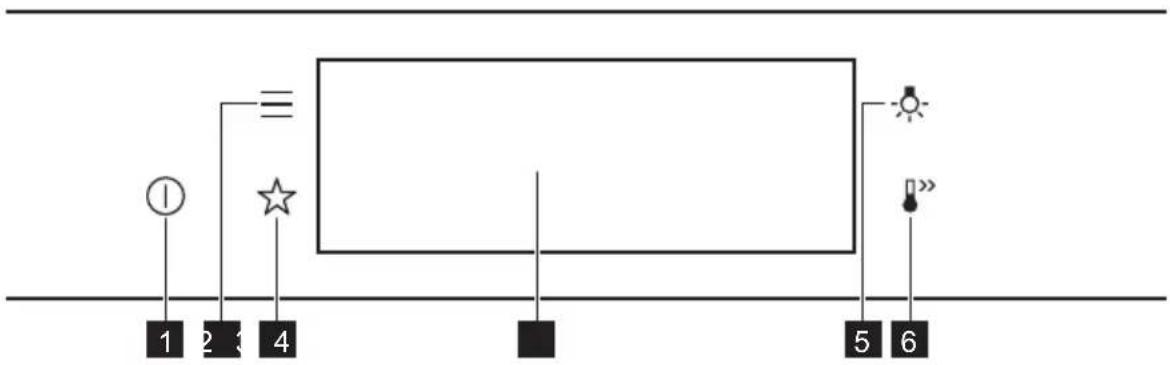
4.1 Control panel
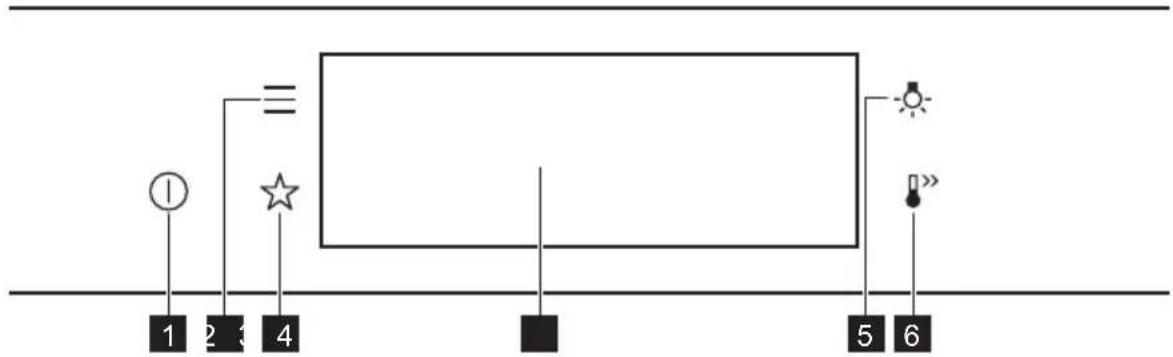
| 1 | ON / OFF Press and | hold to turn the oven on and off. |
| 2 | Menu Lists the oven functions. | |
| 3 | Favourites Lists the favourite settings. | |
| 4 | Display Shows the current settings of the oven. | |
| 5 | Lamp switch To turn the lamp on and off. | |
| 6 | Fast Heat Up To turn on and off the function: Fast Heat Up. | |
| Press Move | ←→ | Press and hold |
| Touch the surface with finger-tip. | Slide fingertip over the sur-face. | Touch the surface for 3 seconds. |
4.2 Display
| 12:301 150°C STARTS | After turning on, the display shows the main screen with the heating function and the default temperature. |
| 12:34 | If you do not use the oven for 2 minutes, the display goes to standby. |
| 12:301 150°C 11min·STOP | When you cook, the display shows the set functions and other available options. |
| A 12:30 785°C 15min START F E D C B | Display with key functions set. A. Time of day B. START/STOP C. Temperature D. Heating functions E. Timer F. Food sensor (selected models only) |
| Display indicators | |
| Basic indicators - to navigate on the display. | |
| OK To confirm the selection / setting. | < To go one level back in the menu. | To undo the last action. | To turn the options on and off. |
| Sound alarm function indicators - when the set time of cooking ends, the signal sounds. | |||
| The function is on. | STOP The function is on. Cooking stops automatically. | Sound alarm is off. | |
| Timer indicators | |||
| To set the function: Delayed start. | To cancel the setting. | ||
5. BEFORE FIRST USE

WARNING!
Refer to Safety chapters.
5.1 Initial Cleaning
| Step 1 Step 2 Step 3 | ||
| Remove all accessories and removable shelf supports from the oven. | Clean the oven and the accessories with a soft cloth, warm water and a mild detergent. | Place the accessories and the removable shelf supports in the oven. |
5.2 First connection
The display shows welcome message after the first connection.
You have to set: Language, Display brightness, Key tones, Buzzer volume, Water hardness, Time of day.
5.3 Initial preheating
| Preheat the empty oven before the first use. | |
| Step 1 Remove all accessories and removable shelf supports from the oven. | |
| Step 2 | Set the maximum temperature for the function: □ Let the oven operate for 1 h. |
| Step 3 | Set the maximum temperature for the function: □ Let the oven operate for 15 min. |
| ① The oven can emit an odour and smoke during preheating. Make sure that the room is ventilated. | |
5.4 How to set: Water hardness
When you connect the oven to the mains you have to set the water hardness level. Use the test paper supplied with the steam set.
| Step 1 Step 2 Step 3 Step 4 | Shake the test paper to remove the excess of water. | After 1 min, check water hardness with the table below. | Set the water hardness level: Menu / Settings / Setup / Water hardness. |
| ① The colours of the test paper continue to change. Do not check water hardness later than 1 min after test. | |||
| You can change the water hardness level in the menu: Settings / Setup / Water hardness. | |||
The table shows water hardness range (dH) with the corresponding level of Calcium deposit and the water classification. Adjust the water hardness level according to the table.
| Water hardness Test | paper Calcium de-posit (mmol/l) | Calcium de-posit (mg/l) | Water classi-fication | |
| Level dH | ||||
| 1 0 - 7 | 0 - 1.3 0 - 50 soft | |||
| 2 8 - 14 | 1.4 - 2.5 51 - 100 | modately | hard | |
| 3 15 - 21 | 21 2.6 - 3.8 101 - | 15chd | ||
| 4 ≥22 ≥ | 3.9 | very hard | ||
When the tap water hardness level is 4, fill the water drawer with still bottled water.
6. DAILY USE

WARNING!
Refer to Safety chapters.
6.1 How to set: Heating functions
| Step 1 | Turn on the oven. The display shows the default heating function. |
| Step 2 | Press the symbol of the heating function to enter the submenu. |
| Step 3 | Select the heating function and press: OK. The display shows: temperature. |
| Step 4 | Set: temperature. Press: OK. |
| Step 5 | Press: START. Food Sensor - you can plug the sensor at any time before or during cooking. |
| STOP - press to turn off the heating function. | |
| Step 6 | Turn off the oven. |
Take a shortcut!

6.2 Water drawer
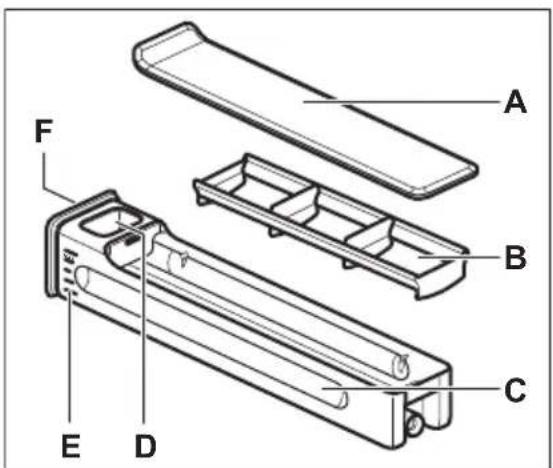
A.Lid
B. Wave-breaker
C. Drawer
D. Water-filling opening
E. Scale
F. Front cover
6.3 How to use: Water drawer
| Step 1 Push the front cover of the water draw- er. | ||
| Step 2 Fill the water drawer up to the maximum level. You can do it in two ways: | ||
| A: Leave the water drawer inside the oven and pour the water from a contain- er. | B:Remove the water drawer from the oven and fill it from a water tap. | |
| Step 3 Carry the water drawer in the horizontal position to avoid water spilling. | ||
| Step 4 When you fill the water drawer, insert it in the same position. Push the front cover until the water drawer is inside the oven. | ||
| Step 5 Empty the water drawer after each use. | ||
| CAUTION! Keep the water drawer away from hot surfaces. | ||
6.4 How to set: Steamify - Steam heating function
| Step 1 Turn on the oven. Select the symbol of the heating function and press it to enter the submenu. | |
| Step 2 | Press Set the steam heating function. |
| Step 3 | Press: OK the display shows the temperature settings. |
| Step 4 Set the temperature. Type of the steam heating function depends on the set temperature. | |
| Steam for Steaming 50 - 100 °C | For steaming vegetables, grains, legumes, seafood, terrines and spoon desserts. |
| Steam for Stewing 105 - 130 °C | For cooking stewed and braised meat or fish, bread and poultry, as well as cheeses and casseroles. |
| Steam for Gentle Crisping 135 - 150 °C | For meat, casseroles, stuffed vegetables, fish and gratin. Owing to the combination of steam and heat the meat gets a juicy and tender texture along with a crusty surface. If you set the timer, grill function turns on automatically in the last minutes of the cooking process to give dish a gentle gratin. |
Take a shortcut!
| Steam for Baking and Roasting 155 - 230 °C | For roasted and baked dishes meat, fish, poultry, fil- led puff pastry, tarts, muffins, gratin, vegetables and bakery dishes. If you set the timer and put the food on the first level, bottom heat function turns on automatically in the last minutes of the cooking process to give dish a crispy bottom. | |
| Step 5 | Press: OK | |
| Step 6 Press the cover of the water drawer to open and remove it. | ||
| Step 7 Fill the water drawer with cold water to the maximum level (around 950 ml). The water supply is sufficient for approximately 50 min. WARNING! Use only cold tap water. Do not use filtered (demineralised) or distil- led water. Do not use other liquids. Do not pour flammable or alco- holic liquids into the water drawer. Use the scale on the water drawer. | ||
| Step 8 Wipe the outside of the water drawer with a soft cloth, if needed. Push the water draw- er to its initial position. | ||
| Step 9 | Press: START Steam appears after approximately 2 min. When the oven reaches the set tempera- ture, the signal sounds. | |
| Step 10 When the water drawer runs out of water, the signal sounds. Refill the water drawer. At the end of cooking, the cooling fan runs quicker to remove steam. | ||
| Step 11 Turn off the oven. | ||
| Step 12 Empty the water drawer after cooking ends. | ||
| Step 13 Residual water can condensate in the cavity. After cooking, carefully open the oven door. When the oven is cold, dry the cavity with a soft cloth. | ||

6.5 How to set: SousVide Cooking
| Step 1 Turn on the oven. Select the symbol of the heating function and press it to enter the submenu. | |
| Step 2 | Press: |
| Step 3 | Press: OK The display shows the temperature settings. |
| Step 4 | Set the temperature and press: OK |
| Step 5 | Press The display shows timer settings. |
| Step 6 | Set the timer and press: OK |
| Step 7 | Press: START |
| Step 8 Residual water can accumulate on the vacuum bags and in the cavity. After cooking, open the oven door carefully. Use a plate and a towel to take out the vacuum bags. When the oven is cold, remove the water from the bottom of the cavity with a sponge. Dry the cavity with a soft cloth. | |
Take a shortcut!

6.6 How to set: Assisted Cooking
Every dish in this submenu has a recommended function and temperature. You can adjust the time and the temperature.
For some of the dishes you can also cook with:
Weight Automatic
- Food Sensor
The degree to which a dish is cooked:
Rare or Less
Medium
Well done or More
| Step 1 Turn on the oven. |
| Step 2 Press: |
| Step 3 | Press: Enter: Assisted Cooking. |
| Step 4 Choose a dish or a food type. | |
| Step 5 | Press: START |
Take a shortcut!

6.7 Heating functions
STANDARD
| Heating function Application | |
| Grill | To grill thin pieces of food and to toast bread. |
| Turbo Grilling | To roast large meat joints or poultry with bones on one shelf position. To make gratins and to brown. |
| True Fan Cooking | To bake on up to three shelf positions at the same time and to dry food. Set the temperature 20 - 40 °C lower than for Conventional Cooking. |
| Frozen Foods | To make convenience food (e.g., french fries, potato wedges or spring rolls) crispy. |
| Conventional Cooking | To bake and roast food on one shelf position. |
| Heating function Application |
| Pizza Function To bake pizza. To make intensive browning and a crispy bottom. |
| Bottom Heat To bake cakes with crispy bottom and to preserve food. |
SPECIALS
| Heating function Application | |
| Preserving | To preserve vegetables (e.g., pickles). |
| Dehydrating | To dry sliced fruit, vegetables and mushrooms. |
| Yoghurt Function | To prepare yogurt. The lamp in this function is off. |
| Plate Warming | To preheat plates for serving. |
| Defrost | To defrost food (vegetables and fruit). The defrosting time depends on the amount and size of the frozen food. |
| Au Gratin | For dishes such as lasagna or potato gratin. To make gratins and to brown. |
| Slow Cooking | To prepare tender, succulent roasts. |
| Keep Warm | To keep food warm. |
| Moist Fan Baking | This function is designed to save energy during cooking. When you use this function, the temperature in the cavity may differ from the set temperature. The residual heat is used. The heating power may be reduced. For more information refer to "Daily Use" chapter, Notes on: Moist Fan Bak-ing. |
STEAM
| Heating function Application | |
| Steamify | Use steam for steaming, stewing, gentle crisping, baking and roasting. |
| SousVide Cooking | The function name refers to a method of cooking in vacuum sealed plastic pouches at low temperatures. Refer to the section SousVide Cooking below and the chapter "Hints and Tips" with the cooking tables to find more information. |
| Steam Regenerat-ing | Food reheating with steam prevents surface drying. Heat is distributed in a gentle and even way, which allows to recover taste and aroma of food as just prepared. This function can be used to reheat food directly on a plate. You can reheat more than one plate at the same time, using different shelf positions. |
| Bread Baking | Use this function to prepare bread and bread rolls with a very good professional-like result in terms of crispiness, colour and crust gloss. |
| Dough Proving | To speed up the rising of the yeast dough. It prevents dough surface from drying and keeps the dough elastic. |
| Full Steam | For steaming vegetables, side dishes, fish |
| H H H High Humidity High | The function is suitable for cooking delicate dishes like custards, flans, ter-rines and fish. |
| H H H Med Humidity Medium | The function is suitable for cooking stewed and braised meat as well as bread and sweet yeast dough. Due to the combination of steam and heat the meat gets a juicy and tender texture and yeast dough bakeries get a crispy and shiny surface. |
| H H H LOW Humidity Low | The function is suitable for meat, poultry, oven dishes and casseroles. Thanks to the combination of steam and heat, meat gets a tender and jui-cy texture along with a crusty surface. |
6.8 Notes on: Moist Fan Baking
This function was used to comply with the energy efficiency class and ecodesign requirements according to EU 65/2014 and EU 66/2014. Tests according to EN 60350-1.
The oven door should be closed during cooking so that the function is not interrupted and the oven operates with the highest energy efficiency possible.
When you use this function the lamp automatically turns off after 30 sec.
For the cooking instructions refer to "Hints and tips" chapter, Moist Fan Baking. For general energy saving recommendations refer to "Energy Efficiency" chapter, Energy Saving.
7. CLOCK FUNCTIONS
7.1 Clock functions description
| Clock function Application | |
| Cooking time To set the length of cooking. Maximum is 23 h 59 min. | |
| End action To set what happens when the timer ends counting. | |
| Delayed start To postpone the start and / or end of cooking. | |
| Time extension To extend cooking time. | |
| Reminder To set a count down. Maximum is 23 h 59 min. This function has no effect on the operation of the oven. | |
| Uptimer Monitors how long the function operates. Uptimer - you can turn it on and off. |
7.2 How to set: Clock functions
| How to set the clock | |
| Step 1 Press: Time of day. | |
| Step 2 | Set the time. Press: OK |
| How to set cooking time | |
| Step 1 Choose the heating function and set the temperature. | |
| Step 2 | Press: |
| Step 3 | Set the time. Press: OK |
Take a shortcut!

| How to choose end option | |
| Step 1 Choose the heating function and set the temperature. | |
| Step 2 | Press: |
| Step 3 Set the cooking time. | |
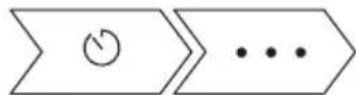
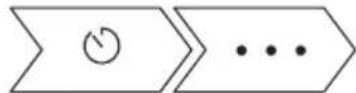
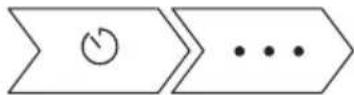
| Step 4 | Press: • • • |
| Step 5 Press: End action. | |
| Step 6 Choose the preferred: End action. | |
| Step 7 | Press: OK Repeat the action until the display shows the main screen. |
| How to delay start of cooking | |
| Step 1 Set the heating function and the temperature. | |
| Step 2 | Press: |
| Step 3 Set the cooking time. | |
| Step 4 | Press: • • • |
| Step 5 Press: Delayed start. | |
| Step 6 Choose the value. | |
| Step 7 | Press: OK Repeat the action until the display shows the main screen. |
| How to extend cooking time |
| When 10% of cooking time is left and the food seems not to be ready, you can extend cooking time. You can also change the heating function. |
| Press +1min to extend the cooking time. |
| How to change timer settings | |
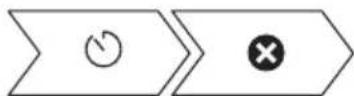
| Step 1 | Press: |
| Step 2 Set the timer value. | |
| Step 3 | Press: OK |
| You can change the set time during cooking at any time. | |
8. HOW TO USE: ACCESSORIES
8.1 Inserting accessories
A small indentation at the top increases safety. The indentations are also anti-tip devices. The high rim around the shelf prevents cookware from slipping of the shelf.
| Wire shelf: Push the shelf between the guide bars of the shelf support. | |
| Baking tray / Deep pan: Push the tray between the guide bars of the shelf support. | |
| Wire shelf, Baking tray / Deep pan: Push the tray between the guide bars of the shelf support and the wire shelf on the guide bars above. |
8.2 Food Sensor
Food Sensor-measures the temperature inside the food. You can use it with every heating function.
| There are two temperatures to be set: | |
| °C The oven temperature: minimum 120 °C. | °C The core temperature. |
| For the best cooking results: | ||
| Ingredients should be at room temperature. | Do not use it for liquid dishes. | During cooking it must remain in the dish. |
The oven calculates an approximate end of cooking time. It depends on the quantity of food, the set oven function and the temperature.
How to use: Food Sensor
| Step 1 Turn on the oven. | |
| Step 2 Set a heating function and, if necessary, the oven temperature. | |
| Step 3 Insert: Food Sensor. | |
| Meat, poultry and fish Casserole | |
| Insert the tip of Food Sensor into the centre of meat, fish, in the thickest part if possible. Make sure that at least 3/4 of Food Sensor is inside of the dish. | Insert the tip of Food Sensor exactly in the centre of the casserole. Food Sensor should be stabilized in one place during baking. Use a solid ingredient to achieve that. Use the rim of the baking dish to support the silicone handle of Food Sensor. The tip of Food Sensor should not touch the bottom of a baking dish. |
| Step 4 Plug Food Sensor into the socket at the front of the oven. The display shows the current temperature of: Food Sensor. | |
| Step 5 | - press to set the core temperature of the sensor. |
Take a shortcut!
| Step 6 | ● ● ● - press to set the preferred option: ·Sound alarm - when food reaches the core temperature, the signal sounds. ·Sound alarm and stop cooking - when food reaches the core temperature, the sig- nal sounds and the oven stops. |
| Step 7 | Select the option and repeatedly press: OK go to main screen. |
| Step 8 | Press: START When food reaches the set temperature, the signal sounds. You can choose to stop or to continue cooking to make sure the food is well done. |
| Step 9 Remove Food Sensor plug from the socket and remove the dish from the oven. | |
| WARNING! There is a risk of burns as Food Sensor becomes hot. Be careful when you unplug it and remove it from the food. | |

9. ADDITIONAL FUNCTIONS
9.1 How to save: Favourites
You can save your favourite settings, such as the heating function, the cooking time, the temperature or the cleaning function. You can save 3 favourite settings.
| Step 1 Turn on the oven. |
| Step 2 Select the preferred setting. |
| Step 3 Press: Select: Favourites. |
| Step 4 Select: Save current settings. |
| Step 5 Press + to add the setting to the list of: Favourites. Press OK |
| - press to reset the setting. - press to cancel the setting. |
9.2 Function lock
This function prevents an accidental change of the heating function.
| Step 1 Turn on the oven. |
| Step 2 Set a heating function. |
| Step 3 ☆,press at the same time to turn on the function. |
| To turn off the function repeat step 3. |
9.3 Automatic switch-off
For safety reasons the oven turns off after some time, if a heating function works and you do not change any settings.
| (℃) (h) | 1 |
| 30 - 115 12.5 | |
| 120 - 195 8.5 | |
| 200 - 230 5.5 |
The Automatic switch-off does not work with the functions: Light, Food sensor, End time, Slow Cooking.
9.4 Cooling fan
When the oven operates, the cooling fan turns on automatically to keep the surfaces of the oven cool. If you turn off the oven, the cooling fan can continue to operate until the oven cools down.
10. HINTS AND TIPS
10.1 Cooking recommendations
①
The temperature and cooking times in the tables are guidelines only. They depend on the recipes and the quality and quantity of the ingredients used.
Your oven may bake or roast differently to the oven you had before. The hints below show recommended settings for temperature, cooking time and shelf position for specific types of the food.
If you cannot find the settings for a special recipe, look for the similar one.
For more cooking recommendations refer to cooking tables on our website. To find the Cooking Hints check the PNC number on the rating plate on the front frame of the oven cavity.
10.2 Moist Fan Baking
For the best results follow suggestions listed in the table below.
| (℃) (min) | ||||
| Sweet rolls, 16 pieces | baking tray or dripping pan | 180 2 25 - 35 | ||
| Swiss Roll baking tray or dripping pan | 180 2 15 - 25 | |||
| Whole fish, 0.2 kg | baking tray or dripping pan | 180 3 15 - 25 | ||
| Cookies, 16 pieces | baking tray or dripping pan | 180 2 20 - 30 | ||
| Macaroons, 24 pieces | baking tray or dripping pan | 160 2 25 - 35 | ||
| Muffins, 12 pieces | baking tray or dripping pan | 180 2 20 - 30 | ||
| Savory pastry, 20 pieces | baking tray or dripping pan | 180 2 20 - 30 | ||
| Short crust biscuits, 20 pieces | baking tray or dripping pan | 140 2 15 - 25 | ||
| Tartlets, 8 pieces | baking tray or dripping pan | 180 2 15 - 25 |
10.3 Moist Fan Baking - recommended accessories
Use the dark and non-reflective tins and containers. They have better heat absorption than the light colour and reflective dishes.
| Pizza pan | Baking dish | Ramekins | Flan base tin |
| Dark, non-reflective 28 cm diameter | Dark, non-reflective 26 cm diameter | Ceramic 8 cm diameter, 5 cm height | Dark, non-reflective 28 cm diameter |
10.4 Cooking tables for test institutes
Information for test institutes
Tests according to: EN 60350, IEC 60350.
| BAKING ON ONE LEVEL. Baking in tins | ||||
| (℃) (min) | ||||
| Fatless sponge cake True | Fan Cooking 140 - 150 | 35 - 50 2 | ||
| Fatless sponge cake Conventional Cooking | 160 35 - 50 2 | |||
| Apple pie, 2 tins Ø20 cm | True Fan Cooking 160 60 | - 90 2 | ||
| Apple pie, 2 tins Ø20 cm | Conventional Cooking | 180 70 - 90 1 | ||
| BAKING ON ONE LEVEL. Biscuits | |||
| Use the third shelf position. | |||
| (℃) (min) | |||
| Short bread / Pastry strips True | Fan Cooking 140 25 - 40 | ||
| Short bread / Pastry strips, preheat the empty oven | Conventional Cooking 160 | 20 - 30 | |
| Small cakes, 20 per tray, preheat the empty oven | True Fan Cooking 150 20 - | 35 | |
| Small cakes, 20 per tray, preheat the empty oven | Conventional Cooking 170 | 20 - 30 | |
| MULTILEVEL BAKING. Biscuits | ||||
| (℃) (min) | ||||
| Short bread / Pastry strips | True Fan Cooking 140 25 - 45 1 / 4 | |||
| Small cakes, 20 per tray, preheat the empty oven | True Fan Cooking 150 23 | - 40 1 / 4 | ||
| Fatless sponge cake True | Fan Cooking 160 35 - 50 1 / 4 | |||
| GRILL | |||
| Preheat the empty oven for 5 minutes. | |||
| Grill with the maximum temperature setting. | |||
| (min) | |||
| Toast Grill 1 - 3 5 | |||
| Beef steak, turn halfway through | Grill 24 - 30 4 | ||
Information for test institutes
Tests for the function: Full Steam.
Tests according to IEC 60350.
| Set the temperature to 100 °C. | |||||
| Container (Gastro-norm) | (kg) | (min) | i | ||
| Broccoli, pre-heat the empy oven | 1 x 2/3 perfo-rated | 0.3 3 8 - 9 Put the baking | tray on the first shelf position. | ||
| Broccoli, pre-heat the empy oven | 1 x 2/3 perfo-rated | max. 3 10 - 11 Put the baking | tray on the first shelf position. | ||
| Container (Gastro-norm) | (kg) | (min) | |||
| Peas,frozen 2 x | 2/3 perfo-rated | 2 x 1.5 2 and 4 | Until the | temperature in the coldest spot rea-ches 85 °C. | Put the baking tray on the first shelf position. |
11. CARE AND CLEANING

WARNING!
Refer to Safety chapters.
11.1 Notes on cleaning
| Cleaning Agents | Clean the front of the oven with a soft cloth with warm water and a mild detergent. Clean the bottom of the cavity with a few drops of vinegar to remove limestone residue. |
| Use a cleaning solution to clean metal surfaces. | |
| Clean stains with a mild detergent. |
| Everyday Use | Clean the cavity after each use. Fat accumulation or other residue may cause fire. |
| Do not store the food in the oven for longer than 20 minutes. Dry the cavity with a soft cloth after each use. |

Accessories
Clean all accessories after each use and let them dry. Use a soft cloth with warm water and a mild detergent. Do not clean the accessories in a dishwasher.
Do not clean the non-stick accessories using abrasive cleaner or sharp-edged objects.
11.2 How to remove: Shelf supports
Remove the shelf supports to clean the oven.
| Step 1 Turn off the oven and wait until it is cold. | ||
| Step 2 Carefully pull the shelf supports up and out of the front catch. | ||
| Step 3 Pull the front end of the shelf support away from the side wall. | ||
| Step 4 Pull the supports out of the rear catch. | ||
| Install the shelf supports in the opposite sequence. | ||
11.3 How to use: Steam Cleaning
| Before you start: | ||
| Turn off the oven and wait until it is cold. | Remove all accessories and removable shelf supports. | Clean the bottom of the cavity and the inner door glass with a soft cloth with warm water and a mild detergent. |
| Step 1 Fill | the water drawer to the maximum level. | ||
| Step 2 Select: Menu / Cleaning. | |||
| Function Description | Duration | ||
| Steam Cleaning Light | cleaning 30 min | ||
| Steam Cleaning Plus Normal cleaning Spray the cavity with a detergent. | 75 min | ||
| Step 3 | Press START the instruction on the display. The signal sounds when the cleaning ends. |
| Step 4 Press any symbol to turn off the signal. | |
| ① When this function works, the lamp is off. | |
| When the cleaning ends: | ||
| Turn off the oven. When the oven is cold, dry the cavity with a soft cloth. Remove the remaining water from the water drawer. | Leave the oven door open and wait until the cavity is dry. | |
11.4 Cleaning Reminder
| When the reminder appears, cleaning is recommended. |
| Use the function: Steam Cleaning Plus. |
11.5 How to clean: Water drawer
| Step 1 Remove the water drawer from the oven. | |
| Step 2 Remove the lid of the water drawer. Lift the cover in correspondence with the protrusion in the rear. | |
| Step 3 Remove the wave-breaker. Pull it away from the drawer body until it pops out. | |
| Step 4 Wash the water drawer parts with water and soap. Do not use abrasive sponges and do not clean the water drawer in a dishwasher. | |
| Step 5 Reassemble the water drawer. | |
| Step 6 Snap in the wave-breaker. Push it into the drawer body. | |
| Step 7 Assemble the lid. First insert the front snap and then push it against the drawer body. | |
| Step 8 Insert the water drawer. | |
| Step 9 Push the water drawer towards the oven until it latches. | |
11.6 How to use: Descaling
| Before you start: | ||
| Turn off the oven and wait until it is cold. | Remove all accessories. Make sure that the water drawer is empty. | |
| Duration of the first part: around 100 min | ||
| Step 1 Place the deep pan on the first shelf position. | ||
| Step 2 Pour 250 ml of the descending agent in the water drawer. | ||
| Step 3 Fill the remaining part of the water drawer with water to the maximum level. | ||
| Step 4 Select: Menu / Cleaning. | ||
| Step 5 Turn on the function and follow the instruction on the display. The first part of descending starts. | ||
| Step 6 After the first part is over, empty the deep pan and put it back on the first shelf position. | ||
| Duration of the second part: around 35 min | ||
| Step 7 Fill the water drawer with water. Make sure there is no remaining descending agent inside the water drawer. Insert the water drawer. | ||
| Step 8 When the function ends, remove the deep pan. | ||
| When this function works, the lamp is off. | ||
| When descending ends: | ||
| Turn off the oven. When the oven is cold, dry the cavity with a soft cloth. Remove the remaining water from the water drawer. | Leave the oven door open and wait until the cavity is dry. | |
| ① If some limestone residue remains in the oven after descending, the display prompts to repeat the procedure. | ||
11.7 Descaling reminder
There are two reminders which prompt you to descale the oven. You cannot disable the descaling reminder.
| Type Description | |
| Soft reminder Recommends you to descale the oven. | |
| Hard reminder Obligates you to descale the oven. If you do not descale the oven when the hard reminder is on, the steam functions are disabled. | |
11.8 How to use: Rinsing
| Before you start: | |
| Turn off the oven and wait until it is cold. Remove all accessories. |
| Step 1 Place the deep pan on the first shelf position. |
| Step 2 Fill the water drawer with water. |
| Step 3 Select: Menu / Cleaning / Rinsing. Duration: around 30 min |
| Step 4 Turn on the function and follow the instruction on the display. |
| Step 5 When the function ends, remove the deep pan. |
| ① When this function works, the lamp is off. |
11.9 Drying reminder
After cooking with a steam heating function the display prompts to dry the oven.
Press YES to dry the oven.
11.10 How to use: Drying
Use it after cooking with a steam heating function or steam cleaning to dry the cavity.
| Step 1 Make sure the oven is cold. |
| Step 2 Remove all accessories. |
| Step 3 Select the menu: Cleaning / Drying. |
| Step 4 Follow the instructions on the screen. |
11.11 How to remove and install: Door
You can remove the door and the internal glass panels to clean it. The number of glass panels is different for different models.

WARNING!
The door is heavy.

CAUTION!
Carefully handle the glass, especially around the edges of the front panel. The glass can break.
| Step 1 Fully open the door. |
| Step 2 Lift and press the clamping levers (A) on the two door hinges. |
| Step 3 Close the oven door to the first opening position (approximately 70° angle). Hold the door at both sides and pull it away from the oven at an upwards angle. Put the door with the outer side down on a soft cloth on a stable surface. |
| Step 4 Hold the door trim (B) on the top edge of the door at the two sides and push inwards to release the clip seal. | 2 B 1 |
| Step 5 Pull the door trim to the front to remove it. | |
| Step 6 Hold the door glass panels on their top edge one by one and pull them up out of the guide. | |
| Step 7 Clean the glass panel with water and soap. Dry the glass panel carefully. Do not clean the glass panels in the dishwasher. | |
| Step 8 After cleaning, do the above steps in the opposite sequence. | |
| Step 9 Install the smaller panel first, then the larger and the door. Make sure that the glasses are inserted in the correct position otherwise the surface of the door may overheat. | |
11.12 How to replace: Lamp

WARNING!
Risk of electric shock.
The lamp can be hot.
| Before you replace the lamp: | ||
| Step 1 Step 2 Step | 3 | |
| Turn off the oven. Wait until the oven is cold. | Disconnect the oven from the mains. | Put a cloth on the bottom of the cavity. |
Top lamp
| Step 1 Turn the glass cover to remove it. | |
| Step 2 Remove the metal ring and clean the glass cover. | |
| Step 3 Replace the lamp with a suitable 300 °C heat-resistant lamp. | |
| Step 4 Attach the metal ring to the glass cover and install it. | |
Side lamp
| Step 1 Remove the left shelf support to get access to the lamp. |
| Step 2 Use a Torx 20 screwdriver to remove the cover. |
| Step 3 Remove and clean the metal frame and the seal. |
| Step 4 Replace the lamp with a suitable 300 °C heat-resistant lamp. |
| Step 5 Install the metal frame and the seal. Tighten the screws. |
| Step 6 Install the left shelf support. |
12. TROUBLESHOOTING

WARNING!
Refer to Safety chapters.
12.1 What to do if...
| The oven does not turn on or does not heat up | |
| Possible cause | Remedy |
| The oven is not connected to an electrical supply or it is connected incorrectly. | Check if the oven is correctly connected to the electrical supply. |
| The oven does not turn on or does not heat up | ||
| Possible cause | Remedy | |
| The clock is not set. Set the clock, for details refer to "Clock Functions" chapter, How to set: Clock functions. | ||
| The door is not closed correctly. Fully close the door. | ||
| The fuse is blown. Make sure the fuse is the cause of the problem. If the problem recurs, contact a qualified electrician. | ||
| The oven Child Lock is on. Refer to "Menu" chapter, Submenu for: Options. | ||
| Components | ||
| Description Remedy | √ | |
| The lamp is burnt out. Replace the lamp, for details refer to "Care and Cleaning" chapter, How to replace: Lamp. | ||
| Water drawer does not work properly | ||
| Description | ? Possible cause | ? Remedy |
| The oven does not retain the water drawer after you insert it. | You did not fully press the water drawer body. | Fully insert the water drawer into the oven. |
| Water comes out of the water drawer. | You did not assemble the lid of the water drawer or wave breaker correctly. | Reassemble the lid of the water drawer and wave breaker. |
| Problems with cleaning procedure | ||
| Description | Possible cause | Remedy |
| The water drawer is difficult to clean. | The lid and the wave breaker were not removed. | Remove the lid and the wave breaker. |
| There is no water inside the grill -/ roasting pan after descaling. | The water drawer was not filled in to the maximum level. | Check if a descaling agent / water is present in the water drawer body. |
| There is dirty water on the bottom of the cavity after descaling. | The grill -/ roasting pan is on a wrong shelf position. | Remove the remaining water and the descaling agent from the bottom of the oven. Next time put the grill -/ roasting pan on the first shelf position. |
| There is too much water on the bottom of the cavity after cleaning. | You put too much detergent in the oven before you started cleaning. | Next time evenly spread the thin layer of a detergent on the cavity walls. |
| Cleaning performance is not satisfactory. | You started cleaning when the oven was too hot. | Wait until the oven is cold. Repeat cleaning. |
| You did not remove all the accessories from the oven before cleaning. | Remove all the accessories from the oven. Repeat cleaning. | |
Power cut always stops cleaning. Repeat cleaning if it's interrupted by power failure.
12.2 How to manage: Error codes
When the software error occurs, the display shows error message. In this section, you will find the list of the problems that you can handle on your own.
| Code and description Remedy | |
| F111 - Food sensor is not correctly inserted in- to the socket. | Fully plug Food sensor into the socket. |
| F240, F439 - the touch fields on the display do not work properly. | Clean the surface of the display. Make sure there is no dirt on the touch fields. |
| F908 - the oven system cannot connect with the control panel. | Turn the oven off and on. |
When one of these error messages continues to appear on the display, it means a faulty subsystem may have been disabled. In such a case contact your dealer or an Authorized Service Centre. If one of these errors occurs, the rest of the oven functions will continue to work as usually.
| Code and description Remedy | |
| F131 - the temperature of the steamer sensor is too high. | Turn the oven off and wait until it cools down. Turn the oven on again. |
| F144 - the sensor in the Water drawer cannot measure the water level. | Empty the Water drawer and refill it. |
| F508 - the Water drawer does not work properly. | Turn the oven off and on. |
12.3 Service data
If you cannot find a solution to the problem yourself, contact your dealer or an Authorised Service Centre.
The necessary data for the service centre is on the rating plate. The rating plate is on the front frame of the oven cavity. Do not remove the rating plate from the oven cavity.
| We recommend that you write the data here: | |
| Model (MOD.) | |
| Product number (PNC) | |
| Serial number (S.N.) | |
13. ENERGY EFFICIENCY
13.1 Product Information and Product Information Sheet*
| Supplier's name AEG | ||
| Model identification | BSE792280M 944188670BSE79228BM 944188654BSK792280B 944188641BSK792280M 944188639BSK792280T 944188653 | |
| Energy Efficiency Index 61.9 | ||
| Energy efficiency class A++ | ||
| Energy consumption with a standard load, conventional mode | 0.99 kWh/cycle | |
| Energy consumption with a standard load, fan-forced mode | 0.52 kWh/cycle | |
| Number of cavities 1 | ||
| Heat source Electricity | ||
| Volume 70 l | ||
| Type of oven Built-In Oven | ||
| Mass | BSE792280M 38.5kg | |
| BSE79228BM 38.5kg | ||
| BSK792280B 38.5kg | ||
| BSK792280M 38.5kg | ||
| BSK792280T 38.5kg | ||
| * For European Union according to EU Regulations 65/2014 and 66/2014. For Republic of Belarus according to STB 2478-2017, Appendix G; STB 2477-2017, Annexes A and B. For Ukraine according to 568/32020. |
| Energy efficiency class is not applicable for Russia. |
| EN 60350-1 - Household electric cooking appliances - Part 1: Ranges, ovens, steam ovens and grills - Methods for measuring performance. |
13.2 Energy saving

The oven has features which help you save energy during everyday cooking.
Make sure that the oven door is closed when the oven operates. Do not open the oven door too often during cooking. Keep the door gasket clean and make sure it is well fixed in its position. Use metal cookware to improve energy saving.
When possible, do not preheat the oven before cooking.
Keep breaks between baking as short as possible when you prepare a few dishes at one time.
Cooking with fan
When possible, use the cooking functions with fan to save energy.
Residual heat
If a programme with the Duration or End Time selection is activated and the cooking time is longer than 30min , the heating elements automatically turn off earlier in some oven functions. The fan and lamp continue to operate. When you turn off the oven, the display shows the residual heat. You can use that heat to keep the food warm.
When the cooking duration is longer than 30min , reduce the oven temperature to minimum 3 - 10 min before the end of cooking. The residual heat inside the oven will continue to cook.
Use the residual heat to warm up other dishes.
Keep food warm
Choose the lowest possible temperature setting to use residual heat and keep a meal warm.
The residual heat indicator or temperature appears on the display.
Cooking with the lamp off
Turn off the lamp during cooking. Turn it on only when you need it.
Moist Fan Baking
Function designed to save energy during cooking.
When you use this function the lamp automatically turns off after 30 sec. You may turn on the lamp again but this action will reduce the expected energy savings.
14. MENU STRUCTURE
14.1 Menu
Press to open Menu.
| Menu item Application | ||
| Assisted Cooking Lists automatic programmes. | ||
| Cleaning Lists cleaning programmes. | ||
| Favourites Lists the favourite settings. | ||
| Options To set the oven configuration. | ||
| Settings Setup To set the oven configuration. | ||
| Service Shows the software version and configuration. | ||
14.2 Submenu for: Cleaning
| Submenu Application | |
| Drying Procedure for drying the cavity | from the condensation re- maining after a use of the steam functions. |
| Steam Cleaning Light cleaning. | |
| Steam Cleaning Plus Thorough cleaning. | |
| Descaling Cleaning of the steam gen | eration circuit from residual lime- stone. |
| Rinsing Cleaning of the steam gener | ation circuit. Use rinsing after frequent steam cooking. |
14.3 Submenu for: Options
| Submenu Application | |
| Light Turns the lamp on and off. | |
| Child Lock Prevents accidental activation of the oven. When the option is on, the text "Child Lock" appears on the display when you turn on the oven. To enable the oven use, choose the code letters in the alphabetical order. Access to the timer, the remote operation and the lamp is available with the Child Lock on. | |
| Fast Heat Up Shortens heat up time. | It is available only for some of the oven functions. |
| Cleaning Reminder Turns the reminder on and off. | |
| Time indication Turns the clock on and off. | |
| Digital clock style Changes the format of the displayed time indication. | |
14.4 Submenu for: Setup
| Submenu Description | |
| Language Sets the oven language. | |
| Display brightness Sets the display brightness. | |
| Key tones Turns the tone of the touch fields on and off. It is not possi- ble to mute the tone for: ① | |
| Buzzer volume Sets the volume of key tones and signals. | |
| Water hardness Sets the water hardness. | |
| Time of day Sets the current time and date. |
14.5 Submenu for: Service
| Submenu Description | |
| Demo mode Activation / deactivation | code: 2468 |
| Software version Information about software version. | |
| Reset all settings Restores factory settings. |
15. IT'S EASY!
| Before the first use you have to set: | |||||
| Language | Display brightness | Key tones | Buzzer volume | Water hardness | Time of day |
| Familiarize yourself with the basic icons on the control panel and the display: | |||||
| ① ON / OFF Men | ≡ nu Favourites | ☆ | ○ Timer | Food sensor | START / STOP |
| Start using the oven | ||||
| Quick start Turn on the oven and start cooking with the default temperature and time of the function. | Step 1 Step 2 Step 3 | |||
| Press and hold: □... - select the preferred function. | Press: START | |||
| Quick Off Turn off the oven, any screen or message at any time. | □- press and hold until the oven turns off. | |||
| Start cooking | ||||
| Step 1 Step 2 | Step 3 Step 4 Step 5 | |||
| ① - press to turn on the oven. | □… - select the heating function. | °C - set the temperature. | OK - press to confirm. | START - press to start cooking. |
| Steam cooking - Steamify | |||
| Set the temperature. Type of the steam heating function depends on the set temperature. | |||
| Steam for Steaming | steam for Stewing | Steam for Gentle Crisping | Steam for Baking and Roasting |
| 50 - 100 °C 105 - | 30 °C 135 - 150 °C 155 - | 230 °C | |
| Get to know how to cook quickly | ||||
| Use the automatic programmes to prepare a dish quickly with the default settings: | ||||
| Assisted Cooking | Step 1 Step 2 Step | 3 Step 4 | ||
| Press: Press: . Press: Assist | Ted Cooking. | Choose the dish. | ||
| Use quick functions to set the cooking time | |
| 10% Finish assist Use 10% Finish assist to add extra time when 10% of the cooking time is left. | To extend the cooking time press +1min. |
| Clean the oven with Steam cleaning | ||
| Step 1 Press: | Step 2 Press: | Step 3 Choose the mode: |
| Steam Cleaning For light cleaning. | ||
| Steam Cleaning Plus For thorough cleaning. | ||
| Descaling For cleaning the steam | generation circuit from residual lime-stone. | |
| Rinsing For rinsing and cleaning | the steam generation circuit after frequent use of the steam functions. | |
16. TAKE A SHORTCUT!
Here you can see all the useful shortcuts. You can also find them in the dedicated chapters in the user manual.
How to set: Heating functions

How to set: Steamify - Cooking with a steam heating function

How to set: SousVide Cooking

How to set: Assisted cooking

How to set: Cooking time

How to delay: Start and end of cooking
How to cancel: Set Timer

How to use: Food Sensor

17. ENVIRONMENTAL CONCERNS
Recycle materials with the symbol. Put the packaging in relevant containers to recycle it. Help protect the environment and human health by recycling waste of electrical and electronic appliances. Do not dispose of appliances marked with the symbol with the household waste. Return the product to your local recycling facility or contact your municipal office.
POUR DES RÉSULTATS PARFAITS
I npriroTOBJIeHIO 341
10.2 BnaXnKa KOHBeKun341
10.3 Bnaxnna KOHBeKunra pekomehnyemblie akceccyapbl 342
14.3 POnMeHNO JIa: Onu.. 360
14.4 POnMeHIO nIa: HAcTpoNka... 361
14.5 POnMeHIO nIa: CepBnC. 362
1. CBEDEHNO TEXHnke B3ONACHOCTN
Ipeed yctaHOBkoN n 3KcPlyataunei np6opab HnMaTeJbHo O3HaKOMbTecb C hactoJeHnCTpyKznei no 3KcPlyatau. N3rOToBnteJIb He HeCET OTBeTCTBHeHocTb 3a KaKne-Jn60 TpaBMbl IIN yUep6, BO3HNKwne BCJeDCTBnE HenpaBnIbHOy YCTaHOBKn IIN 3KcPlyatau. Bcerda xpaHnte 3Tu IHCTpyKzIO IOd pyKO B HaJeXHom MeCTe dJa PocJeDuOSeRo NcNoJb3OBaHna.
1.1 Be3oNaChOcTb DeTei N JnC C OrpaHnueHHbIMN BO3MOxHOCTaMn
-
ΘTOTПрибор может Исплььотьсддтьмнстарш ВOCьМЛETИЛЦAMN C ORpaHnueHHbIMN ФиЗнчeCKIMN, CEHCOPHBIMN IПИ YMCTBHeHHbIMN CnOcO6HocTЯМN IN C HeIOCTaTOUHbIM ONbITOM IПИ 3HaHnYAMN TOJIbKO ПИ UCIOBIM NAXOJdeHnRA NOД PrINCMOTPOM LIIa, OTBeuaIooero 3a INX 6e3ОпаСнOCTь, IПИ NOСЛЕ ПОЛУЧЕHnA COOTBETCTByIOuzNX INHCTpyKzni, NO3BOJIAOuzNX IM 6e3ОпаСнO 3KcПлуаТИрOBaTB n3dEJIne IN DAIOZux IM IpeIcTAbIeHne O6 OnaCNoCTn, CBЯЗHNOJ C erO 3KcПлуаТaциЕ. ДетяМ mlaDwe 8 Лет И Лцam CярК ВыРаЖeHHbIMN IN KOMПLEKCHbIMN HApUSeHnЯMn 3ДОРOBьЯ 3aPpeSаeTcR haxODNTbcR радOM C prINbOpom 6e3 ПОCTОАНHOprNCMOТра.
-Дети ДолжнынхODNTbCS NOД ппсмOTpOM ДЯ Недonyшениngс спбором.
XpaHnTe BCE ynaKOBOHyIe MaTePnAJIb I BHe DoCraEMOCTn DeTei n yTnIn3npyIte nx HndJeKaunm 6pa30M.
BHIMAHHE! Pn6op n ero OTkpblte 3JeMeHbI CNlbHO HarpeBaOTcB O BpemJ 3KcnpyatauH. He noDnyckaIte DeTei N DomaShHx XINBOTbIX K Pn60py BO BpemJ erO INCNoJIb3OBaHnA, a TaKKe KOrda Pn60p eSe He ycpeJ OCTbITb. -
Ecnn npnbop ochaueh yctpoiCTBOM 3aunTbI deTei, erocneDyET BKJIIOHTb.
OuNTka n DoCTyHoe NOIb3OBaTeJIIO TexHnueCKoe 6cnyKbAHne np6opa He doJXhbl BbINOJIHrTbcr DeTbMn 6e3 npncmOTpa.
BbIXoTpy6KnDn ydaeneHnaKnn

CbeMa onopa npOTNBH

IoiKeHH npOTnBn
3.2 Akceccyapbl
PeWEtKa
ДяИСПОЛБОВАнЯ C NOCYDo,ФормамДЯ BBIneUKN,a TAKKe npn npnIroTOBJIeHnJXapKOrO.
3MaIInpoBaHHbI nPoTnBeHb
ДлгпрuroToBHeHЯ KOнДиТeрСКИХ n3deJIи n neueHb.
Tny6okn 3MaHnpOBaHHbI npOTNBHeB dna rpnna
4. BKJIIOUeyHnE N BbIKJIIOUeyHne.
4.1 Панель упавлия
IcnoJIb3yIte HnDnKaTOpHyo nOlocky n3 Ha6opa npOTnBHei dIpy npiroTOBneHna napy.
PnHrTOBJIeHHe HeKHO n COuHOrO kApKOrO.
Hn3KoTeMnpaTypHoe npuroTOBneHne
CoxpaHeHHe IIINB TeIIOM COCTOHHN.
IopdepxkaHne Tena
BnaXnKa KOHBeK-
10.1 PeKoMeHdaaun no npnroToBJIeHHIO
①
PnBedeHHbIe B Ta6nucax 3NaueHnem TempeaTypb I BpeMeH npiroTOBneHnraBnIOCTc opHeHTnpoBOuHbIMn. OHn 3aBncrT OT peCenTa, a TAKKe OT KaueCTBa N KOJIuYeCTBa NCNoJIb3yEmbIX INHrpEIneHTOB.
Bau duxoboi ukaq mokeT OTnuaTbcra xapaKTePOM npiroTOBneHna BblneuN JkapkoTo OT npdeIduyueo. B pekomehdaunx Hnke npboDraTcpeKomeHdyembIe HaCTpoiKn TempeaTypbi, BpeMeH npiroTOBneHn I NOJKeHn I pOTNBHeI dIg ONpeJeHbIX BINOB IpOdyKTOB.
Ecnn HauTn ycTaHOBKn dIy KOHKpeTHoro peeNTa He ydaetc, nonuTe noxokn peeent.
Bone peKoMeHdaaNo npiroToBneHIO Bb HaidTe B TaBnuax npiroToBneHnna HnHa Hauem Be6caIte. Iy BbIbopa KnHrpeCenTob npOBepbTe KoD PNC Ha TabnueKe cTexHHueckmN daHHbIMn Ha nepeDHe pAMKe BHyTpEHNe KaMepbl DxyOBOrO uKaΦa.
10.2 BnaXnay KOHBeKzny
Дяdoctиженя ONTIMaJIbHbIXpe3yIbTaTOBBOcNoJIb3yIteCbpeKOMeHdaZnA MIn, npNBeDEHHbIMN B Ta6JInce HNXe.
I3BneKeTe Bce npHaJnEJKHOCTN.
Y6eHNTecb B TOM, YTO BblBnK-HoH pe3epByap dIy BObl NyCT.
PpOdoJxKTeIbHocTb nepBoro 3Tana -OKoNo 100 MmH
War 1 YcTaHOBnTe COTeHnK Ha nepBbI ypoBeHb.
War 2 Hane Te B BblBnKHO pe3epByap IJI BAoI 250 MJI cpeIcTBO IJI ydaJIeHnHaKnII.
YcTaHOBka OTCpOuKN HaaJaN OKOHuaHn npIroTOBJeHn
OTmeHa yCTaHOBneHHOro TaMepa

Приименени:Термоун

17. OXPAHA OKPYKAIOJIEN CPEIbI
MaTepeNaIbI C cIMBcONOM cneDyET cDaBaTb Ha nepepa6oKy. IonoJnte ynaKOBky B COOTBeTCTByUOuIe KOHTeHepbl dla c6bopa BTOpuHOrO cbipb. PpHmma yuaCTne B nepepa6oTke CTaPoro 3JIeKtpo6bITobOro o6OpUdoBaHnra, Bbl NOMoRaTe 3aunTtB OKpykaIOuYIO cpeDu n 3dOpOBbe yeNoBeka. He Bbl6paCbIBaIte BMeCTe C 6bITOBbIMN OTxOdaMn 6bITOByIO TexHnky, NOMeueHHyIO cIMBcONOM Pnp6op cNeDyET DOCTaBNTb B MeCTO pa3dJeNbHO rakoJIeHnRA n c6bopa OTxODOB NOTpe6JIeHnRA IIIN B pNYKT c6bopa INcnoJIb3OBAHHo8 6bITOB0I TEXnKn dJa IocNeDuOSeYTuINn3aUnn.
ДлЯВIDMIHHNXPE3yЛьТATIB
JaKyemo, 0o Bn6paHn uei Bnpi6 AEG. Mn CTbOpuH N Ioro dna 6e3doarHoo' pO6OTn npotraom 6araTbox pokib, 3a IHHOBauiHmN TexHOJoriam, kI DOnOMaRaIOB pO6HTN XHTTn npocTIuHm — Taki BnactnbOcTi MoKHa N He 3HaHTN y 3BuayauHnx npuaDax. PnpdiJIit bDekiNbKa XBUNH, 06bn npouHTaTN BiOMoCTi, kI DOnOMoKytB BnKOpNCTOByBaTu NOrO MaKcMaJIbHo epeKTNBHO. BiBidaTe Haaw Be6-caTt, 0o6:

Otpmata npa3 BnKopncTaHH, 6poUpyi, iHcTpykci 3 ycHeHH HecnpaBHOCTe, infopmaio odo cepbicy ta peMOHTy:
www.aeg.com/support

3apeectpybatn cbi npodykt dny kpaosoro ocbnyrobybaHHa:

www.registeraeg.com
Pnud6aTn akcecyapn, BntpaTHi MaTepiAIn N opriHaJIbHi 3anYactHn Dnra BaWoRo npnilady:
www.aeg.com/shop
ДОПOMORA КПЕHTAM TA OБСЛУГВАНHA
BnKOpncToByIte IInse opnirHbHi 3anachi qactHH.
3BepTaOuYncb Do HaIoro ABTopn3oBaHoro cepBicHoro ueHTpy, Heo6xIDHO MaTn TaKy
iHopMaIIO:MoJeNb,Homep Bnpo6y,cepHnHomep.
Ihopmaio MoXHa 3HaHTn Ha Ta6NHyCi 3TexHiHIMn DaHIMN.
- IHCTPYKl3 TEXHIK B3NEKN. 370
2.1 BcTaHOBHeHH 370
2.2ПiД'ЕнHaHHЯdo eJekTpOmepeksi..371
2.3 KopucTyBaHHra 371
2.4 Dorna i uuueHHra 372
2.5 PnroToyBaHHa napi..373
2.6BHyTpiwHnPiIDCBiTka... 373
2.7 Cepbic. 373
2.8 Ytuniana 373
- ONIC BUNPOB
3.1 3araIbHn orJ.. 374
3.2 Akcescyapu 374
- YBIMKHEHHA TA BUMKHEHHA DXYOBOI
山AΦN 375
4.1 PanaheIb kepyBaHHra 375
4.2 Ducnnei 376
- INPEENEPUNMBNKKOPNUCTAHNNM.377
5.1 PepBnHHe ouHJHHa 377
5.2 Pepwe niknoueHHra 377
5.3 PonepeHnE nporpiBaHHra 378
5.4 HanaTuBaHHa: XOpctKicTb BODn 378
- ΒΟΥΕΝΗΝΑ ΚΟΡΙΝΥΒΑΝΗΝΑ 379
6.1 HanaatyBaHHa: FynKciHarpiBy. 379
6.2ItoKdBovn.. 380
6.3 CnociB BnKOpncTaHHa: IToTOK dJa BOu.. 380
6.4 HanaTuBaHHa: Steamify -Функця
HarpiBaHHa napoi 381
6.5 HanaTuBaHHa: TOTyBaHHa SousVide 383
6.6 HanaTyuBaHHa: DOnomora npi roTyBaHHi 383
6.7ФункцшarpiBaHHa 384
6.8 PpIMitKn Do: BOnora KOHBeKzij..387
7.ФУнкцIΓОДИHHNKA 387
7.1 Onnc cyHKuii roDHHNka... 387
7.2 HanaTyuBaHHa:ФyHKciI roHnHnKa 388
8.CNOCIB BUKOPUCTAHHRAKCECYAPU 390
8.1 BcTaHOBJIeHHa akcecyapib... 390
8.2 Tepmou.. 391
IcHye pN3NK NOWKOJXeHHa npnAdy.
- 3ao6irTu nooKoJKeHHIO a6o 3He6apBJeHHIO emani, dOtpmUyTeCra TaKx peKOMeHdaui:
-He cTaBTe nocyD a6o iHwi npEiMetn 6e3nocepEhbo Ha dHO npuNaIy;
-He KnaIb aIOMHcBy fObnby 6e3nocepEnbO Ha dHo KaMepn npuJaY;
-He cTaBTe nocyd i3 BOdoHO 6e3nocepEHNbO B po3irpiTn npuna;
- He 3aJIHuaIe B npUlaDi CtpaBn i npOdyKTn 3 BNCOKM BMICTOM BOJOrn nicJra 3aBepWeHHn npNroTyBaHHn iXi;
-6yDbTe oBepexKHi, BnMaIOUH aO bCtAHOBJIIOUHn akcecyapn.
- 3He6apBneHnHa maji a6o HepXaBIOOcTani He BnNBAe Ha eΦeKTHBHCb po60tn npnaNy.
BukopncToByte rIbOke deKO dJa BnikaHn TopTIB i3 BeJIHKm BMicTom BOJOrn. Cik, 0u BnDInEeTbcra i3 pkyTIB, MoKe 3aIIuWATN CTiIKI PnAMn.
3abKn roTyTe i3 3aunHeHmN DBePraTAmn npnaNy. - RaKuo npuIauD po3miueHNO3aHy Me6JeBOI naHeJI (HaNPnKlaI, DBePcT), NepeKoHaNTEcA, 10 DaBepraTa BIDKpITo NiJ cac pOboTu npuIady. XAp i BOIora MoKyTB yTBOpUBaTncr No3aDu 3akpuToI Me6JeBOI naHeJI, CnpuHryuOn noJaIbWe NOsKOdKeHHn npuIady, KopnyCy a6o NiIpor. He 3akpuaTe Me6JeBy naHeJI, DOKN npuIad nobHicTIO He OxoloHe nCnRA BnKOpNCtAHH.
2.4 Dorigla i uuueHHa

NONEPEDXHEHHI
IChy p3nK OTpMaHnTpaBm, noXeKi a6o noXkoJKeHH npuNaNy.
- Ipeed noaKom pemonty npnaT Tpe6a BiD'cHaTN BiE eNEKtpomepexi, 3HABuN 3ano6xHKnA6O BnTgHyBUn UHyp KINBJeHHr 3 po3eTKn.
-Даитприладу oxonoHyTN. Ichye ринк toro, со ckяни naHeJI можуТь TrichyTN. - Y pa3i noUKoJKeHHaCKnHnx naHeNei DBepT cIid oDpa3y 3amHHTn naHeJI. 3BepHiTbcAdo ABTopu3ObaHOrO cepBichoro ueHtpy.
- Bynde o6epeXhi, 3Himaouy DBepuTa 3 npuNaIy. DBepuTa BaxKi!
- Perynapno ouuptyte npnla, 06 3ao6irtn nookdojehmoatepiay nobepxhi.
- PpOtpiB npnad BONoro M'kaKO rAnHipKOIO. 3actocobyte IINe HeNtpaIbHI MNUOi 3ac06n. He BnKOpncTOByte a6pa3nBHi 3aco6n, xOpCTKI cepBeTkn dIra OUnuEHHRA, po3unHHNK a6o MeTaneBi npedMeTI.
-ЯкsoВиКориCTу经Tecаepo30JMyДгУИSeHЯДуXOBxIaФ,обOB'3KOBOdoTPmYnteciInCTpyKcii i3 6e3neKn, HabedeHnxHa ynaKobci.
2.5 Ппuroтуваши на napi

NONEPEDKEEHNA
€ pnsK oTpMaHH onikib a6o noWkoJxHn npuJa.
-
Napa Moje cnpuHHnOniKi:
-
BydTe oBepeKHi, BiDUnHraOuN DBePcTa npnlaNy, KOJI nAKTINBOBaHa cI yHKci. MoKJnBn Buxi napn.
- BiDkprBaIte DBepeTAt npuJaTy oBepeKHo nicra roTyBaHnHa napi.
2.6 BnTypiHnPiicBitKa

NONEPEKHEHHA!
He6e3neKa BpaXeHHr EneKtpnHm CtpymOM.
- CTOCOBH Noamn BCEpeDHHI cboRBOBPO6y Ta 3anaChnx lamn, 1o npOaIObCg OkpEmo: Li amnn npu3HaueHi dIy BnKOpNCtAHN y NObyTOBx npuJaax 3 ekCTpeMaJIbHMn fi3uHmYMOBaMn, TAKIMn k TempepaTypa, Bi6paiz, BOJorictb, a6o npu3HaueHi dIra HadaHn iHΦopMaui II npO CTan pO6OTn npUaHy. BOHn He npu3HaueHi dIra BnKOpNCtAHN 3 IHWO MeTOO Ta He npuaTHI dIra OCBITLeHHr NObyTOBx npMIiueHb.
- Y zubomy Bnpo6i e dzepeno cblta knacy eheproeefektubhocti G.
BnKOpncToByTe JInIe NaMNoUKN 3 TaKIMN X TeXHiUHmN XapaKTepNCtIKaMNI.
2.7 CepBic
-Дя ремонту пида узеварсяdo abtopиobahoro cepbichoro ceHTpy.
BukopncToByTe JnIe opnIHbHi 3anachi qactuHn.
2.8 YtNiI3aCi

NONEPEDEXKENHRA!
IcHyE He6e3neKa 3aDyWeHHra.
- Ito iHopmaio 3 HaneXhoi yTnI3aui npnaIy 3BepHiTbcra do opraHb MyHicnnaIbHOI BnaI.
- BiD'edHaTe npuJaB iD eJekTpomepeKi.
BipixTe ka6eJIb eNeKtpuHoro KINBHeHHa 6JIn3bKO do npnAdy ta yTunl3yIte noro. - Pπbεριβ φικcaTOp DBερταT, οοδ yHemoxJnBntuix 3aunHeHHa, kμo diTu, afo domauni TBapuHn ONHЯTbC BcepEduhi npuaNy.
Lcien npodukT no BMicty He6e3neuHx peoBn H BiINOBiAc BmOram TexhiHoro perIaMeHTy 6bmeKHeHHa BnKOpCTaHHa DeAKNX He6e3neuHx peoBn B eJIeKtpuHOMy Ta eJIeKToHOMy 6bnaHaHHi (noCTaHOBa Ka6iHeTa MInicTpiv YkpaIHn N#139 BiD 10 6pe3Hra 2017p.)
3. ONIC BNP0EY
3.1 3araJIbHnOrJaD
5
4
3
2
1
IIaHeJIb KepyBaHHa
Jinie
JIOTOKJIABODH
THi3oTePmoUyna
HarpiBaIbHn eIeMeHT
J lamna
BeHTHJITOP
OTBipДЯВиДаJIeHЯнИу
OnopHa peIka, 3HIMHa
PIBHIIIOJIuIb
3.2 Akcecyapn
KOM6iHOBaHa pewiTka
IyIOcydy,OpM IyBnIyKN,CMaKeHH.
DekoJnBniiKn
Deko dny rpnj/cMaXKeHHa
IIIA BnIiKaHH Ta CmaKeHHa6o Jk DeKO IIIA 3bnpaHHKnpy.
Tepmouzyn
IhrpeiHnIOBHHi MaTNI KIMHaTHy TEMepaTpy.
He BnKOpncTOBnyTe IJIa piDKnx CTpaB.
Пд уac npnroTyBaHHЯ BiH NOBIneH 3aIIuWATncr BcepeDnHi CtpaBn.
DyxoBa 7a0pa po3paxOBye np6n3Hn yac 3akInueHH naoccy roTyBaHH. Bih 3anExntb BiKilbKOCTI npOdyKTIB, Bn6paHOi ynKciDyxoBoi waT Ta Tempepatyn.
Cnoci6 BnKOpncTaHn: TepMoUp
Kpok 1 YbIMKhHItb DyXOBy wafty.
Kpok 2 YcTaHOBiTb yHKciio HarpIy Ta, kkuo notpi6Ho, TemnepaTypy dYXOBoi wa.
Kpok 3 YcTaBTe: TepMoUyn.
10.4 Ta6nzi npirotoybaHna iXi dny doCniDnucbKnx yCTaHOB InopmaizdnydoCniDnucbKnx yCTaHOB
Tectn 3riDno 3: EN 60350, IEC 60350.
11.7 HaraCyBaHHnI npo BnJaJIeHHnHaKIny
Ipepe6aueHo Dba HaraDyBaHHra, kio NobiOomnIOTb npo Heo6xHicTb BuaJIeHHra HaKny 3 dYxOBoI Wapn. HaraDyBaHHra npo BuaJaleHHra HaKny HEmoxJINBO BmMKHyTN.
| Тип Onис | |
| М'яке наразуваим Реком endуе вдалити наkin 3 духoboiшафи. | |
| Жорстke наразуваим Ня | Зобов'яз ue вдалити наkin 3 духoboiшафи. У вдалку недій сенни Вдалегни накиу, коли akтувовано жорстke наразуваим, Функци 3 ВИКОРИСТАHHЯМ пapi ВДКПЮЧАЮТьСя. |
11.8 Cnoci6 BnKOpncTaHn: POnockaHHa
BnKOpncToBynte 3aHsKObTe TnNo IJy po3irpiBaHHI Hx CTpaB.
IiTpmyBaHHa TpaBn TeNIO
Bn6epitb HauHnXy TemnepaTy 3 MoXnBux, 0o6 BnKOpNCTaTn 3aIuKOBe TenNo dna 36epexehn Ixi TeNIO. Ha DnCnnei 3'YBnEcbc iHdNKaTOp 3aIuKOBoro Tenn a6o TemnepaTypn.
ToTyBaHHa 3 BmKHeHOIO NaMNOIO
BmKHiB lamny niD yac roTyBaHH. BmKaIte II Inue 3a notpe6n.
Bonora KOHBekci
Функця, npn3naueHa nla 36epekeHH eHeprii niJ yac roTybaHH.
При ВИКОРИСТАНHI UIeI Функii lamna BIMnkaCTbCЯ ABTomatNHy Ope3 30 cekyHД.Ви можete BBIMKHyTn lamny 3HOBy, ane UIя пиЗБeDE Do 3HnxKeHHaOikyBaHOi efeKTINBHOCTI 3бepexeHHaEheprii.
14. CTPYKTPA MEHIO
14.1 MeHIO
HaTnchItb 106 BiDkPntn MeHIO.
14.4ПiДмeHIOДЯ:YcTaHOBKa
HanaHTyBaHHa: TpNBaIicTb npnroTyBaHHa

K BiDknactn: Noyatok Ta 3aBepweHn roTyBaHH
KcacyBaTN:BcTaHOBJeHn TaMep
Cnoci6 BnKOpncTaHHa: TepMoUy

17. OXOPOHA IOBkIJIЯ
3dabaiTe Ha nobToPhy nepep6ky MaTeiAn, no3HaueHi BiNobiDnHm CnMBONOM BnndaIte ynaKOBky y BiNobiDiH KoTHeHepn IJra BTOPHHO CnpOBHN. DOnOMoKITb 3axnCTNTn HABKOIIuHc cepeOBNue Ta 3doPob'ay INx JIOJe i 3a6e3neHTn BTOHHy nepep6ky eNeKTPuHnx i eNeKTPoHHnx npuaID. He BnndaTe npuaID, no3HaueHi BiNDnHM CnMBONOM pa3om 3 IHsIM DomaunHim CMITTAM. NobepHtB npOdyKT Do 3aBOdy i3 BTOPHHO nepep6kny BaSiIM MicceBOcTi a60 3BepHITbcr do MicceBx MyHicnPbHx oprahIB Bnadi.


C E