Marathon HR6835 - Vacuum Cleaner PHILIPS - Free user manual and instructions
Find the device manual for free Marathon HR6835 PHILIPS in PDF.
Download the instructions for your Vacuum Cleaner in PDF format for free! Find your manual Marathon HR6835 - PHILIPS and take your electronic device back in hand. On this page are published all the documents necessary for the use of your device. Marathon HR6835 by PHILIPS.
USER MANUAL Marathon HR6835 PHILIPS
- Read these instructions in conjunction with the illustrations before using the appliance.
- Before wet use (i.e. vacuuming liquid and shampooing), never forget to - remove the Micro-filter and the paper dustbag; - place red diffusor and the float unit.
- Before plugging in for the first time, check that the mains voltage indicated on the rating plate corresponds with the mains voltage in your home. You will find the rating plate in the container, at the underside of the motor part.
- Do not insert the mains plug into the wall socket until the appliance is completely ready for use. Ensure that your hand and the mains plug are dry when (dis)connecting the appliance.
- Always remove the mains plug from the wall socket: - if the appliance does not function properly; - before cleaning the appliance; - before opening the container.
- Only vacuum dry material and dust if the paper dustbag (type "Athena" HR 6947, service nr. 4822 015 70058, for normal dust) or the fabric filter (type HR 6944, service nr. 4822 466 93298, for coarser material) has been fitted.
- Never vacuum ashes (from ash-trays and fireplaces) until they are completely cold.
- Never vacuum petrol, white spirit, gas-oil, paraffin-oil or other inflammable or explosive liquids. Do not use the appliance in rooms with explosive vapours (petrol, thinners, solvents).
- When vacuuming ashes, fine sand, lime, cement dust and similar substances, the pores of the paper dustbag may become clogged. In that case, the paper dustbag must be replaced, although perhaps far from being full.
- For replacement, use only the special paper dustbags (type "Athena") which are obtainable from your dealer.
- Do not use the vacuum cleaner without the motor protection filter.
- Never immerse the motor unit in water.
- The container can be cleaned with a damp cloth.
- Never point the jet of shampoo to plugs, sockets or electrical appliances.
- Only switch the pump on if the shampoo reservoir has been filled, placed and connected by means of the two shampoo tubes. Switch the pump off as soon as the reservoir is empty. The pump may be damaged when running dry!
- Keep the appliance and the cleaning liquid away from children.
- After use always switch off and remove the mains plug from the wall socket.
- Always empty, clean and dry the container after wet use. Let the appliance operate with dry clean air for a couple of minutes to dry the inside of the tubes and hose. (By doing so, you prevent an unpleasant smell to occur the next time you use the vacuum cleaner. It also prevents your paper dustbag from becoming wet.)
- Do not store at temperatures below 0 °C to prevent freezing.
- To enable recycling the plastics of the product have been coded.
- The cardboard packaging has been made of recycled material and is entirely suitable for recycling.
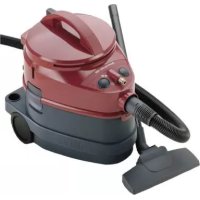
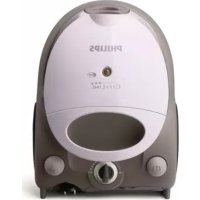
Small nozzle with two (red) fluff collectors (fig. 3). Especially suitable for furniture, curtains, tapestry. For dry use only Crevice nozzle (fig. 4) for narrow spaces. For dry as well as wet use. Convertible carpet & hard floors nozzle (for dry use only) (fig. 2) Brush out: for hard floors (wood, ceramic, stone, synthetic). Brush in: for soft floors (carpets, rugs). Container Contents: max. 17 litre/ 3.75 gallon dry; 10 litre/2.2 gallon dry (with dustbag "Athena"); 9 litre/2 gallon wet (with float unit). Motor unit Dustbag (paper, type "Athena" HR 6947). Must be placed for dry use and removed for wet use) Hose connector Handle Cord winder button (press) "Micro" filter (electrostatic filter which removes small particles from the outlet air; this filter may be placed for dry use and must be removed for wet use) Suction tubes (stainless steel, suitable for dry as well as wet use) Mechanical suction power control (rotate) 1 = maximum O= minimum Tube holder (for tube storage after the job) Clamps (to fix / unfix the motor unit) Storage facility for small nozzle and crevice nozzle Mains cord (pull out) Tube hook Motor on/off button (press) Suction hose (flexible) Dry use5
Double Injection shampoo nozzle with click-on "3-Actions" hard floors adaptor (brush, sponge and squeegee) (fig. 6). Suitable for wet use: vacuuming liquid as well as shampooing. Clips to fix the shampoo tube to the hose and tubes Philips cleaning liquid HR 6965 Motor protection filter Float unit with foam filter (Must be placed for wet use: protects the motor against water.) Shampoo trigger (click-on; press to apply shampoo) Shampoo tube connectors Shampoo tubes Shampoo reservoir (3 litre/5.3 pint) Shampoo pump on/off button (press) with pilot light wet & shampoo use Upholstery nozzle Suitable for wet use: vacuuming liquid as well as shampooing
Diffusor Place before wet use: vacuuming liquid as well as shampooing. Remove before dry use.Dry vacuuming cleaning
How to make your Triathlon ready for use General
- Connecting the hose: Slightly turning, insert the end of the hose into the hose connector (fig. 7). To disconnect: Slightly turning, pull the end of the hose out of the connector (fig. 8).
- Connecting the tubes and nozzles: Press the spring-back knob and insert the narrowed section into the wider section. The spring-back knob fits into the opening (fig. 9). To disconnect: press the spring-back knob and pull the sections away from each other.
- Make the vacuum cleaner ready for either dry vacuum cleaning, for vacuuming liquid or for shampooing. Before first use: open container and remove dust bag holder. (For dry use: fix and position dustbag.)
10To place a (new) dustbag: - Press and hold the red lever when placing the cardboard front plate into the holder (fig. 15). - First position the bottom ridge (1). Then press the top ridge into position (2) (fig. 16). Ensure that the two notches on the front plate point downwards and that the front plate rests on the ridge of the holder. - Slide the holder with dustbag into position so that the holder is supported by the two ridges in the container (fig. 17). To remove a (full) dustbag: - Lift the holder with the dustbag from the container, holding the dustbag and the holder by their handles (fig. 18). - Press and hold the red lever to release the front plate (fig. 19). Discard the old dustbag (fig. 20) and place a new one.
- Put the motor unit back on its place and press the clamps to fix ("Click!") (fig. 21). - Put the Micro-filter back on its place (fig. 22). - Pull the mains plug out of the appliance and insert it into a wall socket (fig. 23). - Switch the motor on (fig. 24). Tips for dry vacuum cleaning
- The convertible nozzle is active over its full width and even vacuums from its sides: so it's very suitable to use alongside plinths, furniture and thresholds.
- Use the crevice nozzle for narrow openings and hard-to-reach places.
- The small nozzle is especially suitable for stairs, upholstery, curtains, etc. The two fluff collectors help you to pick up even sticking fluff and (animal) hairs. Just move the nozzle forward and backward. If necessary, remove the fluff from the nozzle with your hand and then vacuum it in.
- A Philips turbo brush nozzle (type HR 6974 or HR 6974D, service nr. 4822 479 50059) and a parquet brush nozzle (type HR 6943) are available from your dealer as extra accessories. The turbo brush nozzle is ideal for removing (animal) hairs and trodden-in dust and dirt. The parquet brush nozzle is especially suitable for hard floors (such as parquet, tiles, synthetic floors, cork).
24Vacuuming liquid (water)
- Using the handle lift the motor unit from the container (fig. 26). - Remove the paper dustbag (fig. 27). - Using the handle place the float unit (fig. 28). Note correct placement: due to its form the float unit will fit in only one position. - Place the diffusor (fig. 29, 30). (Please note: Do not forget to remove the diffusor before dry use.) - Replace the motor unit and secure with the clamps ("Click!") (fig. 31). - Remove the Micro Filter (fig. 32). Please note: the Micro Filter would loose its electrostatic function if exposed to excessive air humidity. - Pull the mains plug out of the vacuum cleaner and insert into the wall socket (fig. 33).
Remove: paper dustbag and Micro Filter. Place: float unit and diffusor. - Remove the mains plug from the wall socket. - Undo the clamps (fig. 25).
- To prevent overfilling and to protect the motor, the round- shaped float shuts off the air/water stream if the container is full (fig. 35). - If this happens, empty the container (fig. 36). Then you can continue.
- Caution: When vacuuming water from a basin which is higher than the appliance (e.g. roof-gutter, cistern) the system will inevitably function as a syphon. As a result, the container may become overfilled (fig. 37). For your personal safety, ensure never to exceed the maximum capacity of the container which is 9 litre / 2 gallon of water. At regular intervals, lift the nozzle out of the water, switch off, remove the mains plug from the wall socket and empty the container. Shampooing: floors After vacuuming liquid: - Switch off. Remove the mains plug from the wall socket. Empty, clean and dry the container. Let the appliance operate with dry clean air for a couple of minutes to dry the inside of the tubes and hose. Remove: paper dustbag and Micro Filter. Place: float unit, diffusor, (filled) shampoo reservoir, Double Injection nozzle and shampoo trigger. - Prepare the vacuum cleaner as indicated for "vacuuming liquids" (i.e. previous section). - Fill the shampoo reservoir with cold water (fig. 38).
MAX 9 Ltr.- Add one measuring cap of the cleaning liquid to the full reservoir (3 litre) (fig. 39). - Place the shampoo reservoir (fig. 40). - Attach the short shampoo tube to the connector on the vacuum cleaner. Insert (1) and rotate anti-clockwise (2) (fig. 41). - Fix the shampoo trigger to the handgrip of the hose (fig. 42, 43). - Firmly insert the end of the long shampoo tube into the connector on the vacuum cleaner ("Click!") (fig. 44). To release: push the ring towards the appliance (fig. 45). - Attach the long shampoo tube to the flexible suction hose and suction tubes using the clips (fig. 46). - Place the "Double Injection" nozzle (fig. 47). The appliance is now ready for soft floors (carpets, rugs). - If you wish your nozzle close to hand (e.g. for cleaning stairs, upholstery, tapestry) you can connect the nozzle directy to the hose. Fix the excess shampoo tube with a clip (fig. 48). - For hard floors (tiles, ceramic, stone, synthetic) attach the "3-Actions" mopper to the nozzle (fig. 49). Do not forget to secure the mopper with the clip. - Pull the mains plug out of the vacuum cleaner and insert into the wall socket (fig. 50). - First switch on the pump (fig. 51) and then the motor (fig. 52). - Shampoo is applied by squeezing the trigger at the tube handle (fig. 53). - Start shampooing as far away from the door as possible. From that point work your way towards the door. On completion of a lane, begin a new lane with a slight overlap. In this way, the entire area can be covered strip by strip.
53 54If there are still traces of liquid on the cleaned strip, these areas can be vacuumed over again, but make sure that the trigger control is released! - After shampooing, release the trigger and switch off the pump (fig. 54). Let the motor run on. Hold the nozzle high and let the appliance operate with air only for some time to dry the inside of suction hose and tubes (fig. 55). - Switch off the motor. Carpet Shampooing: Three Techniques Dependent upon the degree of contamination you may select (and combine!) the following three carpet shampooing techniques: "Freshening-up" If your carpet (or sections of it) merely requires some light freshening, you need not apply much shampoo. It will probably be sufficient if you only apply it only during the first stroke towards you. Then release the trigger and move the nozzle a couple of times over the treated area without applying shampoo. "Deep-cleaning" For better penetration on more contaminated carpet (or sections of it), move the nozzle a couple of times over the treated area whilst applying shampoo. "Extra thorough cleaning" For extra thorough cleaning (badly soiled areas, stubborn stains), switch off the motor (fig. 56) but let the pump run on. Use the trigger to apply the shampoo (fig. 57). Allow the shampoo to act on the section for some minutes. Take care not to spray too much shampoo as this may damage the carpet. Carpet Shampooing Tips
- Never shampoo floors which are non water- resistent. (When in doubt refer to the supplier of the floor.)
- Do not shampoo delicate fabrics and hand- woven or non-fast carpets.
- Test the colourfastness of your carpet by pouring a little cleaning solution onto a white cloth and rubbing this onto a normally hidden section of the carpet. If there are no traces of dye on the cloth, it can be assumed that the carpet is colourfast. However, if dye comes off onto the cloth, do not shampoo the carpet. If you are in doubt, contact a specialist dealer.
- Before shampooing your carpet, vacuum-clean the whole area thoroughIy.
- For better and quicker drying ensure that the room is well-aired during and after shampooing.
- Allow the carpet to dry well before walking on it again: "freshened-up" areas normally require half an hour to dry, whereas "deep-cleaned" sections require approx. 2 hours. (The drying times of course depend upon the amount of shampoo applied, temperature, air humidity and ventilation.)
- The transparent nozzles - i.e. the Double Injection nozzle and the upholstery nozzle - enable you to judge by the colour of the extracted solution if your carpet, cloth or hard floor has become clean.
- After emptying and cleaning the appliance you can dry the suction hose and tubes by vacuuming in air for a minute (fig. 55). Hard Floor Shampooing Technique The "3-Actions" click-on hard floors adaptor for
1your Double Injection nozzle employs three familiair cleaning tools: ➀ a brush (to release sticking dirt from the floor); ➁ a sponge (to spread out and rub in the shampoo); ➂ a squeegee (to collect the used shampoo from the floor so that it can be vacuumed).
- Do not make your strokes too long.
- For effective scrubbing just move the nozzle forward and backwards (fig. 58) as you would do with a vacuum cleaner. Normally, it is sufficient to apply shampoo only while moving the nozzle forwards.
- To dry the floor just move the nozzle backwards slowly. Make sure that now only the squeegee touches the floor and do not apply shampoo (fig. 59). The wet sponge will inevitably leave a little water where the floor is uneven. This will soon evaporate.
- For most effective shampoo removal we suggest you to follow the illustrated pattern (fig. 60). Please note the overlapping lanes and the cross-lane at the end. Shampooing: upholstery, tapestry - Attach the upholstery nozzle directly to the handgrip (fig. 61).
- This nozzle is very convenient for shampooing furniture, tapistry, curtains, etc. (fig. 62). Cleaning and maintenance - Switch off. Remove the mains plug from the wall socket. - All parts of the appliance, including the container, may be cleaned with a damp cloth and if required some detergent. However, ensure that no water enters the motor part! - Rinse the float unit with foam filter (fig. 63). To guarantee optimum life time of your foam filter, it is advisable to carefully remove it from the float unit (fig. 64) and handwash the filter
58separately (fig. 65). Please note: you can squeeze the foam filter, but do not wring! - The motor protection filter can also be removed (fig. 66) and rinsed (fig. 67) for cleaning. Do not forget to replace the motor protection filter! - Rinse the Double Injection shampoo nozzle (fig. 68). You can remove the hard floors attachment (fig. 69) and clean it separately. - Fill the water reservoir with lukewarm clean water. Pump the water out via the two shampoo tubes into a water outlet (sink, toilet). This will prevent shampoo remainders to cristallize and clog inside the tubes. Replacement dustbags Replacement paper dustbags (sets of 4 pcs., type "Athena") are available at your dealer. Please refer to type number HR 6947 or service nr. 4822 015
Please note: One new motor protection filter and one new Micro Filter are provided free with each set of original Philips paper dustbags. Replacement motor protection filter Replace the motor protection filter (fig. 70) when placing the first of a new set of dustbags. Never use the appliance without the motor protection filter. Replacement Micro Filter When dry vacuum cleaning, the electrostatic Micro Filter purifies the exhaust air by removing miniscule dust particles. In the course of time the efficiency of the filter will decrease. Normally, it suffices to replace the Micro Filter (fig. 71, 72) when placing the first of a new set of paper dustbags. The indicator in the Micro Filter holder remains white. If the filter has become noticeably grey (fig. 73) you may decide to advance filter replacement. Especially if pulmonary obstructive disease or allergy (pollen, dust, etc.) occurs, it may be advisable to replace the Micro Filter more frequently. To enable this, sets of Micro Filters are available from your dealer under type nr. HR 6932 or service nr. 4822 015 70056. Replacement Philips Cleaning liquid Replacement bottles of cleaning liquid type are available at your dealer. Please refer to type number HR 6965 or service nr. 4822 390 80176. Replacement foam filter Replace the foam filter if it is damaged or very dirty. A new foam filter is available from your dealer
73under service nr. 4822 480 40242. Replacing the mains cord If the mains cord of this appliance is damaged, it must only be replaced by Philips or their service representative, as special tools and/or parts are required. Storage - Switch off. - Remove the plug from the mains socket. - Press the cord winder button. The mains cable will be wound automatically inside the appliance (fig. 74). - The small nozzles can be stored as shown in fig. 75. - The tube can be slid into the holder (fig. 76). Please note: To avoid incidental damage to the appliance, the tube will be released from the holder or the holder will be released from the appliance when pulled or knocked fiercely. You can simply place the tube or the holder back. Optional extras: "Hobby" suction set (type nr. HR 6955) For more demanding applications (outdoors, workshed, hobby) a 54 mm (2.1") Ø suction set (hose, tubes, nozzles) is available as an optional extra. This enables you to vacuum leaves, wood chips, etc. Fabric filter (type nr. HR 6944) For vacuuming leaves, wood chips, shavings, etc. it is advisable to place this filter instead of the foam filter. You can simply slide it onto the float unit (fig. 77, 78). In this case, do not place a paper dustbag.
Accessory "Hobby" suction set Dust bags type "Athena" Fabric filter Micro filter Shampoo "Turbo" nozzle Parquet brush nozzle Foam filter "3-Actions" hard floors adaptor Upholstery nozzle Diffusor Application Outdoors use, workshed. Paper dustbags (2–layers) for normal domestic dust. (Dry use.) Place on float unit. (For vacuuming dry or moist esp. coarser material.) Filters the exhaust air. Add to water to clean carpets. Brushes up the carpet while vacuuming for extra thorough cleaning. (Dry use.) Brushes hard floors (parquet, synthetic, etc.) while vacuuming for extra thorough cleaning. (Dry use.) Place on float unit. (Wet use.) For cleaning hard floors. (Wet use.) For shampooing furniture, tapestry, etc. For wet use. (Shampooing, vacuuming liquid.) Description Set: 54 mm (2.1") Ø suction hose and tubes, plus special nozzles. Set: 4 dust bags+ 1 motor protection filter + 1 Micro filter. 2 filters (under type number), or 1 filter (under service number). Set: 3 pcs. 1 bottle. 1 nozzle. 1 nozzle. 1 filter. 1 adaptor 1 nozzle 1 diffusor Type number (service number) HR 6955 HR 6947 (4822 015 70058) HR 6944 (4822 466 93298) HR 6932 (4822 015 70056) HR 6965 (4822 390 80176) HR 6974 or HR 6974D, (4822 479 50059) HR 6943 (4822 480 40242) HR 6982 (4822 479 70069)
Type numbers and Service numbers (for ordering new and/or extra accessories)16 Français Important