
SHTB10 - Turntable TECHNICS - Free user manual and instructions
Find the device manual for free SHTB10 TECHNICS in PDF.
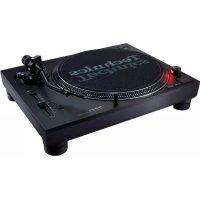
| Product Type | Tonearm Base for Turntable |
| Brand | Technics |
| Model | SHTB10 |
| Dimensions (W × H × D) | 133 × 25 × 171 mm |
| Weight (model SH-TB10-S) | 1360 g |
| Weight (other models) | Approximately 1130 to 1300 g depending on model |
| Material | Metal (unspecified, estimated) |
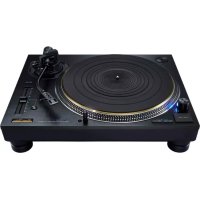
| Compatibility | Technics SL-1000R Turntable |
| Mounting | Securely attaches to the turntable to eliminate vibrations |
| Main Function | Allows mounting a second tonearm to achieve desired sound quality |
| Compatible Tonearms (examples) | SME M2-9R, M2-12R ; Technics EPA-100mk2 ; Ortofon AS-212S, RS-212D ; JELCO SA-250, SA-750L ; IKEDA IT-345 CR-1, IT-407 CR-1 |
| Included Accessories | Set of mounting screws (3 screws, 3 washers) and hex key |
| Safety | Keep small parts away from young children; require two people for installation |
| Maintenance | Work on a stable, level surface; follow the mounting instructions |
Frequently Asked Questions - SHTB10 TECHNICS
User questions about SHTB10 TECHNICS
0 question about this device. Answer the ones you know or ask your own.
Ask a new question about this device
Download the instructions for your Turntable in PDF format for free! Find your manual SHTB10 - TECHNICS and take your electronic device back in hand. On this page are published all the documents necessary for the use of your device. SHTB10 by TECHNICS.
USER MANUAL SHTB10 TECHNICS
Thank you for purchasing this product.
Please read these instructions carefully before using this product, and save this manual for future use.
For the U.S.A. and Canada
If you have any questions, visit:
U.S.A.: http://shop.panasonic.com/support
Canada: www.panasonic.ca/english/support
Register online at http://shop.panasonic.com/support (U.S. customers only)
For the United Kingdom and Ireland customers
Sales and Support Information
Customer Communications Centre
For customers within the UK: 0333 222 8777
For customers within Ireland: 014475229
Monday-Friday 9:00 am - 5:00 pm, (Excluding public holidays).
For further support on your product, please visit our website: www.technics.com/uk/
Features
This tonearm base is a product that allows you to mount a second tonearm to SL-1000R.
- Allows you to mount various types of tonearms in addition to the standard one so that you can achieve the desired sound quality.
- It is designed to fasten firmly and integrally to the turntable unit to eliminate unnecessary vibrations to the tonearm.
Table of contents
Accessories 02
Safety precautions 03
Mounting the tonearm base to the player 04
Tonearm models/specifications per manufacturer 08
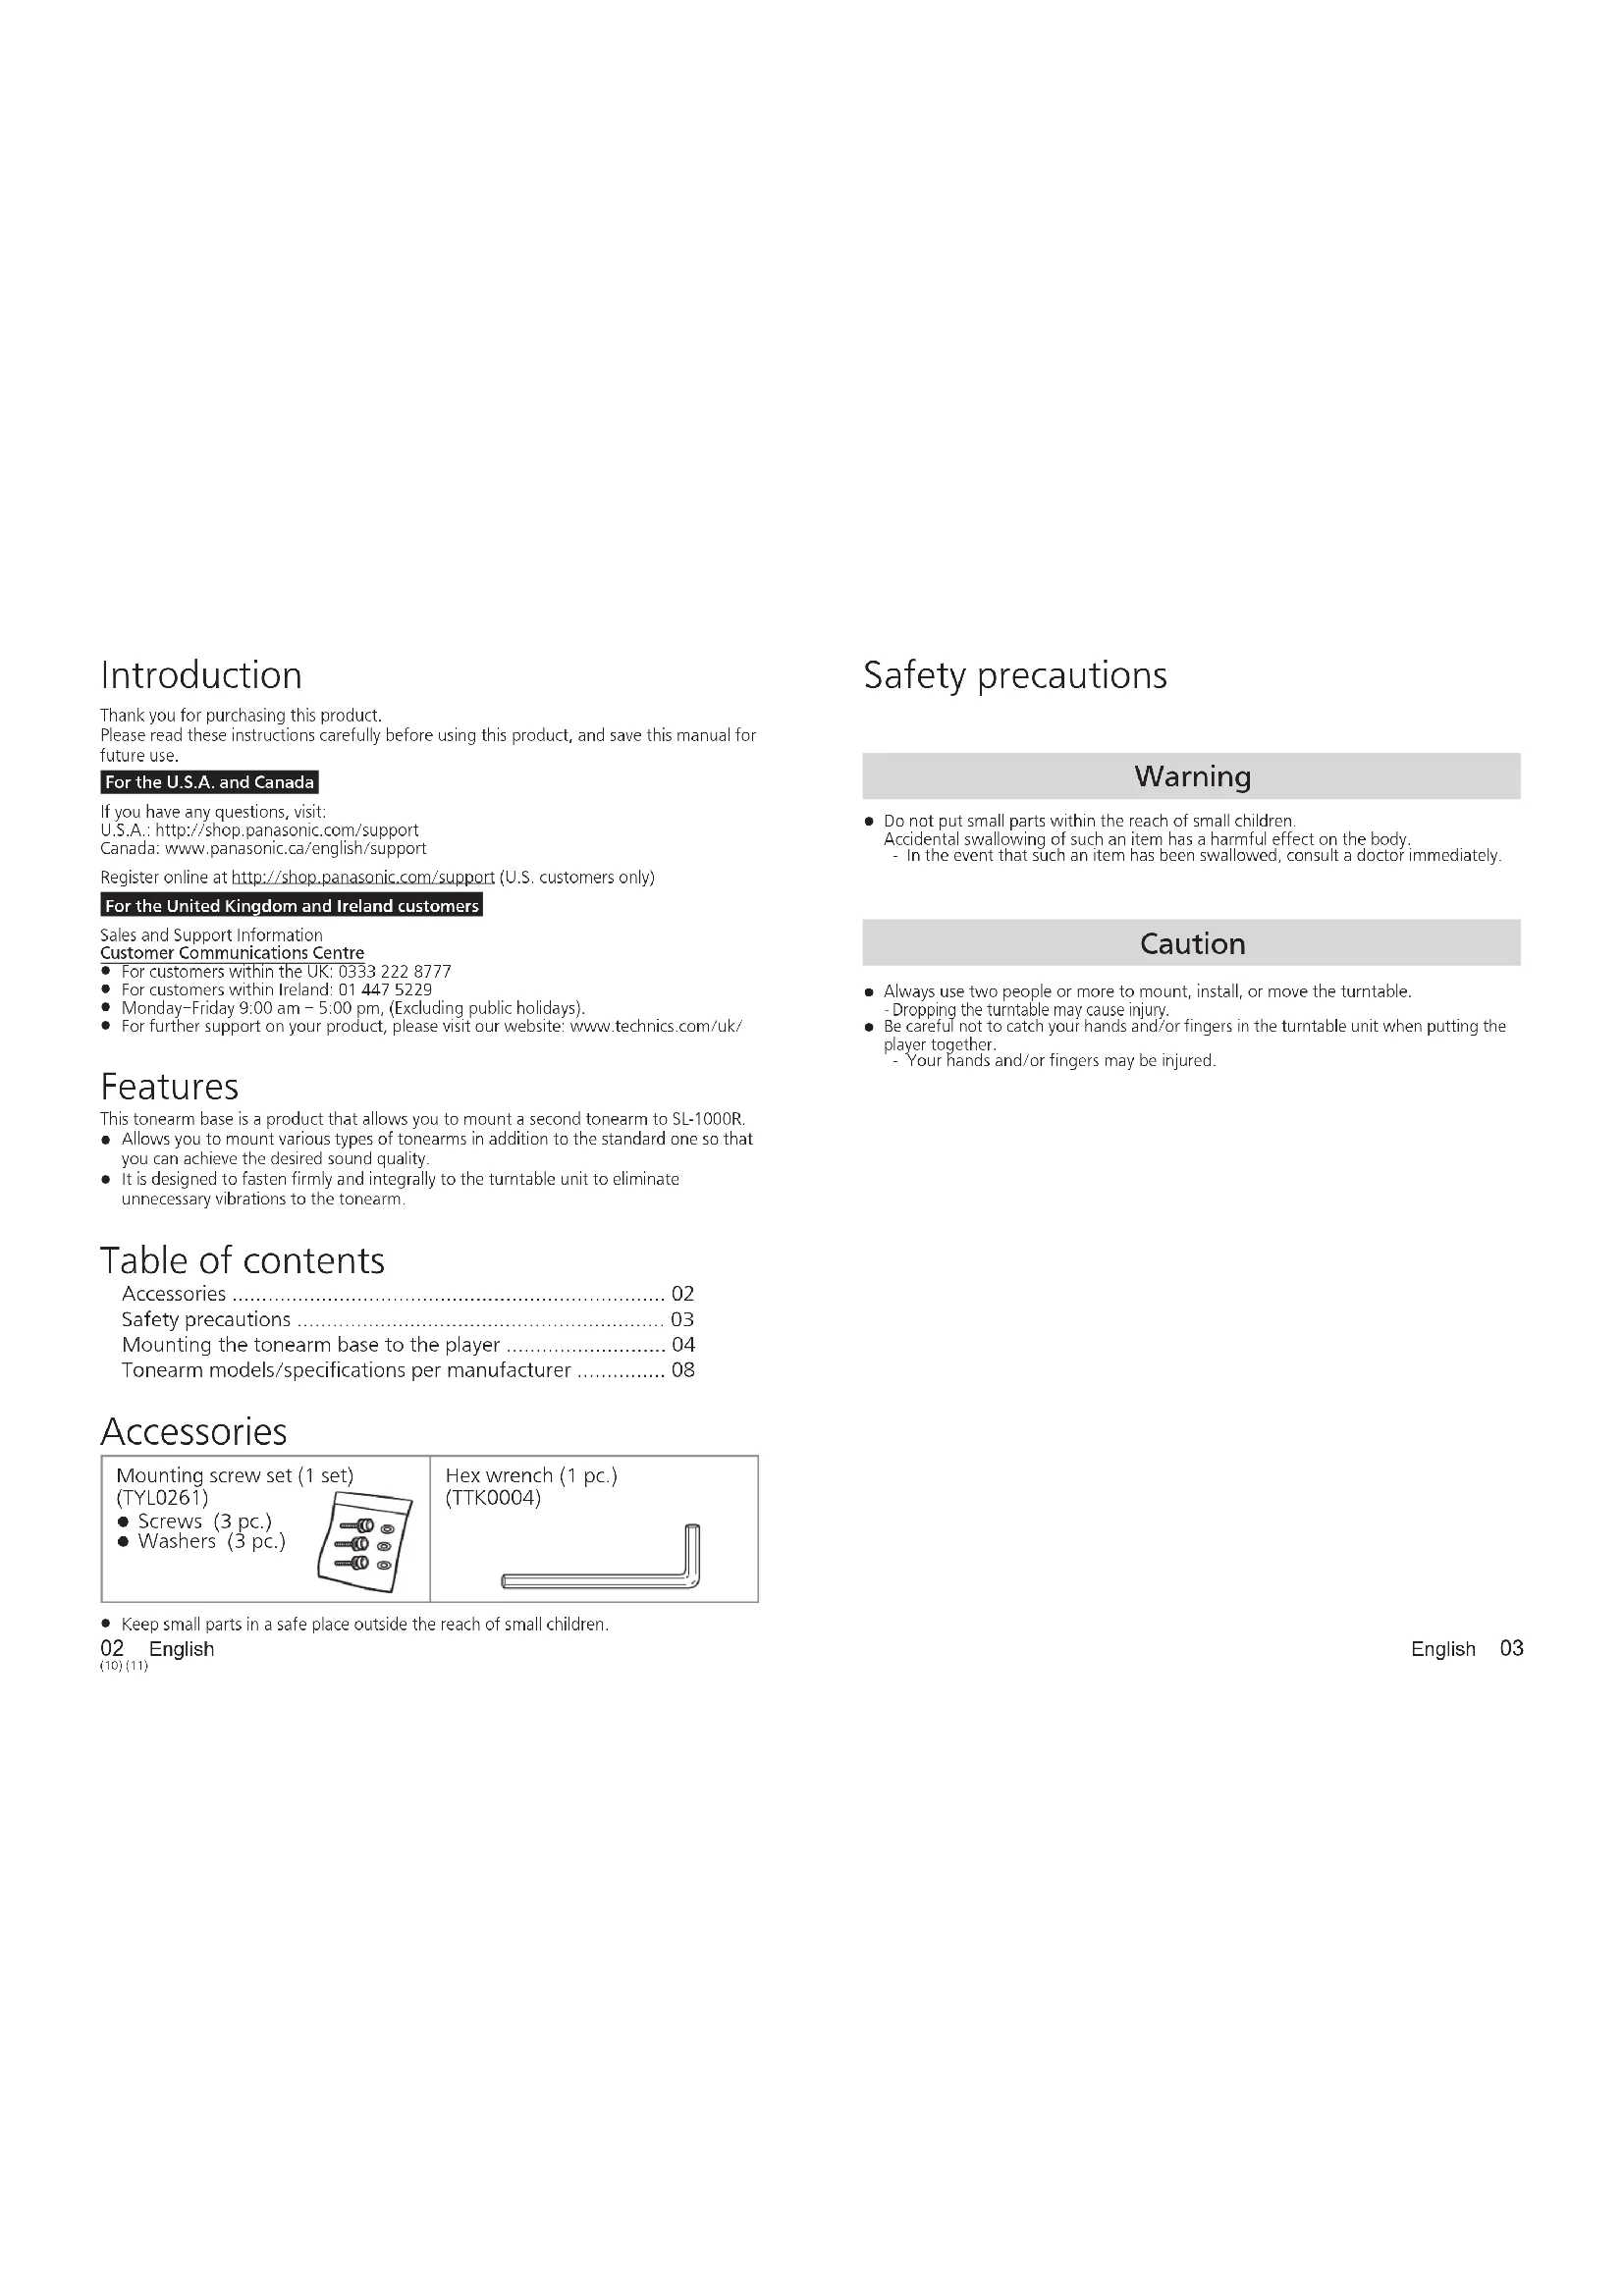
Accessories
Mounting screw set (1 set) (TYL0261)
- Screws (3 pc.)
- Washers (3 pc.)
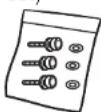
Hex wrench (1 pc.) (TTK0004)
- Keep small parts in a safe place outside the reach of small children.
- English
Safety precautions
Warning
- Do not put small parts within the reach of small children.
Accidental swallowing of such an item has a harmful effect on the body. In the event that such an item has been swallowed, consult a doctor immediately.
Caution
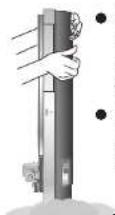
- Always use two people or more to mount, install, or move the turntable. - Dropping the turntable may cause injury.
-
Be careful not to catch your hands and/or fingers in the turntable unit when putting the player together.
-
Your hands and/or fingers may be injured.
Mounting the tonearm base to the player
Attention
Work on a stable, level surface.
(1) Disconnect the control unit connection cable, phono cable, earth lead, etc.
(2) Remove the turntable. (See "To remove the turntable" ( 15) in the SL-1000R Operating Instructions)
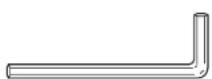
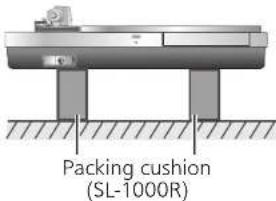
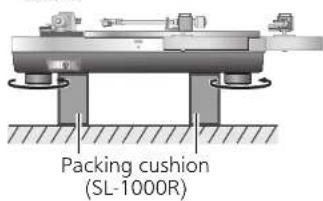
(3)Remove the insulators.
- Place two packing cushions under the main unit to lift, and turn the insulators in the direction shown in the figure below.
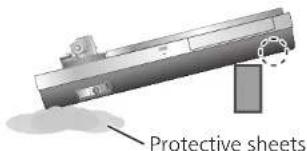
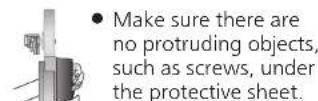
(4) Put the main unit vertically on a side on the protective sheet that came with the main unit.
Make sure there are no protruding objects, such as screws, under the protective sheet.
- Be careful the main unit does not lose balance and tip over.
Protective sheets
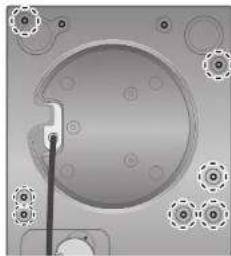
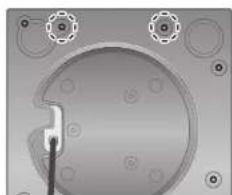
(5)Using the accessory hex wrench, remove the turntable unit mounting screws. (The seven locations indicated in the figure below)
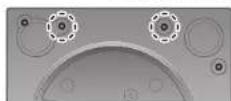
(6) Place one packing cushion under the main unit to put it at an angle. Using the accessory hex wrench, remove the remaining turntable unit mounting screws. (The two locations indicated in the figure below)
(7) Place two packing cushions under the main unit to lift.
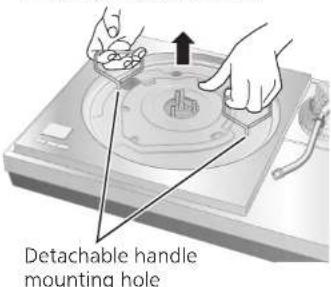
(8) Tighten the detachable handle screws into the detachable handle mounting holes on the turntable unit. Slowly lift the turntable unit to remove.
- Remove carefully to avoid catching the control unit connection cable in the cabinet and the like.
Attention
- Tighten the detachable handle by turning it 5 or more times. If you have tightened it until the end, loose a little bit. Do not tighten it firmly.
(9) Remove from the cabinet the cover at the location where the tonearm will be mounted.
- Using the accessory hex wrench, remove the two mounting screws.
Depending on the tonearm type (short type or long type), its mounting location is predetermined. ( Page 8)
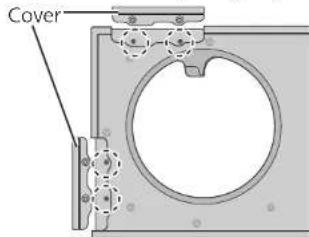
To remove the cover, lift it straight up.
Mounting the tonearm base to the player (continued)
(10) Mount your tonearm to the tonearm base.
Refer to your tonearm leaflet.
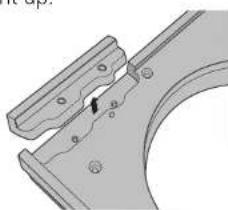
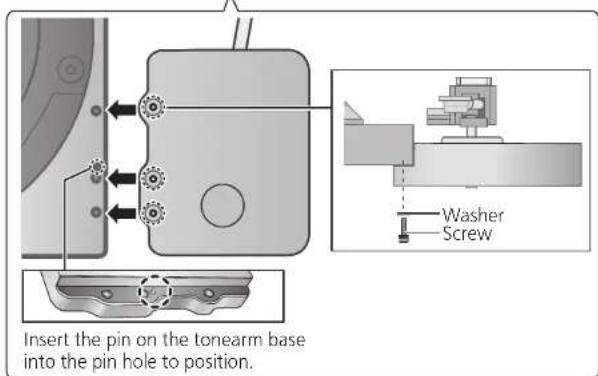
(11) Mount the tonearm base to the turntable unit.
- Mount in the appropriate location.
- Align the location of the pin and screw holes on the tonearm base with that of the pin hole and screw holes on the turntable side, and tighten the screws (three locations) with the hex wrench.
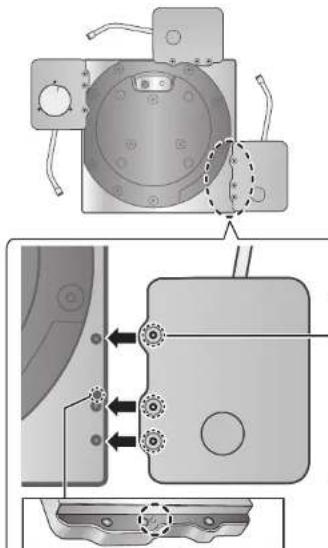
Insert the pin on the tonearm base into the pin hole to position.
(12) Tighten the detachable handle screws into the detachable handle mounting holes on the turntable unit and slowly mount the turntable unit to the cabinet.
- Mount by taking care not to catch the control unit connection cable in the cabinet and the like.
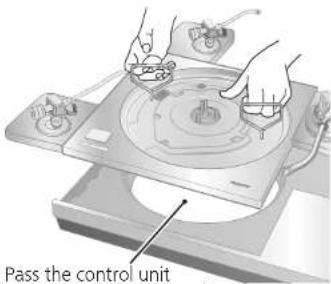
connection cable through the hole on the cabinet.
06
English
(14)(15)
(13) Place one packing cushion under the main unit to put it at an angle to tighten the turntable unit mounting screws with the accessory hex wrench. (The two locations indicated in the figure below)
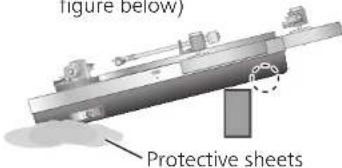
(14) Put the main unit vertically on a side on the protective sheet that came with the main unit.
- Be careful the main unit does not lose balance and tip over.
Protective sheets
(15) Using the accessory hex wrench, tighten the turntable unit mounting screws. (The seven locations indicated in the figure below)
- Re-check that the screws at all nine locations, including the two tighten in step (13) are firmly tighten.

(16) Attach the insulators to the unit.
- Place two packing cushions under the main unit to lift, and turn the insulators in the direction shown in the figure below.
(17) Fitting the turntable. (See "Fitting the turntable" ( 15) in the SL-1000R Operating Instructions
English
Tonearm models/specifications per manufacturer

External dimensions: 133 × 25 × 171 ~mm (Width×Height×Depth)
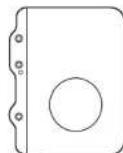
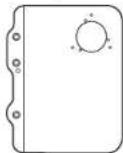
SH-TB10-S
Without tonearm mounting hole.
Machine as necessary to match your tonearm.
Weight: 1360 g
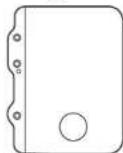
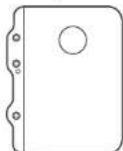
SH-TB10SM1-S
Supported manufacturer: SME
Supported model: M2-9R
Mounting location: Short-type
Weight: 1130 g

08 English
(16)(17)
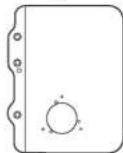
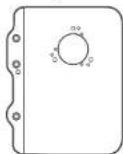
SH-TB10TC1-S
Supported manufacturer: Technics
Supported model: EPA-100mk2
Mounting location: Short type
Weight: 1170 g
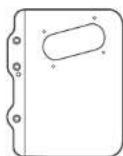
SH-TB10SM2-S
Supported manufacturer: SME
Supported model: M2-12R
Mounting location: Long-type
Weight: 1130 g
SH-TB10RT1-S
Supported manufacturer: ortofon
Supported model: AS-212S, RS-212D
Mounting location: Short-type
Weight: 1200 g
SH-TB10JL1-S
Supported manufacturer: JELCO
Supported model: SA-250
Mounting location: Short type
Weight: 1160 g

SH-TB10KD1-S
Supported manufacturer:IKEDA Supported model:IT-345 CR-1 Mounting location:Short-type Weight: 1300g
SH-TB10RT2-S
Supported manufacturer: ortofon
Supported model: AS-309S, RS-309D
Mounting location: Long-type
Weight: 1200 g
SH-TB10JL2-S
Supported manufacturer: JELCO
Supported model: SA-750L
Mounting location: Long-type
Weight: 1200 g
SH-TB10KD2-S
Supported manufacturer:IKEDA Supported model:IT-407 CR-1 Mounting location:Long-type Weight: 1300g
English
Kadoma, Osaka, Japan
Panasonic Testing Centre
Winsbergring 15, 22525 Hamburg, Germany
For the Japanese
八夕二株式会社
木一ム工nt-テINmnt事業部
Panasonic Corporation of North America
Two Riverfront Plaza, Newark, NJ 07102-5490
www.shop.panasonic.com
For Canada / Pour le Canada
Panasonic Canada Inc.
5770 Ambler Drive,
Mississauga, Ontario,
L4W2T3
www.panasonic.com
For the United Kingdom and Ireland
For Continental Europe
Panasonic Corporation
Web Site: http://www.panasonic.com
© Panasonic Corporation 2018
TQBM0272
S0218AK1


- For the U.S.A. and Canada
- For the United Kingdom and Ireland customers
- Features
- Table of contents
- Accessories
- Safety precautions
- Warning
- Caution
- Mounting the tonearm base to the player
- Attention
- Mounting the tonearm base to the player (continued)
- Tonearm models/specifications per manufacturer
- For the Japanese
- For Canada / Pour le Canada
- For the United Kingdom and Ireland
- For Continental Europe
Brand : TECHNICS
Model : SHTB10
Category : Turntable