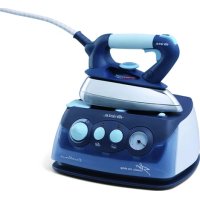
Steam Jet Pro 6248 - Iron ARIETE - Free user manual and instructions
Find the device manual for free Steam Jet Pro 6248 ARIETE in PDF.

| Product type | Vertical garment steamer |
| Brand | Ariete |
| Model | Steam Jet Pro 6248 |
| Power supply | 220-240 V ~ 50/60 Hz |
| Rated power | 1500 W |
| Heating time | 45 seconds |
| Steam setting | Rotary knob (M) |
| Telescopic pole | Yes, height adjustable |
| Distributor support | With hook for clothes |
| Included accessories | Brush for creases and trousers, protective glove, folding hanger with clip |
| Intended use | Refresh and iron delicate fabrics |
| Exterior cleaning | Non-abrasive damp cloth |
| Boiler maintenance | Drain after each use, monthly cleaning against limescale |
| Recommended water type | Tap water or 50% demineralized water mixture if very hard water |
| Precautions | Do not use on silk or velvet, do not point at people |
| Warranty | Does not cover blockages due to limescale |
Frequently Asked Questions - Steam Jet Pro 6248 ARIETE
User questions about Steam Jet Pro 6248 ARIETE
0 question about this device. Answer the ones you know or ask your own.
Ask a new question about this device
Download the instructions for your Iron in PDF format for free! Find your manual Steam Jet Pro 6248 - ARIETE and take your electronic device back in hand. On this page are published all the documents necessary for the use of your device. Steam Jet Pro 6248 by ARIETE.
USER MANUAL Steam Jet Pro 6248 ARIETE
This appliance is made in conformity with appropriate European Regulations in force, to protect the user wherever possible from potential hazards. Even if you are familiar with this type of appliance, carefully read this manual before use. Only use this appliance for the purpose it is designed for in order to prevent accidents and damage. Keep this manual close by for future consultation. If you should decide to give this appliance to other people, remember to also include these instructions.
The information provided in this manual is marked with the following symbols indicating:
Danger for children
Warning of burns
Danger due to electricity
Warning - material damage
Danger of damage originating from other causes
INTENDED USE
You can use the appliance to revive fabrics after they have been hanging or closed for a long time. It is also possible to remove creases from delicate or difficult to iron garments. It is recommended to use the appliance positioning it on the ground on a horizontal surface.
The appliance has been designed for home use only and must not be used for commercial or industrial purposes.
SAFETYWARNINGS
READ THESE INSTRUCTIONS CAREFULLY.
- This appliance is intended to be used in household and similar applications. Any other use of the appliance is not intended by the Manufacturer who does not accept any responsibility for damages of any kind caused by improper use of the appliance itself. Improper use also results in any form of warranty being forfeited.
- We decline any responsibility resulting from misuse or any use other than those covered in this booklet.
- We suggest you keep the original box and packaging, as our free-of-charge service does not cover any damage resulting from inadequate packaging of the product when this is sent back to an Authorised Service Centre.
- Using accessories not recommended or not supplied by the manufacturer of the appliance may entail risks of fire, electric shock or injuries to people.
Danger for children
- This appliance can be used by children aged from 8 years and above and persons with reduced physical, sensory or mental capabilities or lack of experience and knowledge if they have been given supervision or instruction concerning use of the appliance in a safe way and understand the hazards involved. Children shall not play with the appliance or its components. Cleaning and maintenance by the user must not be carried out by children without supervision.
-
The cleaning and maintenance must not be carried out by children under 8 years without supervision.
-
Always keep the appliance and the power cord out of the reach of children under the age of 8 years.
- Do not leave the packaging near children because it is potentially dangerous.
- In the event that this appliance is to be disposed of, it is suggested that the power cord is cut off. It is also recommended that all potentially dangerous components including the power cord are rendered harmless to prevent personal injury. Do not let children play with the appliance or its components.

Danger due to electricity
- Before plugging the appliance into the mains socket, ensure that the voltage shown on the rating plate matches the local voltage supply.
- The use of extensions not approved by the manufacturer can result in damage to property and personal injury.
- Always connect the appliance to an earthed socket.
- Do not immerse the appliance in water or other liquids.
- Do not use the appliance if your hands are wet or if you are barefoot.
- Do not connect any other high-power equipment (stoves, irons, radiators, etc) to the same power outlet. Danger of electric overload.

Danger of damage originating from other causes
- Fill up the tank with water before starting up the appliance. Be sure to unplug the appliance before pouring water into the tank.
- Turn on the appliance only when it is in working position.
- Place the appliance on the ground on horizontal surfaces. Do not place the appliance on tables or mounts: danger of falling!
- Do not move the appliance pulling it from the steam pipe.
- Never leave the appliance unattended when it is connected to the power supply.
- When you have to leave the appliance for a short time, always place the steam dispenser in its holder (B), always turn off the appliance and unplug the power cord from the mains supply.
- The appliance is not to be used if it has been dropped, if there are visible sign of damage, faults or suspected defects after dropping or if it is leaking water. Immediately unplug it from the socket-outlet. Never operate the appliance if defective. To prevent any accident, all repairs, including the replacement of the power cord, must be carried out by an Authorised Service Centre or by suitably qualified personnel. Otherwise, the warranty may be revoked.

Warning of burns
- Never try to use the appliance turned to yourself to iron the garments you wear.
-
Do not touch the metal parts of the appliance, the hot water or the steam when it is in operation and for several minutes after it is turned off since it could cause burns.
-
Do not leave the steam pipe on the ground or wrapped on itself when the appliance is on or immediately after it is turned off.
- Do not remove the steam pipe when ironing. Danger of hot water leakage.
- Burn Hazards – The appliance construction features, covered by this publication, do not allow to protect the user from possible contact with the steam pipe or the steam dispenser when the appliance is in use or in the minutes following its switching off. It is also advised to pay close attention during steam dispensing.
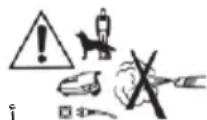
- Do not point the steam dispenser towards body parts or pets.
- During ironing operations put the nozzle on the support with the nozzles turned on the opposite side compared to the position of the folding rack.

- After turning off the appliance and pulled the plug from the socket leave it on the ground.
- Never direct the steam jet towards people, animals, plants or towards equipment containing electrical components (for example inside ovens).
Warning - material damage
- To move the appliance grasp the telescopic rod. Do not pull the steam pipe to move the appliance. If wheels should block, switch off the appliance and empty the water tank. Tilt the device to inspect the wheels.
- Do not lift the appliance holding it by the telescopic rod or the steam pipe.
- Fully unwind the cord before use.
- The use of extensions not approved by the manufacturer can result in damage to property and personal injury.
- Using the appliance with no water in the boiler may damage the pump. Check the water level in the tank on a regular basis.
- Do not use sparkling (carbonated) water. If your water supply is very hard, we suggest you use demineralised water instead.
- Do not pull the power cord to unplug the appliance.
- The appliance must only be cleaned with a soft, slightly damped, cloth after unplugging the appliance and allowing all its parts to cool down. Never use solvents which may damage the plastic parts.
- Do not pour vinegar, descales or other scented substances into the tank; Otherwise, the warranty may be revoked.
- Before storing the appliance, turn it off by pressing the button (L). Always unplug the power cord from the mains supply. Wait until it has cooled down (30 minutes). Fully empty the tank.
- Do not leave the appliance exposed to weathering ( rain, sun, etc.).
- ALWAYS KEEP THESE INSTRUCTIONS.
This appliance is not designed to replace an iron. Before you start to use the appliance check the instructions on the fabric label. If you are not aware of the composition of the fabric of the garment to work, search for a point of the fabric that is not visible. Make a test in this point.
Do not use the appliance on silk or velvet fabric. Some garments are ironed well upside down or from the bottom upward.
If you iron in very low position, close to the floor, it is necessary to occasionally raise the steam dispenser to allow the condensate to fall back into the boiler.
If the nozzles begin to be clogged, you will hear a gurgling noise.
For harder and thicker garments it is necessary to move the steam dispenser several times on them.
DESCRIPTION OF THE APPLIANCE
A - Steam nozzle K - Handle
B - Dispenser support L - Power switch with indicator light
C - Telescopic rod M - Steam adjustment knob
D - Telescopic rod adjustment hook N - Tank cap
E - Power cord O - Water tank
F - Rod connection P - Boiler drain cap
G - Front swivel wheels Q - Foldable hanger with garment pliers
H - Base with boiler R - Brush accessory and for trousers creases
I - Steam pipe connection S - Glove
J - Steam pipe
Technical and identification data
The plate below the base contains the following data:
- manufacturer and CE marking
- model (Mod.)
- serial number (SN)
- electrical supply voltage (V) and frequency (Hz)
- electrical power consumption (W)
- assistance toll-free phone number
When ordering at Authorized Service Centers, indicate the model and serial number.
INSTRUCTIONS FOR USE
Assembling

Warning!
Before using the appliance for the first time remove any labels and protections from the dispenser support.
Remove the components from the box. Position the appliance on the ground on a horizontal surface.
Open the rod adjustment hook (D) and extend the telescopic rod to the desired level (Fig. 2).
Open the specific hook and insert the rod into the joint on the base (Fig. 3).
Close the hooks again to lock the rod into place.
Install the dispenser support (B) in the upper part of the rod (Fig. 4).
Connect the steam tube (J) to the base (Fig. 5). Screw the connection (F) in the direction indicated by the arrow.
Position the steam dispenser on the support (Fig. 6).
Filling the tank before use

Warning!
Make sure the appliance is unplugged from the supply mains before filling the tank with water.
Remove the tank (Fig. 7).
Turn the tank upside-down and remove the cap (N) (Fig. 8).
Fill the tank directly beneath the tap with cool tap water (Fig. 9).
NEVER fill the tank beyond the MAX level.
The product functions with normal tap water.
In the case of particularly calcareous waters (with hardness greater than 20^ ) use a mixture composed of 50% of tap water and 50% of demineralised water.
Never use pure demineralized water.
Do not add any additives or chemicals (such as for example, amides, starches, perfume or other); Otherwise, the warranty may be revoked.

Warning!
Never use the appliance without water in the tank.
Put the tank back in, paying attention to match the tank valve with the pin in the appliance seat (Fig. 10). Press the tank all the way down until it is completely inserted and check that it is correctly installed.
Appliance switching on and use
Before plugging it in, completely unwind the power cord.
Insert the plug into a power outlet (Fig. 11).
Press the on/off button (Fig. 12). Make sure the button indicator light (L) turns on. After about 45 seconds, steam will come out from the dispenser.
Place the garment on the specific hooks of the dispenser support (B).
Turn the steam adjustment knob (Fig. 13) to select the desired quantity of steam.
The first time the appliance is switched on, it is possible to see a light emission of smoke: This transitory effect is perfectly normal and will disappear very soon.
Use the steam dispenser only performing vertical movements from the bottom upwards and vice versa (Fig. 14).

Attention
Do not use the steam dispenser horizontally or upside down, with the nozzles turned down. Danger of hot water leakage from the nozzles.

Warning!
Position the steam dispenser on the dispenser support holding the nozzles facing the opposite side to your body (Fig. 6). Risk of burns.
During use, the steam pipe and the steam dispenser reach high temperatures. This is completely normal. Do not touch, risk of burns.
Do not use the appliance on fabrics that are supported by other people.
Filling the boiler during use
Always check the level of water in the tank while you are ironing.
Turn off the appliance by pressing the on/off button (L).
Unplug the power cord from the socket (Fig. 11).
Remove the tank (Fig. 7).
Turn the tank upside-down and remove the cap (N) (Fig. 8).
Add water directly from the tap (Fig. 9). NEVER exceed the MAX mark when filling the tank.
Place the tank back on the appliance (Fig. 10), plug the cord in and turn on the appliance again.
The appliance is provided with accessories: a brush accessory (R), which can also be used to make hems and creases on trousers, a glove (S) and a foldable hanger with pliers (Q) to hang clothes.

Warning!
Before proceeding with the accessories installation or removal, turn off the appliance. Wait until the appliance has completely cooled.
Using the brush accessory
This accessory can be used as a lint brush, but also to make hems and creases on trousers. Attach the steam dispenser accessory (Fig. 18). To make hems and creases, press the lever of the accessory and place the edge of the trousers inside. Release the lever and, when steam is being distributed, slowly pull the dispenser to iron the cloth (Fig. 19).
Using the glove
This accessory allows you to keep a hand behind the garment that is being ironed, to keep it taut without getting burned.
Using the folding rack
Lift the vertical bars of the folding rack, until the horizontal bars are aligned. Fit the horizontal bars in the seats located on the folding rack body (Fig. 15). Remove the dispenser support from the rod. Insert the folding rack in the rod (Fig. 16). Fit the dispenser support in the pin on the folding rack.
AFTER USING THE DEVICE
Turn off the appliance by pressing the on/off button (L).
Remove the power cable from the socket-outlet.
Remove the tank from the base housing the boiler (Fig. 7).
Empty the water tank completely so as to prevent the water from stagnating, which may form lime deposit (Fig. 20).
Allow the appliance to cool for at least 30 minutes.
Remove the steam tube (J). Close the telescopic rod (C).
Place the appliance horizontally and hold it above a sink. Unscrew the cap and empty the boiler completely (Fig. 21).
Put the appliance in a dry place and away from the reach of children.

Warning!
Before cleaning or maintenance, always disconnect the plug from the mains supply. Allow the appliance to cool for at least 30 minutes.
Cleaning the appliance
Clean plastic parts with a damp, non-abrasive cloth and dry them with a dry cloth. Do not use abrasive products to clean the device.
Tank cleaning
To clean the tank, insert fresh water, rinse and drain. Do not put vinegar, decalcifying agents or other fragrant substance inside the tank; Otherwise, the warranty may be revoked.
Emptying the boiler and cleaning it internally

Warning!
This operation shall be only carried out after the appliance has cooled down completely.

Warning!
Do not put vinegar, decalcifying agents or other fragrant substances inside the boiler; Otherwise, the warranty may be revoked.
Remove the tank (O) and empty it completely before emptying the boiler.
Place the appliance horizontally and hold it above a sink. Unscrew the cap and empty the boiler completely (Fig. 21). Fasten the cap back.
Pour a cup of tap water through the steam tube joint (I) into the boiler (Fig. 22).
Shake the appliance and empty it again, removing all water (Fig. 21). Repeat this operation until the water coming out of the boiler is clean and clear.
Clean the boiler at least once a month, so as to remove any residue of lime that could jeopardize proper operation of the appliance.
THE WARRANTY DOES NOT COVER DAMAGES DUE TO LIMESTONE OBSTRUCTIONS.
A PROPOS DU MANUEL
LISEZ ATTENTIVEMENT CES INSTRUCTIONS.
VEILIGHEIDSWAARSCHUWINGEN
LEES DEZE INSTRUCTIES AANDACHTIG DOOR.
BESCHRIJVING VAN HET APPARAAT
A - Stoomkop K - Handgreep
MepbI 6e3oNaChOCTn no npedeTbpaueHnIO oXKOrOB
- HnKoIa He HappaBnTb DeiCTBne npnbopa Ha ce6a, Ha CBOIO OJExdy.
- I36eRaTb KOHTaKTa C MeTaJIuYeCKMn YacTЯMn npi6opa, ropayeB Odoi nI npam, KOrda npi6Op BkIIOueH nIi cpa3y nocJe erO BbIKIOUeHnA n3-3a OnacHOCTn NOJUyeHnOxOROB.
- Hnkorda He octabnIte Tpy6ky noaun npa Ha noLy n He obBopauBaIte ee BOKpyr CBOero TeJa, KOrda npnbop haxoDITcB pa6ooyem COCTOHN nn cpa3y nocJe erO BbIKJIOUeHn.
3aPpeuTcBbHMaTb Tpy6ky noaun npa BO Bpemr rnaKKn. OnacHOCTb BblTeKaHnra Tropuey BoDbl.
-Опасноctь oxkorob: KoHCTpykTINBHyIe Oco6eHHocTn np6opa, coCTaBnaIooero mpedmet HactoIeN HcTpyKuN, He N03BOJAIOT 3aIHTb NOTpe6nteJIa OT KOHTaC napOBoi Tpy6koI nIIy UcTPOiCTBOM NODaU Napa, KaK BO BpeMЯ NcNoIb3OBAHnI np6opa, TAK I NOcNe erO BbIKIouHeHn. Kpome TOrO, bYdTe OCO6eHNO BHNMaTeIbHbI BO BpeM nOdaU napa. - He pa3pe7aetcHnpaBnTb yCTpoIcTBO nOaun npa B cTOpOHy qAcTei TeJa nnB CTOpOHy DOMaUHnx XNBOTHbIX.
- Bo Bpemr rnaKn nomeCTne ycTpoNCTBO noaun npa Ha noCTaBky C hacaKaMn, o6paueHHbIMN B IpOTNBONIOJXHyO CTOPHY OT Be7aJIKN.

- После тoro, кak Bbl BbIKIIOHnnpnbop n BbIHyN BUNKy n3 pO3eTKN, OCTaBbTe erO OXJaXdTaBcR Ha noJy.
- Kateropnueckn 3anpeaetcna npabnayb ctpyno napa Ha IIOden, XNBOThIX, pacteHnra nn Ha npnbopbl, coedePkaune 3neKtpnueeckne qactn (HaNPmep, fehbl).

Внимане - BO3MOЖHOCТь BO3HNKHOBEнЯ MaTeрnaJIbHoro yUpe6a
- Дя посяпялгь рибopa Heobxodmo DepxkaTb ero 3a Teleckonucekyu pyk. 3anpeaaetc Taryt b 3a Tpy6ky nodaun npapdЯ посяпярemeшия пибopa. Пи 6lokinpOBKe KOlec Heobxodmo BbIKIQUHTb рибop И OCBO6OHTb pe3epByap ot BObl. HabIoHnte рибop И OCMOTpTe KOleca.
- He pa3pe7aetcnoHnMaTb np6Op, depka ero 3a TeJeCKOInueckyU pyKu nn 3a Tpy6kNoDaun napa.
- Перед началов заим раимотайся поноctью заектошур.
- Ппименец HeaBToPn3InpOBAHHbIX npOn3BoIteJIeM np6Opa 3JIeKtpUyeCKnx ydJIHHTeJIe MoKeT npVBecTI K NOJOMkAm I NOBpeJxDeHnA M.
- He npimHeTb annapat 6e3 BOdbI, MoKet noJomMaTbcra Hacoc. PeryJrpHo npoBepaTb ypoBeHb BOdbI B pe3epByap.
He nCnoIb30BaTb ra3npoBaHHyO BODy (c do6aBneHem yrIeKncnoro ra3a). Ecnn BOoONPOBOHna BODa OueHb JecTKa, peKOMeHdyETc npIMeHraTb dEmnHepaN3OBaHHyO BODy.
BbHIMa BnIky n3 3JIeKtpnuecko pO3eTKn, He TAHnte ee 3a npOBoJ. - YIcTka yTbora npOu3BOUITcra Hea6pa3INBHO IN CJIeRka BIIaXHOB TKAHbIO IN TOJbKO NocIe TORO, KaK Bbl BblTaUINBUNKy 3JIeKTPnueCKORO nPOBOda NHTAHNIA N3 PO3ETKN I BCE qACTNu yTbORA OCTbIIN, 3anpeUaETcra pPIMeHrTB JIObIe paCTBOpTeIN, NOckOJbKY OHN MOyT NOBpeINTB PIACTMACCOBbie YaCTN.
He haJIbBaTb B 6aQK yKCyc, yMaIrHTeJIb IJIH apOMaTn3NpOBaHHbIe XnIKoCTN; B npOTNBHom Cnyae DeIcTBne rapaHTm cpa3y Je npeKpaUaETcra. - Прждуем постовп рибор на место, Вькючente erо, Нжав на Вькючать (L). Следует вcertа Вьнмать унур n3 po3etkn. Рождente noka рибор понhoeю oxlaantcra (MHHmym 30 mH.). Погocъю ocboodnte pe3epbyap OT BOДbl.
- He pa3pe7aetcra noBepraTb np6op BO3eJCTBnIO aTMocfephblx fakTopoB (doXdb, coHnce n T.d.).
XPAHNTb HACTOJIeE PYKOBODCTBO NO 3KcIpy-ATAUIN.
COBETbl
DanHbI np6Op He npedHa3aueH dIra TORO, yTO6bl nonHOCTbIO 3aMeHNTb YTHOr. Ipeed HauJAmo 3KcNlyatau cnn npOBepbTe 3TNKeTky Ha OeXde, coepkaUyIO yka3aHnI NO rAnke. B Cnyae oTCyTCTBnI INΦopMaun O COCTaBe TKAHN, KOtOpYIO npEDCTOnIT rNaIDNb, NaIDNTe camoe MaIo3aMeTHoe MeCTO Ha Hei. IOnpObyTe npOrJaNTb B 3TOM MecTe.
He nCnoB3yIe np6op Ha weKOBbIX 6apXaTHbIX TkaHx. HeKOTOpbie Bcun lyuwe rnaNTb B o6paTHOM HnPaBneHm - cH3y BBepx.
EcnBbI rnaTe B DoCTaTOUHO H3KOM NOJoxeHn, B6N3n NOJa, To peKomeHdyetcHemHOro npnOHTb yctpoiCTBO NODaHnpa TaKIM O6pa3OM, YTO6bl KOHeHcT NOJadl PpA MIKOM B KOTeJI.
EcnHacaKn HauHHaIOT 3acopraTbcra,TO MOKeT CbIaTaBcR Wym,NOXOKn Ha 6yIbKaHBe.
Дяиздении зболгплOTнОижecTKaHn peKlmeHdyeTc npOBODHTb yCTpoIcTBOM noDAuN napa 6oile odHoro pa3a.
ONHCAHNE PNUBOPA
A - YcTpoIcTBo nOaun npa K - PyuKa
B-Подставka Дя устpoиства подаши нара
L-KhONKa BbIKHueHnco CBETaUMc nHdNkATOpOM
C - Telenckonuueckaj pyka M - Peryntop npa
D- CToOpHbI ΘeMeHT IJRA BbIDBnraIO- ⅢeNcTpy6Kn
N-KpbiIkape3epByapa
O-BoJaHoN pe3epByap
E-Ka6eIb 3neKtpoNTaHnP - KpbIuKa KOtna
F - KpePteHne dIpyKn Q -
CknaIbIaIouaIacBewaJIka C3axmamMnIpyOeKdbI
G-BeDyIne nepeHne kOleca R-AKceccyap Bnide uTeKN n Hacaakn dJaΦopMn-
H-Ochobanhe c naporehepatopom
I - KpenneHne Tpy6n npaun npa S - NepuataKa
J-Tpy6ka npdaun napa
TexHHueckne XapaKTePncTNKN u ndeHTNcKaunHbI daHHble
Ha ta6nueke, 3akpenenHno nO oCHOBaHnem np6opa, yka3aHbI cneDyUoune daHHbe:
-ПОНЗБОДИТЕЛь И Марк inpobka EC
- MoJoJIb (Mod)
- perncTpaZIOHnBb Nc (SN)
-3JIeKTPnueckoe HappKeHne (B) n uactota (Tc)
- noTpe6IЯEmoe HanpjaKeHne (W)
- 6ecnnatna TeneoHnca Cnykba TeXnoDepKKN
Pn oopmneHn 3aBKn B ABTopn3OBaHHbI ΚeHtp cepBnCHOrO 6cnyKuBaHn, Heo6xOJMo yKa3bIBaTb MoelN pErNCtpaOnOHbI HOMep.
C6opka

BHMMaHne!
Ipeed nepBbIM nCnoB3OBaHnem npnbopa ydaJIte BCE 3TKeTKN I 3aUHTbIe HAKNeKn C NOCTaBKn ycTroPcTBa NODaUn napa.
BbHbTe Bce yacTn np60pa n3 ynaKOBKn. NocTabte np6op Ha non Ha rOpN3oHTaIbHyIO NOBepXHOCTb.
OtkpoTe KpHocK perylnopBkn 5TaHn (D) n ydInHte Teleckonuueckyio 5TaHry do XeJnaemoro ypOBHra (Pnc.2).
OTkpOte COOTBeTCTByIOUm KpIouOK N BCTaBBTe U TaHry B KpeIIneHHe Ha OCHOBAHn (Pnc. 3).
3aKpoTe KpOuKN, YTo6bl 3a6nIOkpObaTb UTaHry.
YcTaHOBnTe nOcTaBky IJy ycTpoiCtBa nOaH npa (B) B BepxHeN yacTn pyKn (Pnc. 4).
PnpcoeHnHTe npOByIO Tpy6ky (J) K OCHOBaHNIO (Pnc. 5). 3aBnHTNTb KpeNexk (F) B HappaBHeHH, yka3aHHOM cTpeJIkoI.
YctahOBHTe yCTpoIcTBO nOaun npa Ha noDcTaBky (Pnc. 6).
3aNoJIHeHHe 6aUka nepeed npImeHHeHem

BHHMaHHe!
Ipeed 3aOpHHeHem 6aUka BDOJ HeoBxOdmo yBeuTbcra, YTO annapat OTKIOueH OT cETn 3JIeKtpn-ueckoro nITaHn.
BbIHyTb 6aOK (Pnc.7).
Ipebebpnte 6ak n n3BneKeNTe npo6ky (N) (Pnc. 8).
HanoHnItb 6aoyok npraMo n3-IOK kpaHa xoJIoHOn BDoN (Pnc.9).
HnkOrda He HanoJrTaB 6aQK BbIe MaKcMaJIbHorO ypOBHa.
Дя pa6obtby np6bopa moKHO nCNoIb3OBaTb obbIHyO BOdOnpOBoHyO Bdy.
B cnyuae noBbIeHHoJ xecTKOCTn (60nee 20°f) BODbl peKOMeHdyetc nCNoIb3OBaTb 50% BObl n3-NOkpaHa n 50% dNCTnIIpOBaHHoB ODbI.
Hn npk KaKx ycNoBnx He nCnoJb3OBaTb OdHy demnHepaJIIN3OBaHHyO BODY.
3anpeaetcdoabnTbBnpbopkakne-lnoxmmueckneBeuectBa(hanpimep,kpaxman,kpacnten,OTdyuKni npotNBHom cnyae deiCTBne rapaHTnCpa3y je npekpaaetcra.

BHHMaHHe!
KaTeOpunecKn 3anpeuaeTcNcNoIb3oBaT npn6op c nycTbIM pe3epByapom.
3aKpeNTb pe3epByap cIeIa 3a TeM, YTo6bI erO KJIaIaN COBnAaIc O StnCfTOM B OCHOBAHIN npi6opa (Pnc.10).
Haximatb Ha dHnue pe3epByapa do ero nonho yCTaHOBKn Ha MeCTO n y6eINTbcB TOM, YTO OHa yCTaHOBJIen npabNtboHO.
BkIIOueHne np6opa n ero 3Kcnnyataaun
PpeJe, Yem BCTaBtB WTeNceJIbHyIO BNkY, NOHOCTBIO pacpmaNTb IPOBOI NITaHn.
BcTaBBTe BnIKy B 3NeKtpopo3eTKy (Pnc.11).
Haxmte nepeknoateBbKIOueHn (Pnc. 12).Y6eNTecb B TOM, yTO INHdkaTOp BbIKIOuataTeJ 3aropeIcR (L).Yepe3 45 cek nap hauhet BbIXoNDt b n3 ycTpoiCTBa noDaun npa.
3aKpeHnTe npEeMTe OeJkbI c nOMOsBIO CneUaJIbHbIX KpOuKOB Ha depKaTeJe ycTpoiCTBa noaHn npa (B).
IobepHnte pyky perynipOBKn npa (Pnc. 13), uTo6bl 3aadabj kenaemoe konuueCTBO noDaBaemoro npa.
Pn nepBOM nCnoJb3OBAHnn np6ope BO3MOXHO NOABHeNe JERKoro DbIMKa: 3TO BNOJHe HopMaJIbHoe ABHeHne, KOtOpoe Ncye3Het Upe3 KOpOTKn IpomexyTok BpemeHN.
IcnoIb3yIte yctpoiCTBO nOaHn npa TOnbKO B BepTkaJIbHOM HApBaJIeHIM: CHN3y BBepx IIN HaO6OpOT (Pnc. 14).

BHHMaHne
He peKOMeHnyeTc 3KcPnIyATnpoBaTb yCTpOJCTBO NOaun npa B rOpN3OHTaJIbHOM noLOXeHNn IINB IpeBepHyToM BVte TaK, YTO6bl HacaKn 6bln HabPbHeBb BN3. ONaCHOCTb BbITEKaHn rOpJeBODbl Upe3 HacaKn.

Bhimahne!
IomeCTnTb yctpoiCTBO noaun npa Ha noCTaBky, ydepXIBaconno B HappaBneHm ot Kopnyca (Pnc.6).OnachocTB oxorob.
Bo Bpem 3Kcnpnyataun npnbopa Tpybka noaun npaa uycpoNCTBO noaun npaa moryt ouehb cnblHo harpeBaTbca. 3TO COBepseHNO HopMaNbHOE YBneHne. He doTparnBaTbca, onachoctb oxorob.
He nCnoIb3yIte np6op Ha TkaHx, noDpeKnBaembIX dpYHMN JIOdbMn.
HanoJIHeHne pe3epByapa B npOceCse npIMeHnna
NoctoHHo npOBepaTb copeKaHne BObbB 6ake B TeueHN rnaKKn.
BbIKJIOUHTe npn6Op, haxKaB Ha BbIKJIouaTeIb (L).
I3BnKeInTe shHy np 3JNeKtpop03eTK (Pnc.11).
BbIHyTb 6a4OK (Pnc.7).
Ipebeberhnte 6ak n n3BneKeTe npo5ky (N) (Pnc. 8).
Body moxho haHnBaT npraMo n3 kpaHa (Pnc. 9). HnkOrda He hanoHrTa b6aOK BbIe MaKcImaHbHoro ypoBHra.
YcTaHOBnTe 6aK o6paTHo Ha np6Op (Pnc. 10), BCTaBbTe BnIKy B3NeKtpopO3eKu N BHOBB BKNIOHTe np6Op.
BbIKJIOUHTe np6Op, HaxKaBa Ha BbIKJIOUaTeJIb (L).
OToeDHHnTb npoBOn nHTaHnI N3 po3EtKn ToKa.
N3BNeKeIte 6ak n3 OCHOBaHnC nporeHePAToPOM (Pnc.7).
Data n3roTOBHeHn yka3aHa Ha Kopnyce n3deJInB 3aunpObaHHOM Bunde SN wk/yrabcdefg,
Ide Wk-HeJeI npOn3BOdCTBa
yr-ROI pON3BODCTBa
abcdefg - cepnHbI HOMep n3deJINr
CoOTBcTCTBye Tpe6oBaHnIaM
TP TC 004/2011 «O 6e3oNaChocTn Hn3KOBolbTHoro obopydobHnra, yTBepxJeH PeSeHnem Komnccn TaMoJxHOro coI03a No768 ot 16 abrycta 2011 roda
TP TC 020/2011 «Делегамогиная COBмсгимость Тхнчecки Срд CB», yтвержден Peшеним Компсни Tamоженьoro coю3a №879 on 9 Deka6bra 2011 за Тулар Тулар Тулар Тулар Тулар Тулар Тулар Тулар Тулар Тулар Тулар Тулар Тулар Тулар Тулар Тулар Тулар Тулар Тулар Тулар Тулark Тулark Тулark Тулark Тулark Тулark Тулark Тулark Тулark Тулark Тулark Тулark Тулark Тулark Тулark Тулark Тулark Тулark Тулark Тулark ТулARK ТулARK ТулARK ТулARK ТулARK ТулARK ТулARK ТулARK ТулARK ТулARK ТулARK ТулARK ТулARK ТулARK ТулARK ТулARK ТулARK ТулARK ТулARK ТулARK Тулark ТулARK ТулARK ТулARK ТулARK ТулARK ТулARK ТулARK ТулARK ТулARK ТулARK ТулARK ТулARK ТулARK ТулARK ТулARK ТулARK ТулARK ТулARK
HOpMaIg O CePTnOkaIIN B pnpIOXeHH N rapaHTnHOMy TaIOHy n/nn Ha ynaKOBke n3deJIy.
Tolbko dIra pbIHKOB cTpaH EC n Poccu
220-240B~50-60Γι 400Bτ Knacc II IPX0
CdeJanaHO B Kntae
MnopTeP:OOO«MeDnaTEx»,
IOpndueckn aDpec:127006, ropod MockBa, yuua CaObaa-TpnuMpaJIbHa, dom 16, cTpoEHe 3, IOM. I, KOM 2
Фaktnueckn aDpec:119048, r. MockBa, yI. YcaYeBa, d.29, Kopnyc 3, nom.II, kom.3
I3roTOBHTelb: De' Longhi Appliances Srl /«ДeNoHr AnnnaeHcnc CPJ» AApec: 50013 IraTn, FlopeHcua,
Kamnn Bn3eHcno, Bna C. Kynpiko 300.
Cnncok orpahrnaui, ynoJHMOueHHbIX n3rotOBuTeIeM ha pa6Oy C npTeH3nMaN NOTpe6BtJeN i cepBnC-hbIM o6cnykBaHneM, pa3MeueH Ha caIte: http://www.ariete.net/ru/assistance
Topyaa liHria Ariete +7915165611
Tobap noctablaetcB c6paHOM Bnde, cneuaIbHbIX Tpe6oBaHn K nepeBO3Ke I XpaHeHIO He yCTaHOJIeHo.
YTNIN3NPOBaTb COOTBeTCTBn C 3aKHOdaTeNbCTBOM MeCTa peaIN3aUN.
TapaHTnHbI cpoK 2 roJa. CpoK cnJx6bI n3dJIeNJa 2 roJa.
HOpMaIgOcePTnOkaIINB pnpIOXeHHN K rapaHTnHOMy TaIOHy n/IIHa ynaKOBke N3deJIy.
g j 10000000000000000000000000000000000000000000000000000000000000
.
:dljg0jIy joo. 11 1 0 oJgll logzbl
Jabla de jbs
y
4
A
s
gaaab1 pUwyy
Jn Jn Jn Jn Jn Jn Jn Jn Jn Jn Jn Jn Jn Jn Jn Jn Jn Jn Jn Jn Jn Jn Jn Jn Jn Jn Jn Jn Jn Jn Jn Jn Jn Jn Jn
a 1 a 1 1 1 1 1 1 1 1 1 1 1
Jol
JooosyI Jc oocssyI j
e j 1 j 1 aaii i Jl 1 1 1 1 1 1 1 1 1 1 1 1 1 1 1 1 1 1 1 1 1 1 1 1 1 1 1
Lg 15 Lg. jolal oJb! Jj Jy Jy Jy y y y y y
J 1
11 13 a 1
aai aai jy Jdai aai
a 1 a
J 1
Jabla de jbs
y jn jnnn n nn n nn n nn n nn n nn n nn n nn n nn n nn n nn n nn n nn n nn n nn n nn n nn n nn n nn n nn n nn n nn n nn n nn n nn n nn n nn n nn n nn n nn n nn n nn n nn n nn n nn n nn n nn n nn n nn n nn n nn n nn n nn n nn n nn n nn n nn n nn n nn n nn n nn nnnn
jaii jaiiabwajd jia jia jaiy
.
jlaJI (B) 15JLJU JIgJgJgJgJgJgJgJgJgJgJgJg
1 1
g 1 1 1 1 1 1 1 1 1 1 1 1 1 1 1 1 1 1 1 1 1 1
J 1 J 1 J 1 J 1 J 1 J 1 J 1 J 1 J 1 J 1 J 1 J 1 J 1 J 1 J 1 J 1 J 1 J 1 J 1 J 1 J 1 J 1 J 1 J 1 J 1 J 1 J 1 J 1 J 1
.(jJyI JxJyI JyI yIyI yIyI yIyI yIyI yIyI yIyI yIyI yIyI yIyI yIyI yIyI yIyI yIyI yIyI yIyI yIyI yIyI yIyI yIyI yIyI yIyI yIyI yIyI yIyI y
a
.
. 1
.
JLJI JIJI LJI 151 JNJ
.
.1jz 1s1 sgsu no pduily gao .alll l adwabl jggo so ngy jglai Jozuiy
Jyj Jn j aie y jg ool 13! (jgySll sS1 gll aldo) ayle ola Joswi y
.1sblgio gjio oJooi Joooi 0o jzai.
JSSS JSS SSS
jagaiab1 jjI 1Jgjj JkS cIbdo Iaia y. bog a
.
oJbI JI I JI JI JI JI JI JI JI JI JI JI JI JI JI JI JI JI JI JI JI JI JI JI JI JI JI JI JI JI JI JI JI JI JI JI JI JI JI JI JI
1,2,3
JJI.3IyIyIyIyIyIyIyIyIyIyIyIyIyIyIyIyIyIyIyIyIyIyIyIyIyIyIyIyIyIyIyIyIy
.1J5 J3 30 30
$$ \left. \right.\left. \right.\left. \right.\left. \right.\left. \right.\left. \right.\left. \right.\left.\left.\left.\left.\left.\left.\left.\left.\left.\left.\left.\left.\left.\left.\left.\left.\left.\left.\left.\left.\left.\left.\left.\left.\left.\left.\left.\right.\right.\right.\right.\right.\right.\right.\right.\right.\right.\right.\right.\right.\right.\right.\right.\right.\right.\right.\right.\right.\right.\right.\right.\right.\right.\right\rangle_ {S} - E $$
$$ \ddot {a} \dot {a} \dot {a} \dot {a} \dot {a} \dot {a} \dot {a} \dot {a} \dot {a} \dot {a} \dot {a} - P \omega a \dot {a} \dot {a} \dot {a} \dot {a} \dot {a} \dot {a} \dot {a} \dot {a} - F $$
$$ \left. \omega \right| _ {0} ^ {\infty} \cup \left[ \begin{array}{l l l l l l l l l l l} \lambda & 1 & 2 & 3 & 4 & 5 & 6 & 7 & 8 & 9 & \dots \end{array} \right] $$
$$ \ddot {u} \dot {u} \dot {u} \dot {u} \dot {u} \dot {u} \dot {u} \dot {u} \dot {u} \dot {u} \dot {u} \dot {u} \dot {u} \dot {u} \dot {u} \dot {u} \dot {u} \dot {u} \dot {u} \dot {u} \dot {u} \ddot {u} - R $$
$$ \ddot {\omega} \varepsilon \dot {L} - H $$
$$ j \ddot {l} \ddot {a} - S $$
$$ \left. \int_ {0} ^ {1} \omega^ {\prime} \omega^ {\prime} \omega^ {\prime} \omega^ {\prime} \omega^ {\prime} \omega^ {\prime} \omega^ {\prime} \omega^ {\prime} \omega^ {\prime} \omega^ {\prime} \omega^ {\prime} \omega^ {\prime} \omega^ {\prime} \omega^ {\prime} \omega^ {\prime} \omega^ {\prime} \omega^ {\prime} \omega_ {0}\right) - I $$
$$ j \dot {l} \dot {w} \dot {u} \dot {v} \dot {w} \dot {i} - J $$
a
:dll llllgl dssel l cddgbl cdlogbdl dlby
CEaaleg jll
..Mod)
(SN) aegobol
()00j()a
(b1g)aataa aiajglal
aillalg aalejll paae
jll jll jll jll jll jll jll
JuswU
!

aai aie oolgbl laoo 10 go g I clogl bclb jj j Joo Jy
.
.(2J)gIbIgssIgSsIgSsIgSsIgSsIgSsIgSsIgSsIgSsIgSsIgSsIgSsIgSsIgSsIgSsIgSsIgSsIgSsIgSsIgSsIgSsIgSsIgSsIgSsIgSsIgSsIgS
.(3J) 15
.
.(4J) 1 (B)
.ogololjyl (F) alogil .(5 Jk) 0dcllly (J) jLJI U
(6J) 1
jll Jooosuol jn jzll a
1

.1111 1111 1111 1111 1111 1111 11
(7) 5k m 的.
(8 J) (N) 1
(9J)jIbI yIbI IbI abwIy aiaa oJzJol
y
aal aai al 10 aolg ay slb Joss
j 1000 (20f j 8 y j 8 16) a k l 1 1 1 1 1 1 1 1 1 1 1 1
. jolabla aio e gjibl cbl j 50% g adai all clo j 50% j 5gso
.0jolab4io gjo jlo lalbo Joo
.1000 1111111111111111111111111
!
.1o jgj jaii IaIba Joo

10J5) jgj 3 Jgbl JssbI gJzll plo aabol oelgoa
J 1
Jlaoiog jaoJI Jz
. 15
(11J)
j 45 .(L) 12
. 2
.(B)
.1111 1111 1111 1111 1111 1111 1111 1111
0 1 1 1 1 1 1 1 1 1 1 1 1 1 1 1 1 1 1 1 1 1 1 1 1 1 1
.
.(14J)
4

111 1
.
!

.(6J)psuU uSslbloljyIyIyIyIyIyIyIyIyIyIyIyIyIyIyIy
y . 1 1 1 1 1 1 1 1 1 1 1 1 1 1 1 1 1 1 1 1
| x - 1| = | x - 2| = 1
. j 1 J 1 1 1 1 1 1 1 1 1 1 1
JoooyI eui Iebl jzjll do
J 1
(L) 1y
.11J5
3ABOPOHrCTbCn HnOBHOBaTn 6ak Bnue pIBN MAX.
Pnpctpi npaoue Ha 3BnuaHnB OdoonpObiDi Boi.
Y BUNaIKy OOCbNBO BANHcToi BOi (KOpCTKicTB Bnua 3a 20^ BnKOpNCToBnyTe cymiw, B kii 50% BOO npoBiHOI BOi i 50% DeminepanizObaHOI BOi.
Kateropnno 3a60pOHaTeBcB BnKOpNCTOByBaTu NcTyr deminepani3ObaHy Body.
He doabaTe 6yIb-yaKnx Doabok abo ximiuHnx peOboHn (Ha npNKna, kpoXmaJIb, anpeTn, napfymn Ta iHwe); ue np3BeDe do HeraiHOi BtpaTI rapaHTII.
yBara!
KateropuHNo 3a6bOpHReTbcra BnKOpncTOBByBaTN npucpii 6e3 BoN y 6aKy.
BctaHOiB 6ak Ha Micce: Klaapanb 6aky nobHHeN 36iraTncr 3 uTnФtom y rhi3di npuJa(y (Pnc. 10). PpTuChITb Do nobHOi ycTaHOBKn 6aky i nepeKoHaITeCra, 0c 6ak BCTaHOBNeHo npabnlbHo.
BbIMKHeHHa Ta BnKOpncTaHHa npnaNy
PobHicTPOo3npaBTe Ka6eJIb KJNBHeHHa, nepw HIX BCTaBnTn BNkY KJNBHeHHa.
BCTaBtBe BnIky BeJNEKtpnHy po3eTky (Pnc. 11).
Ha nchitb Ha nepemukau BBIMKHeHHa (Pnc. 12). IpekoHaiTecB ToMy, IIO IHnKaTOp BmNKaHa 3aropibc
(L). Pnp6n3no uepe3 45 cekyni npa noyne BnxOHTn 3 npictpoIO npaui npn.
3aKpinitb npedMeT Oyry 3a DonomorOIO CneuiabHnx raKIB TpImaay npictpoio noaipn (B).
Pobephitb pyky peryIaTopa nap (Pnc. 13), 0o6 3aatn 6axaHny KInbkicTb nap, 1o nodaetcbra.
He BnKOpncToBnyTe npncTpi, kkuo TkaHnHy TpmaHOt b HsiIIOuN.
HanoBHeHHa 6aKy niJ qac BnKOpNCTaHHa
3aBKnnepeBipRnTe pBeHb Bodn, 0o 3aIIuHaetbcra y 6aky niD qac npacyBaHHr.
BmKHiTb npnla,HaTncHyBwn Ha BmNkau (L).
BiEeHaHte BnKy BiE eJeKtpuHoi po3eTK (Pnc. 11).
3HIMiTb 6aK (Pnc.7).
IpebepehItb6ak IBTuHriHt npo6ky (N) (Pnc. 8).
IodaiTe Bovy 6e3nocepedHbO 3 KpaHy (Pnc. 9). 3AEOPOHRACTbCra HAnOBHIOBaTn 6ak Bnue pIBH, No3Ha-ueHO BiIMtKOIO "MAX".
BctaHOItb 6ak Ha3aHn npna(Pnc.10), BCTaBte BNky B eJeKtpnHy po3eTky i yBIMkhItb npnaI.
IpnnaOcnaeHn akcecyapAMn: 3 uitko (R), rka do3boJcFopMyBaTH OkaHTOBKn i cknadKn Ha 6pKax, pykabNcoo (S) i cknaDAnHO BIIaNkoIO 3 3aTnCKaamn (Q) dny 3akpinneHn npedmetiB odry.

ybara!
Ipeed noaTkom MOHTaxy a6o demoHTaxy KOMnEkTyIOuHX, BmKHiTb npucTii. DooekaTecra, POKn npucTpii NOBHCIO OxOIOHe.
BnKOpncTahHnaCAdKn 3 0itKoIO
Данн akcesуар можна використовыати вякостi стгдя видалени Ковунць,а takож дя Формьанн оkaHTOBK i cknaDOK ha 6pikox.Зakpinitb akcesуap Ha npictpi npaui napn (Pnc.16).Iio6Використовыати наcaKy ДЯ Формьанн OKaHTOBK i cknaDOK,HaTNCHITb Ha Baxinb akcesCyapa i BCTaBTeКрайшанib.BidnyctiTB Baxinb,пд уacnpodykyBaHH Napri nobInbHo TargHITb npictpi npaui napn,Io63arlndkyBatn TkaHHNy (Pnc.17).
BnKopncTaHH pyKaBnUckn
Dahn akcecyap do3B0JAE npITpIMyBaTN BiInapIOBaHn npedMeT oJary 3 iHooi cToPOH, yTpIMyOuN TkaHNHy HATrHyTOIO I He OUnnapIOUOn ce6e.