USER MANUAL DCAM11BK NEDIS
For Full HD car recordings
DCAM11BK
natural_image
Line drawing of a portable CNN/TV camera with a dome-shaped top and control panel (no text or symbols on the device itself)
EN Quick start guide 5
DE Kurzanleitung 9
FR Guide de démarrage rapide 13
NL Snelstartgids 18
IT Guida rapida all'avvio 22
ES Guía de inicio rápido 26
PT Guia de iniciação rápida 31
SV Snabbstartsguide 35
FI Pika-aloitusopas 39
NO Hurtigguide 43
DA Vejledning til hurtig start 47
HU Gyors beüzemelési útmutató 52
PL Przewodnik Szybki start 56
EL Οδηγός γρήγορης εκκίνησης 60
SK Rýchly návod 65
CS Rychlý návod 69
RO Ghid rapid de inițiere
A
B
Dashboard Camera DCAM11BK

For more information see the extended manual online: ned.is/dcam11bk
Intended use
The DCAM11BK is a dashboard camera that can be mounted to the windshield of your vehicle.
This product is intended to take photos, record videos and playback recordings. The product is not intended for professional use.
Any modification of the product may have consequences for safety, warranty and proper functioning.
Specifications
| Product Dashboard Camera | |
| Article number DCAM11BK | |
| Dimensions (l x w x h) 86.2 x 37 x 52.8 mm |
| Input voltage 5V DC | |
| Input current 1 A | |
| Battery 5V 200 mAh Li-ion battery | |
| Battery capacity 200 mAh | |
| Operating temperature -20 - 60 °C |
| Display 2.7 inch LCD display | |
| Viewing angle 120 degrees | |
| Video Loop video | |
| Video format .avi | |
| Video resolution 1920 x 1080p / 1440 x 1080 / 1280 x 720 / 848 x 480 / 640 x 480 @ 60 Hz |
| Image resolution 12MP (4032 x 3024) / 10MP / 8MP / 5MP / 3MP / 2MP (1920 x 1080) / 1.3MP / VGA (640 x 480) |
| Image format .jpg | |
| Language English, French, German | Spanish, Italian,Dutch, Hungarian, Swedish, Finnish,Danish, Czech, |
| Video recording time 1 / 2 / 3 / 5 / 10 min |
| Recording audio Built-in microphone | The microphone can be switched on/off |
| Memory card MicroSD card | |
| Memory card capacity 1 - 32 GB | |
| USB interface USB 2.0 | |
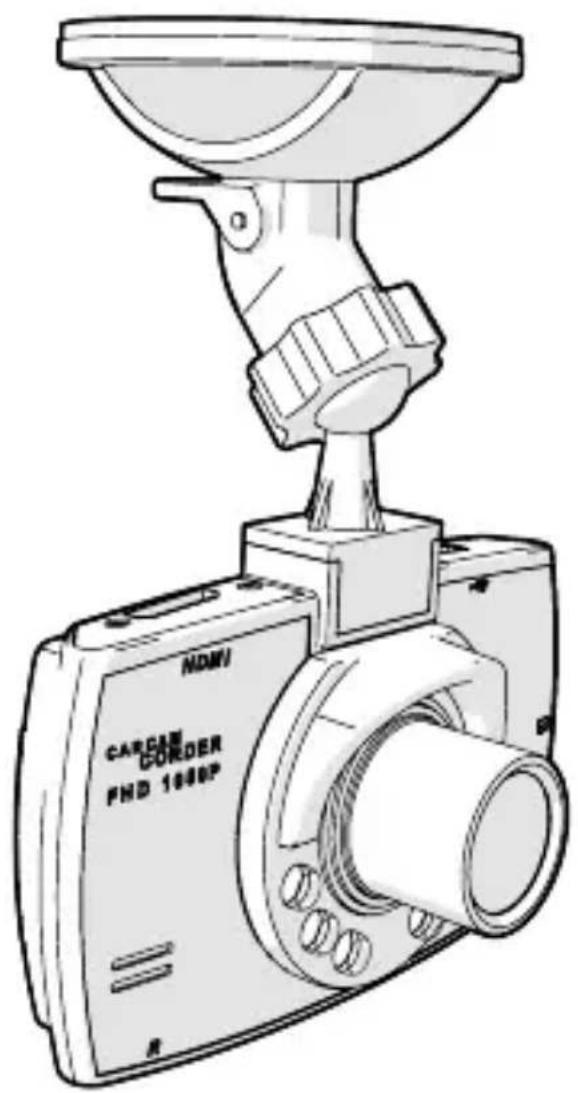
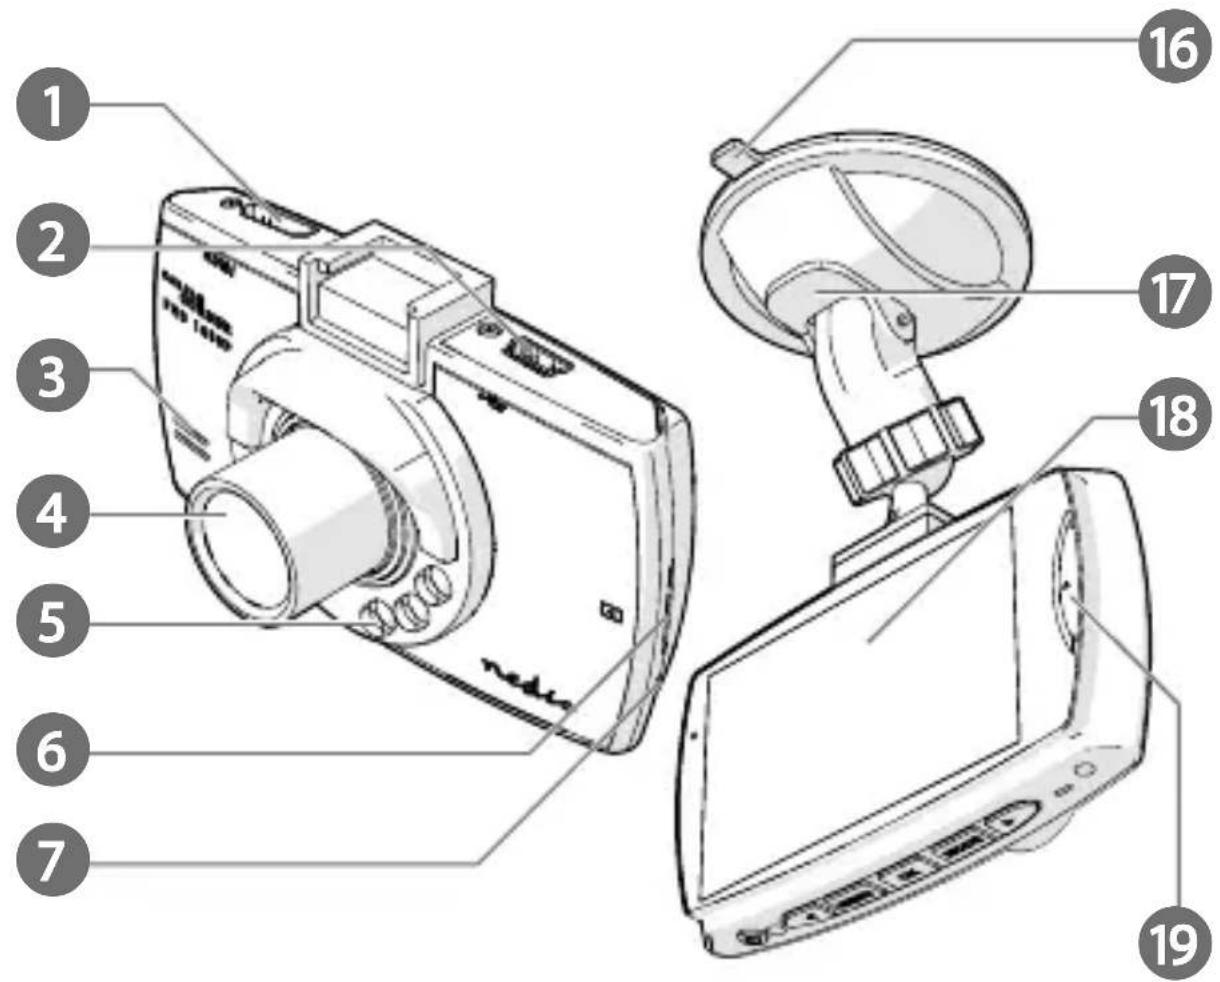
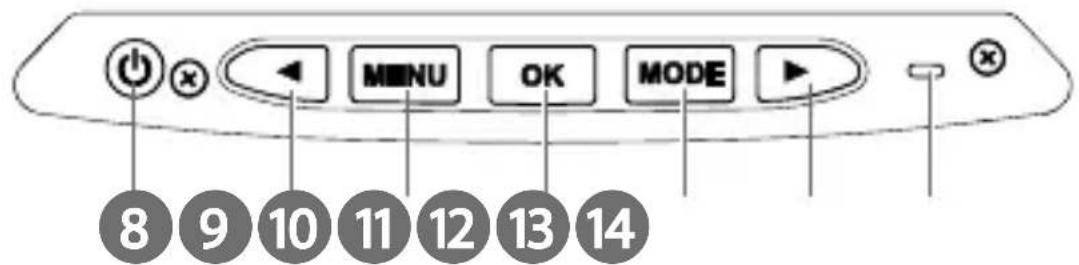
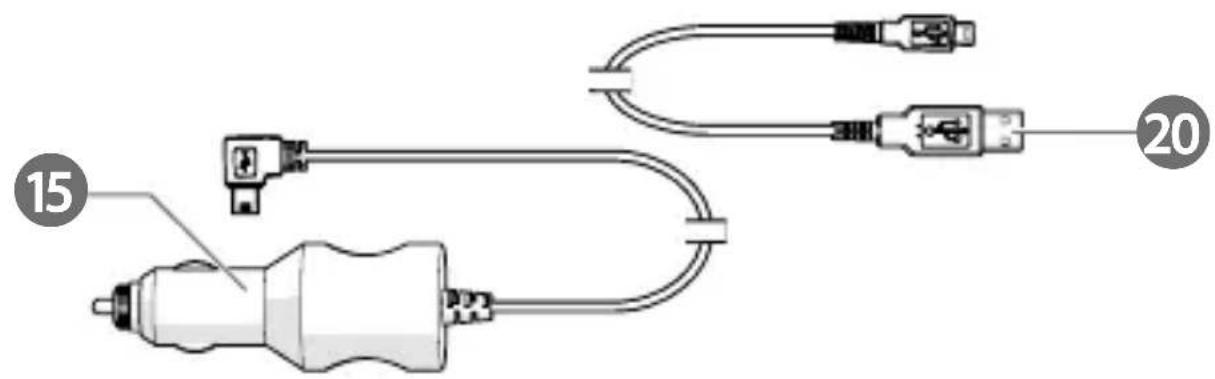
Main parts (image A)
1 Mini HDMI output
2 Mini USB port
3 Speaker
4 Camera
5 Infrared light
6 MicroSD card slot
7 Microphone
8 Power button
9 LEFT button
10 Menu button
11 OK button
12 Mode button
13 RIGHT button
14 Reset button
15 Auxiliary power plug
16 Suction fix
17 Suction fix clip
18 Display
19 Lock button
20 Mini USB cable
Safety instructions
WARNING
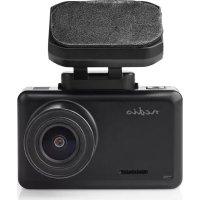
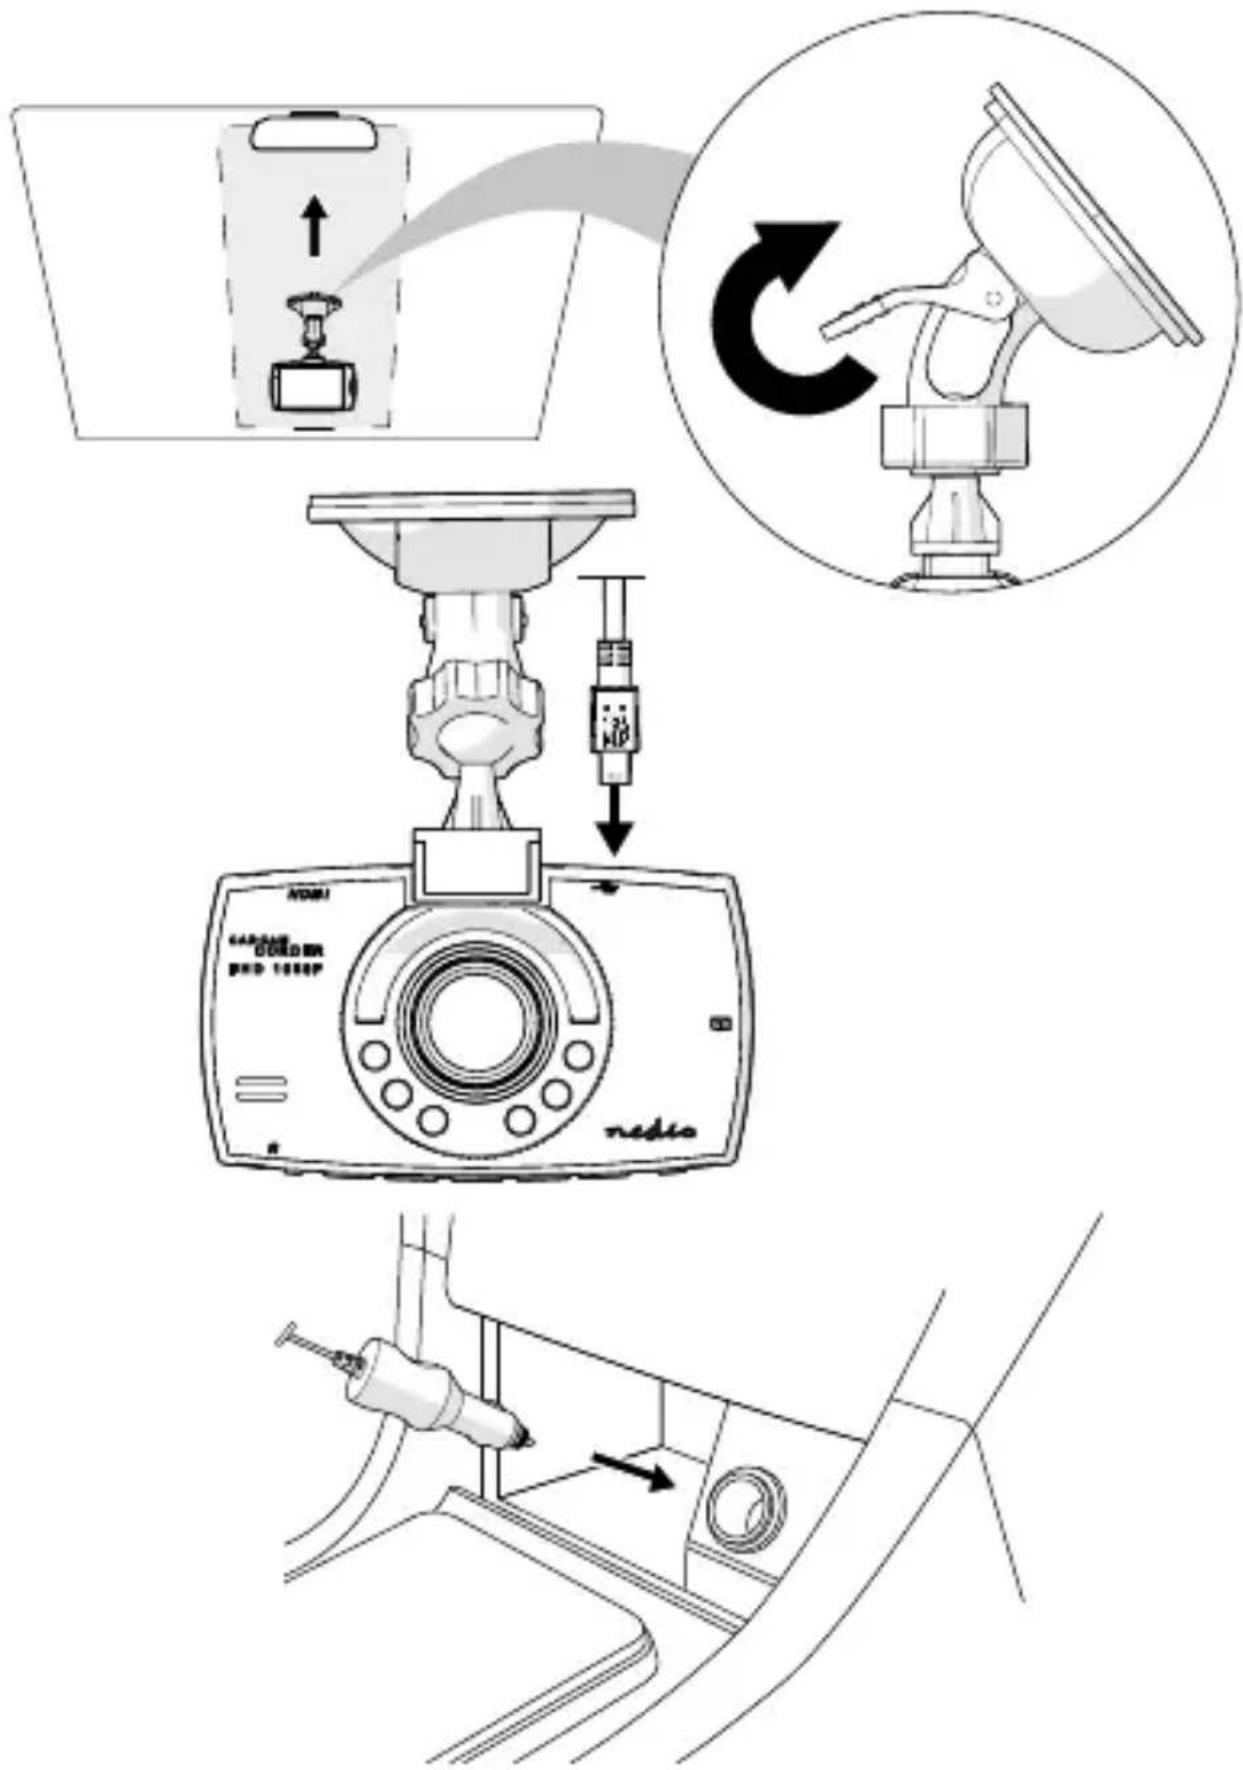
Installing the product (image B)
Before using the product, the user shall check the applicable laws and regulations on the use of the product.
In some jurisdictions, the use of this product can be considered as an invasion of privacy.
The mounting of the product on the windshield might be regulated by law in some jurisdictions.
It is the user's own responsibility to consult the local laws and regulations before installing and using this product.
Switch off the car engine.
- Clean and degrease the spot where you want to fix the product.
Place the product just behind or below the rearview mirror.
-
Place suction fix A 16 on the windshield.
-
Use the suction fix clip A 17 to fix the product to the windshield.
-
Insert a microSD card (not included) into the microSD card slot A 6.
-
Adjust the position of the camera A 4 for optimal view of the road.
Ensure the product and the power cable are installed and do not interfere with the sight of the driver or impede with the operation of any driving controls.
Always focus your attention on the road.
Connecting the product to a power source
Option 1:
- Plug the auxiliary power plug A 15 into an auxiliary power outlet.
- Plug the other end of A 15 into the mini USB port A 2.
Option 2:
- Charge the product using the USB port A 2.
The product automatically switches on and starts recording when you switch on your car engine.
Using the product
- Press power button A 8 for 3 seconds to switch the product on or off.
When switching off the product automatically saves the recordings.
- Press A 10 twice to enter the setup menu.
- Press left A 9 or right A 13 to navigate through the menu.
- Press OK A 11 to confirm a selection.
- Press menu A 10 to go back one step.
- Press A 12 to exit the menu.
- Press Menu A 10 to enter the menu.
- Press left A 9 or right A 13 to navigate through the menu.
- Press OK A 11 to confirm a selection.
- Press menu A 10 to go back one step.
- Press A 10 twice to exit the menu.
Press the mode button A ^12 to toggle between video mode, photo mode and playback mode.
Video mode
- Press A 12 to select video mode.
- Press A 11 to confirm your selection.
- Press A 11 to start or stop recording.
Press A 9 to switch the microphone on or off.
Press A8 to switch the infrared light on or off.
Emergency lock
In video mode, press the mode button A ^19 to save the recording as a read-only file.
This recording cannot be overwritten or deleted when not connected to a computer.

Kurzanleitung
Dashcam DCAM11BK