
PDT 40 E4 - Electric stapler PARKSIDE - Free user manual and instructions
Find the device manual for free PDT 40 E4 PARKSIDE in PDF.
| Product type | Pneumatic stapler (compressed air) |
| Dimensions (L × H × D) | 240 × 239 × 57 mm |
| Weight | 1197 g (with magazine) |
| Power supply | Compressed air, max. pressure 8 bar, recommended range 4–7 bar |
| Air consumption per drive | Approx. 0.09 L |
| Magazine capacity | 100 staples or nails |
| Staple lengths | 10–40 mm (width 5.7 mm) |
| Nail lengths | 15 mm, 20 mm, 25 mm |
| Recommended hose inner diameter | 9 mm |
| Recommended lubricant | Special compressed air oil |
| Sound pressure level (LpA) | 82.0 dB(A) (uncertainty K=2.5 dB) |
| Sound power level (LwA) | 95.0 dB(A) |
| Vibrations (ah) | 3.199 m/s² (uncertainty K=1.5 m/s²) |
| Main functions | Pneumatic stapling and nailing, contact trip or anti-dry fire safety |
| Maintenance and cleaning | Manual lubrication after 5000 cycles; clean with a dry cloth; do not use solvents |
| Safety | Mandatory wearing of safety goggles and hearing protection; do not use on ladders; never exceed 8 bar |
| Spare parts and repairability | Use exclusively original ROWI parts; repairs by qualified personnel |
| Warranty | 3 years (subject to proper use) |
| Reference (IAN) | 315477 |
Frequently Asked Questions - PDT 40 E4 PARKSIDE
User questions about PDT 40 E4 PARKSIDE
0 question about this device. Answer the ones you know or ask your own.
Ask a new question about this device
Download the instructions for your Electric stapler in PDF format for free! Find your manual PDT 40 E4 - PARKSIDE and take your electronic device back in hand. On this page are published all the documents necessary for the use of your device. PDT 40 E4 by PARKSIDE.
USER MANUAL PDT 40 E4 PARKSIDE
natural_image
Black N/A GNDN 1998 airaptor device with attached mounting base (no visible text or symbols)DRUCKLUFT-TACKER PDT 40 E4
AIR STAPLER/NAILER PDT 40 E4
AGRAFEUSE CLOUEUSE PNEUMATIQUE PDT 40 E4
ATDECH
DRUCKLUFT-TACKER
Operation and Safety instructions
Translation of the original instructions
O O
PERSLUCHT-SPIJKERPISTOOL
Before reading, unfold the page containing the illustrations and familiarise yourself with all functions of the device.
FR BE
GB/IE Operation and Safety instructions Page 17
natural_image
Assorted safety components including a spray bottle, safety goggles, and stacked metal sheets (no text or symbols visible)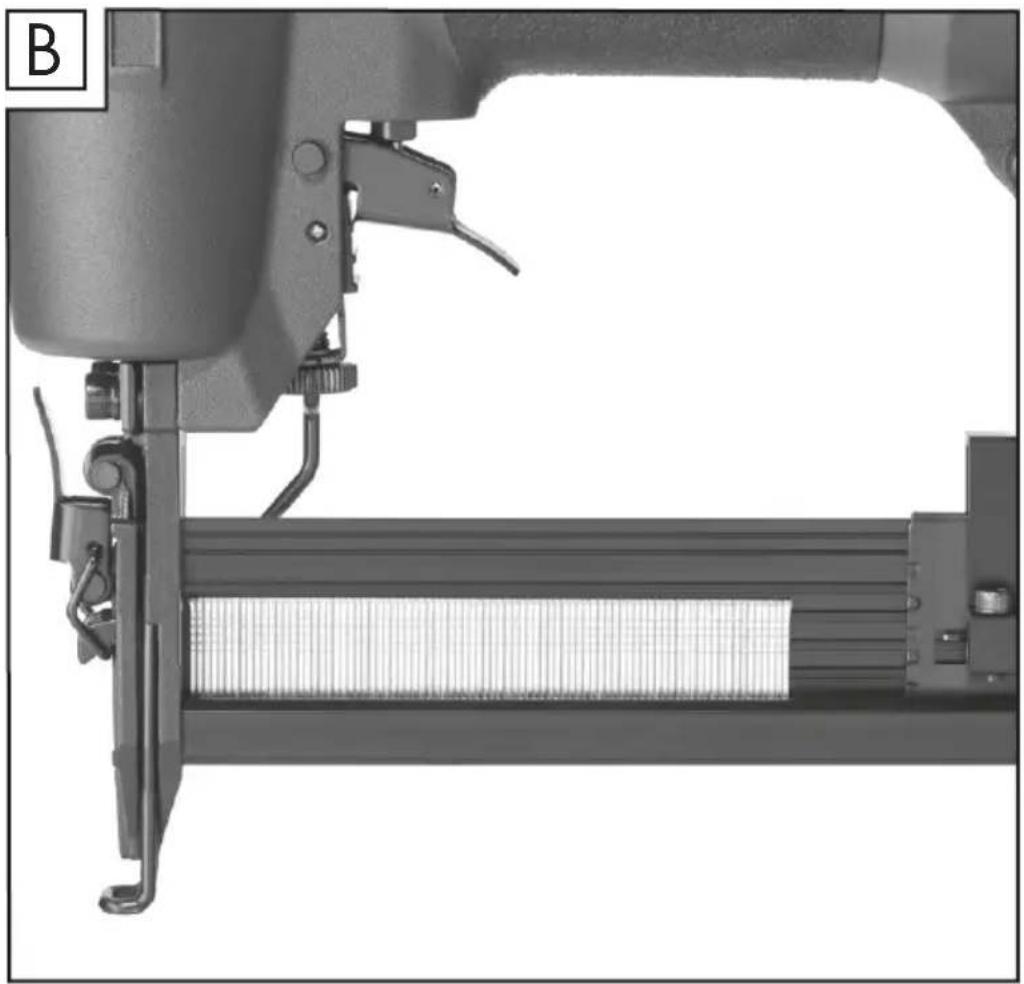
natural_image
Close-up of a sewing machine needle and roller mechanism (no text or symbols visible)
natural_image
Close-up of a sewing machine needle stitching a rectangular component (no visible text or symbols)Ld-services@rowi-electronics.com
Service-Hotline: +800 7694 7694
Key to the pictograms ...... Page 18
Introduction Page 18
Intended use Page 18
Features and fittings ...... Page 18
Included items Page 18
Technical data Page 19
Special references ...... Page 19
Instructions Page 19
Safety of the fastener driving tool Page 20
Work safety Page 20
Additional safety information for compressed air tackers ...... Page 21
Additional safety information for the protective goggles ...... Page 21
Warnings for the compressed air special oil Page 22
Triggering device Page 22
Actuating system Page 22
Additional instructions for fastener driving tools operated by compressed air ...... Page 22
Original accessories/tools Page 22
Preparing the product for use ...... Page 23
Operation Page 23
Connecting the compressed air source Page 23
Loading the magazine Page 23
Use Page 23
Removing jammed fasteners ...... Page 24
Maintenance and cleaning ...... Page 25
User maintenance Page 25
Cleaning Page 25
ROWI Electronics GmbH warranty Page 25
Service Page 27
Disposal Page 27
Translation of the original declaration of conformity/
Manufacturer CE Page 27
Declaration of conformity C€ of protective glasses ...... Page 86
| Key to the pictograms: | |||
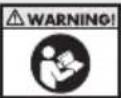 | Read the instructions manual! |  | Use hearing protection! |
 | Read and observe the warning and safety instructions! |  | Use eye protection! |
 | Warning! Fire hazard! |  | Do not use on scaffoldings, ladders! |
 | Actuating system! |  | Never use with oxygen or combustible gas a power source! |
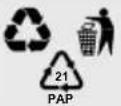 | Dispose of the packaging and device in an environmentally-friendly manner! |  | May be fatal if swallowed and enters airways. |
AIR STAPLER/NAILER PDT 40 E4
- Introduction
We congratulate you on the purchase of your new device. You have chosen a high quality product. The operating instructions are part of the product. They contain important information concerning safety, use and disposal. Before using the product, familiarise yourself with all of the operating instructions and safety instructions. Use the product only as described and for the specified applications. If you pass the product on to anyone else, please ensure that you also pass on all the documentation with it.
Intendeduse
The device is suitable for assembly and repair work. Any other use or modification to the device shall be considered as improper use and could give rise to considerable dangers. We will not accept liability for loss or damage arising from improper use. The device is intended for private domestic use only.
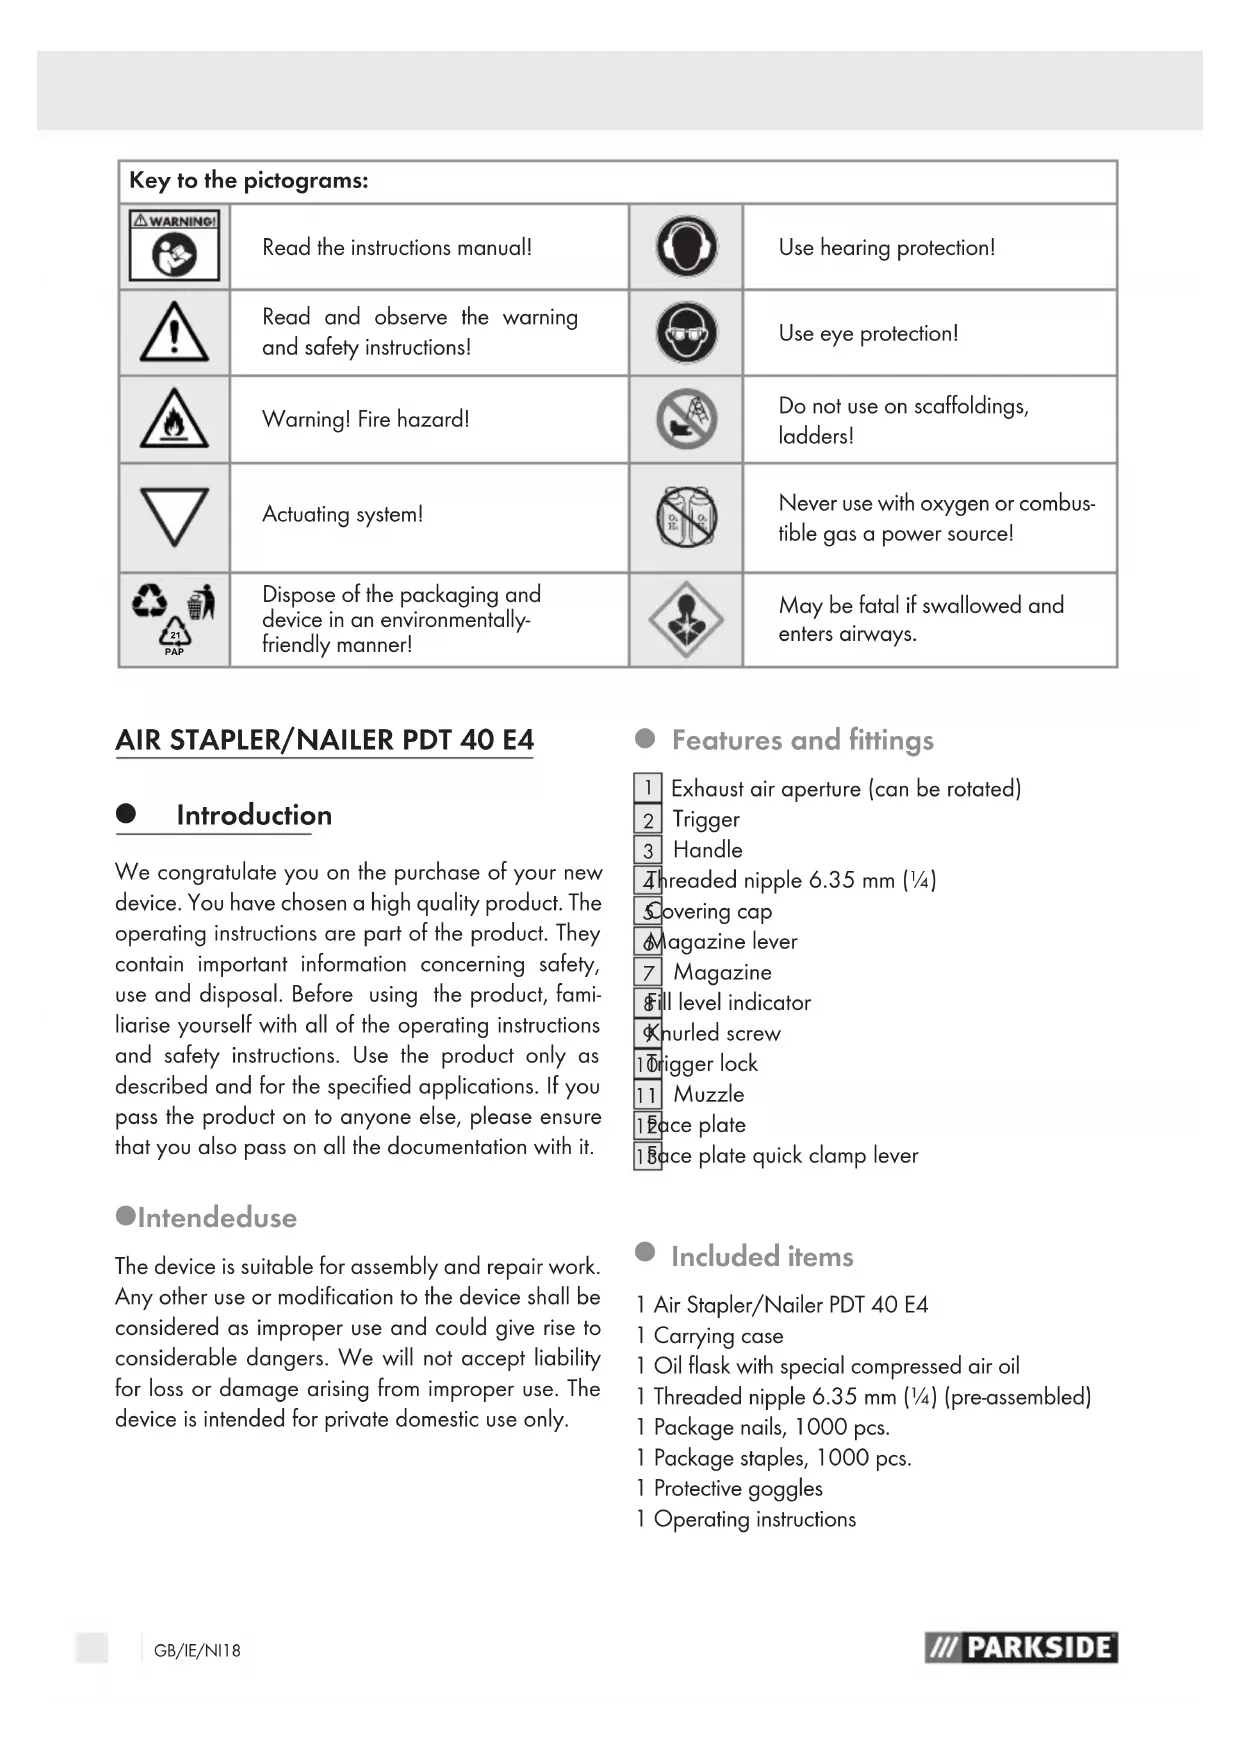
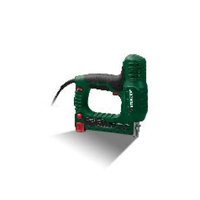
● Features and fittings
1 Exhaust air aperture (can be rotated)
2 Trigger
3 Handle
Threaded nipple 6.35 mm (1/4)
Covering cap
Magazine lever
7 Magazine
\$Fill level indicator
Knurled screw
1 Drigger lock
11 Muzzle
1 Face plate
15ace plate quick clamp lever
Included items
1 Air Stapler/Nailer PDT 40 E4
1 Carrying case
1 Oil flask with special compressed air oil
1 Threaded nipple 6.35 mm ( 14 ) (pre-assembled)
1 Package nails, 1000 pcs.
1 Package staples, 1000 pcs.
1 Protective goggles
1 Operating instructions
- Technical data
Dimensions: 240 x 239 x 57 mm
$$ (L \times H \times W) $$
Weight
(without fasteners): 1197 g
Trigger type: Compressed air
Maximum permissible
pressure: 8 bar

m æ.8 bar
Recommended pressure
range: 4 to 7 bar
Air consumption per
drive in process: approx. 0.09 litre
Recommended lubricant: Compressed air special oil
Loading capacity: 100 pcs
Nail lengths: 15 mm, 20 mm,
Staple lengths: 10–40 mm
Staple width: 5,7 mm
Recommended
Internal hose diameter: 9 mm
Compressed air quality: Cleaned, oil-misted and condensate-free
Noise and vibration data:
Measured values for noise are determined in accordance with EN 12549:1999, EN ISO 4871.
The A-weighted sound pressure level of the device is typically 82,0 dB(A)
Uncertainty K = 2.5 dB
Lwa: 95,0 dB(A)
Lpa (at the work station): 98,3 dB(A)
Lpc: 117,8 dB(A)
These values are characteristic values referenced to the device and do not reflect noise development at the work location. Noise development at the work location depends e.g. on the work environment, the workpiece, the workpiece support and the number of fastener driving processes.
In correspondence with conditions at the work location, individual noise reduction measures may need to be carried out, such as placing the workpiece on a noise-suppressing surface, clamping or covering to prevent workpiece vibration and adjusting to the minimum pressure required by the work process. In certain cases, wearing personal hearing protection is required.
Vibration values in accordance with ISO 8662-11:1999:
Vibration emission value ah = 3,199 m/s ^4
Uncertainty K = 1,5 m/s ^4
Mechanical impact (vibration)
The vibration value for the fastener driving device was determined in accordance with ISO 8662-11:1999 – Hand-held portable power tools – Measurement of vibrations at the handle – Fastener driving tools (see technical data). The value is referenced to the device and does not represent the influence on the hand-arm system when the device is used. Influence on the hand-arm system when using the device depends on e.g. gripping force, pressing force, working direction, air pressure set, the workpiece and its position.
Special references
Instructions
The following standard is applicable to fastener driving tools as per EN 792-13:2000 „Hand-held non-electric power tools – safety requirements – Part 13: Fastener driving tools“. The standard requires that
■ Only those fasteners which are specified in the operating instructions (see technical data) shall be used in fastener driving tools. The fastener driving tool and the fasteners specified in the operating instructions are to be considered as one unit safety system.
■ Quick-action couplings shall be used for connection to the compressed air system and the non-sealable nipple must be fitted at the tool in such way that no compressed air remains in the tool after disconnection.
■ Oxygen or combustible gases shall not be used as an energy source for compressed air operated fastener driving tools.
■ Fastener driving tools shall only be connected to an air-supply where the maximum allowable pressure of the tool cannot be exceeded by more than 10 %; in the case of higher pressures, a pressure reducing valve which includes a downstream safety valve shall be built into the compressed air supply.
■ Only spare parts specified by the manufacturer or his authorized representative shall be used in the repair of fastener driving tools.
■ Repairs shall be carried out only by the manufacturers' authorized agents or by other experts, having due regard to the information given in the operating instructions.
NOTE
Experts are those who, as a result of professional training or experience, have sufficient expertise in the field of fastener driving tools and sufficient familiarity with relevant government industrial protection provisions, accident prevention regulations, directives, and generally recognized technical regulations (e.g. CEN and CENELEC-standards), to be able to assess the safe condition of fastener driving tools.
■ Stands for mounting the fastener driving tools to a support, for example to a work table, shall be designed and constructed by the stand manufacturer in such a way that the fastener driving tools can be safely fixed for the intended use, thus for example avoiding damage, distortion, displacement.
Special fields of application for the fastener driving tools may require the observance of additional provisions and regulations (for example working in areas subject to an explosion hazard).
● Safety of the fastener driving tool

Please read all the safety information and instructions.

e to comply with the safety instructions and instructions can result in severe injuries and/or damage to property.
PLEASE RETAIN ALL SAFETY INFORMATION AND INSTRUCTIONS FOR FUTURE REFERENCE!
■ Each time before starting work, check for flawless functioning of the safety and triggering devices as well as the firm fit of all bolts and nuts.
■ Do not conduct any improper manipulation of the fastener driving tool.
- Do not dismount or block any part of the fastener driving tool, such a trigger lock.
- Do not conduct any „emergency repairs“ with unsuitable materials.
■The fastener driving tool must be regularly and properly maintained as specified by the manufacturer.
■ Prevent anything that would weaken or damage the device, e.g. by:
- stamping or engraving,
- alterations not permitted by the manufacturer,
- guiding on templates made of hard material, e.g. steel,
- permitting to fall onto or slide across the floor,
- using as a hammer,
- every type of external force.
- Work safety
Never point a fastener driving tool that is ready to use directly at yourself, other persons or animals.
During work, hold the fastener driving tool so that head and body can not be injured by possible kickback due to a fault in the power supply or from hard places in the workpiece.
■ Never trigger the fastner driving tool into empty space. Following this instruction will prevent danger due to uncontrolled flying fasteners and overloading the device.
■ Before transporting, disconnect the fastener driving tool from the compressed air network, particularly when using ladders or are moving with an unaccustomed body posture.
At the workplace, only carry the fastener driving tool by its grip and never with the trigger actuated.
- Pay attention to workplace conditions. Fasteners may strike completely through thin workpieces or slide off corners or edges to cause a danger to persons.

Use suitable personal protection equipment, e.g. hearing and eye protection. Wearing personal protective devices such as dust mask, non-slip safety shoes, safety helmet or hearing protectors, depending on the type of fastener driving tool and its application, reduces the risk of injuries.
● Additional safety information for compressed air tackers

WARNING! RISK OF INJURY!
Never exceed the maximum permissible operating pressure of 8 bar. Use a pressure reducer to adjust the operating pressure.

WARNING! RISK OF INJURY!

use oxygen or other flam- mable gases as energy source.
- Keep your working area clean and well lit. Untidy or poorly lit working areas can lead to accidents.
- Keep children and other individuals away from the fastener driving tool during use. Distractions can cause you to lose control of the device.
■ Remain alert at all times, watch what you are doing and always proceed with caution when working with a fastener driving tool. Do not use any fastener driving tool
if you are tired or under the influence of drugs, alcohol or medication. One moment of carelessness when using the fastener driving tool may result in serious injuries.
Avoid placing your body in an unnatural position. Keep proper footing and balance at all times. By doing this you will be in a better position to control the fastener driving tool in unforeseen circumstances.
■ Before any repair and maintenance work or transport, remove the device from the compressed air source.
● Additional safety information for the protective goggles
■The protective goggles are designed for use with the air stapler/nailer and only within its scope of intended use.
The protective goggles provide sufficient protection against particles of up to 6 mm in diameter at a speed of up to 45 m/s.
■ Replace the protective goggles as soon as the oculars are scratched or damaged.
If you replace the protective goggles, be sure to use protective goggles with the same protective properties.
Materials which may come in contact with the wearer's skin could cause allergic reactions to susceptible individuals.
■ Protective goggles can represent a hazard for the wearer if it is worn over normal corrective glasses due to the impact from particles.
Declaration of the markings of the protective goggles:
GUOTAI Marking of the manufacturer
166 Number of the EU testing standard for the protective goggles
1 Optical class
F Protection against impacts from lower energy
CE CE label
ANSI/ISEA
Z 87.1-2010 Number of the ANSI standard for the protective goggles
- Warnings for the compressed air special oil

fatal if swallowed and enters
airways. IF SWALLOWED: Immediately call a poison center or doctor/physician. Do NOT induce vomiting. Store locked up. Avoid release to the environment. Content and packaging have to be disposed of in accordance with local national regulations.
- Triggering device
This fastener driving tool is operated by actuating the trigger using finger pressure. Some fastener driving tools are fitted with an additional safety yoke which enables the driving operation to be carried out only after the muzzle of the tool is pressed against a workpiece. These tools are marked with an inverted triangle ( ▽ and may not be used unless fitted with an effective trigger lock 10.
- Actuating system

WARNING! RISK OF INJURY!

Do not use the device on scaffoldings or ladders.
Fastener driving tools equipped with contact actuation must be marked with the symbol »Do not use on scaffoldings, ladders« and must not be used for specific applications for example: when moving from one driving location to another involves the use of scaffoldings, stairs, ladders, or ladder-like constructions, e.g. roof laths, closing boxes or crates, fitting transportation safety systems e.g. on vehicles and wagons.
Additional instructions for fastener driving tool operated by compressed air

WARNING! RISK OF INJURY!
Do not use the device if the trigger lock 10 is damaged or has been removed. Otherwise injuries may result.
When loosening the hose coupling, hold the hose firmly in your hand to prevent injuries caused by a rebounding hose.
■Be absolutely certain to use a 14 threaded nipple and a quick-release coupling for the compressed air connection.
■Never place your hands near the mouth when the device is ready to operate. Otherwise injuries may result.
Pay attention to damage. Check the device for damage before bringing it into use. If the device exhibits defects, it must not be operated under any circumstances.
Do not use any pointed objects. Never insert pointed and/or metal objects into the inside of the device.
Only connect the air-powered staple gun to lines which are guaranteed not to exceed the maximum operating pressure by more than 10%, e.g. with a pressure control valve in the compressed air line (pressure regulator) with downstream or built-in pressure limiting valve.
■ When using the air-powered staple gun be sure not to exceed the max. pressure.
■ Only operate the air-powered staple gun at the pressure required for the respective operation to prevent needlessly high noise levels, increased wear and malfunctions this causes.

WARNING!
FIRE AND EXPLOSION HAZARD! Never use hydrogen, oxygen, carbon dioxide or other bottled gasses to power this tool as doing so may result in an explosion and thus may cause severe injuries.
Original accessories/tools
■ Use only the accessories and attachments detailed in the operating instructions. The use of fasteners or other accessories other than those recommended in the operating instructions could lead to you suffering an injury.
■ Always have your air-powered tool repaired by a professional using only original spare parts. This will ensure the air-powered tool remains safe.
● Preparing the product for use
Please read and observe these operating instructions before using the tool. Basic safety measures should always be strictly followed to protect against damage to the equipment and personal injury to the user or other people working in the vicinity of operation.
Operation

Note: Wear the safety goggles before operating the machine.
- Connecting the compressed air source
NOTE: The compressed air tacker must only be operated with cleaned, oil-misted compressed air and must not exceed the maximum operating pressure of 8 bar. The compressor must be fitted with a pressure reducer in order to regulate the operating pressure.
- Connect the device to a suitable compressed air source.
- To do so, press the compressed air hose quick-release coupling (not included in the scope of delivery) on the 14 threaded nipple 4 of the compressed air tacker. Locking is automatic.
- Connect the other end of the compressed air hose to the (filter) pressure reducer on the compressor.
Proper functioning of the fastener driving tool requires filtered, dry and oiled compressed air in adequate quantities. If the air pressure in the line system exceeds the maximum permissible operating pressure of the fastener driving tool, a pressure reducing valve followed by a downstream safety valve shall additionally be fitted in the supply line to the tool.
NOTE: When compressed air is generated by compressors, the natural moisture in the air condenses and collects as condensed water in pressure vessels and pipelines. This condensate must be removed by water separators. These water separators must be checked on a daily basis and drained if necessary, since corrosion can otherwise develop in the compressed air system and in the fastener driving tool, which serves to accelerate wear.
The compressor plant shall be adequately dimensioned in terms of pressure output and performance (volumetric flow) for the consumption which is to be expected. Line sections which are too small in relation to the length of the line (pipes and hoses), as well as overloading the compressor, will result in pressure drops. Oilers should be checked daily and, if necessary, filled with the recommended oil (see technical data). When using hose lengths over 10m, the supply of the nailer with oil is not guaranteed. We therefore recommend an lubricator attached directly to the fastener driving tool or to manually lubricate the air inlet directly with 2 - 5 drops of the recommended grade of oil(see technical data).
Use only hoses with an internal diameter not less than 9mm. Otherwise the staples/nails will be shot out of the machine slow and with little pressure.
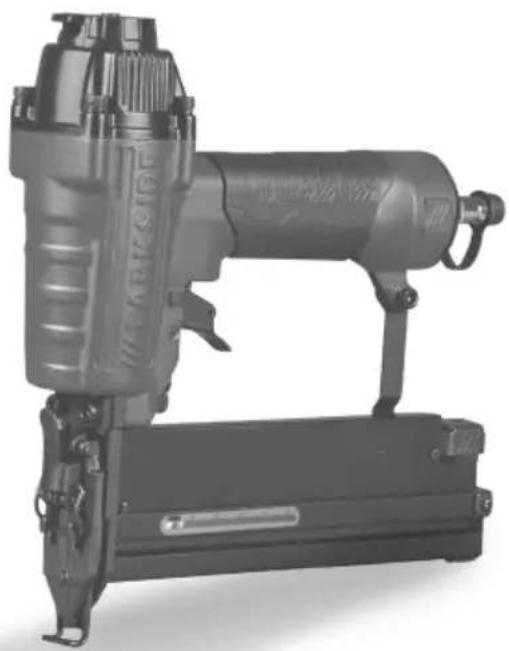
- Loading the magazine
Only those fasteners specified under technical data may be used. When filling the magazine, hold the tool so that the muzzle is not pointing towards your own body or towards any other person.
- Press the magazine lever 6 and pull the magazine cover back to its stop position.
- Insert the corresponding fastener (nails, see Fig. B or staples, see Fig. C) into the magazine 7. The tacks must be put on the rail of the magazine 7.
- Slide the magazine cover forwards until it locks.
Use
□Load the magazine 7 of the compressed air tacker as described in the chapter "Loading the magazine".
□ Use the pressure reducer to set the correct operating pressure.
☐ Ensure that the permissible operating pressure of 8 bar at the device is never exceeded. Operating pressure that is too high does not provide any performance increase, but only increases compressed air consumption and accelerates wear on the device.
□Switch on the compressor.
☐ Allow the compressor to run once long enough until maximum tank pressure is reached and the device is switched off.
☐ Place the compressed air tacker on the workpiece and press the trigger 2.

NOTE: The compressed air tacker is equipped with a trigger lock 10. The fastener will only leave the device whe the mouth of the compressed air tacker is pressed against the workpiece and the trigger 2 is actuated.
Handling the tool
Note the section with special safety references of these operating instructions. Having checked that the fastener driving tool is functioning correctly, apply the tool to a workpiece and actuate the trigger.
☐ Check that the fastener has been driven in corresponding to the work requirements.
- If the fastener is protruding, increase the air pressure in 0.5 bar increments.
- If the fastener is too deep, decrease the air pressure in 0.5 bar increments.
☐ As an alternative, you can accelerate the work by keeping the trigger 2 depressed.
□ Set the compressed air tacker against the wor piece.
☐ Press the device against the workpiece until the mouth 11 touches it. The fastener will leave the device.
☐ As long as the trigger 2 is kept depressed, each time the muzzle 11 touches the workpiece one fastener will leave the device.
Another alternative is to keep the muzzle pressed against the workpiece.
☐ Each time the trigger 2 is actuated, a fastener will leave the device.
You should endeavour in any event to work with the lowest possible air pressure. This will give you three significant advantages:
1) energy will be saved,
2) less noise will be produced,
3) a reduction in fastener driving tool wear will be achieved.
Avoid triggering the fastener driving tool if the magazine is empty. Any defective or improperly functioning fastener driving tool must immediately be disconnected from the compressed air supply and passed to a specialist for inspection. In the event of longer breaks in work or at the end of the working shift, disconnect the tool from the compressed air supply and empty the magazine. The compressed air connectors of the fastener driving tool and the hoses should be protected against contamination. The ingression of coarse dust, chips, sand etc. will result in leaks and damage to the fastener driving tool and the couplings.
NOTE: Fine adjustment with the knurled screw 9 is possible.
☐ Turn the knurled screw 9 downwards in order to drive the fastener more deeply into the workpiece.
☐ Turn the knurled screw 9 upwards in order to drive the fastener less deeply into the workpiece.
☐ Turn the exhaust air aperture 1 to guide the exhaust airflow in the desired direction.
□ After finishing work, disconnect the device from the compressor.
- Removing jammed fasteners
☐ If a staple or nail gets jammed in the magazine slot, immediately disconnect the compressed air supply.
Open the magazine 7 as described in the chapter "Loading the magazine".
☐ Open the face plate 12 by pulling the face plate quick clamping lever 13 in the direction of the trigger lock 10.
□ Remove the jammed fastener.
☐ Close the face plate 12 by pulling the face plate quick clamping lever 13 in the direction of the exhaust air aperture 1.
☐ Close the magazine 7 of the compressed air tacker as described in the chapter "Loading the magazine".
● Maintenance and cleaning
WARNING! RISK OF INJURY!
Be absolutely certain to disconnect the device from the compressed air source and empty the magazine before cleaning or maintaining it.
- User maintenance
Lubrication with oil mister
NOTE: As a treatment stage after the pressure reducer, an oil mister provides continuous and optimum lubrication of the compressed air tacker. An oil mister gives off fine drops of oil into the airflow and so guarantees regular lubrication.
- Install the oil mister after the (filter) pressure reducer. To do so, insert the nipple of the oil mister into the quick-release coupling of the (filter) pressure reducer.
■ Then connect the compressed air device to the quick-release coupling provided for it.
Manual lubrication
NOTE: If you do not have an oil mister, lubricate the device each time after driving about 5000 fasteners.
■ Apply 1-2 drops of special compressed air oil into the threaded nipple 4 of the compressed air tacker.
■ Then press the trigger 2 several times.
ATTENTION: Be certain not to use too much oil; otherwise oil could leave the mouth with the fastener and potentially damage the workpiece.
- Cleaning
- Do not use any sharp objects to clean the device and the protective goggles. Do not allow any liquids to enter the device. Otherwise the device could be damaged.
■ Clean the device and the protective goggles regularly, preferably always immediately after finishing work.
Use a dry cloth to clean the housing and use a damp cloth to clean the protective goggles. Under no circumstances should you use petrol, solvent or cleaners which attack plastic.
■ After each use, pack the compressed air tacker, the protective goggles and the compressed air special oil in the carrying case it was delivered with to protect it from dirt.
- ROWI Electronics GmbH warranty
Dear Customer,
This appliance has a 3-year warranty valid from the date of purchase. If this product has any faults, you, the buyer, have certain statutory rights. Your statutory rights are not restricted in any way by the warranty described below.
Warranty conditions
The validity period of the warranty starts from the date of purchase. Please keep your original receipt in a safe place. This document will be required as proof of purchase.
If any material or production fault occurs within three years of the date of purchase of the product, we will either repair or replace the product for you at our discretion. This warranty service is dependent on you presenting the defective appliance and the proof of purchase (receipt) and a short written description of the fault and its time of occurrence.
If the defect is covered by the warranty, your product will either be repaired or replaced by us. The repair or replacement of a product does not signify the beginning of a new warranty period.
Warranty period and statutory claims for defects
The warranty period is not prolonged by repairs effected under the warranty. This also applies to replaced and repaired components. Any damage and defects present at the time of purchase must be reported immediately after unpacking. Repairs carried out after expiry of the warranty period shall be subject to a fee.
Scope of the warranty
This appliance has been manufactured in accordance with strict quality guidelines and inspected meticulously prior to delivery.
The warranty covers material faults or production faults. The warranty does not extend to product parts subject to normal wear and tear or fragile parts such as switches, batteries, baking moulds or parts made of glass.
The warranty does not apply if the product has been damaged, improperly used or improperly maintained. The directions in the operating instructions for the product regarding proper use of the product are to be strictly followed. Uses and actions that are discouraged in the operating instructions or which are warned against must be avoided.
This product is intended solely for private use and not for commercial purposes. The warranty shall be deemed void in cases of misuse or improper handling, use of force and modifications/repairs which have not been carried out by one of our authorised Service centres.
Warranty claim procedure
To ensure quick processing of your case, please observe the following instructions:
■ Please have the till receipt and the item number (IAN 315477) available as proof of purchase.
■ You will find the item number on the type plate, an engraving on the front page of the instructions (bottom left), or as a sticker on the rear or bottom of the appliance.
If functional or other defects occur, please contact the service department listed either by telephone or by e-mail.
■ You can return a defective product to us free of charge to the service address that will be provided to you. Ensure that you enclose the proof of purchase (till receipt) and information about what the defect is and when it occurred.

NOTE: You can download these instructions along with many other manuals, product videos and software on www.lidl-service.com.
Service
Should problems arise whilst operating your ROWI Electronics product, please proceed as follows:
Contact us
You may contact the ROWI Electronics Service Team at:
ROWI Electronics GmbH
Augartenstr. 3
76698 Ubstadt-Weiher, Germany
Ld-services@rowi-electronics.com
Service-Hotline: +800 7694 7694
(free from landlines)
IAN 315477
Most problems can be resolved with the skilled technical support of our Service Team.
- Disposal

Do not dispose of this product or its accessories with household waste but at municipal recycling collection facilities.

The packaging is made of environmentally friendly materials that can be disposed of at local recycling facilities.
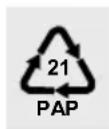
Observe the marking of the packaging materials for waste separation, which are marked with abbreviations and numbers with following meaning: 1-7: plastics / 20-22: paper and fibreboard / 80-98: composite materials.
● Translation of the original declaration of conformity/Manufacturer C€
We,
ROWI Electronics GmbH
Augartenstr. 3
Person responsible for the documentation: Marc Stockenberger, hereby declare that this product complies with the following standards, normative documents and EC directives:
Designation of the device:
Air Stapler/Nailer PDT 40 E4
Relevant EU directives:
Machinery Directive 2006/42/EC
Applicable harmonised standards:
EN 792-13:2000+A1:2008
Year of manufacture: 05-2019
Serial number: IAN 315477
Person responsible for the documentation:
Marc Stockenberger
Location: Ubstadt-Weiher
Date/Signature of manufacturer: 02.05.2019

Particulars of the signatory:
Marc Stockenberger
Managing Director
Poids (sans accessoires
Ld-services@rowi-electronics.com
Directive machines 2006/42/CE
WAARSCHUWING! LETSELGEVAAR!
WAARSCHUWING! LETSELGEVAAR!
Ld-services@rowi-electronics.com
Servicehotline: +800 7694 7694
Ld-services@rowi-electronics.com
Hotline serwisu: +800 7694 7694
Ld-services@rowi-electronics.com
Servis-hotline: +800 7694 7694
Ld-services@rowi-electronics.com
Marc Stockenberger (Managing Director), declares the following conformity in accordance with the EU directive and standards for products: Protective goggles 026 (GUOTAI 1 F CE / GUOTAI 166 F CE)
FR BE


- DRUCKLUFT-TACKER PDT 40 E4
- AIR STAPLER/NAILER PDT 40 E4
- AGRAFEUSE CLOUEUSE PNEUMATIQUE PDT 40 E4
- DRUCKLUFT-TACKER
- PERSLUCHT-SPIJKERPISTOOL
- FR BE
- Key to the pictograms ...... Page 18
- Introduction Page 18
- Special references ...... Page 19
- Safety of the fastener driving tool Page 20
- Preparing the product for use ...... Page 23
- Operation Page 23
- Use Page 23
- Maintenance and cleaning ...... Page 25
- ROWI Electronics GmbH warranty Page 25
- Service Page 27
- Disposal Page 27
- Translation of the original declaration of conformity/
- Manufacturer CE Page 27
- Declaration of conformity C€ of protective glasses ...... Page 86
- - Introduction
- Intendeduse
- ● Features and fittings
- Included items
- - Technical data
- Noise and vibration data:
- Vibration values in accordance with ISO 8662-11:1999:
- Mechanical impact (vibration)
- Special references
- Instructions
- NOTE
- ● Safety of the fastener driving tool
- - Work safety
- ● Additional safety information for compressed air tackers
- WARNING! RISK OF INJURY!
- ● Additional safety information for the protective goggles
- Declaration of the markings of the protective goggles:
- - Warnings for the compressed air special oil
- - Triggering device
- - Actuating system
- Additional instructions for fastener driving tool operated by compressed air
- WARNING!
- Original accessories/tools
- ● Preparing the product for use
- Operation
- - Connecting the compressed air source
- - Loading the magazine
- Use
- Handling the tool
- - Removing jammed fasteners
- ● Maintenance and cleaning
- - User maintenance
- Manual lubrication
- - Cleaning
- - ROWI Electronics GmbH warranty
- Warranty conditions
- Warranty period and statutory claims for defects
- Scope of the warranty
- Warranty claim procedure
- Service
- Contact us
- ROWI Electronics GmbH
- IAN 315477
- - Disposal
- ● Translation of the original declaration of conformity/Manufacturer C€
- Designation of the device:
- Relevant EU directives:
- Applicable harmonised standards:
- Year of manufacture: 05-2019
- WAARSCHUWING! LETSELGEVAAR!
Brand : PARKSIDE
Model : PDT 40 E4
Category : Electric stapler