F210 - Fan BONECO - Free user manual and instructions
Find the device manual for free F210 BONECO in PDF.
User questions about F210 BONECO
0 question about this device. Answer the ones you know or ask your own.
Ask a new question about this device
Download the instructions for your Fan in PDF format for free! Find your manual F210 - BONECO and take your electronic device back in hand. On this page are published all the documents necessary for the use of your device. F210 by BONECO.
USER MANUAL F210 BONECO
Read and save these instructions
Overview and part names 17
Start-up 18
Handling 19
Handling 19
Alignment 19
Positioning tips 20
Notes on performance 20
Air-conditioning System (AC) 20
Fresh air 20
Multiple floors 20
Rooms with high ceilings 20
Cleaning 21
Safety instructions 21
Cleaning the housing 21
Power consumption 33 W (max. level)
Operation noise level 58 dB(A) (max. level)
Air flow 1260 m 3 / h
Air-speed 3.9m / sec
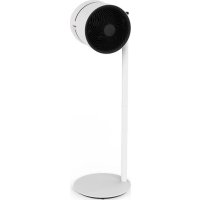
Dimensions L×W×H 375×375×403 mm
Weight 4.5 kg
- Subject to change

INTRODUCTION
DEAR CUSTOMER,
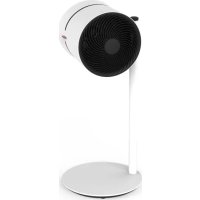
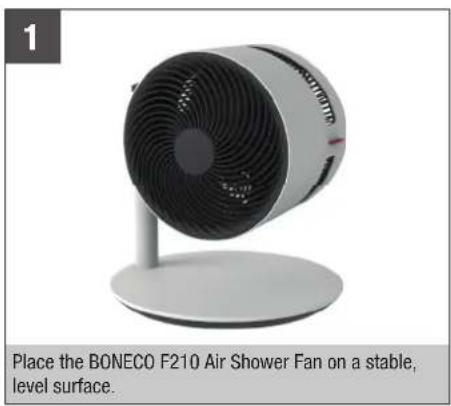
Congratulations on your purchase of the BONECO F210 Air Shower Fan. These high-performance units seamlessly adapt to your needs. When set to the lower output levels, they provide a pleasant breeze in your home on hot days. On the other hand, if you use an air conditioner, the powerful fan distributes the air throughout the room to ensure a uniform temperature.
In developing the BONECO F210 Air Shower Fan, low maintenance and durability were of primary importance. The fan blade's one-of-a-kind shape creates a uniform air flow using minimal energy, which is also good for the environment. The elegant design harmonizes with any decorative style so that you can use your BONECO F210 Air Shower Fan throughout the entire year.
We hope you enjoy your new BONECO F210 Air Shower Fan!
ITEMS INCLUDED
BONECO F210 Air Shower Sy
Manual Safety instructions
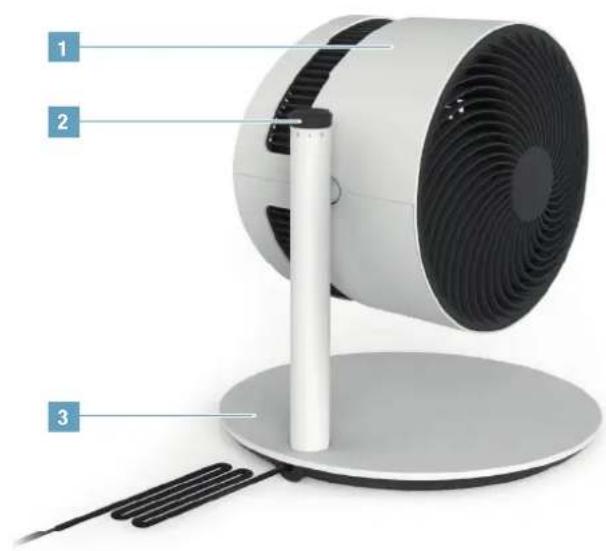
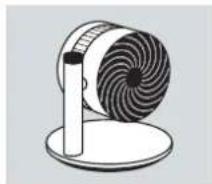
OVERVIEW AND PART NAMES

1 Fan unit
2 Output regulator
3. Base with power cord
en
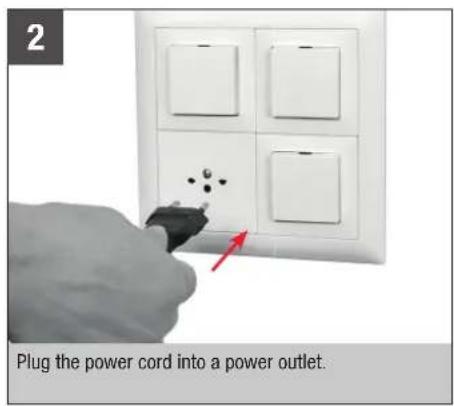
START-UP
HANDLING
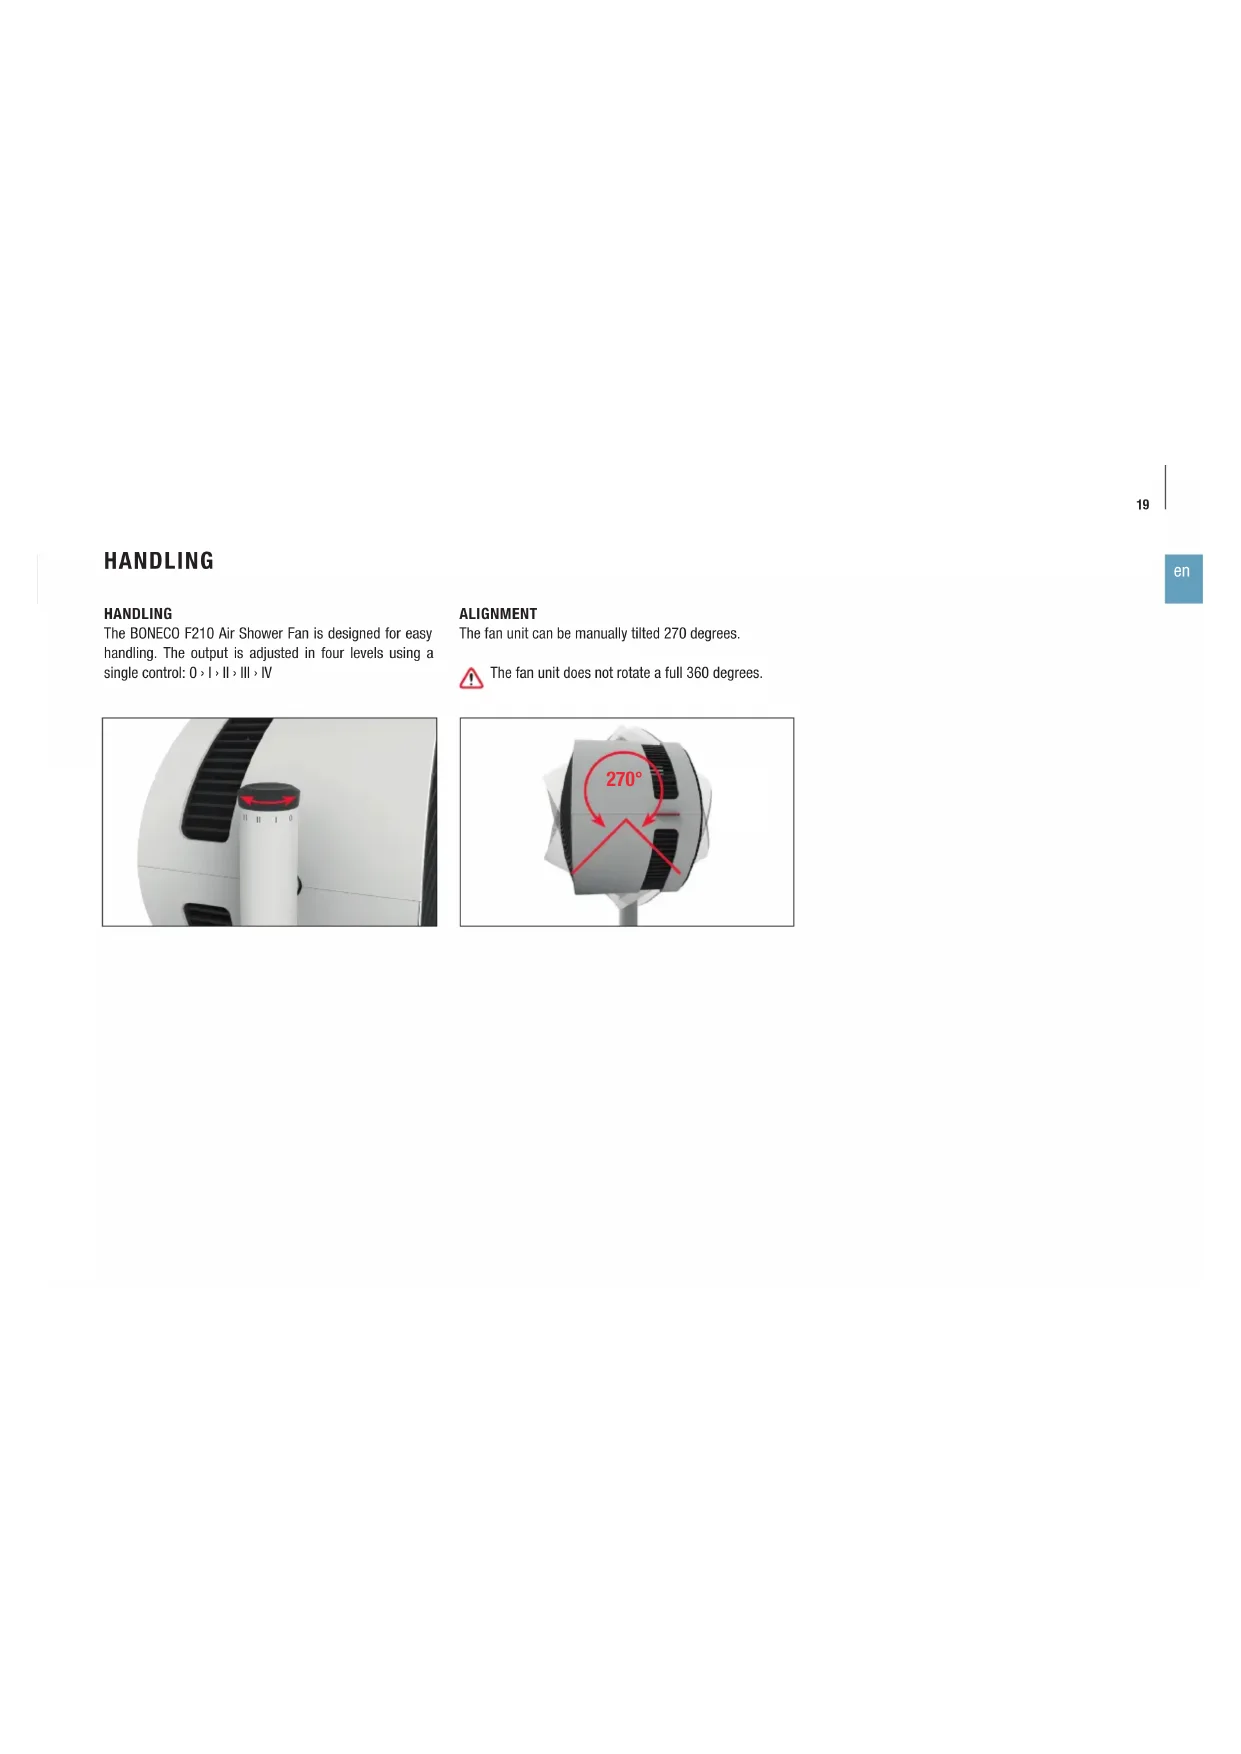
HANDLING
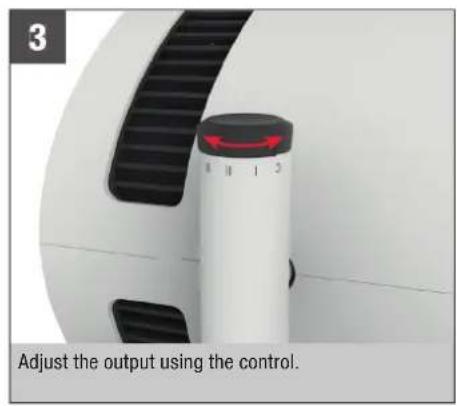
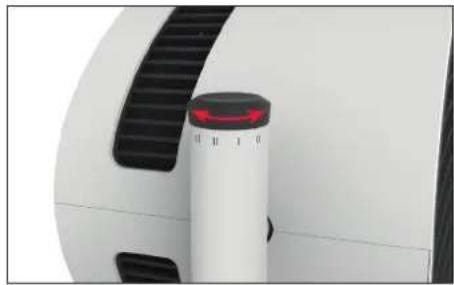
The BONECO F210 Air Shower Fan is designed for easy handling. The output is adjusted in four levels using a single control: 0 > 1 > 1 > 1 > 1
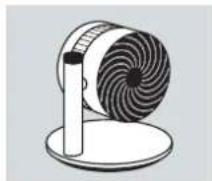
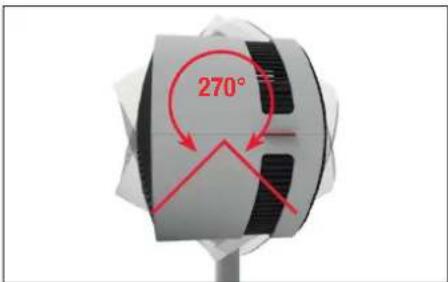
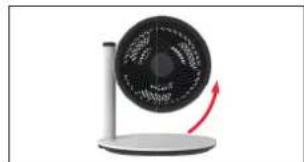
ALIGNMENT
The fan unit can be manually tilted 270 degrees.

The fan unit does not rotate a full 360 degrees.
en
POSITIONING TIPS
NOTES ON PERFORMANCE
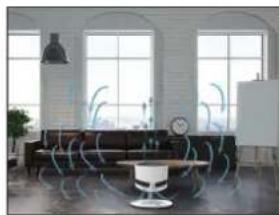
The BONECO F210 Air Shower Fan is equipped with a high-performance fan that can move large amounts of air. Making use of this feature: Guide the air in a specific direction to achieve a uniform room climate. The following examples illustrate how to do this.
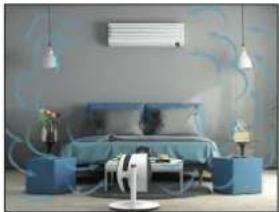
AIR-CONDITIONING SYSTEM (AC)
An air conditioner distributes the temperature in various ways. Use the BONECO F210 Air Shower Fan to move the warm air towards the air-conditioning system. This can be done directly or indirectly via air circulation, as shown in this image.
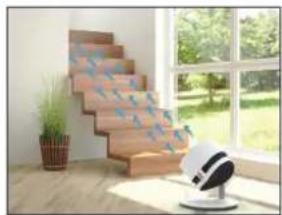
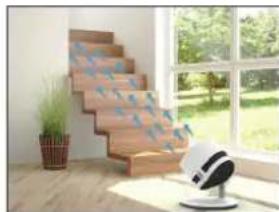
MULTIPLE FLOORS
In the summer, it can become hot and muggy on the upper floors. The powerful BONECO F210 Air Shower Fan directs the cool air from the ground floor to the multiple floors achieving a uniform temperature.

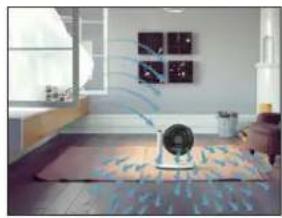
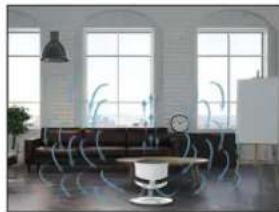
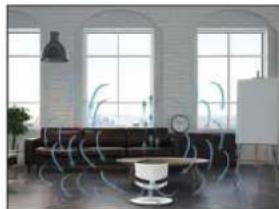
FRESH AIR
The BONECO F210 Air Shower Fan helps you achieve better ventilation indoors. If cross-ventilation is not created, guide fresh air directly from the window into the desired room.
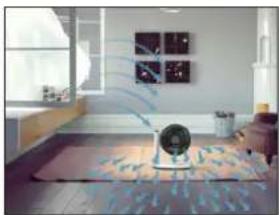
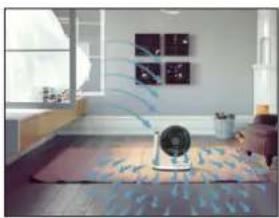
ROOMS WITH HIGH CEILINGS
In air-conditioned rooms with high ceilings, the cold air sinks to the floor while the warm air rises to the ceiling. Turn the BONECO F210 Air Shower Fan straight up for an air-shower sensation.

CLEANING
SAFETY INSTRUCTIONS
Always unplug the BONECO F210 Air Shower Fan before you begin cleaning! Failure to do so can result in electric shock and fatal injury!
Do not use alcohol or corrosive cleaning agents for cleaning.
CLEANING THE HOUSING
The BONECO F210 Air Shower Fan is designed for low-maintenance operation, even after years of use. In most cases, a dry cloth can be used for cleaning.
If stubborn dirt is present, clean the housing using a damp cloth. Add a small amount of dishwashing detergent to the water.
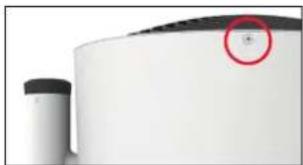
CLEANING THE FAN BLADES
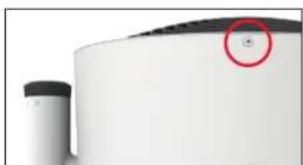
- Tilt the fan unit upwards and loosen the safety screw.
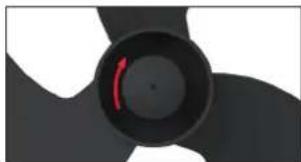
- Remove the front grill by turning counterclockwise slightly.

- Unscrew the safety screw in the middle clockwise.
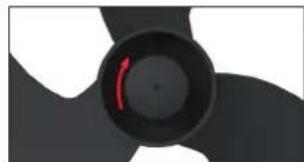
- Remove the fan blades and clean them with a damp cloth.
- Put the unit back together by following the steps in reverse order.
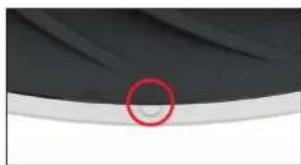
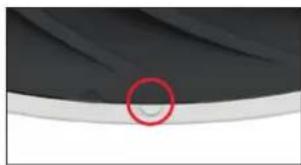
- Attach the front grill with the safety screw. When doing so, pay attention to the position of the screw on the front grill.


MODE D'EMPLOI
BONECO F210

SOMMAIRE
\section*{Caracteristiques techniques 25}
Introduction 26
A ventilatorlapatok tiszitatasa 81
MUSZAKI ADATOK
Muszaki adatok*
Modell BONECO F210
ÖVERSIKT OCH DELARNAS NAMN
Rongering at huscel 121
Rengaring at ventilatorjulene 121
TEKNISKE DATA
Tekniske data*
Model BONECO F210
Stromforsningsspanding 220-240V 50Hz
Energiforbrug 33 W (maks. niveau)
Driftsstoj 58 dB(A) (maks. niveau)
Luftstrøm 1260 m ^3/^t .
RUM MED HOJT TIL LOFTET
I rum med aircondition og hjt til loftet synker den kolde luft ned til gulvet, mens den varme luft stiger opad. Drej BONECO-ventilatoren opad for at opna luftcirkulation.
RENGØRING
SIKKERHEDSANVISNINGER
PATALPOS AUKSTOMIS LUBOMIS
Patalpose su aukstomis lubomis, kuriose jrengtas oro kondcionierius, saltasoras nuseda ant grindu,o siltas -pakyla ir laikosi ties lubomis.Pasukite_BONECO F210 Air Shower ventilatoriuyiriyu kad butu sukurtas orso brauto is virsaus pojitis.

VALYMAS
SAUGOS INSTBUKCLJOS
Pries pradedami valtyi ,BONECO F210 Air Showerventiliatori visada jj atjunkite! Jei to nepadarysite, galite patirti elekros smugir mirtinai susizaloti!
Valymui nenaudokite alkoholio ar esdinanciu valymo priemoniu.
KORPUSO VALYMAS
Enikonk kai ovuaic efapntnatv 207
IpoTa BjmuTa 208
Xειρισμός 209
Xειριαμός 209
Euuypaum 209
Euoue yiayn tonoetnon 210
Bo3duhmynotok1260M 3/4
CKoPoCtB Bo3DyUHOrO noTOKa 3,9 M/ceK
Pa3mepbI 工 × 山 × B 375×375×403MM
Bec 4,5 Kr
- Bo3MOXHHI3MHeHHH

KOMJIeKTAUa
YBAKAEMbI NOKyNTATEb,
No3dpabJnem BAC CpnhOpBeHnEM BeHTnIaTopa BONECO F210 Air Shorw Fan. 3TOB BICOKonpO3BODTeHBn npN6op 3ΦΦeKTHBNO aADNPuyCTK BAaHmNOTpebOCTM.B JApKne Dn OH Oo3dAeB BAWeOMe PnTHBn IerKn BetePok.CpyrO CTopoHb, ECIn y Bac ECTb CNTema KOHNIOHOHPoBAHn BO3DyXa, MOuHb BEHTnTOp paBHomepHO paCnpdeHNT CBExKn BO3dyx No NOMEeHHNO, NODeepKnBaN oocToHHyU TEMepatypy.
Pn pa3pa60ke np6bopa BONECO F210 Air Shower Fan Ooc6oe BHIMAHNE ydEJIIOcB IpOCTe TEXHueCKOrO 06CnyKUBAHN HADEXKHO. YHKALNBHAR FOpMa IONACTE BEHTNIATOPA CO3aET paBHOMePHBI 03- DHHb NOtOK,NOTpe6JIa Pn 3OM MNHMUMY 3HEP Tm,TO CHXKAET HERATMBHO B03dEChTBHe HA OKpyXaOHUY Cpey. 3neraHTHB NdzH INoDJeT NOI KIO6e OOFPMLeHne HTepeba, TAK TO Bbl CMOXKeTe NCnObn30BaT Bau BONECO F210 Air Shower Fan B No6oe Bpemra rda.
HadeemcBbl nolnyte ydoBoNcTBne ot mNoIb3oBaHHa HOBO BONECO F210 Air Shower Fan!
KOMNIJEKT NIOCTABKN
BONECO F210 Air Shower Fan

PykoBODCTBO no 3KcNpy-atau
MHTCPKMM NO TEXHKe 6e30nacHOCTN
MHOOTAXKHBIE NOMEUENH
BJeTHeB BpEmHa BepxHnX 3TaXkX Yacto CtaHOBITcKapko N dyHo. MouHb BeHTnIaTOp BONECO F210AirShower HAnpaBHT npoxlaHb Bo3dyxC HmKHeRo3TaKa Ha BepxHnY, Yo6bI ObecneHTb OJHpOHyToTEMepatpy BO BcEM NOMeUeHN.
IPOBETPMBAHME
BENTNATOP BONECO F210 Air Shower nomoket Bam
ObecneuHb Nyuyu zuPKyuaHO BO3dyxA B NOMe-
ueHH. Ecnk CKBo3HO npOBetpNAHme B NOMeueHH
OTcyTCTByET, BY MOKeTe HApapBHT CBexKn BO3dyx
0KHA B Xekaemom HapabHeHH.
NOMEUEHNA BbICOKMIMIOTJKAMN
BnomeueHnX C BbICOKMn NOTONKAMn, rIe NcNob3yETcnaCTema KOHNuHOHPOBaHnB O3dyxa, XoIOHbN B03dyx ONyCAeTcR BHN3 K NOy, a TEnbl B03-dyX NODHMaEcR K NOTOky. NoBepHnTe BEHTnIATOP BONECO F210 Air Shower BePTNKaJIbHO BBepx, YTO6bIco3aTb 3ΦΦEKT BO3dyWHOrO Dya.
YXOД 3A ПИБОРМ
HNCPTYKUINI NO TEXHNIKE 630NACHOCTN
Peped ouctkOBcerda OTKIOaHTe np6bOP BONECO F210 Air Shower Fan ot cetn! HecobIO-DeHne 30I peKOMEHauM MOKeT PpNBecrK ydAp4y 3JekTPuueckm TOKOM TpaBMe, HECOBMECTMOnC XJN3HbO!
He nCnONb3yInTe dIg OUcNk CpeCTBa,CoepKxAaIe aIKORoNB uIN arpeCCNBHbe BeueCTBa.
OUMCTKA KOPNYCA
BONECO F210 Air Shower pa3pa6oTaHbI nI MaKcImaJIbHO npocToTbI oClykunBaHn, daxe Cnyctra TOnbl EKcNlyaatau. B 6OJIbUHNCTBe cLyuae BnI ONUCTKn np60opa MoKHO nCOnlb3OBaTb cyXyTO KaHb.
Ecn coxpanhotc TpydHOBbIbOdBmble 3aqr3hEnn H OCHNTe Kopnyc npn nmoOnu BlaXKnOH TkaHN. TKaHb MOxHO CMouTH BODO CdoabneHem HeoBluoro KOJNUeCTBa CpeDCTBa Dn MaTb Nocybl.
OYNCTKA JIONACTEN BEHTNIJTOPA
- Pa3BepHnTe BEHTNlAToP BePTMkAnbHo BBePx m OcIa6bTe 3aTJkKy npEdoxpaHnteIbHO BnHTa.
- CHIMITE nepeHIOIO peWETky, AKKypaTHO NOBepHyB ee npOTNB YACOB CTpeKN.
- OTeBepHnTe CEHTPbHBn npedoxpAHNTeHBn BnHT, NOBEPHyB ero no YacOBn CTpeJIke.
- CHMMTE nonactn BEHTHJITOPa H ONUCTNTe npn NOMOUI BIAKHOI TKAHN.
- C6epeHTe np6op, cneDy onncaHHbIM 3Tanam B o6paTHOM npRKe.
6.3akpenite nepeHIO peWETky npn nomou npedoxpaHTenbHO BnHTa.Pnp 3tOM obaaate BHMMAHe Ha noLOXeHBe BnHTa Ha nepeHne peWETke.

jp
取掇説明書
BONECO F210

目次
仕樣 225
はしもに 226
購入の客様へ 226
七卜内容 226
外觀及各部の名称 227
設置 228
使方 229
使方 229
向の調整 229
設置場所のボイ卜 230
性能にて 230
EAPON 230
外気を取り接入の场合 230
上層階に送風する場合 230
天井が高い部屋の场合 230
手入231
安全上ご注意 231
八旬珍のお手入手 231
羽根のお手入手い 231
仕樣
仕樣*
BONECO is a registered trademark of BONECO AG, Switzerland
BONECO AG, Espenstrasse 85, 9443 Widnau, Switzerland