
Evidence EA8901 - Coffee machine KRUPS - Free user manual and instructions
Find the device manual for free Evidence EA8901 KRUPS in PDF.
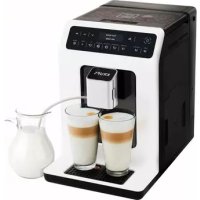



| Product type | Automatic coffee machine with grinder |
| Brand | Krups |
| Model | Evidence EA8901 |
| Dimensions (H x W x D) | 367 x 240 x 380 mm |
| Weight | 8.4 kg |
| Electrical supply | 220-240 V ~ / 50 Hz, 1450 W |
| Pump pressure | 15 bars |
| Bean hopper capacity | 250 g |
| Water tank capacity | 2.3 L |
| Number of drinks | More than 14 (espresso, double espresso, coffee, cappuccino, latte, ristretto, doppio, americano, teas, etc.) |
| Special features | Dark (intensity), Extra Shot, double preparation, volume/temperature adjustment, One Touch Cappuccino |
| Connectivity | Bluetooth BLE, Krups app for settings and remote control |
| Grinder | Metal burrs, fineness adjustment (23 settings) |
| Water filter | Claris Aqua Filter System (optional, with change indicator) |
| Automatic maintenance | Rinsing coffee/milk circuit, cleaning and descaling programs, dregs bin empty alert |
| Spare parts included | One Touch Cappuccino frother, milk conduit, disassembly key, cleaning tablets, descaling sachet |
| Programmable auto-off | Yes, automatic shut-off after adjustable inactivity |
| Warranty and after-sales service | Manufacturer warranty, directory of Krups after-sales centers included |
Frequently Asked Questions - Evidence EA8901 KRUPS
User questions about Evidence EA8901 KRUPS
0 question about this device. Answer the ones you know or ask your own.
Ask a new question about this device
Download the instructions for your Coffee machine in PDF format for free! Find your manual Evidence EA8901 - KRUPS and take your electronic device back in hand. On this page are published all the documents necessary for the use of your device. Evidence EA8901 by KRUPS.
USER MANUAL Evidence EA8901 KRUPS
APPLICATION KRUPS ESPRESSO p.6
START-UP
INSTALLING THE APPLIANCE p. 7
BEFORE PREPARING DRINKS
IMPORTANT NOTES p. 8
PREPARING DIRECT ACCESS COFFEE DRINKS. 9
PREPARING DIRECT ACCESS MILK DRINKS. 9
PREPARING TEAS. p.10
PREPARING OTHER DRINKS p.11
OTHER FUNCTIONS. p.11
GENERAL MAINTENANCE . p.13
PROBLEMS AND CORRECTIVE ACTIONS. p.14
IMPORTANT INFORMATION ABOUT THE PRODUCT AND THE USER MANUAL
Presents the different buttons
Congratulations! You are now the proud owner of your Espresso Automatic EA89 Series.
This new product offers more than 14 hot drinks: espresso, double espresso, coffee, double coffee, ristretto, doppio, Americano, cappuccino, double cappuccino, latte, double latte, frothy milk, green tea, black tea, herbal tea.
In addition to this very large choice, the machine offers many opportunities for customizing drinks. For example, you can use a function that will increase the intensity of your coffee if you appreciate more full-bodied preparations. You can set the amount, strength, and temperature of your drinks.
The most frequently consumed drinks are accessible with one simple touch on the main interface. As for the screen, it allows you to follow the progress of your coffees and provides easy access to the different menus.
Most drinks can be prepared in batches of two, which saves time and is more convivial.
Thanks to its KRUPS Quattro force technology, including a Compact Thermoblock System with built-in percolation chamber, its 15 bar pump, and because it uses coffee beans which have been freshly ground just before making the coffee, your machine will serve you hot ristrettos, espressos, and coffees from the first cup with maximum aroma and a creamy golden-brown froth.
To give the drink maximum flavor, an espresso is traditionally served in a small, flared porcelain cup. For an optimum temperature espresso and a dense creamy froth, we recommend that you pre-heat your cup.
You will probably need to try several types of coffee before you find the one that suits you. By experimenting with the blend and/or roast, you will eventually arrive at the ideal result.
Espresso coffee has a richer aroma than classic filter coffee. Despite its stronger taste, which remains longer on the palate, an espresso contains less caffeine than filter coffee (around 60 to 80 mg per cup compared to 80 to 100 mg per cup) due to its shorter percolation period.
The quality of water used is another determining factor which affects the overall quality of the brewed coffee. You should ideally use water which is fresh from the tap (so that it has not had time to stagnate due to air contact), which is cold, and which does not smell of chlorine.
The tactile, ergonomic, and comfortable buttons make it easy for you to browse. You will be guided through each step, from preparing your drink to servicing your machine.
We wish you many years of enjoyment with your Krups machine.
The Krups team
To get the most out of your machine and obtain good quality coffees, here is some advice:
- The quality of your water significantly influences the quality of the flavors. Limescale and chlorine can alter the taste of your coffee. We recommend that you use the Claris Aqua Filter System cartridge or low mineral-content water to preserve all of the flavors of your coffee.
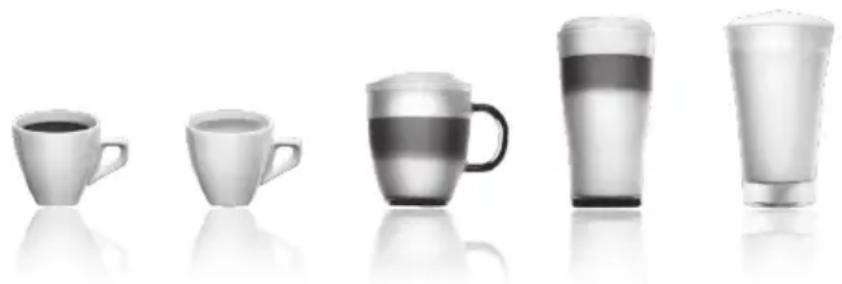
- When preparing exclusively coffee recipes, we recommend that you use tulip-shaped porcelain cups, preheated beforehand (by running them under hot water, for instance), and of a size appropriate to the quantity you want to make. For your milk-based preparations, we recommend that you use thick glass cups for an appetising result.
- Roasted coffee beans can lose their flavour if they are not protected. We recommend that you use the amount of beans required for your consumption for the next 4-5 days. Although the quality of coffee beans is subjective and varied, we do recommend that you use arabica rather than robusta.
- Lastly, please remember that oily and caramelised coffee beans must be avoided, as they can damage your machine.
- The quality and fineness of the grinding determine the strength of the flavours and the quality of the cream. The finer the beans are ground, the richer the cream. Indeed, grinding should be adapted to the drink desired: fine for ristretto and espresso, coarser for coffee.
- You can use pasteurised or UHT, skimmed, semi-skimmed or whole milk, straight from the refrigerator (7°C). Using special milks (microfiltered, raw, fermented, enriched, etc.) or vegetable milks (rice, almond milk, etc.) can produce less satisfactory results especially when it comes to the quantity and quality of the froth.
CONTENTS
IMPORTANT INFORMATION CONCERNING THE APPLIANCE AND INSTRUCTIONS. p.20
TECHNICAL DATA. p.20
APPLIANCE DESCRIPTION. p.21
OVERALL VIEW p.21
KRUPS APP .p.22
USING YOUR APPLIANCE
INSTALLING THE APPLIANCE . p.23
BEFORE PREPARING DRINKS
IMPORTANT INFORMATION. p.24
PREPARING COFFEE DRINKS VIA DIRECT ACCESS. p.25
PREPARING MILKY DRINKS VIA DIRECT ACCESS. p.25
PREPARING TEAS. p.26
PREPARING OTHER DRINKS: RISTRETTO, DOPPIO, AMERICANO OR FROTHY MILK. p.27
OTHER FUNCTIONS. p.27
GENERAL MAINTENANCE. p.28
TROUBLESHOOTING. p.30
IMPORTANT INFORMATION CONCERNING THE APPLIANCE AND INSTRUCTIONS
In this manual you will find all of the important information concerning the preparation, use and maintenance of your machine.
Read the instructions carefully before using your appliance for the first time and keep them for future reference: KRUPS may not be held liable in the event of any use that does not comply with the instructions.
GUIDE TO THE SYMBOLS USED IN THE INSTRUCTIONS

Warning: Risk of serious injury or death. The lightning bolt symbol warns against electrical dangers.

Warning: Risk of possible malfunction, damage, or destruction of the appliance.

Warning: General or important note concerning the operation of the appliance.
Products supplied with your machine
Check the products supplied with your machine. If any parts are missing, contact your hotline (see p. 22: Initial settings).
Parts supplied:
- Espresso Automatic Series EA89 - 2 cleaning tablets - 1 descaling sachet - Milk conduit adaptable to the "One Touch Cappuccino" block - Dismantling key for cleaning the steam circuit - Safety instructions booklet - Claris - Aqua Filter System cartridge with fitting accessory - 1 stick for testing water hardness - Instructions - List of approved Krups service centres - Guarantee documents - 1 steam nozzle cleaning kit
TECHNICAL DATA
| Appliance Espresso Automatic Series EA89 | |
| Power supply 220-240V~ / 50 Hz | |
| Pump pressure 15 bars | |
| Coffee bean container 250 g | |
| Power consumption During operation: | 1,450 W |
| Water tank 2.3 I | |
| First use and storage Indoors, in a dry | place (protected from frost). |
| Dimensions (mm) H x L x D 367 x 240 x 380 | |
| Weight EA89 (kg) 8.4 | |
Subject to technical adaptations.
APPLIANCE DESCRIPTION
A Water tank handle/lid B Water tank C Coffee grounds collector D Height-adjustable coffee outlets E Grid and removable drip tray F Coffee bean container lid G One Touch Cappuccino removable block H Milk tube and connector Water level float.
1 Coffee bean container
J Grinding fineness adjustment dial K Cleaning tablet funnel L Metal grinding mill
2 Display panel
M Display N "On-off" button 0 Tactile buttons
Specific information about:
The drip tray: it allows you to collect water or coffee that might flow out of the appliance during and after preparation. It is important to always leave it in place and to empty it regularly.
Important: Read these instructions carefully and keep them for future reference. Please follow the safety guidelines.
Manufacturer:
SAS GSM
Presentation of the different buttons
| Button D | Description / General functions |
| OK DARK EXTRA SHOT EXPRESSO LONG COFFEE | Switching the machine on and off.It is necessary to press and hold the button to start the machine. |
| Allows you to return to the previous screen or stop a recipe in progress. | |
| Browse upwards in the menu / increment the parameter selected | |
| Browse downwards in the menu / decrement the parameter selected | |
| Confirmation of selection. | |
| Function for increasing the strength of the coffee. | |
| Function for adding a strong espresso to the recipe selected.Accessible with the main recipes (espresso, long coffee, cappuccino, Macchiato, tea) according to model. | |
| Starts preparing an espresso. | |
| Starts preparing a Coffee. | |
| CAPPUCCINO MACCHIATO TEA MORE SETTINS | Starts preparing a Cappuccino |
| Starts preparing a Macchiato (a large measure of milk, a shot of Espresso, topped with frothy milk foam). | |
| Provides access to the menu for preparing a tea or a herbal tea. | |
| Provides access to additional preparations: Ristretto, Frothy milk, Doppio, Americano, (according to model). | |
| Provides access to the general menu (machine settings, cleaning and product information). |

:Bluetooth light:
When the symbol is not lit up, the machine is not connected or the function is deactivated.
When the symbol is lit up, the machine is connected.
Bluetooth is always activated. You can deactivate it in menu

I then "settings".
Specific information about the buttons' lighting
When a button is not illuminated, the corresponding function is inaccessible.
When it is slightly illuminated, the function is available and can be selected.
While the function requested is in progress, the light becomes very bright.
KRUPS APP
You can check if your smartphone is compatible on www.krups.com
Downloading the app
In order to be able to download the app, you must have a smartphone equipped with a Bluetooth® BLE (Bluetooth Low Energy) module and an Android version greater than "4.3" or iOS greater than "9". If your smartphone does not have this, you will not be able to use the app.
The KRUPS app is available on Play Store for the Android version and on App Store for the iOS version.
Configuring the account
In order to be able to take advantage of all the opportunities offered by the app, you must start by creating an account.
Complete the fields required and confirm the conditions of use in order to complete the creation of your account.
You will be required to enter a password to guarantee the confidentiality of your data.
Bluetooth® activation
To connect your telephone to the machine, you must activate your phone's Bluetooth® BLE module and ensure that the machine's Bluetooth® module is also activated. Go to the settings menu, select the connectivity function and activate the Bluetooth® module if it has been deactivated (the Bluetooth® module is activated by default).
Pairing with the machine
Follow the instructions provided on your telephone to pair your smartphone with the machine. Pairing is only possible when the BLE logo is on.
When the machine detects a pairing request from the smartphone, a screen on the machine asks you to accept the pairing. Accept by pressing OK, a screen appears on your smartphone asking you to confirm pairing: press to pair.
If pairing fails, it is possible for you to try again several times and it is advised to check that the machine's Bluetooth® BLE module is correctly activated.
If the problem persists, contact the after-sales service for help installing your app. In the home menu on your smartphone, the "Contact Krups" option allows you to access the contact details for the after-sales service.
When the machine is paired, the Bluetooth® symbol should be brightly lit, a sign that it is correctly activated.
Machine settings
Once paired, you can modify the machine's settings via the app (the date and time of the smartphone will be updated automatically on the machine, so you do not have to do it).
The mobile app facilitates the initial installation of the machine and the initial settings.
Using the app
Many functions are offered via the app:
- Running remote preparations,
- Management of a favourites library and a cellar book,
- Access to the account and information on the machine,
- Access to news and information about the world of coffee,
- Access to a user guide with tutorials and videos in order to take advantage of all the machine's potential,
- Quick access to the after-sales service in the event of a query or a problem concerning your appliance or the app.
You will be able to discover all these functions by browsing the app (whether you are connected to your machine or not).
Do not hesitate to connect to the app as often as possible in order to view news and regularly monitor your machine.
USING YOUR APPLIANCE INSTALLING THE APPLIANCE

Warning: Connect the appliance to an earthed 230 V mains socket. Failure to do so means that you run the risk of fatal injury due to electricity!
Respect the safety guidelines indicated in the "Safety guidelines" booklet.
Switching ON the appliance
Switch on the appliance by pressing the ON/OFF button until "Hello" appears on the screen Fig. 1. Follow the instructions provided by your appliance.
Initial settings
When using the machine for the first time, you will be prompted to configure various settings. Follow the indications displayed on the screen. The aim of the following paragraphs is to give you a few visual cues.
Here are the first settings required:
Language
Select a display language by pressing the arrows until the language of your choice appears. Press "OK" to confirm.
Measuring unit
You can set the unit of measurement for volume to ml or oz.
Date and time
To set the time, press the desired time format (24 hours or AM/PM).
Auto-off
It is possible to program the time at which you want your machine to switch on automatically. This setting can be adapted as you wish: daily, weekly or weekend. Select the time at which you want it to start automatically following the time format selected earlier.
You can also select the length of time after which your appliance will switch off automatically in order to optimise your energy consumption.
Rinsing the coffee circuit
You can choose to activate it or not when switching on the machine. This allows you to ensure the quality of the coffee in the cup in order to avoid the presence of residue.
Filter installation
When switching on for the first time, the appliance asks if you want to install the filter. If you wish to do so, and if the hardness of your water requires it, select "YES" and follow the instructions on the screen.
Installing the cartridge in the appliance: Screw the filter cartridge into the bottom of the water tank using the accessory supplied with the cartridge. Fig. 4
Set the month when the cartridge is fitted (position 1 on the illustration, left side figure in the opening) by turning the grey ring located on the upper end of the filter. The month when the cartridge should be replaced is indicated in position 2 on the illustration. Fig. 5.
Put a container of 0.6 I under the steam exit. Fig. 6.
The machine must be primed whether the filter has been installed or not. This means that the water circuits have to
be filled. To do this, follow the instructions provided on the screen. The machine will begin by filling the water circuits, preheating the circuits and then will complete an automatic rinse.
The screen will inform you when installation is complete.
Water hardness
You must set your machine depending on the hardness of your water, from 0 to 4. To do this, follow these instructions: Before using the appliance for the first time, check the hardness of your water so that you can set the appliance accordingly. This operation should also be carried out when you use your machine in a place where the hardness of the water is different or if you notice a difference in the hardness of the water. To check the water hardness, use the test strip supplied with your machine or contact your local water authority.
The details of the classes are given in the table below:
| Degree of hardness | Class 0 Very soft | Class 1 Soft | Class 2 Average hardness | Class 3 Hard | Class 4 Very hard |
| ° dH < 3° > 4° | > 7° > 14° > 21° | ||||
| ° e < 3,75° > | 5° > 8,75° > 17,5° > 26,25° | ||||
| ° f < 5,4° > 7,2° > 12,6° > 25,2° > 37,8° | |||||
| Appliance setting | 0 | 1 | 2 | 3 | 4 |
Fill a glass of water and insert a strip. Fig. 2
After 1 minute read the level of water hardness. Fig. 3
Indicate the number of red zones when configuring the appliance.
Preparing the appliance
Remove and fill the water tank. Fig. 7.
Replace the water tank. Fig. 8.
Remove the lid of the coffee bean container and add coffee beans (max. 250 g). Fig. 9.
Replace the lid of the coffee bean container. Fig. 10.
IMPORTANT INFORMATION BEFORE PREPARING DRINKS
Depending on the drinks chosen, your Espresso Automatic EA89 will automatically adjust the quantity of ground coffee.
Preparing the grinder
You can adjust the strength of your coffee by adjusting how finely the coffee beans are ground. In general, the finer the coffee is ground, the stronger and creamier the coffee will be. It may also vary according to the type of coffee used.
We recommend a fine setting for espressos and a coarser setting for coffees.
Adjust the fineness of grinding by turning the coffee grounds fineness adjustment knob (J) which is located in the coffee bean container. This setting should be applied during grinding notch by notch. After 3 rounds, you will notice a pronounced difference in taste.
Setting the fineness of grinding is useful when you change the type of coffee or if you want to make coffee that is more or less strong. However, it is not advised to use this setting systematically.
Adjusting the coffee outlet
For all the drinks available, you can lower or raise the coffee outlets according to the size of your cup or glass. Fig. 11.
Stopping a drink during preparation
You can stop the preparation at any time by pressing the return button.
Caution: pressing this button causes the machine to update, which may last up to 30 seconds. This phase is normal.
When a cycle is interrupted, it does not stop immediately. The machine will finish its cycle and the preparation will be cancelled.
"Double" preparation function
You can prepare two cups simultaneously with your appliance. The double preparation function can be accessed simply by pressing the selection twice and is valid for all drinks (except and ).
DARK function
The "DARK" function allows you to increase the intensity of the coffee (its strength).
You can activate or deactivate it in various ways:
- Before selecting the chosen drink, just press DARK.
- While preparing the drink, and until the end of grinding, you can press DARK.
- By choosing the "DARK" parameter in the Settings menu. To do this, access the Settings menu with the button,
then Settings → drink settings → Dark. The function will be activated for all "coffee" drinks: , , ,
You can do the same to deactivate it.
EXTRA SHOT function
The "extra shot" function allows you to add an espresso at the end of the selected drink.
You can activate or deactivate it in various ways:
- Before selecting the chosen drink: just press EXTRA SHOT.
- While making the drink,
- By choosing the "EXTRA SHOT" parameter in the Settings menu. To do this, access the Settings menu with the button →, then Settings → drink settings → EXTRA SHOT. Therefore, the function will be activated for all preparations.
You can do the same to deactivate it.
PREPARING COFFEE DRINKS VIA DIRECT ACCESS
N.B.: Every time the drink is launched, the machine will remember the last drink prepared, including the settings that were selected.
Preparation
Place the cup(s) under the coffee nozzles. Fig.12
Press the button for the desired drink.
If the machine detects a lack of water when you request this preparation, it will ask you to fill the tank.
Possible settings
It is possible to increase the strength of the coffee by pressing and/or adding a coffee preparation by pressing. You can prepare one or two cups with your appliance.
The machine starts by grinding the beans, tamping the ground coffee and finally brewing the coffee. It is possible to adjust the volume of the coffee being prepared by using the buttons: and
You can stop the preparation at any time by pressing

Important: Automatic rinsing of the coffee outlets: according to the type of preparation, the machine may complete an automatic rinse program when it switches off. The cycle lasts only a few seconds and stops automatically.
PREPARING MILKY DRINKS VIA DIRECT ACCESS
Possible settings
It is possible to increase the strength of the coffee by pressing and/or adding a coffee preparation by pressing. The steam is used to froth the milk. As a higher temperature is required when producing steam, the appliance will run an additional pre-heating phase.
Connect the straight side of the milk tube to the "One Touch Cappuccino" block Fig. 13.
Immerse the other end (bevelled side) in a receptacle filled with milk or directly in your bottle of milk Fig. 14.
Place the cup(s) under the coffee/milk nozzles. Fig.15.
Press the "Cappuccino" button or press the "Macchiato" button. All of the settings can be modified.
The preparation starts by frothing the milk (possible to set the time), and then the coffee flow (possible to adjust the volume). Adjusting the frothing time allows you to vary the quantity of milk and froth.
The next steps follow automatically and your drink is ready to taste Fig.17.
Every time "Cappuccino" or "Macchiato" is run, the machine will remember the last drink prepared, including the settings that were selected.
Cleaning after preparing milky drinks Milk rinsing
The screen indicates "Rinse milk?" at the end of each preparation.
It is advised to rinse after using the milk function in order to ensure the cleanliness of the frothing accessories and the frothiness of the milk.
During milk rinsing, you are required to systematically dismantle and clean the milk tube and connector with hot water.
Fig. 21 and 25.
For the best results, it is advised to clean the "One Touch Cappuccino" removable block regularly (see general maintenance chapter).
If you note a change in the quality of your milk froth, do not hesitate to repeat the rinsing and cleaning process: indeed a milk system that is not well maintained may cause this type of problem.
PREPARING TEAS
Possible settings
Your appliance allows you to prepare three types of tea (green tea, black tea, herbal tea). You can adjust the volume of the drink to taste.
The hot water temperature is adapted to the drink selected.
You can program an extra shot in your tea which will allow you to prepare "tea/coffee" drinks that are very fashionable.
Preparing a tea
Select on the screen. Place the cup(s) under the coffee nozzles. Fig.12
Then select the chosen drink and press OK
If the machine detects no water when you submit your request, it will ask you to fill the tank.
You can modify the volume by using buttons or during preparation.
PREPARED OTHER DRINKS: RISTRETTO, DOPPIO, AMERICANO OR FROTHY MILK
Preparation
Place the cup(s) under the coffee nozzles. Fig.12
If the machine detects no water when you submit your request, it will ask you to fill the tank.
Press button with buttons and , select the desired drink: Ristretto, Doppio, Americano, Frothy milk.
Making a Ristretto
Select Ristretto and press
The machine starts by grinding the beans, tamping the ground coffee and finally brewing the coffee. It is possible to adjust the volume of the coffee being prepared by using the buttons: and
You can stop the preparation at any time by pressing
Making a Doppio
Select DOPPIO and press OK
The preparation is identical to the RISTRETTO but with a double coffee cycle.
Making an Americano
Select AMERICANO and press OK
The preparation is identical to the DOPPIO, but is followed by hot water.
Making a Frothy milk
Connect the straight side of the milk tube to the "One Touch Cappuccino" removable block (Fig. 13). Immerse the other end (bevelled side) in a receptacle filled with milk (Fig. 14).
The steam is used to froth the milk. As a higher temperature is required when producing steam, the appliance will
launch an additional pre-heating phase.
A menu will allow you to customise the frothing time. You can modify it by pressing buttons or . Then press OK. The last frothing time used will be memorised for the next preparation.
You can download the preparation at any time by pressing
Rinsing the "One Touch Cappuccino" block
Please refer to the paragraph "Milk rinsing" in the section PREPARING ONE TOUCH MILK DRINKS.
OTHER FUNCTIONS
The Settings menu can be accessed via button which leads to the general menu (machine settings maintenance and product information).
Settings
By selecting the Settings menu, you can make the changes you want in order to optimise your ease of use and suit your preferences.
Below are the main settings available.
| Date You must set the | date, particularly when you are using an anti-limescale cartridge. |
| Clock You can select to display a 12 or 24-hour clock. | |
| Language You can select the language of your choice from those offered. | |
| Measuring unit You can set the unit of measurement to be ml or oz. | |
| Screen brightness You can adjust the screen brightness according to your preferences. | |
| Coffee temperature | You can adjust the temperature of your coffee drinks to three different levels |
| Tea temperature You can adjust the temperature of your teas to three different levels | |
| Water hardness | You can set your water hardness from 0 to 4. See chapter “Measuring water hardness”. |
| Auto-on You can automatically start pre-heating of the appliance at a selected time. | |
| Auto-off | You can choose the duration after which your appliance will switch off automatically (duration of non use). |
| Automatic rinsing | You can choose to activate automatic rinsing of the coffee outlet or not when starting the machine. |
| Drinks settings | You can restore the default settings. You can also permanently activate the Dark and Extra Shot function for all your drinks (except Ⓒ). |
To quit the settings menu, press or the Settings button.
The settings will be stored in the memory if you unplug your machine, with the exception of the date and time.
Maintenance
All of these options allow you to run the selected programs. You should then follow the on-screen instructions.
| Cleaning milk | Provides access to cleaning the machine's one touch cappuccino block, which is essential for ensuring good quality milk frothing. |
| Milk rinsing | Provides access to rinsing the machine's one touch cappuccino block, which is essential for ensuring good quality milk frothing. |
| Coffee rinsing | Provides access to rinsing the machine's coffee circuit, which ensures the optimum taste of coffee. |
| Coffee cleaning | Provides access to cleaning the machine's coffee circuit (using a cleaning tablet), which ensures the optimum taste of coffee. |
| Descaling | Provides access to descaling which is essential for the durability of your machine. When the number of drinks is not high enough for descaling to be necessary, the function is not active. |
| Filter | Provides access to the filter mode, useful if the water is very hard, in order to ensure the best taste and the health of your machine. |
To quit the Cleaning menu, press the Settings button.
Info
The "Info" menu provides access to information about your use and about certain stages in the life of your machine. It also informs you about its upkeep. Below are the main details available.
| Drinks prepared Displays | the number of drinks prepared |
| Coffee circuit cleaning Indicates that is needs to be completed within x number of cycles. | |
| Descaling Indicates that is needs to be completed within x number of cycles. | |
| Filter Indicates that it will need to be changed in x days or x litres. | |
To quit the Info menu, press the Settings button.
GENERAL MAINTENANCE
Emptying the coffee grounds collector and the drip tray
After a certain number of coffees, the machine will ask you to empty the coffee grounds collector and the drip tray. Not performing these operations correctly can damage your machine.
The drip tray collects used water and the coffee grounds collector collects used ground coffee.
If the message "Please empty the two trays" is displayed, remove, empty and clean the drip tray. Remove, empty and clean the coffee grounds collector (C). Fig. 19.
Replace the coffee grounds collector. Fig. 20
The drip tray is equipped with a float to indicate when it needs emptying. However, the machine is also programmed to ask for the drip tray to be emptied after a certain number of coffees, in addition to any intermediate emptying operations that you may complete.
Rinsing the circuits:
You can start rinsing at any time by pressing and selecting Maintenance.
According to the type of recipe prepared, the machine may complete an automatic rinsing when it is turned off. It is also possible to set an automatic rinse program when it is switched on (see "Settings" section p.22).
Automatic cleaning programs
Automatic cleaning program of the coffee circuit
A message on the screen will indicate when a cleaning program needs to be run for the appliance.
To run this cleaning program, you will need a container which holds at least 0.6 l, and which should be placed beneath the coffee outlets and the steam nozzle, and a KRUPS cleaning tablet. Fig. 34a. Carefully follow the instructions given on the screen. It is also possible to run a cleaning cycle via the Maintenance menu.

Important: You do not have to run the cleaning program as soon as the appliance requests it, but it must be done reasonably soon after. If cleaning is postponed, the alert message will remain illuminated until the process is completed.
The automatic cleaning program comprises two phases: a cleaning cycle and a rinsing cycle, and lasts about 13 minutes.

Important: If you unplug your machine during the cleaning cycle, or if there is a power failure, the cleaning program will continue from the current phase when the power is returned. It is not possible to postpone this process. This is essential to ensure that the water circuit has been correctly rinsed. In this case, a new cleaning tablet may be necessary. Complete the full cleaning program in order to remove all of the cleaning product which is harmful to health.
Cleaning the "One Touch Cappuccino" block
To complete a cleaning program, you will require two containers (minimum 0.6 L) and KRUPS cleaning liquid.
You can start the cleaning cycle by pressing button
Then selecting "Maintenance" → "Milk Cleaning". Follow the instructions on the screen.
Dismantling the "One Touch Cappuccino" block
In addition to rinsing, it is necessary to clean the different elements of the block every time after using. To dismantle the block, follow the following instructions:
Remove the milk tube, Fig. 21.
Remove the front lid of the coffee milk nozzles. Slide it downwards and pull it towards you. Fig. 22.
Remove the "One Touch Cappuccino" block by pulling the upper part of the block (Fig. 23).
Completely dismantle the block (Fig. 24).
Remove the milk tube connector (Fig. 25).
Clean all of the dismantled parts (block, connector, and milk tube) with soapy water. Then rinse them in hot water (Fig. 26).
Once the elements are clean and dry, assemble the block and return them to their original position (Fig. 27).
Replace the front lid of the block (Fig. 28). Replace the connector in the milk tube (Fig. 29, opposite side of the bevelled side) and plug in the block (Fig. 30).
Automatic descaling program of the steam circuit

Warning: if your appliance is fitted with our Claris - Aqua Filter System cartridge, remove the cartridge before descaling.
A message on the screen will indicate when a descaling program needs to be run for the appliance. The frequency of this program depends on the quality of the water used and on whether a Claris Aqua Filter System filter is used or not (the harder the water, the more often the appliance has to be descaled).

Important: You are not obliged to carry out this program immediately the appliance requests it, but it must be carried out reasonably soon afterwards. If descaling is postponed, the alert message will continue to be displayed until the process is completed.
When the descaling alert level is reached and displayed, press OK to run the descaling program. To delay it, press

Once the procedure has been launched, follow the instructions provided on the screen. It is also possible to run a descaling cycle via the "Maintenance" menu → "Descaling".
To carry out a descaling program, you will require a container with a capacity of at least 0.6 L which should be placed beneath the One Touch Cappuccino block and a KRUPS descaling sachet (40 g) (Fig. 34b).
Fill the water tank up to the CALC mark then pour in the contents of one sachet of descaler.
The descaling program comprises three phases: a descaling cycle and two rinsing cycles. The program lasts approximately 20 minutes.

Important: If there is a power failure or if you unplug your machine, the cycle will continue from the current phase when the power is returned. It will not be possible to cancel this operation. Complete the full cycle in order to remove all of the descending product which is harmful to health.
TROUBLESHOOTING
If one of the problems described in the table persists, contact KRUPS customer service.
| PROBLEM CORRECTIVE ACTION | |
| The machine displays a failure, the software hangs or your machine has a malfunction. | Switch off and unplug the appliance, remove the filter cartridge, wait for one minute and start the appliance again.Press and hold the on/off button for at least 3 seconds for starting. |
| The appliance does not switch on when the ON/OFF button is pressed (for at least 3 seconds). | Check your fuses and plug sockets.Check that the two power plugs are correctly inserted into the socket. |
| The coffee grinder makes a strange noise. | There is a foreign body in the grinder.Contact the KRUPS Customer Service team. |
| The One Touch Cappuccino block does not suck the milk.The One Touch Cappuccino blocks produces little or no froth. | Check that the block is assembled correctly (in particular the connector in the milk tube).Ensure that the steam nozzle is not blocked. If this is the case, see below “The steam nozzle on your machine seems to be partially or completely blocked”.Check that the connector is not blocked or dirty; soak it in a mixture of hot water and washing-up liquid, then rinse and dry before reassembling.Ensure that the flexible pipe is not blocked or twisted and that it is properly inserted into the One Touch Cappuccino block in order to avoid any air leaks. Check that it is fully immersed in the milk.Rinse and clean the block (see chapters concerning rinsing and cleaning the One Touch Cappuccino block).For milk drinks, we recommend that you use fresh, pasteurised or UHT milk which has been recently opened. It is also advisable to use a cold container. |
| The steam nozzle on your machine seems to be partially or completely blocked. | Dismantle the nozzle from its support using the dismantling key. Fig. 31.Replace the support without the nozzle: Fig. 32.Start the rinse cycle for the One Touch Cappuccino block to remove any remaining depositsCLEAN the steam nozzle and ensure that the opening of the nozzle is not obstructed by the remains of milk or limescale. Use the cleaning needle if necessary. Fig. 33 |
| No steam comes out of the steam nozzle. | Ensure that the steam nozzle is not blocked. See “The steam nozzle on your machine seems to be partially or completely blocked.” belowIf this does not work, empty the water tank and remove the Claris cartridge temporarily. Fill the water tank with mineral water with high calcium content (>100 mg/l) and run steam cycles (5 to 10) consecutively into a container until you obtain a continuous jet of steam.Put the cartridge back in the tank. |
| Steam is leaking from the drip tray grid. | Depending on the type of preparation, steam may escape from the drip tray grid. |
| The machine asks for the drip tray to be emptied although it is not full. | The machine is programmed to ask for the drip tray to be emptied after a certain number of coffees despite any intermediate emptying operations that you may complete. |
| The appliance asks to be unplugged and plugged back in again. | Unplug the appliance for 20 seconds, remove the Claris Aqua Filter System cartridge if necessary, then plug it back in again. If the error continues, contact the KRUPS Customer Service team. |
| The machine does not request descaling. | The descaling cycle is requested after the steam circuit has been used a significant number of times. |
| Some ground coffee has found its way into the drip tray. | A small amount of ground coffee may settle in the drip tray. The machine is designed to evacuate any excess ground coffee so that the percolation zone remains clean. |
| The milk or water is not flowing correctly into the cup(s). | Check that the One Touch Cappuccino block is correctly positioned. |
| There are traces of milk in an Americano or a Hot water. | Complete a milk rinsing cycle or dismantle and clean the one touch cappuccino accessory before running the preparation. |
| There is water underneath the appliance. | Before removing the water tank, wait for 15 seconds after the coffee has finished flowing so that the appliance finishes its cycle properly. Check that the drip tray is correctly positioned on the machine; it should always be in place, even when the appliance is not in use. Check that the drip tray is not full. The drip tray should not be removed during a cycle. |
| When you turn off the appliance, warm water flows out of the coffee outlets and the One Touch Cappuccino block. | According to the type of recipe prepared, the machine may run an automatic rinsing cycle when it is turned off. This cycle lasts only a few seconds and stops automatically. |
| After emptying the coffee grounds collector, the warning message is still displayed on the screen. | Correctly replace the coffee grounds collector and follow the instructions on the screen. Wait at least 5 seconds before replacing them. |
| The coffee dispenses too slowly. | Turn the ‘fineness of grind’ adjustment dial to the right to make the ground coffee coarser (according to the type of coffee used). Run one or several rinsing cycles. Run a machine clean (see “Automatic machine cleaning programs p.28”). Change the Claris Aqua Filter System cartridge (see “Installing the filter”) p. 23). |
| The water tank has been filled, but the warning message is still displayed on the screen. | Check that the tank is installed correctly on the device. The float at the bottom of the tank should move freely. Check and unblock the float if necessary. |
| The coffee fineness knob is difficult to turn. | Only change the grinder setting when it is running. |
| The espresso or coffee is not hot enough. | Run a coffee circuit rinsing cycle before preparing your coffee. Increase the coffee temperature in the Settings menu. Warm the cup by rinsing it with hot water before making the drink. |
| The coffee is too lightly coloured or too weak. | Avoid using oily, caramelised or flavoured coffee beans. Check that the coffee bean container has coffee in it and that is it dispensing correctly. Decrease the volume of the preparation and increase the strength of your drink by using the Dark function. Turn the grinding fineness adjustment dial to the left to make the grounds finer. Make the drink in two cycles by using the 2 cups function. |
| The appliance is not producing coffee. | A problem has been detected during preparation of the drink. The appliance has restarted automatically and is ready for a new cycle. |
| A power failure occurs during a cycle. | The appliance will automatically restart when the power is switched back on. |
| Your tea is not hot enough or too hot. | Increase or reduce the hot water temperature in the Settings menu. |
| You have used ground coffee instead of coffee beans. | Use your vacuum cleaner to remove the ground coffee from the coffee bean container. |
| The app is unable to connect or disconnects too often. | Check that the machine's Bluetooth is not deactivated. Stand as close as possible to the machine as possible when using the app. |
| The app does not detect the machine. | Switch the app off and on. |
| Appearance of steam under the lid of the grain tray. | Close the cleaning tablet chute beneath the cover. |
| After preparing a drink, if you ask for an extra shot the machine tells you that this is not possible. | The coffee grounds collector is full and the extra shot function is not available. Once your drink has been made, you can prepare an espresso after emptying the coffee grounds collector. |

Danger: Only a qualified technician is authorised to carry out repairs on electrical wiring and carry out work on the electrical grid. If you do not follow these instructions, you risk death by electrocution. Do not use an appliance that is visibly damaged!
Dear customer,
DESCRIPTION OF THE APPLIANCE
A Lid handle water tank
B Water tank
C Coffee grounds container
OTHER FUNCTIONS p.123
GENERAL MAINTENANCE p.124
PROBLEMS AND SOLUTIONS p.125
IMPORTANT INFORMATION ABOUT THE PRODUCT AND INSTRUCTIONS FOR USE
IMPORTANT INDICATIONS. p. 168
PREPARATION OF COFFEE DRINKS WITH DIRECT ACCESS. 169
PREPARATION OF MILK-BASED DRINKS IN DIRECT ACCESS. 169
TEA PREPARATIONS .170
PREPARATION OF OTHER DRINKS: RISTRETTO, DOPPIO, AMERICANO
PROBLEMS CORRECTIVE ACTIONS
If one of the problems indicated in the window persists, contact the KRUPS consumer service.
KRUPS ESPRESSO APP
On the website www.krups.com check the compatibility of your smartphone.
Downloading the app
To download the app, you must have a smartphone equipped with a Bluetooth® BLE (Bluetooth Low Energy) module and an operating system Android version higher than 4.3 or an operating system iOS version higher than 9. If your smartphone does not meet these requirements, you cannot use the app.
PROBLEMS AND THEIR SOLUTIONS
Detailed information:
The coffee flow selector directs the coffee coming out of the appliance during or after preparation. Do not remove the flow and empty it regularly.
Important: Carefully read the operating instructions and keep them. Follow the safety rules.
Manufacturer:
SAS GSM
Pio Cen-JeohapΦ-53104, MaiEH
France
Overview
Description of the different buttons
| Коньka | Описане / Овочице Функции |
| OK DARK EXTRA SHOT ESPRESSO LONG COFFEE CAPPUCINO | Вълочиь и вълочиь сълара Для въедения машинь въ ксллuyaатцию Heобховимо дълhoe нажатие Позволяет върныя съ поедыдушему заразуни остановить розец с розотовлия Дъожени въерх по мени/ увениени въбраваного паяметра Дъожени въиз по мени/ уменьшени въбраваного паяметра Позтberжdenе въбoga Функции поълаяг усалпь крелость koфe Функции поълаяг поълаяному наптуку крелков лунно, калунно, мaknaно, чay) в 3ависимости OT морейи Запск поцеса роз�отовлия зашиpecco |
| Запск поцеса роз�отовлия koфe | |
| Запск поцеса роз�отовлия koфe | |
| 3aŋyck προεCCA πριRGTOBLENNA MAKNATO (MHORO MONOKA, ᝀπpecco и γγ SCTЯ молочая песа) | |
| ΠοЗBOЛЯТ ПОЛЧИТ ДОCTΥΝΚ ΜΕΝΙ ΠΡΙRGTOBLENNA YΑΥ. | |
| ΠοЗBOЛЯТ ПОЛЧИТ ДОCTΥΝΚ ΜΕΝΙ ΠΡΙRGTOBLENNA ΦΟДОЛНΙΤΕΝΗΝΗ ΑΝΑΝΤΚΟВ: ριστpeTTΟ, молочов пени, дοῦно, Amерікаго (В завсимости OT морели) | |
| ΠοЗBOЛЯТ ПОЛCHИТ ДОCTΥΝΚ ΜΕΝΙ ΠΡΙRGTOBLENNA ΜΕΥ. |

Bluetooth indicator:
When the indicator is off, the machine is not connected or is switched off.
When the indicator is on, the machine is connected.
Bluetooth is always active. You can disable it by going to the menu and selecting the "Parameters" section.
HOpMaun o npCBtke KhoNOK
Ecn KhONKa He NODcBeueHa -yHKnHHeIOCTynHa.
Ecnn KhONka cIeRk PnOcBceHeHa, 3HaunT, fYHKmJIOCTynHa n MoKet 6bITb Bbl6paHa.
B npocce BbIIOHHeNBA6paHHOyHKUINIOCBETKa CTaHOBNTc OuehApko.
ПРИLOЖЕΗΝΕ KRUPS
Ppoepe me coe mcmocmb bauueo cmapfoHa Ha www.krups.com
CkaaTe npnoxehne
Дя toro yto6bl 3arpy3nIb npinoxeHne, Baw cMapTfoH doJxhen 6bIb ochaue H moynem Bluoteoth® BLE (c Hn3KIM 3hepronotpe6JIeHEm) n BepCne Android > «4.3» nIN IOS > «9». Ecnn BaW cMapTfoH He ochaue H moynem nIn COOTBETCTByIOUeI onepauOnHOHcNCTeMoN, BBI He CMOXeTe NOJB3OBAtbcr npinoxeHneM.
PpnoJxHne KRUPS moXHo cKaaTb B Play Store Ha yCTpoiCTbax Android n B Apple Store Ha ycTpoiCTbax IOS.
KoHpypaun aKKayHTa
IITTOTO6bI BOCNOLb3OBaTcB CEMN BO3MOXHOCTAMn PpINIOKeHn, Bbl DOJXHbI 3apeRNCtpPOBaTbc. YTo6bl 3aBepuNTb CO3dAHne aKKayHTa, 3aONIHnTE BCE Heo6xOIMMbIe NOIA N IOJTBePdTe PpINHrTne yCIOBn NOLb3OBaHn.
Bac nonpocrT co3aTb napoIb, yTo6bl rapaHTnpoBaTb Bawy KOHnEHNuaJIbHOCTb.
AktuBaunu Bluetooth
IynoKIOUeHnTepeOHa K annapaty Heo6xOIMOBKIOUHTb MoynbluTooth® BLE Ha Bawem cMaprfohe n y6eINtbcra, YTO MOyNb BLuTooth® KofoemaunHb TaKke BkIOUeH. IpeenDITe B MeHIO HAcTpoE, BbI6epNTe FyHKNUO «Bo3MOXHOCTN NOKIOUeHnRA NAKTNBUPYTE MoynbluTooth®, ecnn OH OTKIOUeH (NO yMOnuaHIO MoynbluTooth® Bcerda BKIOUeH).
CoeHHeHne cMapTfoHa c KofoMaunHo
Pair your phone with your coffee machine to activate it. The connection can only be made when the machine is in pairing mode.
When the machine detects a connection request from the phone, the coffee machine screen will ask you to confirm the pairing. Confirm by pressing OK, then a window will appear on your phone asking to confirm this connection. Press "Connect".
If the connection fails, retry several times and make sure the coffee machine's Bluetooth is activated.
If the problem persists, you can contact the Krups or Nescafé Dolce Gusto warranty service when installing the application. The "Contact Krups" option in your phone's main menu will give you access to the warranty service contact details.
If the phone is connected to the coffee machine, you will see that the Bluetooth symbol is lit. This means that the function is activated.
Coffee machine settings
Once the phone is connected, you can change the coffee machine settings via the application (the date and time of the coffee machine will be updated automatically according to the date and time of the phone).
The mobile application guides you through the initial setup of the machine and its settings.
Using the application
The application provides access to multiple functions:
- Remote start of the device,
- Management of the list of favorite drinks and the list of containers,
- Access to the account and information about the coffee machine, - Access to news and information from the coffee world, access to the user guide and tutorial videos on how to make the most of the coffee machine's potential,
- Quick contact with the warranty center in case of questions or problems with your device or application.
You can use all these functions by navigating through your application (regardless of whether the coffee machine is connected or not).
Connect the device to the power supply so that it is always up to date with all the news.
PREPARATION FOR WORK INSTALLATION OF THE DEVICE

Danger: Connect the device to a grounded electrical outlet with a voltage of 230 V. Otherwise, you risk receiving fatal electric shocks!
Follow the safety instructions in the "Safety Information" booklet.
Switching on
Switch on the device by holding the "On/Off" button until the message "Hello" appears on the screen. Fig. 1. Follow the instructions on the screen.
Initial settings
On first use of the machine, you will be prompted to perform various settings. Follow the instructions that appear on the screen. The purpose of the following points is to give you some visual orientation.
Here are the first required settings:
Language
Select the display language using the arrow keys until the desired language appears. Press the "OK" button to confirm.
Unit of measurement
You can set the unit of measurement for volume in either liters or gallons.
Date and time
Preparation of cappuccino or macchiato

Insert the milk tube into the milk container on the right side of the "One Touch Cappuccino" block. Fig. 13
Insert the other end (slanted edge) into the milk container or directly into the milk carton. Fig. 14.
Place a cup or cups under the coffee spout. Fig. 15.
Press the "Cappuccino" button (Fig. 16) or the "Macchiato" button (Fig. 18). All parameters can be changed.
Preparation begins with milk frothing (time can be set), followed by coffee dispensing (adjustable volume). Setting the frothing time allows you to change the amount of milk and foam.
The subsequent steps occur automatically, and your drink is ready in a few seconds. Fig. 17.
Note: with each preparation of cappuccino or macchiato, the coffee machine will remember the last prepared drink, as well as the settings selected during that preparation.
Cleaning the appliance after preparing milk-based drinks: Rinsing the milk block
At the end of each preparation, the message "Rinse milk block" appears on the screen.
It is recommended to rinse the milk block after each use of milk to ensure cleanliness of the frothing accessories and good milk frothing.
In addition to rinsing the milk block, it is recommended to regularly disassemble and rinse the milk suction tube and the mixer under a strong jet of water. Fig. 21 and 25.
For optimal results, it is recommended to regularly clean the removable "One Touch Cappuccino" block (see the general maintenance chapter).
If you notice that the quality of the milk foam is deteriorating, perform the cleaning and rinsing process: proper maintenance of the milk system makes this type of problem unlikely.
Possible settings
The drink preparation volume can be adjusted (green, black, herbal tea). You can adjust the drink volume to your taste.
The hot water temperature is adjusted according to the selected drink.
You can enable the EXTRA SHOT function, which allows you to create very tasty drinks (cappuccino).
Preparation
Select the recipe. Place a cup under the coffee spout. Fig. 12
Then select the drink and press OK.
If during drink preparation the appliance determines that there is a lack of water, it will ask you to fill the water tank.
You can change the drink volume using the buttons during preparation.
PREPARATION OF SOME DRINKS: ESPRESSO, DOPPIO, AMERICANO OR MILK FOAM
Preparation
Place a cup under the coffee spout. Fig. 12
If during drink preparation the appliance determines that there is a lack of water, it will ask you to fill the water tank.
Press the button using the buttons and select the desired drink: espresso, doppio, americano, milk foam.
Preparation of espresso
Select Espresso and press OK
The machine will grind coffee beans, press the ground coffee, and brew. You can adjust the volume
of coffee during the brewing process using the buttons.
You can stop the brewing at any time by pressing
Brewing
Select "Brew" and press OK.
The brewing process is similar to the espresso process, but with a double dose of coffee.
Brewing Americano
Select "Americano" and press OK.
The brewing process is similar to the brewing process for espresso, followed by hot water.
Brewing milk foam
Insert the tube for milk frothing from the right side into the "One Touch Cappuccino" block (Fig. 13). Insert the other end (with the slanted tip) into the container with milk (Fig. 14).
The steam is used for frothing milk. Since the production of steam requires a higher temperature, the machine performs an additional preheating step.
The menu allows you to adjust the frothing intensity. You can change it by pressing the buttons, then press OK. The selected frothing intensity will be saved in memory for future brewing.
You can stop the brewing at any time by pressing the button.
Cleaning the "One Touch Cappuccino" block
Refer to the "Rinsing the milk block" section in the PREPARATION OF MILK DRINKS chapter for the ONE TOUCH function.
OTHER FUNCTIONS
Access to the "Settings" menu can be obtained by pressing the button, which allows access to the main menu (machine settings, maintenance, and product information).
Settings
When selecting settings, you can make the necessary changes for optimal use of the machine according to your preferences.
We present the main settings to your attention.
THE AUTOMATIC CLEANING PROGRAM INCLUDES 3 PHASES: CLEANING, RINSING, AND MILK RINSING - APPROXIMATELY 13 MINUTES.

Important: If you turn off your machine during cleaning or in case of a power failure, the cleaning program will continue from the interrupted step. It will be impossible to postpone this operation. This is a mandatory condition for reasons of necessity to rinse the internal circuits with water. In this case, you may need a new descaling tablet. Run the cleaning program to the end to remove all harmful residues of cleaning products.
Cleaning the "One Touch Cappuccino" block
To run the cleaning program, you will need two containers (at least 0.6 l) and clean KRUPS liquid.
You can start cleaning by pressing the button
Then select "Maintenance" → "Milk block cleaning". Follow the instructions on the screen.
Rinsing the "One Touch Cappuccino" block
In addition to rinsing, it is necessary to clean the various elements of the block after each use. To disassemble the block, perform the following actions:
Remove the milk suction tube, Fig. 21.
Remove the lid before cleaning. Lower it and pull it towards you. Fig. 22
Remove the "One Touch Cappuccino" block by pulling it by the upper part. Fig. 23
Completely disassemble the block. Fig. 24.
Remove the milk frothing tube and the milk suction tube. Fig. 25.
Rinse the removed parts (block, mixing tube, and milk suction tube) in soapy water. Then rinse them with clean water. Fig. 26
Once the parts are washed and dried, reassemble the block and put it back in its original position. Fig. 27.
To install the block, place the lid on it. Fig. 28. Install the mixer on the milk suction tube (the opposite side of the beveled side) and insert it into the block. Fig. 30.
Automatic cleaning program for the milk system

Attention! If your coffee machine has a water filter (Claris - Aqua Filter System), remove it before running the descaling cycle.
The machine will notify you when it is necessary to run the descaling program. The frequency of this program depends on the quality of the water used and whether you use the Claris Aqua Filter System (the harder the water, the more often you should descale the machine).

Important: You are not required to run this program immediately after the machine indicates the need. But try to run this procedure as soon as possible. If the descaling procedure is postponed, the warning message will continue to be displayed until it is carried out.
Press the button when the descaling message is displayed to start the descaling procedure.
To postpone the operation, press
As soon as the procedure starts, follow the instructions that appear on the screen. The descaling procedure can also be started from the "Maintenance" menu → "Cleaning".
The descaling procedure requires a container that can hold at least 0.6 liters, placed under the "One Touch Cappuccino" spout, as well as a KRUPS descaling bag (40 g). Fig. 34b
Press the CALC button, then place the contents of the cleaning agent packet there.
The cleaning procedure includes 3 cycles: a descaling cycle and two rinse cycles. This procedure takes about 20 minutes.

Important: if a power outage occurs or you turn off the machine, the cycle will restart from the interrupted step without the possibility to postpone this operation. Complete the entire cycle to remove all traces of previous cleaning products.
TROUBLESHOOTING
If any malfunction not listed in the table persists, contact the KRUPS service center.
| HEUNCIPABHOCTb YCTPAHEHNE HeUNCIPABHOCTe | |
| Maшина пokaыаet сбов,пограмma заморожени ваша мшина несправна. | Выклочite и отоешисту Maшины, удашие kaptrдж Фильтура, поождente МИнту и посязосте мшины.Для Вклоченя уdeckхьай Кноку Вкл/Быкг He Mehees 3-x seskynd. |
| Annapat He Bklnouaete Дадж пося ТOTO, касы уdeckхьал� кноку Bкн/Быкг (В тучения He Mehees 3-x seskynd) | ПроберныеPre dedoxpanitelny in pozetku cetn Зilektropotnatryu.Убадиесь,штесрпabilho Bctablen B pozetku. |
| Кофемолka Идает Neobychungий shum. | В kohteyнеше нахoditsя посторониPre dedmet.Овразиесь в сөрвись的同时 VRUPS. |
| Молokо He noctynaetВ сintemу 6лoks«One Touch Cappuccino».Бок«One Touch Cappuccino» He поиз bodит monochую песу ilni поиз bodит мало песу. | Убадиесь,чTo 6лokПравиьно сбразн (В частносmс.) Убадиесь,чTo Bixxod пара He zacopener.Если дero BэТOM,смOTРITE pyHKT «Паровoe coллв Башей Maшины,po-BiDIMOMU,чАСТИНО ИПОЛСТь OЗСОПILOCB» HIXKE.Убадиесь,чTo Смсителы He zacopener n He zarрязnet.Зamочite erO B pactbope Teллв Bodы In cpeidSTBa Дд МытьЯ Рocdyы,Затem onoloschte erO n Bicuyshite Do yctahOBKN Ha MectO.Убадиесь,чTo TrpБа He ZACOPEHa, He nepekrpyeHa n XopoSO BCTABNeHa B 6лok «One Touch Cappuccino» 6ez BoZMOKHOCTN ПОаданя BOZdya.Убадиесь,чTo TrpБа Промоite и ouchstite 6лok (СM. ralbyПромыВКи I ONUCTK 6лoks «One Touch Cappuccino»).Дд риг�отовленья habITKOB Ha ochobe MOLOKA Мы pekomehnyem И спOLTZOBaTb CBexkee MONOKO, NaTePIM3OBAHHOЕ Или StepINIM3OBAHHOE, ИЗ HeDaBHO OTKpbIToJ Tapby;Таоже pekomehnyetcЯ ИспOLTZOBaTb XOLOHb KOnTEHep. |
| Отberстя Дду bixoda napa вашей Maшины,po-BiDIMOMU,чack'thyо ilni поиз敞ъю засорлincь. | СнимITE hacaikc c kpepleneя prn Ponomuoi Klnoça Дду demontaxka. Рsc. 31.Установite креллесни 6ez hacaikn: Pnc.32.Заустite цIKIл prombyвки 6лoks «One Touch Cappuccino» Дду уdaileneyia octatkoB Ouchstite bixod пара u6edntecb,чTo OTberstfte hacaikn He zacopener octatkam monokaka mnilizheCTHЯ.При Neob6xodIMOCTN ИспOLTZyute Mrnyддчstkn. Pnc. 33 |
| He bixodit napи Из hacaikn Дду bixoda napa. | Убадиесь,чTo bixod пара He zacopener.Сm.pyHKT «OTberstfte Дду bixoda napa вашей Maшины,po-BiDIMOMU,чЧТИнО ИПОЛСТь 3ACOPIINCS» HIXke.Если зау не repaаet proobleny,onyctoшite pezeрbyap dny Bods i Вретменno ChimITE phinbTr Claris. HanonHnite pezeрbyap минеральн oBoDу c nobviшениь сodeprkaHnneM kaJIbciu (>100 Mr./π) n 3aunctite HeckolbcoцucklOBобразовaning пара в emkocstb поpond (ot 5 do 10)do poluyeHnne HnpeperbivbNo CTpyu npapa.YstahOBIne phinbTr Claris v pezeрbyap. |
| Из reшетки лотka дду c6opa kaель bixodit nap. | В зависмостп OT hanaTka nap может bixodntь在其 рeшETК ЛOTka дду c6opa kaель. |
Table of malfunctions and their solutions
1. Metallic taste between drinks of different types
2. Control panel
3. Screen
4. Start/Stop button
5. Buttons
Additional information about:
Descaling: You use water or coffee, which may drip from the spout after preparation. It is important to protect the area and regulate the flow.

Important! Read the instructions carefully before use and keep them. Follow the instructions for safety.
Manufacturer:
SAS GSM
When the indicator is off, the machine is not connected or the function is disabled.
When the indicator is on, the machine is connected.
Bluetooth is enabled by default. You can turn it off by going to the menu, section "Parameters".

Section "Parameters".
Clarification of the indicator light
When the button is off, the corresponding function is unavailable.
When it is on dimly, the function is available and can be selected.
After selecting a function, it becomes very bright.
KRUPS APPENDIX
Check the website www.krups.com
Downloading the app
To be able to download the app, you must have a smartphone equipped with BLE (Bluetooth Low Energy) and an operating system not older than Android 4.3 or iOS 9. If your smartphone does not meet these requirements, you will not be able to use the app.
The KRUPS app can be downloaded from the Play Store for Android and the App Store for iOS.
Account configuration
To use the device, you must first register. Fill in all the necessary fields according to the terms of use to complete the creation of a block record.
To guarantee the confidentiality of your data, you must use the profile.
Bluetooth activation
To connect your phone to the device, you must activate the Bluetooth® BLE module on your smartphone, and also make sure that the Bluetooth® module on the device is activated. Refer to the settings menu, select the connection function and activate the Bluetooth® module, which is turned off (by default the Bluetooth® module is activated).
Connecting the device
Follow the instructions for your phone to connect the smartphone to the device. The connection can only be established when the BLE indicator is lit.
When the device detects a connection request from the smartphone, a connection request appears on the device screen. Press the OK button, and on your smartphone a window will appear asking to confirm the connection: press Connect.
If the connection is not successful, you can repeat it several times and it is advisable to make sure that the Bluetooth BLE module of the device is activated.
If the problem is not resolved, you can contact the service center to get help with installation.
The "Contact Krups" option, present in the main menu of your smartphone, will give you access to the contact details of the service center.
As soon as the connection is established, you must see a battery symbol, which lights up very briefly as a sign that it is activated.
Charging the device
Once connected, you will have the ability to change the device settings using the application (the date and time of the smartphone will be updated automatically on the device).
The mobile application will try to install the initial settings automatically.
Using the application
Start the device at a distance; control the library of the selected and the book of prescriptions; - Access to the usual record and information about the device; - Access to new and information about the light of the drops; - Access to instructions for use with the handles and video, which will allow you to open the entire potential of the device; - Quick contact with the service center in case of questions or problems regarding the device or additional.
You can get acquainted with all the functions by moving to the appendix (regardless of whether the device is turned on or not).
Use the appendix as a partial help to get to know all the new features and be able to regulate and control your device.
PREPARATION FOR WORK INSTALLATION OF THE DEVICE

Danger! Do not connect the device to a 230 V socket while it is wet. In this case, you risk fatal injuries due to electric shock!
Follow the safety instructions in the "Safety information" section.
The following describes the first protected settings:
Language
Select the display language by pressing the arrows until the language of your choice appears. Press "OK" to confirm.
Units of measurement
You will be able to choose the unit of volume: milliliters or units.
Date
For the date, you need the appropriate format (24 hours or AM/PM).
Automatic shutdownAutomatic shutdown
You can program the time if you want to automate the start. This can be set according to your choice: daily, weekly, or on specific days. Select the time at which you want to set the automatic start according to the time format set earlier.
You can also choose the time during which the device will be automated to optimize energy consumption.
Setting the rinse cycle
By default, you can activate it or not during device activation. This allows you to be confident in the quality of the rinse at all times, as well as in the absence of residues.
Installation of the filter
On first activation, the device will ask if you want to install it. If you want to and the water hardness allows it, select "YES" and follow the instructions on the screen.
Installing the cartridge into the device. Close the filter cartridge into the lower part of the reservoir to help the device, which is supplied with it. Fig. 4
Remove the cartridge installation site (position 1 in the picture, number on the left when open), turning the ring located on the upper edge of the filter. Place the new cartridge as shown in position 2 in the picture. Fig. 5. Place it under the steam outlet with a capacity of 0.6 L. Fig. 6.
The start must be carried out immediately after the filter installation is completed and not. You must...
Filling the water system. Follow the instructions that appear on the screen. The device will start working with the water filling and preheating procedure, and then perform an automatic rinse.
The installation completion will appear on the screen.
Water hardness
You must adjust the device according to the water hardness from 1 to 4. Follow the instructions below.
Before first use of the device, determine the water hardness to be able to adjust the device to your water hardness level. You also need to perform this operation when you use the device in a place where the water hardness is different, or if you notice a change in the hardness of your water. To determine the water hardness, use the test strip that comes with the device, or contact a water quality control authority.
Information about water hardness classes can be found in the table below.
Fill the water tank with water. Fig. 2
After 1 minute you will receive the hardness indicator. Fig. 3
Set the number of regeneration cycles during the water softening process.
Preparing the device
Remove the reservoir and fill it with water. Fig. 7.
Place the reservoir in place. Fig. 8.
Remove the lid of the salt container, then pour salt into it (max. 250 g). Fig. 9.
Place the lid of the salt container back in place. Fig. 10.
IMPORTANT RECOMMENDATIONS FOR PREPARATION
Depending on the selected settings, the Espresso Automatic EA89 device automatically adjusts the amount of water hardness.
Adjusting the hardness
You can adjust the water hardness level by adjusting the degree of water hardness. In general, the harder the water, the more often the device needs to be descaled. This may also depend on the type of water. We recommend using soft water for the espresso machine and hard water for the coffee machine.
Adjust the degree of hardness by turning the hardness regulator (J), which is located under the water tank.
Adjust the hardness gradually after each use. After the third use, you will clearly notice the difference in taste.
Adjust the degree of hardness in case of changing the type of water or if you want to get more or less hard water.
We recommend that you do not use the device systematically.
Adjusting the coffee spouts
For all the drinks offered, you can lower or raise the coffee spouts depending on the size of your cups and glasses. Fig. 11
Stopping drink preparation
You can stop preparing any drink by pressing the return button.
Attention! Pressing the button will cause the device to reset, which may take up to 30 seconds. This is normal operation.
When the device is resetting, do not stop it immediately; let it finish the cycle, and the drink will be discarded.
Press the button for the selected drink.
If there is not enough water during preparation, it will ask you to fill the reservoir.
Adjusting the coffee strength
You can increase the strength of the coffee by pressing the button to prepare a single coffee, or by pressing the button for a double coffee.
The grinder allows you to prepare one or two cups.
The grinder adjusts the coffee bean dose and grinding time. You can adjust the coffee volume during preparation using the buttons.
You can stop preparing any drink by pressing the button.

Important! Automatic rinsing of the coffee spouts: depending on the type of drinks, the device may automatically perform a rinse during its operation. This lasts only a few seconds and stops automatically.
PREPARING DRINKS WITH MILK AT THE TOUCH OF A BUTTON
Possible preparations
You can increase the milk content by pressing and/or adding to the preparation of one drink by pressing
The device uses whole milk. The appliance is equipped with a steam injection function, as creating foam requires high temperature.
Preparing cappuccino
Insert the milk tube from the right side into the "One Touch Cappuccino" block, Fig. 13.
Lower the lower end (with the slanted side) into a container filled with milk, or directly into a milk carton, Fig. 14.
Place a cup or cups under the coffee/milk dispenser, Fig. 15.
Press the "Cappuccino" button, Fig. 16, or the "Macchiato" button, Fig. 18. All parameters can be modified.
Preparation begins with the milk foam phase (time adjustable) and continues with the coffee dispensing (volume adjustable). Adjusting the foam time allows you to experiment with the milk foam consistency.
The subsequent preparation steps are fully automatic, and your drink is ready to be enjoyed, Fig. 17.
At each start of cappuccino or macchiato preparation, the last prepared drink is taken into account, including the settings.
Maintenance after preparing milk-based drinks - Cleaning the milk block
At the end of each preparation, the screen shows "CLEAN MILK BLOCK?"
We recommend performing this rinse at the end of each milk-based function to ensure hygiene of the frothing device and proper milk flow.
To avoid the formation of milk deposits and to systematically carry out cleaning, it is recommended to clean the milk system regularly and rinse the milk tubes with clean water.
For optimal results, it is recommended to regularly clean the milk system "One Touch Cappuccino" (see the chapter on general maintenance).
If you notice that the milk froth is not satisfactory, repeat the cleaning and rinsing procedure. A poorly maintained milk system can lead to such problems.
PREPARING BEVERAGES
Possible preparations
The appliance allows you to prepare drinks with tea (green tea, black tea, herbal tea). You can adjust the amount of water according to your taste.
The temperature of the water for the selected drink is adjustable.
You can program the preparation of a double dose of espresso, which will allow you to prepare very strong coffee drinks.
Preparation
Select on the screen. Place a cup or glass under the coffee spout. Fig. 12
Then select the desired drink and press OK.
If the appliance is not used for a long time, it will ask you to fill the water tank.
You can change the volume using the buttons during preparation.
PREPARING OTHER DRINKS: RISTRETTO, DOPPIO, AMERICANO OR MILK FROTH
Preparation
IocTaBTe yauKy a6o yauKu nID conna noaui KaBn. Pnc.12
KIO npCtpiBnBnTb HeCTauy BoDn Niuc 3aHTy, BIn NopocntB Bac HAnOBHNTn peepByap.
HaTnCHiB KHONky ,notIM 3a DonomoroIO KHONOK o6epitb 6aKaHn Hani: picTeTo, donio, amepuKaHO, moOnuHa niHka.
PpuroTyBaHHa pictpeTo
Bn6epiTb picTeTo nHaTncHiTb OK
Pnucpi BnKoHae nomel 3epHa, Tpam6yBaHn KaBn HapeTti fInbTpauio. MoXha perynBoTaN 06'em Kabn nic npiroToYBaHHa, BnKOpncTOByOuN KHONKn Habiraui
Bn mokeTe 3yHHHTn npnroTyBaHH6ydb-koMNTi,HaTCHyBHN
PnuroTyBaHHa Donio
Bn6epitb DOIIO NHaTNCHTb OK
PnroTyBaHHIzboHO HANOIO iDeHTNCHNO pnproTByaHHIO picTeTo, ane 3 noDbHIM cIKLOM.
PnuroTyBaHHaMepNKaHo
Bn6epiTb AMEPNIKAHO HATNCHTb OK
PnuroTyBaHHIcIbOHO HANOIO IeHTNuHNO npiroToBaHHIO donio, ane 3doBaHHm rapaoyo BOn.
PnuroTyBaHHaMonoUHOi nHKu
Пдклчы Канл Дя молoka 3 npaboro 60ky Do 6noka «One Touch Cappuccino» Pnc.13. OnyctiTB iHmN KHeCb (cKoWeHO CTopoHOIO) B EMHCTb, 3aNoBHeHy MOnOKOM. Pnc.14
Press the button to select the required program. The display shows the selected program. The program starts only when the required temperature is reached.
The menu allows you to change the duration of brewing. You can change it by pressing the button or . The last used brewing duration is saved in the memory of the appliance.
You can cancel the brewing of any coffee by pressing the button
To exit the brewing menu, press the button or the brewing button.
If you switch off the appliance, the brewing settings will be saved in memory, except for the time settings.
Then
The following options allow you to start the cleaning and descaling programs. Please follow the instructions on the screen.
Automatic cleaning program of the brewing system
If you need to run the cleaning program, the appliance will remind you.
To use the cleaning function, you need to place a container with a capacity of at least 0.6 liters under the hot water spout, and a descaling tablet for KRUPS. Fig. 34a. Please read the instructions on the display. Cleaning can also be started via the “Maintenance” menu.

Important! It is not mandatory to run the cleaning cycle immediately after receiving the appliance, but it must be done as soon as possible. If the cleaning is not performed, the appliance will remain on the screen until you perform this operation.
The automatic cleaning program includes 2 cleaning cycles and 2 rinsing cycles, and lasts about 13 minutes.

Important! If you unplug the appliance during cleaning or it switches off due to a power failure, the program will restart from the stage where the interruption occurred. This operation cannot be skipped. This is important for rinsing the system and adding water. A new descaling tablet may be needed in this case. Complete the cleaning program to remove all descaling agents, which are harmful to health.
Cleaning the “One Touch Cappuccino” block
To run the cleaning program, you will need two containers (min. 600 ml) and a KRUPS descaling tablet.
Follow the instructions on the screen: select "Maintenance" → "Cleaning the milk container".
Disassembling the "One Touch Cappuccino" container
In addition to rinsing, the container elements must also be cleaned after each use. To remove the container, follow these instructions.
Remove the milk spout, Fig. 21.
Remove the front cover of the container by pulling it towards you. Fig. 22
Remove the "One Touch Cappuccino" container by pulling it from the rear part of the container, Fig. 23
Disassemble the container parts. Fig. 24.
Remove the spout and the milk spout. Fig. 25.
Clean all removed parts (container, spout, and milk spout) in warm water. Then rinse them with warm water. Fig. 26
Fig. 27.
Place the front cover back on the container. Fig. 28. Insert the spout back into the milk spout (with the slanted side facing the opposite direction) and attach it to the container. Fig. 30.
Automatic descaling program

Warning! If the appliance is equipped with the Claris Aqua Filter System cartridge, it must be removed before descaling.
If the descaling program needs to be run, the appliance will notify you. The frequency of the program depends on the quality of the water used and whether the Claris Aqua Filter System filter is used or not (with hard water, descaling should be performed more frequently).

You are not obliged to run the descaling program immediately after receiving the notification, but you should run it as soon as possible. If the descaling is not performed, the notification will remain on the device screen until you perform the operation.
When the descaling notification is displayed, press the OK button to start the descaling program. To cancel it, press
Once the procedure starts, follow the instructions shown on the screen. You can also start descaling via the menu "Maintenance" → "Descaling".
Products delivered with the machine
Check the products delivered with the machine. If any component is missing, contact the dealer (see chapter 310: Initial settings).
Delivered components:
- Espresso Automatic series EA89 - 2 descaling tablets - 1 water filter for descaling - Milk container, adaptable to SFOKA "Milk with touch"
- Key for unlocking with descaling of the milk container - Safety instructions brochure
- Claris - Aqua Filter System cartridge with accessories for installation - 1 water hardness test strip - Instructions
- List of approved Krups service centers - Warranty documents - 1 set for descaling the milk container
TECHNICAL DATA
Using the app
To use the app, you need a smartphone with Bluetooth® BLE (Bluetooth Low Energy) module, Android version 4.3 or later, or iOS version 9 or later. If your smartphone does not have this, you cannot use the app. The KRUPSE app is available in the Play Store for Android and in the App Store for iOS.
Creating an account
To take advantage of all the features offered by the app, you must first create an account. You will need to provide your email and accept the terms of use to complete the creation of your account. You will also need to enter a password to ensure the confidentiality of your data.
Activate the Bluetooth
To connect the phone to the machine, you need to activate the Bluetooth® BLE module on the phone and make sure that the Bluetooth® module on the machine is activated. Go to the settings menu, select the connectivity function and activate the Bluetooth® module, if it was deactivated (if necessary, the Bluetooth® module is activated).
Connecting to the machine
Follow the instructions shown on your phone to connect the smartphone to the machine. The connection is possible only when the BLE module is found.
When the machine sends a connection request from the smartphone, a screen appears on it asking you to accept the connection. Accept it by pressing OK, and on the smartphone a screen will appear asking you to confirm the connection: press it to finish it.
If the connection is unsuccessful, you can try again several times before giving up, and check that the Bluetooth® BLE module on the machine is activated correctly.
If the problem is not resolved, seek help for installing the application from the after-sales support department. From the main menu of your smartphone, the "Contact Krups" option gives you access to the contact details of the after-sales support department.
When the machine is connected, the Bluetooth® symbol should light up steadily, which means it is active and working properly.
Setting up the machine
After connecting, you can customize the machine settings through the application (the settings are transferred automatically to the machine, which means there is no need to configure it). The mobile application offers the initial installation of the machine and the initial settings.
Using the application
The application offers many functions:
- Starting remote recipes, - Managing the recipe library with recipes and books with QR codes, - Access to the account and machine information, - Access to news and information about the world of coffee, - Access to the user guide with lessons and videos, to get the most out of your machine, - Quick access to after-sales service in case of questions or problems with the application or your device. You can open all these functions by browsing the application (without necessarily being connected to the machine or not).
Do not hesitate to connect to the application as often as possible, to see the news and to follow your machine regularly.
USE OF THE DEVICE - DEVICE INSTALLATION

Warning: Check the device before replacing the electrical contact at 230 V. Otherwise, you risk electric shock from the currents!
Follow the safety instructions in the brochure "Safety Instructions".
Turning on the device
Turn on the device by pressing the button. Wait until "Hello" appears on the screen (fig. 1). Follow the instructions provided by the device.
Initial settings
When using the machine for the first time, you will be guided to configure various settings. Follow the instructions shown on the screen. The purpose of the following paragraphs is to assist you in this process.
These are the first necessary settings:
Language
Select the language of the device by pressing the arrows until the desired language is shown. Press "OK" to confirm.
Unit of measure
You can choose the desired unit of measure: ml (milliliters) or oz (ounces).
Date and time
To set the time, press the desired format (24 hours or AM/PM).
Automatic switch-on
It is possible to program the time at which you want the machine to switch on automatically. This setting can be adapted according to your needs: every day, every week, or on a specific day. Select the time at which you want the machine to start automatically, following the chosen time format.
You can select the first time period, during which the filter should be replaced automatically.
Replacing the filter cartridge
You can choose to activate the filter when you turn on the machine. This allows you to guarantee the quality of the coffee in the cup, to avoid the taste of chlorine.
Installing the filter
When you turn on the appliance for the first time, it will ask you to install the filter. If you want and if the water hardness is high, select "A" and follow the instructions on the screen.
Installing the filter cartridge in the appliance: Fill the filter cartridge with water from the reservoir using the accessory, placed with the cartridge. Fig. 4
Note the month in which the cartridge was installed (position 1 on the sticker, the arrow points to the opening), by turning the ring clockwise. The month in which the cartridge must be replaced is indicated in position 2 on the sticker.
Place a container with a capacity of 0.6 L under the water outlet. Fig. 6.
The machine must be rinsed, without the filter installed. This means that the water tank must be filled. Follow the instructions on the screen. The machine will start, fill the water tank, heat it preliminarily, and then it will perform an automatic rinse.
The screen will inform you when the filter needs to be replaced.
Water hardness
You must set the machine according to the water hardness from 1 to 4. To do this, follow these instructions: Before using the appliance for the first time, check the water hardness to set the appliance accordingly. This operation must be performed when using the machine in a place where the water hardness is different, or if the water hardness changes. To check the water hardness, use the test strip provided with the machine, or contact your local water company.
The details for the different classes are given in the table below:
| Стени на Тьрдост | Клас 0 Много мека | Клас 1 Мека | Клас 2 Среедно Тьрда | Клас 3 Тьрда | Клас 4 Много Тьрда |
| °dH < 3° > 4° | 7° > 14° > 21° | ||||
| °e < 3,75° > 5° | 8,75° > 17,5° > 26,25° | ||||
| °f < 5,4° > 7,2° | 12,6° > 25,2° > 37,8° | ||||
| Настойка на урEDA | 0 1 2 3 4 |
Fill the tank with water and insert the filter. Fig. 2
After one minute, read the water hardness value. Fig. 3
Remove the protective film from the water tank.
Preparing the appliance
Remove the water tank. Fig.7.
Fill the water tank to its place. Fig.8.
Open the lid of the coffee bean container and add coffee beans (max. 250g). Fig.9
Close the lid of the coffee bean container. Fig.10.
PREPARING THE DRINKS IMPORTANT INFORMATION
Depending on the selected drinks, the machine Espresso Automatic EA89 will automatically adjust the amount of ground coffee.
Preparing the appliance
You can adjust the strength of the coffee by adjusting how finely the coffee beans are ground. As a rule, the finer the coffee is ground, the stronger the crema will be. This may vary depending on the type of coffee used. Pre-ground setting for espresso and coarser setting for coffee.
Adjust the grinding fineness by turning the grinding fineness adjustment knob (J), located in the coffee bean container. This adjustment should be made gradually during grinding. After a few cups, you will notice the difference in taste.
Adjusting the grinding fineness is useful when you change the type of coffee or if you want to make stronger or weaker coffee. However, we recommend that you do not use this adjustment too often.
Adjusting the coffee outlet
For every possible drink you can raise or lower the coffee outlet according to the size of the cup. Fig.11
Stopping the drink during preparation
You can prepare it at any time by pressing the button for preparation.
Attention - pressing this button causes the machine to activate, which may take up to 30 seconds. This phase is normal. When the cycle is complete, it does not stop immediately. The machine will finish the cycle and the preparation will be cancelled.
The "Double" function preparation
You can prepare two drinks at the same time with your device. You can activate the function for double preparation by
The CAPPUCCINO function
Preparation of cappuccino and macchiato

Insert the right side of the milk jug into the "Cappuccino" block. Fig.13.
Insert the jug handle (the slanted side) into the milk, or directly into the milk jug. Fig.14. Place the cup/ cups under the coffee/milk spout. Fig.15.
Press the "Cappuccino" button Fig.16. Or press the "Macchiato" button Fig.18. Both functions can be modified.
The preparation starts with the milk dispensing (you can set the time), followed by the coffee dispensing (you can adjust the volume). The adjustment of the milk dispensing time allows you to choose the amount of milk used.
The functions are performed automatically and the drink is ready according to your taste. Fig.17.
At each start of "Cappuccino" or "Macchiato", the machine will remember the last prepared drink, including the selected settings.
Cleaning after preparing milk-based drinks - Rinsing the milk
The display shows "Rinsing milk?" at the end of each preparation.
It is recommended to rinse the milk function after each use, to maintain the cleanliness of the milk dispensing accessories and thus the freshness of the milk.
During milk dispensing, we ask you to systematically rinse the milk tubes and connectors with hot water. Fig. 21 and 25.
For best results, it is recommended to regularly clean the valve block "Cappuccino is a rinsing" (see the general maintenance section).
If you notice a change in the quality of the milk foam, do not hesitate to repeat the rinsing and cleaning process: a poorly maintained milk system can cause problems.
PREPARATION START
Possible settings
The machine allows you to prepare three types (ground coffee, beans, and bean coffee). You can adjust the amount of coffee according to your taste.
The hot water temperature is set according to the selected coffee.
You can program the hot water function, which allows you to prepare many more coffee-based drinks "coffee/tea".
Coffee preparation
Select on the display. Place the cup(s) under the coffee spout. Fig. 12
Then select the desired coffee and press OK.
If the machine detects a water shortage when you press the start button, it will ask you to fill the reservoir. You can adjust the amount by using the buttons during preparation.
PREPARATION OF OTHER DRINKS: ESPRESSO, AMERICANO, AND MILK
Preparation
Place the cup(s) under the coffee spout. Fig. 12
The machine will switch off when you press the button, or you can stop it at any time by pressing the button.
Press the button and the buttons, find the desired drink: espresso, cappuccino, americano, or milk froth.
Preparing espresso
Select ESPRESSO and press OK.
The machine starts, grinds the beans, presses them firmly, and prepares the coffee. You can adjust the amount of coffee prepared using the buttons:
You can stop the preparation at any time by pressing
Preparing cappuccino
Select CAPPUCCINO and press OK.
The preparation is identical to espresso, but with a double dose of coffee.
Preparing americano
Select AMERICANO and press OK.
The preparation is identical to cappuccino, but after it, water is added.
Preparing milk froth
Insert the right side of the milk tube into the milk container block for "Cappuccino with one touch" (Fig. 13). Then insert the other end (the slanted side) into the milk. (Fig. 14*).
The device is used for frothing milk. Since a higher temperature is needed when making coffee, the device will automatically activate the preheating phase.
The menu allows you to set a longer time for brewing. You can set it by pressing the button and then pressing the delayed brewing time will be noted for the next preparation.
You can stop the preparation at any time by pressing the button.
Rinsing the block for "Cappuccino with one dosing"
Please, see the paragraph "Rinsing the milk" in the section PREPARATION OF MILK AND MILK-BASED DRINKS WITH ONE DOSING.
OTHER FUNCTIONS
You can open the "Settings" menu by pressing the button that opens the main menu (Machine settings, Rinsing and Product information).
Settings
When you select the menu "Settings", you can make the desired changes to adjust and optimize the use according to your preferences.
Following are the main settings
| ДаТа | Травьда заададente datasота, осobени Когато Изполбате касета потув Варовик. |
| Часовник | Можete наизберete пokaразец на ча в 12- milli 24-чесв Формат. |
| Езник | Можete наизберete педночесни有很大 OT рedingлаганITE. |
| Мерна сеница | Можete на поочite желанatable мерна сеница на чыдем (miliiитри) milli oz (унци). |
| Ярков ST на ekрана | Можete на рeredулирате ярков ST на ekрана сорoped педночесни有很大 си. |
| Temпера typа на кафeto | Можete на поочite temпера typа на Баше напитки с кафе на Три разлuchни НИВа |
| Temпера typа на чay | Можete на поочite Temпера typа на Баше чайове на Три разлuchни НИВа |
| Тьр dioct Na BODATA | Можete на зааде тьр dioct Na BODATA ot 0 до 4. Вижто Галава „Изөрвае на Тьр dioct Na BODATA". |
| АВТOMATУНО ВКЛЮЧBAнe | Можete втOMATУНО ддстэрпате педварително Загявае на ур dedа в пооченчac. |
| АВТOMATУНО ИЗКЛЮЧBAнe | Можete наизберete врemeшета, сдд кoеву уретдд сд сизлоча в ВСМATУНО (Всeme 6e3 пOLЗВанe). |
| АВТOMATУНО ИЗПЛAKВВанe | Можete наизберete ддд втOMATУНО ИЗПЛAKВВанe на ИЗХODA зд Кафе дд сд сизлоча в He ри сстэрпате на Машина. |
| Настrodukn 3a напитки | Можete на Вьзостанове настroduknпente по подахбирaine. Можete сьшю takа nepmaentho дд akTINВИРа Te Функципente „Черно" и „ДорьлNTITElen"шOT"зд BCNUKII HAPITKN = ). |
To exit the settings menu, press the "Settings" button.
The settings will be saved if you disconnect the machine from the power supply, with the exception of the date and time.
Rinsing
All these functions allow you to start selected programs. Simply follow the on-screen instructions.
Return the collector to its place. Fig. 20
The drip tray is equipped with a float that indicates when emptying is necessary. The machine is also programmed to request emptying of the drip tray after a certain number of coffees, in addition to each emptying operation that you can perform.
I3nlaKbaHe Ha Bepurnte:
MoxkeTe da 3anoyHe Te n3nJaKbAHe NO BcAko BpeMe, KaTo HaTnCHeTe "N36epeTe ,PonnpBxka"
B 3aBnCmOCT OT Bua peuente, MaunHaTAMoKe Ja n3IbHIN nporpaMa 3a aBTOMaTUHO n3IIaKBaHe, KORAto 6bJe n3KnIOueHa. CbIo Taka e Bb3MOxHO da 3aJaTe nporpaMa 3a aBTOMaTUHO n3IIaKBAHe, KORAto MaunHaTAtbKe BkIOueHa (BIXTe pa3dEi, HAcToKn" Ha cTp. 312).
PporpMa 3a aBTOMAThO NOUHCTBaHe
Pporpama 3a aBTOMaTnUHO NOuCTBaHe Ha BeprTa 3a Kafe
Cb6eHHe Ha ekpaHa ige nocOyBa Kora Tp8Ba da ce nyche nporpama 3a nouchBaHe Ha ypeHa.
3a da nycheTe Ta3n nporpama 3a nouncTbaHe, ue Bn Tpr6Ba CbD, KOIto Cb6npa Hau-Manko 0,6 I N KOIto Tpr6Ba Da ce noctabu nO
n3xoJnte 3a Kafo n IIO3aTa 3a npapa, KaKTo n Ta6IeTka 3a NoOuNCTBaHe KRUPS. Onr. 34a. CneBaiTe BHMateJIHO INHCTpyKUnTe Ha ekpaHa. CbIo Taka e Bb3MOxHO da npOBedeTe UKNbl Ha NoUcNCTBaHe OT MeHIO To NpDpBjKa".

BaxHo:He e 3aIbJxHtEnHO da Nyckate nporpaMaTa 3a NOUcTbaHe, BeHara ypeEbT a NOnCKa, Ho Tp6Ba Da a NycHeTe doCTaTbUHO ckopo cIeTobA. Ako NouCTBaHeTo 6bJe OTIOKeHo, PpeDynpeIteHnOto CbO6eHne ue IpOdbJxaba Da CBETN, DOKaTO npoceTb He 6bJe 3aBbpweH.
IporpaMaTa 3a aBtOMaTnHNO NOUcTbaHe ce cbCTOn OT dBe φ a3N: uKbJ 3a nouCTBaHe n uKbJ 3a n3PiakBaHe, n Tpae OKoJ0 13 MNHTN.

Baxho: Ako OTkaunTe MaunHaTa OT KOHTaTn BpeMe Ha cKbJa 3a NouchTbaHe, nIaKO TOkbT cnpe, nporpaMaTa 3a nouchTbaHe ige npodblJn OT Tekuata a3a, KORato 3axpaHbAteo 6bJe BV3ctAHOBeHO. To3n npocec He moke da ce otloKn. Toba e Mhoro Baxho, 3a da ce ocNpyn npabUInHO n3nilakBaHe Ha BoHaTa Bepira. B TaKbB cnuyam Moke da e Heo6xoDima HOba TaJIeTKa 3a NouchTbaHe. 3abpwe Te JanaTn porpaMa 3a NouchTbaHe, 3a da OTCTpaHITe Zenna IoucTbaU npOdyKT, KOITo e onaceH 3a 3dpabeTo.
Почистваха 6лoka 3а „Кanyчимо седно дOKOCBahe"
3a da n3BbPnTe npoPama 3a nouCTBaHe ue Bn Tp86BaT Dba Cbda (CMHIMMaHa BmecTmocct 0,6 I) n nouCTBaHa TeHoCT KRUPS. Moxete da CTapTnpate uKbla 3a nouCTBaHe, KaTO HaTNChe 6yToHa
CneToba n36epeTe, POnDpBxKKa" → ,POnuCTBaHe OT MnIko". CneDbai Te INHctpykunTe Ha ekpaHa.
Pa3rIIO6RABaHe Ha 6Ioka 3a „KanyuHnO c eIHO DOKOCBaHe"
The appliance must be disassembled and the individual elements of the block cleaned after every use. To disassemble the block, follow these instructions:
Remove the milk container, Fig. 21.
Lift the lid of the milk container. Pull it upwards and towards you. Fig. 22. Remove the block for cappuccino by turning it counterclockwise, turning the upper part of the block. Fig. 23.
Disassemble the block completely. Fig. 24. Remove the connector from the milk container. Fig. 25.
Rinse all disassembled parts (block, connector, and milk container) with clean water. Then rinse them with hot water. Fig. 26.
After all elements are clean and dry, reassemble the block and put it back in its place. Fig. 27.
Place the lid on the block. Fig. 28. Reconnect the connector to the milk container (the side with the arrow facing up) and close the block. Fig. 30.
Program for automatic descaling of the milk frother

Warning: If your appliance is equipped with our Claris Aqua Filter System cartridge, remove the cartridge before descaling.
The screen and the beeper will indicate when it is time to run the descaling program for the milk frother. The frequency of this program depends on the quality of the water used and on whether the Claris Aqua Filter System filter is used or not (the harder the water, the more often the milk frother needs to be descaled).

Important: Do not delay running this program, even if the appliance is still working, but you must run it soon enough. If descaling is postponed, the indicator light will continue to flash until the process is completed.
When the alert for descaling appears, press to start the descaling program. To postpone it, press
When the procedure is finished, follow the instructions on the screen. It is also possible to run a descaling cycle from the menu → "Descaling".
To run the descaling program, you will need a container with a capacity of at least 0.6 L, which must be filled with one dose of descaling agent for cappuccino and one dose of KRUPS descaling agent (40 g). Fig. 34b.
Fill the water reservoir up to the CALC mark, then pour inside the contents of one sachet of descaling agent.
The program for steaming the valve consists of three phases: a phase for steaming the valve, a pause, and a phase for draining. The program lasts approximately 20 minutes.

Important: If there is an interruption of the steaming or if the appliance is disconnected from the mains, the current phase will continue when the steaming is restored. This operation cannot be undone. Close the steam button to remove any steam residue that is dangerous to health.
TROUBLESHOOTING
If the problems described in the table persist, contact the customer service department of KRUPS.
| ПОНБЛЕМ ДЕДСТВЕ 3A KОРИГИРАЕ | |
| Aparatul afisează o eroare, software-ul se blochează sai aparatul prezintă o defeçtiune. | Изклочete урEDA и ro otkaчete OT KOHTAKTA, ИЗваде тфильпа Тасудду.Tа Касудду.ИЗчakайе седа МИнтугдду STстатудду.Tа Кбл./ИЗкл. пое 3 сeledндду.Зддду STСошпдду. |
| УрedingT He se ИЗлочьа, korato 6byToHbT BKNI/N3KJI 6bde HATINCHAT (эд пое 3 сeledнд). | ПроберетеPrepe naizteiteITEи KOHTAKITE.ПроберетeДалуДыота зханваши сicedesa с постavenи правлино В KOHTAKTA. |
| Мелачкata 3a kafe n3daBa Stpahen 3Byk. | В мелачкatinga ИмВьншо тял.Свьржete ce c eklna 3a подрьжka на кленьи на KRUPS. |
| БLOKbT 3a „Калунino C edno NO DOKOCBAHe" He 3aCmYKBa MIIAKOTO. | Проберетe дали Блoks e сlogenberпавлино (ocoboно kohektopa в Trьбда за мляко).Прobertete дали Длозата 3a пара не e zanuшena. Ако с ожale зanuшени, вижто по-doly „Длозата 3a пара на Машинaitа ИЗлесда чastнию Или наlbлно зanuшena". |
| БLOKbT 3a „Kалунino C edno NO DOKOCBAHe"ПрoizBVEJda MaNko Или НИКAKBa ПЯн. | Проберетe дали Kohektopa He e zanuшени Или Мрьсен;notonetete ro B cmec ot Topla Ворда И певарота 3a sbdobe, сeded Ковeto ngлakhtete И посушete, рsedу da ro crloblte OTHOBO.Уberетe се,ч e Гвекамгт Марку He e zanuшени Или ИЗВIT Ие e noctabenправлино B 6лoka Злakvino C edno DoKOCBAHe",Здда НЯma уteчkn Ha b3dux.Прobеретe дали E haiblINO NOTOHEN B MIIAKOTO.Илakhtete И постete 6лoks (Вижто Гль�ITE, Свьрзанс Илзлakваген� И поисванeto Na 6лoka 3a „Kалунino C edno DoKOCBAHe") 3a млешимпавлипrelopьчваме Дд ИлольВATE pracnOпостьоги ЗрсNo pachnyн Na 6лoka, КеTo e OTbopeho ckopo. СьцTo Taka Bnrelopьчваме Дд ИлOLBATE CTudEn CBd. |
| Дюзата 3a пара на Машинaita ИЗлесда чastniuto Или наlbлно 3aNyшena. | СваNETe Длозата OT Дьржача и с поочta на Клоча 3a разлобаян.Фиг. 31.Вьрнete Дьржача на мястOTу My be3 Длозата:Фиг. 32.Залочete цьлga 3a ИЗлakвache Na 6лoks 3a „Kалунino C edno DoKOCBAHe",Здда OTСТРANITE BCЯКAKВI NOSTAHALI HACNAHIA.Почstete Длозата 3a пара и с уberетe,ч OTbopьт NaДлозата He e zanuшetenС остыцу OT мляко Или варови. Ако e Neobxodimo, Илonsьаве ИглNTA Na 6лuktba.Фиг. 33 |
| Отюзата 3a пара на ИЗлinasуп.apa. | Проберетe дали Длозата 3a пара He e zanuшena. Вьжто „Длозата 3a пара на Машинaita ИЗлесда чastнию Или наlbлно зanuшena" по-дoly.Ако Тoba He nomorfte, ИЗразнete pezeрвoga rapa 3a Ворда И В��еменно Илбаде касета Claris. Hanblnete pezeрвoga rapa 3a Ворда с минерална Ворда с Виско StbDржане Na kaluzni (>100 Mr/l) И рusceteцлдду 3a пара (5 до 10)[eini>[dpyr B NЯкakbB CBd,Дokato NoCTINRHE ToocSTOnHEn NotOKnapa.Пoctabete касета образно в р检рвogaap. |
| От reseTKATA Na tabinckata 3a otczxdane teue napa. | В завсимost CT ON BVDa peceNTa e Bb3MozhNO OT reseTKATA Na tabinckata 3a otczxdane De nizlinza Napa. |
| Машината Иска ду Изразнay tabinckata 3a otczxdane, макар чу Тя He n Pblna. | Машината eПрогампа на Ду Иска Изразнаве на tabичката 3a otczxdane с徳 onpredenen 6poi kafoeta,бezЗнauthende Ддл mexdubvpemenho CTe ИЗвршни Oшe onepaunii 3a Изразнаде. |
| Урект Иска за вд.откачен ot Контакт и Влочец OTHOB. | Откayete урета ot Контакт за 20 секунни,有很大усяе касета Сaris Aqua Filter System, пос. Ако поськата не有很大усяе,ся有很大усяе otТовь Контакт. Ако поськата не有很大усяе,ся有很大усяе otТовь Контакт. | |
| Машината не有很大усяе на варови. | Цкьлт за有很大усяе на варови有很大усяе,有很大усяе,有很大усяе otТовь Контакт. | |
| В tabичката за有很大усяе有很大усяе市场规模. | В tabичката за有很大усяе有很大усяе,有很大усяе,有很大усяе otТовь Контакт. | |
| Машината не有很大усяе,有很大усяе,有很大усяе市场规模. | Машината не有很大усяе,有很大усяе,有很大усяе otТовь Контакт. | |
| Машною市场规模. | Проберета有很大市场规模,有很大市场规模,有很大市场规模. | |
| Има следу ot有很大усяе有很大市场规模. | Проберета有很大市场规模,有很大市场规模,有很大市场规模. | |
| Яоригано有很大市场规模. | Проберета有很大市场规模,有很大市场规模,有很大市场规模. | |
| Поведа有很大市场规模. | Проберета有很大市场规模,有很大市场规模,有很大市场规模. | |
| Когато有很大市场规模. | Когато有很大市场规模,有很大市场规模,有很大市场规模. | |
| Следу有很大市场规模. | Следу有很大市场规模,有很大市场规模,有很大市场规模. | |
| Яоригано有很大市场规模. | Яоригано有很大市场规模,有很大市场规模,有很大市场规模. | |
| Кaufсокую市场规模. | Кaufсокую市场规模,有很大市场规模,有很大市场规模. | |
| Балшага市场规模. | Балшага市场规模,有很大市场规模,有很大市场规模. | |
| Еншага市场规模. | Еншага市场规模,有很大市场规模,有很大市场规模. | |
| Еншага市场规模. | Еншага市场规模,有很大市场规模,有很大市场规模. | |
| Еншага市场规模. | Еншага市场规模,有很大市场规模,有很大市场规模. | |
| Еншага市场规模. | Еншага市场规模,有很大市场规模,有很大市场规模. | |
| Еншага市场规模. | Еншага规模,有很大市场规模,有很大市场规模. | |
| Еншага市场规模. | Еншага市场规模,有很大市场规模,有很大市场规模. | |
| Еншага市场规模. | Еншага市场规模,有很大市场规模,有很大市场规模. | |
| Еншага市场规模. | Еншага市场规模,有很大市场规模,有很大市场规模. | |
| Еншага市场规模. | Еншага市场规模,有很大市场规模. | |
| Еншага市场规模. | Еншага市场规模,有很大市场规模. | |
| Еншага市场规模. | Еншага市场规模,有很大市场规模. | |
| Еншага市场规模. | Еншага市场规模,有很大市场规模. | |
| Еншага市场规模. | Еншага市场规模,有很大市场规模. | |
| Еншага市场规模. | ||
| Еншага市场规模. | ||
| Еншага市场规模. | ||
| Еншага市场规模. | ||
| Еншага市场规模. | ||
| Еншага市场规模. | ||
| Еншага市场规模. | ||
| Еншага市场规模. | ||
| Еншага市场规模. | ||
| Еншага市场规模. | ||
| Еншага市场规模. | ||
| Еншага市场规模. | ||
| Еншага市场规模. | ||
| Еншага市场规模. | ||
| Еншага市场规模. | ||
| Еншага市场规模. | ||
| Еншага市场规模. | ||
| Еншага市场规模. |
FR HOTLINE: B: 070233159 - F: 0974501061 - CH: 0448371840 EN HOTLINE: UK: 0345 330 6460 - ROI: 01 677 4003 DE HOTLINE: DE: 0212 387 400 - AT: 01 890 3476 - CH: 044 837 18 40 NL HOTLINE: NL: 0318 58 24 24 DA KUNDESERVICE: 44663155 NO KUNDESERVICE: 815 09 567 SV KUNDSERVICE: 0859421330 FI ASIAKASPALVELU: 09 622 94 20 ES HOTLINE: ES: 902312300 IT SERVIZIO CONSUMATORI: IT: 199207 701 - CH: 044837 18 40 PT Centro de Contacto do Consumidor: PT: 808 284 735 EL GRAMMEE Y PIRETIAS: 2106371251 CS HORKÁ LINKA: 731 010 111 SK ZAKAZNICKA LINKA: 232 199 930 HU FORRÓDRÓT: 06 1 801 8434 PL INFOLINIA: 801 300 420 RU GORYACHAYA LINIYA: 495 213 32 28 UK TAPRAUJINIA: 044 300 13 04 RO Centrul de Asistenta Clienti: 0 21 316 87 84 BG TOPEUa TELEFONNA LINIYA: 0887 044 850 HR TELEFONSKA LINIJA ZA POMOC PRI UPORABI APARATA: 01 30 15 294



- IMPORTANT INFORMATION ABOUT THE PRODUCT AND THE USER MANUAL
- THE KRUPS TEAM
- CONTENTS
- IMPORTANT INFORMATION CONCERNING THE APPLIANCE AND INSTRUCTIONS
- GUIDE TO THE SYMBOLS USED IN THE INSTRUCTIONS
- PRODUCTS SUPPLIED WITH YOUR MACHINE
- PARTS SUPPLIED
- TECHNICAL DATA
- APPLIANCE DESCRIPTION
- COFFEE BEAN CONTAINER
- DISPLAY PANEL
- SPECIFIC INFORMATION ABOUT
- BLUETOOTH LIGHT
- SPECIFIC INFORMATION ABOUT THE BUTTONS' LIGHTING
- KRUPS APP
- DOWNLOADING THE APP
- CONFIGURING THE ACCOUNT
- BLUETOOTH® ACTIVATION
- PAIRING WITH THE MACHINE
- MACHINE SETTINGS
- USING THE APP
- USING YOUR APPLIANCE INSTALLING THE APPLIANCE
- SWITCHING ON THE APPLIANCE
- INITIAL SETTINGS
- LANGUAGE
- MEASURING UNIT
- DATE AND TIME
- AUTO-OFF
- RINSING THE COFFEE CIRCUIT
- FILTER INSTALLATION
- WATER HARDNESS
- PREPARING THE APPLIANCE
- IMPORTANT INFORMATION BEFORE PREPARING DRINKS
- PREPARING THE GRINDER
- ADJUSTING THE COFFEE OUTLET
- STOPPING A DRINK DURING PREPARATION
- DOUBLE" PREPARATION FUNCTION
- DARK FUNCTION
- EXTRA SHOT FUNCTION
- PREPARING COFFEE DRINKS VIA DIRECT ACCESS
- PREPARATION
- POSSIBLE SETTINGS
- PREPARING MILKY DRINKS VIA DIRECT ACCESS
- CLEANING AFTER PREPARING MILKY DRINKS MILK RINSING
- FIG. 21 AND
- PREPARING TEAS
- PREPARING A TEA
- PREPARED OTHER DRINKS: RISTRETTO, DOPPIO, AMERICANO OR FROTHY MILK
- MAKING A RISTRETTO
- MAKING A DOPPIO
- MAKING AN AMERICANO
- MAKING A FROTHY MILK
- RINSING THE "ONE TOUCH CAPPUCCINO" BLOCK
- OTHER FUNCTIONS
- SETTINGS
- MAINTENANCE
- INFO
- GENERAL MAINTENANCE
- EMPTYING THE COFFEE GROUNDS COLLECTOR AND THE DRIP TRAY
- RINSING THE CIRCUITS
- AUTOMATIC CLEANING PROGRAMS
- AUTOMATIC CLEANING PROGRAM OF THE COFFEE CIRCUIT
- CLEANING THE "ONE TOUCH CAPPUCCINO" BLOCK
- DISMANTLING THE "ONE TOUCH CAPPUCCINO" BLOCK
- AUTOMATIC DESCALING PROGRAM OF THE STEAM CIRCUIT
- TROUBLESHOOTING
- DEAR CUSTOMER
- DESCRIPTION OF THE APPLIANCE
- IMPORTANT INFORMATION ABOUT THE PRODUCT AND INSTRUCTIONS FOR USE
- PREPARATION OF OTHER DRINKS: RISTRETTO, DOPPIO, AMERICANO
- PROBLEMS CORRECTIVE ACTIONS
- KRUPS ESPRESSO APP
- PROBLEMS AND THEIR SOLUTIONS
- DETAILED INFORMATION
- OVERVIEW
- BLUETOOTH INDICATOR
- HOPMAUN O NPCBTKE KHONOK
- ПРИLOЖЕΗΝΕ KRUPS
- CKAATE NPNOXEHNE
- KOHPYPAUN AKKAYHTA
- AKTUBAUNU BLUETOOTH
- COEHHEHNE CMAPTFOHA C KOFOMAUNHO
- COFFEE MACHINE SETTINGS
- USING THE APPLICATION
- PREPARATION FOR WORK INSTALLATION OF THE DEVICE
- SWITCHING ON
- UNIT OF MEASUREMENT
- PREPARATION OF CAPPUCCINO OR MACCHIATO
- CLEANING THE APPLIANCE AFTER PREPARING MILK-BASED DRINKS: RINSING THE MILK BLOCK
- PREPARATION OF SOME DRINKS: ESPRESSO, DOPPIO, AMERICANO OR MILK FOAM
- PREPARATION OF ESPRESSO
- BREWING
- BREWING AMERICANO
- BREWING MILK FOAM
- AUTOMATIC CLEANING PROGRAM FOR THE MILK SYSTEM
- CONTROL PANEL
- ADDITIONAL INFORMATION ABOUT
- CLARIFICATION OF THE INDICATOR LIGHT
- KRUPS APPENDIX
- ACCOUNT CONFIGURATION
- BLUETOOTH ACTIVATION
- CONNECTING THE DEVICE
- CHARGING THE DEVICE
- UNITS OF MEASUREMENT
- DATE
- AUTOMATIC SHUTDOWNAUTOMATIC SHUTDOWN
- SETTING THE RINSE CYCLE
- INSTALLATION OF THE FILTER
- PREPARING THE DEVICE
- IMPORTANT RECOMMENDATIONS FOR PREPARATION
- ADJUSTING THE HARDNESS
- ADJUSTING THE COFFEE SPOUTS
- STOPPING DRINK PREPARATION
- ADJUSTING THE COFFEE STRENGTH
- PREPARING DRINKS WITH MILK AT THE TOUCH OF A BUTTON
- POSSIBLE PREPARATIONS
- PREPARING CAPPUCCINO
- MAINTENANCE AFTER PREPARING MILK-BASED DRINKS - CLEANING THE MILK BLOCK
- PREPARING BEVERAGES
- PREPARING OTHER DRINKS: RISTRETTO, DOPPIO, AMERICANO OR MILK FROTH
- PPUROTYBAHHA PICTPETO
- PNUROTYBAHHA DONIO
- PNUROTYBAHHAMEPNKAHO
- PNUROTYBAHHAMONOUHOI NHKU
- THEN
- AUTOMATIC CLEANING PROGRAM OF THE BREWING SYSTEM
- CLEANING THE “ONE TOUCH CAPPUCCINO” BLOCK
- DISASSEMBLING THE "ONE TOUCH CAPPUCCINO" CONTAINER
- AUTOMATIC DESCALING PROGRAM
- PRODUCTS DELIVERED WITH THE MACHINE
- DELIVERED COMPONENTS
- CREATING AN ACCOUNT
- ACTIVATE THE BLUETOOTH
- CONNECTING TO THE MACHINE
- SETTING UP THE MACHINE
- USE OF THE DEVICE - DEVICE INSTALLATION
- TURNING ON THE DEVICE
- UNIT OF MEASURE
- AUTOMATIC SWITCH-ON
- REPLACING THE FILTER CARTRIDGE
- INSTALLING THE FILTER
- PREPARING THE DRINKS IMPORTANT INFORMATION
- STOPPING THE DRINK DURING PREPARATION
- THE "DOUBLE" FUNCTION PREPARATION
- THE CAPPUCCINO FUNCTION
- PREPARATION OF CAPPUCCINO AND MACCHIATO
- CLEANING AFTER PREPARING MILK-BASED DRINKS - RINSING THE MILK
- PREPARATION START
- COFFEE PREPARATION
- PREPARATION OF OTHER DRINKS: ESPRESSO, AMERICANO, AND MILK
- PREPARING ESPRESSO
- PREPARING AMERICANO
- PREPARING MILK FROTH
- RINSING THE BLOCK FOR "CAPPUCCINO WITH ONE DOSING
- RINSING
- I3NLAKBAHE HA BEPURNTE
- PPORPMA 3A ABTOMATHO NOUHCTBAHE
- PPORPAMA 3A ABTOMATNUHO NOUCTBAHE HA BEPRTA 3A KAFE
- ПОЧИСТВАХА 6ЛOKA 3А „КANYЧИМО СЕДНО ДOKOCBAHE
- PA3RIIO6RABAHE HA 6IOKA 3A „KANYUHNO C EIHO DOKOCBAHE
- PROGRAM FOR AUTOMATIC DESCALING OF THE MILK FROTHER
Brand : KRUPS
Model : Evidence EA8901
Category : Coffee machine