RVA420B - Robot vacuum BLACK & DECKER - Free user manual and instructions
Find the device manual for free RVA420B BLACK & DECKER in PDF.

User questions about RVA420B BLACK & DECKER
0 question about this device. Answer the ones you know or ask your own.
Ask a new question about this device
Download the instructions for your Robot vacuum in PDF format for free! Find your manual RVA420B - BLACK & DECKER and take your electronic device back in hand. On this page are published all the documents necessary for the use of your device. RVA420B by BLACK & DECKER.
USER MANUAL RVA420B BLACK & DECKER
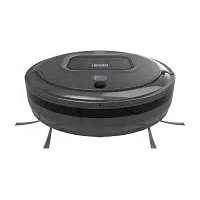
Your BLACK + DECKER RVA425B or RVA420B Robot Vacuum cleaner has been designed for light dry vacuum cleaning purposes. This appliance is intended for household use only.
Safety instructions
Warning! Read all safety warnings and all instructions.
Failure to follow the warnings and instructions listed below may result in electric shock, fire and/or serious injury.
Warning! When using battery-powered appliances, basic safety precautions, including the
following, should always be followed to reduce the risk of fire, leaking batteries, personal injury and material damage.
Read all of this manual carefully before using the appliance.
- The intended use is described in this manual. The use of any accessory or attachment or the performance of any operation with this appliance other than those recommended in this instruction manual may present a risk of personal injury.
- Retain this manual for future reference.
- This appliance contains batteries that are only replaceable by skilled persons.
Warning! For the purposes of recharging the battery, only use the detachable supply unit (K25V240100X or charging dock N512295) provided with this appliance.
Using your appliance
- Do not use the appliance to pick up liquids or any materials that could catch fire.
Do not use the appliance near water. - Do not immerse the appliance in water.
- Never pull the charger lead to disconnect the charger from the socket. Keep the charger lead away from heat, oil and sharp edges.
- This appliance can be used by children aged from 8 years and above and persons with reduced physical, sensory or mental capabilities or lack of experience and knowledge if they have been given supervision or instruction concerning use of the appliance in a safe way and understand the hazards involved. Children shall not play with the appliance. Cleaning and user maintenance shall not be made by children without supervision.
Inspection and repairs
- Before use, check the appliance for damaged or defective parts. Check for breakage of parts, damage to switches and any other conditions that may affect its operation.
Do not use the appliance if any part is damaged or defective. - Have any damaged or defective parts repaired or replaced by an authorized repair agent.
Regularly check the charger lead for damage. Replace the charger if the lead is damaged or defective.
- Never attempt to remove or replace any parts other than those specified in this manual.
Additional safety instructions
Residual risks.
Additional residual risks may arise when using the tool which may not be included in the enclosed safety warnings. These risks can arise from misuse, prolonged use etc.
Even with the application of the relevant safety regulations and the implementation of safety devices, certain residual risks can not be avoided. These include:
Injuries caused by touching any moving parts.
Injuries caused by touching any hot parts.
Injuries caused when changing any parts or accessories.
Injuries caused by prolonged use of the appliance. When using any appliance for prolonged periods ensure you take regular breaks.
Batteries and chargers
Batteries
- Never attempt to open for any reason.
- Do not expose the battery to water.
Do not expose the battery to heat.
Do not store in locations where the temperature may exceed 40^ .
Charge only at ambient temperatures between 10^ and 40^ . - Charge only using the charger provided with the appliance/tool.
Using the wrong charger could result in an electric shock or overheating of the battery.
- When disposing of batteries, follow the instructions given in the section "Protecting the environment".
Do not damage/deform the battery pack either by puncture or impact, as this may create a risk of injury and fire. - Do not charge damaged batteries.
Under extreme conditions, battery leakage may occur. When you notice liquid on the batteries carefully wipe the liquid off using a cloth. Avoid skin contact.
In case of skin or eye contact, follow the instructions below.
Warning! The battery fluid may cause personal injury or damage to property. In case of skin contact, immediately rinse with water. If redness, pain or irritation occurs seek medical attention. In case of eye contact, rinse immediately with clean water and seek medical attention.
Chargers
Your charger has been designed for a specific voltage. Always check that the mains voltage corresponds to the voltage on the rating plate and the information in the technical data table.
Warning! Never attempt to replace the charger unit with a regular mains plug.
Use your BLACK+DECKER charger only to charge the battery in the appliance/tool with which it was supplied. Other batteries could burst, causing personal injury and damage.
- Never attempt to charge nonrechargeable batteries.
- If the supply cord is damaged, it must be replaced by the manufacturer or an authorised BLACK+DECKER Service Centre in order to avoid a hazard.
Do not expose the charger to water.
Do not open the charger.
Do not probe the charger.
- The appliance/tool/battery must be placed in a well ventilated area when charging.
Electrical safety
Your charger has been designed for a specific voltage. Always check that the mains voltage corresponds to the voltage on the rating plate. Never attempt to replace the charger unit with a regular mains plug.
Symbols on the charger

Read all of this manual carefully before using the appliance.

This tool is double insulated; therefore no earth wire is required. Always check that the power supply corresponds to the voltage on the rating plate.

The charging base is intended for indoor use only.
Labels on appliance
The following symbols appear on this appliance along with the date code:
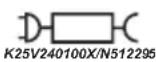
Only use with charger K25V240100X or charging dock N512295
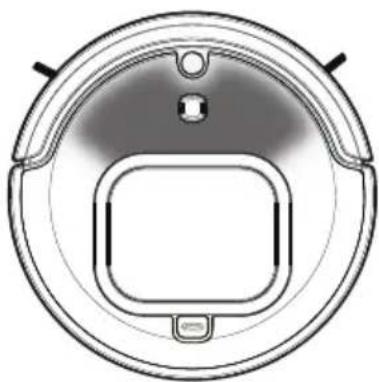
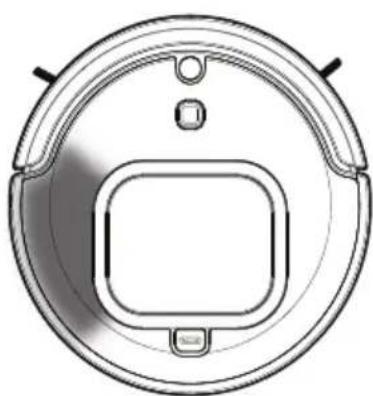
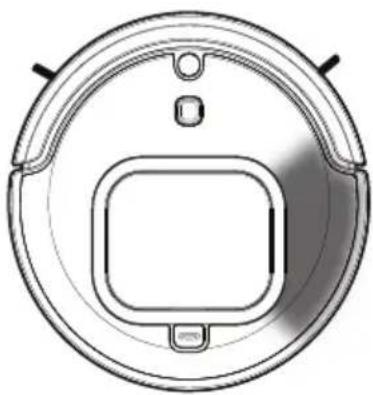
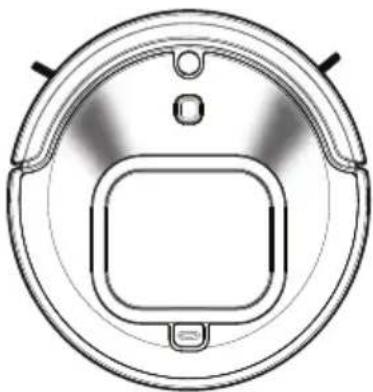
Features
This tool includes some or all of the following features.
- Power switch
- Charging socket
- Start/stop button
- Sensor
- Front wheel
- Infrared transmitter
- Charging plate
- Front lens
- Dust bin
- Dust bin release button
-
Side brushes
-
Main brush
- Main brush frame
- Main brush frame tabs
- Charging dock
15a. Dock pairing button - Charging dock infrared window
- Charging electrodes
- Maintenance tool
- Battery charger
Additional Accessories
A. Side brushes (2)
B. Side brush screws (2)
C. HEPA Filter
The vacuum is recommended for the following floor surfaces:
Hardwood/Laminate
Ceramic/Stone tile
- Low and medium pile carpets (plush carpeting is not recommended).
Note: Vacuum may not work on some black carpet and darker floor surfaces, as the sensors may be detecting the surface as an edge or stairs.
Room Preparation
Place the cords from other appliances out of the area to be cleaned.
Do not operate the vacuum in a room where an infant or child is sleeping.
- Do not operate the vacuum in an area where there are lit candles or fragile objects on the floor to be cleaned.
- Do not operate the vacuum in a room that has lit candles on furniture that the vacuum may accidentally hit or bump into.
Do not allow children to sit on the vacuum.
- Do not use the vacuum on a wet surface.
Test the height of thresholds. Robot cannot climb thresholds above 10-15mm.
Assembly
Remove front lens (8) protection film.
Ensure the dust bin (9) and main brush (12) are fitted securely.
Installing side brushes (Fig. A)
Ensure the power switch (1) is in the OFF position.
Place the vacuum upside down on a flat surface.
Remove the side brush retaining screws (20).
Place the side brushes (11) into the brush slots (21).
Install side brush retaining screws.
Charging
Your vacuum can be manually charged via the jack plug or automatically charged via the charging dock.
Before charging, ensure the power switch (1) is in the ON position.
Before first use, the battery must be charged for at least 4-5 hours.
Note: While charging, the charger may become warm. This is normal and does not indicate a problem. The appliance can be left connected to the charger indefinitely.
Warning! Do not charge the battery at ambient temperatures below 10^ (50°F) or above 40°C (104°F).
Manually Charge (Fig. B)
Ensure the power switch is turned ON to charge.
Plug the battery charger (19) into a wall outlet.
Slide the jack plug (22) end of the charger into the charging socket (2) of the vacuum.
The power indicator (start/stop button) (3) will blink and emit a single short beep meaning the vacuum is charging. The power indicator LED (start/stop button) will turn off when the vacuum is fully charged.
Automatically Charge (Fig. C, D)
Plug the battery charger (19) into a wall outlet.
Slide the jack plug (22) end of the charger into the charging dock's charging socket (23) as shown in Figure C.
Place the charging dock base on the floor with the back of the charger against a wall.
Note: Do not place anything under the charging dock. It will prevent the vacuum from automatically charging
- Place the vacuum on the charging dock so that the charging electrodes (17) contact the two charging plates (7) as shown in Figure D.
Note: If manually placing on dock then ensure power switch is turned ON
The power indicator (start/stop button) (3) will blink and emit a single short beep indicating the vacuum is charging. the power indicator LED (start/stop button) will turn off when the vacuum is fully charged.
Note: You can check the charging status of the vacuum from your BLACK+DECKER app.
Note: The vacuum will search for the charging dock when it is low on battery charge in Auto mode. However, if the room is too large or the vacuum is obstructed from "seeing" the dock, it may fail to find the dock to automatically recharge. If this occurs, place the vacuum on the charging dock as described above.
Note: In Spot and Quick Clean Mode, the robot will finish its cleaning cycle and stop, not returning to the dock, unless the battery level is low, in which case it will continue searching for the dock.
Using the BLACK+DECKER App to operate your robot vacuum
The BLACK+DECKER App allows you to operate and connect to your robot vacuum from a compatible mobile device. After downloading the App, you connect your device to the vacuum. Then you can use the App to operate the robot.
Note: Your mobile device has to be within Bluetooth range to operate the robot.
You can use the BLACK+DECKER App to:
Schedule an auto cleaning to occur on the days and times of your choosing.
Note: If at any time, the robot is switched to OFF position, the scheduling function needs to be restored by reconnecting to the app after the unit has been turned on.
Initiate a quick, spot, or manual cleaning.
Monitor the robot's battery charge level.
Add another BLACK+DECKER robot vacuum to your device.
View Troubleshooting FAQ for suggestions on how to solve common problems or errors.
Create an account to receive promotional materials.
Disconnect your device from the robot.
To download the BLACK+DECKER App and connect your device, do the following:
Download the BLACK+DECKER App, application at:


Double-click the BLACK+DECKER App icon to launch the App on your device. An App TERMS AND CONDITIONS page appears.
Note: The BLACK+DECKER App is governed by separate terms and conditions available for viewing through the mobile application.
Scroll down the App TERMS AND CONDITIONS page to make the Agree button clickable.
Click the Agree button to continue. A CREATE ACCOUNT page appears.
Take one of the following options on the CREATE ACCOUNT page:
Complete and Submit the form if you want to create a Stanley Black & Decker (SBD) user account. SBD will send promotional emails to the email address you specify.
Click Skip to continue without creating an SBD user account.
ANDROID ONLY; iOS SKIP to the next step. When the Quick Setup screen appears, ensure that the "Enable Bluetooth", "Location Services", and "App Permissions" boxes are checked, and click Continue.
- On the Select Product screen, click the Robot Vacuum icon to connect the robot vacuum to your mobile device.
Important: The power switch (1) MUST be in the ON position (I) for the vacuum to pair.
- When the Connecting screen appears, press and hold the blue start/stop button on the robot vacuum to connect your mobile device to the vacuum. A confirmation message appears when the connection process completes, followed by an optional tutorial that explains Robot App basics.
To view the App User Guide and Troubleshooting FAQ:
Click the Settings icon to launch the Settings page.
Click App User Guide to view instructions on how to use BLACK+DECKER App features and screens.
Click FAQ to view robot vac troubleshooting tips.
Operating the robot Vac without the App
You can still operate the unit in auto clean mode without the app by ensuring the power switch is on and then pressing the power indicator (start / stop) button (3) once briefly. The unit will run for full battery discharge before start looking for the docking station.
Emptying the dust Bin (Fig. E)
Turn the power switch (1) off.
Press the dust bin release button (10) and the dust bin will pop up from the top of the vacuum.
Pull out the dust bin.
Open the filter door (24) and empty the contents of the dust bin.
Note: The dust bin can be washed using mild soap and water.
Ensure dust bin is completely dry before reinstalling.
Cleaning the Filter (Fig. F)
Turn the power switch (1) off.
Remove the dust bin (9) as described above.
Pull out the blue or purple filter frame (25). Remove the pleated filter (26) and sponge filter (27) with care.
To clean the dust from the filters, use the maintenance tool or wash both filters under warm running water.
Note: Ensure both filters are completely dry before reinstalling.
Reinstall dry filters into the filter frame. Insert the filter frame into the dust bin, and reinstall dust bin into the vacuum.
Warning! Never use the appliance without the filter. Optimum dust collection will only be achieved with a clean filter.
Assembly and removal of the Main Brush (Fig. G)
Turn the power switch (1) off.
Place the vacuum upside down on a flat surface.
Pull up on the two brush frame tabs (14) and lift off the main brush frame (13).
Remove the main brush (12).
Remove all hair and debris using the maintenance tool (18).
Assemble in the reverse order.
Note: When reinstalling the main brush frame, ensure the side brushes are not trapped under the frame.
Cleaning the Brushes
Turn the power switch (1) off.
Place the vacuum upside down on a flat surface.
Cleaning the Main Brush
Clean the main brush regularly with the maintenance tool.
Remove all hair and debris using the maintenance tool regularly.
Cleaning the Side Brushes (Fig. A)
Remove the side brush retaining screw (20).
Remove the side brush (11), clean the side brush, then clean debris in the slot (21).
Reinstall side brush and retaining screw.
Cleaning the Wheels
Clean the wheels regularly
Remove all hair and debris using the maintenance tool.
Note: If hair is trapped in the front wheel, using a small screwdriver pry out the wheel. Remove any hair or debris and reinstall the front wheel.
Cleaning the wall sensor
Turn the power switch (1) off.
Clean the front lens (8) with a clean, dry cloth.
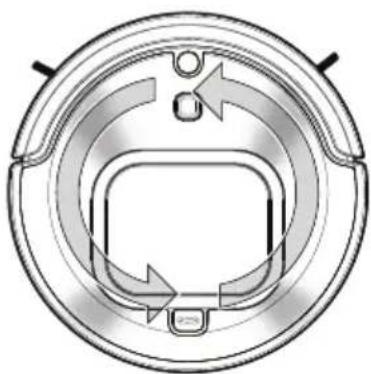
Cleaning the ground detection sensors
Turn the power switch (1) off.
Place the vacuum upside down on a flat surface.
Clean the sensor windows (4) with a clean, dry cloth.
Accessories
Recommended accessories for use with your appliance are available from your local dealer or authorized service center.
Warning! The use of any accessory not recommended for use with this appliance could be hazardous.
Replacing the Filter
The filter should be replaced every 6 months and whenever worn or damaged. Replacement filters are available from your BLACK+DECKER dealer.
Maintenance
Your BLACK+DECKER corded/cordless appliance/tool has been designed to operate over a long period of time with a minimum of maintenance. Continuous satisfactory operation depends upon proper tool care and regular cleaning.
Warning! Before performing any maintenance on corded/ cordless power tools:
Switch off and unplug the appliance/tool.
Or switch off and remove the battery from the appliance/ tool if the appliance/tool has a separate battery pack.
Or run the battery down completely if it is integral and then switch off.
Unplug the charger before cleaning it. Your charger does not require any maintenance apart from regular cleaning.
Regularly clean the ventilation slots in your appliance/tool/ charger using a soft brush or dry cloth.
Regularly clean the motor housing using a damp cloth. Do not use any abrasive or solvent-based cleaner.
Error code Indication Patterns A - F
Your robot will indicate several error or status conditions by use of the LEDs (only applies to the RVA425B unit. In the case of the RVA420B unit, errors will be indicated via a short recurring beep)
Some of the main errors are:
Error Display
Error Code A:
Front section flashing Red to OFF.
Problem:
Main brush stuck.
Solution:
Clear debris/obstruction from main brush. Press the power button twice to clear the error and restart the vacuum.
Error Display
Error Code B:
Left hand side flashing Red to OFF.
Problem:
Left wheel stuck.
Solution:
Clear debris/obstruction from left wheel. Press the power button twice to clear the error and restart the vacuum.
Error Display
Error Code C:
Right hand side flashing Red to OFF.
Problem:
Right wheel stuck.
Solution:
Clear debris/obstruction from right wheel. Press the power button twice to clear the error and restart the vacuum.
Error Display
Error code D:
2 front sections flashing Red to OFF.
Problem:
Side brush stuck.
Solution:
Clear debris/obstruction from side brush. Press the power button twice to clear the error and restart the vacuum.
NOTE: If there is hair wrapped around the side brush, you may need to uninstall and reinstall the side brush.
Error Display
Error code E:
All LEDs Spinning Pattern - Orange to OFF.
Problem:
Dust Bin not fully inserted.
Solution:
Press down on the dustbin to fully install into vacuum. Press the power button twice to clear the error and restart the vacuum.
Error Display
Error code F:
Front center LED section flashing Blue to OFF.
Problem:
Unit shut down, battery level too low to return to charging dock automatically.
Solution:
Manually return robot to charging dock. Press the power button twice to clear the error and restart the vacuum.
To clear an error
- After debris/obstruction has been removed from the vacuum, clear the error by pressing the Start/Stop button (3).
To resume vacuuming, press the Start/Stop button (3) again.
Troubleshooting
| Problem Possible Cause Possible Solution | ||
| Vacuum stops cleaning | Vacuum is in error state. Vacuum has completed Quick Clean or Spot mode. Battery charge is low. | Clear error (see error indication table pg 9 - 10). Charge battery. |
| Vacuum does not charge. | Charger is not plugged in correctly. Power switch on vacuum is not ON | Ensure the charger is fully plugged into and the jack plug is properly plugged into the vacuum or charging dock. Ensure power switch is "ON". |
| Vacuum only moves backwards or moves a few inches before backing up and stopping. | Floor has dark stripes or spots that the vacuum detects as a drop off or stairs. Sensors are dirty. | Only use vaccum on recommended surfaces (pg 7). Clean sensors with dry cloth. |
| Vacuum keeps moving in small circle. | A wheel is blocked. Vacuum is operating in SPOT mode. | Remove debris from blocked wheel. |
| Vacuum does not detect drop off or stairs. | Sensors are covered. | Clean sensors with dry cloth. |
| Vacuum will not pair with app. | Vacuum not sufficiently charged. Bluetooth function on mobile device is not turned on. Mobile device located too far from vacuum. Location Services and AppPermissions for Locations Services may be turned OFF. (Android Only). Vacuum and mobile device need to be restarted. | Ensure the vacuum is fully charged and restart your mobile device. Ensure Bluetooth function on your mobile device is ON. Move your mobile device closer to the vacuum. Go to your mobile devices preferences and turn ON permissions for the BLACK+DECKER APP. Turn vacuum off and then back on and restart your mobile device. Re-open the BLACK+DECKER App. Attempt to pair the robot vacuum again. Be sure to press and hold the power indicator (3) button on the top of the vacuum for at least five seconds. |
| Robot will not return to dock. | Robot is out of range to "see" the dock. Robot is obstructed by objects in the cleaning area. Robot may not be paired to dock. | Move robot closer to dock. Clear obstruction from robot's cleaning area. With the unit turned off, ensure the dock is plugged into a wall outlet. Press and hold the pairing button (15a) and turn the robot power switch (1) to the ON position. Robot will beep twice when pairing is successful. |
| Scheduled cleaning will not work. | Vacuum was not reconnected to app after robot was switched OFF. | If at any time, the robot is switched to OFF position, the scheduling function needs to be restored by reconnecting to the app after the unit has been turned on. |
| Suction Power is weak. | Filters are clogged, dustbin full. | Clean dustbin and filters. |
| Vacuum noise changes during operation. | AUTOSENSE in action - vacuum changes suction power from carpet to hard surface. Debris in rotating brush, wheel or side brush. | Remove debris from brush, wheel or side brush. |
Note: See your BLACK+DECKER app for other troubleshooting details.
Protecting the environment
Separate collection. Products and batteries marked with this symbol must not be disposed of with normal household waste.
Products and batteries contain materials that can be recovered or recycled reducing the demand for raw materials. Please recycle electrical products and batteries according to local provisions. Further information is available at www.2helpU.com
Technical data
| RVA425B | RVA420B | |
| Voltage (Vdc) 14.4v 14.4v | ||
| Battery | 2.5Ah 2 | 0Ah |
| Weight (Kg) 3.8 | 3.8 | |
| Charger | K25V240100X or N512295 charger base | K25V240100X or N512295 charger base |
| Input Voltage (Vac) | 100 - 240v 1 | 100 - 240v |
| Output Voltage (V) | 24v 24v | |
| Current (mA) 1000mA 1000mA | ||
| Approx charge time (h) | 4 - 5hrs | 4 - 5hrs |
Guarantee
Black & Decker is confident of the quality of its products and offers consumers a 12 month guarantee from the date of purchase. This guarantee is in addition to and in no way prejudices your statutory rights. The guarantee is valid within the territories of the Member States of the European Union and the European Free Trade Area.
To claim on the guarantee, the claim must be in accordance with Black & Decker Terms and Conditions and you will need to submit proof of purchase to the seller or an authorised repair agent. Terms and conditions of the Black & Decker 1 year guarantee and the location of your nearest authorised repair agent can be obtained on the Internet at www.2helpU.com, or by contacting your local Black & Decker office at the address indicated in this manual.
Please visit our website www.blackanddecker.co.uk to register your new Black & Decker product and receive updates on new products and special offers.
Verwendungszweck
Download on the App Store

ANDROID APP ON Google play
Download on the App Store

ANDROID APP ON Google play
Download on the App Store

ANDROID APP ON Google play
Download on the App Store

ANDROID APP ON Google play
Din BLACK + DECKER RVA425B ellr RVA420B
Download on the AppStore

ANDROID APP ON Google play
NORSK
Download on the App Store

ANDROID APP ON Google play
Dobbeltklik på ikonet for BLACK+DECKER-appen for at starte appen på din enchod. Siden for appens TERMS AND CONDITIONS (vilkår og betingelser) vises.
Download on the App Store

ANDROID APP ON Google play
Download on the App Store

ANDROID APP ON Google play
Kavte dIiAo kIK OTo EIKovio TnC EvapuoyNC BLACK+DECKER yia va avoiEe Tnv Evapuoyn OTNV KInTn Suokcun oac. EupaviTea iia eAidae tTTO TERMS AND CONDITIONS (Opoi Ka I TPOUToeEeic) YIA TIV Evapuoyn.