
T3 Rush - Gaming chair CORSAIR - Free user manual and instructions
Find the device manual for free T3 Rush CORSAIR in PDF.
| Product Type | Gaming Chair |
| Brand | Corsair |
| Model | T3 Rush |
| Upholstery Material | Synthetic leather (PU) and foam |
| Frame Material | Steel |
| Maximum Weight Capacity | 120 kg |
| Adjustable Seat Height | 44 to 52 cm |
| Backrest Recline | Adjustable with lock |
| Recline Tension | Adjustable (rotary knob) |
| Swivel | 360 degrees |
| Caster Wheels | Polyamide, suitable for carpets and hard floors |
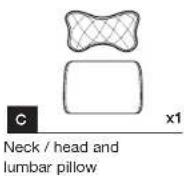
| Lumbar Cushion | Included, removable |
| Neck Pillow | Included, height adjustable |
| Assembly | Requires assembly, tools included |
| Product Weight | Approximately 20 kg |
| Assembled Dimensions | Height approx. 125 cm, seat width approx. 50 cm, seat depth approx. 50 cm |
| Warranty | 2 years |
| Care and Cleaning | Clean with a damp cloth and mild soap. Avoid solvents. |
| Safety | Do not use if parts are missing or damaged. Do not sit on the front edge. |
| Spare Parts and Repairability | Parts available from Corsair customer service. Repairs by a professional recommended. |
Frequently Asked Questions - T3 Rush CORSAIR
User questions about T3 Rush CORSAIR
0 question about this device. Answer the ones you know or ask your own.
Ask a new question about this device
Download the instructions for your Gaming chair in PDF format for free! Find your manual T3 Rush - CORSAIR and take your electronic device back in hand. On this page are published all the documents necessary for the use of your device. T3 Rush by CORSAIR.
USER MANUAL T3 Rush CORSAIR
BLOG: corsair.com/blog
FORUM: forum.corsair.com
YOUTUBE: youtube.com/corsairhowto
© 2019-2020 CORSAIR MEMORY Inc. All rights reserved. CORSAIR and the sale logo are registered trademarks in the United States and/or other countries. All other trademarks are the property of their respective owners. Product may vary slightly from those pictured. A30-302956 AA


CORSAIR
natural_image
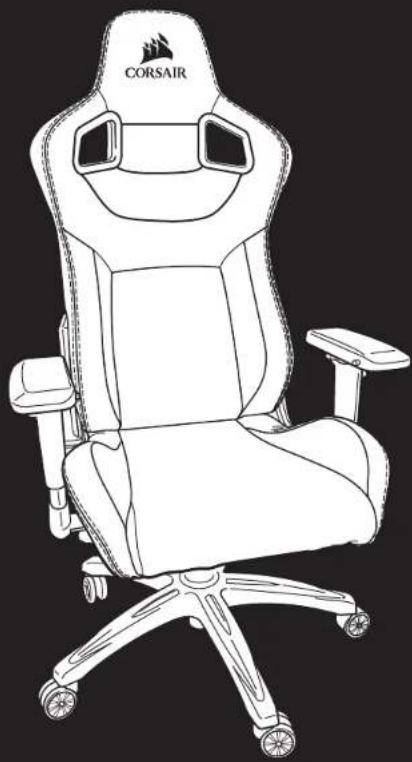
Line drawing of a Corsair racing studio chair with visible seat, wheels, and head (no text or symbols on the chair itself)T3 RUSH
Gaming Chair
CORSAIR
ENGLISH....1
FRANÇAIS 8
DEUTSCH 15
NEDERLANDS 22
DANSK 29
SUOMI....36
SVENSKA....43
NORSK....50
ITALIANO 57
ESPAÑOL....64
PORTUGUÊS....71
POLSKI 78
РУССКИЙ 85
简体中文....92
繁體中文....99
日本語....106
한국어....113
العربية....120
ENGLISH ENGLISH
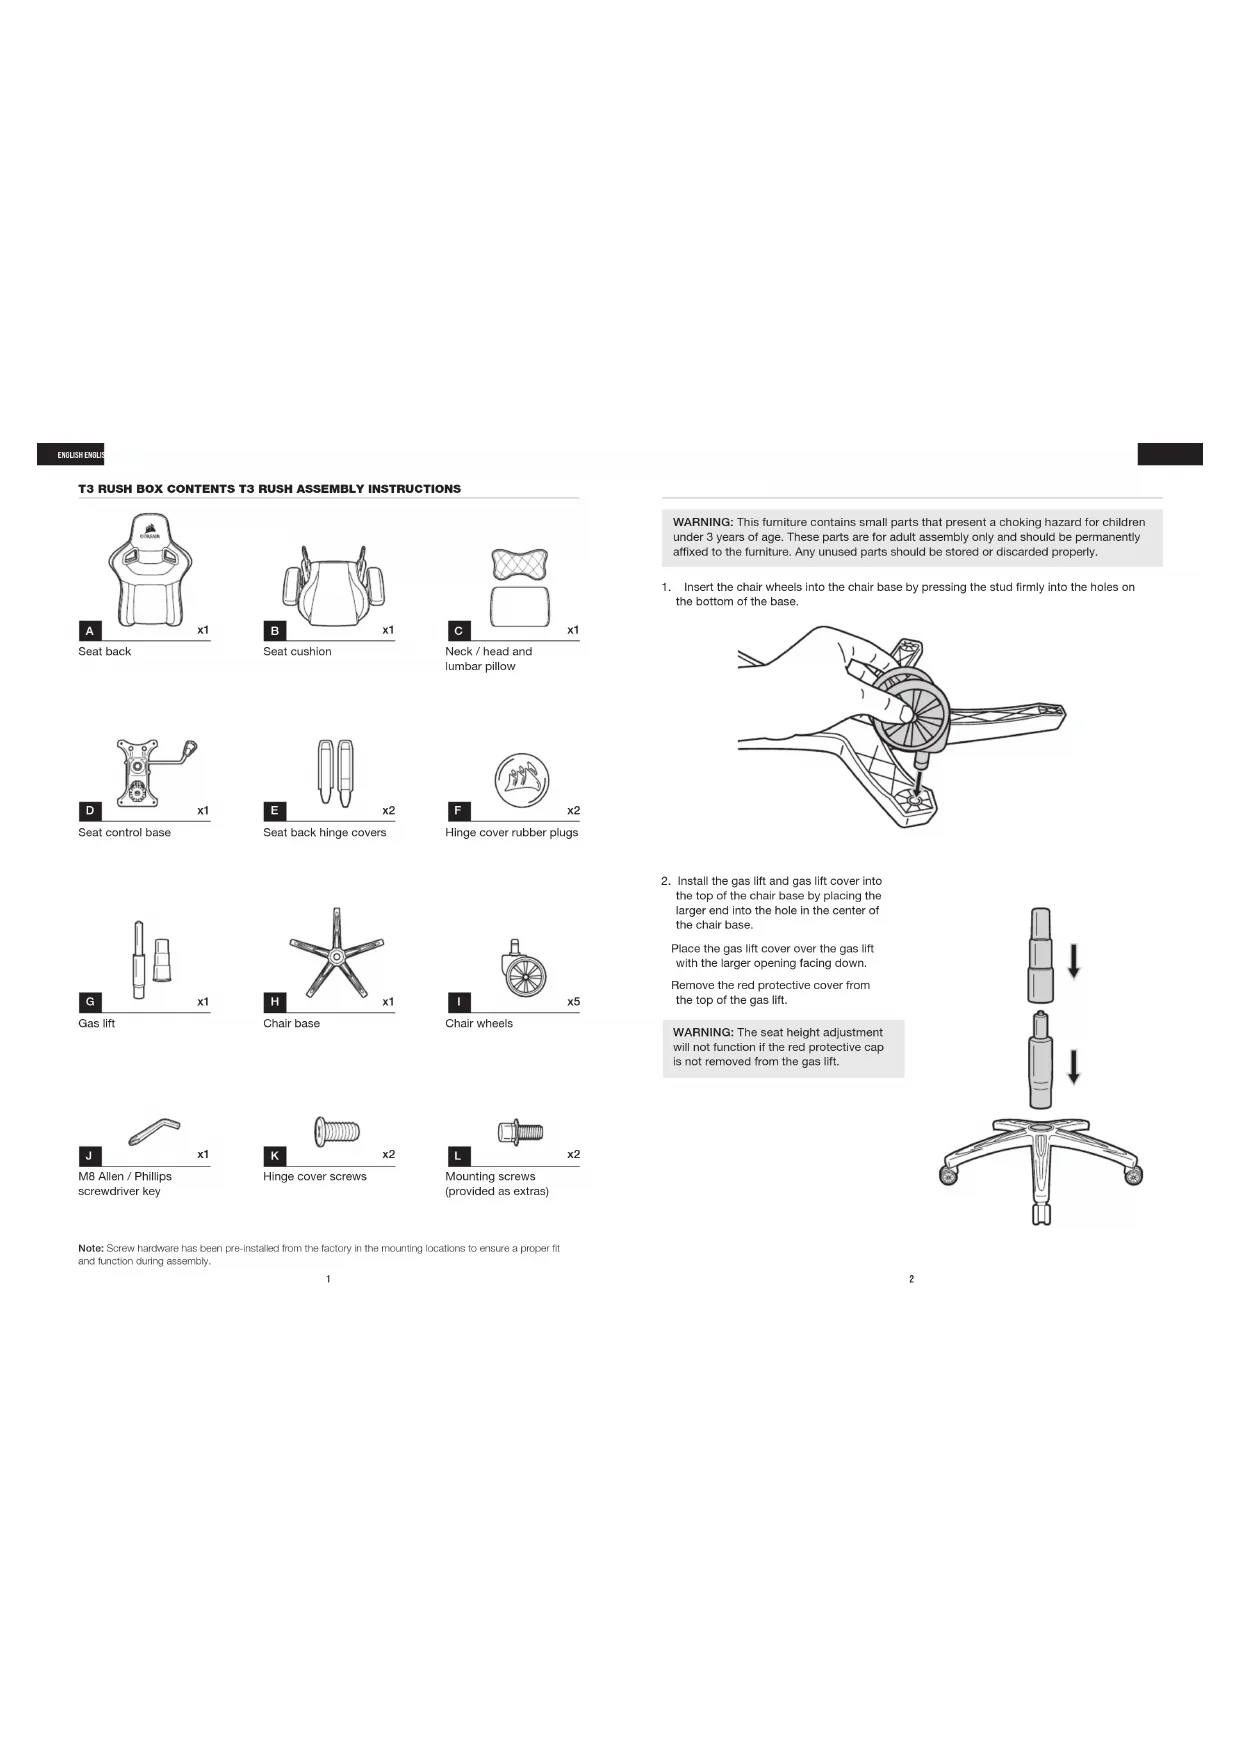
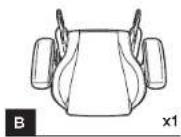
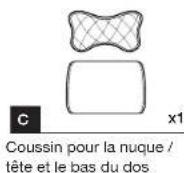
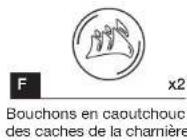
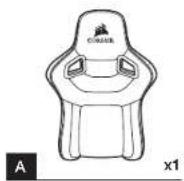
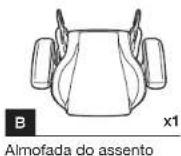
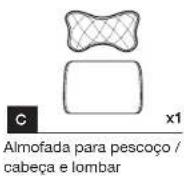
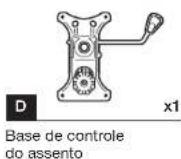
T3 RUSH BOX CONTENTS T3 RUSH ASSEMBLY INSTRUCTIONS
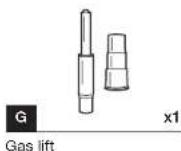
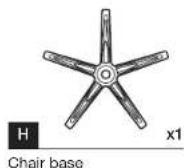
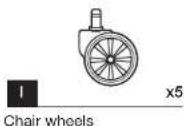
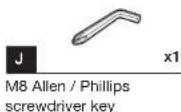
WARNING: This furniture contains small parts that present a choking hazard for children under 3 years of age. These parts are for adult assembly only and should be permanently affixed to the furniture. Any unused parts should be stored or discarded properly.
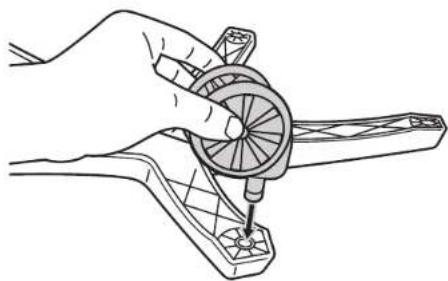
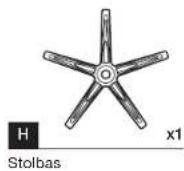
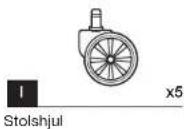
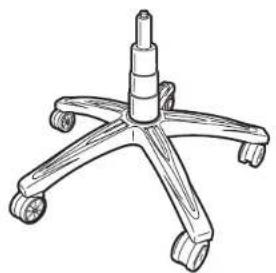
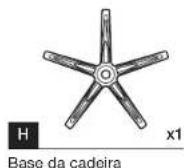
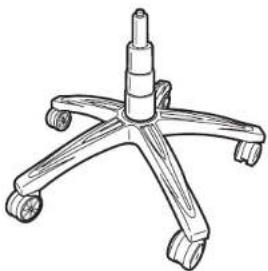
- Insert the chair wheels into the chair base by pressing the stud firmly into the holes on the bottom of the base.
natural_image
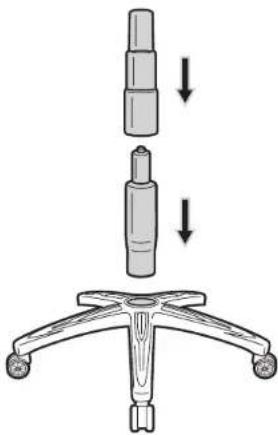
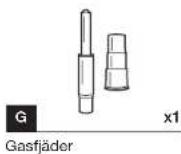
Line drawing of a hand using a tool to adjust a circular component (no text or symbols)- Install the gas lift and gas lift cover into the top of the chair base by placing the larger end into the hole in the center of the chair base.
Place the gas lift cover over the gas lift with the larger opening facing down.
Remove the red protective cover from the top of the gas lift.
WARNING: The seat height adjustment will not function if the red protective cap is not removed from the gas lift.
natural_image
Diagram showing a mechanical assembly with three parts and downward arrows indicating motion (no text or symbols)Note: Screw hardware has been pre-installed from the factory in the mounting locations to ensure a proper fit and function during assembly.
1
2
ENGLISH ENOL
T3 RUSH ASSEMBLY INSTRUCTIONS T3 RUSH ASSEMBLY INSTRUCTIONS
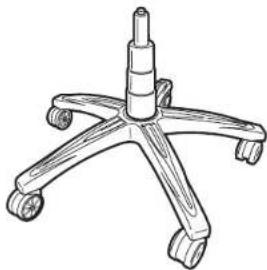
- Place the completed chair base assembly aside.
natural_image
Line drawing of a five-leaf office chair with wheels and a central shaft (no text or symbols)- Chair seat assembly.
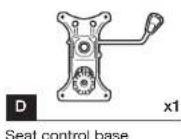
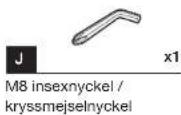
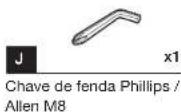
Remove the four screws from the seat cushion bottom using the M8 Allen key provided.
Using the four screws from the seat cushion bottom, attach the seat control base to the seat cushion.

3
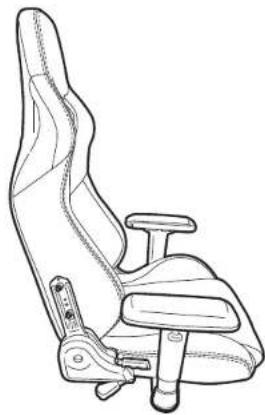
- Chair back to seat assembly.
Remove the screws from the seat back using the M8 Allen key provided.
TIP: Start with the right side of the chair with the recline mechanism. It is much easier to start on this side as the mount point is fixed in place. Do not tighten the screws down completely until you have both sides (all four bolts) started in the seat back.
natural_image
Line drawing of a car racing chair with seat, grip, and driver seat (no text or symbols)
natural_image
Line drawing of an office chair with a seat and supporting legs, showing two different postures of the chair (no text or symbols present)- Use the screws taken from the seat back to attach the seat cushion and the seat back together. Place the seat assembly onto the chair base assembly by inserting the gas lift cylinder into the center hole in the seat control base.
Make sure the seat assembly is firmly pressed down into place before using the chair.
4
ENGLISH ENOL
T3 RUSH ASSEMBLY INSTRUCTIONS ADDITIONAL FEATURES
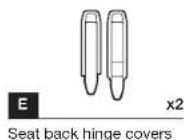
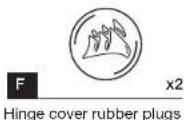
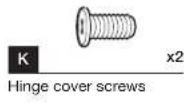
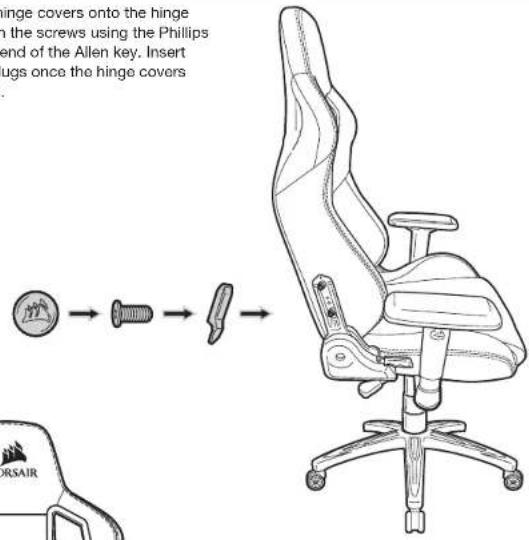
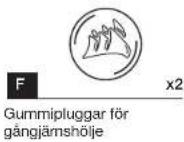
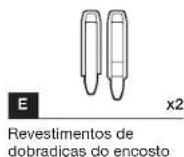
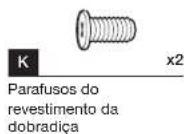
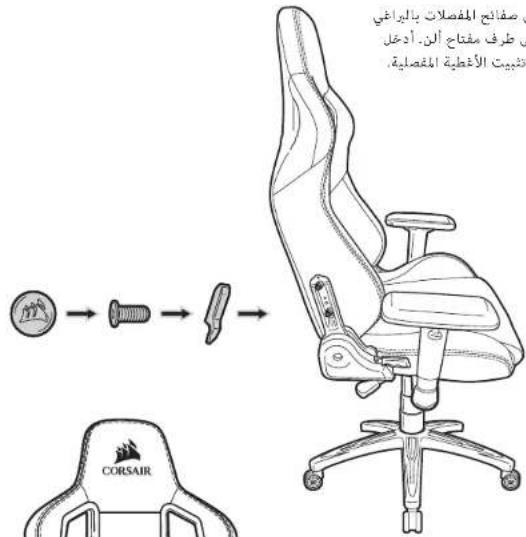
- Attach the hinge covers onto the hinge brackets with the screws using the Phillips head on the end of the Allen key. Insert the rubber plugs once the hinge covers are fastened.
natural_image
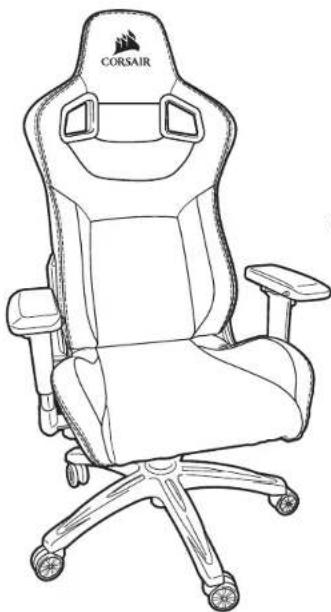
Line drawing of a Corsair racing studio chair with visible seat, wheels, and head (no text or symbols on the chair itself)- Congratulations on assembling your new T3 RUSH gaming chair. Enjoy!
5
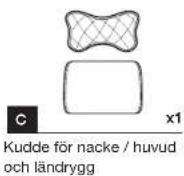
- Attach neck pillow.
The neck pillow has a snap attachment that allows the pillow to be installed in two different ways. You can slide the band over the top of the headrest for taller placement of the pillow or attach the pillow through the holes in the neck area for a lower placement of the pillow.
- Place the Lumbar Pillow on the backrest for additional back support.

natural_image
Line drawing of a person wearing a cap with a patterned cushion (no text or symbols)USER MANUAL
WARNING: Improper use of this chair may cause damage to this chair or result in personal injury. Please use this chair in a non-abusive manner.
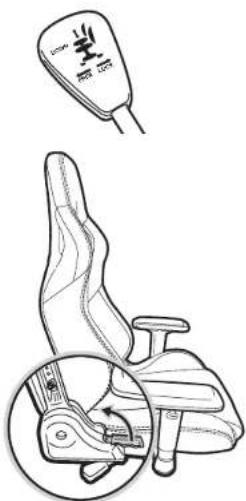
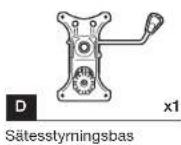
- Tilt lock / height adjustment lever
Push the lever towards the center of the chair to engage the tilt lock. Pull it away from the chair to disengage the tilt lock.
To lower the height of the chair, pull the lever upwards while weight is applied on the chair. To increase the height, pull the lever up while the chair is empty.
- Recline lever
Pull this lever up to recline the seat back forward or backward.
WARNING: Do not apply pressure to the seat back prior to pulling the recline lever. The sudden shift of weight may cause the chair to become unstable which may cause damage to the chair and/or result in personal injury.
6
ENGLISH FRAN
USER MANUAL
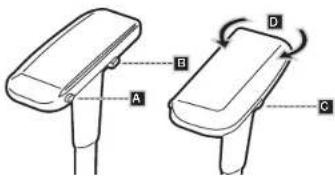
- 4D armrest
A. Forward / backward slide button
B. In / out button
C. Height adjustment tab
D. Swivel
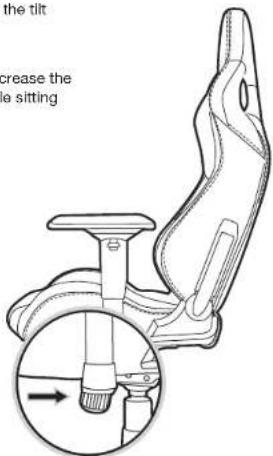
- Tilt tension knob
Rotate this knob to increase (+) or decrease (-) the tilt tension.
TIP: If the chair tilts easily, you may want to increase the tension. Alternatively, decrease the tension if you find it too hard to lean back while sitting on the chair.
7
CONTENU DE LA BOÎTE T3 RUSH
Dossier du fauteuil
Coussin d'assise
natural_image
Line drawing of a hand using a tool to adjust a mechanical component (no text or symbols present)natural_image
Diagram showing a mechanical assembly with three cylindrical components and a base, no text or symbols present.9
INSTRUCTIONS DE MONTAGE DU T3 RUSH
natural_image
Line drawing of a six-petal office chair with wheels and a central shaft (no text or symbols)natural_image
Line drawing of a car racing seat with driver seat and steering wheel (no text or symbols)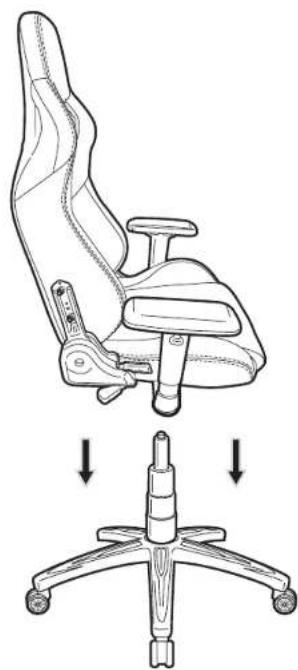
natural_image
Line drawing of an office chair with seat and legs, showing top-down assembly (no text or symbols)natural_image
Line drawing of a person wearing a hat with a patterned cushion (no text or symbols)MANUEL DE L'UTILISATEUR
natural_image
Line drawing of a car seat with a highlighted seatbelt mechanism (no text or symbols)MANUEL DE L'UTILISATEUR
- 4D armrest
natural_image
Line drawing of a hand using a tool to adjust or install a mechanical component (no text or symbols present)natural_image
Diagram showing a mechanical assembly with a cylindrical component being lifted by two arrows, mounted on an office chair (no text or symbols present)DEUTSCH DEUT
natural_image
Line drawing of a five-leaf office chair with wheels and a central shaft (no text or symbols)natural_image
Line drawing of a car racing chair with seat, grip, and driver seat (no text or symbols)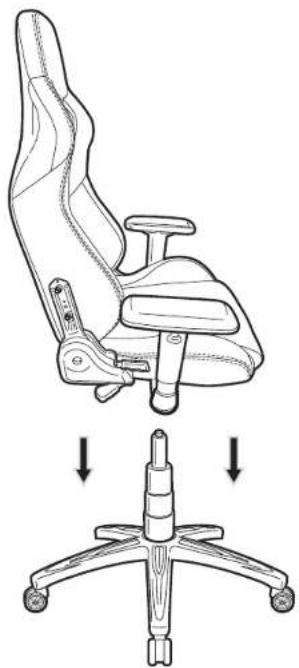
natural_image
Line drawing of an office chair with a seat and supporting legs, showing two different postures of the chair (no text or symbols present)natural_image
Line drawing of a Corsair racing studio chair with five wheels and headrest (no text or symbols on the chair itself)natural_image
Line drawing of a person's head wearing a cap with a patterned cushion (no text or symbols)BENUTZERHANDBUCH
BENUTZERHANDBUCH
- 4D-Armlehne
natural_image
Line drawing of a hand using a tool to adjust a circular component (no text or symbols present)natural_image
Diagram of a mechanical press or lift assembly with two vertical components and downward arrows indicating force direction (no text or symbols)23 24
MONTAGE-INSTRUCTIES VOOR DE T3 RUSH
natural_image
Line drawing of a five-leaf office chair with wheels and a central shaft (no text or symbols)natural_image
Line drawing of a modern office chair with seat, armrest, and adjustable arm (no text or symbols)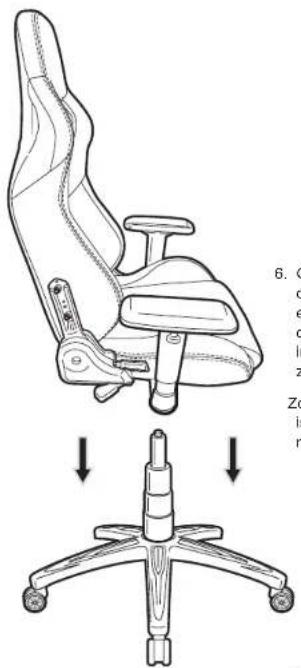
natural_image
Line drawing of a person wearing a hat with a patterned cushion (no text or symbols)HANDLEIDING
natural_image
Line drawing of a car seat with a handbag and a close-up inset showing the seat being adjusted (no text or symbols)27 28
HANDLEIDING
3.4D-armsteun
natural_image
Line drawing of a hand using a tool to adjust or install a mechanical component (no text or symbols present)natural_image
Diagram showing a mechanical assembly with three cylindrical components and downward arrows indicating motion (no text or symbols)DANSK DANSK
SAMLEVEJLEDNING TIL T3 RUSH SAMLEVEJLEDNING TIL T3 RUSH
natural_image
Line drawing of an office chair with five legs and a central shaft (no text or symbols)natural_image
Line drawing of a car seat with adjustable armrest and seatbelt (no text or symbols)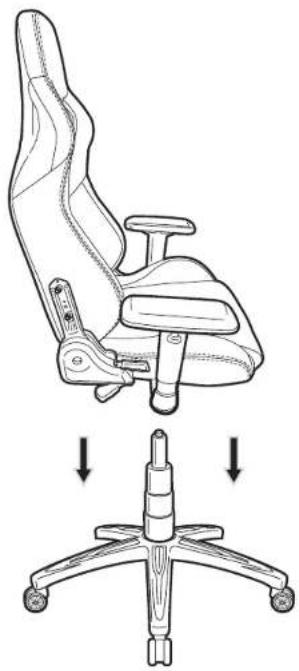
natural_image
Line drawing of an office chair with seat and legs, showing top and side views (no text or symbols)natural_image
Line drawing of a Corsoair racing office chair with visible seat, wheels, and branding (no text or symbols beyond 'CORSAIR' logo)33 34
natural_image
Line drawing of a person's head wearing a cap with a patterned cushion (no text or symbols)BRUGERVEJLEDNING
natural_image
Line drawing of a car seat with a head-mounted device and a close-up inset showing the seat's mechanism (no text or symbols)DANSK SUOMI
BRUGERVEJLEDNING
- Armlæn i 4D
natural_image
Line drawing of a hand using a tool to adjust a mechanical component (no text or symbols present)natural_image
Diagram of a mechanical press or lift assembly with two vertical components and downward arrows indicating force direction (no text or symbols)3738
T3 RUSH -KOKOAMISOHJEET
natural_image
Line drawing of an office chair with five legs and a central shaft (no text or symbols)- Istuinkokonaisuus.
natural_image
Line drawing of a car racing chair with seat, grip, and driver seat (no text or symbols)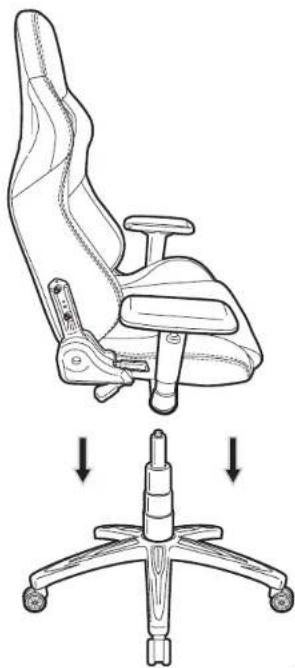
natural_image
Line drawing of an office chair with seat and legs, showing top and side views (no text or symbols)natural_image
Line drawing of a hat with a patterned cushion and sail, no text or symbols presentKÄYTTÖOPAS
natural_image
Line drawing of a car seat assembly with a close-up inset showing the mechanism (no text or symbols)4142
KÄYTTÖOPAS
3.4D-käsinoja
A. Eteen- / taakse-liukupainike
natural_image
Line drawing of a car racing chair with an inset showing the seat and arm (no text or symbols)SVENSKA SVENS
T3 RUSH-LÄDANS INNEHÄLL


MONTERINGSINSTRUKTIONER FÖR T3 RUSH
natural_image
Line drawing of a hand using a screwdriver to adjust a mechanical component (no text or symbols present)natural_image
Diagram showing a mechanical assembly with three parts and downward arrows indicating motion (no text or symbols)natural_image
Line drawing of an office chair with five legs and a central shaft (no text or symbols)natural_image
Line drawing of a car racing chair with seat, grip, and driver seat (no text or symbols)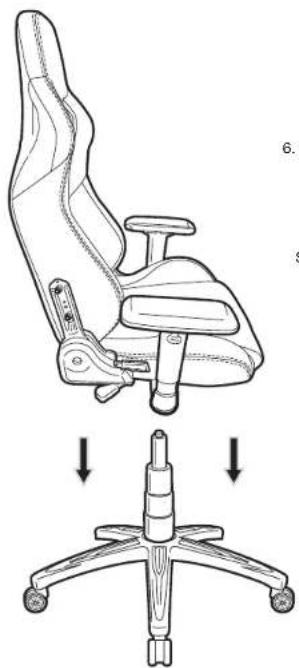
natural_image
Line drawing of an office chair with a seat and adjustable arm, shown from top and side views (no text or symbols)natural_image
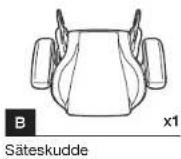
Line drawing of a Corsair racing studio chair with visible seat, wheels, and head (no text or symbols on the chair itself)47 48
- Fästa nackkudde
natural_image
Line drawing of a person's head wearing a cap with a patterned cushion (no text or symbols)BRUKSANVISNING
natural_image
Line drawing of a car seat assembly with a magnified inset showing the seatbelt mechanism (no text or symbols)SVENSKA KORS
BRUKSANVISNING
- 4D-armstöd
natural_image
Line drawing of a hand using a tool to adjust a mechanical component (no text or symbols present)natural_image
Diagram of a mechanical press or lift assembly with two vertical components and downward arrows indicating force direction (no text or symbols)5152
T3 RUSH MONSTERINGSINSTRUKSJONER
- Sett den ferdigmonterte stolbasen til siden.
natural_image
Line drawing of an office chair with five legs and a central shaft (no text or symbols)natural_image
Line drawing of a racing chair with seat, driver seat, and steering wheel (no text or symbols)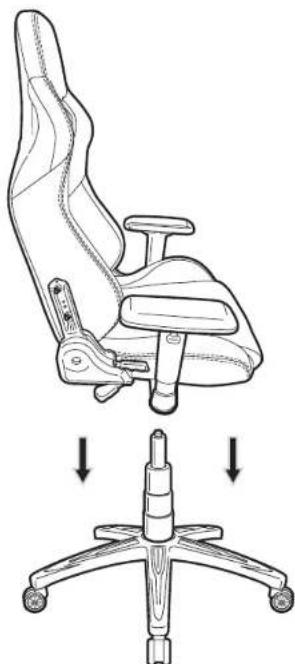
natural_image
Line drawing of an office chair with seat, showing top and side views (no text or symbols)natural_image
Line drawing of a person wearing a hat with a patterned cushion (no text or symbols)BRUKERHÄNDBOK
ADVARSEL: Fell bruk av stolen kan forårsake skader på stolen eller føre til personskader. Ikke mishandle denne stolen.
natural_image
Line drawing of a car seat assembly with a highlighted inset showing the mechanism (no text or symbols present)BRUKERHÄNDBOK
- 4D-armlene
A. Forover / bakover skyveknapp
B. Inn-/ut-knapp
natural_image
Line drawing of a car racing chair with an inset showing the seat and arm (no text or symbols)ITALUAND ITALI
natural_image
Line drawing of a hand using a tool to adjust or install a mechanical component (no text or symbols present)natural_image
Diagram showing a mechanical assembly with a cylindrical component being lifted by two arrows, above an open chair base (no text or symbols)ITALUAND ITALI
ISTRUZIONI DI MONTAGGIO T3 RUSH ISTRUZIONI DI MONTAGGIO T3 RUSH
natural_image
Line drawing of an office chair with five legs and a central shaft (no text or symbols)natural_image
Line drawing of a car seat assembly with adjustable armrest and seat (no text or symbols)
natural_image
Line drawing of an office chair with seat and legs, showing top and side views (no text or symbols)natural_image
Line drawing of a Corsoair racing studio chair with visible seat, wheels, and branding (no text or symbols beyond 'CORSAIR' logo)natural_image
Line drawing of a person's head wearing a cap with a patterned cushion (no text or symbols)MANUALE UTENTE
natural_image
Line drawing of a car seat with a head-mounted device and a close-up inset showing the seat's mechanism (no text or symbols)ITALIANO ESPAL
MANUALE UTENTE
- Braccioli 4D
natural_image
Line drawing of a car racing chair with an inset showing the seat and wheel (no text or symbols)63 64
natural_image
Line drawing of a hand using a tool to adjust a mechanical component (no text or symbols present)natural_image
Diagram showing a mechanical assembly with two cylindrical components and a base, no text or symbols present.65 66
natural_image
Line drawing of an office chair with five legs and a central shaft (no text or symbols)natural_image
Line drawing of a car racing chair with seat, grip, and driver seat (no text or symbols)
natural_image
Line drawing of an office chair with seat and legs, showing top-down assembly (no text or symbols)natural_image
Line drawing of a Corsoair racing studio chair with visible seat, wheels, and head (no text or symbols on the chair itself)ESPÁNOL ESPA
CARACTERÍSTICAS ADICIONALES
natural_image
Line drawing of a person wearing a cap with a patterned cushion (no text or symbols)MANUAL DEL USUARIO
natural_image
Line drawing of a car seat assembly with a close-up inset showing the mechanism (no text or symbols)6970
MANUAL DEL USUARIO
natural_image
Line drawing of a car racing chair with an inset showing the seat and wheel (no text or symbols)PORTUGUÊS POR
CONTEÚDO DA EMBALAGEM DA T3 RUSH


natural_image
Line drawing of a hand using a tool to adjust or install a mechanical component (no text or symbols present)natural_image
Diagram showing a mechanical assembly with three stacked components and downward arrows indicating motion (no text or symbols)PORTUGUÊS POR
INSTRUÇÕES DE MONTAGEM DA T3 RUSH INSTRUÇÕES DE MONTAGEM DA T3 RUSH
natural_image
Line drawing of an office chair with five legs and a central shaft (no text or symbols)natural_image
Line drawing of a car racing chair with seat, grip, and driver seat (no text or symbols)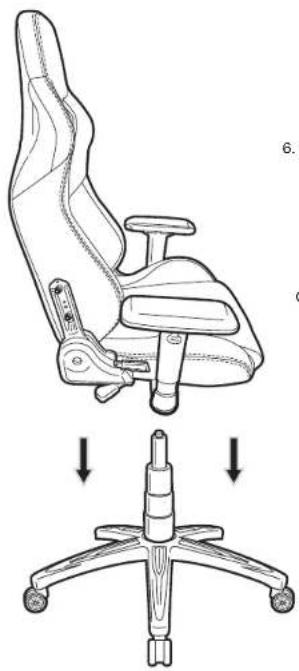
natural_image
Line drawing of an office chair with seat and armrest, showing top-down rotation arrows (no text or symbols)natural_image
Line drawing of a Corsair racing studio chair with visible seat, wheels, and branding (no text or symbols beyond branding)7576
natural_image
Line drawing of a person's head wearing a cap with a patterned cushion (no text or symbols)MANUAL DO USUÁRIO
natural_image
Line drawing of a car seat with a hand holding the seat, showing front and side views (no text or symbols)PORTUGUÉS POL
MANUAL DO USUÁRIO
- Apoio de braço 4D
natural_image
Line drawing of a hand using a tool to adjust a circular component (no text or symbols present)natural_image
Diagram of a mechanical press or lift assembly with two cylindrical components and downward arrows indicating force direction (no text or symbols)7980
INSTRUKCJA MONTAŻU FOTELA T3 RUSH
natural_image
Line drawing of a six-petal office chair with wheels and a central shaft (no text or symbols)natural_image
Line drawing of a racing chair with seat, driver seat, and steering wheel (no text or symbols)
natural_image
Line drawing of an office chair with seat, showing top and side views (no text or symbols)natural_image
Line drawing of a hat with a patterned cushion and sail, no text or symbols presentINSTRUKCJA OBSŁUGI
natural_image
Line drawing of a car seat with a highlighted inset showing the seatbelt mechanism (no text or symbols present)INSTRUKCJA OBSŁUGI
- Podłokietnik 4D
natural_image
Line drawing of a hand using a tool to adjust or install a mechanical component (no text or symbols present)natural_image
Diagram of a mechanical press or lift assembly with downward arrows indicating force application (no text or symbols present)natural_image
Line drawing of an office chair with five legs and a central shaft (no text or symbols)- Сборка сиденья.
natural_image
Line drawing of a car racing chair with seat, grip, and seatbelt (no text or symbols)
natural_image
Line drawing of an office chair with seat and legs, showing top and side views (no text or symbols)natural_image
Line drawing of a Corsair racing studio chair with visible seat, wheels, and head (no text or symbols on the chair itself)89 90
natural_image
Line drawing of a person's head wearing a cap with a patterned cushion (no text or symbols)natural_image
Line drawing of a car seat with a handbag and a close-up inset showing the seat mechanism (no text or symbols)РУССКИЙ
natural_image
Line drawing of a hand using a tool to adjust a circular component (no text or symbols present)natural_image
Diagram showing a mechanical assembly with two cylindrical components and a base, no text or symbols present.93 9493 94
T3 RUSH 安装说明
- 将完成组装的椅座组件放到一边。

natural_image
Line drawing of an office chair with five legs and a central shaft (no text or symbols)- 座椅组装。
natural_image
Line drawing of a racing chair with seat, grip, and adjustable arm (no text or symbols)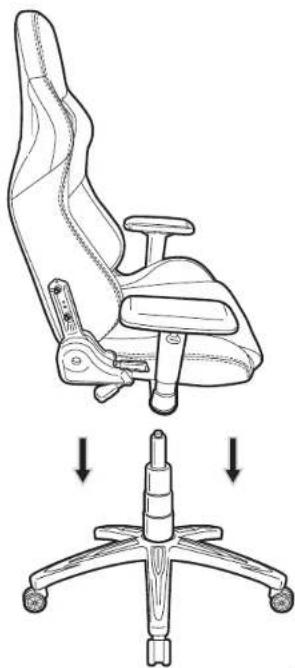
natural_image
Line drawing of an office chair with seat and legs, showing top-down assembly (no text or symbols)natural_image
Line drawing of a CorSAIR office chair with visible seat, legs, and front panel (no text or symbols on the chair itself)简体中文简
其他功能
- 安装颈枕
natural_image
Line drawing of a hat with a patterned cushion and sail, no text or symbols present用户手册
natural_image
Line drawing of a car seat with a highlighted lever mechanism (no text or symbols)97 9897 98
用户手册
3.4D 扶手
A. 向前 / 向后滑钮
B. 进 / 出按钮
C. 高度调节耳片
D. 转椅座架

4.倾斜紧度旋钮
natural_image
Line drawing of a hand using a tool to adjust a wheel component (no text or symbols)natural_image
Diagram showing a mechanical assembly with a cylindrical component being lifted by two arrows, mounted on an office chair (no text or symbols present)組裝 T3 RUSH
- 將整個椅座組件放到側邊。
natural_image
Line drawing of an office chair with five legs and a central shaft (no text or symbols)- 座椅組件。
natural_image
Line drawing of a car racing chair with seat, grip, and driver seat (no text or symbols)natural_image
Line drawing of an office chair with a seat and adjustable arm, shown from top and side views (no text or symbols)紧握中文紧握
紧體中文 紧體
組裝 T3 RUSH
natural_image
Line drawing of a Corsoair racing studio chair with visible seat, wheels, and branding (no text or symbols beyond branding)103 104
T3 RUSH 特點
- 安装頸枕
natural_image
Line drawing of a person's head wearing a cap with a patterned cushion (no text or symbols)快速使用者手册
natural_image
Line drawing of a car seat with a highlighted side view showing the wheel and seat (no text or symbols)紧體中文
快速使用者手册
3.4D扶手
natural_image
Line drawing of a hand using a tool to adjust a circular component (no text or symbols present)natural_image
Diagram of a mechanical press or lifting device with two downward arrows indicating force application (no text or symbols present)107 108107 108
T3 RUSH の組み立て手順
natural_image
Line drawing of an office chair with five legs and a central shaft (no text or symbols)- チェアシートアセンブリを組み立てます。
natural_image
Line drawing of a racing chair with seat, grip, and adjustable arm (no text or symbols)
natural_image
Line drawing of an office chair with seat and legs, showing top-down rotation arrows (no text or symbols)natural_image
Line drawing of a person wearing a hat with a patterned cushion (no text or symbols)取扱説明書
natural_image
Line drawing of a car seat with a handbag and a close-up inset showing the seat mechanism (no text or symbols)111 112111 112
取扱説明書
- 4D アームレスト
A. 前/後ろ方向スライドボタン
B. In / out ボタン
C. 高さ調整タブ
D. 左右

4.傾斜拡張ノブ
natural_image
Line drawing of a hand using a screwdriver to adjust a mechanical component (no text or symbols)natural_image
Diagram showing a mechanical assembly with a cylindrical component being lifted by two arrows, mounted on an office chair (no text or symbols present)T3 RUSH 조립 지침
natural_image
Line drawing of a six-petal office chair with wheels and a central shaft (no text or symbols)- 의자 시트 조립.
natural_image
Line drawing of a car racing chair with seat, grip, and driver seat (no text or symbols)natural_image
Line drawing of an office chair with a seat and adjustable arm, shown from top and side views (no text or symbols)한국이한국이
한국이 한국
T3 RUSH 조립 지침
natural_image
Line drawing of a CorSAIR office chair with visible seat, spoked wheels, and no text or symbols on the chair itself.117 118
추가 기능
1.목네개연결
natural_image
Line drawing of a person's head wearing a cap with a patterned cushion (no text or symbols)사용 설명서
natural_image
Line drawing of a car seat with a head-mounted device and a close-up inset showing the seat's grip mechanism (no text or symbols)한국이
사용 설명서
3.4D 팔걸이
natural_image
Line drawing of a hand using a tool to adjust a circular component (no text or symbols)
natural_image
Diagram of a mechanical press or lift assembly with downward arrows indicating force or movement (no text or symbols present)natural_image
Line drawing of a six-petal office chair with wheels and a central shaft (no text or symbols)- مجوعة قصد الكCSI.
natural_image
Line drawing of a car seat with adjustable armrest and seatbelt (no text or symbols)natural_image
Line drawing of an office chair with seat, showing top and side views (no text or symbols)123 124
natural_image
Line drawing of a person's head wearing a cap with a mesh pattern (no text or symbols)natural_image
Line drawing of a car seat assembly with a hand holding the seatbelt (no text or symbols)
- CORSAIR
- T3 RUSH BOX CONTENTS T3 RUSH ASSEMBLY INSTRUCTIONS
- T3 RUSH ASSEMBLY INSTRUCTIONS T3 RUSH ASSEMBLY INSTRUCTIONS
- T3 RUSH ASSEMBLY INSTRUCTIONS ADDITIONAL FEATURES
- USER MANUAL
- CONTENU DE LA BOÎTE T3 RUSH
- INSTRUCTIONS DE MONTAGE DU T3 RUSH
- MANUEL DE L'UTILISATEUR
- BENUTZERHANDBUCH
- MONTAGE-INSTRUCTIES VOOR DE T3 RUSH
- HANDLEIDING
- SAMLEVEJLEDNING TIL T3 RUSH SAMLEVEJLEDNING TIL T3 RUSH
- BRUGERVEJLEDNING
- T3 RUSH -KOKOAMISOHJEET
- KÄYTTÖOPAS
- T3 RUSH-LÄDANS INNEHÄLL
- MONTERINGSINSTRUKTIONER FÖR T3 RUSH
- BRUKSANVISNING
- T3 RUSH MONSTERINGSINSTRUKSJONER
- BRUKERHÄNDBOK
- ISTRUZIONI DI MONTAGGIO T3 RUSH ISTRUZIONI DI MONTAGGIO T3 RUSH
- MANUALE UTENTE
- CARACTERÍSTICAS ADICIONALES
- MANUAL DEL USUARIO
- CONTEÚDO DA EMBALAGEM DA T3 RUSH
- INSTRUÇÕES DE MONTAGEM DA T3 RUSH INSTRUÇÕES DE MONTAGEM DA T3 RUSH
- MANUAL DO USUÁRIO
- INSTRUKCJA MONTAŻU FOTELA T3 RUSH
- INSTRUKCJA OBSŁUGI
- T3 RUSH 安装说明
- 简体中文简
- 其他功能
- 用户手册
- 組裝 T3 RUSH
- T3 RUSH 特點
- 快速使用者手册
- T3 RUSH の組み立て手順
- 取扱説明書
- T3 RUSH 조립 지침
- 추가 기능
- 사용 설명서
Brand : CORSAIR
Model : T3 Rush
Category : Gaming chair