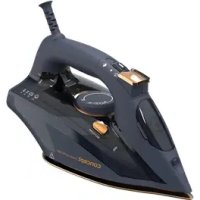
ZN9110 - Iron Concept - Free user manual and instructions
Find the device manual for free ZN9110 Concept in PDF.


| Product Type | Clothes Iron |
| Brand | Concept |
| Model | ZN9110 |
| Supply Voltage | 220-240 V ~ 50/60 Hz |
| Power | 2350 W - 2800 W |
| Water Tank Capacity | 400 ml |
| Soleplate Material | Non-stick |
| Temperature Adjustment | Yes, with rotary knob and indicator light |
| Steam Function | Yes, with continuous control (low/high/off) |
| Vertical Steam Function | Yes |
| Spray Function | Yes |
| Anti-scale Function | Yes, built-in filter |
| Self-cleaning Function | Yes |
| Recommended Water Type | Distilled or demineralized water |
| Cleaning | Soft damp cloth; rubbing alcohol for stubborn stains |
| Usage | Household use only |
| Safety | Do not immerse; do not direct steam at persons or body parts |
| Included Accessories | Graduated cup |
| Repairability | Authorized service center only |
Frequently Asked Questions - ZN9110 Concept
User questions about ZN9110 Concept
0 question about this device. Answer the ones you know or ask your own.
Ask a new question about this device
Download the instructions for your Iron in PDF format for free! Find your manual ZN9110 - Concept and take your electronic device back in hand. On this page are published all the documents necessary for the use of your device. ZN9110 by Concept.
USER MANUAL ZN9110 Concept
natural_image
Modern concept air iron with gold placket and brand mark, displayed against a plain background (no text or symbols on the device itself)ZN9110
CZ
HULVDEFR ENSKPL
ITES
RO
concept
CZ
PODĚKOVÁNÍ
SYMBOLY PÁRY
SYMBOLY PÁROV
SYMBOLE PAR
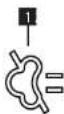
1 Bez pary
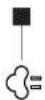
2 Niska moc
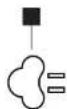
3 Wysoka moc
PRZED PIERWSZYM UŻYCIEM
FUNKCJA SELF-CLEANING
PÁROS SZIMBÓLUMOK
PĀRU SIMBOLI
1 Bez tvaika
2 Zema jauda
3 Liela jauda
PIRMS PIRMÄS LIETOŠANAS
Thank you for purchasing a Concept product. We wish you much joy with your new appliance every day you use it. Please read the Instruction manual carefully before initial use. To refer to this manual any time you need to, we recommend you to keep it in a safe place. And please pass it to any future owner of the appliance.
| Technical specifications | |
| Voltage 220-240 V - 50/60 Hz | |
| Input 2350 W - 2800 W | |
| Water tank volume 400 ml | |
IMPORTANT SAFETY PRECAUTIONS
- Do not use the appliance in any other way than as described in this manual.
- Remove all the covering and marketing materials from the appliance before the first use.
- Make sure the mains voltage corresponds to the values on the rating plate of the appliance. Only use grounded sockets.
- The appliance is hot during operation and for some time after switching off. Therefore, do not touch hot surfaces. Due to the risk of burning use only the handle and buttons.
- Do not clean, store or cover the appliance until it has cooled completely.
- Do not leave the appliance unattended when it is switched on or connected to the mains.
- Never carry the appliance during operation or while it is still hot. Do not carry it by the power cord.
- Before connecting or disconnecting the appliance from the mains socket, make sure that the switch is in the off position.
- When disconnecting the appliance from the wall outlet, never pull the power cord, grasp the plug end and disconnect it by removing it from the receptacle.
- Do not allow children or unauthorized people to handle the appliance, use it out of their reach.
- Persons with reduced mobility, reduced sensory perception, mental disadvantage or persons not familiar with the operation must use the appliance only under the supervision of responsible person, who is familiar with the instructions.
保
样
EN
concept
concept
EN
- Pay extra attention if the appliance is used near children.
- Do not use the appliance as a toy.
- Do not use any accessories other than those recommended by the manufacturer.
- Before cleaning and after use of the appliance, switch the appliance off, disconnect it from the mains and allow it to cool down.
- Do not allow the power cord to hang freely over the edge of the table. Do not allow the power cord to touch hot surfaces.
- Only place the appliance on a stable and heat-resistant surface away from other heat sources such as radiators, ovens, etc. Protect it from direct sunlight and moisture.
- There must be water in the appliance before connecting it to the mains.
- Do not add water when the appliance is on!
- After filling the appliance with water, make sure that it is dry and that no water leaks anywhere.
- Fill the water tank only up to the recommended maximum – if the amount of water exceeds the recommended maximum level, boiling water may spurt out – RISK OF SCALDING!
- Before switching the appliance on, make sure that the lid is properly closed. Do not open it during operation to avoid scalding.
- Do not use coarse and chemically aggressive substances to clean the appliance.
- Do not use the appliance if it is not working properly, has been dropped, damaged or immersed in liquid. Have it checked and repaired by an authorized service centre.
- Do not use the appliance with a damaged cord or plug and have it repaired immediately by an authorized service centre.
- Do not use the appliance outdoors.
- The appliance is only suitable for home use and is not intended for commercial use.
- Do not immerse the power cord, plug or appliance in water or any other liquid.
- Do not repair the appliance yourself. Contact an authorized service centre.
- Never direct the steam towards people, body parts, animals, plants or any appliances containing electrical parts (electrical appliances, sockets, cables, interiors of ovens, etc.) - risk of electric shock.
-
Direct the steam only at the fabric.
-
Never steam clothes that you or someone else is wearing.
- Some parts of this product can become very hot and cause burns. Be cautious when using the appliance in the presence of children and disabled people.
- This appliance can be used by children aged from 8 years and above and persons with reduced physical, sensory or mental capabilities or lack of experience and knowledge if they have been given supervision or instruction concerning the use of the appliance in a safe way and understand the hazards involved. Cleaning and maintenance performed by the user must not be carried out by children unless they are at least 8 years old and under supervision. Children aged under 8 years of age must be kept away from the appliance and its power cord. Do not let children play with the appliance.
Damages from failure to follow the manufacturer's instructions are not covered by the warranty.
EN
concept
concept
EN
PRODUCT DESCRIPTION
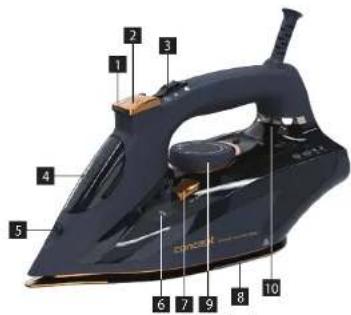
1 Steam release button
2 Button for spraying water
3 Steam control button
4 Water refill hole
5 Spray hole
6 Full water container mark
7 Self-cleaning button
8 Ironing surface
9 Material selection button
10 Indication
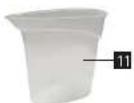
11 Measuring tape
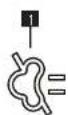
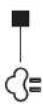
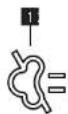
PAIR SYMBOLS
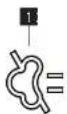
1 Without steam
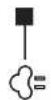
2 Low power
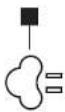
3 High power

BEFORE FIRST USE
Before connecting to the mains, wipe the outside surface of the iron with a soft damp cloth and dry it thoroughly. It is best to use an old piece of cloth to remove any dirt that may have formed during the ironing process, making sure that the highest temperature setting is appropriate for the material.
- Plug the iron into the mains and switch it on, place the iron on the fabric and then press the steam release button.
- Repeat this process 2-3 times, waiting approximately 5 seconds in between; this will remove any dirt from the non-stick surface plate. Do not immerse the iron in water or any other liquid.
Note: A slight odour and a small amount of smoke may be emitted when the iron is first used. This is normal and will soon subside.
46
FILLING THE WATER TANK
- Switch off and disconnect the iron from the mains.
- Check that the steam control button is in the off position.
- Place the iron on the heel rest and open the water tank lid.
- Fill the measuring cup with water and carefully pour the contents into the water tank.
- Close the lid of the water tank.
Note: Do not fill the water tank past the maximum fill mark. It is best to check the water level,
when the iron is on the heel rest.
Note: Never add descaling, aromatic, alcoholic or cleaning agents to the water tank, as this could damage the iron or injure the user.
Very important notice:
• To ensure maximum durability, we strongly recommend using only distilled or demineralized water! If you live in an area with hard water, limescale will clog your appliance and reduce its efficiency.
• Use only cold water (never hot)!
INSTRUCTIONS FOR USE
Ironing with steam
The steam setting is ideal for easily removing creases from fabrics such as cotton and linen.
1. Fill the water tank according to the instructions in the section. "Filling the water tank".
2. Plug the iron into the mains and switch it on.
3. To increase the temperature of the iron, turn the temperature control clockwise until you reach the desired temperature setting. To lower the temperature, turn the temperature control dial counterclockwise. The indicator light will come on to indicate that the iron is heating up; it will go off when the iron is ready to use. The iron will only heat up when the control dial is set to the minimum temperature.
4. Slide the steam control switch to the low steam position and slide it to the high steam position for additional steam. The steam setting can be turned off at any time by moving the steam control switch to the no steam position.
5. After use, turn the temperature control to the "0" position and unplug it from the mains. Allow the iron to cool down thoroughly.
Note: Allow the iron to reach the desired temperature setting before use, failure to do so may result in water dripping from the water tank. During normal use, the temperature light will cycle on and off as the iron maintains the selected temperature.
Note: Never leave a non-stick ironing surface on the fabric for more than 15 seconds.
Ironing without steam
To remove creases from more delicate fabrics, iron without steam.
- Move the steam control switch to the "no steam" position.
- Plug the iron into the mains and switch it on.
- Turn the temperature control dial until the desired temperature setting is selected. The temperature indicator light will come on to indicate that the iron is heating up. When the iron is ready for use, it will turn off.
- Test the iron on a small area of fabric to check that the selected temperature is appropriate; adjust if necessary.
- After use, turn the temperature control to the "0." position. Switch off and unplug the iron and allow it to cool down thoroughly.
MANUAL STEAM DISCHARGE FUNCTION
For stubborn and difficult to remove creases, use the steam switch to select the desired steam setting and press the steam release button if necessary.
Wait approximately 5 seconds between each press to prevent water from escaping from the steam vents.
Note: The manual steam release function will work even when the steam control switch is in the off position.
EN
concept
concept
EN
VERTICAL STEAM IRONING
The steam release button can also be used to steam curtains and other items of hanging clothing vertically.
- Hang the object to be vertically tensioned.
- Move the steam control switch to the "no steam" position.
- Fill the water tank according to the instructions in "Filling the water tank".
- Plug the iron into the mains and switch it on.
- Turn the temperature control until the desired temperature setting is selected. The higher the temperature,
the stronger the steam. - Hold the iron approximately 15 cm from the item and press the steam shock button to remove any creases, waiting approximately 5 seconds between each press.
WATER SPRAY FUNCTION
The water spray function can be used to remove stubborn creases on heavier fabrics. It can also be used for dry ironing delicate fabrics that cannot be steam ironed. To use the water spray function, hold the iron over the ironing surface and then press the water spray button.
Note: The water spray function will not work if the water tank is empty. When using the water spray function for the first time, it may be necessary to press the water spray button several times.
ANTI-CALC FUNCTION
The iron has a built-in anti-calc filter located in the water tank that prevents calcium and limescale build-up. Calcium deposits, which can occur in hard water areas, can hinder performance and reduce the life of the iron. This is an automatic function that is permanently activated.
Note: Filtr je vestavěný a není třeba jej vyměňovat.
CLEANING AND MAINTENANCE
Always unplug the iron and allow it to cool sufficiently before any cleaning or maintenance.
- Drain the remaining water from the water tank to prevent leakage during cleaning.
- Wipe the non-stick ironing surface with a soft damp cloth and dry thoroughly
- If polyester has burned onto the non-stick soleplate, wipe it with a soft cloth dipped in methylated spirit.
- Use a cotton tip dampened with methylated spirit to remove any build-up around the steam holes.
- Wipe off the methylated spirit with a soft damp cloth and dry thoroughly.
SELF-CLEANING FUNCTION
The self-cleaning function removes limescale and dirt from the non-stick surface. We recommend using this function once a fortnight or more often if you use the iron in an area with hard water.
- Switch off and disconnect the iron from the mains.
- Move the steam control switch to the "no steam" position.
- Put the iron away.
- Fill the water tank according to the instructions in the "Filling the water tank" section.
- Plug the iron into the mains and switch it on.
- Set the temperature dial to the highest heat setting and allow the iron to heat until the temperature indicator light goes out.
- Switch off the iron and disconnect it from the mains.
- Carefully hold the iron over the sink, making sure that the power cord and plug remain out of reach of the non-stick surface plate and remain dry.
- Press and hold the self-cleaning button. Hot water and steam, along with any debris, will flow out of the steam vents.
- After approximately 1 minute or when the water reservoir is completely empty, release the self-clean button.
-
Remove the iron and allow it to cool down thoroughly.
-
After the iron has cooled sufficiently, wipe it with a soft damp cloth.
-
Plug the iron into the mains and switch it on.
-
Set the temperature dial to the highest heating setting.
-
When the temperature indicator light goes off, use the iron on an old piece of fabric to remove excess water and dirt accumulated in the steam holes.
Note: Water may leak out of the steam vents while the iron is heating up.
Note: Never press the self-cleaning button when using the iron. Only press it when the iron is switched off and unplugged and held securely over the sink. When the iron is self-cleaning, a large amount of hot steam is released from the steam vents of the iron.
TROUBLESHOOTING
This chapter lists the most common problems you may encounter when using the appliance. If the instructions below do not help you to solve the problem, contact the Jindrich Valenta - Concept company service department.
| Problem Cause Solution | ||
| No steam is coming out of the machine. | The steam vents are blocked. | Clean, see paragraph cleaning and maintenance. |
| The steam setting button is set to no steam. | Switch on the steam function. | |
| The fabric is damaged by heat. | The selected temperature is too high. | Lower the temperature. |
| No water spray. There's no water in the container. Refill the water in the container. | ||
| The iron does not remove creases from the fabric. | The set temperature is too low. | Set a higher temperature that will not damage the fabric. |
| The steam function is switched off. Switch on the steam function. | ||
EN
concept
concept
DE
SERVICE
Extensive maintenance or repair, which requires access to internal parts of the product, has to be performed by a qualified specialist or the service centre.
ENVIRONMENTAL CONCERNS
- Packaging materials and old appliances should be recycled.
• Packaging materials may be disposed of as sorted waste. - Dispose the plastic bags made of polyethylene (PE) of as sorted waste.
Recycling of the appliance at the end of its lifespan:

This appliance is labelled in accordance with European Directive 2012/19/EU concerning used electrical and electronic appliances (Waste Electrical and Electronic Equipment - WEEE). The symbol on the product or on its packaging indicates that this product may not be treated as household waste. Instead, it should be taken to the appropriate collection point for the recycling of electrical and electronic equipment. By ensuring this product is disposed of correctly, you will help prevent potential negative consequences for the environment and human health, which could otherwise be caused by inappropriate waste handling of this product. The disposal of such material has to be done according to the recycling regulations. For more detailed information about recycling of this appliance see the authorized local office or service for household waste disposal or the shop, where you purchased the appliance.

The product meets all the necessary requirements of the EU directives applicable to the specific product.
Changes in text, design, and technical specifications are subject to change without prior notice and we reserve the right to change them.
DANKSAGUNG
PAAR-SYMBOLE
MANUELLE DAMPFABLASSFUNKTION
SYMBOLES DES COUPLES
FONCTION SELF-CLEANING
SIMBOLI DI COPPIA
1 Senza vapore
2 Bassa potenza
3 Alta potenza
PRIMA DEL PRIMO UTILIZZO
FUNZIONE SELF-CLEANING
SIMBOLOS DE PAREJA
SIMBOLURI DE CUPLU
1 Färä abur
2 Putere redusă
3 Putere mare


ÎNAINTE DE PRIMA UTILIZARE

- concept
- PODĚKOVÁNÍ
- SYMBOLY PÁRY
- SYMBOLY PÁROV
- SYMBOLE PAR
- PRZED PIERWSZYM UŻYCIEM
- FUNKCJA SELF-CLEANING
- PÁROS SZIMBÓLUMOK
- PĀRU SIMBOLI
- PIRMS PIRMÄS LIETOŠANAS
- IMPORTANT SAFETY PRECAUTIONS
- EN
- PRODUCT DESCRIPTION
- PAIR SYMBOLS
- BEFORE FIRST USE
- FILLING THE WATER TANK
- Very important notice:
- INSTRUCTIONS FOR USE
- Ironing with steam
- Ironing without steam
- MANUAL STEAM DISCHARGE FUNCTION
- VERTICAL STEAM IRONING
- WATER SPRAY FUNCTION
- ANTI-CALC FUNCTION
- CLEANING AND MAINTENANCE
- SELF-CLEANING FUNCTION
- TROUBLESHOOTING
- SERVICE
- ENVIRONMENTAL CONCERNS
- Recycling of the appliance at the end of its lifespan:
- DANKSAGUNG
- PAAR-SYMBOLE
- MANUELLE DAMPFABLASSFUNKTION
- SYMBOLES DES COUPLES
- FONCTION SELF-CLEANING
- SIMBOLI DI COPPIA
- PRIMA DEL PRIMO UTILIZZO
- FUNZIONE SELF-CLEANING
- SIMBOLOS DE PAREJA
- SIMBOLURI DE CUPLU
- ÎNAINTE DE PRIMA UTILIZARE
Brand : Concept
Model : ZN9110
Category : Iron