La Diva - Speaker HECO - Free user manual and instructions
Find the device manual for free La Diva HECO in PDF.
User questions about La Diva HECO
0 question about this device. Answer the ones you know or ask your own.
Ask a new question about this device
Download the instructions for your Speaker in PDF format for free! Find your manual La Diva - HECO and take your electronic device back in hand. On this page are published all the documents necessary for the use of your device. La Diva by HECO.
USER MANUAL La Diva HECO
At the end of the product's useful life, please dispose of it at appropriate collection points provided in your country.
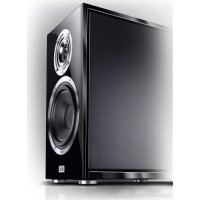
We congratulate you on acquiring this exclusive HECO product.
Acquiring this loudspeaker will enable you to fulfil your wildest dreams for listening to natural, unadulterated sound.
Please study the instructions and information below carefully before using your new loudspeakers.
SET-UP INFORMATION
LA DIVA should if possible be set up without obstruction and slightly inclined towards the place of listening (fig. 1).
In the ideal configuration the speakers and the listening position should form an equilateral triangle. When the left and right speakers are the same distance from the listening position their sound arrives at the same time, resulting in a harmonious, natural music reproduction.
There should be a clear line of sight between the loudspeakers and the listening position. Any sound-absorbing or reflecting obstacles in the path will distort the sound.
FITTING THE FLOOR PLATES
The floor plates provided must be fitted to both speakers before use. To do this, place the speakers on a clean, stable base with the bottom facing upwards. It is better not to remove the protective bag until after fitting has been completed so as to avoid damage to the paint surface.
First fit the four metal spikes to the floor plate, as shown in Fig. 2a: Four spikes (x) are screwed into the threaded holes in the floor plate (y) from below as far as they will go. The lock screw (z) is then fitted and tightened.
Now fit the pre-assembled floor plate using the M6 screws provided, as shown in Fig. 2b.
The metal spikes (x) are height-adjustable so as to guarantee the stability of the speaker. To do this, loosen the top lock nut (z) and adjust the spike by turning it. Once the right setting has been found, tighten the lock nut again.
Rubber inserts are screwed into the bottom of the cone spikes. These ensure optimum stability on smooth, hard floor coverings, such as laminate or tiles. The rubber inserts can be replaced with metal inserts (included in the package). This variation is better suited for carpets, for example.
BI-WIRING AND BI-AMPING, TRI-WIRING AND TRI-AMPING
LA DIVA possesses a field with eight screw terminals, which - besides conventional connection to an amplifier - also permit bi-wiring/bi-amping and tri-wiring/tri-amping.
The (-) terminals are on the left.
The top terminals are connected to the treble branch, the middle ones to the crossover filter's mid-range branch and the bottom terminals to the bass branch. The additional terminal at the top right allows the treble range to be elevated by 2dB, the other terminal in the centre right allows the mid-range to be lowered by 2dB.
The appropriate setting depends on the listening space, on where the loudspeakers are placed and naturally on personal taste.
In rooms with high absorption (e.g. heavily upholstered furniture and curtains), the +2dB tweeter setting is recommended and where the speakers are set up in close proximity to a wall at their backs and rooms with low absorption, the -2dB setting is recommended.
Bi-wiring means that high and low frequencies are transported through separate cables. The bi-amping method also requires a second final amplifier in addition to the second cable.
Tri-wiring requires a third cable, tri-amping requires an additional third amplifier.
Four cable bridges have been supplied.
Please connect the loudspeaker terminals for conventional use with the y-cable bridges (one cable shoe and two plugs) in accordance with Fig. 3 a - d.
Please use the other cable bridges (one cable shoe and one plug) as shown in Fig. 3 e - l for bi-wiring and bi-amping.
No bridges may be used for tri-wiring and tri-amping. Figs. 3 m - t show the connections to the amplifier(s).
CONNECTING YOUR HECO LA DIVA LOUDSPEAKERS
Warning: Only hi-fi amplifier loudspeaker outputs may be connected to the loudspeaker terminal.
Please always use a good quality loudspeaker connection cable from an audio dealer. To prevent impairment of sound quality, we recommend cables with cross-sections of at least 2.5mm^2 for lengths up to 3m and at least 4mm^2 for lengths above 3m .
Always turn off the amplifier or receiver before connecting or disconnecting loudspeaker cables. Place the loudspeakers in their planned positions and cut the cables to the right length. The cables for both channels should always be exactly the same length.
For good sound it is imperative that the cables must be connected in such a way that the speakers are "in phase". This means that the black negative terminals on the speakers (-) must be connected to the negative (-) terminals on the amplifier, the red positive (+) speaker terminals to the positive (+) amplifier terminals. To make this easier one wire of most speaker cables is marked with a coloured strip or a ridge in the insulation.
The terminal is designed for 3 cord sets:
- Connection via banana plugs (fig. 4a)
- Connection via clevis type fittings (fig. 4b)
Non-ready-made (fig. 4c)
Strip 10 - 15mm of insulation from the ends of non-ready-made cables. Twist the ends – this is much better than tinning them with solder – insert them in the terminals and tighten the terminal screws firmly.
Before switching on the system double-check all your connections and make sure that the terminal screws are tight and that there are no short circuits caused by stray wire filaments – this could cause serious damage to your amplifier!
MAINTENANCE
The lacquered surface is best cleaned with a mild household cleaner. On no account use furniture polish or similar products on these surfaces.
HOW TO AVOID DAMAGE TO YOUR VALUABLE SPEAKERS
All HECO loudspeakers are designed and built for optimum sound reproduction with the tone controls in the central position - i.e. with "linear" amplifier output. Turning up the bass and treble controls too far delivers more power to the woofers and/or tweeters, and at high volumes this can actually destroy the speaker units!
If the output of your amplifier is significantly higher than the rated power handling capacity of your speakers extremely high volumes can physically destroy your speakers. This doesn't actually happen often but you should be aware that it is possible.
Weak amplifiers with low output ratings can actually be more dangerous for your speakers at medium volumes because weak amplifiers may overload much faster than powerful ones and this causes measurable and audible distortion, which is extremely dangerous to your loudspeakers.
Always turn the volume down immediately as soon as you hear distortion! If you like listening to loud music make sure that your amplifier can deliver at least as much power as the speakers' power-handling rating.
Amplifiers, tuners and CD players can all produce inaudible high-frequency signals – and this doesn't only apply to cheap products. If your tweeters fail at low or medium volumes you should have a qualified technician check your system components for dangerous inaudible signals.
SPECIFICATIONS
Configuration: 3-way bass reflex
Power-handling capacity: 300 / 550 W
Impedance: 4-8 ohms
Frequency response: 17 - 52 500 Hz
Recommended amplifier output: 30 - 550 W
Efficiency (1W/1m): 93 dB
Dimensions (WxHxD): 385 × 1340 × 435 (465 incl. terminal and floor plate) mm
Weight: 49.8kg
Accessory: Metal spikes
Rubber Spikes
Subject to technical change.
Très cher client,
Belasthaarheid: 300/550 Watt
Impedantie: 4-8 Ohm
Frequentiebereik 17-52 500 Hz
LIGACAO DAS SUAS COLUMNAS HECO LA DIVA
Panael npncoeHHeNA LA DIVA nMeet BOCemb BNHTOBbIX 3aXIMOB, C NOMOuI KOTOpbIX BO3MOxHO He ToJIbKO cTaNapTHoe noKIOUeHne K yCnIITeIIO, Ho n noKIOUeHn Bi-wiring/Bi-amping n Triwiring/Tri-amping.
C neBoi cToPOHbI hXoOaTcra 3aKIMbl (-).
BepxHne 3axmbl CBra3aHbI C BbICOKOyACTOTHOB BetBbH, CpeHNHe CO CpeDHeCACTOTHOB BetTbIO KpoccoBepa, a HIXHne 3axmbl C Hn3KoYAcTOTHOB BetTbIO. BnaOApA donoNHTeNbHOMy 3axmMy BBepy cnpaba BO3MOKeH NOdbE M ycIneHnB Oblaactn BbcOKnx YacToT Ha 2d5, a c nOmoIbU eIe ODHorO 3axmMa NocpeDNHe cnpaba - ChNXeHne CpeHNx YacToT Ha 2d5.
OnTImaJIbHaJ HAcTpOJa 3aBnCt OT NOMEeHnI pOcNlyuBaHnI, OT paCCTaHOBKn rPOMKOrOBOpnteJe I, KOHeUHO JKe, OT NlUHoro BKyCa.
B cnIbHO akyctnueckn demnpnoBaHHbIX NOMeueHnax (HaNP., C MaccNBHO JMRKoM Me6JIbIO n TjXeJIbIMN 3aHaBeCmN) peKOMeHnyetc HAcTPOkA BbICOKNX TOHO H +2D5, npu yCTaHOBKe B6n3n 3aDHeN cTeHbI N B cna6o demnpnoBaHHbIX NOMeueHnax - HAcTPOkA cpeHNx TOHOB Ha 2D5.
Bi-wiring 3haHT, yTO BbICOKne n Hn3Kne qactOTbI TpaHCnOpTnpyIOc KaJdbI NO OTdEnbHOMy Ka6eJIHO.
ДЯ MeToDa Bi-amping Tpe6ByETc KpOME BTOPOI NINHm eIe I DOnONHITeJIbHbI BTOPOI OKOHeHbI
ycuInTeJIb.
Дя Tri-wiring tpe6yeTcra TpeTb JInn, a JЯ Tri-amping dononHnteBHy bTpeTn ycnJnteB.
B o6bEM nocTabKn BXOJ4 Ka6eIbHbIe IpeEmbIyKn.
CoeHInHe 3aXnMbI rPOMKOrOBOpntEn I nI cTaNdApTHoro peXnMa pa6oTbI c Ka6eJIbHbIMn nepembykamTuNa Y (1 ka6eJbHbI HakoHeuHnK n 2 6aHaHOBbIX uTeNceJe) corlacho pnc. 3 a-d.
Дя ржимов Bi-wiringи Bi-amping pekomehnyetcЯncnoьзоваты дугпе kaбельные поемык (1 Ka6eblhblн HaKoHeuHnK n 1 6aHaHObbl mTeIceNb) кak noka3aHo Ha pnc. 3 e -l.
Для ржимов павOTы Tri-wiringи Tri-amping nepembyкн He моNTурюся. Пдклочене к успinteю/ ycninteям nokazho Ha pucyHKax 3 m - t.
OBUHE YKA3AHNA NO NODKNIQUEHNO rPOMKOrOBOPTEJIEN HECO LA DIVA
IpeynpeKdene: Toblko BbIXoDbHa rpoMkorOBopnteJb ycHnTeJe Knacca Hifi moryT 6bITb noDKnUoyHeB I K TepMNany rpoMkorOBopnteJe LA DIVA!
Для подклоченя громкогорптелов Bam Heo6xodmo IMeMbсецальнье ka6eNi, пиобpeTaembIe B cneuaJIIN3INPOBaHHbIX mara3nHax. Bo n36exaHne chnxeHna KaueCTBa 3ByaHnЯ Мbl peKOMeHnyem Bam npimHeTb ka6eJIn ДЛINOHДо 3 M n C pIoUaIbTO ceYehnЯ He MeHee 2,5 MM², a npn 6OJIbWei DLIHe - He MeHee 4 MM².
Do Tex nop, noka He 6ydyT CdeIaHb BCE CoeINHeHn, ycJIInTeIb II npneMHNK DoJXHbIOCTaBaTbcB BByIKJIIOueHHOM COCTOAHN. Ipy TOrO, YTObI BBIBpaTb npabINbHyIO dNNHy KaBeJe, rPOMKOROBOpHTeIN Npeed 3TN M DOJXHbI 6bITb pa3MeUeHbI Ha CBOUX MeCTax. DnIHbI KaBeJe dnn OboNX Kahanob DoJXHbI 6bITb ODNHaKOBBIMN.
Pn noKJUeyHn Ka6eIg o6paaIte BHMaHne Ha npBnBHOCTb f3npOBKn NOJIuOHeHn, T.e. YepHbIe (-) 3axm KaxdOro n3 rpoMkoROBOpTeJe DOJxEh 6bITb COeINHeH C (-) 3axmAMn ycInTeJIa, COOTBeTCTBeHHO, KpachN (+) 3axm KaxdOro n3 rpoMkoROBOpTeJe DOJxEh 6bITb COeINHeH C (+) 3axmAMn ycInTeJIa. O6bHuO, c eIbIO o6IeHn IpaBnBHOf a3npOBKn ODA Hn JxNJ Ka6eJIa DnA rpoMkoROBOpTeJIy IMeET pNpNeHyIO IIN CBETOBYIO MAPKIpOBKy.
TepmHaJ LA DIVA paccuHan Ha 3 BnDa Ka6eJia:
-ПОДКЛЮЧЕНС pa3ьемOM TINа „бан" (pnc. 4a)
ПОДКЛЮЧЕНС Ka6eJIbHbIM HakoHeuHnKOM B BuIe BuIKN (pnc. 4b)
6e3Ka3bEMOB IN HakoHeuHKnOB (pnc.4c)
KoHcI Ka6ene 6e3 HakoHeuHKnOB DoXhbl 6bItb OunUeHbHa yactke 10 - 15 MM. KoHcI 3aTeM cKpyuBaOTcra (3TO lyUwe, Yem NOKpbIBaTb nx npnOeM), 3aBOJrTCB 3axmbl KOHTAKTOB n HaedxHO 3akpePJIOTcBnHTAMN.
Eepe 3y6eHTEcB HndexHoCTN 3aKpeIeHn Ka6eJe N OTCyTCTBn KOpOTKO 3aMbKaHnHa npimep, n3-3a BbICTypaIOxN n3 3axIMOB BOJOKOH npoBOda. 3TO MOKeT PpeDCTabJIaTb OnaCHOctb DnRA BKNIOeHHORO yCUNITeIa.
yXoA
IaknpoBaHHbIe NOBepxHOCTN JpepeKOMeHdyETcA OUNaTb C NOMOuMo MRAKINX yHNBePcAlhBbIX YNCTAUX CpeDCTB, T. e. HN B KOem cnyae He npIMeHrTb ONNTpy dJa Me6en nn T. n.
COBETbI NO NCKJIIOUeHNIOCNTYAUcN, TPEByIOxX PEMOHTA
Bce rpoKorOBopnteHn HECO hactpoeHbHa HanIyUwe BocpOn3BeDeHne B yCNoBnX, KOrda peryIaTOp yPoBn 3Byka HaxoNTcB CpeDHeM NIOxKeHn, T.e. Ha IINHeHOM yAcTke pa60tby ycNITeJIa MoUHOCTn. CyueCTBeHHoe NObIiSeHne yPoBn 3Byka npIBoNDt K TOMy, YTO B ObJAcTn Hn3Knx N/IIIN BepxHIX TOHOB BbIeJeTcra N3bItOuHna 3Heprna, YTO pRn BBicOKo rPOMKOcTn MOnkET npNBecTn K NCKaKeHnIO 3ByaHnA.
Ecnn B BaWeM paCnpaJxHn HaxoDHTcY yCnIHTb, KOtbpI oBnaJaET cyuectBeHHO 60JeE BbICOKOBbIXoHNo MoUHocTbU, npeBbIshaUoSei NaCnpTHyU HaRpy3OHyU CnOCo6HOCTb KOnOHok, TO TAKOUYpe3MePbHb UPOBeHb rPOMKoCTm MOKeT npNBecTN K pa3pyuHeHHU rPOMKOROBOpHTeJIa, YTO, BnPooyem, cLyuAeTcB BecbMa peko.
YcHInTeJIco CnAbbIM BbIXOdom, MOryT, OndaKo, PpeCTaBnTb OnaChocTb DnKoLoHOK yKe npi cpeHne CnIe 3Byka, TAK KAK OHN MOrY T OKa3aTbcra NpeerpyKeHHbIMn HAMHOro 6blCTpee, Yem B Cnyae MoUhBX ycHInTeNe. Takaon peerpuy3ka obycnoBnBaet OTcHTnBO pernctpnpyeMbie npnbopamn Cblshmble nckaxehn, kpaIHe onaChbIe dna BaWero rPOMKorOBopnteJI.
B CB83n C 3TINm npocim o6paatb BHMaHne Ha nckkaeHna, BO3NkaUcHne npn peyInpOBaHn 3Byka, n, pni Heo6xOIMOCtN, HemeJPeHHO yMeHbWAtb erO ypoBeHb. ToT, KTO JIObNT cJyWAtb, DOJIKeH cJeITb 3a Tem, YTO6bl yCNIteJIb KaK MOXHO pexe BblAbaJI TakyHO MoUHOCtB, KOtopaR MoXET npNBecTN K neperpy3kam B KOJOnHKax.
B OБЦЕМ...
yCnHtEni, TIOHepbI n CD nIeepbI - n He ToJIbKO B cIyue HeDopOrnx I3deIin - MoryT BOCpOn3BOAnITb BOCpInHmAmEble cIyXOM BbICOKOaCTOTHbIe KOJIeBaHn. EcIIN pRn MaIOM n CpeIhEm yPOBHX rPOMKoCTn y Bac nponaAoiT BbICOKne TOHa, To BaWy cnCTeMy DoJxKe H pOBePTb CneuaJIInCT.
TEXHINUeCKNE XAPAKTEPNCNTIKN
KoHΦnIgypaun: 3 noIochIe 己 aCpePfneKc
Harpy30nHa nocO6HocTb: 300/550BT
IMpeanu:4-8OM
UactoTHbI dnaana3OH:17-52500T
PekomeHdyemam MouHocTb ycuiHtTeJ: 30-550BT
Ko3Φ. noJIe3HOrO DeIeCTBnA (1 BTr/1 M): 93 Λ
T6apntbI (UxxBxΓ): 385 x 1340 x 435/465 MM
Bec: 49,8 K
Ochactka MetanJIuYeCKne Ⅲnbl,36oHHTOBbIe Ⅲnbl
Bo3MOKhbl TeHNueckne N3MeHeHn.
尊敬的HECO用户,
Congratulations! You have made a wise selection in becoming the owner of a HECO HiFi equipment. Due to high quality HECO
HiFi products have earned an excellent reputation through the western world. And this high quality standard enables us to grant a 5-years warranty for HECO HiFi products.
The equipments are checked and tested continuously during the entire production process. In case you have problems with your HECO HiFi equipment, kindly observe the following:
- The guarantee period commences with the purchase of the component and is applicable only to the original owner.
- During the guarantee period we will rectify any defects due to faulty material or workmanship by replacing or repairing the defective part at our discretion. Further claims, and in particular those for price reduction, cancellation of sale, compensation for damages or subsequent damages, are excluded.
- Unauthorized tampering with the equipment will invalidate this guarantee.
- Consult your authorized dealer first, if guarantee service is needed. Should it prove necessary to return the component to the factory, please insure that the component is packed in original factory packing in good condition your enclose your receipt as proof of purchase.
- Excluded from the guarantee are: • Illuminates • Wear parts • Shipping damages, either readily apparent or concealed (claims for such damages must be lodged immediately with forwarding agent, the railway express office or post office). • Scratches in cases, metal components, front panels, etc. (You must notify your dealer directly of such defects within three days of purchase.) • Defects caused by incorrect installation or connection, by operation errors (see operating instructions), by overloading or by external force. • Equipments which have been repaired incorrectly or modified or where the case has been opened by persons other than us. • Consequential damages to other equipments. • Reimbursement of cools, without our prior consent, when repairing damages by third parties.
F
No warranty without receipt!
HECO
Lise-Meitner-Str. 9 · D-50259 Pulheim · Germany
Tel. +49 (0) 2234 / 807 - 0 • Fax +49 (0) 2234 / 807 - 399
www.heco-audio.de