
FatMax SFMCPC93 - Pressure washer STANLEY - Free user manual and instructions
Find the device manual for free FatMax SFMCPC93 STANLEY in PDF.
| Product type | Cordless high-pressure washer |
| Brand | STANLEY |
| Model | FatMax SFMCPC93 |
| Maximum pressure | 24 bar |
| Water flow rate | 120 l/h |
| Power supply | 18 V lithium-ion battery (models SFMCB202/204/206) |
| Charger | SFMCB, input 230 V, output 18 V, 2 A |
| Battery capacity | 2.0 / 4.0 / 6.0 Ah depending on model |
| Water inlet pressure | 1.4 - 6.9 bar |
| Water supply | Cold water only |
| Inlet hose length | 6 m |
| High-pressure lance | With quick connect (model STZQDW1) |
| Nozzle | 5-in-1 variable jet nozzle (model STZ5N1) |
| Included accessories | Detergent bottle, suction hose with float, hose adapter, quick connect filter |
| Sound pressure level | LPA = 75.0 dB(A) (uncertainty K = 3 dB) |
| Sound power level | LWA = 86.0 dB(A) (uncertainty K = 1.6 dB) |
| Warranty | 12 months from date of purchase |
| Intended use | Cleaning boats, vehicles, decks, driveways, fences, siding, motorcycles, patios, outdoor furniture |
| Essential safety instructions | Wear safety goggles, do not direct spray at people, animals, or electrical equipment |
| Routine maintenance | Regularly clean nozzles, quick connect filter, and suction hose; store indoors, frost-free |
Frequently Asked Questions - FatMax SFMCPC93 STANLEY
User questions about FatMax SFMCPC93 STANLEY
0 question about this device. Answer the ones you know or ask your own.
Ask a new question about this device
Download the instructions for your Pressure washer in PDF format for free! Find your manual FatMax SFMCPC93 - STANLEY and take your electronic device back in hand. On this page are published all the documents necessary for the use of your device. FatMax SFMCPC93 by STANLEY.
USER MANUAL FatMax SFMCPC93 STANLEY
Your STANLEY FATMAX SFMCPC93 Pressure Cleaner has been designed for cleaning boats, cars, decks, driveways, grills, house siding, motorcycles, patios, and outdoor furniture. These appliances are intended for consumer use only.
Safety instructions
Warning! When using mains-powered/ cordless appliances, basic safety precautions, including the following, should always be followed to reduce the risk of fire, electric shock, personal injury and material damage.

Never direct the water
jet at people, animals,
the machine or electric
components.
Warning! High pressure jets can be dangerous if subject to misuse.
According to the applicable regulations, the appliance must never be
used on the drinking water network without a system separator. Use a separator as per IEC 61770 Type BA.
Water flowing though a system separator is considered not drinkable.
- Read all of this manual carefully before operating the appliance.
- The intended use is described in this manual. The use of any accessory or attachment or the performance of any operation with this appliance other than those recommended in this instruction manual may present a risk of personal injury.
- Retain this manual for future reference.
Using your appliance
Always take care when using the appliance.
- The liquid or steam must not be directed towards equipment containing electrical components, such as the interior of ovens.
- The appliance is not to be used if it has been dropped, if there are visible signs of damage or if it is leaking.
Always use safety glasses or goggles. - Never allow children, persons with reduced physical, sensory or mental capabilities or lack of experience and knowledge or people unfamiliar with these instructions to use the machine, local regulations may restrict the age of the operator. Never operate the machine while people, especially children, or pets are nearby.
-
Do not allow children or animals to come near the work area or to touch the appliance or power supply cord.
-
Close supervision is necessary when the appliance is used near children.
This appliance is not intended for use by young or infirm persons without supervision. - This appliance is not to be used as a toy.
- Only use the appliance in daylight or good artificial light.
- Use in a dry location only. Do not allow the appliance to become wet.
- Avoid using the appliance in bad weather conditions, especially when there is a risk of lightning.
Do not immerse the appliance in water. - Do not open the body casing. There are not user-serviceable parts inside.
Do not operate the appliance in explosive atmospheres, such as in the presence of flammable liquids, gases or dust. - The appliance is only to be used with the power supply unit provided with the appliance.
Residual risks.
Additional residual risks may arise when using the tool which may not be included in the enclosed safety warnings.
These risks can arise from misuse, prolonged use etc.
Even with the application of the relevant safety regulations and the implementation of safety devices, certain residual risks can not be avoided.
These include:
Injuries caused by touching any rotating/moving parts.
- Injuries caused when changing any parts, blades or accessories.
Injuries caused by prolonged use of a tool. When using any tool for prolonged periods ensure you take regular breaks.
Impairment of hearing.
Health hazards caused by breathing dust developed when using your tool (example:- working with wood, especially oak, beech and MDF.)
After use
- When not in use, the appliance should be stored in a dry, well ventilated place out of reach of children.
Children should not have access to stored appliances. - When the appliance is stored or transported in a vehicle it should be placed in the boot or restrained to prevent movement following sudden changes in speed or direction.
Inspection and repairs
- Before use, check the appliance for damaged or defective parts.
Check for breakage of parts and any other conditions that may affect its operation. - Do not use the appliance if any part is damaged or defective.
- Have any damaged or defective parts repaired or replaced by an authorised repair agent.
- Never attempt to remove or replace any parts other than those specified in this manual.
Additional safety instructions for pressure cleaners
The intended use is described in this manual. The use of any accessory or attachment or performance of any operation with this appliance other than those recommended in this instruction manual can present a risk of personal injury and/or damage to property.
To protect your feet and legs while operating the appliance, always wear heavy duty footwear and long trousers.
Always switch off your product, allow the fan to stop and remove the battery when:
- You leave your product unattended.
Clearing a blockage.
- Checking, adjusting, cleaning or working on your product.
- If the appliance starts to vibrate abnormally.
Do not place the inlet or outlet of the pressure cleaner near eyes or ears when operating. Never point in the direction of bystanders.
Do not use in the rain or leave outdoors while it is raining.
- Do not cross gravel paths or roads whilst your product is switched on. Walk, never run.
Do not place your unit down on gravel while it is switched on.
Always be sure of your footing, particularly on slopes.
Do not overreach and keep your balance at all times.
- Do not place any objects into the openings. Never use if the openings are blocked - keep free of hair, lint, dust and anything that may reduce the airflow.
Warning! Always use your product in the manner outlined in this manual.
Your product is designed to be used in an upright mode and if it is used in any other way it may result in injury. Never run your product whilst lying on it's side or upside down.
- The operator or user is responsible for accidents or hazards occurring to other people or their property.
- Do not use solvents or cleaning fluids to clean your product. Use a blunt scraper to remove grass and dirt.
- Check the collection bag frequently for wear or deterioration.
Replacement fans are available from a STANLEY FATMAX service agent. Use on STANLEY FATMAX recommended spare parts and accessories. - Keep all nuts bolts and screws tight to make sure that the appliance is in a safe working condition.
Safety of others
This appliance is not intended for use by persons (including children) with reduced physical, sensory or mental capabilities, or lack of experience and knowledge, unless they have been given supervision or instruction concerning use of the appliance by a person responsible for their safety.
Children should be supervised to ensure that they do not play with the appliance.
Additional safety instructions for batteries and chargers
Batteries
- Never attempt to open for any reason.
Do not expose the battery to water. - Do not store in locations where the temperature may exceed 40^ .
Charge only at ambient temperatures between 10^ and 40^ . - Charge only using the charger provided with the tool.
- When disposing of batteries, follow the instructions given in the section "Protecting the environment".
Chargers
Use your STANLEY FATMAX charger only to charge the battery in the tool with which it was supplied. Other batteries could burst, causing personal injury and damage.
- Never attempt to charge nonrechargeable batteries.
- Have defective cords replaced immediately.
Do not expose the charger to water.
Do not open the charger.
Do not probe the charger.

The charger is intended for indoor use only.

Read the instruction manual before use.
Electrical safety

Your charger is double insulated; therefore no earth wire is required. Always check that the mains voltage corresponds to the voltage on the rating plate. Never attempt to replace the charger unit with a regular mains plug.
If the supply cord is damaged, it must be replaced by the manufacturer or an authorised STANLEY FATMAX Service Centre in order to avoid a hazard.
Labels on appliance
The following warning symbols are found on the appliance along with the date code:
Read the manual prior to operation.

- Wear safety glasses or goggles when operating this appliance.
- Wear suitable ear protectors when operating this appliance.

Always remove the battery from the appliance before performing any cleaning or maintenance.

Do not expose the appliance to rain or high humidity.
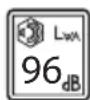
Directive 2000/14/EC guaranteed sound power.
Features
This appliance includes some or all of the following features.
- Main handle
- Pressure Cleaner unit
- Water intake
- Trigger Lock
- Battery pack release button
- Battery pack (included with SFMCPC93D1)
- On/Off trigger
- Quick connect filter (included)
-
Pressure Cleaner Quick Connect wand (included STZQDW1)
-
5in1 Nozzle (included STZ5N1)
- Soap bottle (included STZSBSK3: Cleaning KIT)
- Suction hose (included STZIHK2)
- Quick connect hose connector (included STZIHK2)
- Float ball (included STZIHK2)
- Garden hose adapter (included)
- Short Wand (accessory STZSW1)
- Brush (included STZSBSK3: Cleaning KIT)
- Squeegee (accessory STZSBSK3: Cleaning KIT)
- Bucket (included STZB1)
Charging a battery
STANLEY FATMAX chargers are designed to charge STANLEY FATMAX battery packs.
Plug the charger into an appropriate outlet.
Insert and fully seat battery pack. Green charging light will continuously blink while charging.
- Charging is complete when the green charging light remains continuously ON. Battery pack can be left in charger or removed.
Recharge discharged batteries as soon as possible after use or battery life may be greatly diminished. For longest battery life, do not discharge batteries fully. It is recommended that the batteries be recharged after each use.
Charger diagnostics
This charger is designed to detect certain problems that can arise with the battery packs or the power source. Problems are indicated by one LED flashing in different patterns.
Bad battery
The charger can detect a weak or damaged battery. The LED flashes in the pattern indicated on the label. If you see this bad battery blink pattern, do not continue to charge the battery.
Return it to a service center or a collection site for recycling.
Hot/cold pack delay
When the charger detects a battery that is excessively hot or excessively cold, it automatically starts a Hot/Cold Pack Delay, suspending charging until the battery has normalized. After this happens, the charger automatically switches to the Pack Charging mode. This feature ensures maximum battery life. The light flashes in the pattern indicated on the label.
Leaving the battery in the charger
The charger and battery pack can be left connected with the LED glowing indefinitely. The charger will keep the battery pack fresh and fully charged.
This charger features an automatic tune-up mode which equals or balances the individual cells in the battery pack to allow it to function at peak capacity.
Battery packs should be tuned up weekly or whenever the battery no longer delivers the same amount of work. To use the automatic tune-up mode, place the battery pack in the charger and leave it for at least 8 hours.
Important charging notes
- Longest life and best performance can be obtained if the battery pack is charged when the air temperature is between 18^ - 24^ . DO NOT charge the battery pack in an air temperature below +4.5^ , or above +40^ . This is important and will prevent serious damage to the battery pack.
- The charger and battery pack may become warm to the touch while charging. This is a normal condition, and does not indicate a problem.
To facilitate the cooling of the battery pack after use, avoid placing the charger or battery pack in a warm environment such as in a metal shed or an uninsulated trailer.
If the battery pack does not charge properly:
Check operation of receptacle by plugging in a lamp or other appliance;
- Check to see if receptacle is connected to a light switch which turns power off when you turn out the lights;
Move the charger and battery pack to a location where the surrounding air temperature is approximately 18^ - 24^
If charging problems persist, take the tool, battery pack and charger to your local service center.
- The battery pack should be recharged when it fails to produce sufficient power on jobs which were easily done previously. DO NOT CONTINUE to use under these conditions. Follow the charging procedure. You may also charge a partially used pack whenever you desire with no adverse effect on the battery pack.
Foreign materials of a conductive nature such as, but not limited to, grinding dust, metal chips, steel wool, aluminum foil, or any buildup of metallic particles should be kept away from charger cavities. Unplug the charger before attempting to clean.
- Do not freeze or immerse the charger in water or any other liquid.
To install battery pack (fig. G)
Note: For best results, make sure your battery pack (6) is fully charged.
Lift and hold the battery port cover (6b) up to expose the battery port (6c).
Align the battery pack with the rails inside the tool's battery port (6c) and slide it into the battery port until the battery pack is firmly seated in the tool and ensure that it does not disengage.
Close the battery port cover (6b). Ensure thecover is fully latched into position before starting the tool.
To remove battery pack (fig. G)
Lift and hold the battery port cover (6b) up to expose the battery pack (6).
Press the battery release button (6a) on the battery pack (6) and firmly pull the battery pack out of tool.
Insert the battery into the charger as described in the charger section of this manual.
Assembly
Warning! To reduce the risk of serious personal injury, turn unit off and remove the battery pack before making any adjustments or removing/installing attachments or accessories. An accidental start-up can cause injury.
Attaching quick connect filter (Fig. A)
This pressure cleaner must be used with the quick connect adapters. The garden or suction hose can only be attached when the quick connect filter (8) is installed.
To connect the quick connect filter (8) to the pressure cleaner (2), place the end of the quick connect filter onto the water intake (3). Tighten the quick connect filter by hand.
Note: Avoid cross threading when installing the hose. Cross threading will cause leaks.
To attach the spray wands, soap bottle or other attachment (Fig. B)
The spray wand, soap bottle bottle and other attachments (sold seperately) connect to the pressure cleaner. To connect the spray wands (9) (16) and soap bottle (11) to the pressure cleaner (2):
Insert the end of the attachment into the opening on the pressure cleaner (2). Push in and turn the attachment clockwise until its secured into working position.
To remove the attachment, push in and turn the attachment counterclockwise and pull from the pressure cleaner (2).
Note: Other accessories are available for use with this pressure cleaner, refer to the Accessories section.
To attach the garden or suction hose (Fig. C, D)
Connecting the garden hose or suction hose will depend on the job to be performed.
To attach garden hose (Fig. C)
This pressure cleaner must be used with the quick connect adapters.
To connect the quick connect hose adapter (13) to a garden hose, thread the quick connect hose adapter onto the end of the garden hose. Tighten the garden hose by hand.
Note: Avoid cross threading when installing the hose. Cross threading will cause leaks.
Note: Before connecting the garden hose to the pressure cleaner, run water through the garden hose for thirty seconds to clear any debris from the mouth of the garden pressure hose.
To connect the quick connect hose adapter (16) to the quick connect filter (3) on the pressure cleaner (2), push the quick connect hose adapter firmly onto the quick connect filter.
Note: Before use, gently tug on the garden hose to ensure the connection is secured. Make sure the quick connect hose adapter is flush with the quick connect filter as shown in Figure D.
Always disconnect the garden hose after usage. To disconnect, pull back the collar on the quick connect hose adapter and remove from the quick connect filter.
To attach the suction hose (Fig. C, E)
Use the suction hose to pull water from a bucket or other fresh water source.
Note: Do not use to suction soap, chemicals, dirty or corrosive liquids, such as window cleaner, plant food, fertilizers or bleach. Do not use salt water.
To connect the quick connect hose adapter (13) on the end of the suction hose to the quick connect filter (3) on the pressure cleaner (2), push the quick connect hose adapter firmly onto the quick connect filter.
Note: Before use, gently tug on the garden hose to ensure the connection is secured. Make sure the quick connect hose adapter on the end of the suction hose is flush with the quick connect filter as shown in the Figure E inset.
Place other end of suction hose with filter on it into container of fresh water or a fresh water source. Adjust the float on the suction hose so the filter stays covered in the liquid.
Select the correct nozzle to be used. See How to Use the Multi-Spray Nozzle paragraph.
After the job being performed is complete, place the suction hose into container of clean water and draw the clean water through the system to rinse.
How to attach 5in1 nozzle to spray wand
Warning! Risk of fluid injection. Do not direct discharge stream toward persons, unprotected skin, eyes or any pets or animals. Serious injury will occur.
Warning! Flying objects could cause risk of serious injury. DO NOT attempt to change nozzles while pressurecleaner is running. Turn pressure cleaner off before changing nozzles.
To connect the nozzle (10) to the spray wand (9), pull the quick connect collar toward the spray wand and insert the nozzle.
Release the quick connect collar to lock the nozzle in place.
To ensure nozzle is locked into place, give the nozzle a firm tug after the quick connect collar has locked into place.
How to use spray wand (Fig. F)
A variable 5 in 1 spray nozzle (10) is supplied with this pressure cleaner.
To adjust the pressure of the variable spray nozzle (10), twist the tip clockwise or counterclockwise for the desired flow.
A narrow spray is good for cleaning grills, driveways, sidewalks and brick work.
A wide spray is good for cleaning decking, vinyl, painted surfaces, auto/rv and stucco.
Note: The high pressure spray from your pressure cleaner is capable of causing damage to surfaces such as wood, glass, automobile paint, auto striping and trim, and delicate objects such as flowers and shrubs. Before spraying, check the item to be cleaned to assure yourself that it is strong enough to resist damage from the force of the spray.
Proper hand position (Fig. H)
Warning! To reduce the risk of serious personal injury, ALWAYS use proper hand position as shown.
Warning! To reduce the risk of serious personal injury, ALWAYS hold securely in anticipation of a sudden reaction. Proper hand position requires one hand on the main handle (1) and the other hand on the pressure cleaner's (2) body as shown.
Pressure cleaning
Preparing surface for cleaning
Remove objects from the area which could create a hazard.
Ensure that all doors and windows are closed tight. Protect all plants and trees in the adjacent area with a drop cloth ensuring that they will not be harmed by any overspray.
Pre-rinse cleaning area with fresh water.
Use only detergents formulated for pressure washers.
Always test detergent in an inconspicuous area before use.
Preparing pressure cleaner unit for use
Warning! Risk of fluid injection and laceration. When using the high-pressure setting, DO NOT allow the high-pressure spray to come in contact with unprotected skin, eyes, or with any pets or animals. Serious injury will occur.
Warning! Before operation:
Connect the water supply to the pressure cleaner. For instructions on connecting the water supply to the pressure cleaner, please refer to Attaching Garden or Suction Hose under Assembly and Adjustments.
Connect the pressure spray wand, soap bottle, or other attachment.
For instructions on connecting the pressure spray wand, please refer to To Attach the Spray Wand, Soap Bottle or other Attachment under Assembly and Adjustments.
Preparing pressure cleaner
Important: Disengage the trigger lock-off (4), squeeze the trigger (7) and hold the trigger for 30 seconds to purge the system of air. If air is still found in the water stream, continue to run water through the spray handle.
Disengage the trigger lock-off (4).
Squeeze the trigger (7).
Cleaning a surface
Warning! Risk of injury from spray. Always engage the trigger lock when gun is not in use. Failure to do so could cause accidental spraying.
To start the pressure cleaner, disengage the trigger lockoff (4) and squeeze the trigger (7).
Note: The best angle for spraying water against a cleaning surface is 45^ . Spraying head on tends to cause dirt particles to embed in the surface. When working on vertical surfaces, it is best to apply detergent starting at the bottom and working upwards which will prevent the detergent from sliding down and causing streaks.
To stop the pressure cleaner, release the trigger.
Note: Excessive pump pressure may be the result of a clogged nozzle or brass coupling.
Always turn off the pressure cleaner and remove the battery before attempting to unclog a nozzle or brass coupler.
Warning! Never draw from water that contains chemicals.
Only draw from fresh water sources.
Shutdown
To stop the pressure cleaner, release the trigger and remove the battery.
Turn off water at the faucet.
Discharge residual pressure by squeezing the trigger (7) until no more water comes out of the spray wand (9).
Disconnect the garden hose from the water intake (3) and drain hose.
ENGLISH
(Original instructions)
Remove garden hose from pressure cleaner by pulling back the collar on the quick connect hose adapter and removing it from the quick connect filter.
Maintenance
Warning! To reduce the risk of serious personal injury, turn unit off and remove the battery pack before making any adjustments or removing/installing attachments or accessories. An accidental start-up can cause injury.
Cleaning
Warning! Blow dirt and dust out of all air vents with clean, dry air at least once a week.
To minimize the risk of eye injury, always wear eye protection when performing this procedure.
Warning! Never use solvents or other harsh chemicals for cleaning the non-metallic parts of the tool. These chemicals may weaken the plastic materials used in these parts. Use a cloth dampened only with water and mild soap. Never let any liquid get inside the tool; never immerse any part of the tool into a liquid.
Nozzle
If the nozzle becomes clogged with foreign materials, such as dirt, excessive pressure may develop.
If the nozzle becomes partially clogged or restricted, the pump pressure will pulsate. Clean the nozzle immediately.
Shut off the pressure cleaner (2) and turn off the water supply.
Pull trigger (7) on main handle (1) to relieve any water pressure.
Remove the nozzle from the spray wand (9) by pulling the quick connect collar (10) toward the spray wand.
Unclog any debris from the nozzle.
Run water from a faucet or garden hose through the nozzle.
Soap bottle
To clean the soap bottle, shut off the pressure cleaner and turn off the water supply.
Pull trigger on gun handle to relieve any water pressure.
Decouple the soap bottle (11) from the pressure cleaner and unscrew the soap bottle nozzle.
To clean the soap bottle (11), empty any remaining detergent back into its container. Use water from a garden hose to thoroughly rinse out the bottle. Empty the bottle and allow it to dry.
Reinstall soap bottle nozzle to the soap bottle.
Suction hose
To clean the suction hose (12), shut off the pressure cleaner.
Pull trigger switch to relieve any water pressure.
Decouple the suction hose (12) from the pressure cleaner.
To clean the suction hose, use water from a garden hose to thoroughly rinse out the suction hose and allow it to dry.
Suction hose filter (Fig. J)
Turn the filter (20) on the end of the suction hose (12) counterclockwise and remove. Remove the strainer from inside of the filter. Rinse all of the parts with clean water and reassemble.
Quick connect filter (Fig. K)
Pull back the collar on the quick connect hose adapter and remove the garden or suction hose from the quick connect filter (8).
Remove the quick connect filter from the pressure cleaner.
Inside the quick connect filter (8) is a screen filter (22). Remove the screen filter and rinse with clean water and reassemble.
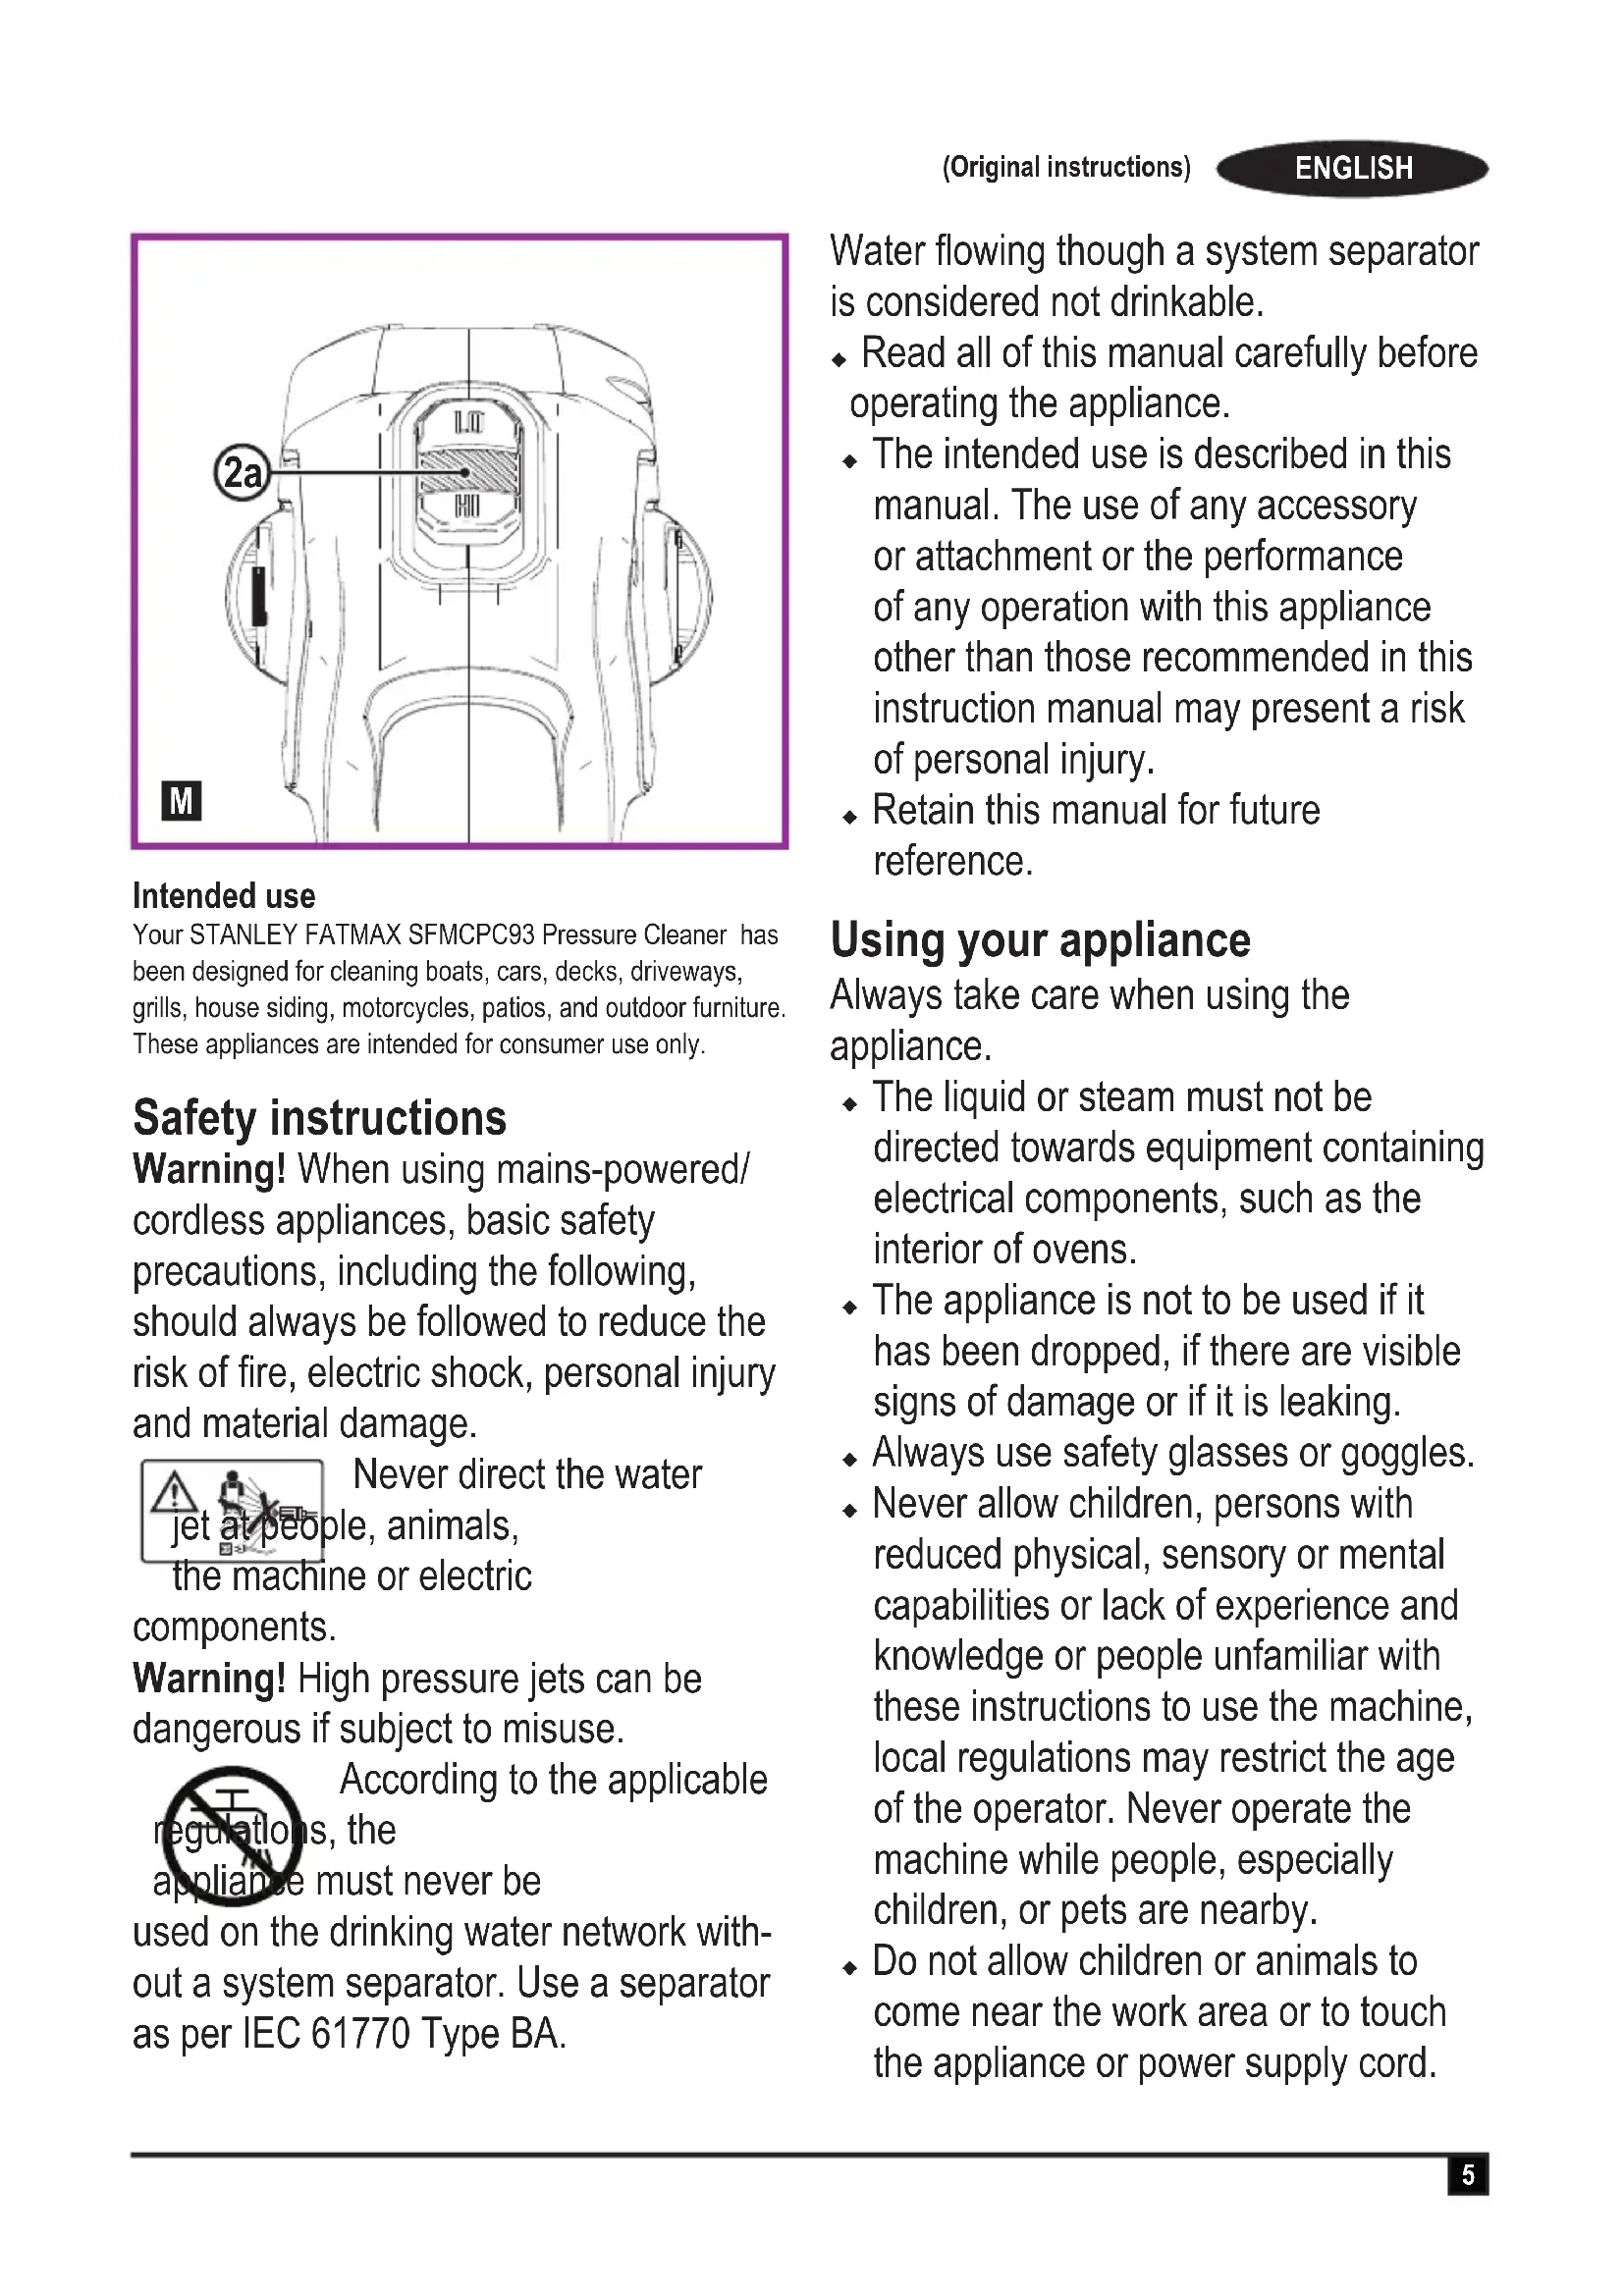
Speed Selector (Fig. M)
This power cleaner gives you the choice to operate at a lower pressure for more delicate jobs, or accelerate the power cleaner speed for high-performance cleaning.
To accelerate, pull the speed selector (2a) back toward the main handle (1) into the "HI" position. This mode is best for applications that need higher PSI.
For lower pressure, push the speed selector forward toward the spray wand (8) into the "LO" position. This mode is best for larger projects that require more time to complete.
Note: When in "HI" mode, runtime will be decreased as compared to when pressure cleaner is in "LO" mode.
Storage
Always completely empty water from the suction hose, pressure cleaner, spray wand, nozzles, and soap bottle.
Store in a dry, covered location above freezing temperature. STORE IN DOORS.
Accessories
Warning! Since accessories, other than those offered by STANLEY FATMAX, have not been tested with this product, use of such accessories with this tool could be hazardous. To reduce the risk of injury, only STANLEY FATMAX recommended accessories should be used with this product.
Recommended accessories for use with your tool are available at extra cost from your local dealer or authorized service center. If you need assistance in locating any accessory, please contact www.blackanddecker.co.uk.
STZIHK2: SFM Inlet Hose, hose adaptor KIT
STZSBSK3: SFM Cleaning KIT (Brush, Squeegee, Soap Bottle)
STZSW1: SFM Short Wand
STZ5N1: SFM 5in1 nozzle
STZB1: SFM Bucket
STZQDW: SFM Quick Detach Wand
Protecting the environment

Separate collection. Products and batteries marked with this symbol must not be disposed of with normal household waste.
Products and batteries contain materials that can be recovered or recycled reducing the demand for raw materials. Please recycle electrical products and batteries according to local provisions.
Technical data
| SFMCPC93 | ||
| Pressure | (BAR) 24 | |
| Water flow | (I/h) 120 | |
| Battery | DC 18V | |
| Inlet Hose 6m | ||
| Pressure of Inlet Water | (BAR) 1.4 - 6.9 | |
| Inlet water | Cold tap0 | |
| Soap Consumption Rate 10% MAX |
| Charger SFMCB | 2 | |
| Input Voltage V | ∞ | 230 |
| Output Voltage V | ∞ | 18 |
| Current A 2 |
| Battery | SFMCB202 | SFMCB204 | SFMCB206 | |
| Voltage | Vcc | 18 | 18 | 18 |
| Capacity | Ah | 2.0 | 4.0 | 6.0 |
| Type | Li-Ion | Li-Ion | Li-Ion |
Emission sound pressure level L_PA:76,0 dB(A) Uncertainty K = 3dB(A)
Measured sound power level L_WA : 86,0 dB(A) Uncertainty K = 2,9dB(A)
The undersigned is responsible for compilation of the technical file and makes this declaration on behalf of STANLEY FATMAX.
Patrick Dippencach
Patrick Diepenbach
General Manager, Benelux
STANLEY FATMAX,
Stanley Fat Max is confident of the quality of its products and offers consumers a 12 month guarantee from the date of purchase. This guarantee is in addition to and in no way prejudices your statutory rights.
The guarantee is valid within the territories of the Member States of the European Union and the European Free Trade Area.
To claim on the guarantee, the claim must be in accordance with Stanley Fat Max Terms and Conditions and you will need to submit proof of purchase to the seller or an authorised repair agent. Terms and conditions of the Stanley Fat Max 1 year guarantee and the location of your nearest authorised repair agent can be obtained on the Internet at www.2helpU.com, or by contacting your local Stanley Fat Max office at the address indicated in this manual.
Please visit our website www.stanley.eu/3 to register your new Stanley Fat Max product and receive updates on new products and special offers.
STZ5N1: SFM 5-in-1-Düse
STZB1: SFM Eimer
General Manager, Benelux
STANLEY FATMAX,
STZSW1: Lance courte SFM
STZ5N1: Buse 5-en-1 SFM
STZB1:Seau SFM
General Manager, Benelux
Black and Decker,
STZ5N1: Testina 5 in 1 SFM
STZB1: Secchio SFM
STZQDW: Lancia a sgancio rapido SFM
Tutela ambientale

General Manager, Benelux
Black and Decker,
STZSW1: SFM Korte Ians
STZ5N1: SFM 5-in-1-spuitmond
STZB1: SFM Emmer
General Manager, Benelux
Black and Decker,
| Charger SFMCB12 | ||
| Input Voltage V | ac | 230 |
| Output Voltage V | cc | 18 |
| Current | A | 2 |
| Battery | SFMCB202 | SFMCB204 | SFMCB206 | |
| Voltage | Voc | 18 | 18 18 | |
| Capacity | Ah | 2.0 | 4.0 | 6.0 |
| Type | Li-Ion | Li-Ion | Li-Ion |
Director General, Benelux
STANLEY FATMAX,
Director-Geral, Benelux
Black and Decker,
General Manager, Benelux
Black and Decker,
STZ5N1: SFM 5-i-1 dyse
STZB1: SFM bøtte
STZQDW1: SFM Hurtigkobelanse
Miljøvern

General Manager, Benelux
STANLEY FATMAX,
STZSW1: SFM Kort stang
STZ5N1: SFM 5-i-1-mundstykke
STZB1: SFM Spand
- Safety instructions
- Using your appliance
- Residual risks.
- After use
- Inspection and repairs
- Additional safety instructions for pressure cleaners
- Safety of others
- Additional safety instructions for batteries and chargers
- Batteries
- Chargers
- Electrical safety
- Labels on appliance
- Features
- Charging a battery
- Charger diagnostics
- Bad battery
- Hot/cold pack delay
- Leaving the battery in the charger
- Important charging notes
- To install battery pack (fig. G)
- To remove battery pack (fig. G)
- Assembly
- Attaching quick connect filter (Fig. A)
- To attach the spray wands, soap bottle or other attachment (Fig. B)
- To attach the garden or suction hose (Fig. C, D)
- To attach garden hose (Fig. C)
- To attach the suction hose (Fig. C, E)
- How to attach 5in1 nozzle to spray wand
- How to use spray wand (Fig. F)
- Proper hand position (Fig. H)
- Pressure cleaning
- Preparing surface for cleaning
- Preparing pressure cleaner unit for use
- Preparing pressure cleaner
- Cleaning a surface
- Shutdown
- ENGLISH
- (Original instructions)
- Maintenance
- Cleaning
- Nozzle
- Soap bottle
- Suction hose
- Suction hose filter (Fig. J)
- Quick connect filter (Fig. K)
- Speed Selector (Fig. M)
- Storage
- Accessories
- Protecting the environment
- Tutela ambientale
- Miljøvern
Brand : STANLEY
Model : FatMax SFMCPC93
Category : Pressure washer