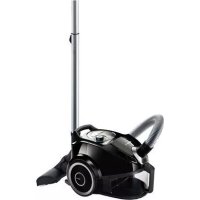
USER MANUAL Runn'n BGS4USITAU BOSCH
Please keep this instruction manual. When passing the vacuum cleaner on to a third party, please also pass on this instruction manual.
Intended use
This appliance is intended for domestic use only. This appliance is intended for use up to a maximum height of 2000 metres above sea level. Only use this vacuum cleaner in accordance with the instructions in this instruction manual.
In order to prevent injuries and damage, the vacuum cleaner must not be used for:
Vacuum-cleaning persons or animals Vacuuming up:
- hazardous, sharp-edged, hot or glowing substances. -damp or liquid substances.
- highly flammable or explosive substances and gases.
- ash, soot from tiled stoves and central heating systems.
- toner dust from printers and copiers.
Spare parts, accessories, dust bags
Our original spare parts, original (special) accessories and original dust bags are designed to work with the features and requirements of our vacuum cleaners. We therefore recommend that you only use our original spare parts, original (special) accessories and original dust bags. This will ensure that your vacuum cleaner has a long service life and that the quality of its cleaning performance will remain consistently high throughout.
Please note:
Using unsuitable or inferior-quality spare parts, (special) accessories and dust bags can damage your vacuum cleaner. Damage caused by the use of such products is not covered by our guarantee.
This vacuum cleaner complies with the recognized rules of technology and the relevant safety regulations.
The appliance may be used by children over the age of 8 years and by persons with reduced physical, sensory, or mental capacity, or by persons with a lack of experience or knowledge, if they are
supervised or have been instructed on the safe use of the appliance and have understood the potential dangers of using the appliance.
Children must never play with the appliance. Cleaning and user maintenance must never be carried out by children without supervision. Plastic bags and films must be kept out of the reach of children before disposal.
Risk of suffocation.
Proper use
Only connect and use the vacuum cleaner in accordance with the specifications on the rating plate. Never vacuum without the dust bag or dust container, motor protection, or exhaust filter.
This may damage the vacuum cleaner.
Always keep the vacuum cleaner away from your head when using nozzles and tubes. This could cause injury! When vacuuming stairs, the appliance must always be positioned below the user. Do not use the power cord or the hose to carry or transport the vacuum cleaner. For safety reasons, if this appliance's mains power cable becomes damaged, it must be replaced by the manufacturer, their after-sales service department, or a similarly qualified person. If using the appliance for longer than 30 minutes, pull out the power cord completely. When disconnecting the appliance from the mains, pull on the plug itself to remove it; do not pull on the power cord. Do not pull the power cord over sharp edges or allow it to become trapped. When the cable is being automatically rewound, ensure that the mains plug is not thrown towards persons, body parts, animals, or objects.
Use the mains plug to guide the power cord.
Pull out the mains plug before carrying out any work on the vacuum cleaner. Do not operate the vacuum cleaner if it is damaged. Unplug the appliance from the mains if a fault is detected. For safety reasons, only authorized after-sales service personnel are permitted to carry out repairs and fit replacement parts to the vacuum cleaner. Protect the vacuum cleaner from the weather, moisture, and sources of heat.
- Do not pour flammable substances or substances containing alcohol onto the filters (dust bag, motor protection filter, exhaust filter, etc.). The vacuum cleaner is not suitable for use on construction sites.
Vacuuming up building rubble could damage the appliance.
- When not in use, switch off the appliance and pull out the mains plug. At the end of its life, the appliance should immediately be rendered unusable, then disposed of in an appropriate manner.
Please note
The mains socket must be protected by at least a 16 amp circuit breaker.
If a circuit breaker is tripped when you switch on the vacuum cleaner, this may be because other electrical appliances which have a high current draw are connected to the same power circuit.
To prevent the circuit breaker from tripping, select the lowest power setting before switching the appliance on, and increase the power only once it is running.
■ Packaging
The packaging is designed to protect the vacuum cleaner from being damaged during transportation. It is made of environmentally friendly materials and can therefore be recycled. Dispose of packaging that is no longer required at an appropriate recycling point.
Old appliance
Old appliances still contain many valuable materials. Therefore, please take appliances that have reached the end of their service life to your retailer or recycling centre so that they can be recycled. For current disposal methods, please enquire at a retailer or your local council.
Disposal of filters and dust bags
Filters and dust bags are manufactured from environmentally friendly materials. Provided they do not contain substances that are not permitted in household waste, you can dispose of them with your normal household waste.
Notes on the energy label
This vacuum cleaner is a general purpose vacuum cleaner with a primary hose.
To achieve the declared energy efficiency and cleaning performance class on carpet and hard floor, please use the interchangeable universal nozzle.
These calculations are based on the Commission Delegated Regulation (EU) No. 665/2013 of 3rd May 2013 supplementing Directive 2010/30/EU.
Unless otherwise stated, all the procedures referred to in these instructions were carried out in accordance with the EN 60312-1:2017* standard.
*As the motor service test is carried out with the dust collector empty, the stated motor service life must be increased by 10% for tests with the dust collector half filled.
=TyHwblfy kayni 6ap!
Tnicti peTTe naJaIaIHy
I WaaHcOpfbIbITbI TEK 3aybITbIK TaKTaIIwA 6oBbIHwa KocbiN icKe KocbIHbI3. Eukaan Hau Ka6bHemece KOHTeHepici3 MOTopbl Kopray hemece ypney cy3ricn WaHCOPMaHbI. = Kip kYfbl MaunHa 6y3bnIn KeTy i MymkH! Ewkaan 6acbl andbihda fopcyHka MeH K6bipdla waHCOPMaHb3. = Kapakat any kayni 6ap!
Catbnapda WauHcopFaHda Kypblnbfbl epaBIM naDanaHysbI actbIHda Tpybi KepeK. ■Xenire kocy kaBeni MeH WnHaHTbI WaHcOpfbIbTbI Tacy / TaBImaanday yuHn naDanaH6aHbI3. Ocb 6yBIMhHn Keni KaBeni 6y3bInbN 3aKbIMdaHFaH Kynde 6oJCa, KayinTePdiN nauDa 6OyHyBn 6oJbIpMaY uHIN OHbIH WbIFapyUH HEmeCE TexHKaJIbIK KbI3MeT KepceTy opTaNbIFbHbH MaMaHbI apKbInbI, HEmeCE OcbInapra YKcac apHaBbI 6inimi 6ap aam TapabHaH aybICtbIPbInyKaKeT.
Kymbic aici 30 MmHyTTaH y3ak 6oJca, xeJIre Kocy Ka6eJIH TOIbIFbIMEH TapTbIN anbIHbI3.
Kocy ka6eJIHe emec, po3eTKaJaH TaPbIn KypblfblHbI XeJIeH aXbIpaTbHbI3. Keire Kocy Ka6enin etKip KbIpnapaH TapTnHa3 XHe 6acbn KOImMaHb3. Xeni aascbi Ka6eIb aBOMaTTb TaTbIMaca aamap, DeHe Mywenepi, XaYaNap Hemece 3aTTap MeHen TaTbJbn KetneyiHe Ke3 KekTi3iHj3.
> = Kenire kocy ka6ejin awa Kemerimeh anapbHb3.
WahcopfbwTa eTki3iNetiH KymbIcTapdbH 6apnbfbH eTki3y aNbIH H JeJI aNbIPbH WbIFapbIN aNbHbI3. 3aKbIMdaIanFaH WaHCOPfblWtB icke KocnaHbI3. AkaynbI KaJa 6oJca aHaHbTaptbIn KOJIbHbI3. KayinTepin anbH any yuH uHaCOPfBHTeK eKInetri Kbl3MeT Kepcety opTaIbIfba fHa XeHdeyi Hemece 6enweKeTepi aybCTbpybi Kepek.
UHaHcOpfblWbI aya paBb ecepHeH, bINFaJIdbIKTaH XaHE KByJy Ke3depeiHeKopFaHbI3. KHaHbIH HeMece KypambHda ankoRb6ap 3aTKeTpdi cy3ire naDanaan6aHb3 (wah Ka6bl, MOTopdb KoPray cy3rci, ypney cy3rici T.6.). HcopfblTb KypblntbTa naaHaMyMkiH emc. ⇒ Kypblbc KOkltapBH copy Kypblfbl 3aKbIMdaHybHa aJbIn KeIyIMKHI. Erep uahcopmacaHb3 ToHa3blKbIUtbl eipin auaHb1 po3eTKadaH bIrapbHb3. Eckipren Kypblfblapbl naanahbIn 60JmaTbH Kblhbl3, COcbIH KypblfblbI Tnicti peTTe KeDere XapaTyfa anapblbl3.
Eckepihi3
Kei po3eKacbHa kemHne 16A caKaTHdbIpfbIbI bOybl Tnic.
ErepcaKtahdbipbIkwpbInfbKocblfHaiaCTenKaCa, OHda6yn6aca3neKtp Kpyblfbnap da 6ipden TK XeicHeXorapblKocymHImehKocblfHa c6e6iHeh 6onyblMymkIH.
CaKaTaHDbIpFbIw icTeN KaNyBIn KpypbIJIbHbI KocyaHa aAnDbH eH TMeHri BaCKbIiKa peTten CoCbIH fHaJ XorapbIpaK Kyat BaCKbIiBHa etIH3.
Kedere kapaTy 6oBbIHwa HycKaynap
Opama
This appliance can be used by children aged from 8 years and above and persons with reduced physical, sensory or mental capabilities or lack of experience and knowledge if they have been given supervision or instruction concerning use of the appliance in a safe way and understand the hazards involved. Children shall not play with the appliance. Cleaning and user maintenance shall not be made by children without supervision.
Disposal
Dispose of the appliance in accordance with local regulations. For disposal, hand over the appliance to an authorized collection point or recycling center. Contact your local waste management authority or retailer for information on proper disposal.
Water and filter maintenance
The appliance contains water and filter materials. If the water tank is empty, the appliance may be operated without water.
Energy efficiency information
This appliance is a wet and dry vacuum cleaner.
This appliance is a household vacuum cleaner.
Do not use the appliance to vacuum up flammable or combustible liquids or gases.
This product is based on the Ecodesign Regulation (EU) No. 665/2013 of 3 May 2013 supplementing Directive 2010/30/EU. This declaration is based on the standard DIN EN 60312-1:2017*.
*If the motor power is measured according to the standard, the measured value may be up to 10% higher than the value indicated on the rating plate.
Please keep the instruction manual for future reference.
Spare parts, accessories, and dust bags
Our original spare parts and accessories, as well as original filter bags and dust bags, are optimally matched to the properties and requirements of our vacuum cleaners. Therefore, we recommend using exclusively original spare parts and accessories, as well as original filter bags and dust bags. Only in this way can a long service life be ensured and a high cleaning result with your vacuum cleaner be guaranteed.
Instruction:
Using non-original spare parts, accessories, or bags may damage the vacuum cleaner. Our warranty does not cover damage caused by the use of such parts.
Safety Instructions
This vacuum cleaner complies with recognized technical standards and safety regulations.
Use of the vacuum cleaner by children over 8 years of age or by persons with reduced physical, sensory, or mental capabilities, or lack of experience and knowledge, is only permitted under supervision or after they have been instructed in the safe use of the appliance and understand the hazards involved. Children must not play with the appliance. Cleaning and user maintenance must not be performed by children without supervision. Keep plastic bags and plastic wrap out of reach of children. Danger of suffocation!
Proper Use
Connection to the power supply: The vacuum cleaner should only be connected according to the data on the rating plate. Never use the vacuum cleaner without the dust bag or container, motor protection filter, or exhaust filter.
The vacuum cleaner may be damaged!
Do not point the suction hose or tube at your head.
This may cause injury! When cleaning stairs, the vacuum cleaner must always be placed below the user. Do not use the power cord or hose for carrying or transporting the vacuum cleaner. To avoid danger, replacement of a damaged power cord must only be carried out by the manufacturer, its authorized service center, or a similarly qualified person. If the vacuum cleaner is used for more than 30 minutes, the power cord must be fully extended. When disconnecting from the power supply, always pull the plug, not the cord. Ensure that the power cord is not pinched or caught on sharp edges. Before automatic cord rewind, make sure the plug does not hit people, animals, or objects.
Disconnect the power cord from the power supply by pulling the plug.
Do not use a defective vacuum cleaner. If a malfunction occurs, remove the plug from the socket. To avoid danger, all repair and replacement work on the vacuum cleaner must be carried out only by an authorized service center.
Protect the vacuum cleaner from weather, moisture, and heat sources.
Do not expose filters (dust bag, motor protection filter, exhaust filter, etc.) to flammable or alcohol-containing substances. The vacuum cleaner is not intended for use on construction sites.
When vacuuming construction debris, the vacuum cleaner may be damaged.
After the end of operation, turn off the device and unplug the power cord. Maintenance of the device should be carried out in accordance with the operating instructions, and then dispose of it in accordance with applicable regulations.
Attention:
The mains socket must be protected by a fuse of at least 16 A.
When the device is turned on, the fuse may trip immediately if other devices with high total power consumption are connected to the same electrical circuit at the same time.
Tripping of the fuse can be prevented by setting the minimum power before turning on the device, and then gradually increasing it.
Disposal instructions
Packaging
The packaging protects the vacuum cleaner from damage during transport. It is made of environmentally friendly materials, so it can be used for secondary processing. Used packaging material should be taken to collection points for recycling.
Used devices
Used devices are hazardous waste and are not intended for further use. Therefore, the used device should be taken to a collection point for recycling for further disposal. Information on disposal options is available from the dealer or local administration.
Disposal of filters and dust bags
Filters and dust bags are made of environmentally safe materials. If they do not contain any substances prohibited from disposal with household waste, you can dispose of them together with household waste.
.*1:2017-EN 60312
.10 1
Therefore, the common length is 9/x.
13
e
y
(a + b)(a^2 - ab + b^2) = a^3 + b^3
(1) \ n + ( 1 - x) n - xn\ ⇔ xn = xn + x
Congratulations on your purchase of the Bosch Runn` vacuum cleaner.
This instruction manual describes various Runn'n models, meaning that some of the equipment features and functions described may not be available on your model. You should only use original Bosch accessories, which have been specially developed for your vacuum cleaner, in order to achieve the best possible vacuuming results.
Please keep this instruction manual for future reference. When passing the vacuum cleaner on to a third party, also pass on this instruction manual.
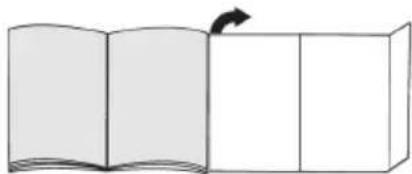
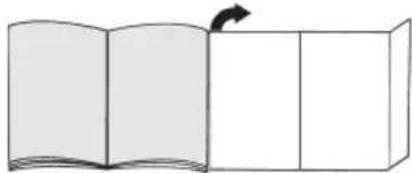
Fold out the picture pages.
Your vacuum cleaner
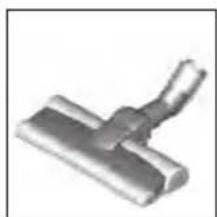
1 Adjustable floor tool (For the same functions, the appearance of the nozzle may differ from the picture) 2 Telescopic tube with sliding switch but without accessory connection 3 Telescopic tube with adjusting sleeve and accessory connection 4 Flexible hose 5 Handle 6 Foam filter 7 Parking aid on the back of the appliance 8 Exhaust filter lid 9 Power cord 10 Appliance lid 11 Foam filter lid 12 Carrying handle 13 On/off button with electronic suction regulator 14 Filter control display (Sensor Control) 15 Dust container with carrying handle 16 Storage aid on the underside of the appliance 17 Fluff filter cover 18 Multi-purpose nozzle 19 Accessories holder for multi-purpose nozzle 20 Professional upholstery nozzle 21 Professional crevice nozzle 22Upholstery nozzle 23 Accessories holder 24 Crevice nozzle 25 Brush ring (for fitting on the upholstery nozzle)*
26 Drill dust nozzle* 27 Hard furnishings brush 28 Hard-floor nozzle* 29 Hard-floor nozzle
Replacement parts and special accessories
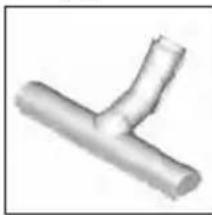
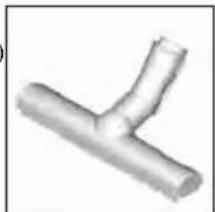
A Hard-floor nozzle BBZ123HD
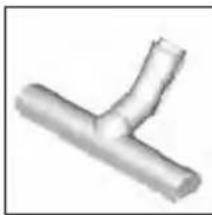
For vacuuming hard floors (parquet, tiles, terracotta, etc.)
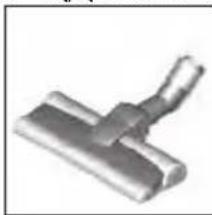
B Hard-floor nozzle BBZ124HD
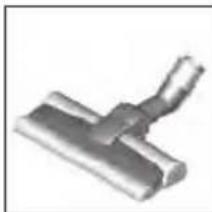
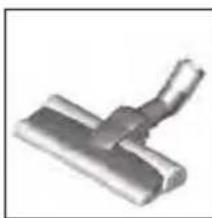
With 2 rotating brush rollers For caring for expensive hard floors and for the improved collection of coarse dirt.
Before using your appliance for the first time
Fig. 1
- Push the handle onto the flexible hose and lock it in place.
Initial use
Fig. 2
- Push the flexible hose adapter into the air intake opening on the appliance and lock it in place. You will hear an audible 'click'.
Fig. 3*
a) Telescopic tube without accessory connection: Push the handle into the telescopic tube. b) Telescopic tube with accessory connection: Push the handle into the telescopic tube until it locks into place.
Fig. 4*
a) Nozzle without accessory connection:
Push the telescopic tube into the connecting piece of the floor nozzle.
b) Nozzle with accessory connection:
Push the telescopic tube into the connecting piece of the floor nozzle until it locks in place.
Fig. 5*
- Unlock the telescopic tube by moving the sliding switch or adjusting sleeve in the direction of the arrow, and adjust it to the desired length. The slide resistance on carpet is at its lowest when the telescopic tube has been completely pulled out.
Fig. 6*
a) Place the accessories holder in the required position on the telescopic tube. b) Use some pressure to insert the upholstery nozzle with brush ring and the crevice nozzle into the accessories holder from above or below.
Fig. 7*
- Attach the accessories holder to the multi-purpose nozzle and clip it onto the suction pipe/telescopic tube.
Fig. 8
Holding the power cord by the plug, pull it out to the required length and insert the plug into the mains socket.
Fig. 9
To switch the vacuum cleaner on or off, press the ON/OFF button.
Controlling the suction level
Fig. 10
Turn the control knob to infinitely adjust the suction level to the level required.

Low power range
For vacuuming delicate materials, e.g. delicate upholstery, curtains, etc.

Medium power range: For daily vacuuming of lightly soiled floors. High power range: For vacuuming durable floor coverings, hard floors and heavily soiled surfaces.
Vacuuming
Caution
- Floor nozzles are subject to a certain amount of wear, depending on the type of hard floors you have (e.g. rough, rustic tiles). You must therefore check the underside of the floor nozzle at regular intervals. Worn undersides of floor nozzles may have sharp edges that can damage sensitive hard floors, such as parquet or linoleum. The manufacturer does not accept any responsibility for damage caused by worn floor nozzles.
Fig. 11
Set the adjustable floor nozzle:
Rugs and carpets:

Hard floors/parquet:

If you are vacuuming up relatively large particles, make sure that you vacuum them up successively and carefully to ensure that the vacuum channel of the floor nozzle does not become blocked.
If necessary, you should raise the nozzle in order to better vacuum up the dirt particles.
Vacuuming with accessories
Attach the nozzles to the suction pipe or handle as required:
a) Crevice nozzle for vacuuming crevices and corners, etc. b) Upholstery nozzle for vacuuming upholstered furniture, curtains, etc. c) Upholstery nozzle with fixed brush ring for vacuuming window frames, cupboards, profiles, etc.
After use, reinsert the crevice nozzle and upholstery needle into the accessories holder.
d) Professional crevice nozzle
Extra-long crevice nozzle for cleaning crevices, corners and narrow spaces, e.g. in a car.
e) Professional upholstery nozzle
For gently and thoroughly cleaning upholstered furniture, curtains, etc.
For cleaning the professional upholstery nozzle, simply vacuum it using the handle.
f) Hard furnishings brush For cleaning window frames, cabinets, mouldings, etc. g) Hard-floor nozzle for vacuuming hard floor coverings (tiles, parquet flooring, etc.)
Cleaning the hard-floor nozzle
a) Vacuum the nozzle from below to clean it. b) Use scissors to cut through threads and hairs wound round the rollers and then vacuum them away.
Drill dust nozzle
- Fasten the drill dust nozzle onto the handle and position it on the wall so that the drill hole opening on the nozzle is placed directly over where the hole is to be drilled.
- Set the appliance to the lowest power level and then switch it on. The drill dust nozzle is held in the required position by suction. Depending on the condition of the wall to be drilled, you may need to adjust to a higher power setting to ensure that the drill dust nozzle remains in place.
During drilling, the fine dust is automatically vacuumed up.
Fig. 15
You can use the parking aid on the back of the vacuum cleaner if you want to stop vacuuming for a short time.
After switching off the appliance, slide the hook on the floor nozzle into the parking aid.
Fig. 16
When vacuuming stairs, the appliance must be positioned at the bottom of the stairs. If it does not reach far enough, the appliance can also be carried using the carrying handle or the handle on the dust container.
After vacuuming
Fig. 17
Switch off the appliance. Remove the main plug. Briefly pull on the power cord and then let go. (The power cord retracts automatically.)
Fig. 18*
Unlock the telescopic tube by moving the sliding switch in the direction of the arrow, and slide one tube into the other.
Fig. 19
To store the appliance, use the storage aid on the underside.
a) Prop up the appliance with the hose or dust container handle. b) Slide the hook on the floor nozzle into the storage aid.
Disassembly
Fig. 20
To remove the flexible hose, press the two catches together and pull out the hose from the appliance's suction opening.
Fig. 21*
a) Telescopic tube without accessory connection: To release the connection, turn the handle slightly and pull it out of the telescopic tool. b) Telescopic tube with accessory connection: To release the connection, press the locking collar on the telescopic tube and pull out the handle.
Fig. 22*
a) Nozzle without accessory connection: To release the connection, turn the telescopic tube slightly and pull it out of the floor nozzle. b) Nozzle with accessory connection: To release the connection, press the locking collar and pull the telescopic tube out of the floor nozzle.
Cleaning and care
Emptying the dust container
Fig. 23
In order to achieve the best possible vacuuming results, the dust container should be emptied after every use or, at the latest, when dust in the dust container has reached the marking at any point.
Caution
- The dust container can only be removed when the appliance is in a horizontal position. Therefore, place the appliance on the floor to unlock the release button.
Fig. 24
a) Press the release button and pull the dust container out of the appliance using the handle. b) Remove the lid from the dust container and empty the dust container. c) Put the lid back on the dust container. d) Remove any dirt which may have been lodged underneath the container ejector opening. e) Insert the dust container in the appliance, so that it clicks audibly into place.
Maintaining the dust separation system
Your appliance is equipped with a Sensor Control indicator. This function constantly monitors whether your vacuum cleaner is working at its optimum power level.
Fig. 25
In normal operation
Fig. 25
The indicator (blue ring) flashes red when the foam filter needs to be cleaned. The appliance is automatically adjusted to the lowest power level.
Cleaning the foam filter
Switch off the appliance.
Fig. 26
a) Open the lid of the foam filter by pulling on the locking lever. b) Remove the filter cartridge with foam filter using the tab. Remove the foam filter from the filter cartridge and tap out both parts. c) If they are very dirty, the foam filter and filter cartridge should be cleaned under running water.
Alternatively, the unit can be cleaned in the washing machine at max. 30°C using a gentle programme and the lowest spin speed.
TIP: To protect other laundry items, put the filter unit into a laundry bag.
d) Allow the foam filter and filter cartridge to dry completely (at least 24 hours) and then reinsert the foam filter into the filter cartridge. e) Insert the filter cartridge with foam filter back into the appliance. Close the lid of the foam filter.
Caution
The lid will only close if a filter has been inserted.
In the event of a fault
The Sensor Control indicator also flashes after the foam filter has been cleaned:
Removing a blockage from the dust separation unit
Fig. 27
Switch off the appliance.
a) Hold the appliance lid by the recessed handle and open it. b) Unlock the cover by turning it anti-clockwise, and remove it from the appliance.
Remove the blockage from the collecting unit.
c) Put the cover back on and lock it in place by turning it clockwise. Close the appliance lid.
If the Sensor Control indicator continues to flash red, check whether the nozzle, suction pipe or flexible hose are blocked. This can also trigger the Sensor Control indicator.
Exhaust filter care
Depending on the model, your appliance is equipped with either a (H)EPA filter (Fig. 28) or a micro filter (Fig. 29).
Depending on the model, your appliance has additional sound insulation behind the (H)EPA or micro filter. This does not have to be cleaned.
(H)EPA filter
Cleaning a washable (H)EPA filter
The (H)EPA filter with the "washable" imprint is designed so that it does not need to be replaced, provided the appliance is used as intended in the household.
To ensure that the vacuum cleaner is working at its optimum power level, the exhaust filter should be rinsed out after one year. The filtering action of the filter remains intact, even if the filter surface becomes discoloured.
Fig. 28*
a) Open the lid of the exhaust filter by pushing and pulling on the locking tab. b) Unlock the (H)EPA filter and remove it from the appliance. c) Tap out the filter unit and rinse it under running water.
Alternatively, the unit can be cleaned in a washing machine at max. 30°C using a gentle programme and the lowest spin speed.
TIP: To protect other laundry items, put the filter unit into a laundry bag.
d) Once the (H)EPA filter has dried completely (at least 24 hours), insert it back into the appliance and lock it in place.
>= Close the exhaust filter lid. In doing so, push the lock bar upwards until it audibly clicks into place.
Micro filter
Cleaning the micro filter
The micro filter is designed so that it does not need to be replaced, provided the appliance is used as intended in the household.
To ensure that the vacuum cleaner is working at its optimum power level, the exhaust filter should be rinsed out after one year. The filtering action of the filter remains intact, even if the filter surface becomes discoloured.
Fig. 29*
a) Open the lid of the exhaust filter by pushing and pulling on the locking tab. b) Pull the locking tab to unlock the filter unit with foam filter and microfilter and remove it from the appliance. c) Remove the foam filter and microfilter from the filter frame. d) Rinse the foam filter and micro filter under running water. Alternatively, they can be cleaned in the washing machine at max. 30°C using a gentle programme and the lowest spin speed.
TIP: To protect other laundry items, put the unit into a laundry bag.
e) Once the foam filter and microfilter have dried completely (at least 24 hours), insert them back into the filter frame. f) Insert the filter unit in the appliance and ensure that the locking tabs audibly click into place. g) Close the exhaust filter lid. In doing so, push the lock bar upwards until it audibly clicks into place.
Cleaning instructions
Always switch off the vacuum cleaner and disconnect the power cord from the mains before cleaning the vacuum cleaner. The vacuum cleaner and plastic accessories can be cleaned with an ordinary plastic cleaner.
Caution:
- Do not use abrasive materials, glass-cleaning agents or all-purpose cleaning products. Never immerse the vacuum cleaner in water.
Subject to technical modifications.
d) Professional crevice nozzle
Introduction to the technical specifications.
27. Accessories: 28. Carpet and floor nozzle* 29. Carpet and floor nozzle*
Brushes for upholstery and crevices
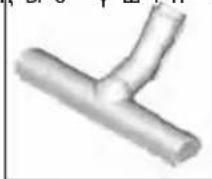
A. Carpet and floor nozzle BBZ123HD
Low-pile carpet nozzle (parquet, tiles, terracotta, ...)
B. Carpet and floor nozzle BBZ124HD
Install the batteries in the battery compartment according to the polarity markings.
Battery installation
Figure 1
Insert the plug into the socket.
Starting the device
Figure 2
Insert the plug into the socket and turn on the power switch.
Figure 3*
a) Without the telescopic tube: insert the plug into the telescopic tube. b) With the telescopic tube: insert the plug into the telescopic tube.
Figure 4*
a) Without the nozzle: insert the telescopic tube into the nozzle. b) With the nozzle: insert the telescopic tube into the nozzle.
Figure 5*
If the telescopic tube is not long enough, extend it by pulling it out. The telescopic tube can only be extended to its maximum length.
Figure 6*
a) Insert the required accessory into the telescopic tube. b) Insert the nozzle into the accessory or press it firmly.
Cyper 7
K e p e k - x a p a K T a p
CONNORA caIbIn copy/TeNECKoNTbIK Ky6bipnfa KbcBihb3.
Cyper 8
Keire Kocy Ka6eHIN = aBbPbHaH YcTAN KepeKTI y3bHDbkkA wBfapbIn XeJI aBbPbH CanbHbI3.
Cyper 9
-山HaC0pFbIuTbKocy/eWippy nepheciH 6acbin KocbiHb3 Hemece eWipiH3.
Copy kyyiH peTey
Cyper 10
Pettey Tymecin 6ypan Kepekti copy KywiH 6acn peTey MymKiH.

TeMeH KyaT aMafbl
= CeimTan MaTePnAnDapDbI copy yuH, MbicabI, =He3ik nepdeJepdi, KanTaybUHTapDbI T.6.
Opta KyaT aMmaftbI
A3 nactaHfah Ke3de KHy caibH Ta3anay yuH.
Kofapbl Kyat aMaFbl
For cleaning the layers, the layers and the parts of the layers.

Copy
Be careful
The salt solution is used to clean the surface of the product (soap, soap powder, various detergents). For this, the salt solution must be heated. After heating, the salt solution can be used to clean the surface of the product. The heated salt solution can be used for cleaning with a brush or sponge.
Figure 11
To rinse the salt solution:
■ Rinse with clean water
Layers/package →


If you rinse with more water, then they will be rinsed together and then rinsed again, and the salt solution will be completely removed.
If necessary, the salt solution may need to be heated for better rinsing.
Rinse with a jet of water
Figure 12
If necessary, the salt solution can be poured into a container or a bucket:
a) for rinsing the salt solution from the surface of the product, i.e.
b) for rinsing the salt solution from the surface of the product, from the surface of the product, etc.
c) The connection is made through the holes, gaskets, profiles, etc. of the cover. The cover connection and the catalog connection are required for the layout of the parts.
d) The cover connection parts, gaskets, and intermediate elements, such as screws, machines, etc., are used for the cover connection. e) The catalog connection is used for the catalog's covers, bindings, etc., and for their layout. The catalog connection and its components are described. For the layout of frames, gaskets, profiles, etc. g) For the layout of the cover and its components, the cover connection (plates, parquet, etc.)
Layout of the cover connection
Figure 13*
a) For layout, the connection is used for the cover. b) The gasket and the cover are cut to size and the connection is removed.
Gasket connection
Figure 14*
The gasket connection is placed on the cover by gluing the gasket to the upper surface of the cover.
The cover is placed on the tool holder and the connection is cut.
The gasket connection is stored in the required place. For the gasket connection, the cover is cut to size and the gasket is glued to the cover.
During gasket cutting, the cover and the automatic cover are cut.
Figure 15
It is possible to cut the cover by using the short cut method.
After the cover is cut, the cover connection is cut with the short cut method.
Figure 16
The lamp is equipped with a built-in switch. If the switch is faulty, it is possible to replace it by removing the lamp cover.
End of operation
Figure 17
Check the lamps. Check the sockets. Replace the cable if it is too short. (Cable for automatic machines).
Figure 18
If the telescopic tube is not extended, pull it out one by one until it is fully extended.
Figure 19
To install the lamp, insert it into the socket and turn it clockwise.
a) Insert the lamp into the socket or into the container. b) Turn it clockwise until it locks.
Voltage
Figure 20
To remove the lamp, pull it out of the socket by turning it counterclockwise.
Figure 21*
a) With the telescopic tube not extended: to adjust the height, pull the telescopic tube out. b) With the telescopic tube extended: to adjust the height, push the telescopic tube in.
Figure 22
a) Before starting work: Check the integrity of the cable for damage before connecting it to the power source. b) Before starting work: Check the integrity of the cable before connecting it to the power source.
Disassembly and assembly
Removing the shaft
Figure 23
To remove the shaft, it is necessary to disconnect the shaft from the coupling, and then, if necessary, remove the shaft from the bearing housing.
Attention
The shaft must be removed horizontally. Do not tilt the shaft during removal.
Figure 24
a) Remove the shaft by pulling it out of the coupling. b) Remove the shaft from the bearing housing. c) Remove the bearing housing. d) Remove any remaining parts from the housing. e) Place the shaft on a clean surface.
Do not use the shaft as a lever
The shaft is equipped with a "Sensor Control" (sensor control) cable. This function allows the sensor to be controlled remotely. Figure 25
Cleaning the housing
Figure 25
If cleaning is necessary, use a soft cloth. The housing should be cleaned with a mild detergent.
Cleaning the housing
Remove the plug from the socket.
Figure 26
a) Remove the plug from the socket. b) Remove the plug from the socket by turning it counterclockwise. c) Take the plug and insert it into the two slots. d) At the bottom of the housing, there is a drain hole for the water that collects when the plug is removed. This block can be cleaned with a maximum of 30°C warm water and, if necessary, with a mild detergent.
NOTE: To prevent the remaining water from freezing, drain the water completely.
e) Remove the plug and the water collection tray. After 24 hours, pour the collected water into the plug tray. f) Connect the water collection tray to the plug. Remove the plug.
Be careful not to spill.
Only use the plug with the tray attached.
In the event of a malfunction
Sensor for detecting water level
Cleaning instructions:
Remove the parts to be cleaned from the device.
Figure 27
Remove the plug.
a) Remove the plug from the socket. b) Turn the cap counterclockwise. =Remove the parts to be cleaned from the device. c) Remove the cap and clean it with warm water. =Remove the plug.
If the water level sensor is activated, the red indicator light will illuminate. This sensor can be removed for cleaning.
The water filter should be cleaned after every 28 days of use, or after every 30 days of microfilter use. After cleaning the water filter with water or with a microfilter, it is necessary to dry it - it should not be left wet.
Water filter
Cleaning the water filter
The water filter contains silver particles that provide antibacterial protection.
To optimize the operation of the device, it is necessary to clean the water filter regularly. The cleaning effect of the filter is preserved even after repeated use.
Figure 28*
a) Remove the water filter by pressing the locking button. b) Rinse the water filter under running water. c) Clean the filter block with a soft brush under running water. Do not use any cleaning agents for this block. It can be cleaned at temperatures up to 30°C and with the lowest possible water pressure.
NOTE: To protect the remaining parts of the filter block, do not use cleaning agents.
d) After completely drying the water filter (at least 24 hours), reinsert it into the device.
> = Replace the water filter. Then run the replacement procedure.
Microfilter
Cleaning the microfilter
The microfilter contains silver particles that provide antibacterial protection.
To optimize the operation of the device, it is necessary to clean the microfilter regularly. The cleaning effect of the filter is preserved even after repeated use.
Cyper 29*
a) Remove the water tank and empty it. b) Remove the water tank and the microswitch from the water tank connector. c) Remove the water tank and the microswitch from the water tank connector. d) Remove the water tank and the microswitch from the water tank connector. They should be cleaned with a soft cloth. Do not use abrasive cleaners. At 30°C, the water tank can be washed with water. NOTE: To protect the remaining parts, wash the water tank separately. e) Remove the water tank and the microswitch from the water tank connector. f) Place the water tank in the water tank connector and remove the water tank connector. g) Remove the water tank. Then use a soft cloth to clean it.
Cleaning and maintenance
After each use, the water tank should be emptied and rinsed with clean water. The water tank and plastic parts can be cleaned with standard plastic cleaners.
Caution:
Do not use abrasive cleaners, brushes, or sharp objects. Do not immerse the water tank in water.
The water tank and the water tank connector have electrical contacts.
zh
A nozzle for hard floor coverings BBZ123HD
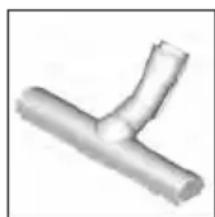
For cleaning smooth floors (parquet, tile, or ceramic tile, etc.)
A nozzle for hard floor coverings BBZ124HD
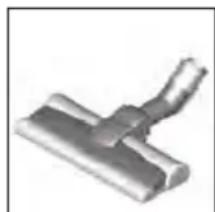
With rotating brushes for caring for hard floor coverings, optimal for cleaning.
Before first use
Fig.1 Attach the handle to the appliance and lock it.
Preparation for work
Fig. 2 Insert the hose into the suction opening of the vacuum cleaner so that it is fixed with the locking ring. Fig. 3 a) Telescope tube without adapter for accessories: Insert the handle into the telescope tube. b) Telescope tube with adapter for accessories: Insert the handle into the telescope tube until it clicks into place. Fig. 4* a) Nozzle without adapter for accessories: Insert the telescope tube into the nozzle for floor/carpet cleaning. b) Nozzle with adapter for accessories: Insert the telescope tube into the nozzle for floor/carpet cleaning until it clicks into place.
Fig. 5*
On the locking ring or coupling ring, in the direction of the arrow, unlock the telescope tube and set the required length. The resistance to movement over the floor covering is minimal when the telescope tube is fully extended.
Fig. 6*
a) Install the holder for accessories on the telescope tube in the lower position. b) Insert the nozzle for upholstery/crevice with the crevice nozzle by pressing from top to bottom into the holder for accessories.
Fig. 7*
Insert the combination nozzle into the holder and fix it on the suction/telescope tube.
Fig. 8
Hold the plug of the power cord, pull the cord to the required length, and insert the plug into the socket.
Fig. 9
Switching the vacuum cleaner on/off is done by pressing the switch.
Power adjustment
Fig. 10
The maximum power is set smoothly by the regulator.
Minimum power
For cleaning delicate materials such as, for example, soft upholstery and curtains. Medium power for cleaning with light soiling. Maximum power for cleaning durable and hard floor coverings with heavy soiling.
cleaning
attention
The nozzle for cleaning floors/carpets is subject to wear depending on the quality of the hard floor covering in your home (e.g., rough ceramic tile). Therefore, it is necessary to regularly check the working surface of the nozzle. Worn working surfaces with sharpened edges can damage delicate hard floor coverings such as parquet or laminate. The manufacturer is not liable for possible damage caused by worn nozzles.
Fig. 11
Adjusting the brush strip on the nozzle for floors/carpets:
For carpets and carpet coverings =>

For hard floor coverings and parquet =>

If you need to vacuum up a larger amount of dust, make sure that it is sucked up only once at a time so that the nozzle channel does not become clogged.
If necessary, tilt the nozzle so that dirt particles are better sucked up by the vacuum cleaner.
Cleaning with additional accessories
Fig. 12*
Attaching the nozzle to the handle or tube:
a) Crevice nozzle for cleaning crevices, corners, etc. b) Nozzle for soft furniture for cleaning soft furniture, curtains, etc. c) Nozzle for soft furniture with a brush insert for cleaning window frames, cabinets, profiles, etc.
After cleaning, insert the crevice nozzle and the nozzle for soft furniture into the accessory holder.
d) Upholstery nozzle
Special long nozzle for cleaning upholstery, corners and narrow gaps (e.g., in a car, etc.).
e) Nozzle for soft furniture Profi
For thorough cleaning of soft furniture, etc.
To clean the nozzle for soft furniture Profi, simply rinse it under running water.
f) Brush for upholstered furniture
For cleaning upholstered furniture, cabinets, profiles, etc.
g) Nozzle for hard floors (laminate, parquet, etc.)
Cleaning the nozzle for hard floors
Fig. 13*
a) Clean the nozzles under running water. b) Cut off tangled threads and hairs with scissors and collect them with a vacuum cleaner.
Nozzle for removing drill dust
Fig. 14*
Attach the nozzle for removing drill dust to the handle and position it relative to the wall so that the nozzle opening is directly above the hole being drilled.
Set the vacuum cleaner to a low power level, then switch it on.
The drill dust will be collected in the required position by the vacuum cleaner. It may be necessary to increase the power depending on the wall material in which the hole is being drilled, to ensure reliable dust removal with the nozzle.
When drilling, fine dust will be removed automatically.
Fig. 15
During short breaks in the cleaning process, use the parking bracket for the tube on the rear side of the device.
After switching off the vacuum cleaner, insert the nozzle protrusion for floor/carpet cleaning into the parking bracket for the tube.
Fig. 16
When cleaning stairs, the vacuum cleaner should always be at the bottom, at the base of the stairs. If this is not sufficient, the vacuum cleaner can be carried by the handle on the vacuum cleaner itself or on the dust container.
After cleaning
Fig. 17
Switch off the device. Remove the plug from the socket. Slightly pull the cable by the cord (the cable automatically rewinds).
Fig. 18*
Press the slide button in the direction indicated by the arrow, unlock the tube and fold it.
Fig. 19
For storage, the vacuum cleaner can be hung using the hanging brackets located on the bottom.
a) Lift the vacuum cleaner vertically by the handle of the dust container. b) Insert the nozzle protrusion for floor/carpet cleaning into the parking bracket for the tube.
To disconnect the suction hose, simultaneously press both locks and pull the hose out of the suction opening of the vacuum cleaner.
Fig. 21*
a) Telescopic tube without attachment for accessories: To unlock the connection, slightly turn the hose handle and pull it out of the telescopic tube. b) Telescopic tube with attachment for accessories: To unlock the connection, press the unlocking sleeve on the telescopic tube and pull out the hose handle.
Fig. 22*
a) Nozzle without attachment for accessories: To unlock the connection, slightly turn the telescopic tube and pull it out of the nozzle for floor/carpet. b) Nozzle with attachment for accessories: To unlock the connection, press the unlocking sleeve and pull the telescopic tube out of the nozzle for floor/carpet.
Maintenance instructions
Emptying the dust container
Fig. 23
To achieve good results, empty the dust container after each cleaning, at the latest when the dust level in the container reaches the special marking.
Attention
The dust container can only be removed when the vacuum cleaner is in a horizontal position. Therefore, place the vacuum cleaner on the floor to unlock the locking button.
Fig. 24
a) Press the locking button and pull the dust container out of the vacuum cleaner by the handle. b) Remove the lid of the dust container and empty the container. c) Put the lid back on the container. d) If necessary, remove dirt that has accumulated at the outlet opening. e) Insert the container into the vacuum cleaner and lock it until it clicks.
Figure 3 shows the control system.
Your vacuum cleaner is equipped with a «Sensor Control» indicator. This function constantly monitors whether the vacuum cleaner is operating at an optimal performance level. Fig. 25
During normal operation
Fig. 25
If the indicator (blue circle) starts flashing red, this means that the HEPA filter requires cleaning. The vacuum cleaner power is automatically reduced to a minimum.
Cleaning the motor filter
Switch off the vacuum cleaner.
Fig. 26
a) Open the motor filter cover by pulling the latch. b) Remove the cassette with the motor filter by the grips. c) Remove the motor filter from the cassette and knock out the dust from both parts. d) If the motor filter and cassette are heavily soiled, they must be rinsed under running water. The filter can also be washed in a washing machine at a temperature not exceeding 30°C in the gentle cycle at minimum spin speed.
TIP: To wash the filter in the washing machine, place the filter block in a laundry bag.
e) Allow the motor filter element and cassette to dry completely for at least 24 hours and install the motor filter back into the cassette. f) Insert the cassette with the motor filter back into the vacuum cleaner. Close the motor filter cover.
Attention
The cover closes only when the filter is installed.
In case of malfunction
Cleaning the microfilter
When using the vacuum cleaner in the household, replacing the microfiber filter is not required.
To ensure the optimal power level, it is recommended to rinse the filter after every 3 uses of the vacuum cleaner. The functionality of this filter is preserved even if the color of the filter surface changes.
Fig. 29*
a) Open the cover of the exhaust filter by pressing the latch. b) Disassemble the filter block with the foam filter and microfiber filter by pulling the latch, and remove it from the vacuum cleaner. c) Remove the foam filter and microfiber filter from the frame. d) Rinse the foam filter and microfiber filter under running water. Or they can be washed in a washing machine at a temperature not exceeding 30 °C, carefully using the gentle cycle at minimum spin speed.
TIP: When washing laundry in the washing machine, place the filter block in a laundry bag.
e) After the foam filter and microfiber filter have dried (min. 24 hours), install them in the filter frame. f) Insert the filter block back into the vacuum cleaner and secure the latch. g) Close the cover of the exhaust filter. When doing so, push the latch upward so that it locks with a click.
Cleaning instructions
Before each cleaning of the vacuum cleaner, turn it off and unplug the power cord from the outlet. The vacuum cleaner and plastic accessories can be cleaned with ordinary detergents for plastic.
Attention:
Do not use abrasive cleaning agents, glass cleaning agents, or universal cleaning agents. Do not immerse the vacuum cleaner in water.
We reserve the right to make technical changes.
4
5
6
7
8 m 9 ONOFFaoufain
10


21*
J 1


11


a 155g 155g 155g 155g 155g
aal plxswy jyjol 151 a.
a 10000000000000000000000000000000000000000000000000000
a a 1
13*
0g 0
J 1 J 2 J 3 J 4 J 5 J 6 J 7 J 8 J 9 J 10
9
090
y/1jz jge bdoa aisol g 1
baill ogo b
10
0g
aJrJlgl awsu baaalogbdo sKoJj 01 Jx


BBZ123HD
(__SUPPRIMER__)
BBZ124HD
1
2 0
3*
Joou 15
jauu uuuu uuuu 16
yglolueo ohe 17
18
*olalssyllsaaa aaii 19
*jaiol Lgajal 20
21
Lgdoa 22
*aullull laloll Jol 23
gaiJ 24
AE United Arab Emirates,
BSH Home Appliances FZE
Round About 13.
Plot Nr MO-0532A
Jebel Ali Free Zone - Dubai
Tel.: 048814401
mailto:service.uae@bshg.com
www.bosch-home.com/ae
Republic of Albania, Albania
ELEKTRO-SERVIS sh.p.k
Rr. Shkelqim Fusha, Selite,
Pallati "Matrix Konstruktion",
Ground floor and +1
1023 Tirane
Tel.: 42278130, -131
Fax: 42278130
mailto:info@elektro-servis.com
EXPERT SERVIS
Rugae Kavajes,
Kulla B Nr 223/1 Kati I
1023 Tirane
Tel.: 44806061
Tel.: 42274941
Fax:42270448
Cel: +355 069 60 45555
mailto:info@expert-servis.al
AT Österreich, Austria
Gate 1, 1555 Centre Road
Clayton, Victoria 3168
Tel.: 1300 369 744*
Fax: 1300 306 818
mailto:aftersales.au@bshg.com
www.bosch-home.com.au
*Mo-Fr: 24 hours
BA Bosna i Hercegovina, Bosnia-Herzegovina
"HIGH" d.o.o.
Gradačačka 29b
71000 Sarajevo
Tel.: 061 10 09 05
Fax: 033 21 35 13
mailto:bosch_siemens_sarajevo@
yahoo.com
BE Belgique, Belgie, Belgium
BSH Home Appliances S.A.
European Trade Center Building, 5th floor
1784 Sofia
Tel.: 0700 208 17
Fax:028787972
mailto:informacia.servis-bg@bshq.com
www.bosch.home.bg
BH Bahrain
Khalafat Est.
P.O.Box 5111
Manama
Tel.: 017400553
mailto:service@khalaifat.com
BY Belarus, Bénapycb
OOO“BCX BbITOBaTexHnka
ten.: 495 737 2961
mailto:mok-kdh@bshg.com
CH Schweiz, Suisse, Svizzera, Switzerlan
BSH Hausgeräte AG
Old Wolverton Road Wolverton
Milton Keynes MK12 5PT
To arrange an engineer visit, to order spare parts and accessories or for product advice please visit www.bosch-home.co.uk
or call Tel.: 0344 892 8979*
*Calls are charged at the basic rate, please check with your telephone service provider for exact charges
GR Greece, EAA
BSH Ikiakes Siskeves A.B.E.
Central Branch Service
17 km E.O. Athinon-Lamias &
Potamou 20
14564 Kifisia
IavvAynio tnEeWvo:181 82
(AOTIKn xpewn)
mailto:nkf-CustomerService@bshg.com
www.bosch-home.gr
HK Hong Kong
BSH Home Appliances Limited
Unit 1 & 2, 3rd Floor
North Block, Skyway House,
3 Sham Mong Road
Tai Kok Tsui, Kowloon
Hong Kong
Tel.: 2565 6151
Fax: 2565681
mailto:bosch.hk.service@bshg.com
www.bosch-home.cn
HR Hrvatska, Croatia
BSH kućni uredaji d.o.o.
Kneza Branimira 22
10000 Zagreb
Tel.: 015520888
Fax:016403603
mailto:informacije.servis-hr@bshg.com
www.bosch-home.com/hr
HU Hungary
www.bosch-home.com/hu
IE Republic of Ireland
BSH Home Appliances Ltd.
Unit F4, Ballymount Drive
Ballymount Industrial Estate
Walkinstown
Dublin 12
Service Requests, Spares and Accessories
Tel.: 01450 2655*
Fax: 01450 2520
www.bosch-home.co.uk
*0.03 € per minute at peak.
Off peak 0.0088 € per minute.
IL Israel,
C/S/B/ Home Appliance Ltd.
1, Hamasger St.
North Industrial Park
Lod, 7129801
Tel.: 089777222
Fax: 089777245
mailto:csb-serv@csb-ltd.co.il
www.bosch-home.co.il
IN India, Bharat,
BSH Household Appliances
Mfg. Pvt. Ltd. Arena House, Main Bldg,
2nd Floor,
Plot No. 103, Road No. 12
MIDC, Andheri East
Mumbai 400 093
Toll Free 1800 266 1880*
www.bosch-home.com/in
(exclude public holidays)
IS Iceland
Smith & Norland hf.
Noatuni 4
105 Reykjavik
Tel.: 05203000
Fax: 05203011
www.sminor.is
IT Italia, Italy
www.bosch-home.com/it
KZ Kazakhstan, Kazakhstan
IP Turebekov Yerzhan
Nurmanovich
Jangeldina str. 15
Shimkent 160018
Tel.: 0252 31 00 06
mailto:evrika_kz@mail.ru
LB Lebanon,
Teheni, Hana & Co.
Boulevard Dora 4043 Beyrouth
P.O.Box 90449
Jdeideh, 1202 2040
Tel.: 01 255 211
mailto:Info@Teheni-Hana.com
LT Lietuva, Lithuania
Senuku prekybos centras UAB
Jonavos g. 62
44192 Kaunas
Tel.: 0372 12146
Fax: 0372 12165
www.senukai.lt
UAB "AG Service"
R. Kalantos g. 32
52494 Kaunas
Tel: 070055655
Fax: 037331363
mailto:servas@agservice.lt
www.agservice.lt
Baltic Continent Ltd.
Lukšio g. 23
09132 Vilnius
Tel.: 052741788
Fax: 052741722
mailto:info@balticcontinent.It
www.balticcontinent.it
LU Luxembourg
S.R.L. "Rialto-Studio"
yn. UyceBa 98
2012 KIINHeB
TeN./ΦaKc:022 23 81 80
mailto:bosch-md@mail.ru
ME Crna Gora, Montenegro
Elektronika komerc
UI.Slobode17
84000 Bijelo Polje
Tel./Fax: 050432575
Mobile: 069324812
mailto:ekobosch.servis@t-com.me
MK Macedonia, Madeonna
GORENEC
Jane Sandanski 69 lok.3
1000 Skopje
Tel.: 022 454 600
Mobile: 070 697 463
mailto:gorenec@yahoo.com
MT Malta
Oxford House Ltd.
Notable Road
Mriehel BKR 14
Tel.: 021 442 334
Fax: 021 488 656
www.oxfordhouse.com.mt
MV Raajjeyge Jumhooriyyaa, Maldives
Lintel Investments
Ma. Maadheli, Majeedhee Magu
Malé
Tel.: 0331 0742
mailto:mohamed.zuhuree@
lintel.com.mv
NL Netherlands
Unit F 2, 4 Orbit Drive
Mairangi Bay
Auckland 0632
Tel.: 0800 245 700*
Fax: 0800 256 535
newsletter: aftersales.nz@bshg.com
www.bosch-home.co.nz
(exclude public holidays)
PL Polska, Poland
OOO "BSH Household Appliances"
Customer Service
Major Kanyushka 19/1
119071 Moscow
Tel.: 495 737 2961
mailto:mok-kdhl@bshg.com
www.bosch-home.com
SA Kingdom Saudi Arabia,
111 111
Abdul Latif Jameel Electronics
and Airconditioning Co. Ltd.
BOSCH Service centre,
Kilo 5 Old Makkah Road
(Next to Toyota), Jamiah Dist.
P.O.Box 7997
Jeddah 21472
Tel.: 800 244 0043
mailto:kunnumalsp@aj.com
www.aljazeera.com.sa
SE Sverige, Sweden
BSH Home Appliances AB
Landsvagen 32
169 29 Solna
Tel.: 0771 11 22 77 local rate
mailto:Bosch-Service-SE@bshg.com
www.bosch-home.se
SG Singapore, Singapore
BSH Home Appliances Pte. Ltd.
Block 4012, Ang Mo Kio Avenue 10
01-01 Techplace 1
Singapore 569628
Tel.: 6751 5000*
Fax: 6751 5005
mailto:bshsgp.service@bshg.com
www.bosch-home.com.sg
- Mo-Fr: 8.30am to 7.00pm, Sa: 8.30am to 5.30pm
(exclude public holidays)
SI Slovenija, Slovenia
BSH Hišni aparati d.o.o.
Litostrojska 48
1000 Ljubljana
Tel.: 015830700
Fax: 01 583 08 89
mailto:informacije.servis@bshg.com
www.bosch-home.com/si
SK Slovensko, Slovakia
BSH domaci spotbrebe s.r.o.
www.bosch-home.com/tr
- Cagli merkezini sabit hatlardan
aramanin bedeli sehir icücretlendirme,
Cep telefonlarindan isekullanlan
BSH Home Appliances Private Limited
台北市内湖區洲子街80號11樓
11F., No.80, Zhouzi St., Neihu Dist.
Taipei City 11493
Tel.: 0800 368 888
Fax: 02 2627 9788
mailto:bshtzn-service@bshg.com
TOB "BCX NObyToBa Texhika"
Tel.: 044 490 2095
mailto:bsh-service.ua@bshg.com
Service-General SH.P.K.
Rruga Mag Prishtine-Ferizaj
70000 Ferizaj
Tel.: 0290 321 434
Tel.: 0290 330 723
mailto:a_SERVICE@
gama-electronics.com
XS Srbija, Serbia
BSH Kučni aparati d.o.o.
15th Road Randjespark
Private Bag X36, Randjespark
1685 Midrand-Johannesburg
Tel.: 086 002 6724
Fax: 086 617 1780
mailto:applianceserviceza@bshg.com
www.bosch-home.com/zao

de
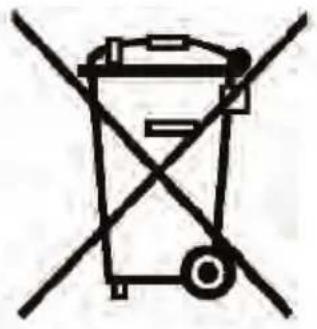
This appliance is labelled in accordance with European Directive 2012/19/EU concerning used electrical and electronic appliances (waste electrical and electronic equipment - WEEE). The guideline determines the framework for the return and recycling of used appliances as applicable throughout the EU.
fr
((waste electrical and electronic equipment - WEEE
DE Garantie
GB Conditions of guarantee
For this appliance the guarantee conditions as set out by our representatives in the country of sale apply. Details regarding same may be obtained from the dealer from whom the appliance was purchased. For claims under guarantee the sales receipt must be produced.
FR Conditions de garantie
01/17

www.bosch-home.com/tr
www.bosch-yetkiliservisi.com
Fax: 0216.528.91.88
E-mail:
Customer service hotline*: 8 (800) 200-29-61
Official website: www.bosch-home.ru
Addresses of authorized service centers, as well as all information on service, are available on the official website: www.bosch-home.ru.
We recommend that you use the services of authorized service centers only.
Original accessories and care products for Bosch household appliances can be purchased in our online store: www.bosch-home.ru/store. You can find the terms of order, payment and delivery on the website. Also, original accessories and care products can be purchased at authorized service centers.
1. Product
- Moenb
NHTb1 1-2 3aONHnOTc TOnbKO B Cnyae, eCN N 3TN DaHHbIe He CoepKATC H DOKyMeHTax O NOKyKe N3denn (Kaccobbl yek n/nn TOBapHbI uek, TOBapHaH NaHnaH).
3.ДаннгИнФОм�ИЯпаспостранггсян Млбь БToBObIпиббрБToBAPHOrO 3HaKAsBosch:КoepEeBaRKn,КoepMaunHbI,КоepMOnIKN,BeCsI, KxOHNbIe KMaBnHb,МкePcBb,ПынecocbI,peZK,TOncOcBb,уTOrH,фeHb,pacpmaHTENnI BONOC,3NEKTPOuaHNNKc,KoCoBbXIMaNK,IMeMnBHTEN,ОнeHdpe,rtanHbHbIbe DOCKN,BaHouKOnc,HaNOnbHbIe BecbI,yTOrH,napOBBe STaHUnn,IraNtINbIe DOckN u aHAnoruHbIYbe IM N3denn.

- YBaKaemble DAmbln rocnoa, cooBaaem Bam, yto noTBePckJeHHe COOTBeCTBnHaWe npOyKunn O6raTeBnHm Tpe6oBaHHM BcootBeTCTBnC 3aKaHOaDteNaCTBOM cOyueCTBnEeTcB POpMe o6raTeBnHcpETnPHkauu HneKapnpoBBncooTbBnA HfOpMaHIO6ob6raTeBnHOM noTBePckJeHHe COOTBeCTBnHaWnnp6oBop, B Tom uCne TaHbIe oHomepe ceptnKkata COOTBeCTBn (DeKnapauinooCoOTBeTCTBn) n CpOe erO (ee) DeNCTBnBbl MoKeTe nOnyUHT BOO BCX BtTOBbePi6oBp).
Haia npOkyu npOn3BODITcno kONTPonem TpaHcnaIOHObHOKOpnpaun 5CX Xaycrepe Tm6X), aDpec WtAb-Kbaptnpy: 81739 Mioxhen, Kapn-Bepn Utpacc 34, FepMaHHa (BSH Hausgerate GmbH, Carl-Wery-Str. 34, 81739 Munchen, Germany).
OprHn3aueH, BbIOnNtHIOUeIyHKUHINHOCTpAnHORHO HrTOBHTeRNa, yONHOMouEHNO HrTOBOHTeMeHa OCHOBHN DoROBOPa C HMM, ABNRcO OOO 已 BCX BtIOBtePi6bp81, 1985A,CaKrt-TepeBypr, r. TepeProf, yn. Kapna CmHenca, d.l nT. A, fnnn an b r. MockBa, 119071, yn. Manan Kanyccka, d.15, tenefoh (495) 737-2777, faoxc (495) 737-2798.
- 063aTeBhIe CBeHnO TeXnuecknx XapaKtepncTKkax npbopa npnbedeHb Ha TnnoBTo Ta6nueke np6opa nnHa erO 3THKeTKe n/nn B cOpBOIDHTbHOJ DOKyMeHTaun.
6. AkceccyapbI n cpeDCTBa no yxOdy
IyHKUHOHOBAHnBaWeTexHKnN yXoJa 3a He npOHBOHTeB peKOMHyETNCONb3OBA Tb TOnkO pRnHnHbHbIe AkeccCyapn BcpeCTBaNo xOyoD. OprHHnHbHeAkeCCcyapn Pa3paOtaTaNpIOB3OHTeEM, OHneAIBNO nOxOAnr HmHNO dHaBero PnpObaOp. OprHHnHbHeAkeCCcyapn BcpeCTBa No xyOdy CoOTBeTCTBYOT CaMIM BvICQHM TpeBOAHm KaeCTBa N3aka Bosch, OH npOxOJaT 3ABODckHe INbTAHn DnEObceNeueHMAKCMANBHO HADEXKHOIN BpOte. NO CEM BonPocAM, CB3aHbM c AkCEcyapamn I cpeCTBaMn No yOxyd nPa Baew6bTOBoiTexHKn, Bbl MoKeTe ObpaHTbc B aTOpH3OBAHhble cepBCHhble ceHTpbl nno Tenefohy cnYk6bl NDpEJKK.
7.7apaHTHn3rTOBNTeH
Hnma 3roBntel npedctabnre H na npo6peTHeB Bamn B Pocchcko Fedepaunb6bToBo np6op rapaTHIO BOOTBTCTBN CdeNTyOuImm 3akoHDoTeCBtOM P cspok 1 r. Ha np6peTHeB B Pecny6nke Bepny6pK KOTOPOM pRnOKynke 6blB bIaDnraPaprHnHb TaTOH, dEChETByOT rapAHTNHeYcLOBH, nePtoTHOpueaNe 3akoHDoTeCBtBY PeCy6nKnBeBnApycb.
8. Bhmahne! Baxhna HhOpMaunn nnotpe6ntene
DnHb npn6op npedhaueh nIe nncnb0aHn IcknuyntenbHO nIyHbIX, cEmeHbIX, domaunHX nHbIX hynk, He C83aHHbIX cOcy ictneHem npednprHmatercKo deTertbHocTH nHbO yOBDNETBOpEHnEM bHTOBx nOTpe6HCTE B oFnce npednpnrTHn, yUpeJdHn Hnnpn6opHa3auu. Ncnonb0aHn np6opa B cienX, OTnuchbx ot Bblweka3aHHbx, ABnETcH ahyuHem npabHn HndnxaeJ3Kcnnyatau nn np6bna.
Handle the device carefully! Please make sure to keep the device in good condition throughout its entire service life. Removing the label may lead to device malfunction and possible violations of its operating rules.
The manufacturer is not responsible for defects in the device that arise after the device has been transferred to the consumer due to improper use, transportation, storage, exposure to third parties, natural disasters (fire, natural disasters, etc.), damage by household insects, rodents, or other external factors, as well as due to significant violations of technical requirements specified in the operating instructions, including instability of electrical parameters established by GOST 3214-2013.
To confirm the warranty repair or replacement of the device, you must present the purchase receipt (check, sales receipt, or other documents confirming the date and place of purchase).
Following the recommendations contained in the operating instructions (user rules) can prevent problems during device operation and its malfunction.
Warranty problems are checked and repaired or replaced with new ones. The decision on the appropriateness of their replacement or repair remains with the service department.
9. Service information
During the warranty period and after its expiration, the service department and workshops of our partners are always ready to offer you their services. The list of addresses of authorized service centers approved by the manufacturer is available on the official website: www.bosch-home.ru.
The service life of household appliances (except for remote controls and power supplies) is 2 years. The service life of remote controls and power supplies is 5 years. The service life is calculated from the date of purchase, or if it cannot be determined, from the date of manufacture of the product, indicated on the product's type plate. In accordance with the manufacturer's standard, the product is marked with FD MM, where FD is the year of manufacture minus 1920, and MM is the month of manufacture. To determine the year of manufacture of the product before 1920, add the number TT.
bosch-infoteam@bshg.com