
AMM 842 - Lawn mower VIKING - Free user manual and instructions
Find the device manual for free AMM 842 VIKING in PDF.
| Brand | Viking |
| Model | AMM 842 |
| Category | Lawn mower |
| Cutting width | 107 cm |
| Cutting height | 30 to 85 mm (mechanical adjustment with fixed positions) |
| Net weight | 53 kg |
| Front tire pressure | 0.6 bar (9 psi) |
| Rear tire pressure | 0.4 bar (6 psi) |
| Blade drive | Direct drive V-belt |
| Number of blades | 2 interchangeable Y blades |
| Blade tightening torque | Screw V: 9.8 Nm, Screw W: 24 Nm |
| Cutting system | Multiclip (mulching and grass dispersion) |
| Cutting height adjustment | Mechanical: fixed positions from 30 to 85 mm |
| Folding cutting deck | Yes, for cleaning and maintenance |
| Safety symbols | Caution! Read the instruction manual, projection, hands/feet under the machine, disconnect spark plug before repair |
| Blade material | Hardened steel (estimated) |
| Tire type | Pneumatic (estimated 16 inches) |
| Maintenance | Cleaning the underside of the deck after each use, sharpening the blades, checking the belt |
| Safety precautions | Stop the engine, disconnect the spark plug wire, engage the parking brake before intervention |
| Replacement parts | Use only genuine Viking parts |
Frequently Asked Questions - AMM 842 VIKING
User questions about AMM 842 VIKING
0 question about this device. Answer the ones you know or ask your own.
Ask a new question about this device
Download the instructions for your Lawn mower in PDF format for free! Find your manual AMM 842 - VIKING and take your electronic device back in hand. On this page are published all the documents necessary for the use of your device. AMM 842 by VIKING.
USER MANUAL AMM 842 VIKING
VIKING AMM 842, AME 842

VIKING AMM 842, AME 842


DEUTSCHDE
SYMBOLE
The following symbols appear on the machine.
They are there to remind you of the care and attention required in use.
This is what the symbols mean:
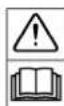
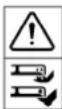
Warning!
Read the instruction manual and the safety manual before using the machine.
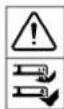
Warning!
Do not insert your hands or feet under the cover when the machine is in operation.
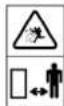
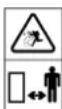
Warning!
Watch out for discarded objects. Keep onlookers away.
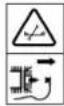
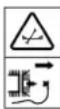
Warning!
Before starting repair work, remove the spark plug cable from the spark plug.
INTRODUCTION
This cutting deck is available as standard in two versions:
- with mechanical setting of the cutting height (AMM 842).
with factory-fitted, electrical setting of the cutting height (AME 842).
ASSEMBLY
DECK ARMS
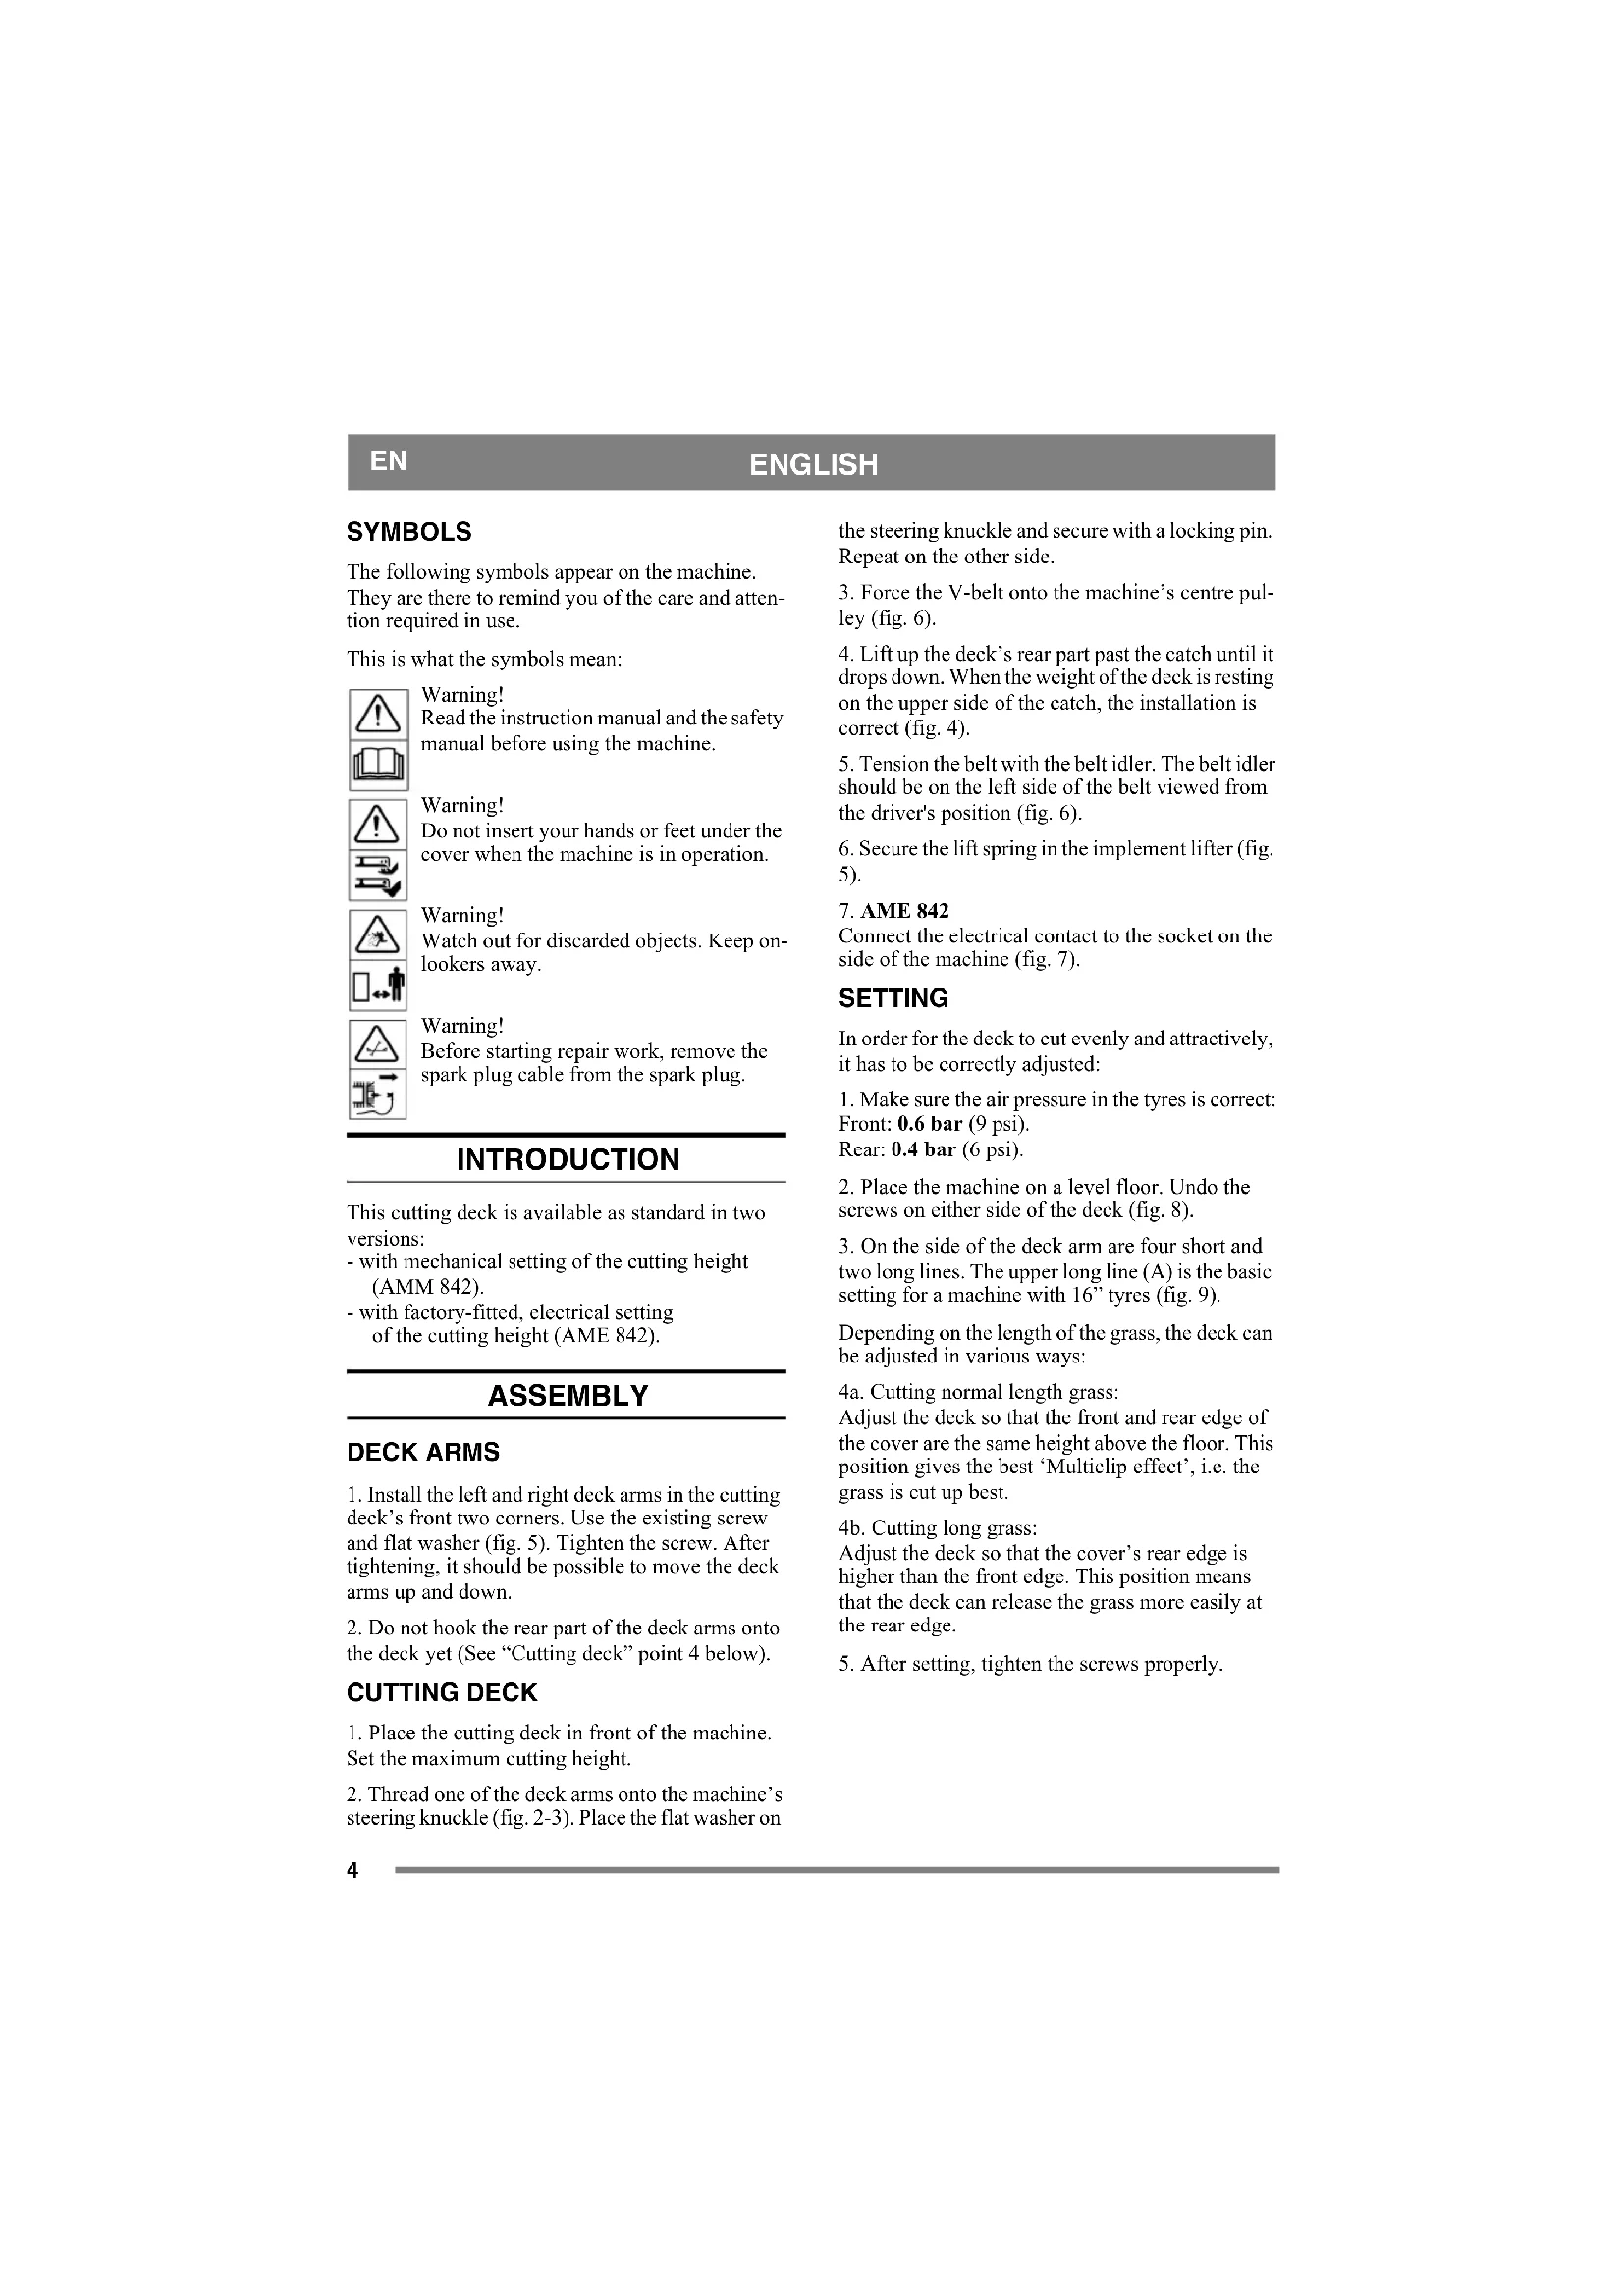
- Install the left and right deck arms in the cutting deck's front two corners. Use the existing screw and flat washer (fig. 5). Tighten the screw. After tightening, it should be possible to move the deck arms up and down.
- Do not hook the rear part of the deck arms onto the deck yet (See "Cutting deck" point 4 below).
CUTTING DECK
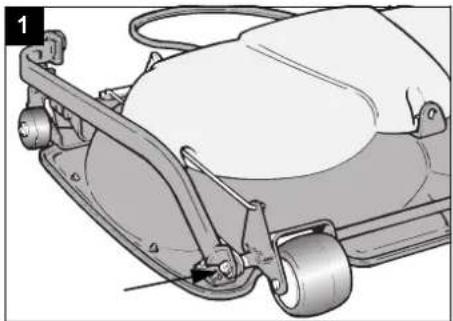
- Place the cutting deck in front of the machine. Set the maximum cutting height.
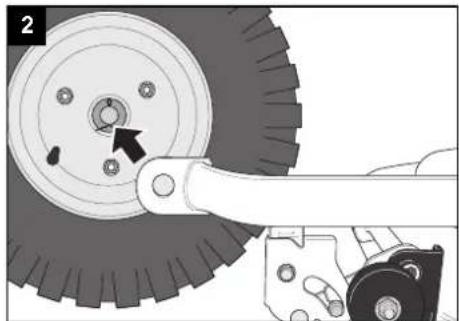
- Thread one of the deck arms onto the machine's steering knuckle (fig. 2-3). Place the flat washer on
the steering knuckle and secure with a locking pin. Repeat on the other side.
7.AME842
- Force the V-belt onto the machine's centre pulley (fig. 6).
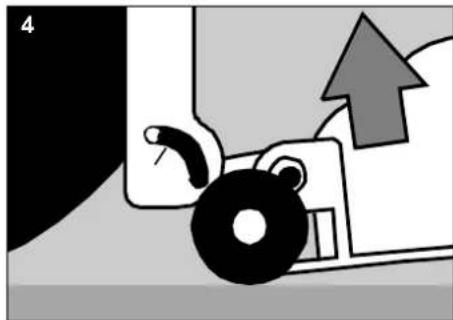
- Lift up the deck's rear part past the catch until it drops down. When the weight of the deck is resting on the upper side of the catch, the installation is correct (fig. 4).
- Tension the belt with the belt idler. The belt idler should be on the left side of the belt viewed from the driver's position (fig. 6).
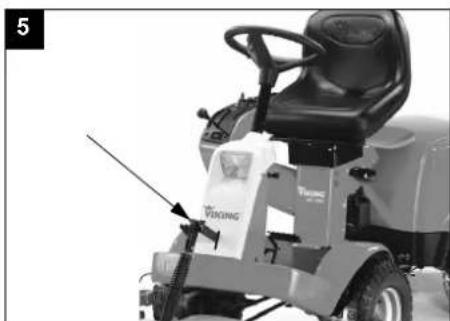
- Secure the lift spring in the implement lifter (fig. 5).
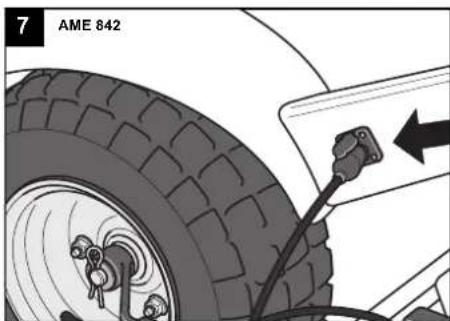
Connect the electrical contact to the socket on the side of the machine (fig. 7).
SETTING
In order for the deck to cut evenly and attractively, it has to be correctly adjusted:
- Make sure the air pressure in the tyres is correct: Front: 0.6 bar (9 psi).
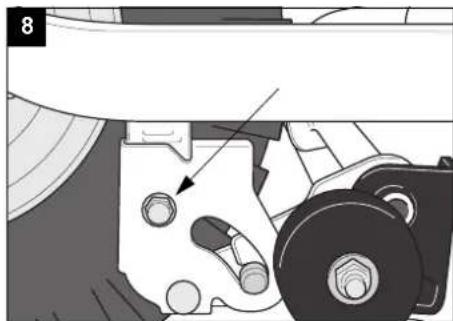
Rear: 0.4 bar (6 psi). - Place the machine on a level floor. Undo the screws on either side of the deck (fig. 8).
- On the side of the deck arm are four short and two long lines. The upper long line (A) is the basic setting for a machine with 16" tyres (fig. 9).
Depending on the length of the grass, the deck can be adjusted in various ways:
4a. Cutting normal length grass:
Adjust the deck so that the front and rear edge of the cover are the same height above the floor. This position gives the best 'Multiclip effect', i.e. the grass is cut up best.
4b. Cutting long grass:
Adjust the deck so that the cover's rear edge is higher than the front edge. This position means that the deck can release the grass more easily at the rear edge.
5. After setting, tighten the screws properly.
USING THE MACHINE
CUTTINGHEIGHT
AMM 842:
The cutting height can be varied between a number of fixed positions, from 30 to 85mm
AME 842:
The cutting height is continuously variable from 30 to 85mm
Note: Stated cutting heights apply when the machine is on a firm surface.
CUTTING TIPS
For optimum 'Multiclip effect', follow these tips: - cut frequently.
-run the engine at full revs.
- keep the underside of the cutting deck clean.
- use sharp blades.
- do not cut wet grass.
- cut twice (with different cutting heights) if the grass is long.
SERVICE AND MAINTENANCE
PREPARATIONS
Unless otherwise stated, all service and maintenance must be carried out on a stationary machine when the engine is not running.

Prevent the machine from rolling by always applying the parking brake.

Prevent unintentional starting of the engine by always stopping the engine, disconnecting the spark plug cable from the spark plug and earthing it. Disconnect the negative cable from the battery.
MAINTENANCE TIPS
To make cleaning and maintenance easier, the cutting deck can be folded up:
- Set the cutting height setting to the maximum cutting height.
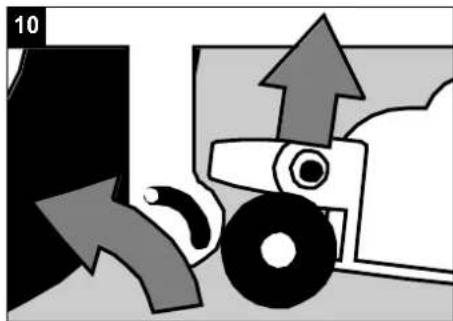
- Lift the rear edge of the deck with one hand (fig. 10).
- Push up the catch and release the rear edge of the
deck (fig. 10).
- Repeat the procedure on the other side.
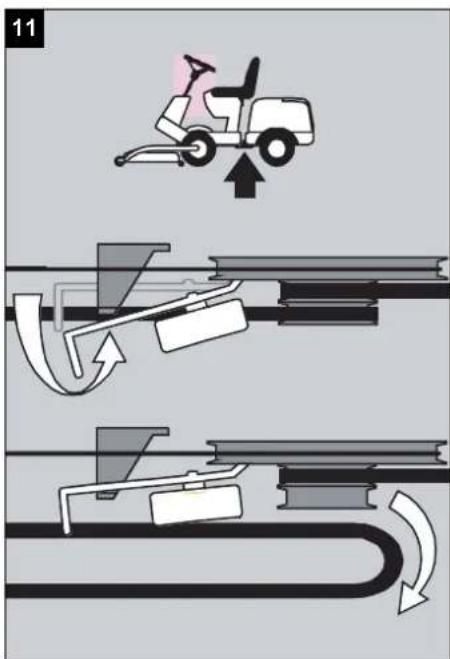
- Hook the belt idler arm on the mount (fig. 11)
- Force the belt off the centre pulley.
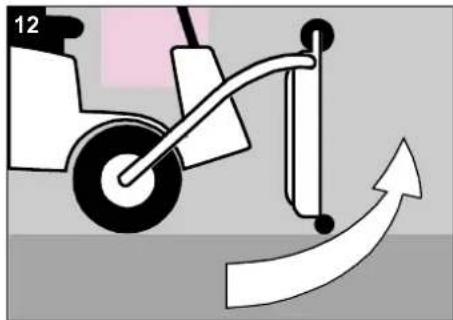
- Fold up the deck to the vertical position (fig. 12).
When the deck is folded down to working position, ensure that the catch drops down into position when the rear edge of the deck is lifted up (fig. 4).
CLEANING
After each use, the underside of the cutting deck should be rinsed off.
If the grass has dried solid, scrape clean the underside.
If necessary, touch up the underside with paint to prevent corrosion.
BLADES

Use protective gloves when changing blades to avoid cutting yourself.
Ensure that the blades are always sharp. This produces the best cutting results.
Always check the blades after a collision. If the blade system has been damaged, defective parts should be replaced.

Always use genuine spare parts. Nongenuine spare parts can entail a risk of injury, even if they fit the machine.
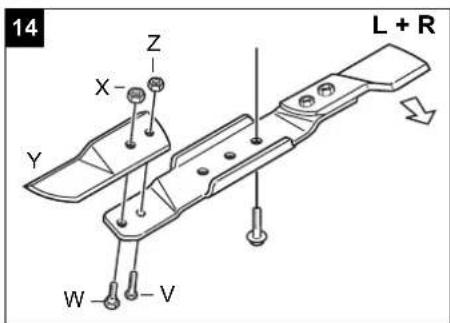
Install the blades according to fig. 13 where the blade edge is marked. The folded-up edge of the blade should be positioned inwards towards the blade holder.
The cutting system comprises two blade bars with two replaceable blades Y (fig. 14). When replacing blades, both should be replaced to avoid imbalance.
Install the new blades. Tighten screws V and W properly. Tightening torque: V - 9.8 Nm, W - 24 Nm.
In the event of a powerful collision, the blades may be bent out. Undo the locking nut X and fold back the blade. Install a new genuine break bolt V.
Tighten the locking nuts X and Z.
EN
ENGLISH
POSITIVE DRIVE BELT
Both blades are powered inside the deck by a positive drive belt.
If one of the blades has struck a solid object (e.g. a stone), the belt tension may be altered. This can lead to the positive drive belt 'over-meshing' which, in the long term, can damage the blades.

Following a powerful collision, always check that both blades are at right-angles to each other (fig. 13).
The working areas of the blades overlap each other. If the blades' position in relation to each other has been altered, there is a considerable risk of the blades striking each other. This can entail serious damage to the cutting deck.
If this is the case, take the machine and cutting deck to a service workshop for repair and inspection.
TECHNICAL DATA
| AMM 842 AME 842 | ||
| Cutting width 107 cm 107 cm | ||
| Cutting height 30-85 mm 30-85 mm | ||
| Net weight 53 kg 53 kg | ||
FR
FRANÇAIS
SYMBOLES
REVISAO E MANUTENCAO
PREPARATIVOS
SERVICE OG VEDLIKEHOLD
FORBEREDELS
Octopokho!
DnnaJia KcIpyaTuaHH BINHMaTeJIbHO
H3yHTe pykoBOCTBO NO 3KcIpyaTuaHH
HHCTpykuHIO ITOxHHKe 630HaCHOCTH.
Octopokho!
BoBpEMIpaobTHMaIHIN3aIPpeHaeTcR
PnPKacatbca pykAMH HOrAMN K
CTaJIaM,paCHIOJXCKHHbIMHOJ
KpbIIkoH.
Octopokho!
BIMATEbIO cIeINTE 3a TEM,HTO6bI IOJ
pa6oTAIOHc MAIHHO HC OKa3AINCb
IOCTOPOHHE INe pEIMTe.Ha yactke
BbIOJIHeHH pa6OTb HE JIOJKHO 6bITb
IOCTOPOHIX JIIH.
Octopoxho!
IpepcMOHTOMOTcOCHHITc HPOBO
OT CBEH3aKHaIIH.
BVEEHE
JaHHBpeKyHIN6JIOKBaueCTBe CTAHAPTHOTHOHCIOHcHbBbHyckactCBabyx BapHaIIax:
- C M xαaHnueckoeprγI npOBkoB BbICOTbI cTPhKKN, (AMM 842, AMM 842).
-cIeKtpnueckoH,HactpaHbaemOH H3aBOHepepyINpOBKO BbICOTbCTPnKKH,(AME842).
HHTPYKUNI NO CBOPKE
KPOHHTENHbI PEXUYUcERO BLOKA
1.3aKpeHHTe IcBn H npabn KpOHHTeHbI B
IbYx NepeDIIHX yIax peKyUero 6IOKA.
BocNtB3yTeCbI IJIg TTORE HMeOIOIHMCB HHTOM
cIIAH6oB (PHC.5).3aTaNHTc EOT BHT. PocJC
3aTaNKKn KPOHHTeHbI peKyIero 6IOKA dIOJKHb
CBO6OIOHO XOHTb BBCpx-BHN3.
2.3aⅡHIOO qactb kpoⅢteHIOB pexyIeI O6IOKa NOKa He 3akpenJIHTe (CM.HNKe IyHKT 4 pa3JeJa "PEKYIIN BLOK").
PEKUIMBLOK
1.IIOCTABLTepeKyIINH6IOK Ipeepa3OHOKOCHIKOI. YcTAHOBHTe MaKCHMaTbHyOBBCOTY cTpHKN.
2. HaJIeHbTe OINH H3 KPOHITcHOB peKyIcTO 6IOKA HA IOBOPOTHbI IIIAPIIHP raOHOKOCJIK (pHc.2).HaJIIOKHTe Ha IOBOPOTbI IIIAPHP IIIOCKYIO IaIIbOy H3akpeIHrTE cc IIIJIHHROM. CTeJIaTIte To JKe HA pyTOI CTOpHe RAHOHOKOCJIKN.
3. HaJIeIIbTe KJIINIOBHNIIH peMeIb HcpeIIHH, BCJyUHNIIKHB Ia3OHOKOCJHKn (PHC.6).
4.ПИПОДИМНITE BBEpx 3aIHHIOYacThb peKyIICRO 6IbKa YpeC3 ΦHkCatop TAK,HTO6bl ΦHkCatop yIIaB HIN3.EcIn peKyIiIN 6IbOK Ier CBOHM BECOM CBEXpy Ha ΦHkCatop,3HaHT OH yCTAHOBJH INpABNIBHO (phc.4).
5.HaTHHHTpeMeHb HATXKHBIMIKHBOM. HATXKHOI KHBIOJIKCH 6bITb HAJCBOI CTOPOc peMII,ecIH CMOTpeB H3IOIOKeIIHH TOI,KTO pa6oTaET c Ra3OHOKOChIKoH (PHC.6).
6.3aKpeINHTeIOJIbEmHyIOpyKHHyBIOJIbEmHOM yctpoCTBe(pnc.5).
7.AME842
PiKIOHOHTe 3IEKTPHueckn KOTAKT K pa3bemy, pacIOIOKEIIOMy Ia MaIIHHe c60ky (PHc.7).
PEYUNPOBKA
TTOYTO6bPOBHO KpaCHBO NOCTPHB 203OH, CICyET IOIKHBIM 6pa3OM OTperIHPoBAT RaIOHOKOJIky:
1.Y6eHTECB TOM,TOIOIUEpKHaCTeTpeyEmoe DaJIeINHe BO3UxA B IHHAXB NepEnHIX:0,6 6ap(9fHT/KB.IIOHM).B3aIHHX:0,4 6ap.(6fHT/KB.IIOHM).
2.YCTAHOBHTe rAOHOKOCHNY Ha POBHyIOBepxIOCTb.OCJIa6JIte BHNITb C 06EHX CTOpOHpeKyuIero 6noka (PHC.8).
3.Ha60KOBOI CTPOHc KPOHITeHa 6IOKa HMeIOCTaTeTbpe KOPOTKHe H DBe DIIHHIIbIe PnCKH. BepxHra DHHHAR pNcKa(A) COOTBETCTByET OCHOBHOMy pcYJHPoBOHOMy IOJOKEHIO DIA RAOHOKOCHIOK cHHHAMnDnAMetpOM 16IOHMOB (pnc.9).
Fa3OHOKOCHIIKA MOKeT 6BHTb OTpeYIHHPOBaII NOpa3HOMy B 3ABHCMOCTN OT BBICOTb TpaBb!
4a.IIOCTpHraIHe TpaBb CpeIIe HbICOTb: OtperyIpyIte peKyIIN 0IK TAKHM 06pa3OM, YTO6b IpeEiINn H 3aIINn KpaI KpbIINn HAXOJIINcHb HaONHO BILCOTE OTHCOTIEBHO IpyHa. B TOm IOIOXcHHIOCTHrAcTc HAnIyIuHH "OoFekT MIOHorokpaTHoro Cpe3a", TO eCTb 06cNEHBAeTc ONTHMaJIbHaa CTpNJka TpaBbI.
4b. IIOCTPnHHe BmCOKo TpaBBI: IIOpeYIMpyrTe peKyuNBI 6IOK TAK, YTO6bl 3aIIIN KpA KpBIKN 6BII BIIIE nepeIero. IIPI TAKOM IOJIOKeHHN peKyuEmy 6IOKY 6yIcT JICHE BB6paBbATb TpaBy c 3aIIHe CTOPBOHl.
- PioeJe peyHIOBKN 3aTHHTBE HHTbI.
3KCNJYATAURA MAUNHbI
BbICOTA CTPNKKN
AMM 842:
BbICOTy cTPhKMOKHO pcTyJINHPOBaTb CTyeHcHAr, B IIpeJeJax O3 30 do 85 MM.
AME 842:
BbCOTy cTPhKMOKIO IIABHOpeYHPOBaT B IpeJExJax OTR0I085MM.
IpiHMeaHHe: BbICota cTpHKn Yka3bIbaeTcRdIra3OHOKoCHIKN, yCtAHOBJIeHHOH Ha TBepOMIpyHTc.
NOJE3HbIE COBETbl
TTO TTO6MaHHa“Multiclip"paOtaIa cMAKCHMALbHM 3ΦΦEKTOM, CJIeJyITcCJICYIOHM COBCTAM:
- HPOHBOHTNECTPNKkyHaCtO.
- IBHrataJIb IIOJKeH paOraTb Ha IIIOHOIckopocTH.
- OHIIaIITRE HIXKHOIO HOBcpxHOCTb peKyIIEO 6JOKa.
- PnIMHeHTe OCTpbIE HOxH.
He IPOH3BOJHTe CTPHKy MOKPOI TpaBbI
IPOH3BOINHTe cTPhKky DbaKJb(cpa3IOB bICOTOn cTPhKKn),ecJTN TpaBa BbcOKa.
TEXHNUECKOE OBCJNYKUBAHNE IN PEMOHT
IIOIROTOBKA
EcHHe yka3aHO HHOe, Bce pa6oTbI NO texHHueckOMy 06cIyKHBaHIIO H pemOHITy IJIKHb BbIIIOHHTbcH Ha HeIOBHKHOH MaIHHe cOCTaHOBJICHbIM ABHATcEM.

IINPepoN3BOJbHOOTKATA MAHHHbBCeTcTABtE ee HcTOnHOHbTOPM03.

Bo n36eKaHHe c.lyauaHoro Hycka
DBHratae.1IIOscIe octAnOba
OTcoeHNHTc IPOB0I OT CBEuH
3aKHTaHHn H 3a3Emlnte e1o.
OTcoeHNHTc IPOB0I
otPnHaTeJIbHoro NIO.Hoc aKKyMyJITopHOH 6aTapen.
NIOJE3HbIE COBETBI NO TEXHNUeCKOMO OBCJNUKBAHNO
IIN O6JIeHHeHH NcTKN HpyTHX paOOT NO TEXHNueckOMy 06cJyKHBaHHo peKyHn6IOK MOKHOOYCTAHOBHTB BcPTHKA.1bHO:
1.YcTaHOBHTe MaKCHMaJIbHyIO BbICOTy cTpHKKH.
2. OIOHOI pyKoi IIOIHMMHTE 3aIHIN Kpan peKyIero 6IOka (pnc.10).
3. pyroynykoHnKaMNTcHaΦHKcatop cHn3b BBepx nOCBO6oJHTe 3aHHKn KpaepKyIero 6IOka (pnc.10).
4.IIOBTOPTHToJKeCpyrOHTOPONI Ia3OHOKOCHIKH.
5.3aIeHITe pUar HATJXHO rIKHBapeMHa 3a KPOHHTeIN (puc.11)
6.CHHMHTpeMeHbCBeYIIErOIIKHBa.
7. YerahOBHTepeKyuHn6IOKBCPTHKa1bHO(pnc. 12).
Korla Bn CHOBa OHyCTHe pekyuHn 6IOK B
paOoyee NIOJKeHne, y6eHTecb B TOM, TTO
fHKcAup HepeMeCtHJIC BHN3 Ha CBOc McTeO,
NocIe TORKAK bJI pHIIOJIT 3aIIIN Kpai
pekyuero 6Joka (Pnc.4).
RU
PYCCKN
OuHCTKA
IocJIe KaKJIOI IINPMHeHH RA3OHOKOCJIHK CJIeJeYI IPOMBiBaTb BOIOH HIKHIIOI HOBepxHOCTb peKyIIIEo 6IOKA.
YdaJIHTe c HINKHe NOBepxHocTH INPHINHIyIO H 3acoXHHO TpaBy.
EcIIN Tpe6yETc,IOIkpacbTe IIN3 KOpIyCa BO H36eKaHHe Kopp03HH.
HOXN

Bo n36eKaHHe Iope3OB IIpH 3aMeHe HooKei pa6oTaIIe B 3aIHTbIX NepTuKax.
HcnoB3yIeTOJbKOxOPOIOHOaTOOHHe HOHN. BOTOMCIyAcBbOCTAHCCbIOBOIBHbI pe3yIbTaAMn pa60TbCra3oHOKOCHIKoH.
IocbcBcKoro ydaapaKaKaHbPi3 npOBpcnIe IIOKN.EcHn CnTeMa IIOKei NOBpeKdEHa, 3aMeHITRe DepeKTHBe YactH.

HcnoIb3yIe ToIbKO hPmehnHbc 3aIaHbIe YactH.IpH HcNo.Ib30BaHH 3aIaHbIX YactC,BbHyckaemhix dpyTHM H3IOTOBHTJIMH,MOKHO IOUYHTb TpaMbI,JaKe cEIN 3TH aCTH NIOXoBT KMAHHc.
YcTaHABJIHBAIte HOKn COIaHcHO pHe.13,Ha KOTOPOM yKa3aIIa peKyUaI KpOMKa IIOka.HoKn YcTaHABJIHBAIOTc H3OHTyTOI KpOMKO B IepKaTeJIb.
PexyIa cHcTeMa HMeET IBa HOKeBbIX
IepKaTeJIc C ByMg CMEIIIMMH IOKaMH Y (pHc. 14).Bo H36eKaHHe pa36aJHaHca 3aMeHnTe
OIOHOBCMCHHO Oba HOka.
YcTaHOBHTe HOBBIE HOXH.3aTHHTe BHHTM V W C Tpe6yEMbIM MOMCHTOM.MOMCHT 3aTRKKH:V- 9,8HM,W-24HM
PnCHIbHOM yape HOKMOYr HOrHybc. OcIa6bTe KOHTprAky X np3oITHe HOK. YCTaHOBHTe HOBBI KpEckHH6OT V (HMecTc B KOMIIeKeTe). 3aTINHTe KOHTprAkyX H Z.
3Y6yATbI IPNIBODHOPEMEHb
O6a HoKa IINHBOIATTCB IIBNKeHHe BHYTpH pckyIeIO 6HOKA ODHMM 3y6HaTbM HPNBOIHbIM peMIeM.
PnyapeOHOHO HOKeH O TBeHbI npMet (IIaep,0KameH) HATXeHHpeMIMMOKET
H3MeIHITbcBcIeCTBHe 3TOrMOKeI pONHOHT "pepeaenIIeHne" 3y6aTOrO IpHBOHOTo PCMH, HTO CpeC3 HcKOTOpoc BPCM MoKET IIpHBecTH KIOBpeKDeHHo HOKei.

IocJcKaKIOO cpcbC3HOIcTOJIIOBENHII IpOBepaIteIpaBHJBHOCTb yHa MeKJy HOKaAMH(pnc.13).
Pa6oHHe IOBcpxHOCT HOKe B3aHmHO
IpeKpbBaIOTe. IIpH H3MeHIIHH B3aHMIIOrO
paCIOIOKeHHHO HOKe BO3HkAeT OAnCHOTbHX
coyApacHH. 3TO MOKc TIOBIECh 3a CO60i
cuJeCTBeHIIoe IOBpeKdHHe peKyIero 6Joka.
BcIyae cyIeCTBeHIO rOBpeKdEHHa CJIeYET IOCTABHTb Ra3OHOKCHIKy H peKyIHn 6NOK BcePBCHbH nCHTp HIOOCMOHa n PcMOHa.
TEXHueCKNE DAHHbIE