
BN650EU - Soup maker NINJA - Free user manual and instructions
Find the device manual for free BN650EU NINJA in PDF.
User questions about BN650EU NINJA
0 question about this device. Answer the ones you know or ask your own.
Ask a new question about this device
Download the instructions for your Soup maker in PDF format for free! Find your manual BN650EU - NINJA and take your electronic device back in hand. On this page are published all the documents necessary for the use of your device. BN650EU by NINJA.
USER MANUAL BN650EU NINJA
natural_image
Black:Ninja NINJA blender with clear glass interior and control buttons (no visible text or symbols on device body)TAK
DEN TIL FREMTIDIGE OPSLAG.
natural_image
Line drawing of a blender with a hand holding the top handle (no text or symbols)natural_image
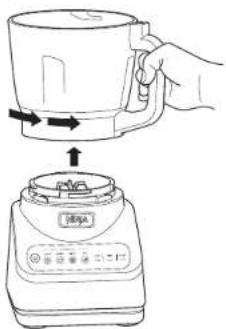
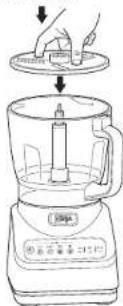
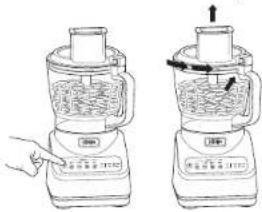
Line drawing of a blender with control panel and directional arrows indicating motion (no text or symbols)5 Placer låget med påfyidningstragten på skålen, og drej det i retning med uret, indtil der håres et klik, som angiver, at låget er låst fast.
BRUG AF PROCESSORSKÅLEN - FORTSAT
natural_image
Line drawing of a blender with a hand pointing to the side panel (no text or symbols present)natural_image
Line drawing of a blender with control panel and side arm (no text or symbols)natural_image
Line drawing of hands holding a device with arrows indicating motion (no text or symbols)natural_image
Illustration of a blender with two views showing internal mixing (no text or symbols)natural_image
Line drawing of a hand using a blender to press the lid (no text or symbols)natural_image
Line drawing of a blender with control panel and upward arrow indicator (no text or symbols)natural_image
Line drawing of a blender with handle and control panel (no text or symbols)natural_image
Line drawing of a blender with control panel and handle (no text or symbols)natural_image
Line drawing of hands holding a device with arrows indicating motion (no text or symbols)natural_image
Illustration of a two-step kitchen blender with a hand pointing to the side (no text or symbols)for purchasing the Ninja' Food Processor with Auto-iQ®

REGISTER YOUR PURCHASE

akitchen.eu

QR code using mobile device
RECORD THIS INFORMATION
Mode Number: ____
Serial Number:
Date of Purchase:
(Keep receipt)
Store of Purchase:
TECHNICAL SPECIFICATIONS
Voltage: 220-240V-, 50-60Hz
Power: 850 Watts
PLEASE READ CAREFULLY AND
KEEP FOR FUTURE REFERENCE.
TIP: You can find the model and serial numbers on the QR code label on the back of the unit by the power cord.
CONTENTS
Important Safety Instructions....4
Parts 7
Before First Use 8
Features 8
Auto-iQ* Programs for the Food Processor Bowl....8
Manual Programs 8
Using the Food Processor Bowl .9
Using the Slicing/Grating Disc ....11
Care & Maintenance 13
Cleaning 13
Storing 13
Resetting the Motor Thermostat....13
Ordering Replacement Parts 13
Troubleshooting Guide....14

This marking indicates this product should not be disposed of with other household wastes throughout the EU. To prevent possible harm to the environment or human health from uncontrolled waste disposal, recycle it responsibly to promote the sustainable reuse of material sources. To return your used device, please use the
return and collection systems or contact the retailer where this product was purchased. They can take this product for environmentally safe recycling.
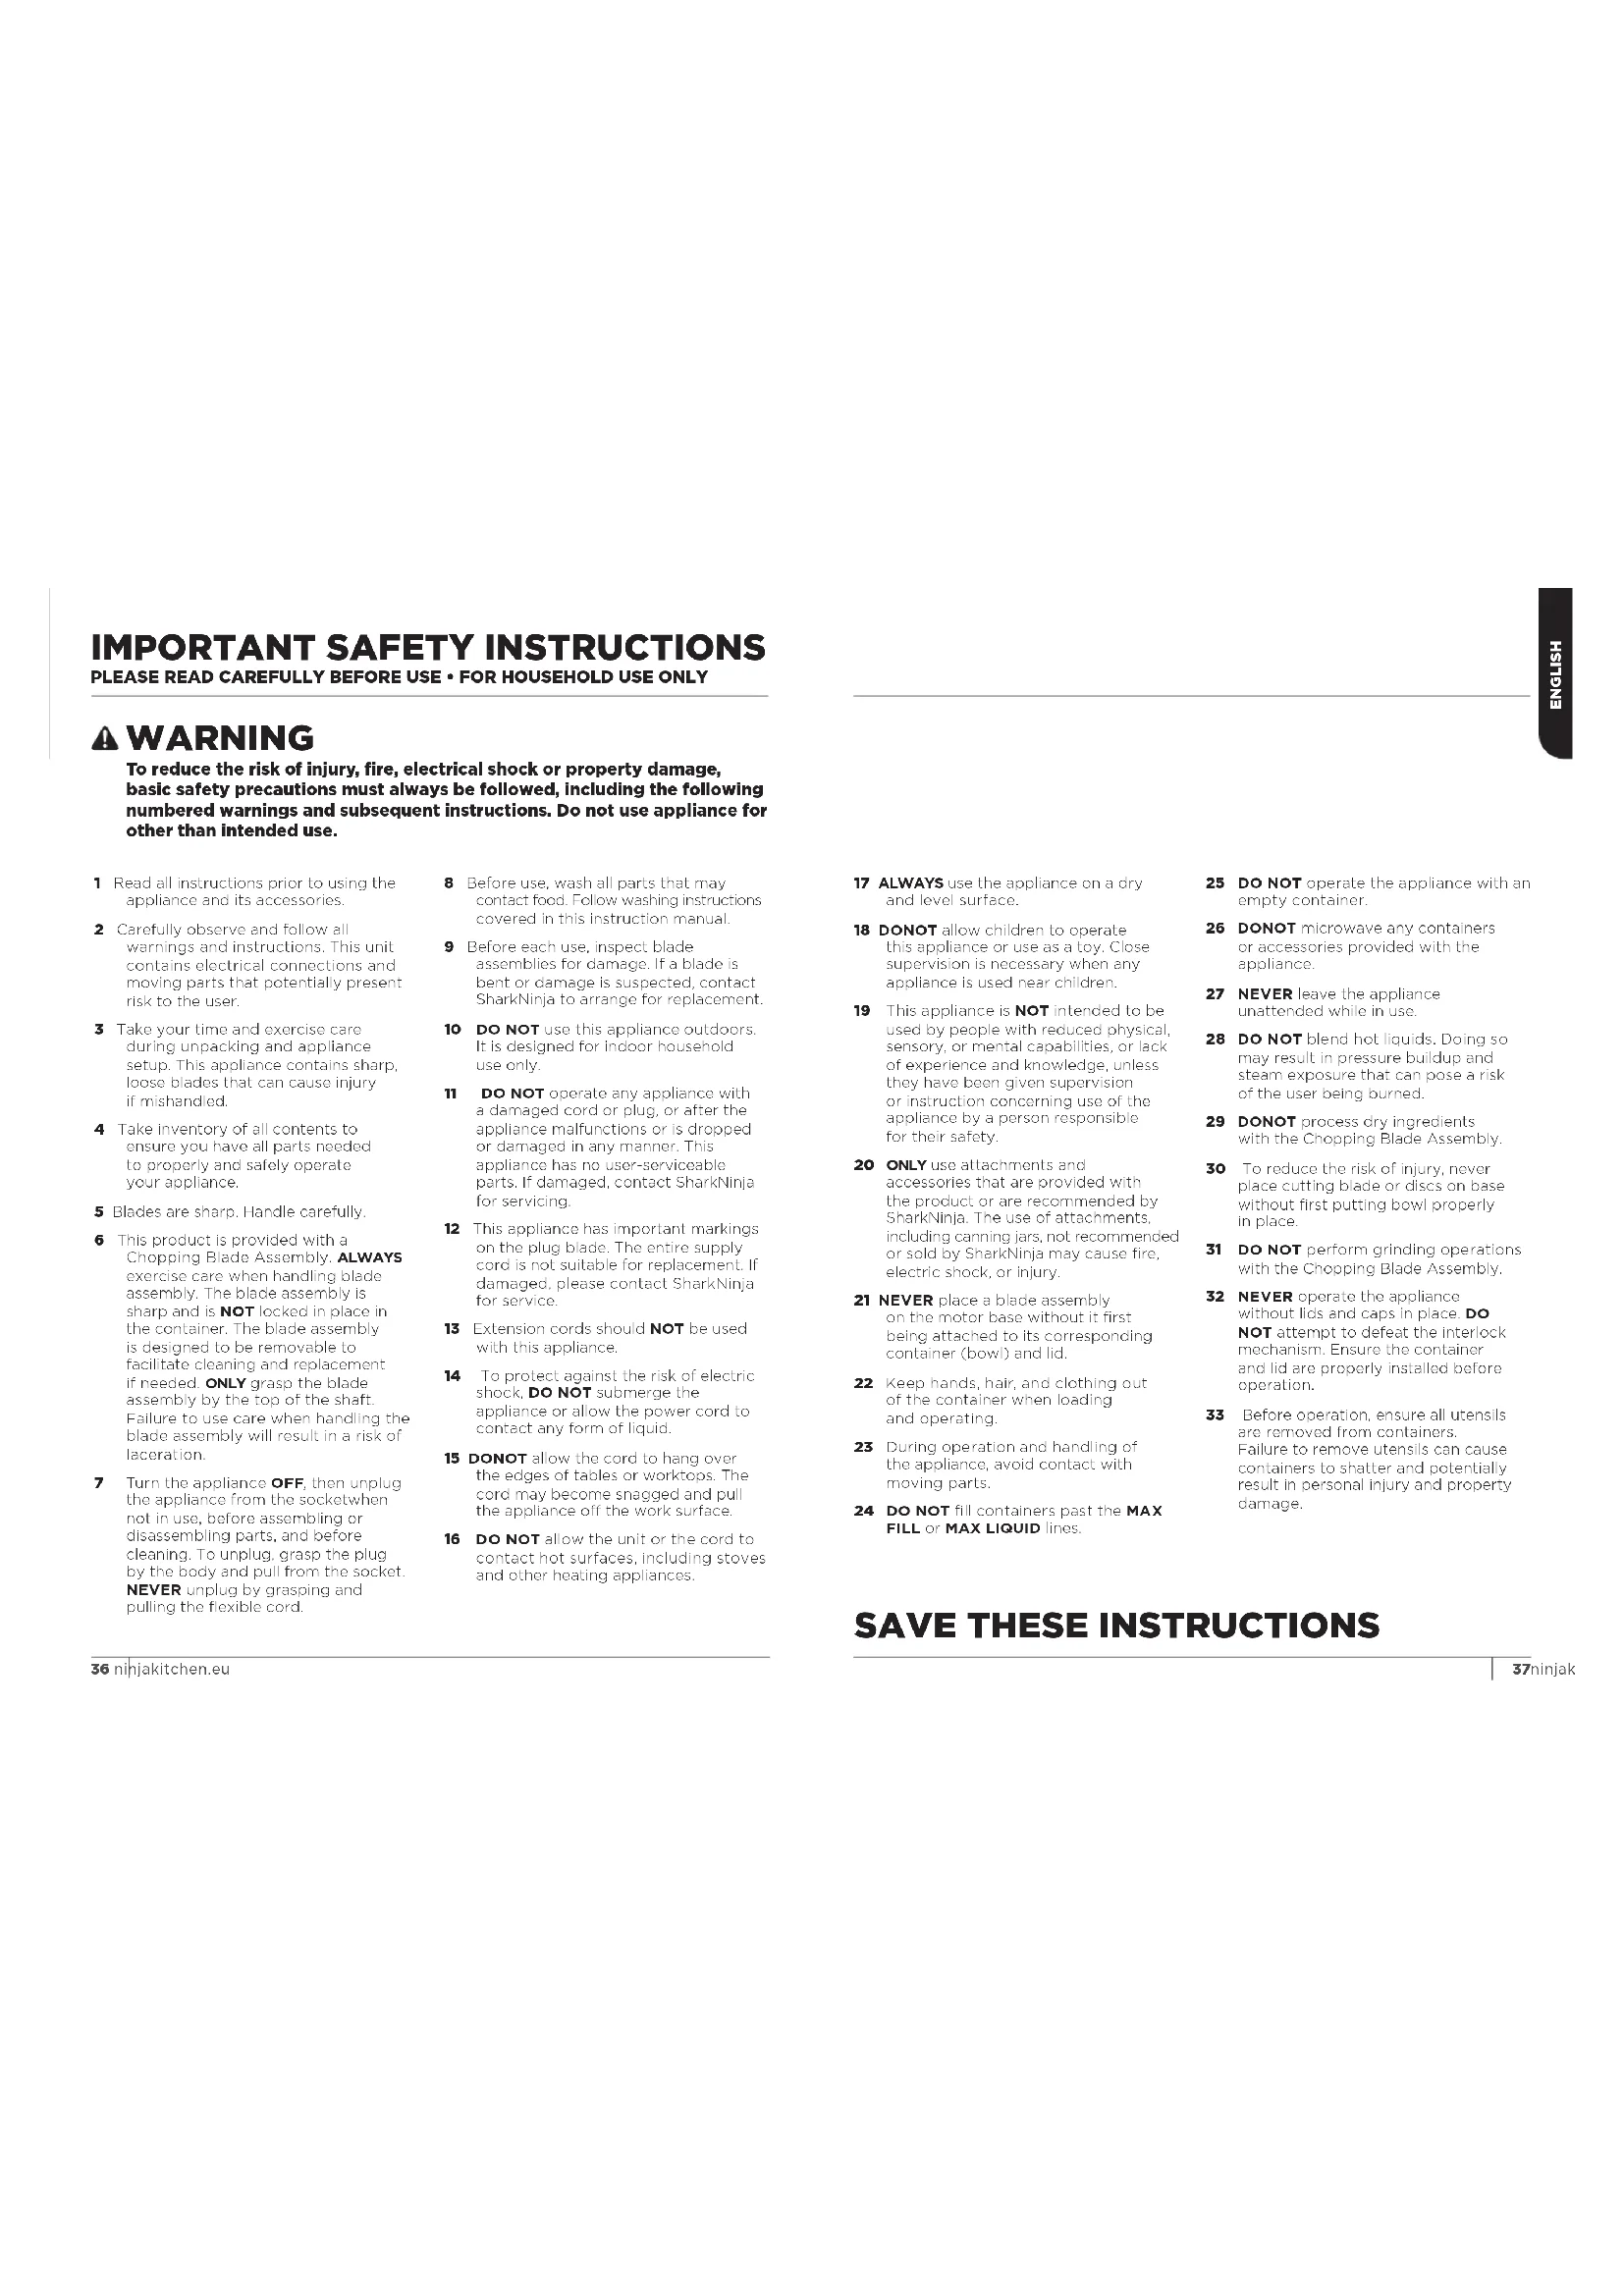
IMPORTANT SAFETY INSTRUCTIONS
PLEASE READ CAREFULLY BEFORE USE • FOR HOUSEHOLD USE ONLY
WARNING
To reduce the risk of injury, fire, electrical shock or property damage, basic safety precautions must always be followed, including the following numbered warnings and subsequent instructions. Do not use appliance for other than intended use.
1 Read all instructions prior to using the appliance and its accessories.
2 Carefully observe and follow all warnings and instructions. This unit contains electrical connections and moving parts that potentially present risk to the user.
3 Take your time and exercise care during unpacking and appliance setup. This appliance contains sharp, loose blades that can cause injury if mishandled.
4 Take inventory of all contents to ensure you have all parts needed to properly and safely operate your appliance.
5 Blades are sharp. Handle carefully.
6 This product is provided with a Chopping Blade Assembly. ALWAYS exercise care when handling blade assembly. The blade assembly is sharp and is NOT locked in place in the container. The blade assembly is designed to be removable to facilitate cleaning and replacement if needed. ONLY grasp the blade assembly by the top of the shaft. Failure to use care when handling the blade assembly will result in a risk of laceration.
7 Turn the appliance OFF, then unplug the appliance from the socket when not in use, before assembling or disassembling parts, and before cleaning. To unplug, grasp the plug by the body and pull from the socket. NEVER unplug by grasping and pulling the flexible cord.
8 Before use, wash all parts that may contact food. Follow washing instructions covered in this instruction manual.
9 Before each use, inspect blade assemblies for damage. If a blade is bent or damage is suspected, contact SharkNinja to arrange for replacement.
10 DO NOT use this appliance outdoors. It is designed for indoor household use only.
11 DO NOT operate any appliance with a damaged cord or plug, or after the appliance malfunctions or is dropped or damaged in any manner. This appliance has no user-serviceable parts. If damaged, contact SharkNinja for servicing.
12 This appliance has important markings on the plug blade. The entire supply cord is not suitable for replacement. If damaged, please contact SharkNinja for service.
13 Extension cords should NOT be used with this appliance.
14 To protect against the risk of electric shock, DO NOT submerge the appliance or allow the power cord to contact any form of liquid.
15 DONOT allow the cord to hang over the edges of tables or worktops. The cord may become snagged and pull the appliance off the work surface.
16 DO NOT allow the unit or the cord to contact hot surfaces, including stoves and other heating appliances.
17 ALWAYS use the appliance on a dry and level surface.
18 DONOT allow children to operate this appliance or use as a toy. Close supervision is necessary when any appliance is used near children.
19 This appliance is NOT intended to be used by people with reduced physical, sensory, or mental capabilities, or lack of experience and knowledge, unless they have been given supervision or instruction concerning use of the appliance by a person responsible for their safety.
20 ONLY use attachments and accessories that are provided with the product or are recommended by SharkNinja. The use of attachments, including canning jars, not recommended or sold by SharkNinja may cause fire, electric shock, or injury.
21 NEVER place a blade assembly on the motor base without it first being attached to its corresponding container (bowl) and lid.
22 Keep hands, hair, and clothing out of the container when loading and operating.
23 During operation and handling of the appliance, avoid contact with moving parts.
24 DO NOT fill containers past the MAX FILL or MAX LIQUID lines.
25 DO NOT operate the appliance with an empty container.
26 DONOT microwave any containers or accessories provided with the appliance.
27 NEVER leave the appliance unattended while in use.
28 DO NOT blend hot liquids. Doing so may result in pressure buildup and steam exposure that can pose a risk of the user being burned.
29 DONOT process dry ingredients with the Chopping Blade Assembly.
30 To reduce the risk of injury, never place cutting blade or discs on base without first putting bowl properly in place.
31 DO NOT perform grinding operations with the Chopping Blade Assembly.
32 NEVER operate the appliance without lics and caps in place. DO NOT attempt to defeat the interlock mechanism. Ensure the container and lid are properly installed before operation.
33 Before operation, ensure all utensils are removed from containers. Failure to remove utensils can cause containers to shatter and potentially result in personal injury and property damage.
SAVE THESE INSTRUCTIONS
IMPORTANT SAFETY INSTRUCTIONS
PLEASE READ CAREFULLY BEFORE USE • FOR HOUSEHOLD USE ONLY
WARNING
To reduce the risk of injury, fire, electrical shock or property damage, basic safety precautions must always be followed, including the following numbered warnings and subsequent instructions. Do not use appliance for other than intended use.
34 Keep hands and utensils out of containers while chopping to reduce the risk of severe personal injury or damage to the blender/food chopper. A scraper may be used ONLY when the processor is not running. When using the processor, always use food pusher to add food. NEVER add food by hand.
35 DONOT attempt to remove the container or lid from the motor base while the blade assembly is still spinning. Allow the appliance to come to a complete stop before removing lids and containers.
36 If the appliance overheats, a thermal switch will activate and temporarily disable the motor. To reset, unplug the appliance and allow it to cool for approximately 15 minutes before using again.
37 DONOT expose the containers and accessories to extreme temperature changes. They may experience damage.
38 Upon completion of processing, ensure that the blade assembly is removed BEFORE emptying container's contents. Remove the blade assembly by carefully grasping the top of the shaft and lifting it from the container. Failure to remove the blade assembly before emptying the container results in a risk of laceration.
39 The maximum wattage rating for this appliance is based on the configuration of the Food Processor Bowl. Other configurations may draw less power or current.
40 DONOT submerge the motor base or control panel in water or other liquids. DO NOT spray motor base or control panel with any liquid.
41 DONOT attempt to sharpen blades.
42 Turn off the appliance and unplug the motor base before cleaning.
43 Never feed food by hand. Always use food pusher.
44 To reduce the risk of injury from damage to the food processing bowl or separation of the lid, DO NOT load the bowl with ice cubes for crushing.
SAVE THESE INSTRUCTIONS
38 ninjakitchen.eu
PARTS
There are a variety of accessories that are compatible with this food processor series.
NOTE: The top flap of your box shows the select accessories that are included with your model.
To purchase more accessories and find great recipes, visit ninjakitchen.eu.
PARTS
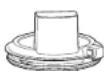
A Pusher for Feed Chute Lid
B Feed Chute Lid
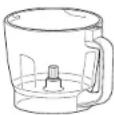
c 2.1L Food Processor Bowl
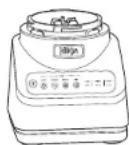
D Motor Base
(attached power cord not shown)
E Reversible Slicing/Grating Disc
F Disc Adapter
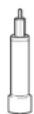
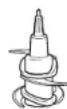
G Chopping Blade Assembly
H Dough Blade Assembly


BEFORE FIRST USE
IMPORTANT: Review all warnings on pages 36-38 before proceeding.
NOTE: All attachments are BPA free and dishwasher safe. It is recommended that the bowl, lid, disc, and blade assemblies be placed on the top rack of the dishwasher. Exercise care when handling blade assemblies.
FEATURES
The Power button should be used to turn the unit on or off.
AUTO-IQ®
Intelligent preset programs combine unique processing and pausing patterns that do the work for you. Once an Auto-iQ® program is selected, it will start immediately and automatically stop when processing is complete. To stop processing before the end of a program, press the currently active button again.
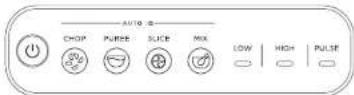
Auto-iQ® PROGRAMS
CHOP
Timed pulses and pauses give you consistent chopping results. Run program once for a large chop, twice for a small chop and three times if you prefer it even finer.
PUREE
Create anything from silky-smooth sauces to the perfect hummus.
SLICE
Use with the reversible disc shaped blade to quickly slice or grate cheese and vegetables with minimal effort.
MIX
Quickly mix together doughs and batters for pizzas, bread, pastry and cakes.
MANUAL PROGRAMS
LOW and HIGH
When selected, each of these speeds runs continuously until turned off. They do not work in conjunction with any preset Auto-iQ® programs.
PULSE
Offers greater control of pulsing and processing. Operates only when PULSE is pressed. Use short presses for short pulses and long presses for long pulses.
IMPORTANT: DO NOT run the unit on HIGH if using the dough blade.
IMPORTANT: The unit is NOT intended to crush ice. Refer to warnings.
USING THE FOOD PROCESSOR BOWL
IMPORTANT As a safety feature, if the blade assembly is not fully seated, you will not be able to install and lock the lid in position.
NOTE: DO NOT acid ingredients before completing installation of the blade assembly.
NOTE: Please follow the same instructions to install the Dough Blade Assembly.
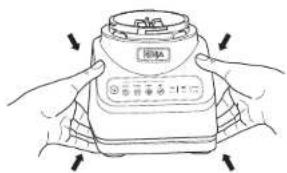
1 Place motor base on a clean, dry, level surface such as a worktop or table.
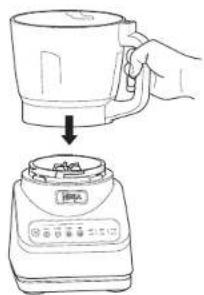
2 Lower the Food Processor Bowl onto the motor base and rotate clockwise until it clicks into place.
natural_image
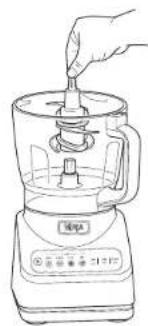
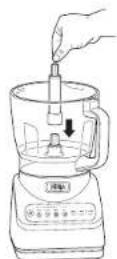
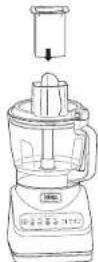
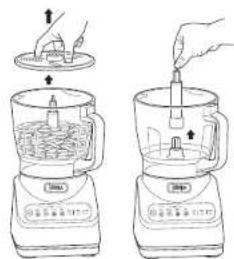
Line drawing of a hand using a blender to press or adjust the lid (no text or symbols present)3 Exercising care, grasp the Chopping Blade Assembly by the top of the shaft and place it onto the drive gear inside the bowl. Note that the Chopping Blade Assembly will fit loosely on the drive gear.
4 Aod ingredients to the bowl, making sure not to exceed the MAX FILL line.
natural_image
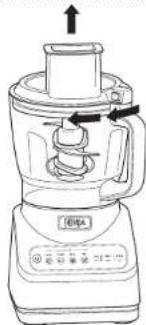
Line drawing of a blender with control panel and directional arrows indicating motion (no text or symbols)5 Place the feed chute lid on the bowl and turn clockwise until you hear a click, indicating the lid is locked in place.
USING THE FOOD PROCESSOR BOWL - CON'T

natural_image
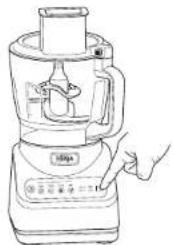
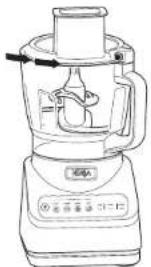
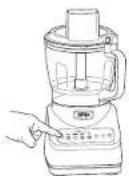
Line drawing of a blender with handle and control panel (no text or symbols)6a Plug in the unit, then press the Power button to turn it on. If using an Auto-iQ® program, first select the program that best suits your recipe. The preset feature will automatically stop the unit at the end of the program. To stop the unit at any time, press the currently active program again.
6b If not using an Auto-iQ® program, select one of the manual programs. Once the ingredients have reached your desired consistency, press the active button again, and wait for the unit to come to a complete stop.
natural_image
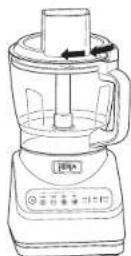
Line drawing of a blender with control panel and brand logo (no text or symbols on the device itself)7 When finished, press the button on the feed chute lid near the handle to unlock, then turn the lid anti-clockwise. Lift the lid from the bowl. Always remove the Chopping Blade Assembly before emptying the ingredients from the bowl. To remove the Chopping Blade Assembly, carefully grasp it by the top of the shaft and lift it out of the bowl.
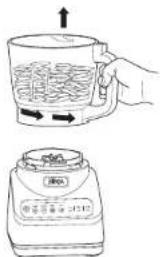
8 To remove the bowl from the motor base, turn the bowl anti-clockwise and then lift it.
natural_image
Line drawing of hands holding a device with arrows indicating motion (no text or symbols)9 Press the Power button to turn the unit off, then unplug the unit. Refer to the Care & Maintenance section for cleaning and storage instructions.
NOTE: The food chute lid features a pusher to guide food through the chute.
NOTE: The Slicing/Grating Disc is reversible. Use the side labeled "Slicer" for slicing. Carefully if ip the disc over to the side labeled "Shredder" for grating.
1 Place motor base and place on a clean, dry, level surface such as a worktop or table.
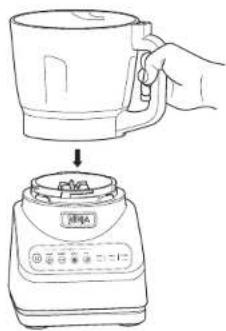
2 Lower the Food Processor Bowl onto the motor base and rotate clockwise until it clicks into place.
3 Place the disc spindle onto the drive gear inside the bowl.
4 Use the finger holes to grasp the disc and place it over the spindle.
5 Place the feed chute lid on the bowl and turn clockwise until you hear a click, indicating the lid is locked in place.
6 Plug in the unit, then press the Power button to turn it on. Select LOW. The disc will begin spinning.
7 Add the ingredients you want to slice or grate through the feed chute on the lid. Use the food pusher to help guide the ingredients through the feed chute. The middle piece of the food pusher is removable to use for smaller ingredients.
natural_image
Illustration of a blender with two side-by-side views showing internal mixing (no text or symbols)8 When finished, stop the unit by touching the Power button and wait for the disc to stop spinning. Press the button on the feed chute lid near the handle to unlock, then turn the lid anti-clockwise. Lift the lid from the bowl.
9 Using the finger holes, carefully lift the disc out of the bowl.
10 Grasp the spindle by the top of the shaft and lift it out of the bowl.
11 To remove the bowl from the motor base, turn the bowl anti-clockwise and then lift it.
12 Press the Power button to turn the unit off, then unplug the unit. Refer to the Care & Maintenance section for cleaning and storage instructions.
CARE & MAINTENANCE
CLEANING
Separate all parts. Wash bowl in warm, soapy water with a soft cloth.
•Hand-Washing
Wash bowl, lid, disc, and blade assemblies in warm, soapy water. When washing the blade assemblies, use a dishwashing utensil with a handle to avoid direct hand contact with blades.
Handle blade assemblies with care to avoid contact with sharp edges. Rinse and air-dry thoroughly.
•Dishwasher
All attachments are dishwasher safe. It is recommended that the bowl, lid, disc, and blade assemblies be placed on the top rack of the dishwasher ONLY. Ensure the blade assembly is removed from the bowl before placing in the dishwasher. Exercise care when handling blade assemblies.
- Motor Base
Turn off the unit and unplug the motor base before cleaning. Wipe motor base with a clean, damp cloth.
DO NOT use abrasive cloths, pads, or brushes to clean the base.
STORING
Wrap the power cord around the cord wrap on the back of the motor base. Store the unit upright and store all blade assemblies inside or attached to the bowl with the lid locked in place.
DO NOT slack items on top of the containers. Store any remaining attachments alongside the unit or in a cabinet where they will not be damaged or create a hazard.
RESETTING THE MOTOR THERMOSTAT
This unit features a unique safety system that prevents damage to the motor and drive system should you inadvertently overload the unit. If the unit is overloaded, the motor will be temporarily disabled. Should this occur, follow the reset procedure below.
1 Unplug the unit from the socket.
2 Allow the unit to cool for approximately 15 minutes.
3 Remove the bowl's lid and blade assembly. Empty the bowl and ensure no ingredients are jamming the blade assembly.
IMPORTANT: Ensure that maximum capacities are not exceeded. This is the most typical cause of appliance overload.
ORDERING REPLACEMENT PARTS
To order additional parts and attachments, visit ninjakitchen.eu
TROUBLESHOOTING GUIDE

WARNING: To reduce the risk of shock and unintended operation, turn power off and unplug unit before troubleshooting.
Unit doesn't turn off.
- Remove bowl from base by rotating it anti-clockwise and lifting it. Unplug the power cord from the socket.
Unit doesn't mix well; ingredients get stuck.
- Using the Auto-iQ® programs is the easiest way to achieve great results. The pulses and pauses allow the ingredients to settle toward the blade assembly. If ingredients are routinely getting stuck, adding some liquid will usually help.
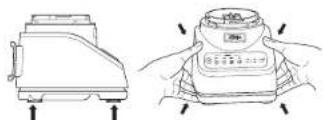
Motor base won't stick to worktop or tabletop.
- Make sure surface and suction feet are wiped clean. Suction feet will only stick to smooth surfaces.
- Suction feet will not stick to some surfaces such as wood, tile, and non-polished finishes.
- DO NOT attempt to use unit when the motor base is stuck to a surface that is not secure (chopping board, platter, plates, etc.).
Unit is diffi cult to remove from worktop for storage.
- Place your hands underneath both sides of the motor base and gently pull the unit up and toward you.
Food is not evenly chopped.
- For best results when chopping, cut pieces of ingredients in a uniform size and don't overfi ll the bowl.
PRODUCT REGISTRATION
TWO (2) YEAR LIMITED GUARANTEE
When you buy a product in Germany as a consumer, you get the benefit of legal rights relating to the quality of the product (your "statutory rights"). You can enforce these statutory rights against your retailer. However, at Ninja we are so confident about the quality of our products (the "Products") that we give you an additional manufacturer's guarantee of up to two years. This guarantee only applies to the Product if it is bought in new and unused condition. These terms and conditions relate to our guarantees only – your statutory rights as a buyer are unaffected. Please note that the 2 year guarantee is available in all EU countries.
The conditions below describe the prerequisites and scope of our guarantees which are issued by SharkNinja Germany GmbH, Kurt-Blaum-Platz 8, 63450 Hanau (Germany) ("us", "our" or "we"). They do not affect your statutory rights or the obligations of your retailer and your contract with them. The same applies if you have purchased the product directly from Ninja.
Ninja\* Guarantees
A household kitchen appliance constitutes a sizeable investment. Your new machine needs to work properly for as long as possible. The guarantee it comes with is an important consideration - and reflects how much confidence the manufacturer has in its product and manufacturing quality.
Our customer service helpline (0800 000 9063) is open from 9.00am to 6.00pm Monday - Friday. It's free to call, and you'll be put straight through to a Ninja representative. You'll also find online support at www.ninjakitchen.eu.
How do I register my guarantee?
You can register your guarantee online within 28 days of purchase. To save time, you'll need the following information about your machine:
- Model no.
- Serial Number (only if available)
• Date of purchase of the Product (receipt or delivery note)
To register online, please visit www.ninjakitchen.eu
IMPORTANT
- The guarantee covers your Product for 2 years starting on the date of purchase.
- Please keep the receipt at all times. Should you need to use your guarantee we will need the receipt to verify the information supplied to us is correct. The inability to produce a valid receipt will invalidate your guarantee.
What are the benefits of registering my guarantee?
When you register your guarantee, you can choose to receive our newsletter containing tips, advice and competitions. Hear the latest news about new Ninja technology and launches. If you register your guarantee online, you'll get instant confirmation that we've received your details.
For details of our privacy policy please visit www.ninjakitchen.eu
How long are our Products guaranteed for?
Our confidence in our design and quality control means that your Product is guaranteed for a total of two years.
What is covered by the guarantee?
Repair or replacement (at Ninja's discretion) of your Product, including all parts and labour in case of any defect in design, materials and workmanship (including transport and shipping costs). Our guarantee is in addition to your legal rights as a consumer.
What is not covered by the guarantee?
• Normal wear and tear.
- Accidental damage, faults caused by negligent use or care, misuse, neglect, careless operation or handling of the kitchen appliance which is not in accordance with the Ninja® Instruction Manual supplied with your machine.
- Use of the kitchen appliance for anything other than normal domestic household purposes.
- Use of parts not assembled or installed in accordance with the operating instructions.
- Use of parts and accessories which are not Ninja® Genuine Components.
- Faulty installation (except where installed by Ninja®).
- Repairs or alterations carried out by parties other than Ninja or its agents, Repairs or alterations carried out by parties other than Ninja or its agents, unless you can show that the repairs or alterations carried out by others are not related to the defect for which you exercise the guarantee.
What happens when my guarantee runs out?
Ninja does not design products to last for a limited time. We do appreciate that there may be a desire for our customers to want to repair their kitchen appliance after the guarantee has elapsed. In this case please contact our free phone customer service help line and ask about our guarantee program, on 0800 000 9063.
Where can I buy genuine Ninja spares and accessories?
Ninja spares and accessories are developed by the same engineers who developed your Ninja kitchen appliance. You'll find a full range of Ninja spares, replacement parts and accessories for all Ninja machines at www.ninjakitchen.eu
Please remember that using non-Ninja spares may invalidate your manufacturer's guarantee. However, your statutory rights are unaffected.
NOTES
GRACIAS
USO DEL BOL FOOD PROCESSOR
natural_image
Line drawing of a hand using a blender to press or adjust the lid (no text or symbols)natural_image
Line drawing of a blender with control panel and upward arrow indicator (no text or symbols)natural_image
Line drawing of a blender with a hand pointing to the side (no text or symbols)natural_image
Line drawing of a blender with control panel and brand logo (no text or symbols on the device itself)natural_image
Illustration of a blender with two views showing internal mixing (no text or symbols)natural_image
Line drawing of a blender with a hand holding the top handle (no text or symbols)natural_image
Line drawing of a blender with control panel and upward arrow indicator (no text or symbols)natural_image
Line drawing of a blender with a hand pressing the button (no text or symbols)natural_image
Line drawing of a blender with control panel and side arm (no text or symbols)natural_image
Illustration of hands holding a device with arrows pointing to the lid (no text or symbols visible)LOW e HIGH (BASSA e ALTA)
natural_image
Line drawing of a blender with a hand holding the top handle (no text or symbols)natural_image
Line drawing of a blender with control panel and directional arrows (no text or symbols)natural_image
Line drawing of a blender with a hand pressing the button (no text or symbols)natural_image
Line drawing of a blender with control panel and side arm (no text or symbols)natural_image
Line drawing of hands holding a device with arrows indicating movement or change (no text or symbols)natural_image
Line drawing of a blender with two views showing internal mixing (no text or symbols)natural_image
Line drawing of a hand using a blender to press or adjust the lid (no text or symbols)natural_image
Line drawing of a blender with control panel and upward arrow indicator (no text or symbols)natural_image
Line drawing of a blender with a hand pressing the button (no text or symbols)natural_image
Line drawing of a blender with control panel and speaker (no text or symbols)natural_image
Illustration of hands holding a portable electronic device with buttons and indicator lights (no text or symbols)natural_image
Illustration of a blender with two views showing internal mixing (no text or symbols)natural_image
Technical line drawing of a mechanical component with two views (front and side), no visible text or symbolsnatural_image
Line drawing of a hand using a blender to press or adjust the lid (no text or symbols)natural_image
Line drawing of a blender with an upward arrow indicating motion (no text or symbols)natural_image
Line drawing of a blender with a hand pointing to the side panel (no text or symbols present)natural_image
Line drawing of a blender with control panel and speaker (no text or symbols)natural_image
Line drawing of two hands holding a handheld device with control buttons and a display (no text or symbols visible)natural_image
Illustration of a blender with two views showing internal mixing (no text or symbols)STELL OG VEDLIKEHOLD
RENGJ∅RING
Skill alle delene fra hverandre. Vask bollen i varmt såpevann med en myk klut.
• Vask for hånd
natural_image
Line drawing of a hand using a blender to press or adjust the lid (no text or symbols)natural_image
Line drawing of a blender with handle and control panel (no text or symbols)natural_image
Line drawing of a blender with a hand pointing to the side (no text or symbols)natural_image
Line drawing of hands holding a device with arrows indicating direction (no text or symbols)natural_image
Illustration of a blender with two views showing internal mixing (no text or symbols)9 Nosta levy varovasti kulhosta tarttuen siihen sormirei'sta.
natural_image
Line drawing of a hand using a blender to press or adjust the lid (no text or symbols)natural_image
Line drawing of a blender with control panel and upward arrow indicator (no text or symbols)natural_image
Line drawing of a blender with a hand pointing to the side panel (no text or symbols present)natural_image
Line drawing of hands holding a device with buttons and a display (no text or symbols)Illustrations may differ from actual product. We are constantly striving to improve our products; therefore the specifications contained herein are subject to change without notice.
AUTO-IQ and NINJA are registered trademarks of SharkNinja Operating LLC.
PRINTED IN CHINA
ESPAÑOL
- TAK
- BRUG AF PROCESSORSKÅLEN - FORTSAT
- REGISTER YOUR PURCHASE
- RECORD THIS INFORMATION
- TECHNICAL SPECIFICATIONS
- PLEASE READ CAREFULLY AND
- CONTENTS
- IMPORTANT SAFETY INSTRUCTIONS
- WARNING
- SAVE THESE INSTRUCTIONS
- PARTS
- BEFORE FIRST USE
- FEATURES
- AUTO-IQ®
- Auto-iQ® PROGRAMS
- CHOP
- PUREE
- SLICE
- MIX
- MANUAL PROGRAMS
- LOW and HIGH
- PULSE
- USING THE FOOD PROCESSOR BOWL
- USING THE FOOD PROCESSOR BOWL - CON'T
- CARE & MAINTENANCE
- CLEANING
- •Hand-Washing
- •Dishwasher
- - Motor Base
- STORING
- RESETTING THE MOTOR THERMOSTAT
- ORDERING REPLACEMENT PARTS
- TROUBLESHOOTING GUIDE
- WARNING: To reduce the risk of shock and unintended operation, turn power off and unplug unit before troubleshooting.
- Unit doesn't turn off.
- Unit doesn't mix well; ingredients get stuck.
- Motor base won't stick to worktop or tabletop.
- Unit is diffi cult to remove from worktop for storage.
- Food is not evenly chopped.
- PRODUCT REGISTRATION
- TWO (2) YEAR LIMITED GUARANTEE
- Ninja\* Guarantees
- How do I register my guarantee?
- IMPORTANT
- What are the benefits of registering my guarantee?
- How long are our Products guaranteed for?
- What is covered by the guarantee?
- What is not covered by the guarantee?
- What happens when my guarantee runs out?
- Where can I buy genuine Ninja spares and accessories?
- NOTES
- GRACIAS
- USO DEL BOL FOOD PROCESSOR
- LOW e HIGH (BASSA e ALTA)
- STELL OG VEDLIKEHOLD
- RENGJ∅RING
- • Vask for hånd
- ESPAÑOL
Brand : NINJA
Model : BN650EU
Category : Soup maker