
Comfort Quick - Thermometer CHICCO - Free user manual and instructions
Find the device manual for free Comfort Quick CHICCO in PDF.
| Product type | Infrared ear thermometer |
| Brand | Chicco |
| Model | Comfort Quick |
| Dimensions | 120.4 × 37.8 × 40.3 mm |
| Weight | 57.7 g (with battery) |
| Power supply | 1 CR2032 lithium battery |
| Battery life | Approximately 3000 measurements or 1 year of normal use |
| Measuring range | 34°C to 42.2°C (93.2°F to 108°F) |
| Accuracy | ±0.2°C between 35°C and 42°C; ±0.3°C outside |
| Display | LCD with backlight |
| Memory | 25 measurement series |
| Fever alarm | Yes, from 37.5°C (99.5°F) |
| Mode conversion | Displays oral equivalent |
| Probe diameter | 5.9 mm (the smallest in the world) |
| Probe cover | Disposable, reference 00001205000000 |
| Cleaning | 70% alcohol on the sensor and plastic surface |
| Protection rating | IP22 |
| Storage temperature | -20°C to 50°C (-4°F to 122°F) |
| Operating humidity | 15% to 85% RH |
| Automatic shutdown | After 1 minute of inactivity |
| Warranty | Compliance according to national conditions |
| Recalibration | Every 3 years |
Frequently Asked Questions - Comfort Quick CHICCO
User questions about Comfort Quick CHICCO
0 question about this device. Answer the ones you know or ask your own.
Ask a new question about this device
Download the instructions for your Thermometer in PDF format for free! Find your manual Comfort Quick - CHICCO and take your electronic device back in hand. On this page are published all the documents necessary for the use of your device. Comfort Quick by CHICCO.
USER MANUAL Comfort Quick CHICCO
EN Instructions for Use
Please read these instructions carefully and keep them for future reference.
Radian Innovation Inc.
Indirizzo: 1F, n.3, Industrial East 9th Rd., Science-Based Industrial Park, HsinChu, Taiwan

MT Promedt Consulting GmbH
Indirizzo: Altenhofstrasse 80, D-66386
St. Ingbert, Germania
Distribuito da:
Artsana S.p.A.
Dear Customer, thank you for choosing our product!
This thermometer was designed by a panel of highly proficient technicians and produced in conformity with all applicable European Standards. It uses the smallest probe in the world (5.9 mm in diameter) and is therefore ideal for measuring ear temperatures of newborns, infants and all children in general.
The thermometer picks up the infrared radiation emitted by the tympanic membrane and converts the reading into an equivalent oral measurement. Always keep the thermometer and probe caps out of reach of children and never leave children unattended when using the thermometer. The thermometer contains small parts that children can accidentally swallow. If in doubt, or if the temperature goes up, contact your doctor for advice.
BODY TEMPERATURE
It is important to bear in mind that body temperature varies from person to person, depending on where the reading is taken, and it varies throughout the day, fluctuating between 35.5 ^ C and 37.8^ (95.5 F -100 F). This is why, in order to evaluate the temperature reading properly, we recommend you record the child's normal ear temperature, when he is in good health, at various times of day and use this as your benchmark when assessing if the temperature has risen or not. To determine whether someone has a fever, it is recommended to compare the current temperature reading with one taken in good health: an increase equal to or greater than 1^ (1.8 F) compared to the benchmark temperature is usually indicative
of a fever. Furthermore, not only do different measurement points (rectal, underarm, oral, frontal, ear) provide different readings, but it is also difficult to produce valid correlations for each subject (there are only statistical data in this sense). It is hence absolutely normal that the temperature differs when taken in the ear rather than the underarm and it is wrong to try and compare the two. It is also wrong to compare readings taken on the right and left sides of the body as the temperature readings depend on the depth of the blood vessels where the reading is taken, and this depth usually differs between the right and left side. The indicative readings below refer to standard adult temperatures taken in different parts of the body:
- ear temperature: 35.8 - 38^ C/96.4 -100.4°F
rectal temperature: 36.6 - 38°C / 97.9 - 100.4° F
underarm temperature: 34.7 - 37.3^ / 94.5 - 99.1^ - oral temperature: 35.5 - 37.5°C / 95.9 - 99.5° F
HOW TO TAKE A TEMPERATURE Precautions
The thermometer tends to compensate ear temperature readings according to the room temperatures. To get the most accurate reading, it is therefore recommended to place the thermometer in the room where it will be used for at least 20-25 minutes. The person whose temperature will be taken should also be in the same room for at least 5 minutes before taking the reading. Whilst taking the temperature, make sure that the patient and thermometer are not exposed to direct heat, sunlight or air conditioning.
- Before taking the reading, check that the ear canal is clean and accessible; do not clean the ear just before using the probe

as the use of hot or cold water will affect the reading.
- Do not take a person's temperature for at least thirty minutes after physical effort, a bath or after a meal.
- If the probe is pointed at a hot object, it will perform a remote temperature reading. To avoid such reading errors, keep the time from when it is switched on to when it takes the ear reading to a minimum.
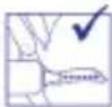
- Do not touch the sensor, the probe or the probe cap with your fingers. If fingerprints get left on the sensor, remove them following the instructions provided in the "CARE AND MAINTENANCE" section.
READING PROCEDURE
Important: before switching the appliance on, the probe cap must be fitted correctly, following the instructions provided in the "Fitting the probe cap" section.
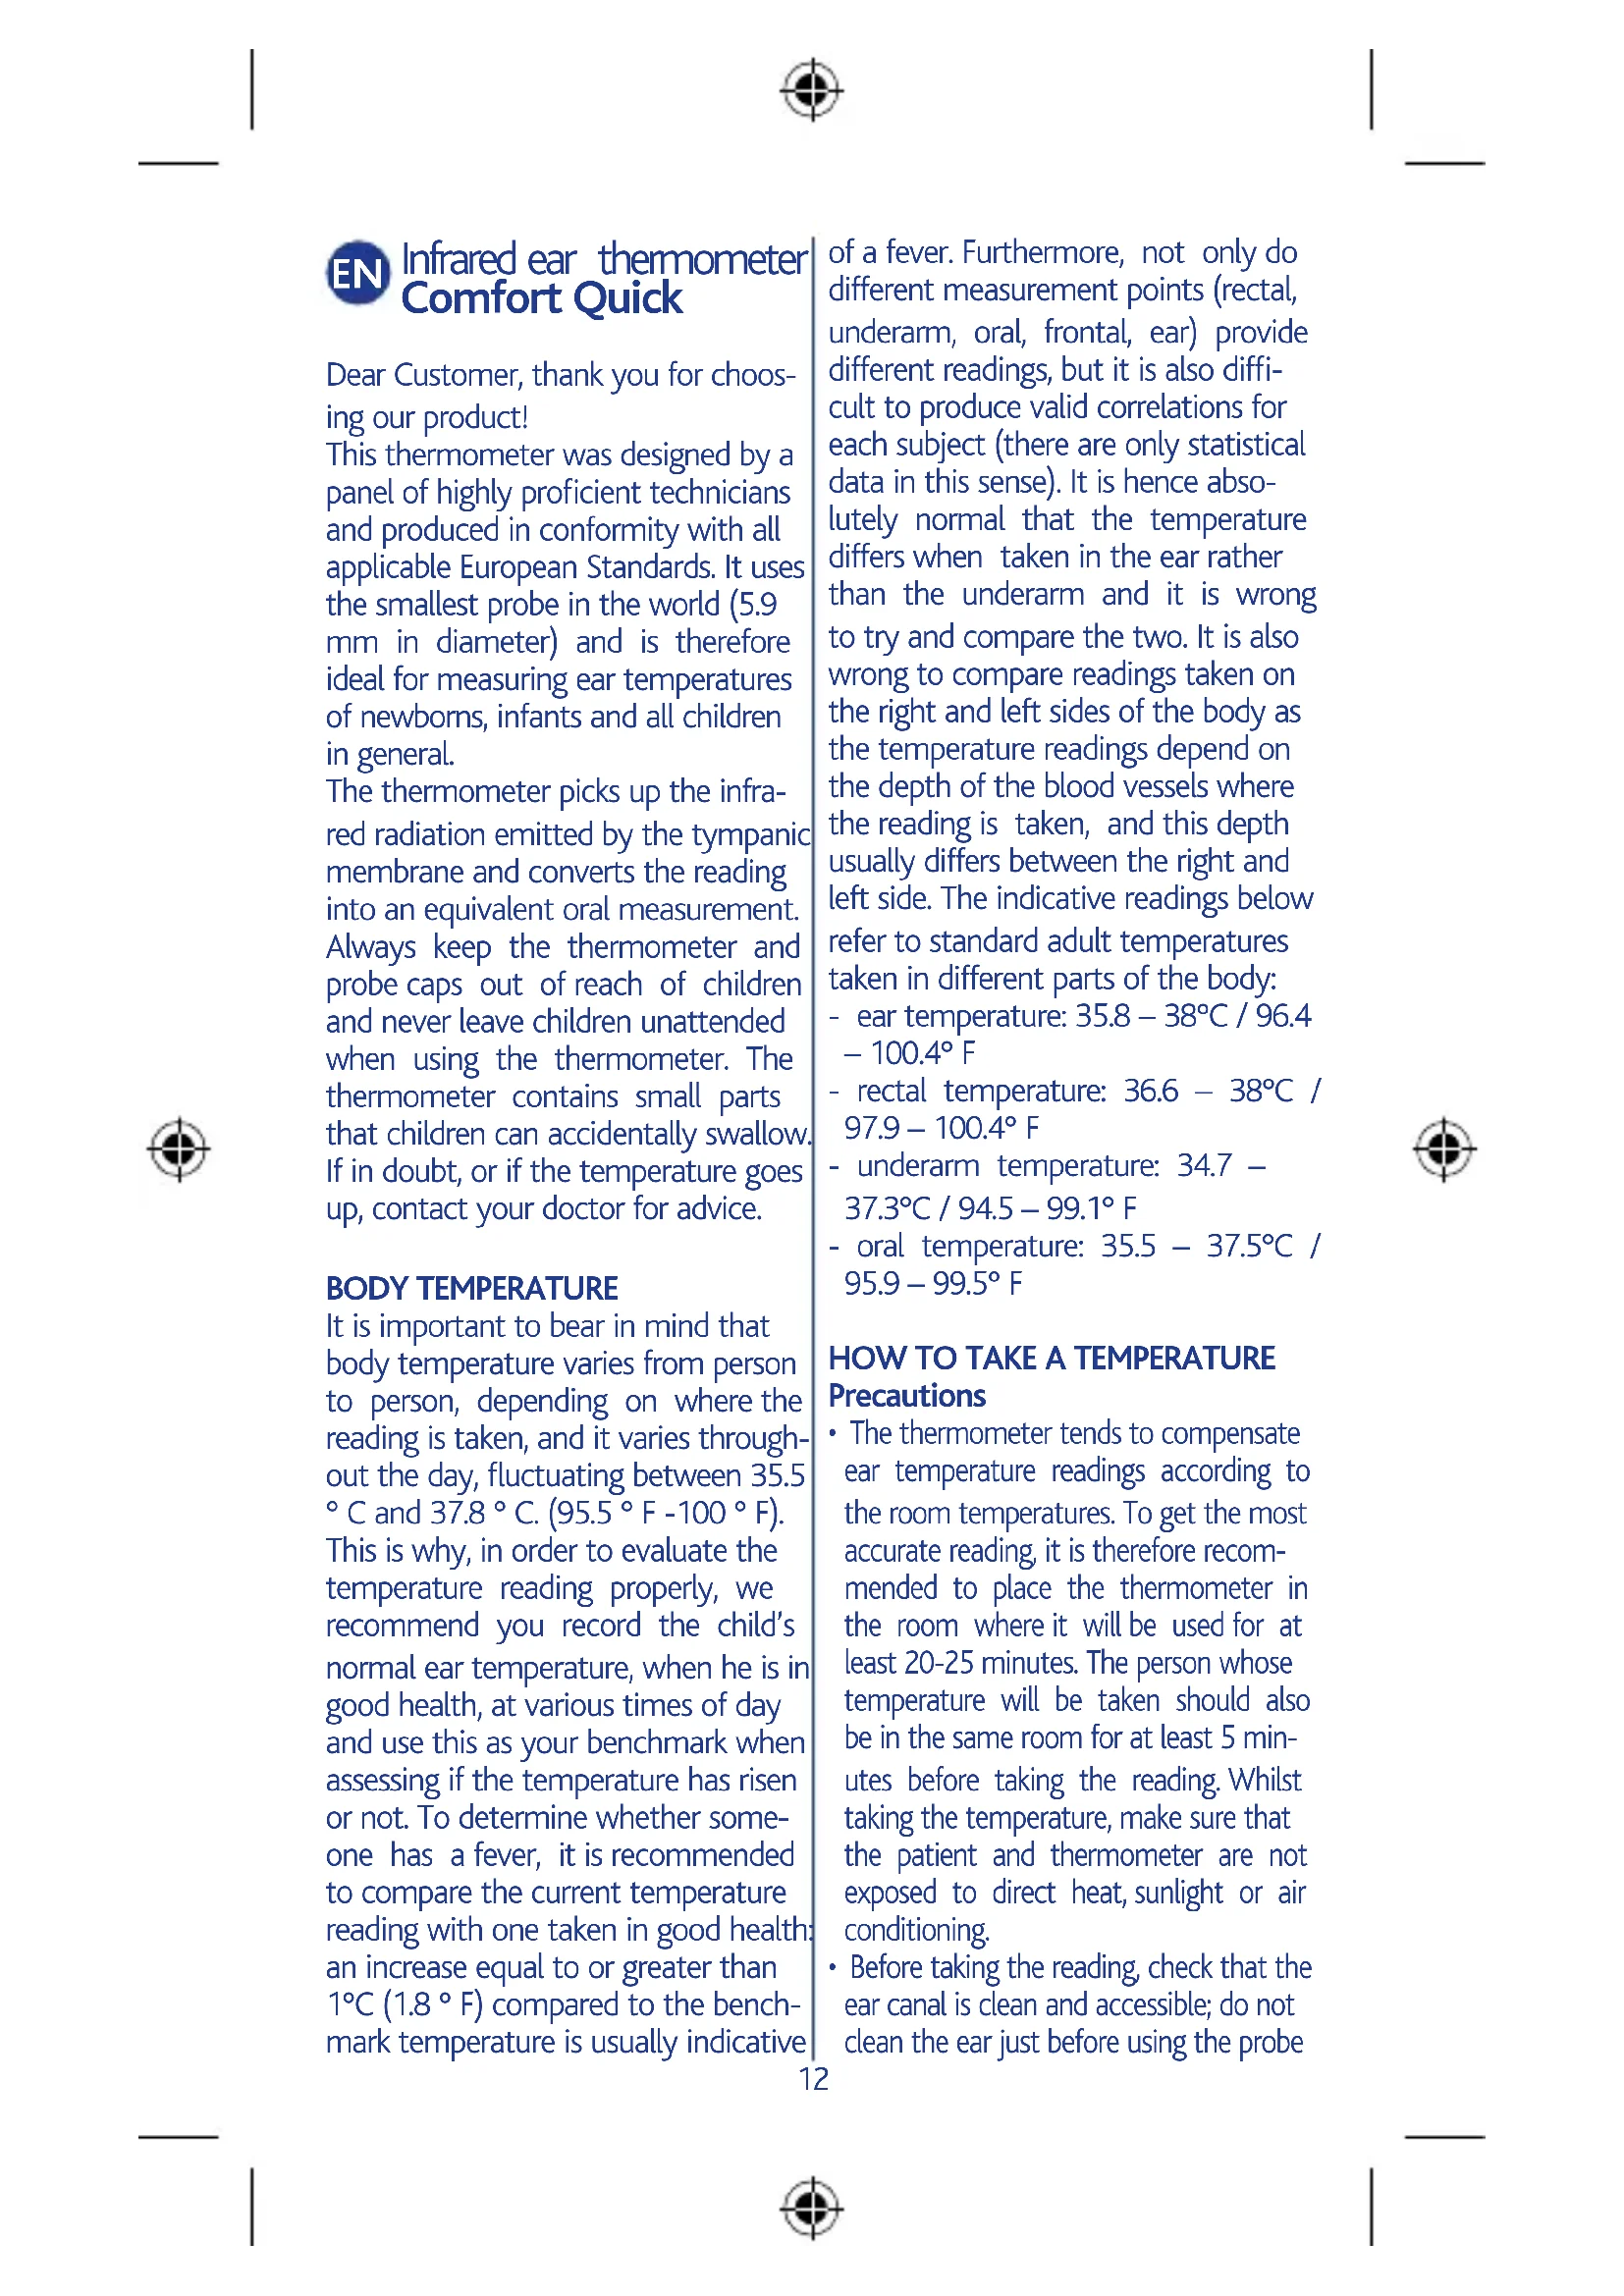
Fitting the probe caps.
- Place the probe cap in the housing in the thermometer case (see diagram 1). Important: position the probe cap making sure the adhesive part, i.e. the knurled section, (see diagram 1) is facing upwards.
- Align the centre of the probe cap with the centre of the probe.
- Insert the probe into its seat until you hear it click into place; this mean it is now ready to use.
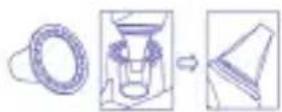
Fig. 1
If the probe cap is not fitted correctly, when the appliance is switched on, the symbol will blink on the display and it will not be possible to take any readings (the appliance will beep three times and no message will ap
pear on the display).
If this happens, fit the probe cap again following the instructions provided in points 1-3 of this section very carefully.
Warning! Only use dedicated probe caps REH 00001205000000
Switching on the appliance and taking readings
Press the (ON/MEM) button on the left side of the appliance.

Fig. 3
When the appliance is switched on, it will run an autotest and all the segments on the display will light up. If any segments do not light up, do not use the thermometer under any circumstances.
When the autotest sessions has been completed, the thermometer display will look like the picture in diagram 4. The thermometer is ready for use as soon as the (ear) icon stops blinking and the appliance beeps twice.
Fig. 4
If an error message appears on the display, please refer to page 19.
Important: Before taking a reading, always make sure that the sensor is clean and has not been damaged in any manner; also check that the ear canal is perfectly clean too. Now press
the ① (ON/MEM) button to turn the appliance ON.
How to take a temperature:
- Gently move the ear back slightly to straighten the ear canal and very carefully insert the probe into the canal. Aim towards the timpani membrane to get the most accurate reading.

Diag. 5
- For children under two years of age, gently pull the ear backwards.
- For children over two years of age and adults, gently pull the ear upwards and backwards.

0-2 years

Fig. 6
- Press the "SCAN" button on the right side of the thermometer and in about 1 second the thermometer will emit an acoustic signal which means it has taken the reading. The temperature reading will be visible on the display immediately.


Fig. 7
Note: Ear temperatures have to be converted into the equivalent oral temperature.
The thermometer converts the temperature to show the equivalent oral temperature (depending on the result of clinical Bias).
Note: the reading taken in the right ear canal can vary to the reading in the left ear canal: this is because the depth and size of the right and left tympanic artery can be different. Once the temperature has been recorded, the thermometer will emit
another short beep when it is ready to be used again.
IMPORTANT
Always take temperatures in the same ear canal to obtain more accurate results. Always use the same ear if the temperature has to be taken repeatedly at various intervals. If consecutive readings are required, wait at least 2 minutes between readings to prevent the sensor from overheating and recording inaccurate measurements.


Holding the thermometer in your hand for too long and/or exposing it to heat sources could cause the sensor to record a higher than normal room temperature. This could cause the ear temperature reading to be lower than normal.
"LAST READING" FUNCTION
The icon indicates that the "last reading" function is enabled. When this function is used, you can take temperatures one after another, without switching the thermometer off, and the last reading will be visible in the top right corner of the display.
MEMORY FUNCTION
This thermometer has a memory which can store up to 25 readings (Please note: if repeated readings are taken without switching the thermometer off in between, the memory will only store the last reading taken). To access the memory, switch the thermometer on, press the (1) ON/ MEM) button repeatedly to scroll through the various readings until you find the one you need.
CHANGING BETWEEN FAHRENHEIT (°F) AND CELSIUS (°C)
To change the reading mode on the LCD display from ^ C to ^ F : switch the appliance off, press and hold the "SCAN" button, now press and release the ① (ON/MEM) button. When the "oF' sign appears on the LCD display, release the "SCAN" button. Use the same procedure to change the reading mode on the LCD display from ^ F to ^ C .
FEVER ALARM
If the thermometer detects a reading of ≥ 37.5^ (or 99.5^ ) it will emit an acoustic signal followed by three short beeps to warn the user that the patient could have a fever.
SWITCHING OFF THE THERMOMETER
The appliance switches off automatically if unused for over 1 minute to preserve battery life, or if the ① button is pressed and held for 5 seconds.
CARE AND MAINTENANCE
The sensor (shown in the diagram 9) is the most delicate part of the thermometer.
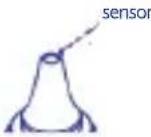
Fig. 9
Handle with great care when cleaning the sensor to avoid damaging it in any way.
a. Store the appliance in a dry place, away from liquids and direct sunlight.
b. Use cotton wool or pads soaked in 70% rubbing alcohol to clean the sensor and the plastic part which comes into contact with the ear canal.
c. Use a new probe cap for each read
ing to avoid any cross contamination. Clean the sensor if dirty to ensure accurate readings. Allow the sensor to dry completely for at least 1 minute.
Important notes:
- Check that the sensor is clean.
- before taking someone's temperature, make sure the person is in the room for about 5 minutes before the reading and has not undergone physical exertion or had a bath in the last 30 minutes; place the thermometer in the room at least 20/25 minutes before the reading so it can adapt to the room temperature.
- Use a new probe cap for each reading.
- Use dedicated probe caps only
- Check that the ear canal is perfectly clean before taking someone's temperature. Try to avoid cleaning it just before the reading
- Keep a distance from all sources of heat when taking temperatures.
7.The first time you use the thermometer, remember to remove the battery protection tab (see paragraph "HOW TO INSERT/REPLACE THE BATTERY") - If the thermometer or the probe get damaged in any manner, the thermometer could encounter difficulties whilst taking temperatures: if the thermometer is dropped or there is sign of damage, do not use it again before having it checked
- Have the calibration checked every 3 years. For further information please consult the Chicco website at www.chicco.com
Choking from swallowing probe covers and connection ring by children or pets is possible, please keep the probe covers and connection ring
at places where children and pets can't reach.
IMPORTANT: this thermometer is NOT waterproof. Always store the appliance in a clean, dry place and at a distance from liquids. Storage temperature: -20^ 50^ (-4^ 122^)
HOW TO INSERT/REPLACE THE BATTERY
The appliance comes with a lithium battery (CR2032x1pc). Fig. 10
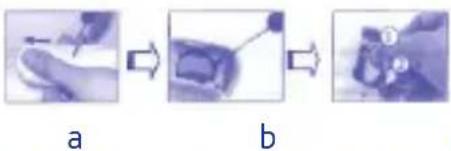
- Insert a small pointed object in the hole on the back of the thermometer whilst applying pressure on the battery seat which will then slide out easily (see diagram 10a).
- When using the appliance for the first time, remember to remove the battery safety tab.
- To replace a spent battery, hold the thermometer firmly and insert a screwdriver under the battery to remove it (see diagram 10b)
- Insert the new battery under the metal hook on the left hand side (number 1), as seen in diagram 10c and press the battery downwards (number 2) until you hear it click into place. Important: insert the battery with the positive pole (+) facing upwards.
- Replace the battery cover.
Warning: replace with a CR 2032 battery only.
Never use other types of batteries to prevent fire and explosion risks. Warning: the battery can explode if not handled with care. Do not recharge, pull apart, overheat or set the
battery on fire.
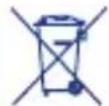
Keep the battery out of reach of children. To dispose of the thermometer, please follow the instructions provided by EC Directive 2012/19/EC (see page 20); to dispose of the battery, please follow the instructions provided by EC Directive 2006/66/EC (see page 20).
TECHNICAL SPECIFICATIONS
- Complies with EN 60601-1 and EN 60601-1-2 Standard requirements.
- Complies with EN 12470-5 Standard requirements for Clinical Thermometers - Section 5: IR ear thermometer performances (with maximum appliance)
- Temperature reading range: 34 42.2^ (93,2~108°F)
- Accuracy level: +/-0.2^ (0.4^) between 35.0^ (95.6^) and 42.0^ (107.6^) and +/-0.3^ (0.5^) beyond this range
- Operating range: 10 40^ (50 % 104^) relative humidity 15/85
- The "Repeatability" is 0.17^ .
- Battery life: around 3,000 readings.
Enable normal use: 1 year. - Expected Service Life: 4 years.
- Enclosure Rating: IP22
- Dimensions: 120.4 × 37.8 × 40.3 mm; Weight: 57.7 grams including battery.
A. Storage temperature range: -20 +50^, RH≤ 85%
B. Transportation temperature shall be less than 70^ , RH ≤ 95%
C. Atmospheric pressure: 800~1013 hPa.
The device should not submerge into any liquids and expose it to direct

moisture.
Classified to EN 60601-1 International Standards:
- Internally powered appliance.
- Applied part: BF type.
- Continuous operation mode
CE 0120: conforms to the 93/42/CEE + 2007/47/EC Medical
Equipment Standard. Note:
- The thermometer was produced in compliance with all standards currently in force and meets all magnetic compatibility protection requirements. However, it is necessary to take certain EMC precautions and prepare and use the thermometer following the
| Manufacturer's Guide and Statement- Electromagnetic Emissions | ||
| Chicco's IR ear thermometer Comfort Quick is designed to operate in the following electro-magnetic environments. The consumer or end-user should check that the thermometer is used in recommended environmental conditions. | ||
| Emission test | Conformity | Electromagnetic environment - Guide |
| CISPR11RF Emissions | Group 1 | Chicco's IR ear thermometer Comfort Quick uses RF power for its internal functions only. The RF emissions are therefore very low and presumably do not generate any form of interference with electronic devices in the vicinity. |
| CISPR11RF Emissions | Group B | The thermometer is suitable for use in any home environment and premises directly connected to public low voltage power plants which provide supplies to civil buildings. |

TROUBLESHOOTING
| Symbol Descriptions | |||||
| CE 0120 | The CE mark and Notified Body Registration Numbers, the requirement of Annex II from Medical Device Directive 93/42/EEC are met. | It means that the device is subject to the EU directive on the disposal of electrical and electronic equipment. To protect the environment, dispose of useless device at appropriate collection sites according to national regulations. | Authorized representative in the European community | ||
| Caution | Instructions | Paper Recycling | |||
| Manufacturer | BF type applied part | Battery Recycling | |||
| IP22 | Classification for water ingress and particulate matter. | ||||
EMC instructions provided in this document.
- Portable and mobile radio communication devices can affect the correct functioning of electro-medical devices. In the presence of electromagnetic disturbance, it is highly
WARRANTY
The product is guaranteed against any conformity defect in normal conditions of use as provided for by the instructions for use.
The warranty shall not therefore apply in the case of damages caused by improper use, wear or accidental events. For the duration of warranty on conformity defects please refer to the specific provisions of national laws applicable in the country of purchase, where provided.

Troubleshooting:
| Error message Prob | em Action | |
| The probe cap is not fitted correctly | Check that the probe cap is positioned correctly (see the "Fitting the probe cap" section). | |
| Er | Error 5-9, the system is not working properly. | Remove the battery, wait one minute, replace it and switch it back on. If the message appears again, please contact your retailer for further assistance. |
| The battery has run low and cannot take any temperature readings. | Replace the battery. | |
| Er1 | Readings taken before the appliance is ready. | Wait for the icons to stop blinking before using the appliance |
| Er3 | The temperature reading is not within the foreseen range of from 10°C to 40°C (50°F - 104°F). | Place the thermometer in a room for at least 30 minutes with a temperature of from: 10°C to 40°C (50°F-104°F). |
| Hi | The temperature reading is over 42.2°C (108.0°F). | Make sure the patient remains in the same room for about 5 minutes and has not undergone physical exertion or had a bath in the last 30 minutes; then check that the probe is clean before taking the temperature again. |
| Lo | The temperature reading is under 34°C (93.2°F) in forehead mode. | If it still malfunctions, please contact your local retailer. |
| 8888 | The appliance will not switch on. | Replace the battery with a new one. If it still malfunctions, please contact your local retailer. |
If the LCD displays the following icons at intervals:
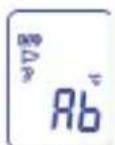
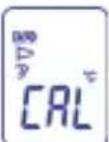
this means that the appliance is in Calibration mode. The readings are not accurate when the appliance is
in this mode. Switch off the appliance and switch it back on again to ensure it functions properly.
REF 00000656000000

Radiant Innovation Inc.
Address: 1F, n.3, Industrial East 9th Rd., Science-Based Industrial Park, HsinChu, Taiwan

MT Promedt Consulting GmbH
Address: Altenhofstrasse 80, D-66386
St. Ingbert, Germany
Distributed by:
Artsana S.p.A.
Via Saldarini Catelli 1, 22070 Gran-date (Co), Italia

Read these instructions carefully and keep them for future reference.

This product complies with the Directive 2012/19/EU.
The crossed bin symbol on the appliance indicates that the product, at the end of its life, must be disposed of separately from domestic waste, either by taking it to a separate waste disposal site for electric and electronic appliances or by returning it to your dealer when you buy another similar appliance. The user is responsible for taking the appliance to a special waste disposal site at the end of its life. If the disused appliance is collected correctly as separate waste, it can be recycled, treated and disposed of ecologically; this avoids a negative impact on both the environment and health, and contributes towards the recycling of the product's materials. For
further information regarding the waste disposal services available, contact your local waste disposal agency or the shop where you bought the appliance.
THIS PRODUCT COMPLIES WITH EC DIRECTIVE 2006/66/EC
The crossed bin symbol on the batteries indicates that, at the end of their life, they must be disposed of separately from domestic waste, either by taking them to a separate waste disposal site for batteries or by returning them to your dealer when you buy similar rechargeable or non-rechargeable batteries. The chemical symbols Hg , Cd , Pb , printed under the crossed bin symbol, indicate the type of substance contained in the batteries: Hg = Mercury , Cd = Cadmium , Pb = Led . The user is responsible for taking the batteries to a special waste disposal site at the end of their life, so that they can be treated and recycled. If the spent batteries are collected correctly as separate waste, they can be recycled, treated and disposed of ecologically; this avoids a negative impact on both the environment and human health, and contributes towards the recycling of the batteries' substances. Non-compliance with the norms on battery disposal damages the environment and human health. For further information regarding the waste disposal services available, contact your local waste disposal agency or the shop where you bought the batteries.
Radiant Innovation Inc.
Dirección: 1F, n.3, Industrial East 9th Rd., Science-Based Industrial Park, HsinChu, Taiwan

El的概率 of the probability of a card to be drawn.
Radiant Innovation Inc.
Endereço: 1F, n.3, Industrial East 9th Rd., Science-Based Industrial Park, HsinChu, Taiwan

MT Promedt Consulting GmbH
Endereço: Altenhofstrasse 80, D-66386 St. Ingbert, Alemania
Distribuido por:
Artsana S.p.A.
Via Saldarini Catelli 1, 22070 Gran-date (Co), Italia

COMMENT PLACER/REPLACER LA PILE
Radiant Innovation Inc.
Adresse: 1F, n.3, Industrial East 9th Rd., Science-Based Industrial Park, HsinChu, Taiwan

MT Promedt Consulting GmbH
Adresse: Altenhofstrasse 80, D-66386 St. Ingbert, Allemagne
CONFORMITE ALA DIRECTIVE EU 2006/66/EC
Radiant Innovation Inc.
Adres: 1F, n.3, Industrial East 9th Rd., Science-Based Industrial Park, HsinChu, Taiwan

MT Promedt Consulting GmbH
Adres: Altenhofstrasse 80, D-66386
St. Ingbert, Duitsland
Gedistribueerd door: Artsana S.p.A. Via Saldarini Catelli date (Co), Italia

Radiant Innovation Inc. : 1F, n.3, Industrial East
9th Rd., Science-Based Industrial
Park, HsinChu, Taiwan

Radian Innovation Inc.
Indirizzo: 1F, n.3, Industrial East
9th Rd., Science-Based Industrial Park, HsinChu, Tayvan
firmasi tarafindan üretilmi_tir

MT Promedt Consulting GmbH
Indirizzo: Altenhofstrasse 80, D-66386 St. Ingbert, Almanya
Pn HnnpabNbHOn yCTaHOBKe
yexna DnHaHakOHeuHnKa BKnIOue-
Hne TepMometpa npNBeTe K Mn-
raHnIO 3NaUHa Ha DNcNlEe, npi
ETOM N3MepeHne 6yDet HeBO3MOxHbIM (NocJeIOT TpN 3ByKOBbIX
CnHana, Na DNcNlEe He BBIO-
dTcHnKaKne COo6UeHnA).

B 3TOM Cnyae CneIyET 3aHOBO n npabnIbHO yCTaHOBITb YexoI dna HakoHeuHaKa (CM. nyHKtbi 1-3 nped
bIDyUeRo pa3dena).
BHHMaHHe! NcNoJb3yIe ToJIbKO CneuaJIbHbIe YexJIb Ira NaKoHeuHNKOB 00001205000000
BkIoueHne nI3MepeHne
HaxmTe Ha KhoNky ① (ON/MEM), pacnoJoxeHHyU B JIeBOJ yactn np6opa.

pncyHok 3
PnBKnUoyen np6opa npoBODITcCaMOTecTnpOBaHne, BO BpemKOTOPORO BCE cerMeHTbI DnCnJIe3aropaiOTc
Ecnno6hApxKeHbHe3aRopeBwnecr CeMeHTb, 3aIpeUaETcNcNoIb30BaTb TepMometp.
Pn ycnHOM 3aBepueHHN cAmOTeCTnPOBaHnI DnCnIe TepMometpa npIMET Bn, KaK Ha pncyHke 4.
Tepmometp roTOB K pa6Ote npi npeKpaueHn MngaHn IKOHN (Xo)I NOCE DByx 3ByKObIx CnHaIOB.

PnnoBHeHn COo6eHnO6 Own6Ke 6paTntecb Ha cTpaHcy 88.
Baxho: nped n3mepenem tempepatypb 683aTeNbHO y6eNTecb,TO daTnK He 3arpa3HeH H NOBpeXdE, a yHoN KaHaI OUnSeH. BkIOHTe np6Op haxatneM Ha KhoNky (ON/MEM).
Измерени TemnepaTpybl:
- MaRKO OTBeIte Ha3aJ yXO, YTO6bI BbIPrMaTb yUHOn KaHaN I OueHb OCToPoXHO BBeIte HaKHeuHk B yUHOn KaHaN. IJa HAn6Oone
TOUHOrO N3MepeHnHaNpaBbTe HakoHeuHb B CToPOHy 6apabHHOI nepenOHKn.

-Детам мадше Дух.net сдуET ydepxmbaTb yxo OTTHbIM Ha3aI.
-ДетамстаршдыхлетиВЗрocIbIMСлдуETOTTЯнтbyxOBBepxNOTBECTnHa3a.

pncyHok 6
- Haxmte Ha KhoNky «SCAN», KO-TopaHaxoINTcB IpaBOu yactn TepMometpa, B TeueHne CeKyndbl NocIe 3TOrO pa3daCTcA DOJIrN 3ByKOBOu CnHaJ, ONOBeuAIOUIN O TOM, YTO n3MepeHne BbIOnHeHo. Ha DnCpIe Cpa3y Jke BbIO-DNTcN3MepeHHaY TempepaTypa.

IpimueaHne: TemnepaTpa oTo6paXaETcB pexKIMe potOBoN NOIOCTN. TepMometp npeo6pa3yET temnepaTpy tAKIM 6pa3OM, yTObI OTo6pa3NTb ee B "KBNBaJIeHTHom 3NaueHIn potOBoN NIOCTN" (COrnaCHO KInHnueCKO NOnApn3aun - clinical bias).
IpimechnE: Tempeatpa, n3MepeHHaB B npabOM yHOM KaHane, MoKet OTInuAtbCt OT n3MepeHHoB BLeBOM yHOM KaHane: 3TO 3aBNCITOT TORO, UTO pa3Nue B rnybHe nponerAHn I pa3MepOB 6apabHOn apTePN Ha npabOu N neBOI CTOpOHax.
Iocne n3MepenHn TempepaTpybI Tepmometp 6yDet CHOBa rOTOB K pa6ote Iocne dByx 3ByKObbix CnHaNoB.
BAKHO:
UTo6bI NOJyUHTb TOUHbIe pe3yNbTaTbI, N3MepaTe TEMpepaTy B OAnHom N TOM JxuHOM KaHane. EcIn Tpe6yETc Yactoe ChrTne DaHHbIX, N3MepaTe TEMpepaTyB OAnHom N TOM JxE yXe. Ppi nocJeDoBaTeNbHbIX N3MepenX CnElyET BbxJaTb He MeHee 2 MmHyT, C Tem UTo6bI N36ExaTb NeperpeBa DaTuKHa Ha N3MepaUoIe HakoHeuNkei, CLeIOBaTeJIbHO, OwIoOuHbIX pe3yNbTaTOB.

IpoJOnKInTeNbHoe yIepXnBaHne Bpykax TepMometpa n/nnu BO3deNCTBHe Na HrO BHeUHX NCTOChNKOB TeNJa MOrYT npINBeCTN K 3aMepy DaTHNKOM 3aBbIeHHoN Tempeatypbl OkpykaIOSei Cpebl. ITo tOJ npUHHe pe3yIbTaT n3MepeHnA TEMepaTypbl B yUHOM KaHane Ha CamOM dene bSyET Hxke fakTNueCKoro.
ФУнкцИЯ «ПОСЛЕДОНTO-KA3AHИА»
IkoHa Ka3bIbaeHa pa6OaIOuOyUo OyHKUHO «NocJeHrero Noka3aHnA».BlaRaOapra 3ToJ OyHKUIMoXHo UACTO N3MePrtb Tempeatpy,He BbIKNoUaTepMometpa:B BePxHei npaBoi Uactn DInCpIeA OT6pa3ntc PpeDbIyua N3MepeHHa Tempepatya.
ФУHKLИРAMRTN
DaHbI TePMoMeTp OChaueH naMaTbIO, B KOTOpyIO MOxHO 3aHeCTn Do25 n3MepenH (BhImaHne - EcnnpoBOaTcayactbE n3MepenH6e3 BbIKIOUeHnRA TePMoMeTp a, 6yDyT COXpAHbI TOlbKO NocJeHNcHTbI DaHHBe).YTObI NOJyHTbIOCTyN K DaHHbIM B NaMaTn, NocJIe
BKNIOUeHn TepMometpa HaxMMTe Ha KhoNky ON/ME) cTolbko pa3,Ha cKoNbKO No3nCn B nAmrtn Bbl XOTNTe BepHyTbcra Ha3aI, YTO6bl NOCMOTpeb HxKHyTO Temnepatypy.
IPEKJIIOUATEJIb: TPAJYCbI UJIbCnA (°C) - TPAJYCbI ΦA-PEHΓEITAT (°F)
Kak n3MeHntb eINHnUy n3Mepenna TemrepeIpybHa KK-dncnnee n3°C B°F: npn BbIKIOueHHOM TepMometpe Haxmte Ha KONky «SCAN» uYdepXnITE ee, 3aTEM Haxmte N OTnyCTNTe KONky (ON/MEM).NocTe TORO, KaK Ha KK-dncnnee NOBHTcR "F', OTNyCTNTe KONky «SCAN». 3TaKe npoUedypa NCNoJb3yETc npn CmeHe CNCTembl rpaDycOB Ha KK-dncnnee c°F Ha°C.
TPEBOTA:JKAP
Ecnn n3mepenHna TepMometpom TemnepaTpa ≥ 37,5^ (nnn 99,5°F), OINn DOnnN n Tpr KOpOTKnx 3ByKObBix CnHaHa ONOBECTI NOlb3ObaTeJr O BO3MOxHOM Xape.
BbIKJIIOUeyHNE
TepMometp abTomatnueckn BblKlouaetcyepe3 1 MNHyt y6e3-DeiCTBnra, uTObI npOJIntb cPOK DeiCTBnra 6atapeKn. BblKloueHneTaKke OcyuieCTBJAreTc 5-CekyHnHbIM HaxkATnEM KHONK
YXOДИЧИCTKA
DaTnK (OTMeueHbI Ha pncyHke 9) RaBnEeTa HAnboJe DeNkaTHoU YaCTbIO TepMometpa.

Bo Bpem qn opaaatec b C HIM OcOo OCTOpoxHo, yTo6bl npe
JOTBpaTb NOBpeXdEHHa.
a. Pnp6op DoJxhen 6bItb CyxmXpaHnTbcBdaJIOn OT XnKoTeu INPpMOrO CoHHeuHOrO CBeta.
6.OuHuaTeN3MePnteIbHbIaT- YNK I NpactMaCCOBYIO NOBepXHOCTb, KOHTaKtNyUOyC KoxeI, CMOueHHbIMN B CnIpte TaMNOHAMN INN BaTOI, CMOueHHoB BCnIptOBOM 70%-m pactBOpe.
c. KaKdbi pa3 dIy HOBOrO n3MepeHn IcNoJIb3yIte HOBbI yExoI dIra HaKOHeuHka, 3TO npEOTBpaIT BO3MOxHoe INHΦuNpOBaHne. OunlaTe n3MepntelbHbI DaTnK OT 3aRpa3HeHn, YTObbl ObecneuBaTb TOUHOe CHTbIBaHne.
JaTe DaTnky NOnHOCTbIO BbICOXHyTb B TeueHne 1 MNHyTbl.
BaxHbI npUmeuaHn:
PpOBepbTe YnCTOTy N3MepuTebHoro DaTuNka.
OCTaBaIteCb B NOMeUeHnB TeueHne 5 MInHyT, n36erag fN3MueCKoAKTNBHOCTn N BaHH B npedbIyuJe 30 MInHyT; TepMometp DOJXeH HaxoDHTcB A NOMeUeHn, B KOTOpOM 6ydet PPOBOdHTbcr N3MpeHne, OKOJO 20/25 MNHyT.
He nCnoIb3yIte 6aTapeKn npyroro Tnna, YTO6bl He Bbl3BaTb ONaCHOCTn NOkapa NII B3pbIbA.
BHHMaHHe: 6aTapeKka MoKeT B3OpBaTbCra, eCn HeakkypatHo C Hei 6bpaatbCra. 3aPepaetcnape3apKaTb, pa3bnpaTb, HarpBeBaTb nn CxNrAraTb 6aTapeKn.
XpaHnTe 6aTapeKv B HeDoCTynHom dIy DeTei MeCte.
IyTuIn3aun TepMometpa
ObpaTntecb K HopMe 2012/19/ CE (cm. cTpaHnUy 95), IyTuIn3aun 6aTapeek - K HopMe 2006/66/CE (cm. cTpaHnUy 95).
TEXHnueCKNe XAPAKTEPNUCTNI
- COOTBETCTBNE CTaHdaptam 60601-1 n EN 60601-1-2.
- COOTBETCTBNE cTahdaptam 12470-5 KInHnueckne TepmometpbI - pa3den 5: nokaataJinyuHbIX IK-TepmometpoB (c MaK
Radiant Innovation Inc.
Amprec: 1F, n.3, Industrial East 9th Rd., Science-Based Industrial Park, HsinChu, Taiwan

MT Promedt Consulting GmbH
Ampec: Altenhofstrasse 80, D-66386
St. Ingbert, Germania
Dnctpn6bIOpTe:
COOTBETCTBNE INPEKJ 2006/66/EC
IpiBHeHbHa 6aTapeKax CmBOL nepeepkhytoi Kop3nHb Ioo3Naayet, UTO B KOHcE cPoka CnyKb6b6baTapeek, INx Heo6xOIMMO cdaBaTb B nyHKT c6opa BTOpcbp8dIy nepepa0TK NINcDaTb npOaBcU pRn NOKyIke HObIX nepe3apJXaUHXsCBAtapeek INN ODNop3OBbIX EKBnBaJIeHTbIX 6bTaapeek.3HaKN XmMInuecknx 3IemENTOB Hg,Cd,Pb, nOmeuHHbIe NOcIMBOLOm nepeepkHyToi KOp3nHbI, 6o3Naayet TIN BeueCTBa, CoepJXaUeroocB 6bTaapeKe: Hg=Mepkyn, Cd=KaMn, Pb=Cbinu. IOTpe6ntelh HecET OTBeCTBeHHocTb 3a Cdauy 6batapeek B KOHcE cPoka INx CnyKb6bIB CnEuaNbHbIE opraHn3aun C6opa C cIeblIO CNOC6CTBOBaTb nepepa0tke i peytin3aun. HadJeXaun C6op BTOPcbip8c NocLeDyUoSe Cdaey NCNOB3OBaHbIX 6batapeek Ha NOBTOPHoe NCNOB3OBAHne, nepepa0TK yTnIN3aunio 6e3 HaHeceHn yUep6a OkpykaIoUe CpeDe NOMORAET CHN3NTb OTPCuTeNbHOe BO3DeICTBVE Ha Hei HA ZDOPOBBe JIODei, a TaKxe CNOOC6CTByET NOBTOPHOMY NCNOB3OBAHIO BEUeCTBa, IN3 KOTOPORO COCTOAT 6batapeyn. CamOBONHna YtIN3aun IN3DeNIA NOTpe6nteM BNeueT 3a C6oB yUeP6 OkpykaUoSe CpeDe IN ZDOPOBbIO LIODei. Bolee NoDPoBHie CBedeHn OBIMEoUxCS CnoCobax C6oppa Bbl MoKeTe NOnyUnTB, O6paTNBUnCb B MEChTyIO CnyKb6y BblBO3a OTXODOB INN JKe B Mara3HN, rge Bbl Kynnn IN3deInne.


c∈0120

Artsana S.p.A. - Via Saldarini Catelli 1 - 22070 Grandate (CO) Italy
www.chicco.com

- BODY TEMPERATURE
- HOW TO TAKE A TEMPERATURE Precautions
- READING PROCEDURE
- Fitting the probe caps.
- Switching on the appliance and taking readings
- How to take a temperature:
- IMPORTANT
- "LAST READING" FUNCTION
- MEMORY FUNCTION
- CHANGING BETWEEN FAHRENHEIT (°F) AND CELSIUS (°C)
- FEVER ALARM
- SWITCHING OFF THE THERMOMETER
- CARE AND MAINTENANCE
- Important notes:
- HOW TO INSERT/REPLACE THE BATTERY
- Warning: replace with a CR 2032 battery only.
- TECHNICAL SPECIFICATIONS
- Classified to EN 60601-1 International Standards:
- Equipment Standard. Note:
- TROUBLESHOOTING
- WARRANTY
- Troubleshooting:
- COMMENT PLACER/REPLACER LA PILE
- CONFORMITE ALA DIRECTIVE EU 2006/66/EC
- BkIoueHne nI3MepeHne
- pncyHok 3
- Измерени TemnepaTpybl:
- BAKHO:
- ФУнкцИЯ «ПОСЛЕДОНTO-KA3AHИА»
- ФУHKLИРAMRTN
- IPEKJIIOUATEJIb: TPAJYCbI UJIbCnA (°C) - TPAJYCbI ΦA-PEHΓEITAT (°F)
- TPEBOTA:JKAP
- BbIKJIIOUeyHNE
- YXOДИЧИCTKA
- COOTBETCTBNE INPEKJ 2006/66/EC
Brand : CHICCO
Model : Comfort Quick
Category : Thermometer