PHG 3000 D4 - Heating PARKSIDE - Free user manual and instructions
Find the device manual for free PHG 3000 D4 PARKSIDE in PDF.
| Brand | Parkside |
| Model | PHG 3000 D4 |
| Product type | pH meter |
| Power supply | CR2032 button cell, 3 V |
| pH measurement range | 0.00 to 14.00 |
| pH resolution | 0.01 |
| pH accuracy | ± 0.05 |
| pH calibration points | pH 6.86; pH 4.01; pH 9.18 |
| Temperature measurement range | 0 to 50 °C (32 to 122 °F) |
| Temperature resolution | 0.1 °C |
| Temperature accuracy | ± 1 °C |
| Automatic temperature compensation | 0 to 80 °C |
| Functions | pH measurement, temperature measurement, HOLD function, backlight, auto power-off (5 min) |
| Protection rating | IP67 (probe) / IP20 (rest of device) |
| Display | LCD screen with backlight |
| Delivery contents | 1 pH meter, 6 packets of pH buffer powder (pH 6.86; 4.01; 9.18), 1 CR2032 battery, instruction manual |
| Warranty | 3 years |
| Care and cleaning | Clean the probe with distilled water after each use; do not immerse the device |
| Spare parts and accessories | pH buffer solutions available at www.kompernass.com (ref. IAN 434249_2304) |
| After-sales service (France) | Tel. 0800 919270, email: kompernass@lidl.fr |
| After-sales service (Belgium) | Tel. 0800 12089, email: kompernass@lidl.be |
Frequently Asked Questions - PHG 3000 D4 PARKSIDE
User questions about PHG 3000 D4 PARKSIDE
0 question about this device. Answer the ones you know or ask your own.
Ask a new question about this device
Download the instructions for your Heating in PDF format for free! Find your manual PHG 3000 D4 - PARKSIDE and take your electronic device back in hand. On this page are published all the documents necessary for the use of your device. PHG 3000 D4 by PARKSIDE.
USER MANUAL PHG 3000 D4 PARKSIDE
PH METER / PH-MESSGERÄT / PH-MÉTURE PPHM 2 A1
GB IE
PH METER
Operating instructions
FR BE
PH-MÉTURE
Mode d'emploi
DE AT CH
PH-MESSGERÄT
Bedienungsanleitung
NL BE
PH-METER
Gebruiksaanwijzing
IAN 434249_2304
DE FR BE NL CZ SK
C
PH METR
Návod k obsluze
SK
MERAC PH
Návod na obsluhu
DK
PH MÅLEAPPARAT
GB/IE Operating instructions Page 1
Information about these instructions for use 5
Proper use 5
Warnings and symbols used 6
Safety. 8
Basic safety instructions 8
Safety instructions for handling batteries 10
Operating elements / parts 12
Getting started 13
Check package contents. 13
Inserting/replacing the battery 14
Switching the appliance on/off 15
Cleaning the electrode probe and absorption stick for test liquids 15
pH calibration 16
Preparation of the pH buffer solution 17
General steps for calibration 18
PARKSIDE
Checking the calibration 21
Manual calibration 22
Clearing calibrated data 23
Operation 24
Before the measurement 25
Measuring the pH value of liquids 25
Measuring the temperature of liquids 27
Battery indicator and display lighting 28
Changing the temperature unit 29
Troubleshooting 29
Cleaning 31
Storage 32
Disposal 32
Disposal of the appliance 33
Disposal of the packaging 34
Disposal of batteries 35
Ordering accessories 36
Appendix 37
Technical specifications 37
KompennassHandelsGmbHHwarranty. 39
Service 42
Imporer 43
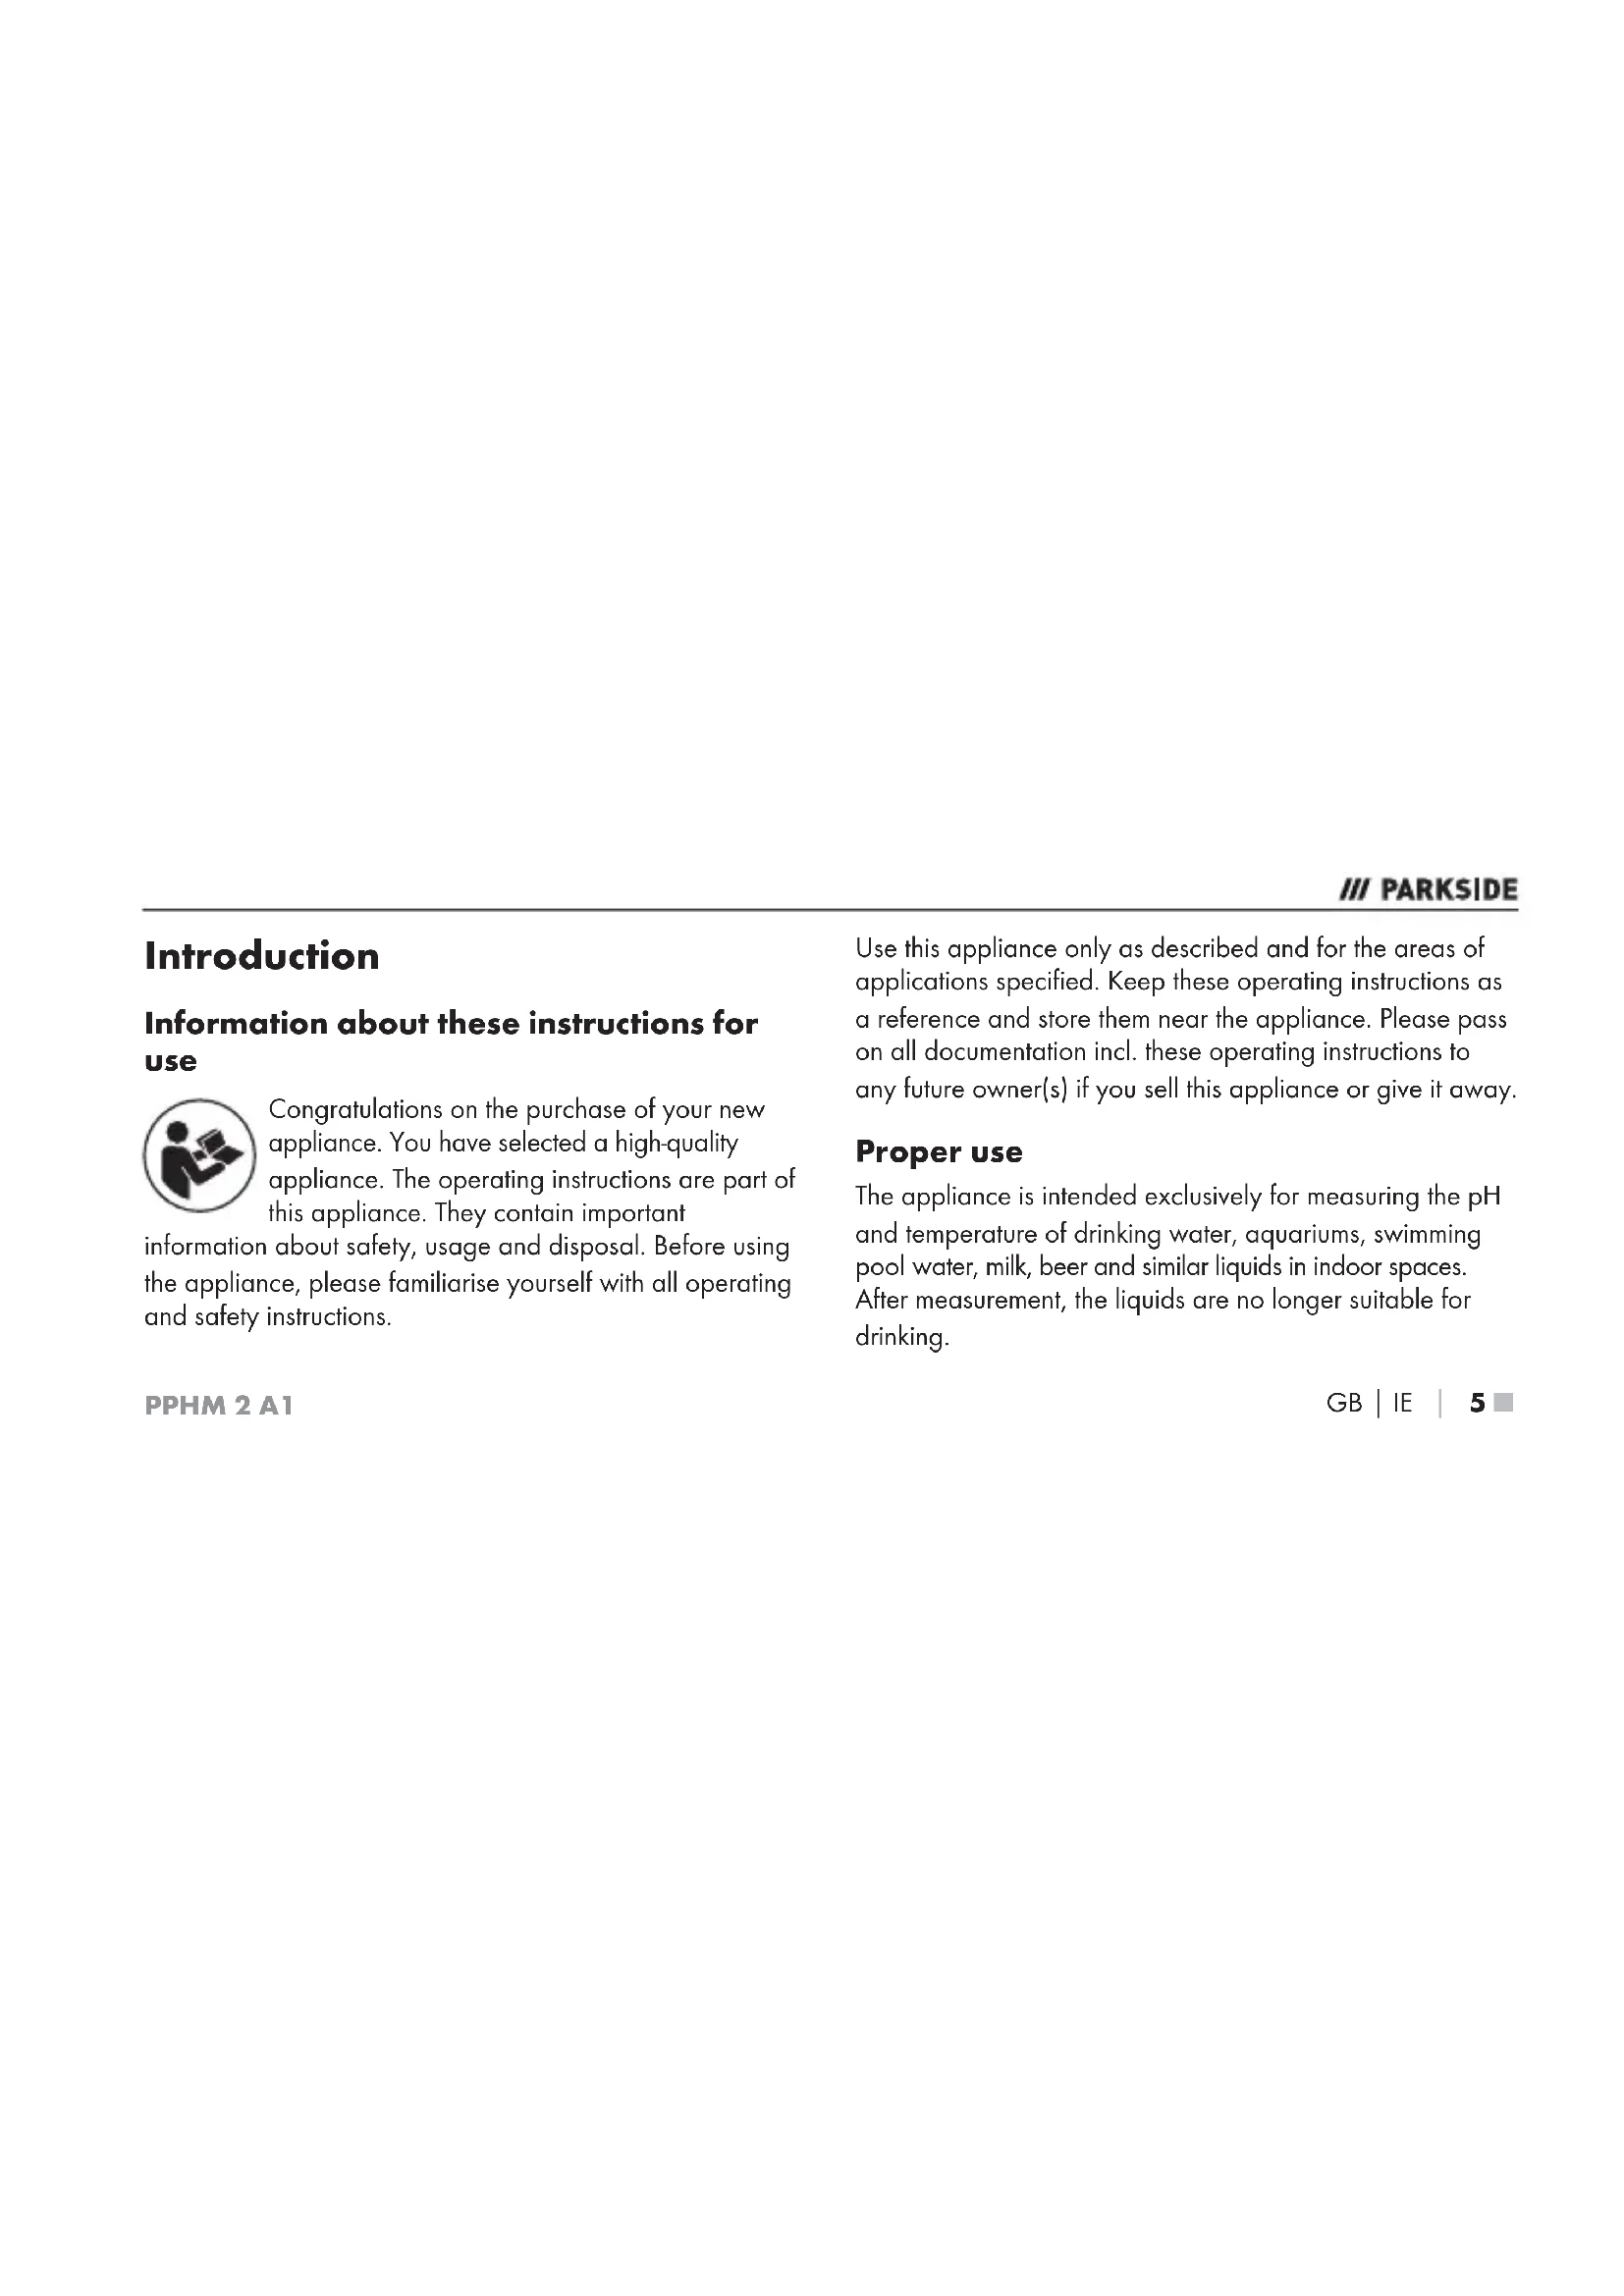
Introduction
Information about these instructions for use

Congratulations on the purchase of your new appliance. You have selected a high-quality appliance. The operating instructions are part of this appliance. They contain important
information about safety, usage and disposal. Before using the appliance, please familiarise yourself with all operating and safety instructions.
PPHM 2 A1
Use this appliance only as described and for the areas of applications specified. Keep these operating instructions as a reference and store them near the appliance. Please pass on all documentation incl. these operating instructions to any future owner(s) if you sell this appliance or give it away.
Proper use
The appliance is intended exclusively for measuring the pH and temperature of drinking water, aquariums, swimming pool water, milk, beer and similar liquids in indoor spaces. After measurement, the liquids are no longer suitable for drinking.
PARKSIDE
Commercial or industrial use is not permitted. No liability will be assumed in cases of improper use. No liability will be assumed for damage caused by misuse or improper handling, the use of force or unauthorised modification. The risk is borne solely by the user.
Warnings and symbols used
The following warnings and symbols are used in these operating instructions, on the packaging and on the appliance:
| WARNING! A warning with this symbol and the signal word "WARNING" indicates a potentially hazardous situation which could result in death or serious injury if not avoided. | |
| ATTENTION! A warning with this symbol and the signal word "ATTENTION" indicates a potential situation which could result in property damage if not avoided. |
6 GBIE
PPHM 2 A1
| i | Note:A note provides additional information that will assist you in using the appliance. |
| Use the appliance only in dry indoor areas. | |
| = | DC current/voltage |
| Keep batteries out of the reach of children. |
// PARKSIDE
Safety
This section contains important safety instructions for handling the appliance. This appliance complies with the statutory safety regulations. Improper use may result in personal injury and property damage.
Basic safety instructions
To ensure safe operation of the appliance, follow the safety guidelines set out below:

WARNING! Do not allow children to play with the packaging material! Keep all packaging materials away from children.
This appliance may be used by children aged 8 years and above and by persons with limited physical, sensory or mental capabilities or lack of experience and knowledge, provided that they are under supervision or have been told how to use the appliance safely and are aware of the potential risks. Do not allow children to play with the appliance. Cleaning and user maintenance tasks may not be carried out by children unless they are supervised.
WARNING! Do not use the appliance in locations where there is a risk of fire or explosion, e.g. in the vicinity of inflammable liquids or gases.
Check the appliance before every use to make sure it is in perfect condition. Do not use the appliance if it is damaged in any way.
Do not leave the packages of pH buffer powder or pH buffer solution unattended. The packages of pH buffer powder or pH buffer solutions could be swallowed by children or pets. If swallowed, drink plenty of water and seek medical advice immediately. Dispose of the pH buffer powder or pH buffer solution packages after use.
PPHM 2 A1
■ Be careful when handling warm/hot, acidic and alkaline liquids.
Wear appropriate personal protective equipment (gloves, safety goggles, apron). Only perform the measurements in a well ventilated environment.
Avoid direct skin or eye contact with pH buffer powder or pH buffer solutions. In the event of skin contact, wash off the affected area with soap and plenty of cold water. In the event of eye contact, rinse the eyes under flowing water for about 15 minutes.
Protect the appliance from wetness or direct sunlight.
PARKSIDE
Do not expose the appliance to any extremes of temperature or temperature fluctuations. For example, do not leave it lying in a car for extended periods. After exposure to large temperature fluctuations, allow the appliance to acclimatise before using it again. The precision of the appliance can be adversely affected by extreme temperatures or temperature fluctuations.
Avoid hefty knocks or dropping the appliance.
WARNING! Switch the appliance off immediately and remove the batteries from the appliance if you notice unusual noises, a burning smell or smoke. Have the appliance checked by a qualified specialist before using it again.
Safety instructions for handling batteries
WARNING! Mishandling the batteries can cause fires, explosions, leakages or other hazards!
Keep batteries out of the reach of children.
Make sure that no one can swallow the batteries.
If a battery is swallowed, seek medical assistance immediately.
Always use the stated battery type.
Never try to recharge non-rechargeable batteries.
10 GB IE
PPHM 2 A1
PARKSIDE
Remove rechargeable batteries from the appliance before recharging them.
Do not throw batteries into a fire or water.
Never expose batteries to high temperatures or direct sunlight.
Never open or deform batteries.
Do not short-circuit the terminals.
Remove depleted batteries from the appliance and dispose of them safely.
Do not use different types of batteries together or mix new batteries with used batteries.
Always ensure that the batteries are installed in the appliance with the correctly aligned polarity.
If you do not intend to use the appliance for an extended period, remove the batteries.
Check the condition of the batteries at regular intervals. Leaking batteries can cause injuries as well as damage to the appliance.
PARKSIDE
Always use protective gloves when handling leaking batteries! Clean the battery and appliance contacts and the battery compartment with a dry cloth. Do not let the chemicals get into contact with your skin and mucous membranes, especially your eyes. In case of contact with chemicals, wash the affected area with plenty of water and immediately seek medical attention.
12 GBIE
Operating elements / parts
(See fold-out page for illustrations)
1 Electrode probe
2 Absorption stick for test liquids*
MIN mark (lower limit)
MAX mark (upper limit)
CAL/HOLD button (calibration, hold current value, backlighting)
6 MODE button (on/off, select mode)
7 Display
PPHM 2 A1
pH value indicator
HOLD indicator (hold current value)
10 Temperature measurement indicator
1 Low battery indicator
12 Temperature unit indicatorC/°F
13 Protective cap
14 Battery compartment cover
15 Belt clip
- The absorption stick for test liquids ② absorbs the test liquid while testing the pH value of the liquid.
Getting started
Check package contents
1× pH meter
- 6 × pH buffer powder package (2 packages each with 6.86 pH, 4.01 pH, 9.18 pH)
- 1×3=CR2032 button cell
These operating instructions
Remove all components from the packaging. Remove all packaging materials and the protective film from the display 7.
PARKSIDE
Note: Check the package for completeness and signs of visible damage. If the delivery is incomplete or damage has occurred as a result of defective packaging or during transport, contact the service hotline (see the section Service).
Inserting/replacing the battery
The appliance is delivered and operated with one 3 V CR2032 button cell. If the low battery indicator appears on the display, the battery must be replaced. A weak battery can lead to incorrect or inaccurate measurement results.
Use a coin to turn the battery compartment cover 14 clockwise up to the mark.
Remove the battery compartment cover 14.
Remove the depleted battery (if present) using a small screwdriver or similar tool.
Insert a new battery of type CR2032 into the battery compartment below the contacts on the edge. Ensure the correct polarity, as indicated on the battery compartment cover 14.
Place the battery compartment cover 18 back on the battery compartment with the 19 marks aligned.
14 GB IE
PPHM 2 A1
Use a coin to turn the battery compartment cover 14 anti-clockwise up to the mark, securing it in place.
Switching the appliance on/off
Press the / MODE button to switch on the appliance. The pH value indicator appears on the display 7.
Hold the / ODE button 6 pressed until the display 7 switches off. The appliance is switched off.
Note: If no button is pressed for five minutes, the appliance automatically switches off.
Cleaning the electrode probe and absorption stick for test liquids
Note: It is necessary to clean the electrode probe 1 and the absorption stick for test liquids 2 for all calibrations and measurements as described in the subsequent sections of these operating instructions.
Remove the protective cap 13.
Hold the appliance such that the electrode probe 1 and the absorption stick for test liquids 2 point downwards.
PARKSIDE
Rinse the electrode probe 1 and the absorption stick for test liquids 2 with distilled water for at least 15 seconds.
Carefully dry the accessible parts of the electrode probe 1 and the absorption stick for test liquids 2 with a soft, dry cloth.
Note: If you have already used the appliance approximately 10 times, it may not be sufficient to simply rinse the absorption stick for test liquids with distilled water. Dirt or residues can remain on the tip of the absorption stick for test liquids.
In this case, use a soft plastic brush, such as a toothbrush, to carefully clean the tip of the absorption stick for test liquids 2.
pH calibration
Note: The calibration must be performed before the first use, after prolonged disuse and in the event of insufficient pH precision.
16 GBIE
PPHM 2 A1
Preparation of the pH buffer solution
Replacement pH buffer solutions are available from specialist shops. Alternatively, you can order these replacement pH buffer solutions on our website or via our service centre (see the section Ordering accessories).

Note: Using pH buffer solutions with different pH values can lead to malfunctions. See the section Technical specifications for the correct specification
Two sets of pH buffer powder are included with this appliance. These packages are needed to create pH buffer solutions.
These pH buffer solutions can be used for calibration, checking and manual calibration of the appliance.
Take one package each of the pH buffer powder 6.86 pH,4.01 pH and 9.18 pH.
Prepare three separate glass containers. Fill each glass container with 250ml of distilled water.
Open the package with 6.86~pH powder. Pour the powder into one of the glass containers with distilled water. Stir it well until the powder has completely dissolved. Label this glass container as "6.86 pH buffer solution".
PARKSIDE
Repeat the previous steps in this section to prepare a 4.01pH and a 9.18pH buffer solution.
General steps for calibration
Remove the protective cap 13.
Clean the electrode probe 1 and the absorption stick for test liquids 2.
Press the / ODE button 6 to switch on the appliance.
Press the / ODE button twice to enter calibration mode. CAL flashes on the display.
pH calibration: 6.86 pH
① Note: If the electrode probe ① is not inserted into the pH buffer solution within two minutes, Err flashes on the display ⑦. Repeat all steps of this section.
Insert the electrode probe 1 into the 6.86~pH buffer solution between the MIN mark 3 and the MAX mark 4.
CAL flashes on the display until the current pH buffer value has been determined.
18 GBIE
PPHM 2 A1
After successful identification of the pH buffer value, 6.86 pH flashes on the display ①. The calibrated data are saved in the internal memory of the appliance. End flashes on the display ⑦.
The display 7 switches to pH measurement mode. The pH value indicator 8 appears on the display 7.
Take the appliance out of the pH buffer solution.
Clean the electrode probe 1 and the absorption stick for test liquids 2.
pH calibration: 4.01/9.18 pH
Note: For best measurement results, calibrate the appliance before every measurement. If the pH buffer solutions contain air bubbles, remove the air bubbles before performing the pH measurement. Otherwise, the measured value may not be exact. The pH value deviates slightly if the temperature of the pH buffer solution changes.
PARKSIDE
| °C 4.01 | pH 6.86 pH | 9.18 pH | |
| 10 4.00 | 6.92 9.33 | ||
| 15 4.00 | 6.90 9.28 | ||
| 20 4.00 | 6.88 9.23 | ||
| 25 4.01 | 6.86 9.18 | ||
| 30 4.01 | 6.85 9.14 | ||
| 35 4.02 | 6.84 9.10 | ||
| 40 4.03 | 6.84 9.07 |
| °C 4.01 | pH 6.86 pH | 9.18 pH | |
| 45 4.04 | 6.83 9.04 | ||
| 50 4.06 | 6.83 9.02 |
To calibrate the appliance with the 4.01pH buffer solution and the 9.18pH buffer solution, repeat the entire process above, as described in the section pH calibration: 6.86 pH.
Checking the calibration
The appliance is ready to use for measuring the pH value of liquids. The calibration can be checked as follows:
Repeat the entire calibration process (see the section pH calibration: 6.86 pH and pH calibration: 4.01 pH/9.18 pH).
Make a note of the stabilised values.
PPHM 2 A1
Check the test result:
If the display 0 for all three tests indicates approximately the pH value of the respective pH buffer solution, the appliance has passed the check. The appliance is ready to use for measuring the pH value of liquids (see the section Operation).
If the pH values shown on the display are incorrect or do not closely correspond to the respective pH value of one of the three pH buffer solutions, the calibration for this specific pH buffer solution has failed. Perform a manual calibration for the failed pH buffer solution(s) (see the section Manual calibration).
PARKSIDE
Manual calibration
Note: If the electrode probe ① is not inserted into the pH buffer solution within two minutes, Err flashes on the display ⑦. Repeat all steps of this section.
Clean the electrode probe 1 and the absorption stick for test liquids 2.
Switch the appliance off and on again. The pH value indicator 3 appears on the display 7.
Press the / ODE button twice to enter calibration mode. CAL flashes on the display
Press the CAL/HOLD button 5 repeatedly until the desired pH value (4.01 pH, 6.86 pH or 9.18 pH) flashes on the display 7.
Insert the electrode probe 1 into the pH buffer solution between the MIN mark 3 and the MAX mark 4.
The respective pH value flashes on the display until the appliance detects the value of the current pH buffer solution.
After successful identification of the pH buffer value, End flashes on the display ⑦. The display ① switches to pH measurement mode.
22 GBIE
PPHM 2 A1
The pH value indicator ⑧ appears on the display ⑦. The appliance has successfully completed the manual calibration for the respective pH value. Take the appliance out of the pH buffer solution.
If necessary, repeat all the previous steps in this section to manually calibrate one or both of the other pH values. Once all manual calibrations have been completed and passed, the appliance is ready to measure the pH value of liquids (see the section Operation).
If Err flashes on the display ⑦ after the manual calibration, the manual calibration has failed.
Take the appliance out of the pH buffer solution. Clear the calibrated data from the internal memory of the appliance (see the section Clearing calibrated data).
Clearing calibrated data
Clean the electrode probe 1 and the absorption stick for test liquids 2.
Switch the appliance off and on again. The pH value indicator 3 appears on the display 7.
Press the MODE button twice to enter calibration mode. CAL flashes on the display
PARKSIDE
Press the CAL/HOLD button 5 repeatedly until Crl flashes on the display 7. Press the /MODE button 6.
Note: If you do not press the MODE button within two minutes, Err flashes on the display and the calibrated data are not cleared. Repeat all previous steps of this section.
The appliance clears the calibrated data from its memory. The display ⑦ switches to pH measurement mode. The pH value indicator ⑧ appears on the display ⑦.
Calibrate the appliance again.
Operation
ATTENTION! Damage to the appliance! The appliance is equipped with an automatic temperature compensation function for warmer liquids. Be careful when handling particularly warm liquids. Measurements in hot liquids can cause the electrode probe to wear out significantly more quickly.
Note: The appliance is equipped with a built-in belt clip for easier carrying.
24 GB IE
PPHM 2 A1
Before the measurement
1 ATTENTION! Damage to the appliance! Never allow the electrode probe ① or the absorption stick for test liquids ② to dry without being cleaned first.
Note: (1) For best measurement results, calibrate the appliance before every measurement. (2) If the pH buffer solutions contain air bubbles, remove the air bubbles before performing the pH measurement. Otherwise, the measured value may not be exact.
(3) Clean the electrode probe 1 and the absorption stick for test liquids 2 after every measurement.
Measuring the pH value of liquids
Pour the liquid to be measured into a glass container.
Remove the protective cap 13.
Clean the electrode probe 1 and the absorption stick for test liquids 2.
Press the / MODE button to switch on the appliance. The pH value indicator appears on the display 7.
Insert the electrode probe 1 into the liquid between the MIN mark 3 and the MAX mark 4.
PARKSIDE
Wait until the measured pH value stabilises on the display 7.
Briefly press the CAL/HOLD button 5 to hold the measured pH value on the display 7. The HOLD indicator 9 is shown on the display 7.
Take the appliance out of the liquid. Make a note of the measured pH value.
Press the CAL/HOLD button again to release the held value on the display . The HOLD indicator disappears from the display .
Note: Repeat all previous steps of this section to perform additional pH measurements.
Hold the MODE button 0 pressed until the display 7 switches off. The appliance is switched off.
Clean the electrode probe 1 and the absorption stick for test liquids 2.
Place the protective cap 13 on the appliance.
26 GB IE
PPHM 2 A1
Measuring the temperature of liquids
Pour the liquid to be measured into a glass container.
Remove the protective cap 13.
Clean the electrode probe 1 and the absorption stick for test liquids 2.
Press the / ODE button to switch on the appliance. The pH value indicator appears on the display 7.
Press the / MODE button again to enter temperature measurement mode. The temperature measurement indicator appears on the display .
Insert the electrode probe 1 into the liquid between the MIN mark 3 and the MAX mark 4.
Wait until the measured temperature value on the display ⑦ stabilises. This may take some time.
Take the appliance out of the liquid. Make a note of the measured temperature value.
PARKSIDE
Note: Repeat all previous steps of this section to perform additional temperature measurements.
Hold the /MODE button 6 pressed until the display 7 switches off. The appliance is switched off.
Clean the electrode probe 1 and the absorption stick for test liquids 2.
Place the protective cap 18 on the appliance.
Battery indicator and display lighting
Note: (1) The display backlight cannot be switched off in temperature measurement mode. (2) If the low battery indicator appears on the display, the battery must be replaced. A weak battery can lead to incorrect or inaccurate measurement results.
Replace a weak battery as soon as possible.
Hold the CAL/HOLD button 5 pressed for about three seconds to switch the lighting on or off.
28 GB IE
PPHM 2 A1
Changing the temperature unit
In temperature measurement mode, you can hold the CAL/HOLD button 5 pressed for about three seconds to switch between ^ and ^ for the temperature unit indicator 12.
Troubleshooting
| Fault Remedy | |
| The measurement result is obviously too high or too low. For example, pure water should have a pH of 7 while pure milk should have a pH from 6.7 to 6.9. | Calibrate the appliance. |
PARKSIDE
| Fault Remedy | |
| The value shown on the display ⑦ does not respond. | Is the display ⑦ showing the HOLD indicator ⑨? - If yes, press the CAL/HOLD button ⑤. - If not, remove the battery and re-insert it to reset the appliance. |
| Fault Remedy | |
| It is hard to read the value on the display ①. | The battery is weak. Replace the battery. |
Electrostatic discharges can cause malfunctions. In the event of such faults, remove the battery and then re-insert it.
Cleaning
1 ATTENTION! Damage to the appliance! The appliance is not waterproof. To avoid irreparable damage to the appliance, do not immerse the appliance in water and make sure that no moisture can get into it during cleaning. Do not use caustic, abrasive or solvent-based cleaning agents. They can damage the surfaces of the appliance.
Clean the surfaces of the appliance with a soft, dry cloth.
Clean the electrode probe 1 and the absorption stick for test liquids 2 (see the section Cleaning the electrode probe and absorption stick for test liquids).
Inspect the appliance for visible external damage before every use, especially the electrode parts.
PARKSIDE
Storage
If you do not intend to use the appliance for a long period, remove the batteries and store it in a clean, dry location away from direct sunlight.
Always place the protective cap on the appliance when it is not in use.
Disposal
Applies only to France:

The product, its packaging and the operating instructions are recyclable. They are subject to an extended manufacturer responsibility and will be collected separately.
PPHM 2 A1
Disposal of the appliance
The adjacent symbol of a crossed-out wheelie bin means that this appliance is subject to Directive 2012/19/EU. This directive states that this appliance may not be disposed of in the normal household
waste at the end of its useful life, but should be handed in at specially set-up collection locations, recycling depots or disposal companies.
PARKSIDE
This disposal is free of charge for the user. Protect the environment and dispose of this appliance properly.
If your old appliance has stored any personal data, you are responsible for deleting it yourself before returning it.
If it is possible to do so without destroying the old appliance, remove the old batteries or rechargeable batteries before returning the appliance for disposal and take them to a separate collection point. In the case of permanently installed rechargeable batteries, you must indicate during disposal that the appliance contains a battery.

Your local community or municipal authorities can provide information on how to dispose of the worn-out product.
Disposal of the packaging

The packaging materials have been selected for their environmental friendliness and ease of disposal and are therefore recyclable. Dispose of packaging materials that are no longer needed in accordance
with applicable local regulations.
34 GBIE
PPHM 2 A1
Dispose of the packaging in an environmentally friendly manner. Note the labelling on the packaging and separate the packaging material components for disposal, if necessary. The packaging material is labelled with abbreviations (a)
and numbers (b) with the following meanings: 1-7: plastics, 20-22: paper and cardboard, 80-98: composites.
Disposal of batteries
Batteries/rechargeable batteries must be treated as hazardous waste and must therefore be disposed of in an environmentally sound manner by appropriate bodies (retailers, specialist retailers, public
municipal bodies, commercial disposal companies). Batteries/rechargeable batteries may contain toxic heavy metals.
The heavy metals contained are identified by letters below the symbol: Cd = cadmium, Hg = mercury, Pb = lead.
PARKSIDE
For this reason, do not dispose of batteries/rechargeable batteries in domestic waste. Take them to a specialist collection point.
Only return batteries or rechargeable batteries when they are fully discharged.
Ordering accessories
You can order accessories for this appliance on the internet at www.kompernass.com.

Scan the QR code with your smartphone/tablet. You can use this QR code to go directly to our website to view and order the available accessories.
36 GBIE
PPHM 2 A1

Note:
If you have problems with your online order, you can contact our service centre by phone or email.
Always quote the article number (IAN) 434249_2304 in your order.
Please note that online ordering of accessories is not possible for all countries.
Appendix
Technical specifications
| Operating voltage | 3 V = CR2032 button cell |
| pH measurement range 0.00 to 14.00 | |
| pH resolution 0.01 | |
| pH accuracy ± 0.05 | |
PARKSIDE
| 3 pH calibration points | 6.86 pH, 4.01 pH, 9.18 pH |
| Automatic temperature compensation | 0°C to +80°C |
| Temperature measurement range | 0°C to +50°C (32°F to 122°F) |
| Temperature resolution 0.1 °C | |
| Temperature accuracy ±1 °C | |
| Automatic switch-off function | approx. 5 minutes |
| IP protection type | IP67 (only the electrode probe ① and absorption stick for test liquids ②) IP20 (remainder of the appliance) |
KompernassHandelsGmbHWarranty
Dear Customer,
This appliance has a 3-year warranty valid from the date of purchase. If this product has any faults, you, the buyer, have certain statutory rights. Your statutory rights are not restricted in any way by the warranty described below.
Warranty conditions
The warranty period starts on the date of purchase. Please keep your receipt in a safe place. This will be required as proof of purchase.
PPHM 2 A1
If any material or manufacturing fault occurs within three years of the date of purchase of the product, we will either repair or replace the product for you or refund the purchase price (at our discretion). This warranty service requires that you present the defective appliance and the proof of purchase (receipt) within the three-year warranty period, along with a brief written description of the fault and of when it occurred.
If the defect is covered by the warranty, your product will either be repaired or replaced by us. The repair or replacement of a product does not signify the beginning of a new warranty period.
// PARKSIDE
Warranty period and statutory claims for defects
The warranty period is not prolonged by repairs effected under the warranty. This also applies to replaced and repaired components. Any damage and defects present at the time of purchase must be reported immediately after unpacking. Repairs carried out after expiry of the warranty period shall be subject to a fee.
Scope of the warranty
This appliance has been manufactured in accordance with strict quality guidelines and inspected meticulously prior to delivery.
The warranty covers material faults or production faults. The warranty does not extend to product parts subject to normal wear and tear or to fragile parts which could be considered as consumable parts such as switches, batteries or parts made of glass.
The warranty does not apply if the product has been damaged, improperly used or improperly maintained. The directions in the operating instructions for the product regarding proper use of the product are to be strictly followed. Uses and actions that are discouraged in the operating instructions or which are warned against must be avoided.
40 GBIE
PPHM 2 A1
This product is intended solely for private use and not for commercial purposes. The warranty shall be deemed void in cases of misuse or improper handling, use of force and modifications / repairs which have not been carried out by one of our authorised Service centres.
Warranty claim procedure
To ensure quick processing of your case, please observe the following instructions:
Please have the till receipt and the item number (IAN) 434249_2304 available as proof of purchase.
You will find the item number on the type plate on the product, an engraving on the product, on the front page of the operating instructions (below left) or on the sticker on the rear or bottom of the product.
If functional or other defects occur, please contact the service department listed either by telephone or by e-mail.
You can return a defective product to us free of charge to the service address that will be provided to you. Ensure that you enclose the proof of purchase (till receipt) and information about what the defect is and when it occurred.
PARKSIDE

You can download these instructions along with many other manuals, product videos and installation software at www.lidl-service.com.
This QR code will take you directly to the Lidl service page (www.lidl-service.com) where you can
open your operating instructions by entering the item number (IAN) 434249_2304.
Service
GB Service Great Britain Tel.:08004047657 E-Mail: kompernass@lidl.co.uk
IE Servicelreland Tel.:1800 101010 E-Mail: kompernass@lidl.ie
IAN 434249_2304
42 GB IE
PPHM 2 A1
Importer
Please note that the following address is not the service address. Please use the service address provided in the operating instructions.
KOMPERNASS HANDELS GMBH
BURGSTRASSE 21
44867 BOCHUM
GERMANY
www.kompernass.com
PARKSIDE
44 GBIE
PPHM 2 A1
Inhaltsverzeichnis
Einführung 47
KOMPERNASS HANDELS GMBH
BURGSTRASSE 21
44867 BOCHUM
DEUTSCHLAND
www.kompermass.com
PARKSIDE
Table des matieres
Introduction 91
Chere cliente, cher client,
Chere cliente, cher client,
KOMPERNASS HANDELS GMBH
BURGSTRASSE 21
44867 BOCHUM
ALLEMAGNE
www.kompernass.com
Inhoud
Inleiding 141
Lever batterijen/accu's in ontladen toestand in.
Accessoires bestellen
KOMPERNASS HANDELS GMBH
BURGSTRASSE 21
44867 BOCHUM
DUITSLAND
www.kompernass.com
PARKSIDE
182 | NL | BE
PPHM 2 A1
Obsah
Uvod. 185
Informace k tomuto navodu k obslze 185
Pouziti v souladu s urcenim 185
KOMPERNASS HANDELS GMBH
BURGSTRASSE 21
44867 BOCHUM
NEMECKO
www.kompernass.com
222
CZ
PPHM 2 A1
Spis tresci
Wstep 225
KOMPERNASS HANDELS GMBH
BURGSTRASSE 21
44867 BOCHUM
NIEMCY
www.kompernass.com
Obsah
Uvod. 267
KOMPERNASS HANDELS GMBH
BURGSTRASSE 21
44867 BOCHUM
NEMECKO
www.kompermass.com
306
SK
PPHM 2 A1
Indices
Introduccion 309
KOMPERNASS HANDELS GMBH
BURGSTRASSE 21
44867 BOCHUM
ALEMANIA
www.kompernass.com
PARKSIDE
Indholdsfortegnelse
Introduktion 353
Andering of temperaturehed
I temperaturmäle-modus kan du holde CAL/HOLD-knappen 5 nede i ca. tre sekunder for at skiftemellem 念 og Fi temperaturenheds-visingen 12.
PARKSIDE
Afhjælpning af fejl
KOMPERNASS HANDELS GMBH
BURGSTRASSE 21
44867 BOCHUM
TYSKLAND
www.kompernass.com
PPHM 2 A1
DK
PARKSIDE
390 DK
PPHM 2 A1
Indice
Introduzione 393
KOMPERNASS HANDELS GMBH
BURGSTRASSE 21
44867 BOCHUM
GERMANIA
www.kompernass.com
Tartalomjegyzék
Bevezeto 4
KOMPERNASS HANDELS GMBH
BURGSTRASSE 21
44867 BOCHUM
NÉMETORSZÁG
www.kompernass.com


KOMPERNASS HANDELS GMBH
BURGSTRASSE 21
44867 BOCHUM
GERMANY
www.kompernass.com
Version: 11/2023
Ident.-No.: PPHM2A1-082023-2
IAN 434249_2304

8