
IHGC963A1X - Range hood GORENJE - Free user manual and instructions
Find the device manual for free IHGC963A1X GORENJE in PDF.
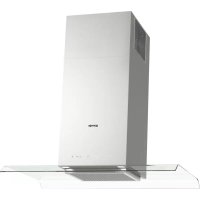


| Brand | Gorenje |
| Model | IHGC963A1X |
| Product type | Extractor hood (external ducting or internal recirculation) |
| Use | Domestic only |
| Power supply | 220-240 V ~ 50/60 Hz (according to rating plate) |
| Extraction power | 3 manual speeds + Power Boost intensive speed (5 min timer) |
| Automatic functions | AdaptTech (automatic speed adjustment), Refresh (runs 10 min every 50 min), Delayed shut-off (30 min) |
| Lighting | LED (lifetime up to 10 times longer than traditional bulbs, 90% energy savings) |
| Grease filter | Metallic, dishwasher safe (quick cycle, low temperature) or hand wash with non-aggressive detergent, clean at least once a month |
| Activated carbon filter | Optional for recirculation version, replace at most every 4 months (not washable) |
| Filter saturation indicator | Yes, steady light for grease filter, flashing for carbon filter (manual activation) |
| Calibration | Required for AdaptTech automatic operation (about 5 minutes) |
| Minimum safety distance | 50 cm above an electric cooktop, 65 cm above a gas or mixed cooktop (unless otherwise specified by the cooktop manufacturer) |
| Diameter of ducting | Must match the diameter of the connection flange (not supplied) |
| Installation | By two or more persons (heavy appliance), requires an accessible electrical outlet and possibly a duct |
| General maintenance | Clean interior and exterior at least once a month with a damp cloth and neutral detergent (no alcohol or abrasives) |
| Safety instructions | Do not flambé food, avoid open flames, monitor during frying, unplug before maintenance, do not use without filter grille |
| Warranty and assistance | For replacement of power cord or LEDs, contact technical support |
Frequently Asked Questions - IHGC963A1X GORENJE
User questions about IHGC963A1X GORENJE
0 question about this device. Answer the ones you know or ask your own.
Ask a new question about this device
Download the instructions for your Range hood in PDF format for free! Find your manual IHGC963A1X - GORENJE and take your electronic device back in hand. On this page are published all the documents necessary for the use of your device. IHGC963A1X by GORENJE.
USER MANUAL IHGC963A1X GORENJE
Do not use the hood without correctly installed filters! Danger from electric shocks!
No liability is accepted for any damage or fire caused by failure to comply with these instructions.
This device complies with the requirements of:
- European Directive 2002/96/EC
- Waste Electrical and Electronic Equipment (WEEE).
Make sure that this device has been recycled according to local regulations for environmental protection and your health.
The symbol on the device or its packaging indicates that this product must not be treated as household waste, but must be handed over to a special collection point for recycling of electrical and electronic equipment. Please contact your local authorities, the household waste collection service, or the store where you purchased this device for more information.
The device is designed, tested, and manufactured in accordance with:
- Safety: EN/IEC 60335-1; EN/IEC 60335-2-31, EN/IEC 62233.
- Performance characteristics: EN/IEC 61591; ISO 5167-1; ISO 5167-3; ISO 5168; EN/IEC 60704-1; EN/IEC 60704-2-13; ISO 3741; EN 50564; IEC 62301. EMC - Electromagnetic compatibility: EN 55014-1; CISPR 14-1; EN 55014-2; CISPR 14-2; EN/IEC 61000-3-2; EN/IEC 61000-3-3.
Tips for correct use to reduce environmental impact: Turn on the hood at minimum speed when you start cooking and leave it running for a few minutes after cooking is finished. Increase the speed only in case of large amounts of smoke and steam, and use the boost speed only in extreme situations. Replace the charcoal filter / grease filter when necessary to maintain good efficiency of the filter. Clean the grease filter when necessary to maintain good efficiency of the grease filter. Use the maximum diameter of the exhaust air system, as indicated in this manual, to optimize efficiency and reduce noise.
WARNING! Failure to install the screws or fixing mechanism in accordance with these instructions may result in a risk of electric shock.
USE
The extractor hood is intended for suction and removal of polluted air, simultaneously with its purification.

EXTRACTOR HOOD VERSION
The hood removes polluted air through an exhaust pipe connected to the ventilation duct.
The exhaust pipe must correspond to the diameter of the ventilation duct opening.
Attention! The exhaust pipe is not included in the accessories and must be purchased separately.
In the horizontal part, the pipe must be slightly inclined upwards (about 10°) to facilitate the removal of air upwards.
The hoods are equipped with filters; the exhaust pipes must be installed.
Connect the hood to the exhaust pipe and the opening in the wall. The diameter of the pipe must correspond to the diameter of the ventilation duct opening for air removal.
Connecting to an exhaust pipe and opening with a smaller diameter reduces the suction capacity and significantly increases noise during operation.
In these cases, the manufacturer assumes no responsibility.
Use pipes with the necessary length. Use pipes with as few elbows as possible (maximum number of bends: 90°). Do not sharply reduce the cross-section of the pipe! Use pipes with as smooth an inner surface as possible. The materials from which the pipes are made must comply with the standards in force.
The extracted air is discharged and freshened before being reintroduced into the room. To use the hood in this mode of operation, it is necessary to install a filter system on the base of the hood with active carbon filters.
INSTALLATION
The minimum distance between the surface on which the cooking appliances are placed and the lowest part of the kitchen hood must be not less than 50 cm in the case of electric cookers and not less than 65 cm in the case of gas or combined cookers.
If the instructions for the gas cooking appliance specify a greater distance, then this must be taken into account.

The voltage in the mains must correspond to the voltage indicated on the label with the data for the aspirator, placed on its inner side. If it is equipped with a plug for connecting the aspirator to the mains, the corresponding standard plugs should be used, and you should refer to the relevant standard for the plug. After connecting, the installation is complete.
If it is not equipped with a plug (direct connection to the mains), or if the plug has been removed after installation, use a double-pole switch according to the standards, so that the connection to the mains is made with a contact separation of at least 3 mm, in accordance with the installation rules.
Warning! Before connecting the aspirator to the mains and checking that it functions properly, check that the cable is installed as it should be.
The aspirators are supplied with a special cable for connection; in case the cable is damaged, contact the warranty service to get a new one.
INSTALLATION
Because a lot of heat is generated during the operation and extraction of the aspirator, it must be installed away from flammable materials.
Before starting the installation:
Make sure that the product you have purchased corresponds in size to the chosen place for installation. Remove the filter/grease filter with activated carbon (it is disassembled if the model you have chosen has one). To do this, follow the procedure in the relevant paragraph. Mount the filter again only if you want to use the aspirator in the filtering version. Make sure that during transport, no foreign objects have entered the inner part of the aspirator, such as screws, warranty cards, etc.; if you find any, remove them and keep them. If possible, disassemble the furniture that is in the immediate vicinity of the place where you intend to install the aspirator. This way you will have better access to the wall or ceiling where it will be installed. Otherwise, be careful not to damage the furniture or any other objects during installation. Choose a flat surface and cover it with a suitable cloth, on which to place the aspirator and the corresponding accessories. Make sure that the place where you intend to install the aspirator has easy access and also that it is possible to connect it to the exhaust (only for the extraction version). - The necessary operations are described, for example: install the contact/plug or make the opening for the passage of the exhaust pipe. The aspirator is equipped with a bracket for fixing to the lower part of the wall and the ceiling.
For all this, we recommend that you consult a qualified technician to be sure that the accessories you have installed are suitable for the place. The wall, and the corresponding ceiling, must be sufficiently stable to withstand the load.
METHOD OF USE
If a lot of steam is released during cooking, switch to the maximum working mode. It is recommended to turn on the aspirator 5 minutes before you start cooking and to leave it running for about 15 minutes after you have turned it off.
To select the functions of the aspirator, simply touch and hold the control.
T1

T2

T3

T4

T5

T6

T7

T8

T1. Standby (control off - the function is deactivated) / ON (control on)
Note: After about one minute of operation (suction and lighting), the extractor switches to standby mode automatically.
T2. ON/OFF lighting
Press the button to switch the lighting on or off.
T3. ON/OFF automatic mode "AdaptTech"
The extractor automatically adjusts the suction speed (power) and increases the speed if the conditions detected by the sensor indicate it is necessary.
If the conditions of the environment change, after 10 minutes the extractor switches off (if it was operating at the first speed (power) of suction).
Note: For proper use of this function, first read "Adjusting the parameters for automatic operation" (see corresponding paragraph).
Note: During automatic operation, if the user activates another function that adjusts the speed, the automatic ventilation function is deactivated.
T4. Button for adjusting the suction speed (power):
L1: 1st speed (power) of suction L2: 2nd speed (power) of suction L3: 3rd speed (power) of suction
Press the button to turn off the aspirator (OFF).
Note: When the command is briefly pressed, all other functions related to suction are deactivated.
T5. ON/OFF intensive speed (power) of suction "POWER BOOST" (with a set time limit)
Note: After 5 minutes of operation, the aspirator returns to the previous state.
T6. ON/OFF "Refresh" operating mode
Every 50 minutes of inactivity, the 1st speed (power) of suction is activated for 10 minutes.
T7. ON/OFF delayed shutdown of the suction speed (power) (about 30 minutes)
Note: This function is intended for the speeds selected via button T4.
Warning! Never use it with water!
Warning! Failure to comply with the cleaning and maintenance instructions for the aspirator and the filter may pose a fire risk. Strictly follow the instructions in this manual!
No liability is accepted for any damage to the motor or fire caused by incorrect use or failure to follow these instructions.
GREASE FILTER
The grease filter retains the grease particles released during cooking. It should be cleaned every month with neutral detergents. It can also be washed in a dishwasher at low temperature and with a short washing cycle. When cleaning the grease filter in a dishwasher, it may become discolored, but this in no way affects its filtering capacity. To remove the grease filter, pull the handle with the spring mechanism.
Before starting installation:
T6. ON/OFF "Refresh"
T6. ON/OFF "Refresh" mode
Closely follow the instructions set out in this manual. All responsibility, for any eventual inconveniences, damages or fires caused by not complying with the instructions in this manual, is declined. The hood is conceived for the suction of cooking fumes and steam and is destined only for domestic use.
The hood can look different to that illustrated in the drawings in this booklet. The instructions for use, maintenance and installation, however, remain the same.
It is important to conserve this booklet for consultation at any moment. In the case of sale, cession or move, make sure it is together with the product. ! Read the instructions carefully: there is important information about installation, use and safety. Do not carry out electrical or mechanical variations on the product or on the discharge conduits. Before proceeding with the installation of the appliance verify that there are no damaged all components. Otherwise contact your dealer and do not proceed with the installation.
Note: the elements marked with the symbol (*) are optional accessories supplied only with some models or elements to purchase, not supplied.

CAUTION
WARNING! Do not connect the appliance to the mains until the installation is fully complete.
Before any cleaning or maintenance operation, disconnect hood from the mains by removing the plug or disconnecting the mains electrical supply.
Always wear work gloves for all installation and maintenance operations.
The appliance is not intended for use by children or persons with impaired physical, sensorial or mental faculties, or if lacking in experience or knowledge, unless they are under supervision or have been trained in the use of the appliance by a person responsible for their safety.
This appliance is designed to be operated by adults, children should be monitored to ensure that they do not play with the appliance.
This appliance is designed to be operated by adults. Children should not be allowed to tamper with the controls or play with the appliance.
Never use the hood without effectively mounted grating!
The hood must NEVER be used as a support surface unless specifically indicated.
The premises where the appliance is installed must be sufficiently ventilated, when the kitchen hood is used together with other gas combustion devices or other fuels.
The ducting system for this appliance must not be connected to any existing ventilation system which is being used for any other purpose such as discharging exhaust fumes from appliances burning gas or other fuels.
The flaming of foods beneath the hood itself is severely prohibited.
The use of exposed flames is detrimental to the filters and may cause a fire risk, and must therefore be avoided in all circumstances.
Any frying must be done with care in order to make sure that the oil does not overheat and ignite. Accessible parts of the hood may become hot when used with cooking appliance.
With regards to the technical and safety measures to be adopted for fume discharging it is important to closely follow the regulations provided by the local authorities.
The hood must be regularly cleaned on both the inside and outside (AT LEAST ONCE A MONTH).
This must be completed in accordance with the maintenance instructions provided in this manual. Failure to follow the instructions provided in this user guide regarding the cleaning of the hood and filters will lead to the risk of fires.
Do not use or leave the hood without the lamp correctly mounted due to the possible risk of electric shocks.
We will not accept any responsibility for any faults, damage or fires caused to the appliance as a result of the non-observance of the instructions included in this manual.
This appliance is marked according to the European directive 2002/96/EC on Waste Electrical and Electronic Equipment (WEEE). By ensuring this product is disposed of correctly, you will help prevent potential negative consequences for the environment and human health, which could otherwise be caused by inappropriate waste handling of this product.
The symbol
on the product, or on the documents accompanying the product, indicates that this appliance may
not be treated as household waste. Instead it should be taken to the appropriate collection point for the recycling of electrical and electronic equipment. Disposal must be carried out in accordance with local environmental regulations for waste disposal.
For further detailed information regarding the process, collection and recycling of this product, please contact the appropriate department of your local authorities or the local department for household waste or the shop where you purchased this product.
Appliance designed, tested and manufactured according to:
Safety: EN/IEC 60335-1; EN/IEC 60335-2-31, EN/IEC 62233.
Performance: EN/IEC 61591; ISO 5167-1; ISO 5167-3; ISO 5168; EN/IEC 60704-1; EN/IEC 60704-2-13; ISO 3741; EN 50564; IEC 62301. EMC: EN 55014-1; CISPR 14-1; EN 55014-2; CISPR 14-2; EN/IEC 61000-3-2; EN/IEC 61000-3-3.
Suggestions for a correct use in order to reduce the environmental impact: Switch ON the hood at minimum speed when you start cooking and kept it running for few minutes after cooking is finished. Increase the speed only in case of large amount of smoke and vapour and use boost speed(s) only in extreme situations. Replace the charcoal filter(s) when necessary to maintain a good odour reduction efficiency. Clean the grease filter(s) when necessary to maintain a good grease filter efficiency. Use the maximum diameter of the ducting system indicated in this manual to optimize efficiency and minimize noise.
Additional Installation Specifications:
Use only the fixing screws supplied with the product for installation or, if not supplied, purchase the correct screws type. Use the correct length for the screws which are identified in the Installation Guide.
In case of doubt, consult an authorised service assistance centre or similar qualified person.
WARNING! Failure to install the screws or fixing device in accordance with these instructions may result in electrical hazards.
USE
The hood is designed to be used either for exhausting or filter version.

DUCTING VERSION
In this case the fumes are conveyed outside of the building by means of a special pipe connected with the connection ring located on top of the hood.
Attention! The exhausting pipe is not supplied and must be purchased apart. Diameter of the exhausting pipe must be equal to that of the connection ring.
In the horizontal runs the exhausting pipe must be slightly slanted (about 10°) and directed upwards to vent the air easily from the room to the outside.
Attention! If the hood is supplied with an active charcoal filter, it must be removed.
Connect the hood and discharge holes on the walls with a diameter equivalent to the air outlet (connection flange).
Using tubes and discharge holes on walls with smaller dimensions will cause a reduction in suction performance and a drastic increase in noise.
Any responsibility in this matter is therefore declined.
Use a duct of the minimum indispensable length.
Use a duct with as few elbows as possible (maximum elbow angle: 90°). Avoid drastic changes in the duct cross-section. Use a duct as smooth as possible inside. The duct must be made of certified material.
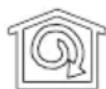
FILTER VERSION
One active charcoal filter is needed for this and can be obtained from your usual retailer.
The filter removes grease and odors from the extracted air before sending it back into the room through the upper outlet grid.
INSTALLATION
The minimum distance between the supporting surface for the cooking equipment on the hob and the lowest part of the range hood must be not less than 50 cm from electric cookers and 65 cm from gas or mixed cookers.
If the installation instructions for the gas hob specify a greater distance, this must be adhered to.

ELECTRICAL CONNECTION
The mains power supply must correspond to the rating indicated on the plate situated inside the hood. If provided with a plug, connect the hood to a socket in compliance with current regulations and positioned in an accessible area after installation. If it is not fitted with a plug (direct mains connection) or if the plug is not located in an accessible area after installation, apply a double pole switch in accordance with standards which assures the complete disconnection of the mains under conditions relating to over-current category III, in accordance with installation instructions.
Warning! Before re-connecting the hood circuit to the mains supply and checking the efficient function, always check that the mains cable is correctly assembled.
The hood is provided with a special power cable; if the cable is damaged, request a new one from Technical Service.
MOUNTING
Very heavy product; hood handling and installation must be carried out by at least two persons. Before beginning installation:
Check that the product purchased is of a suitable size for the chosen installation area. - Remove the charcoal (*) filter/s if supplied (see also relative paragraph). This/these is/are to be mounted only if you want to use the hood in the filtering version. - Check (for transport reasons) that there is no other supplied material inside the hood (e.g. packets with screws () , guarantees () , etc.), eventually removing them and keeping them. If possible, disconnect and move freestanding or slide-in range from cabinet opening to provide easier access to rear wall/ceiling. Otherwise put a thick, protective covering over countertop, cooktop or range to protect from damage and debris. Select a flat surface for assembling the unit. Cover that surface with a protective covering and place all canopy hood parts and hardware in it. In addition check whether near the installation area of the hood (in the area accessible also with the hood mounted) an electric socket is available and it is possible to connect a fumes discharge device to the outside (only suction version). - Carry out all the masonry work necessary (e.g. installation of an electric socket and/or a hole for the passage of the discharge tube).
Expansion wall plugs are provided to secure the hood to most types of walls/ceilings. However, a qualified technician must verify suitability of the materials in accordance with the type of wall/ceiling. The wall/ceiling must be strong enough to take the weight of the hood. Do not tile, grout or silicone this appliance to the wall. Surface mounting only.
OPERATION
Use the high suction speed in cases of concentrated kitchen vapours. It is recommended that the cooker hood suction is switched on for 5 minutes prior to cooking and to leave in operation during cooking and for another 15 minutes approximately after terminating cooking.
To select the functions of the hood just lightly touch and hold control.
| T1 | T2 | T3 | T4 | T5 | T6 | T7 | T8 |
| ① | P>> | L30' |
T1. Standby mode (the control panel off all functions disabled) / ON (control panel switched on)
Note: After about a minute of inactivity (suction and lights), the hood will automatically switch to standby.
T2. ON/OFF lights
Press again to turn off the lights.
T3. ON/OFF Automatic operation "AdaptTech"
The hood automatically sets the suction speed (power) to increase if the environmental conditions detected by the hood sensor require it.
If there are no variations in the environmental conditions, after 10 minutes (if the hood is already in suction speed (power) 1), the hood turns off.
Note: for a correct use of this function, first perform the "Setting of the parameters for Automatic Operation" (see corresponding paragraph).
Note: During automatic operation, if the user acts on the other functions that adjust the speed, auto ventilation function is switched off.
T4. Manual selection of the suction speed (power):
L1: suction speed (power) 1 L2: suction speed (power) 2 L3: suction speed (power) 3
Press again to turn off the hood (OFF).
Note: manual selection excludes any other suction related set function.
T5. ON/OFF Intensive suction speed (power), POWER BOOST" (timed)
Note: After 5 minutes of operation the hood returns to its previous state.
T6. ON/OFF operation mode "Refresh"
Every 50 minutes of inactivity, the suction speed (power 1 is turned on for 10 minutes.
T7. ON/OFF Delayed switch off of the suction speed (power) (approx. 30 minutes
Note: this function is available for the speeds that can be selected with button T4.
T8. Indicator and reset fi iter saturation
The button lights on automatically with steady light when it is necessary to perform the grease filter maintenance. The button lights on automatically with flashing light when it is necessary to perform the charcoal filter maintenance.
After performing the maintenance, with the hood off and the button active, press the button for more than 3 seconds to perform the reset of the filter saturation indicator; repeat the operation if necessary (for ex., when both filters are saturated).
Activation of the charcoal filter saturation indicator
The saturation indicator of the charcoal filter is normally disabled. To activate it, proceed in the following manner: With the display on (ON) and the suction off (OFF), press simultaneously the buttons T7 and T8 for more than 3 seconds; the button T8 lights on with steady light for approx. 5 seconds, to indicate the activation. To disable it, repeat the operation; the button T8 will flash for approx. 5 seconds to indicate the disabling.
Setting of Automatic Operation parameters
For correct use of the automatic operation, perform "Hood Calibration".
Hood Calibration
With the display on (ON) and the suction off (OFF), press button T3 for 5 seconds.
The suction speed (power) 1 starts functioning and button T3 flashes to indicate that hood calibration is initiated and it will last for approx. 5 minutes.
Note: to interrupt the calibration, press T3 for 5 seconds; the calibration will be invalidated and should therefore be repeated.
MAINTENANCE
ATTENTION! Before performing any maintenance operation, isolate the hood from the electrical supply by switching off at the connector and removing the connector fuse.
Or if the appliance has been connected through a plug and socket, then the plug must be removed from the socket.
CLEANING
The cooker hood should be cleaned regularly (at least with the same frequency with which you carry out maintenance of the fat filters) internally and externally. Clean using the cloth dampened with neutral liquid detergent. Do not use abrasive products. DO NOT USE ALCOHOL!
WARNING: Failure to carry out the basic cleaning recommendations of the cooker hood and replacement of the filters may cause fire risks. Therefore, we recommend observing these instructions. The manufacturer declines all responsibility for any damage to the motor or any fire damage linked to inappropriate maintenance or failure to observe the above safety recommendations.
GREASE FILTER
Traps cooking grease particles. The grease filter must be cleaned once a month using non aggressive detergents, either by hand or in the dishwasher, which must be set to a low temperature and a short cycle. When washed in a dishwasher, the grease filter may discolour slightly, but this does not affect its filtering capacity. To remove the grease filter, press it and pull it down.
CHARCOAL FILTER (filter version only)
It absorbs unpleasant odours caused by cooking. The saturation of the charcoal filter occurs after more or less prolonged use, depending on the type of cooking and the regularity of cleaning of the grease filter. In any case it is necessary to replace the cartridge at least every four months. The charcoal filter may NOT be washed or regenerated.
REPLACING LAMPS
The hood is equipped with a lighting system based on LED technology. The LEDs guarantee an optimum lighting, a duration up to 10 times as long as the traditional lamps and allow to save 90% electrical energy.
For replacement, contact the technical service.
| T1 | T2 | T3 | T4 | T5 | T6 | T7 | T8 |
| ① | P>> | L30' |
T2. Lights on/off (ON/OFF)
To turn off the lights, press again.
T3. Automatic operation on/off (ON/OFF) "AdaptTech"
REPLACING LAMPS
HOOD OPERATION
T6. ON/OFF Operation "Refresh"
T3. ON/OFF Automatic operation "AdaptTech"
| T1 | T2 | T3 | T4 | T5 | T6 | T7 | T8 |
| ① | P | L30' |

T5

T6

T7

T8

T3. Setting up the automatic milk feeding system "AdaptTech"
If the calf is not able to drink from the mother, the automatic feeder should be installed in a place where the calf can easily access it.
If the calf does not drink from the mother, after 10 minutes (if the calf has not drunk from the feeder) the feeder will feed the calf.
Note: To use this function correctly, follow the procedure described in "Setting the automatic feeding parameters" (see corresponding paragraph).
Note: If the automatic feeding process is interrupted by other functions, the automatic feeding function will be delayed.
T4. Setting the number of feedings (quota):
L1: 1st feeding (quota) L2: 2nd feeding (quota) L3: 3rd feeding (quota)
Press the button to turn off the feeder.
Note: The setting procedure is described in the function that is activated each time the feeder is used.
T5. Setting the automatic feeding function "POWER BOOST" (with increased intensity)
Note: After 5 minutes of feeding, the feeder will increase the intensity.
T6. Setting the feeding mode "Refresh"
After 50 minutes of operation, the first copy (draft) will be ready in 10 minutes.
T7. Press and hold the copy (draft) button for 30 minutes.
Expert: This function is intended for hot water supply.
T8. Indicator of water level in the tank
If maintenance is required, the automatic device will indicate the need for repair.
If maintenance is required, the automatic device will indicate the need for repair.
If maintenance is required, press and hold the T8 button for more than 3 seconds to reset the water level indicator; if necessary, repeat the procedure (for example, if the water level is low).
Resetting the water level indicator
The water level indicator may be faulty. To reset it, follow these steps:
Press and hold the ON and OFF buttons simultaneously for more than 3 seconds; the T8 indicator will light up for 5 seconds to confirm reset.
To reset, press the button; the T8 indicator will light up for 5 seconds to confirm.
Setting automatic parameters
To set automatic parameters, perform the "Calibration" procedure.
Calibration
Press and hold the ON and OFF buttons simultaneously for 5 seconds.
1-1i copy kbldaMbIbI (KyaT) Kymbc iTeen 6actaIdbI XHe T3 TyMeci copfbIITbI KaIIbpey npoueDypacbi 6actaIbI, wamameH 5 MInHT 60bI KalfacaTbIHbIH Kepcety uH KblbIKTaIbI.
EckepTne: KaIb6pney npoceypacbIH TOKtaTy ywiH T3 TYmecin 5 MInyT 6ObI 6aCbIbI3; KaIb6pney npoceypacbI opbHaJMaNtBnDbIKTaH, KaTaNahybl KaXeT 60laDbI.
TexHnKaJIbIK KbI3MeT KOpCeTy
EckepTy! Ke3 KeIReH Ta3aIay HeMece TexHnKaIbIK KbI3MeT eTy OnpauncBIn JxacaydaH 6ypbH, BnIkaHbl ShbIFapbHn Hemece 6eJImeHi, 6actbl aXbIpaTKblbIH cybIPbIN CopFbIHTbl 3JeKtp JeicHeH axbIpaTbIHbI3.
Tazalay
Copfblw iwiHEn XsHe cbipbHaH XnI Ta3aHaBIn Typyb KaKeT (Kem DerEHe WAMMeH MaNDbYCTan KanaTbH fNilbTpdi Ta3aJAY Mep3iMHe cAkeC). Ta3aJAY ysiH 6eITapan JyFbiW 3aTne H cyJahFaH apNaBl sy6epeKti naDalaHaBHyB. A6pa3nJIbIK KocnacBi 6ap 3aTTb NaJaDaHaH6aHbI3.
CINPTTI NAI DAJAHBAHbI3!
EckepTy: ΦιNbTpdi aybictbipy xHe acnantbTa3anay epexepeiHcaktaBb6aybl eptTih naJa 6onybHa kEnyi Mymkyn. CoHdbikTah 6epinre HxCKaymen naJaIaHyFa KeHec 6epem3. Kofapbida KopceTilreh eckepTynepei caKtAmFaHbIKTah HeMece dypbc emec JOhdey cIaDapbHaH 6oIFAH ePT Hemece Ko3FaybItbH 6yInHyHe 6aJIaHbICTb 6apbIK kayanKeppwnik aIbHaDbI.
MaCy3rici
Ac daBHndaydaFb MaB 6JIweKTePiH yCTan KaIaNbl.
Фильстрий саьин arpeccnbTi emec kYfbl 3aTapMeH, KOлмен Hemece bIDbICKyfbIIMaшинада, TEmen TemnepaTypada, YHemdi Ta3anay TApTi6iHde Kyy Kepek.
bldbicxyfbiMaunHada KyblFaH MaY CTaTbIH cNlTp TYcci3deHy i MymKiH, 6ipak OdaH OHbH cy3riu KaCneTi MyIe e3repicc3 kaIaIbI.
MaCy3ricin anbIn TaCay ywiH cepinnneI 6OcAty TTKacbIH TapTbHb3
Oa3aOCTAH Pecny6nKacbl,AnMaTbI Oanacbl,BerannH
1949, Pp-Bo "Gorenje", PpeTeH3nH no KaueCTBy
To find the address of the service center
Kazakhstan, Almaty, st. Begalina, house 19\49
Gorenje service center 8 (727) 293 03 07
Poland
| T1 | T2 | T3 | T4 | T5 | T6 | T7 | T8 |
| ① | P>> | L30' |
T1. Standby mode (excluding the control of the table - this function is deactivated) / ON (including the control of the table)
Note: After one minute of use of the vacuum cleaner (suction and light), it automatically returns to standby mode.
T2. Turning the light on/off
Press the button once to turn off the light.
T3. Turning on/off the automatic function "AdaptTech"
The vacuum cleaner automatically adjusts the suction power (capacity) to the cleaning conditions detected by the vacuum cleaner's sensor.
If there is no change in the cleaning conditions, after 10 minutes (if the vacuum cleaner is already in the first suction power (capacity)), the vacuum cleaner turns off.
Note: For proper use of this function, first perform "Adjusting the parameters for automatic operation" (see the corresponding paragraph).
Note: During automatic operation, if the user uses other functions for adjusting the speed, the automatic ventilation function is deactivated.
T4. Manual selection of suction power (capacity):
L1: First suction power (capacity)
L2: 2-speed (power) for vacuuming
L3: 3-speed (power) for vacuuming. Press the button again to turn it off.
Note: The appliance will automatically turn off every other setting during vacuuming.
T5. Turning on/off the turbo speed (power) for vacuuming "POWER BOOST" (temporary). Note: After 5 minutes of operation, the vacuum cleaner returns to its previous state.
T6. Turning on/off the "Refresh" function mode
After 50 minutes of inactivity, the 1-speed (power) function mode turns on for 10 minutes.
T7. Turning on/off the delayed shutdown of the vacuum speed (power) (about 30 minutes). Note: This function is available for the speeds that can be selected with button T4.
T8. Filter clogging indicator
It is activated automatically with a steady light when it is necessary to perform servicing of the filter for dust.
It is activated automatically with a flashing light when it is necessary to perform servicing of the filter for the air.
After servicing, with the vacuum cleaner off and the appliance plugged in, press and hold button T8 for more than 3 seconds to reset the filter clogging indicator. Repeat the operation if necessary (for example, if the filter is clogged again).
Activating the filter clogging indicator for the air filter
The indicator for the clogging of the air filter is usually inactive. To activate it, proceed as follows: With the appliance on (ON) and vacuuming off (OFF), press and hold the combination of buttons T7 and T8 for more than 3 seconds. Button T8 will be activated with a steady light for about 5 seconds to confirm the activation.
To deactivate it, repeat the operation. Button T8 will flash for about 5 seconds to confirm that it is deactivated.
Adjusting the parameters for automatic operation
3a npabnHTo KOpnteHe Ha ABtOMaTcKToTo fynKuOHaPaHe HAnpaBeTe,KaIbPnpaHe Ha acnPapotO".
KanibpnpaHeHaacnnpaTopoT
Pn3aapanekpan (ON) ncknyeHO BCmykyBahe (OFF), npntncheTe ro koncheTo T3 5cekyHn.
1-pa 6p3nHa (MoKHOCT) Ha BCMyKyBaHe 3anoHyBa da yHKuOnHnpa a KonyeTo T3 TpeNka 3a da CnHaJIn3npa deKa e AKTNbIpaHo KaINbPnpaHBeTo Ha acnPaTopoT KOeWTO Ke Tpae OKNY 5 MNHTN.
3a6eneka: 3a da ce npkeKHe KaIINbPnpaHbeto npTnCHeTo KOncyTeo T3 5 cekyn; kaJIINbPnpaHbeto Ke ce nOHnHTn IKe Tpe6a da ce nobTopu.
OДРЖУBAHБE
Ipeynpeybae! Ipe6nokkaBo onepaunja 3a uinctbe nIn oDpxyBaBe, NCKnyteTo acnpaTopoT od eJektpuHata MpeXa co Baede He Na CTPuyHnot pNknyHnK nIn Co NCKnyyBaHe Ha DomauHnot Mpexhen PpeKHyBa.
YHCTEHE
Acnipatopot Mopa peoBHO da ce uCTn (hajmaIky co nctata foekbeHunja co koja ce Bpwn oDpxyBaHeTo ha fntepnTe 3a MaCTn) kako od BHaTpeWHOCTa Taka n OD hAnBopeWHOCTa. 3a YnCTeHeTO KOpCTeTe Kpna HABJAXHTa CO TeHN HeYtpaHn DeTepreHTn. Da He KopNCtnte npOn3bOuKo cOdpXaT abpa3NBn. HE KOPNCTETE ANKOXON!
IpeynpeyBahe! Ako He ce cneDat ynaTcTBaTO BO Ondoc Ha uNCTeHbeto Ha acnnpaTopoT n 3ameHa ha qniltpnte ke doBeDe Do pn3nk od noxapn. Ce npenopayBa Do npdprkyaBaBe Ha npednoxhenTe ynaTcBA.
Hne OndBame 6nIOKABA OndROBOPHOCT 3a eBEHTyAIN OHOTeYBaHa HA MOTOR NIOKAP npEiN3BnKaH KAKO pe3yI-TaH HnPaBnHO OndPxyBaHe INN HeCNeDeHBe Ha HBeDEHTE yNaTCTBaTa.
ФИЛТЕР 3A MACTN
3a co6npahe Ha macHTe coCToJKN oN napeata od rotBeHeTo.
MetaHnOt cHnTepe3a MaCTn Tpe6a da ce nctn edhaM MeceHcO HearpcBHN DeTepeHTn, paHno Hn BO MaunHa 3a MHeBaHa caobn Ha Hnckn TemnpaTpyn B O KpaTOK nHTepBaJ. Co nepeBeTo BO MaunHa 3a MneHe Ha caobn MetaHnOt cHnTepe3a MaCTn MoKe da ja n3rybM Manky Bojata Ho HerOBnTE KapakTePncTHKn 3a cHnTpnpaHe BOONIto He ce MeHyBaat. 3a da ro n3BaInTe cHnTepot 3a MaCTn NobLeyete ro 3abeot 3a OTKOnyBaHe.
ФИЛТЕР CO AKTINBEH JAFJIEN (Само за Вариаю с co Фплтпраьe)
Keep the appliance away from heat sources and open flames.
The operation of the filter depends on the type of cooking and the frequency of use. In any case, it is necessary to replace the filter at least every 4 months. It cannot be washed or reused.
REPLACING THE FILTERS
This appliance is equipped with an LED lighting system.
LED bulbs guarantee optimal lighting, have a lifespan about 10 times longer than traditional bulbs, and allow for energy savings of up to 90%.
For replacement, contact the technical support service.
ON/OFF "Refresh" button
"Refresh" ON/OFF button
Do not leave children unattended to prevent them from playing with the appliance.
Do not use the hood if the grille is not correctly installed!
It is strictly forbidden to use the hood as a support surface, unless specifically stated. Ensure proper air exchange in the room when using the hood simultaneously with gas or other fuel-burning appliances.
The extracted air must not be discharged into a flue used for exhaust fumes from gas or other fuel-burning appliances.
It is strictly forbidden to cook over an open flame, as the free flame could damage the filters and cause a fire; therefore, refrain from doing so in any case.
Frying with large amounts of oil must be done under constant supervision, keeping in mind that overheated oil can ignite.
When used together with other cooking appliances, the exposed parts of the appliance may become very hot.
The hood must be installed without risk when removing smoke, strictly following the rules provided by the regulations of local competent authorities.
Periodically clean the hood both inside and outside (at least once a month, while observing the conditions specifically prescribed in the maintenance instructions for this appliance).
Failure to follow the instructions for cleaning the hood and replacing/cleaning the filters may cause a fire.
Do not use or leave the hood without properly installed lamps due to the possible risk of electric shock.
We disclaim all liability for malfunctions, damage, or burning of the appliance due to non-compliance with the instructions given in this manual.
Air exhaust installation
In this mode, vapors are discharged through a pipe with a diameter of 16 cm, connected to the connecting ring. The diameter of the exhaust pipe must match the diameter of the connecting ring.
Attention! The exhaust pipe is not included in the package and must be purchased separately.
In the horizontal part, the pipe must be slightly inclined upward (approximately 10°) so that air can escape more easily. If the hood is equipped with a charcoal filter, make sure it is
Connect the hood to the exhaust pipe with a diameter corresponding to the air outlet opening (connecting flange).
Installing pipes with a smaller diameter reduces the suction power of the air and sharply increases the noise level.
The manufacturer disclaims all liability regarding the above.
Use the pipe with the minimum necessary length.
Use the pipe with the minimum number of bends (maximum bend angle: 90°). Avoid sharp changes in the pipe direction. The inner surface of the pipe used should be as smooth as possible. The pipe material must comply with standards.
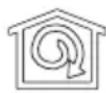
Installation in recirculation mode
Do not use charcoal filters if they are not present in your appliance. The air is drawn in and deodorized before being returned to the room through the upper grille.
INSTALLATION
The distance between the lower edge of the hood and the hob surface must be at least 50 cm for electric hobs, and at least 65 cm for gas or combination hobs. If the installation instructions for the gas hob specify a greater distance, follow that.

ELECTRICAL CONNECTION
The mains voltage must correspond to the voltage indicated on the data plate, which is located inside the appliance. If the appliance is fitted with a plug, connect it to a suitable socket. The socket must comply with current regulations and be located in an easily accessible place. The appliance can be plugged in only after installation. If the appliance is not fitted with a plug (direct connection to the mains), or if the socket is not in an accessible place after installation, use a two-pole switch that ensures complete disconnection from the mains under overvoltage category III conditions, in accordance with installation instructions.
Warning! Before connecting the electrical system of the hood to the power supply and checking its correct operation, make sure that the power cable is correctly installed.
The hood has a special power cable; if the cable is damaged, it must be replaced by the technical service department.
INSTALLATION
The appliance is very heavy; at least two people are required to move and install it. Before starting:
- Check that the dimensions of the product you have purchased are suitable for the chosen installation location.
- Remove the charcoal filter(s), if present (see also the relevant section). They are only to be used if you intend to use the hood in recirculation mode.
- Check that no packaging materials (e.g., bags with screws, warranty documents, etc.) have been left inside the hood during transport; if any are present, remove and keep them.
- If possible, detach and move any furniture elements located under the hood or near its installation area, to ensure easier access to the ceiling/walls where the hood will be fixed. If this is not possible, protect furniture and other items as carefully as possible during installation. Choose a flat surface, cover it with a protective covering, and place the hood and its fixing parts on it.
- Also check that near the hood installation area (in a zone accessible even after installation) there is a power socket and a hole for the flue, which vents the fumes outside (only in ducted mode). Carry out all necessary work (e.g., installing the power socket and/or drilling the hole for the flue pipe).
The device is designed for installation on most walls/ceilings. However, it is necessary to consult a qualified technician and ensure that the material is suitable for the specific type of wall/ceiling. The wall/ceiling must have sufficient strength, taking into account the mass of the device.
OPERATION
Use the intensive mode and extractor hood in case of particularly high concentrations of kitchen vapors. We recommend turning on the extractor hood 5 minutes before starting the cooking process and leaving it on for 15 minutes after the process is finished.
Press again to turn off the light.
T3. ON/OFF of the automatic operating mode "ADAPTIVE".
The extractor hood automatically selects the speed (power) of suction if the sensors in the hood detect conditions that require an increase.
If there are no changes in environmental conditions, after 10 minutes (if the hood is already set to speed (power) 1), the hood turns off.
Note: For proper use of this function, first perform "Setting the parameters of the automatic operating mode" (see the corresponding paragraph).
Note: If during the automatic operating mode the user acts on other functions that regulate the speed, the automatic operating mode function is deactivated.
T4. Manual selection of suction speed (power):
L1: Suction speed (power) 1
L2: Suction speed (power) 2
L3: Suction speed (power) 3
Press again to turn off the extractor hood (off).
Note: Manual selection deactivates any other set function related to suction.
T5. ON/OFF high speed (power) intensive suction "POWER BOOST" (programmed by time)
Note: After 5 minutes of operation, the hood will return to its previous state.
T6. ON/OFF REFRESH mode
Every 50 minutes of operation, the suction speed (power) will turn on for 10 minutes.
T7. ON/OFF delayed shutdown of the suction speed (power) (approximately 30 minutes) Note: This function is available for speeds that are selected at low level.
T8. Filter saturation indicator and reset
The button lights up automatically with a fixed light when maintenance of the grease filters is required.
The button lights up automatically with a flashing light when maintenance of the activated carbon filter is required.
After performing maintenance, with the hood off and the activated carbon filter button off, press the button for more than 3 seconds to reset the filter saturation indicator. Repeat the operation if necessary (for example, if both filters are saturated).
Activation of the activated carbon filter saturation indicator
The activated carbon filter saturation indicator is normally deactivated. To activate it, follow the example:
With the display on (ON) and the suction off (OFF), press buttons T7 and T8 simultaneously for more than 3 seconds. Button T8 will light up with a fixed light for approximately 5 seconds to show the activation that has occurred.
To deactivate, repeat the operation. Button T8 will flash for approximately 5 seconds to show the deactivation that has occurred.
Adjustment of parameters for automatic operating mode
To ensure correct automatic operation, perform the "hood calibration".
Calibration of extraction
With the extractor on (ON) and the suction off (OFF), press button T3 for 5 seconds.
The suction speed (power) 1 will start operating and button T3 lights up to indicate that the extraction calibration has started, which will take approximately 5 minutes.
Note: To interrupt the calibration, press T3 for 5 seconds; the calibration will be considered invalid and must be repeated.
Maintenance
Warning! Before performing any cleaning or maintenance operation, disconnect the device from the electrical network by unplugging the plug or switching off the room's circuit breaker.
Cleaning
The extractor must be cleaned frequently both internally and externally (at least with the same frequency as the maintenance of the grease filters). For cleaning, use a special cloth moistened with a neutral liquid detergent. Do not use products containing abrasive materials.
DO NOT USE ALCOHOL!
Warning: Failure to follow the cleaning rules and filter replacement may lead to a risk of fire. Therefore, we recommend following the provided instructions.
The manufacturer declines all responsibility for possible damage to the motor and fires caused by improper installation or failure to follow the warnings above.
COMPLIANCE WITH GOVERNMENT REGULATION
RF No. 270 of 16.06.97 - 10 years from the date of manufacture

Official importer and authorized representative in the RF
LLC "Gorenievet",
Tel. 8-800-700-05-15
Made in Poland
T3. ON/OFF Automatic operation "AdaptTech"
The vacuum cleaner automatically sets the suction speed (power) which will increase if the environmental conditions detected by the vacuum cleaner's sensor require it.
If the environmental conditions do not change, after 10 minutes (if the vacuum cleaner is already set to suction speed (power) 1), the vacuum cleaner will turn off.
DO NOT USE ALCOHOL!
The product is designed, tested and manufactured in accordance with:
- Safety: EN/IEC 60335-1; EN/IEC 60335-2-31, EN/IEC 62233.
- Operational quality: EN/IEC 61591; ISO 5167-1; ISO 5167-3; ISO 5168; EN/IEC 60704-1; EN/IEC 60704-2-13; ISO 3741; EN 50564; IEC 62301. EMC: EN 55014-1; CISPR 14-1; EN 55014-2; CISPR 14-2; EN/IEC 61000-3-2; EN/IEC 61000-3-3.
Instructions for proper operation and environmental protection: Turn on the extractor at minimum speed before starting cooking and leave it running for a few minutes after finishing cooking. Increase the speed only in case of a large amount of fumes and steam, and use the high speed only in extreme cases. For
To maintain high efficiency in removing odors, if necessary, replace the charcoal filter(s). To maintain high efficiency of the grease filter, if necessary, clean the grease filter(s).
Use the maximum diameter of the air exhaust system, as indicated in the instructions for optimal efficiency and minimal noise.
WARNING! Incorrect installation of the vent and its fastening elements in accordance with these instructions may lead to the risk of electric shock.
USAGE
The unit is designed for operation in exhaust mode, with air exhaust to the outside or through a recirculation filter.

EXHAUST MODE
The exhaust pipes are led outside through an exhaust pipe connected to the flange connection.
The diameter of the exhaust pipe must match the diameter of the exhaust outlet.
WARNING! The exhaust pipe is not supplied and must be purchased separately.
The horizontal part of the exhaust pipe should be slightly inclined (at an angle of about 10°) so that the air can be exhausted to the outside.
If the exhaust hood has carbon filters, they must be removed.
Connect the hood to the parts of the exhaust pipe and the exhaust outlet with the same diameter of the air outlet (flange connection).
Using parts of exhaust pipes and outlets with a smaller diameter will lead to a decrease in the efficiency of the exhaust and an increase in the noise level.
Therefore, we disclaim all responsibility for the above.
! Use only short exhaust ducts.
Use an exhaust duct with the minimum number of bends (maximum bend angle: 90°). Avoid sharp bends in the exhaust duct. ! Use a duct with smooth inner surfaces. ! The material of the exhaust duct must comply with the standards.
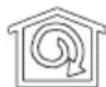
RECIRCULATION MODE
The battery must be replaced by qualified personnel. To use the hood in your mode, it is necessary to install a filter system with activated carbon.
INSTALLATION
The distance from the lower part of the hood to the hob must be at least 50 cm for electric hobs, and 65 cm for gas and combination hobs.
It is necessary to take into account the distances indicated in the installation instructions for the gas hob.

ELECTRICAL CONNECTION
The voltage in the electrical network must correspond to the characteristics indicated on the plate located inside the hood. If the plug for connection to the electrical network is included in the kit, connect it to a socket that complies with current standards and is in an accessible place, which can be done after installation. If the plug is not included in the kit (direct connection to the electrical network), or the socket is not in an accessible place, also after installation, install a reliable two-pole switch that ensures complete disconnection from the network under conditions of overvoltage category III, in full compliance with installation rules.
Before connecting the hood to the electrical network again, check the correctness of the operation, so that the control switch of the network is installed correctly.
The hood has a special power cord with grounding conductor; entrust it to the technical service.
INSTALLATION
The product has significant weight, so its movement and installation should be carried out by at least two people.
Before starting installation:
- Check that the dimensions of the product you received correspond to the chosen installation location. Remove the filter(s) if present (see also the relevant sections). Reinstall the filter(s) only if you intend to use the hood in recirculation mode.
- Check that inside the hood there are no objects left, packaging materials during transport (for example, bags with screws, warranty cards, etc.), and if there are, remove them and keep them. If possible, remove or move the furniture that is near the hood and around the installation area, to ensure freer access to the wall/ceiling where the hood will be attached. If this is not possible, protect the furniture and other objects with a protective cover during installation. Check the flat surface, mark the fixing points and place the hood and fixing parts on it. Also check that the installation area of the hood (in the zone accessible also after installation of the hood) has a wall socket and an outlet for the exhaust air duct, which leads the air outside (only in exhaust mode). Perform all necessary works (for example: installation of the wall socket and/or execution of the exhaust air duct hole).
The kit includes screws for fixing, designed for most walls/ceilings. However, it is necessary to contact a qualified technician to check the suitability of the materials depending on the type of wall/ceiling. The wall/ceiling must be sufficiently strong to support the weight of the hood.
OPERATION
The hood is designed for high concentration of steam. We recommend turning on the hood 5 minutes before starting to cook and leaving it on for 15 minutes after cooking is finished.
The control panel is located inside the hood.

T1. Standby (control panel off - all functions off) / On (control panel on) Note: If the hood is not used for one hour (heating and lighting), it will automatically return to standby.
T2. Turn on/off the light
Press once to turn on the light.
T3. Turn on/off automatic mode "ADAPTTECH"
The hood automatically selects the power (suction capacity) of the hood, which the sensors adjust according to the conditions when they need to be increased.
If there are changes in environmental conditions, after a few minutes (the hood is already set to the power (suction capacity) of the hood 1), the hood will turn on.
Note: For correct use of this function, follow the "Setting parameters of automatic mode" (see the corresponding paragraph).
Note: If during automatic mode the user changes the functions that regulate the power, the functions of the automatic mode are turned off.
T4. Power (suction capacity) selection buttons:
L1: Power (suction capacity) of the hood 1
L2: Power (suction capacity) of the hood 2
L3: Power (suction capacity) of the hood 3
Press once to turn on the hood (On).
Note: The choice of the fan speed is set by the function and is related to the setting.
T5. Turn on/off the fan speed (power) of intensive suction "POWER BOOST" (programmed for a while). Note: After 5 minutes of operation, the fan will return to the previous state.
T6. Turn on/off the operating mode "REFRESH".
Every 50 minutes of operation, the suction power will turn on for 10 minutes.
T7. Turn on/off the delayed automatic shutdown of the suction power (approximately 30 minutes).
Note: The functions available on the display are selected using the T4 buttons.
T8. Indicator and reset of the filter saturation.
The button lights up automatically with a fixed light when it is necessary to carry out maintenance of the grease filters.
The button lights up automatically with a flashing light when it is necessary to carry out maintenance of the activated carbon filter.
After carrying out maintenance, with the hood switched on, press the button for more than 3 seconds to reset the filter saturation indicator. Repeat the operation if necessary (for example, if the filters are saturated).
Activation of the activated carbon filter saturation indicator.
The activated carbon filter saturation indicator is deactivated. To activate it, it is necessary to proceed as follows:
With the hood on (ON) and the suction off (OFF), press simultaneously the T7 and T8 buttons for more than 3 seconds. The T8 button will light up with a fixed light for about 5 seconds to indicate activation. To deactivate, repeat the operation; the T8 button will flash for about 5 seconds to indicate deactivation.
Adjustment of parameters for automatic operating modes.
In order to ensure correct automatic operation mode, perform the "Calibration of the hood".
3. To turn on (activate) or turn off (deactivate) the standby mode, press the T3 button for 5 seconds.
The standby (power) mode will turn on and the T3 button will light up, indicating that calibration is in progress, which will take approximately 5 minutes.
Note: To interrupt calibration, press T3 for 5 seconds; calibration will be saved and will be repeated.
Before cleaning or maintenance, disconnect the appliance from the electrical outlet, turning off the appliance or unplugging the main plug.
CLEANING
The appliance should be cleaned regularly, both outside and inside (at least every 3 months, depending on the frequency of use and the condition of the filters and grease traps). For cleaning, use a special sponge, mild detergent, and a non-abrasive cleaner. Do not use abrasive materials. DO NOT USE ALCOHOL!
Warning: Failure to follow the instructions for use and replacement of filters may lead to the risk of fire. Therefore, we recommend following the instructions provided.
All responsibility is disclaimed for any possible damage or injuries resulting from incorrect installation or failure to follow the aforementioned precautions.
GREASE FILTER
It traps grease particles produced during cooking.
It should be cleaned regularly, either by hand with mild detergents or in the dishwasher at low temperature and with a short cycle. When washing the metal grease filter in the dishwasher, it may lose its color, but its filtering characteristics will not change.
To remove the grease filter, press the spring handle on the filter.
Activated carbon filter (only in recirculation mode)
Strong unpleasant smell from the kitchen.
Checking the filter for saturation should be carried out after a shorter period of use, depending on the type of kitchen and the regularity of filter cleaning. In any case, it is necessary to replace the cartridge at least every four months. Do not wash or reuse it.
REPLACING THE LAMP
The hood is equipped with an LED lighting system.
They provide optimal lighting, their lifespan is 10 times longer than conventional bulbs and they provide 90% energy savings.
To replace, contact technical service.
.
.
.
The LED is connected to the LED by a connector, and the LED is connected to the LED by a connector.
90% of the time, 10-
.5wnn
n nn nnnnnnnnnnnnnnnnnnnnnnnnnnnnnnnnnnnnnnnnnnnnnnnnnnnnnnnnnnnnnnnnnnnnnnnnnnn
y, 3 ynn nn nnnn nn nn nn nn nn nn nn nn nn nn nn nn nn nn nn nn nn nn nn nn nn nn nn nn nn nn nn nn nn nn nn nn nn nn nn nn nn nn nn nn nn nn nn nn nn nn nn nn nn nn nn nn nn nn nn nn nn nn nn nn nn nn nn nn nn nn nn nn nn nn nn nn nn nn nn nn nn nn nn nn nn nn nn
()
anonnnnny
n nn nnnnnnnnnnnnnnn
:y
T8-17 5-ynn T8 nynn nn by n5-nn T8 nnn
"nnn nnnn nn nnnn nn nnnn nn nnnn nn nnnn
"
nubip


n) nyon / (nyo n npnn - naon npan nb) (Stand by) nn asn .T1
(pTmnpn
ynnn nn (nnnnn noyn) nnnn nn nnnn nn
.(stand by) n'mnvn
nixnn/nyon.T2
nnnnnnnnnnnnnnnnnnnnnnnnnnnnnnnnnnnnnnnnnnnnnnnnnnnnnnnnnnnnnnnnnnnnnnnnnnnnnnnnnnnnnnnnnnnnnnnnnnn
unuiXn n/nyn.T3
ynnn nn nnnn nn nnnn nn nnnnnnnnnnnnnnnnnnnnnnnnnnnnnnnnnnnnnnnnnnnnnnnnnnnnnnnnnnnnnnnnnnnnnnnnnnnnnnnnnnnnnnnnnnnnn
JXrOuTUpn
n nn nnnnnnnnnnnnnnnnnnnnnnnnnnnnnnnnnnnnnnnnnnnnnnnnnnnnnnnnnnnnnnnnnnnnnnnnnnnnnnnnnnnnnnnnnnnnnnnnnnnnnnnnnnnnnnnnnnn
.(1)
"unuiin nn nnn" ynn, nynn nn nn nn nn nn nn nn nn nn nn nn nn nn nn nn nn nn nn nn nn nn nn nn nn nn nn nn nn nn nn nn nn nn nn nn nn nn nn nn nn nn nn nn nn nn nn nn nn nn nn nn nn nn nn nn nn nn nn nn nn nn nn nn nn nn nn nn nn nn nn nn nn nn nn nn nn nn nn nn nn nn nn nn nn nn
(
nnnnn nnnp nnnn nnnn nnne nee nee nee nee nee nee nee nee nee nee nee nee nee nee nee nee nee nee nee nee nee nee nee nee nee nee nee nee nee nee nee nee nee nee nee nee nee nee nee nee nee nee nee nee nee nee nee nee nee nee neee
.
nbnnnnnaTnTnT4
1nnpnnn:L1
2nnpnn:L2
3n#pnn:L3
n nn nnnn nn by yinb
nnpnnnnnnnnnnnnnnnnnnnnnnnnnnnnnnnnnnnnnnnnnnnnnnnnnnnnnnnnnnnnnnnnnnnnnnnnnnnn
(nn) "Power Boost" nnn nn nn nn nn nn nn nn. T5
nnpnn nniynn npnnn 5 nn
"mmnnn"ybnnyn/naT6
107n1nnnnpnnnnp 50
(npt 30-7y)nnn nnynnynn/nynT7
T4yNnNnNnNnNnNnNnNnNnNnNnNnNnNnNnNnNnNnNnNnNnNnNnNnNnNnNnNnNnNnNnNnNnNnNnNnNnNnNnNnNnNn
0000000000000000000000000000000000000000000
non npinnn nwnpnn nyn yea (nyap nn ny) annn
__SUPPIMER__
1
(1)

1
nnn nn n, (010 y) nybn nn nn nn nn nn
.
nONbVX,ON pONnNnO
n nn nnnn nn nnnn nn nnnn nn nnnn nn nnnn nn
.(
n nn nnnnnnnnnnnnnnnnnnnnnnnnnnnnnnnnnnnnnnnnnnnnnnnnnnnnnnnnn
.
.
799n 79
n nn no nnnn nn nn
1
n
0000000000000000000000000000000
mnnnnoe

EC/2002/96 (WEEE) directive
y 1
:
.EN/IEC60335-1;EN/IEC60335-2-31,EN/IEC62233:
;EN/IEC 61591; ISO 5167-1; ISO 5167-3; ISO 5168; EN/IEC 60704-1; EN/IEC 60704-2-13 :n. .ISO 3741; EN 50564; IEC 62301
EMC: EN 55014-1; CISPR 14-1; EN 55014-2; CISPR 14-2; EN/IEC 61000-3-2; EN/IEC 61000-3-3
:nnn nn nnnn nn nnnn nn nnnn nn
y 111111111111111111111111111111111111111
nnn nn nnnn nn nnnn nn nnnn nn nnnn nn nnnn
∴ S 木弟形 COBD = S ΔCOD + SΔBDO
mnnn nnnnnnnnnnnnnnnnnnnnnnnnnnnnnnnnnnnnnnnnnnnnnnnnnnnnnnnnnnnnnnnnnnnnnnnnnnnnnnnnnnnnnnn
n nn nnnnnnnnnnnnnnnnnnnnnnnnnnnnn
n nn nnnn nn nnnn nn nnnn nn nnnn nn nnnn nn
T
- USE
- EXTRACTOR HOOD VERSION
- INSTALLATION
- METHOD OF USE
- GREASE FILTER
- CAUTION
- DUCTING VERSION
- FILTER VERSION
- ELECTRICAL CONNECTION
- MOUNTING
- OPERATION
- ACTIVATION OF THE CHARCOAL FILTER SATURATION INDICATOR
- SETTING OF AUTOMATIC OPERATION PARAMETERS
- HOOD CALIBRATION
- MAINTENANCE
- CLEANING
- CHARCOAL FILTER (FILTER VERSION ONLY)
- REPLACING LAMPS
- HOOD OPERATION
- SETTING AUTOMATIC PARAMETERS
- CALIBRATION
- TEXHNKAJIBIK KBI3MET KOPCETY
- TAZALAY
- CINPTTI NAI DAJAHBAHBI
- MACY3RICI
- ADJUSTING THE PARAMETERS FOR AUTOMATIC OPERATION
- KANIBPNPAHEHAACNNPATOPOT
- OДРЖУBAHБE
- YHCTEHE
- ФИЛТЕР 3A MACTN
- ФИЛТЕР CO AKTINBEH JAFJIEN (САМО ЗА ВАРИАЮ С CO ФПЛТПРАЬE)
- REPLACING THE FILTERS
- ON/OFF "REFRESH" BUTTON
- AIR EXHAUST INSTALLATION
- INSTALLATION IN RECIRCULATION MODE
- ADJUSTMENT OF PARAMETERS FOR AUTOMATIC OPERATING MODE
- CALIBRATION OF EXTRACTION
- DO NOT USE ALCOHOL
- T3. ON/OFF AUTOMATIC OPERATION "ADAPTTECH
- USAGE
- EXHAUST MODE
- RECIRCULATION MODE
- ADJUSTMENT OF PARAMETERS FOR AUTOMATIC OPERATING MODES
- ACTIVATED CARBON FILTER (ONLY IN RECIRCULATION MODE)
- REPLACING THE LAMP
- MNNNNOE
- N NN NNNNNNNNNNNNNNNNNNNNNNNNNNNNN
Brand : GORENJE
Model : IHGC963A1X
Category : Range hood