
OR2000E - Heating GORENJE - Free user manual and instructions
Find the device manual for free OR2000E GORENJE in PDF.
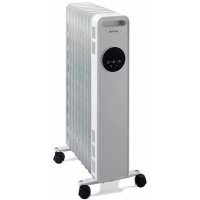



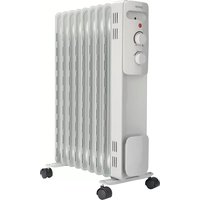
| Product type | Oil-filled radiator |
| Model | OR2000E |
| Brand | Gorenje |
| Nominal power | 2000 W |
| Minimum heating power | 800 W |
| Supply voltage | 220-240 V ~ 50 Hz |
| Oil type | Diathermic oil |
| Dimensions (approx.) | 50 x 25 x 65 cm |
| Weight (approx.) | 12 kg |
| Number of elements | 9 fins (estimated) |
| Power settings | 3 levels: I (800 W), II (1200 W), III (2000 W) |
| Thermostat | Adjustable, with comfort zone |
| Timer | Programmable 0-24 hours |
| Remote control | Yes, included |
| Digital display | Yes |
| Memory function | Resumes last setting after power on |
| Overheat protection | Automatic shut-off at 50 °C, reset required |
| Material | Steel with heat-resistant paint |
| Castors | 4 swivel castors, assembly included |
| Cleaning | Soft damp cloth, no abrasive detergents |
| Usage | Domestic only |
| Repairability | Sealed oil tank, repair by qualified professional |
Frequently Asked Questions - OR2000E GORENJE
User questions about OR2000E GORENJE
0 question about this device. Answer the ones you know or ask your own.
Ask a new question about this device
Download the instructions for your Heating in PDF format for free! Find your manual OR2000E - GORENJE and take your electronic device back in hand. On this page are published all the documents necessary for the use of your device. OR2000E by GORENJE.
USER MANUAL OR2000E GORENJE
OIL-FILLED RADIATOR
OIL-FILLED RADIATOR
OIL-FILLED RADIATOR
OIL RADIATOR
OIL RADIATOR
OIL RADIATOR
OIL RADIATOR
OIL RADIATOR
OIL-FILLED RADIATOR
OIL-FILLED HEATER
OIL-FILLED ELECTRIC RADIATOR
OIL-FILLED RADIATOR
OIL-FILLED ELEMENT
OIL RADIATOR
OIL-FILLED RADIATOR
OIL-FILLED RADIATOR
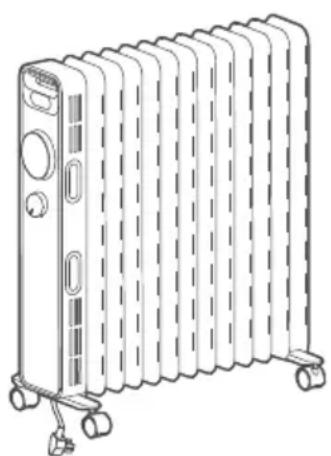
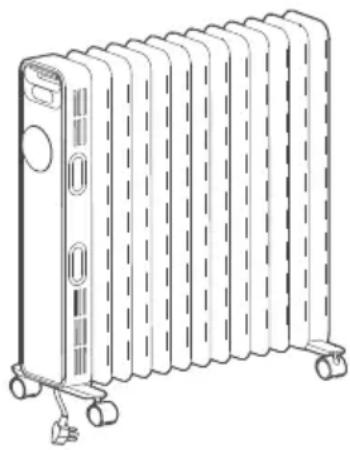
This product is only suitable for well insulated spaces or occasional use.
INSTRUCTION MANUAL SI
INSTRUCTION MANUAL BIH HR
INSTRUCTION MANUAL SRB MNE
INSTRUCTION MANUAL MK
INSTRUCTION MANUAL EN
INSTRUCTION MANUAL AL
INSTRUCTION MANUAL RO
INSTRUCTION MANUAL CZ
INSTRUCTION MANUAL SK
INSTRUCTION MANUAL UA
INSTRUCTION MANUAL HU
INSTRUCTION MANUAL BG
INSTRUCTION MANUAL RU
INSTRUCTION MANUAL DK
INSTRUCTION MANUAL FR
INSTRUCTION MANUAL IT
INSTRUCTIONS FOR USE
OIL-FILLED RADIATOR
Important safety precautions
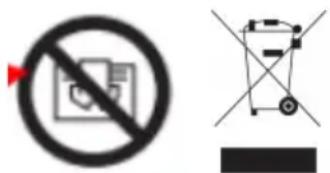
When using the appliance, always follow the basic safety precautions listed below. Read these instructions carefully and use the appliance only in accordance with the instructions. After removing the packaging, make sure that the appliance is in good condition. In order to avoid overheating, do not cover the heater. If the supply cord is damaged, it must be replaced by the manufacturer or its service agent or a similarly qualified person in order to avoid a hazard. This appliance can be used by children aged from 8 years and above and persons with reduced physical, sensory or mental capabilities or lack of experience and knowledge if they are under supervision or taught about safe use of the appliance and if they are aware of potential dangers related to the use of appliance. When children are using the appliance please supervise them and make sure they do not play with the appliance. Children should not clean the appliance or perform maintenance tasks unless they are 8 years old or older and with proper supervision. The appliance must not be located immediately below a socket-outlet. Do not use this appliance in the immediate surroundings of a bath, a shower or a swimming pool. This marking indicates that this product should not be disposed with other household wastes throughout the EU. To prevent possible harm to the environment or human health from uncontrolled waste disposal, recycle it responsibly to promote the sustainable reuse of material resources. To return your used device, please use the return and collection systems or contact the retailer where the product was purchased. They can take this product for environmentally safe recycling. This heater cannot achieve accurate temperature control of the environment, and thus cannot be used as insulation device for storage environment, items, animals and plants. This radiator is filled with a precise quantity of special oil. Repairs requiring opening of oil-container are only to be made by the manufacturer or his service agent who
should be contacted if there is an oil leak. When scrapping the appliance, follow the regulations concerning the disposal of oil. 10. This heater cannot achieve accurate temperature control of the environment, and thus cannot be used as insulation device for storage environment, items, animals and plants. The appliance is intended for domestic use only.
Caution
Fire risk exists if the heater is covered by or positioned close to curtains or other combustible materials. Some parts of this product can become very hot and cause burns. Particular attention must be given where children and vulnerable people are present.
PART FIGURE (OR2000M)
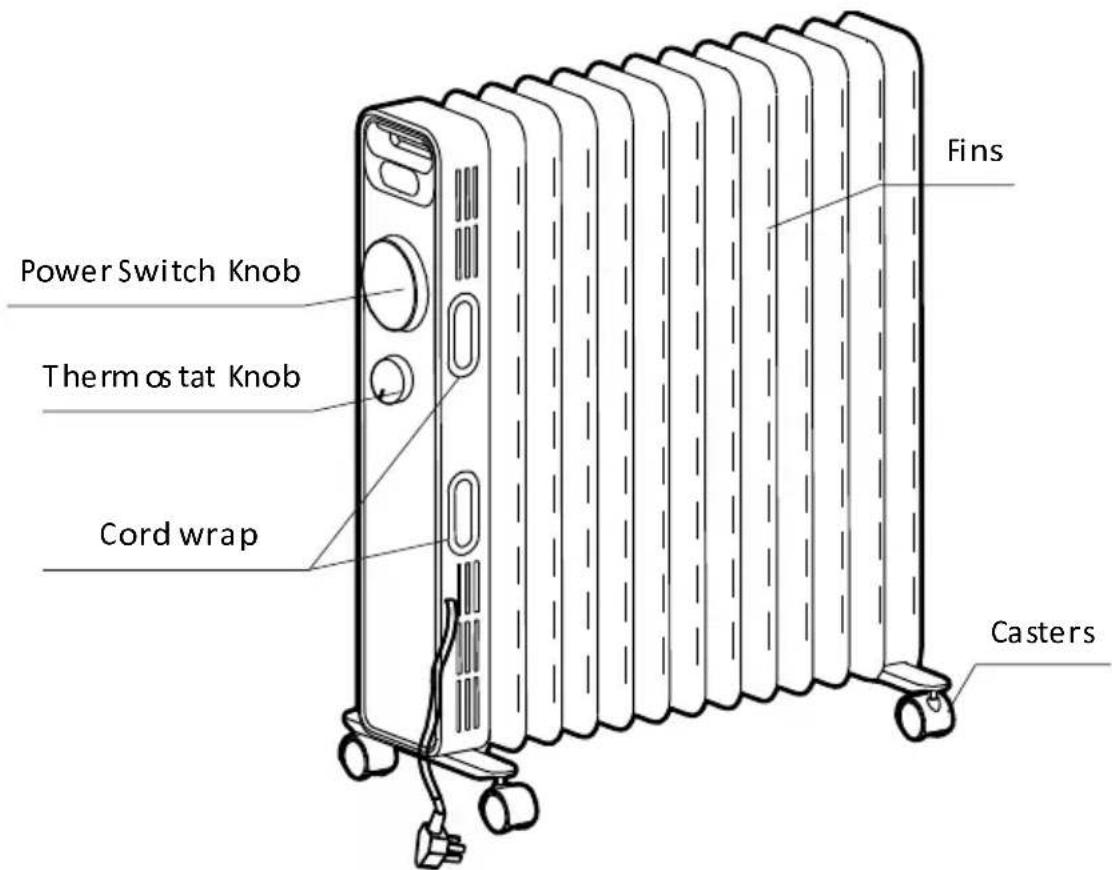
USE OF OIL-FILLED RADIATOR (OR2000M)
- Turn the heater upside down.
- As shown in figure 1, align the mounting hole of a set of caster assembly and install it on the screw of the caster pad plate at the end of the radiator fin, and align the other caster assembly to the screws mounted at the bottom of the control box.
- As shown in figure 2, tighten two sets of caster components with four butterfly nuts. Install solidly and then put the heater in place - just put the wheels on the ground.
figure 1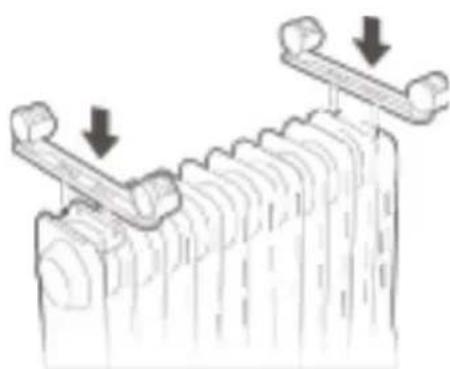
figure 2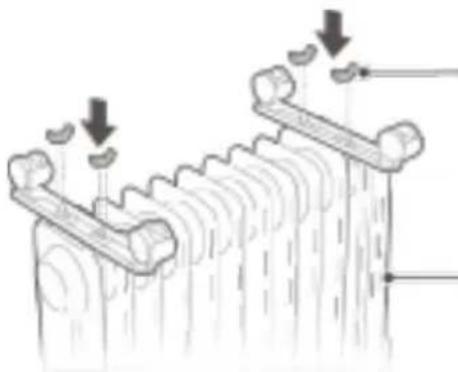
butterfly nuts
control box
C
PART FIGURE (OR2000E / OR2000EB)
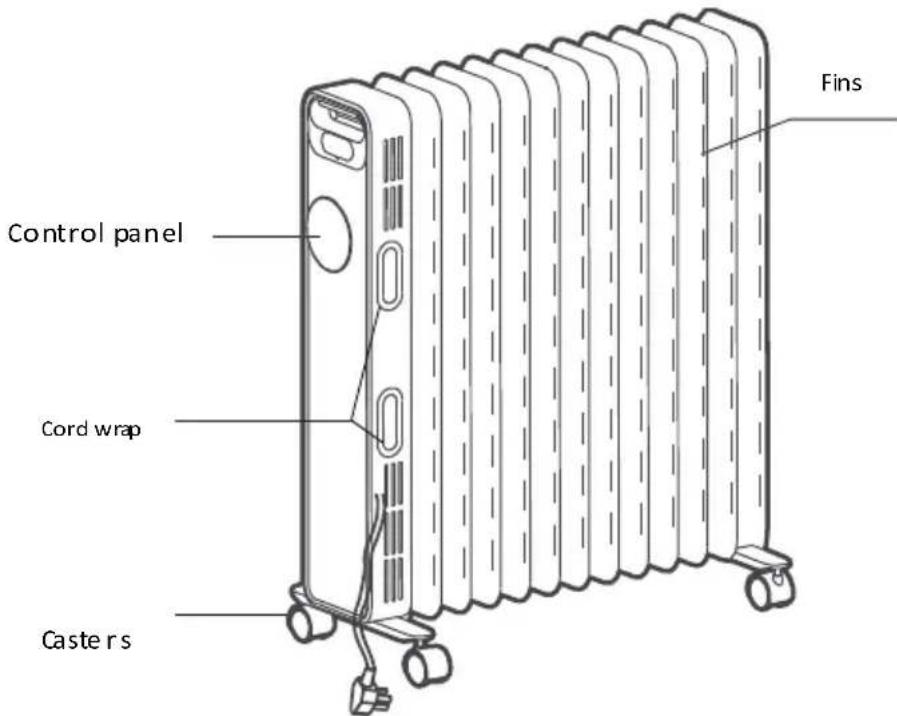
USE OF OIL FILLED RADIATOR OR2000E / OR2000EB)
- Turn the heater upside down.
- As shown in figure 1, align the mounting hole of a set of caster assembly and install it on the screw of the caster pad plate at the end of the radiator fin, and align the other caster assembly to the screws mounted at the bottom of the control box.
- As shown in figure 2, tighten two sets of caster components with four butterfly nuts. Install solidly and then put the heater in place - just put the wheels on the ground.
figure 1 figure 2
OPERATING INSTRUCTIONS (OR2000E / OR2000EB)
Before the start
1. The power cord shall not be damaged or fractured. 2. Please verify that the rated current of the power socket is in line with the requirements in the table above and that it is equipped with a safety grounding device before use; otherwise, replace the socket.
Operating Instructions
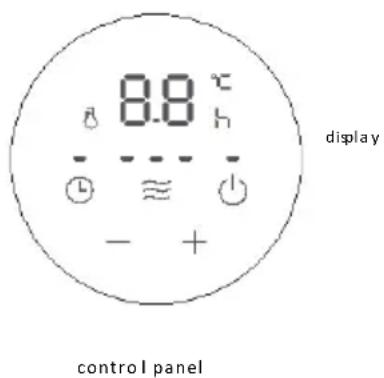
Work/Standby: Plug in the power, the buzzer will "beep" for a long time, press the power key "U" to enter the heating working state, and then press the power key "O" to enter the standby state.
Gear selection: In the working state, press the "key" to select one of the work modes such as high gear, medium gear, and low gear.
Temperature Setting: In the working state, press and hold the "+" key or "-" key to set the temperature; press and hold the "+" key or the "-" key to quickly set the temperature. After setting the temperature, if there is no operation for 5 seconds, exit the temperature setting screen.
Scheduled operation: Tap the timer key "U" in standby mode to enter the scheduled work setting screen. Press the "+" key or "-" key to set the scheduled time; press the "+" key or "-" key for a long time to quickly set the scheduled time, and the scheduled time will reach the working status of the machine.
Scheduling standby: In the working state, press the timer key "U" to enter the scheduling standby setting screen. Press the "+" key or "-" key to set the scheduling time; press the "+" key or "-" key for a long time to quickly set the scheduling time, and the scheduling time is in the standby state to the machine.
A: The scope of scheduling is for 0~24 hours, and press the "+" key or "-" key each time to increase or decrease 1 hour. When the set value is 0H, press the "-" key to set the time for 24H. When the set value is 24H, press the "+" key, and the setting time is 0H. When the set value is 0H, the scheduling is canceled. When the set value is not 0H, the scheduling is started. Set the appointment time, press the timing key "O" key or "-" key, or without operation for 5 seconds, exit scheduling mode.
B: If the scheduling time is set, press the power button "U" to enter the standby state and cancel the scheduling.
C: After the scheduling is started, press the scheduling key to check the remaining time of the appointment and reset the scheduling time. During the scheduled time, the machine is shut down or started up under temperature control, and the scheduled time is always normal and free from down time. During the scheduled time, it is cleared in case of power failure.
Memory function: When started up the machine again, it will operate according to the status before the last standby.
Safety protection function: When the indoor ambient temperature Th exceeds 50°C under the standby or working state, all outputs are turned off, the buzzer prompts 10 long beeps, the digital screen displays "FF" and flashes at 1 Hz for 75 seconds. As long as there is protection, even if the ambient temperature is less than 50°C, the running or operation cannot be resumed, and the operation can only be performed after the power is turned off and on again.
Shut down: Under the working state, press the power key "O" on the control panel to enter the standby state, unplug the power cord, wait for the whole machine to cool, and place the heater stably.
To use the machine for the first time or to re-insert the socket, please pay attention to check whether the plug and the socket are fitted well.
Insert the power plug into the socket and start for use; after about half an hour, turn off and pull out the plug. Check whether the plug pins are hot; replace the socket if so (more than about 50°C) to avoid burning the plug or even causing a fire caused by overheating of the socket due to poor contact.
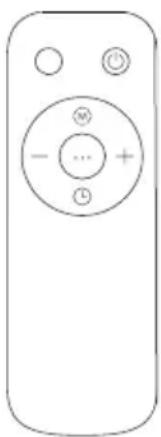
USING THE REMOTE CONTROL (OR2000E / OR2000EB)
Instructions for remote control unit functions are basically consistent with the operation panel of the body, and the remote control unit cannot control the combination key.
| U | ON/OFF |
| M | Mode |
| + “ + ” | |
| - “ - ” | |
| L | Timer |
| PARAMETER TABLE Model: OR2000M Type: NY2009 20M | ||
| ITEM VALUE UNIT | ||
| Rated Power 2000 W | ||
| Voltage Type 220-240 V | ||
| Nom. heat output 800 W | ||
| PARAMETER TABLE Model: OR2000E Type: NY2009 20MR | ||
| ITEM VALUE UNIT | ||
| Rated Power 2000 W | ||
| Voltage Type 220-240 V | ||
| Nom. heat output 800 W | ||
CLEANING AND MAINTENANCE
- The electric heater should be cleaned regularly to wipe out the dust on the surface of flanges. As this may influence the radiating efficiency.
- Disconnect electricity supply and allow radiator to cool, wipe out dust with a soft damp cloth. Do not use detergent or abrasives.
- Do not scrap the surfaces of flanges with sharp hard tools, to avoid surfaces getting rusty, because of damage of the paint coat.
Environment
After the useful life of the appliance, do not discard it with municipal waste – take it to the official recycling point. This is how you can contribute towards conservation of the environment.
Warranty and service
For information or in case of problem please turn to Gorenje's consumer help centre in your country (you can find the telephone number in the international warranty sheet). If there is no such centre in your country, please turn to your local Gorenje dealer or Gorenje's department for small domestic appliances.
For personal use only!
GORENJE WISHES YOU A LOT OF PLEASURE IN USING YOUR RADIATOR!
MANUALUDHEZIMI
RADIATOR (IMBUSHUR) ME VAJ
MANUAL DE INSTRUCTIONS
RADIATOR UMPLUT CU ULEI
Important safety information

RADIATOR PLNÉNY OLEJEM
Power selection: In standby mode, press the button to select one of the operating modes: high power, medium power, or low power.
Temperature setting: In operating mode, press the "+" or "-" button to set the temperature; for quick setting, press and hold the "+" or "-" button; after setting the temperature, if no action is taken within 5 seconds, you will exit the temperature setting screen.
Scheduled operation: Press the timer button to enter the scheduled operation setting screen. Press the "+" or "-" button to set the scheduled hour, press and hold the "+" or "-" button to quickly set the scheduled hour, and at that hour the device will enter operating mode.
Scheduling standby mode: In operating mode, press the timer button to enter the scheduling standby mode setting screen. Press the "+" or "-" button to set the scheduled hour, press and hold the "+" or "-" button to quickly set the scheduled hour, and at that hour the device will enter standby mode.
A: The scheduling time is 0~24 hours. Each press of the "+" or "-" button increases or decreases by 1 hour. When the set value is 0H, press the "-" button to set the time to 24H. When the set value is 24H, press the "+" button to set the time to 0H. When the set value is 0H, scheduling is canceled. When the set value is not 0H, scheduling is enabled. To set the time for scheduling, press the "+" or "-" button. If no action is taken for 5 seconds, you will exit the scheduling mode.
B: If the scheduled hour is set, press the power button to enter standby mode and cancel the scheduling.
C: After starting the scheduling, press the power button to check the remaining time of the scheduled hour and to adjust the hour. If during the scheduled hour the device is turned off or started with a temperature setting, the scheduled hour works normally without counting down. If during the scheduled hour there is a power failure, the scheduled hour is canceled.
Delay function: When the device starts again, it will operate according to the state before the last standby.
Safety function: When the internal temperature exceeds 50°C in standby mode, the device turns off, a buzzer sounds an alarm, the digital display shows "FF" and flashes at 1 Hz for 75 seconds. The protection remains even if the ambient temperature drops below 50°C; operation cannot be resumed until the device is unplugged and plugged back in.
Switching off: In operating mode, press the power button to enter standby mode. To switch off completely, unplug the power cord from the outlet, wait for the device to cool down, and store it safely.
When using the device for the first time or when plugging it into a power outlet, ensure that the plug is fully inserted into the socket.
Insert the plug into the socket and turn on the device; after about an hour, turn it off and unplug it. Check if the plug is hot; if so, replace the socket (if it is about 50°C to avoid overheating or fire risk caused by a loose connection).
Control panel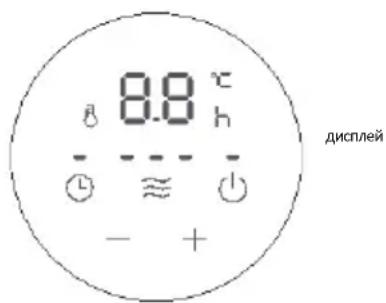
USING THE REMOTE CONTROL (OR2000E / OR2000EB)
The instructions for the remote control functions are in accordance with the control panel; the remote control cannot operate the combined button.
FOR HOUSEHOLD USE ONLY!
GORENJE WANTS TO ENSURE THAT USING THE APPLIANCE GIVES YOU SATISFACTION!
USER MANUAL
OIL-FILLED RADIATOR
| U | AV/PA |
| M | Modus |
| + “+” | |
| - “-” | |
| L | Timer |
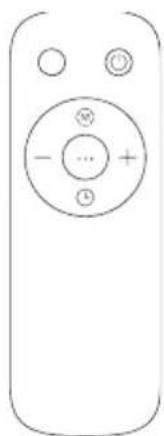
| PARAMETER TABLE Model: OR2000M Type: NY2009 20M | ||
| ITEM VALUE UNIT | ||
| Rated Power 2000 W | ||
| Voltage Type 220-240 V | ||
| Nom. heat output 800 W | ||
| PARAMETER TABLE Model: OR2000E Type: NY2009 20MR | ||
| ITEM VALUE UNIT | ||
| Rated Power 2000 W | ||
| Voltage Type 220-240 V | ||
| Nom. heat output 800 W | ||
CLEANING AND MAINTENANCE
| U | ON/OFF |
| M | Läge |
| + " + " | |
| - " - " | |
| L | Timer |
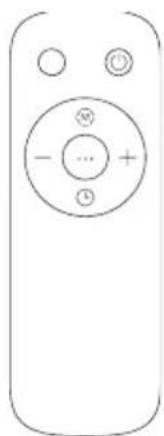
| PARAMETER TABLE Model: OR2000M Type: NY2009 20M | ||
| ITEM VALUE UNIT | ||
| Rated Power 2000 W | ||
| Voltage Type 220-240 V | ||
| Nom. heat output 800 W | ||
| PARAMETER TABLE Model: OR2000E Type: NY2009 20MR | ||
| ITEM VALUE UNIT | ||
| Rated Power 2000 W | ||
| Voltage Type 220-240 V | ||
| Nom. heat output 800 W | ||
CLEANING AND CARE
INSTRUCTION MANUAL
OIL-FILLED RADIATOR


- INSTRUCTIONS FOR USE
- IMPORTANT SAFETY PRECAUTIONS
- CAUTION
- PART FIGURE (OR2000M)
- USE OF OIL-FILLED RADIATOR (OR2000M)
- PART FIGURE (OR2000E / OR2000EB)
- USE OF OIL FILLED RADIATOR OR2000E / OR2000EB)
- OPERATING INSTRUCTIONS (OR2000E / OR2000EB)
- BEFORE THE START
- OPERATING INSTRUCTIONS
- USING THE REMOTE CONTROL (OR2000E / OR2000EB)
- CLEANING AND MAINTENANCE
- ENVIRONMENT
- WARRANTY AND SERVICE
- MANUALUDHEZIMI
- MANUAL DE INSTRUCTIONS
- IMPORTANT SAFETY INFORMATION
- USER MANUAL
- CLEANING AND CARE
- INSTRUCTION MANUAL
Brand : GORENJE
Model : OR2000E
Category : Heating